Few outdoor activities lend themselves to photography as thoroughly as climbing. With awe inspiring displays of athletic prowess, moments of do-or-die intensity, and breathtaking scenery, the sharp end is a place that delivers the goods again and again. But capturing those moments is not always easy. Getting into the right position to get a good shot usually takes some work, and then you also have to ensure that you have enough variety in your shots to tell a compelling story. In this article, I cover both technical and creative topics in depth. The time for bum shots is over. From now on, you’ll aspire to take photos worthy of the covers of Rock & Ice or Climbing Magazine.
Note: This article assumes that you are already familiar with basic climbing techniques like rappelling and cleaning. In the next dozen paragraphs, I will focus only on topics particular to climbing photography:
My approach to climbing photography
If you’re going to all this trouble to get better climbing photos, you are probably already a hobby photography and are familiar with the basic rules of composition and the photographic triangle. However, if aperture, ISO, and shutter speed are still foreign concepts to you, this article by Fstoppers can explain the basics of exposure. The same blog also has a great article on composition. With the universal basics of photography under your belt, you can then tackle the creative challenges particular to climbing photography.
Tell a story with a variety of shots
A friend of mine started taking climbing photos at the roughly the same time as me. We weren’t living in the same city, climbing together regularly, or even just sharing strategies on taking photos, and yet, after about a year, there were definite similarities – a pattern – in our photography. All of our photos looked kind of the same. We were taking the same kinds of shot again and again. Almost all were medium distance shots of climbers cranking through hard crux moves. We had both gotten it into our heads that climbing photos should capture moments of great intensity.
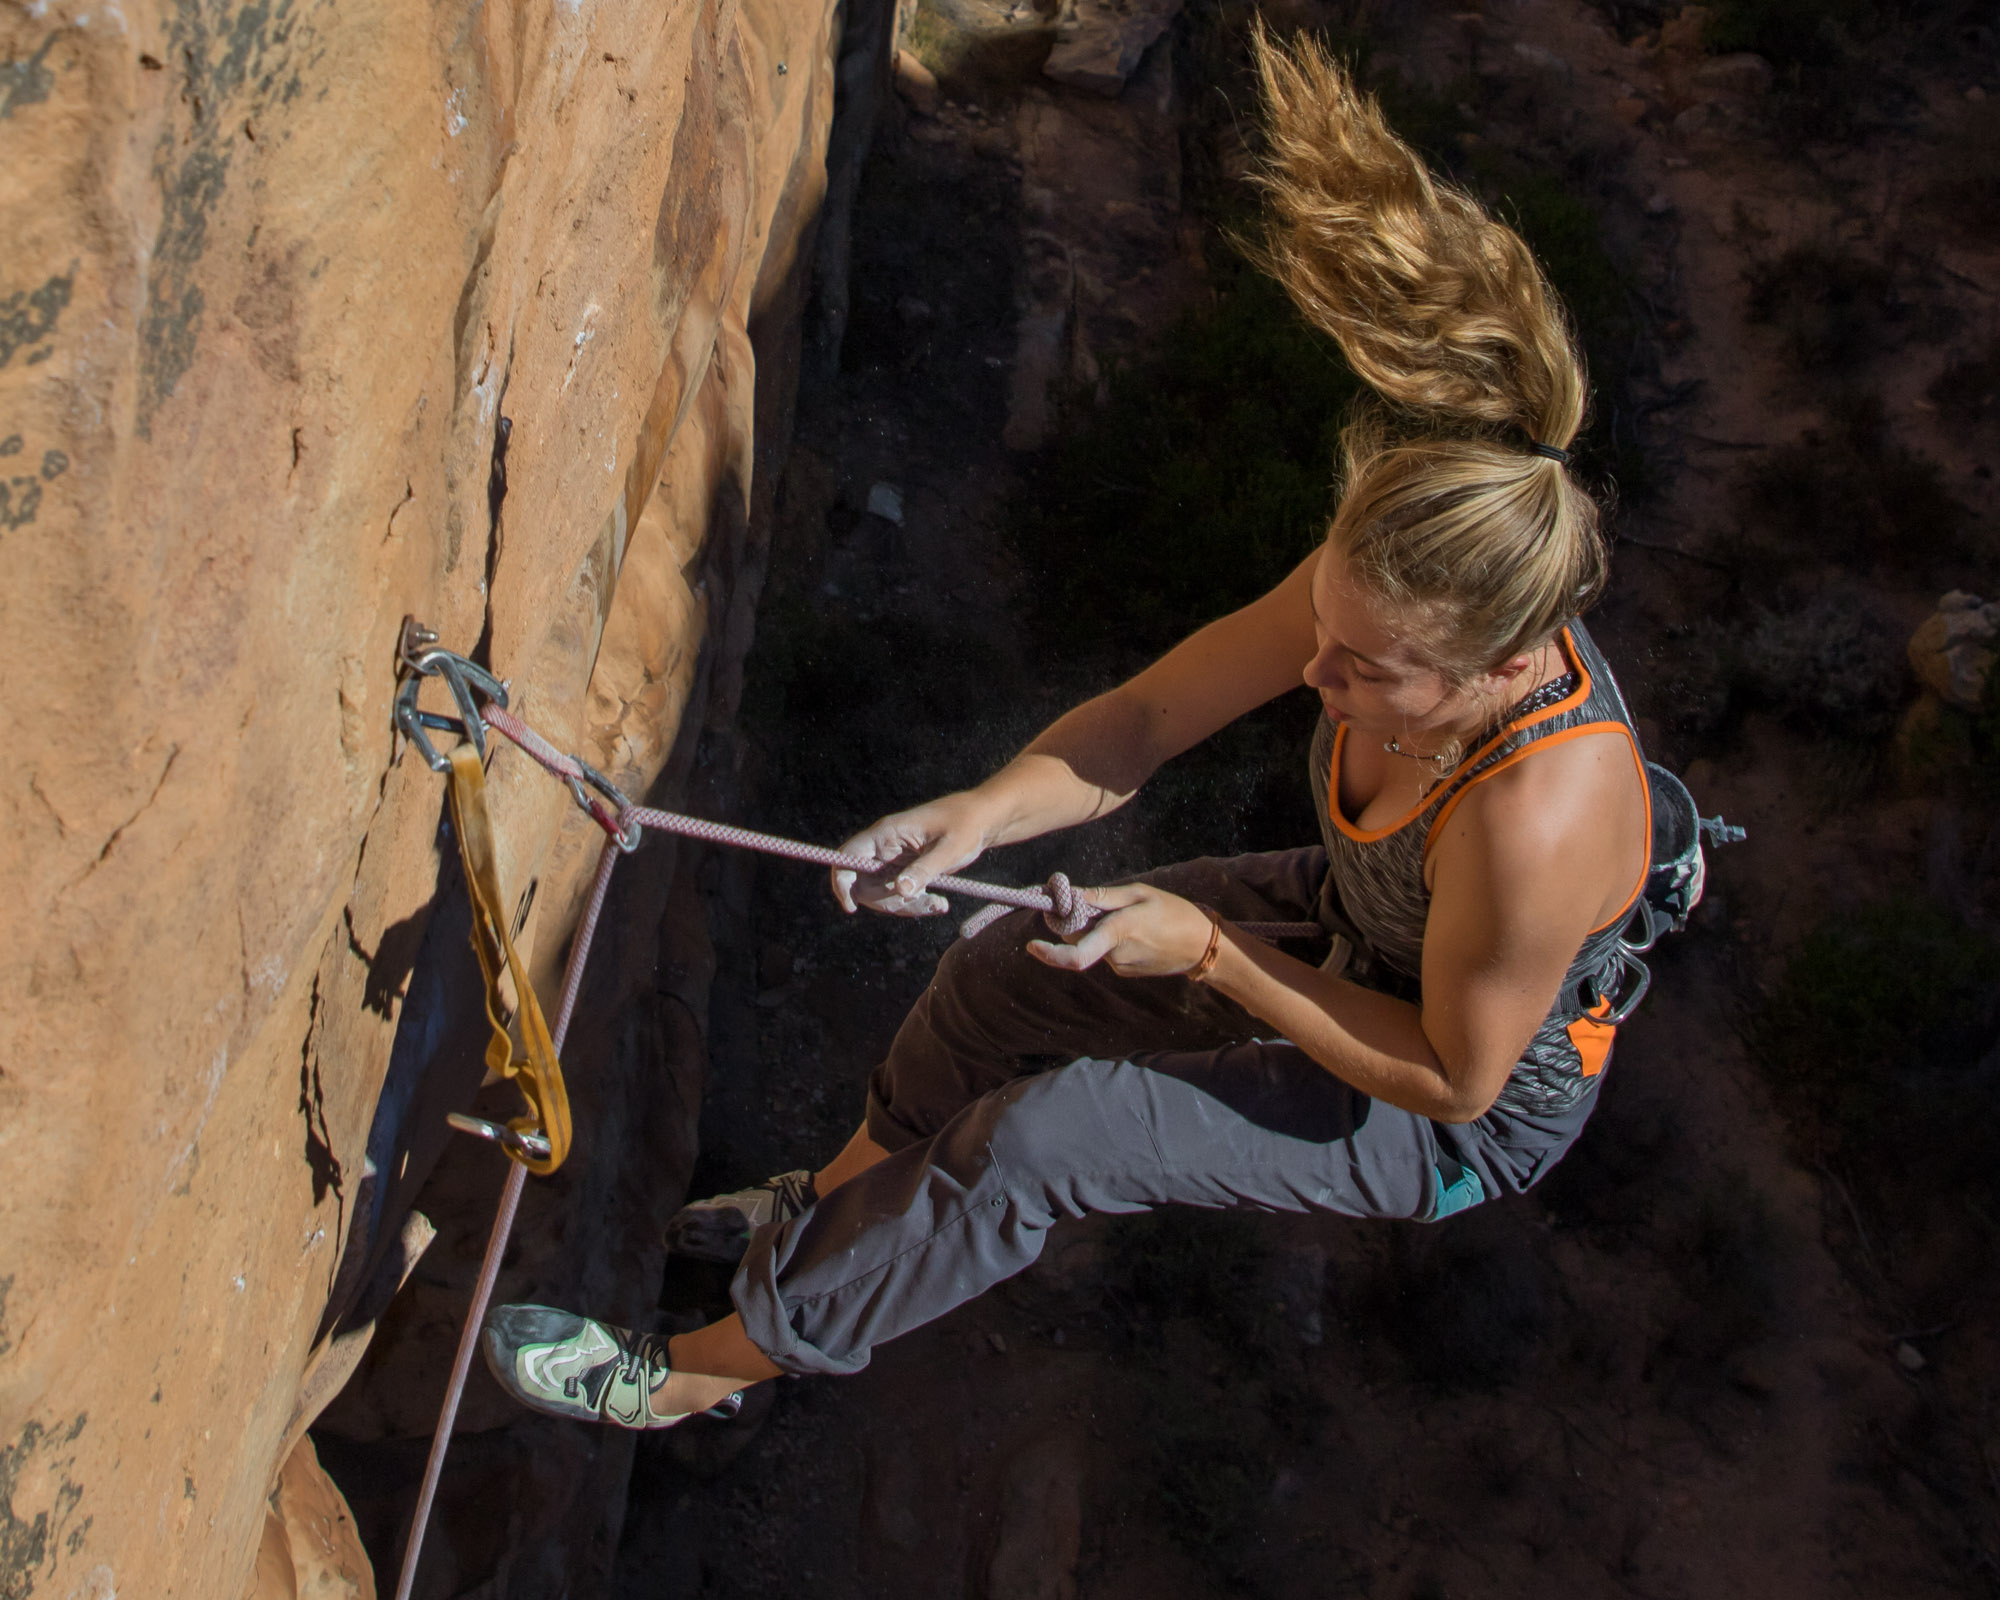
Obviously, such photos are great, but there’s a lot more to the whole climbing experience than just pulling hard moves. To break myself out of the habit of taking only crux photos, I have since adopted a storytelling approach to my photography. This has been pivotal in making my climbing photography (and outdoor photography in general) more interesting. I now think of each climbing session as a story with an beginning, middle, and end. According to this approach, all aspects of the wider activity of climbing deserve to be told.
The beginning
The beginning of your story should include everything up until the point that the climber steps onto the rock and starts the ascent. It can begin with the walk-in or drive to the crag or even earlier with trip preparations. All of the following can be included in your story’s beginning:
- Packing & preparation
- The drive and walk-in
- Scouting out the crag
- Debating possible beta
- Unpacking & preparing gear
- Roping up and putting on shoes
The walk-in is a great opportunity to get wide context-setting shots, while moments like those when climbers consult a guidebook or gaze up at the cliffs are a great time to zoom in and introduce the characters in your story.
The middle
If you have already taken some climbing photos, this is the part of the story you are already familiar with – the physical act of climbing. Tenuous technical climbing makes for some of the best photography, but there’s a lot more to the middle of your story than the crux sequence. This part of your narrative can be divided again into its own beginning, middle, and end. Consider how each of the following can contribute to a viewers’ understanding of a climb.
- Clipping the first few bolts
- Resting & shaking out
- Enjoying the fun cruisy sections
- Gritting teeth through the hard parts
- Falling off
- Lowering off
- Topping out
At the beginning of a roped climb, you can get both the climber and belayer in focus and so remind viewers of a participant who is integral to climbing but is sometimes forgotten. The end of an ascent also offers many unique opportunities.Then, in the middle, there is that techy crux sequence that you worked so hard to get – the kind of photography that requires split second timing and a steady hand. Finally, there is the end – the topout or last desperate few moves to the chains.
The end
The end of your story might seem similar to the beginning in some ways (walking out, driving back), but there are some significant differences, especially if these photos include a sunset or evening campfire shots. Look for opportunities that convey satisfaction and triumph, or defeat (Things don’t always go our way).
- Battered & bloody fingers
- Face covered in chalk
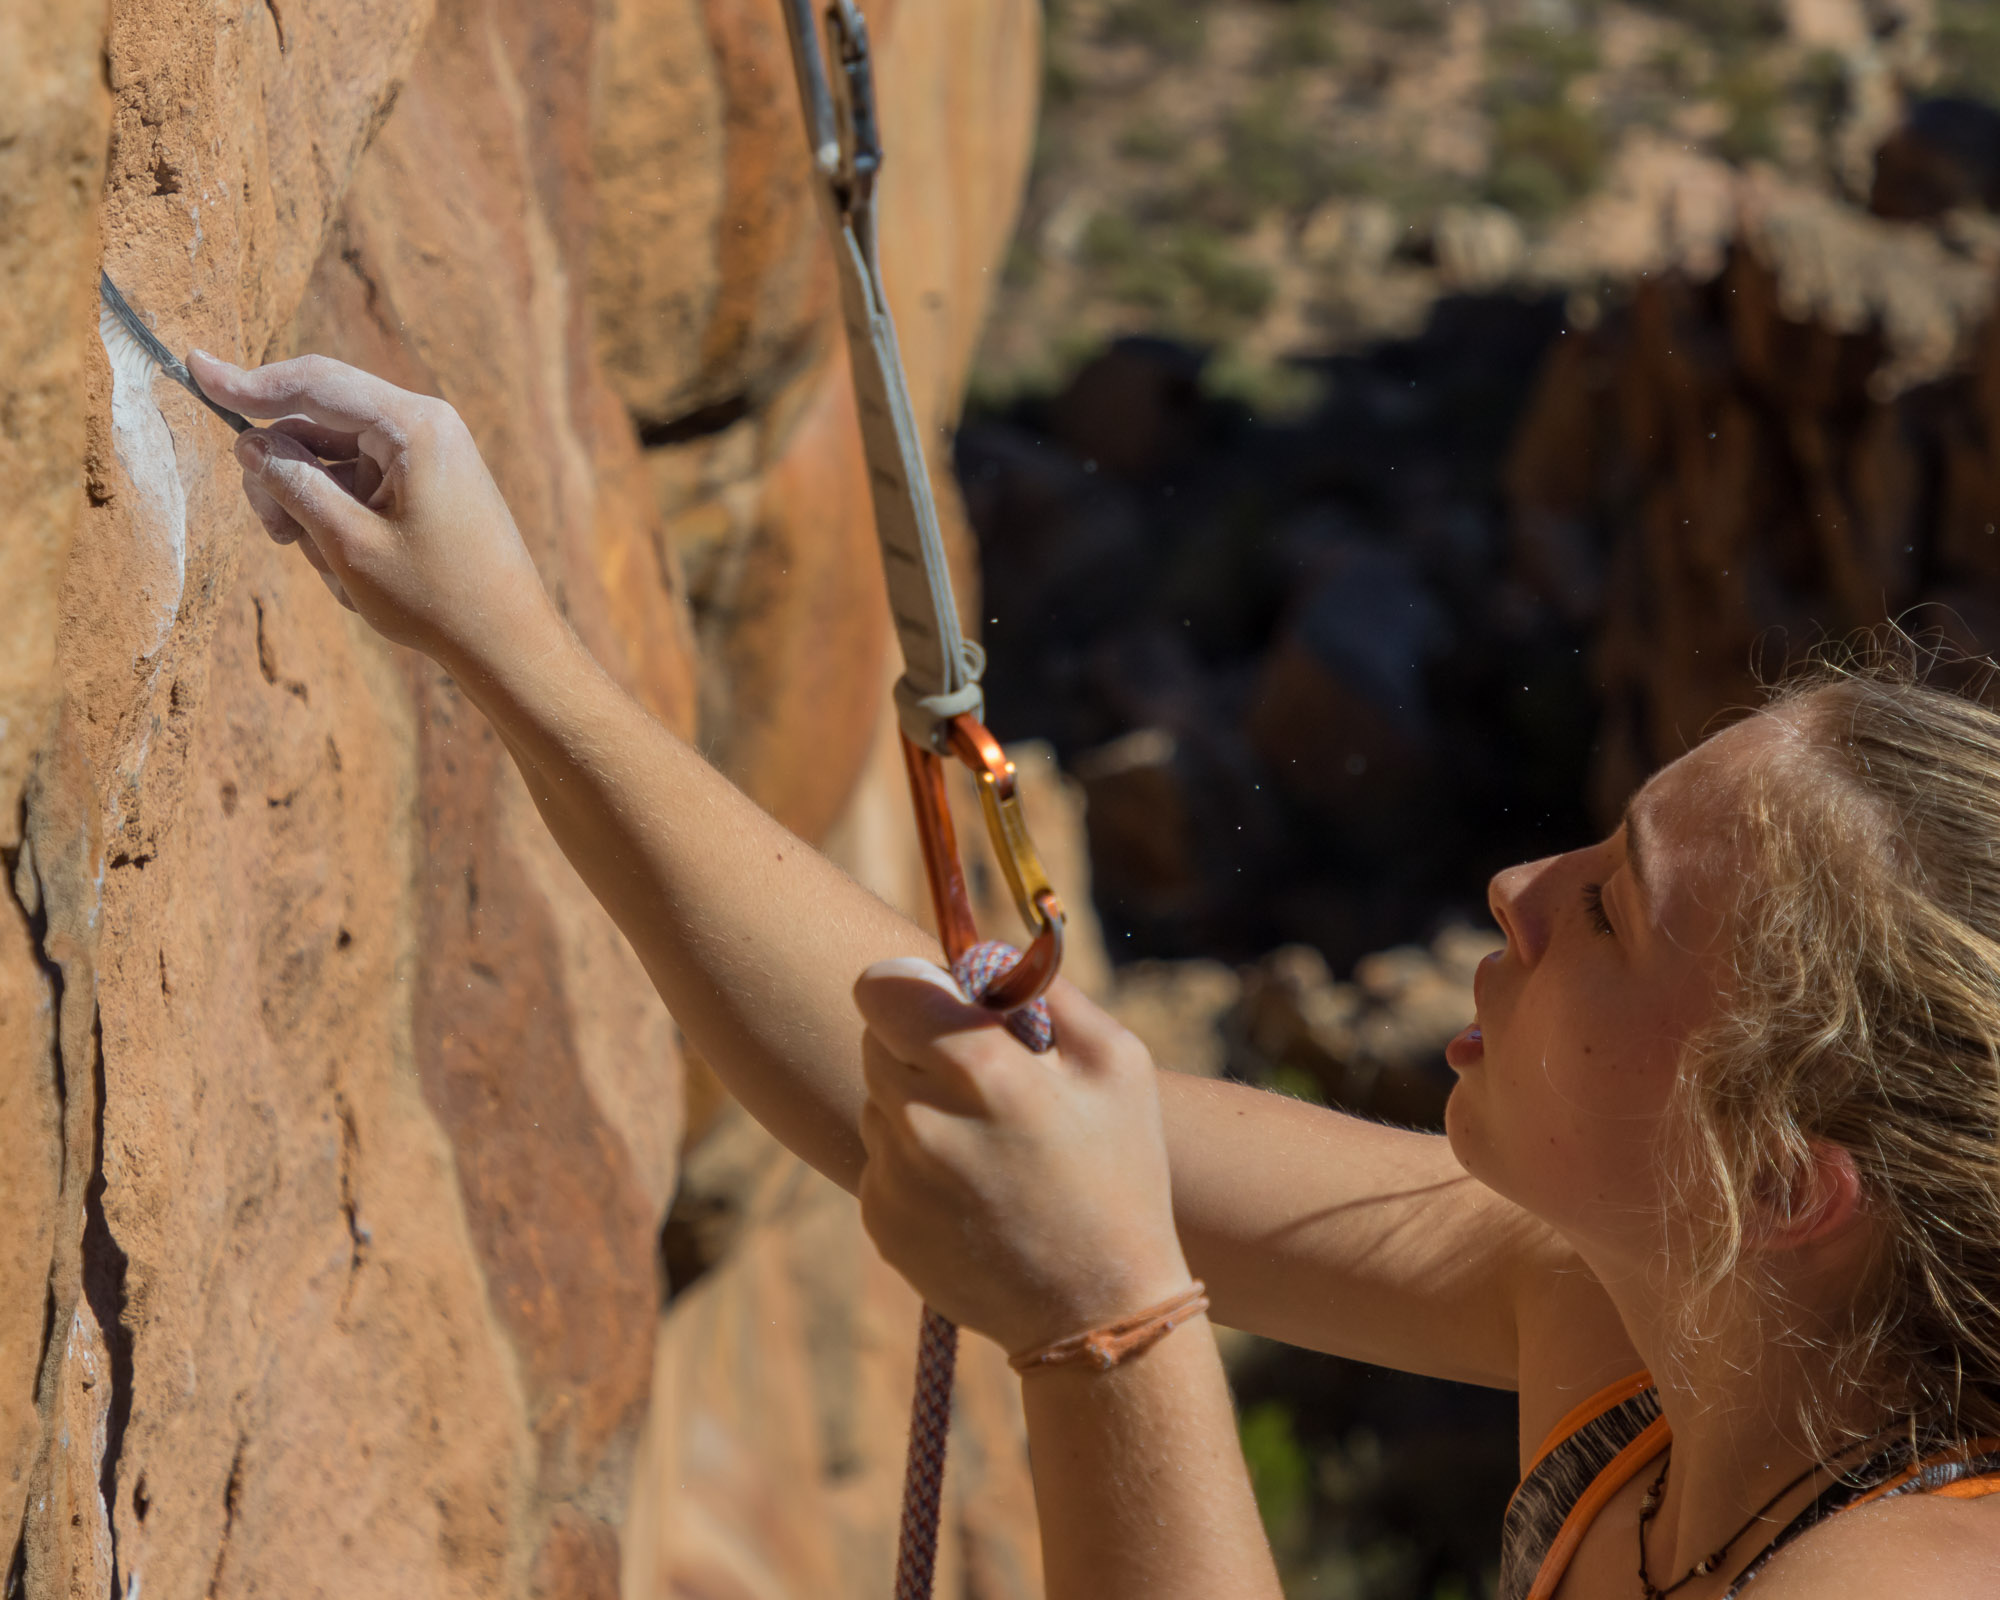
- Brushing holds
- Walking out with sun low in the sky
- Recounting climbing stories around a campfire
- Choosing next day’s routes from a guidebook
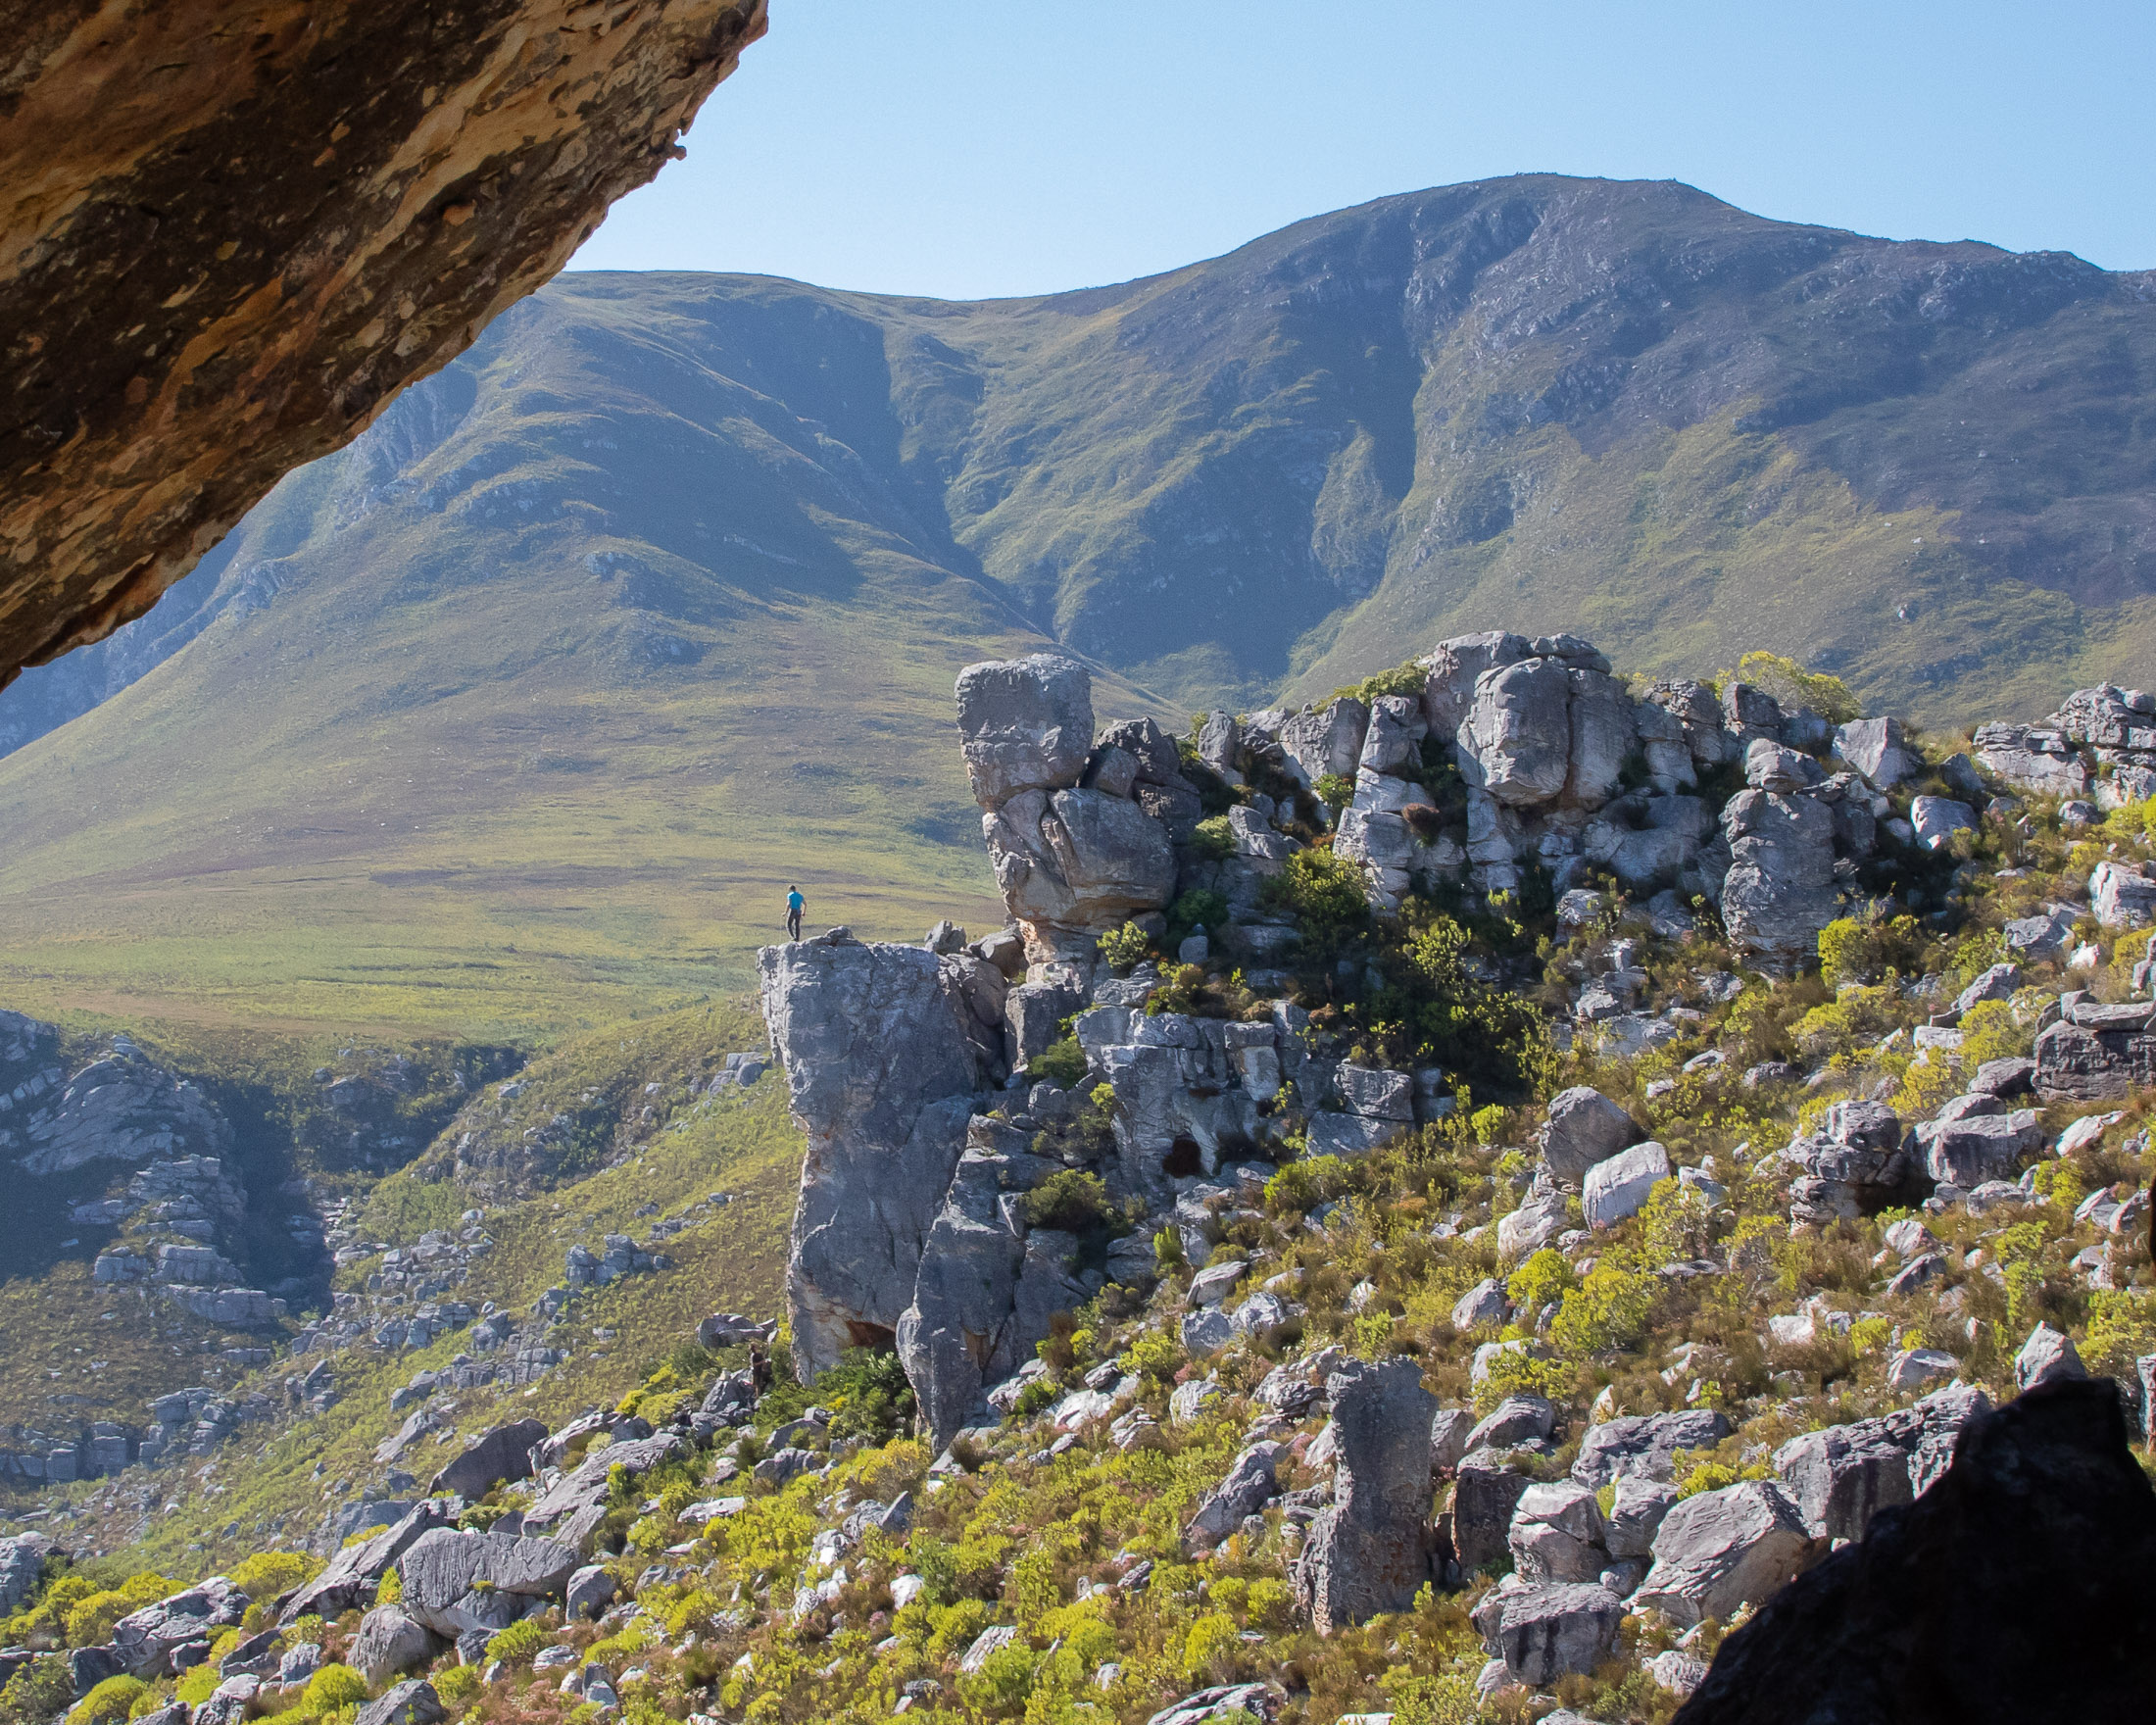
Over the course of each story, you should aim to also use different types of shot – wide, medium, and close – and different angles – above, side on, behind, and even below (just to add a little variety). The variety will make your photography a lot more interesting and will do a much better job of telling the viewer what it was like to be there.
Capturing the moment
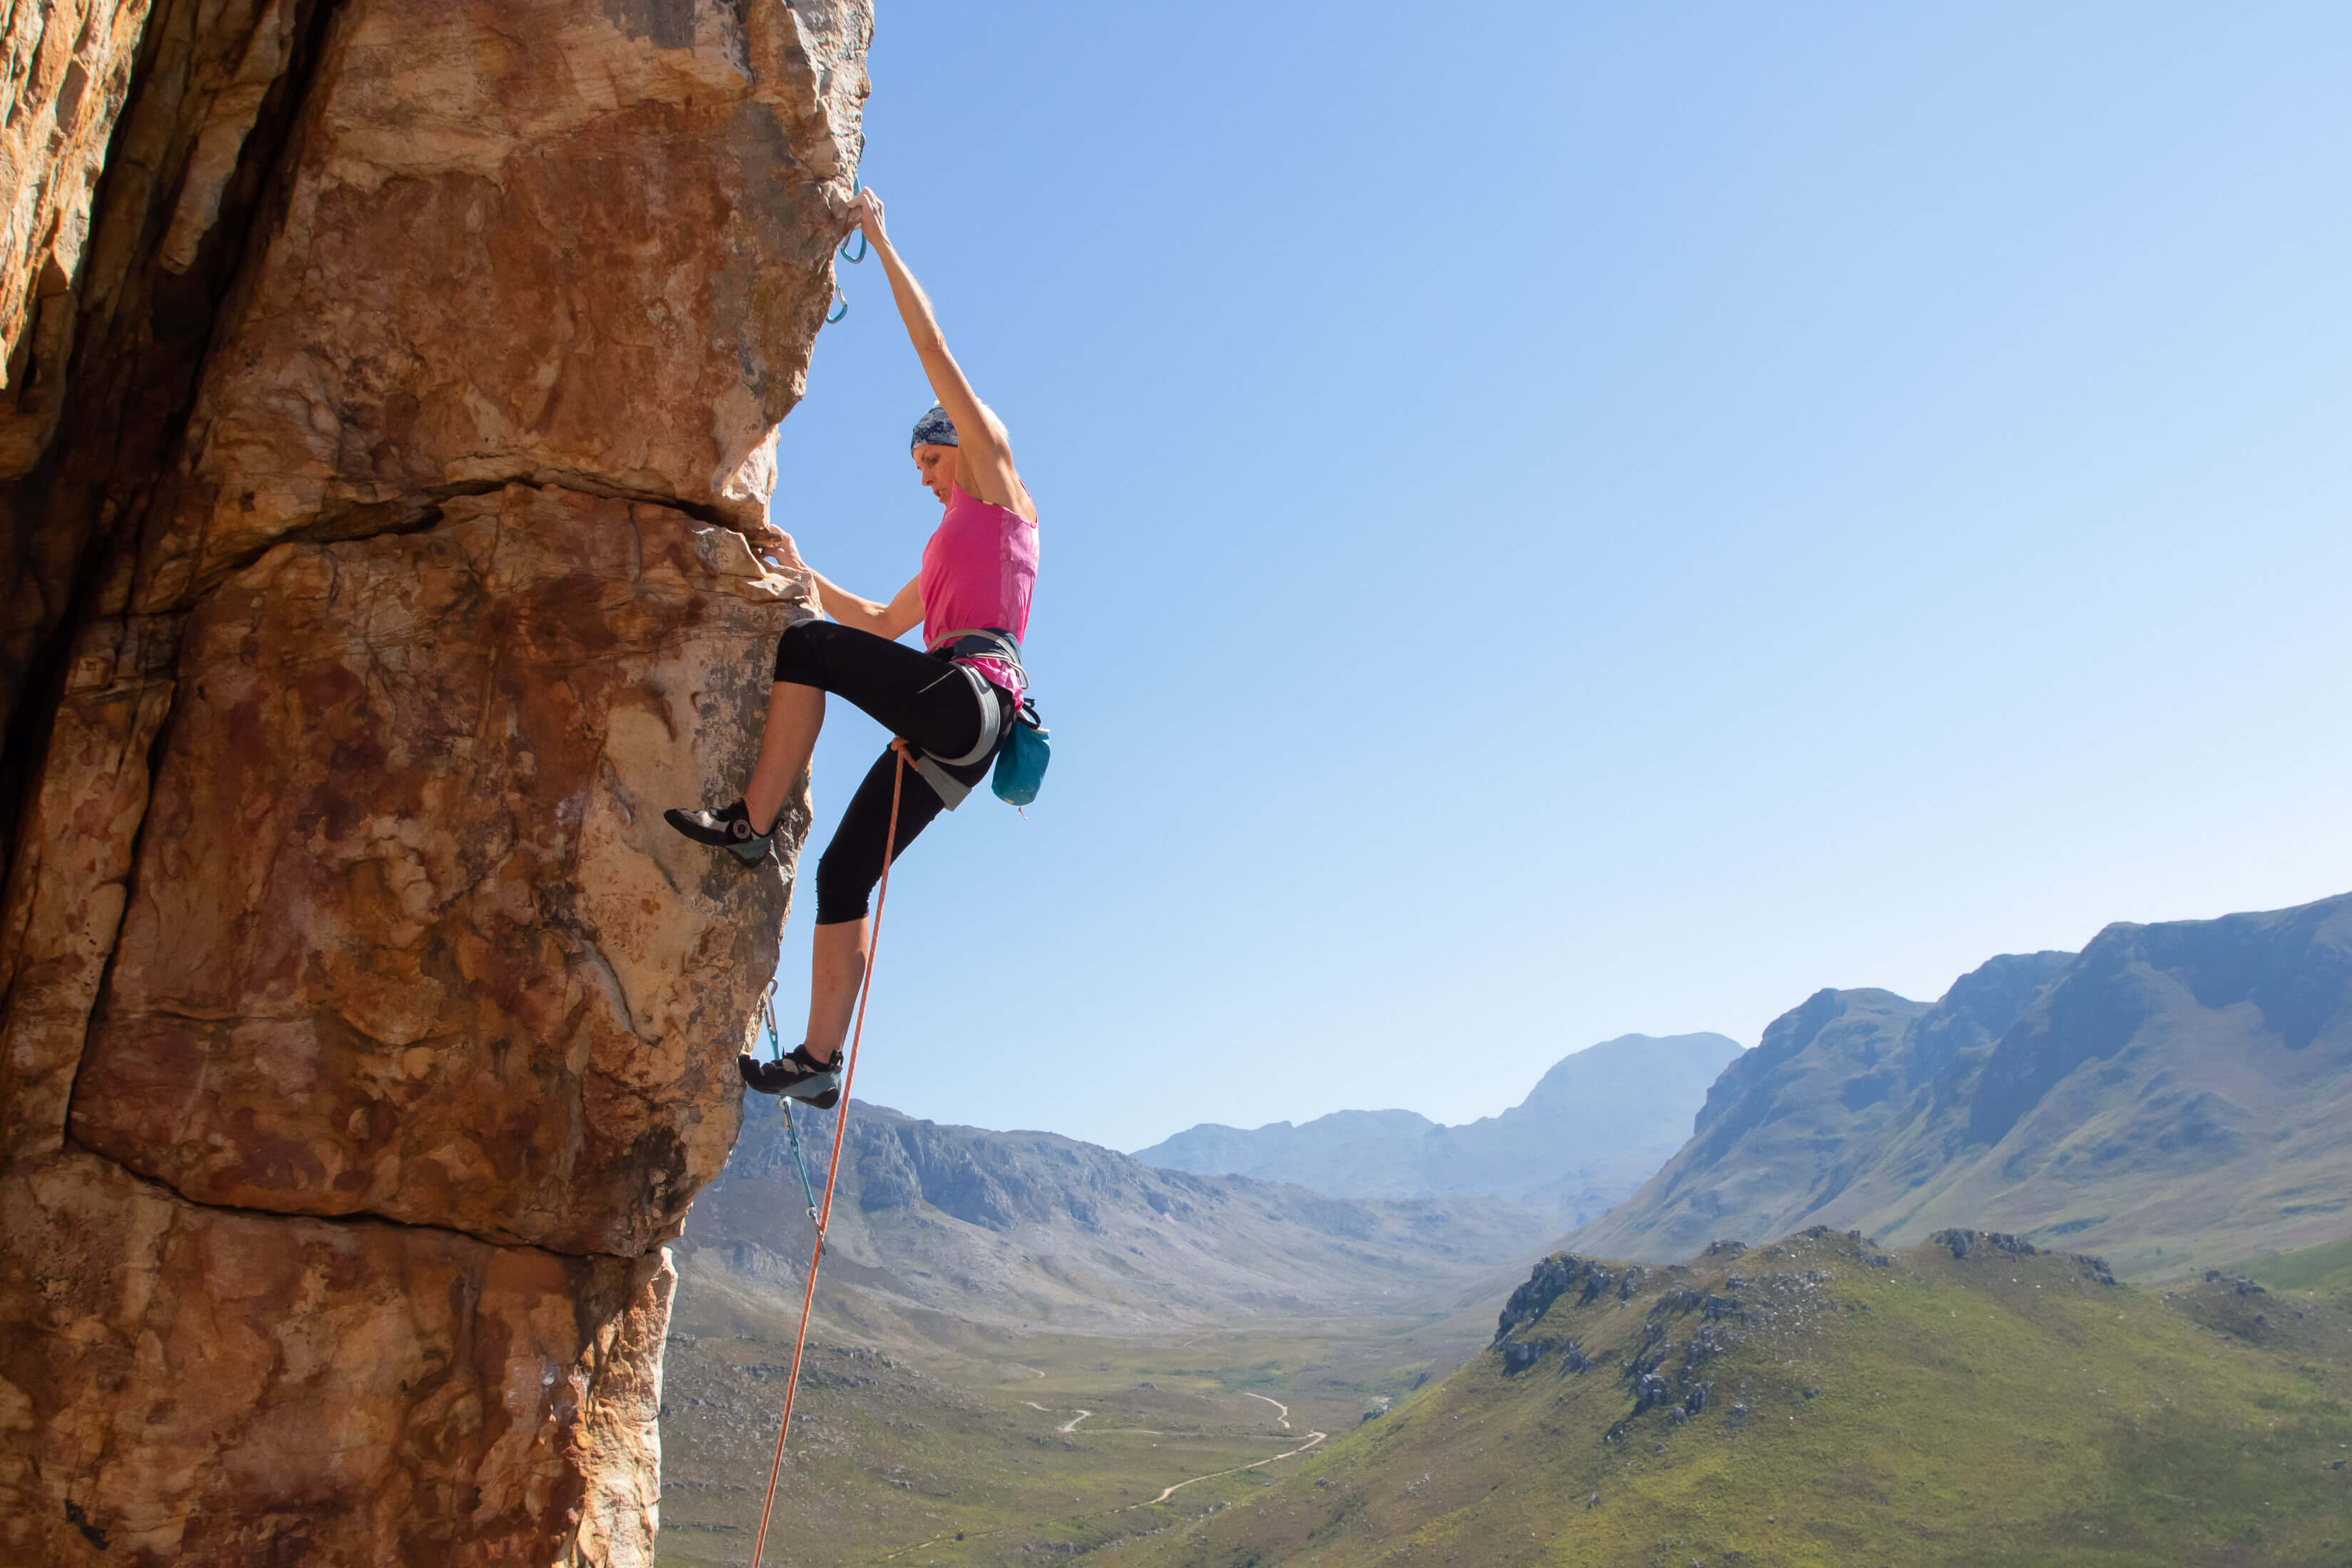
In certain situations – like those intense crux moves – there will be one moment when everything comes together to create a really great shot. In this type of photo, facial expression, body position, and context come together to tell a story far better than any of other shots in that sequence. Anticipating and capturing these moments consistently is one of the most important skills in adventure photography. In climbing photography, there are at least three things you can look for when anticipating these moments
Facial expressions
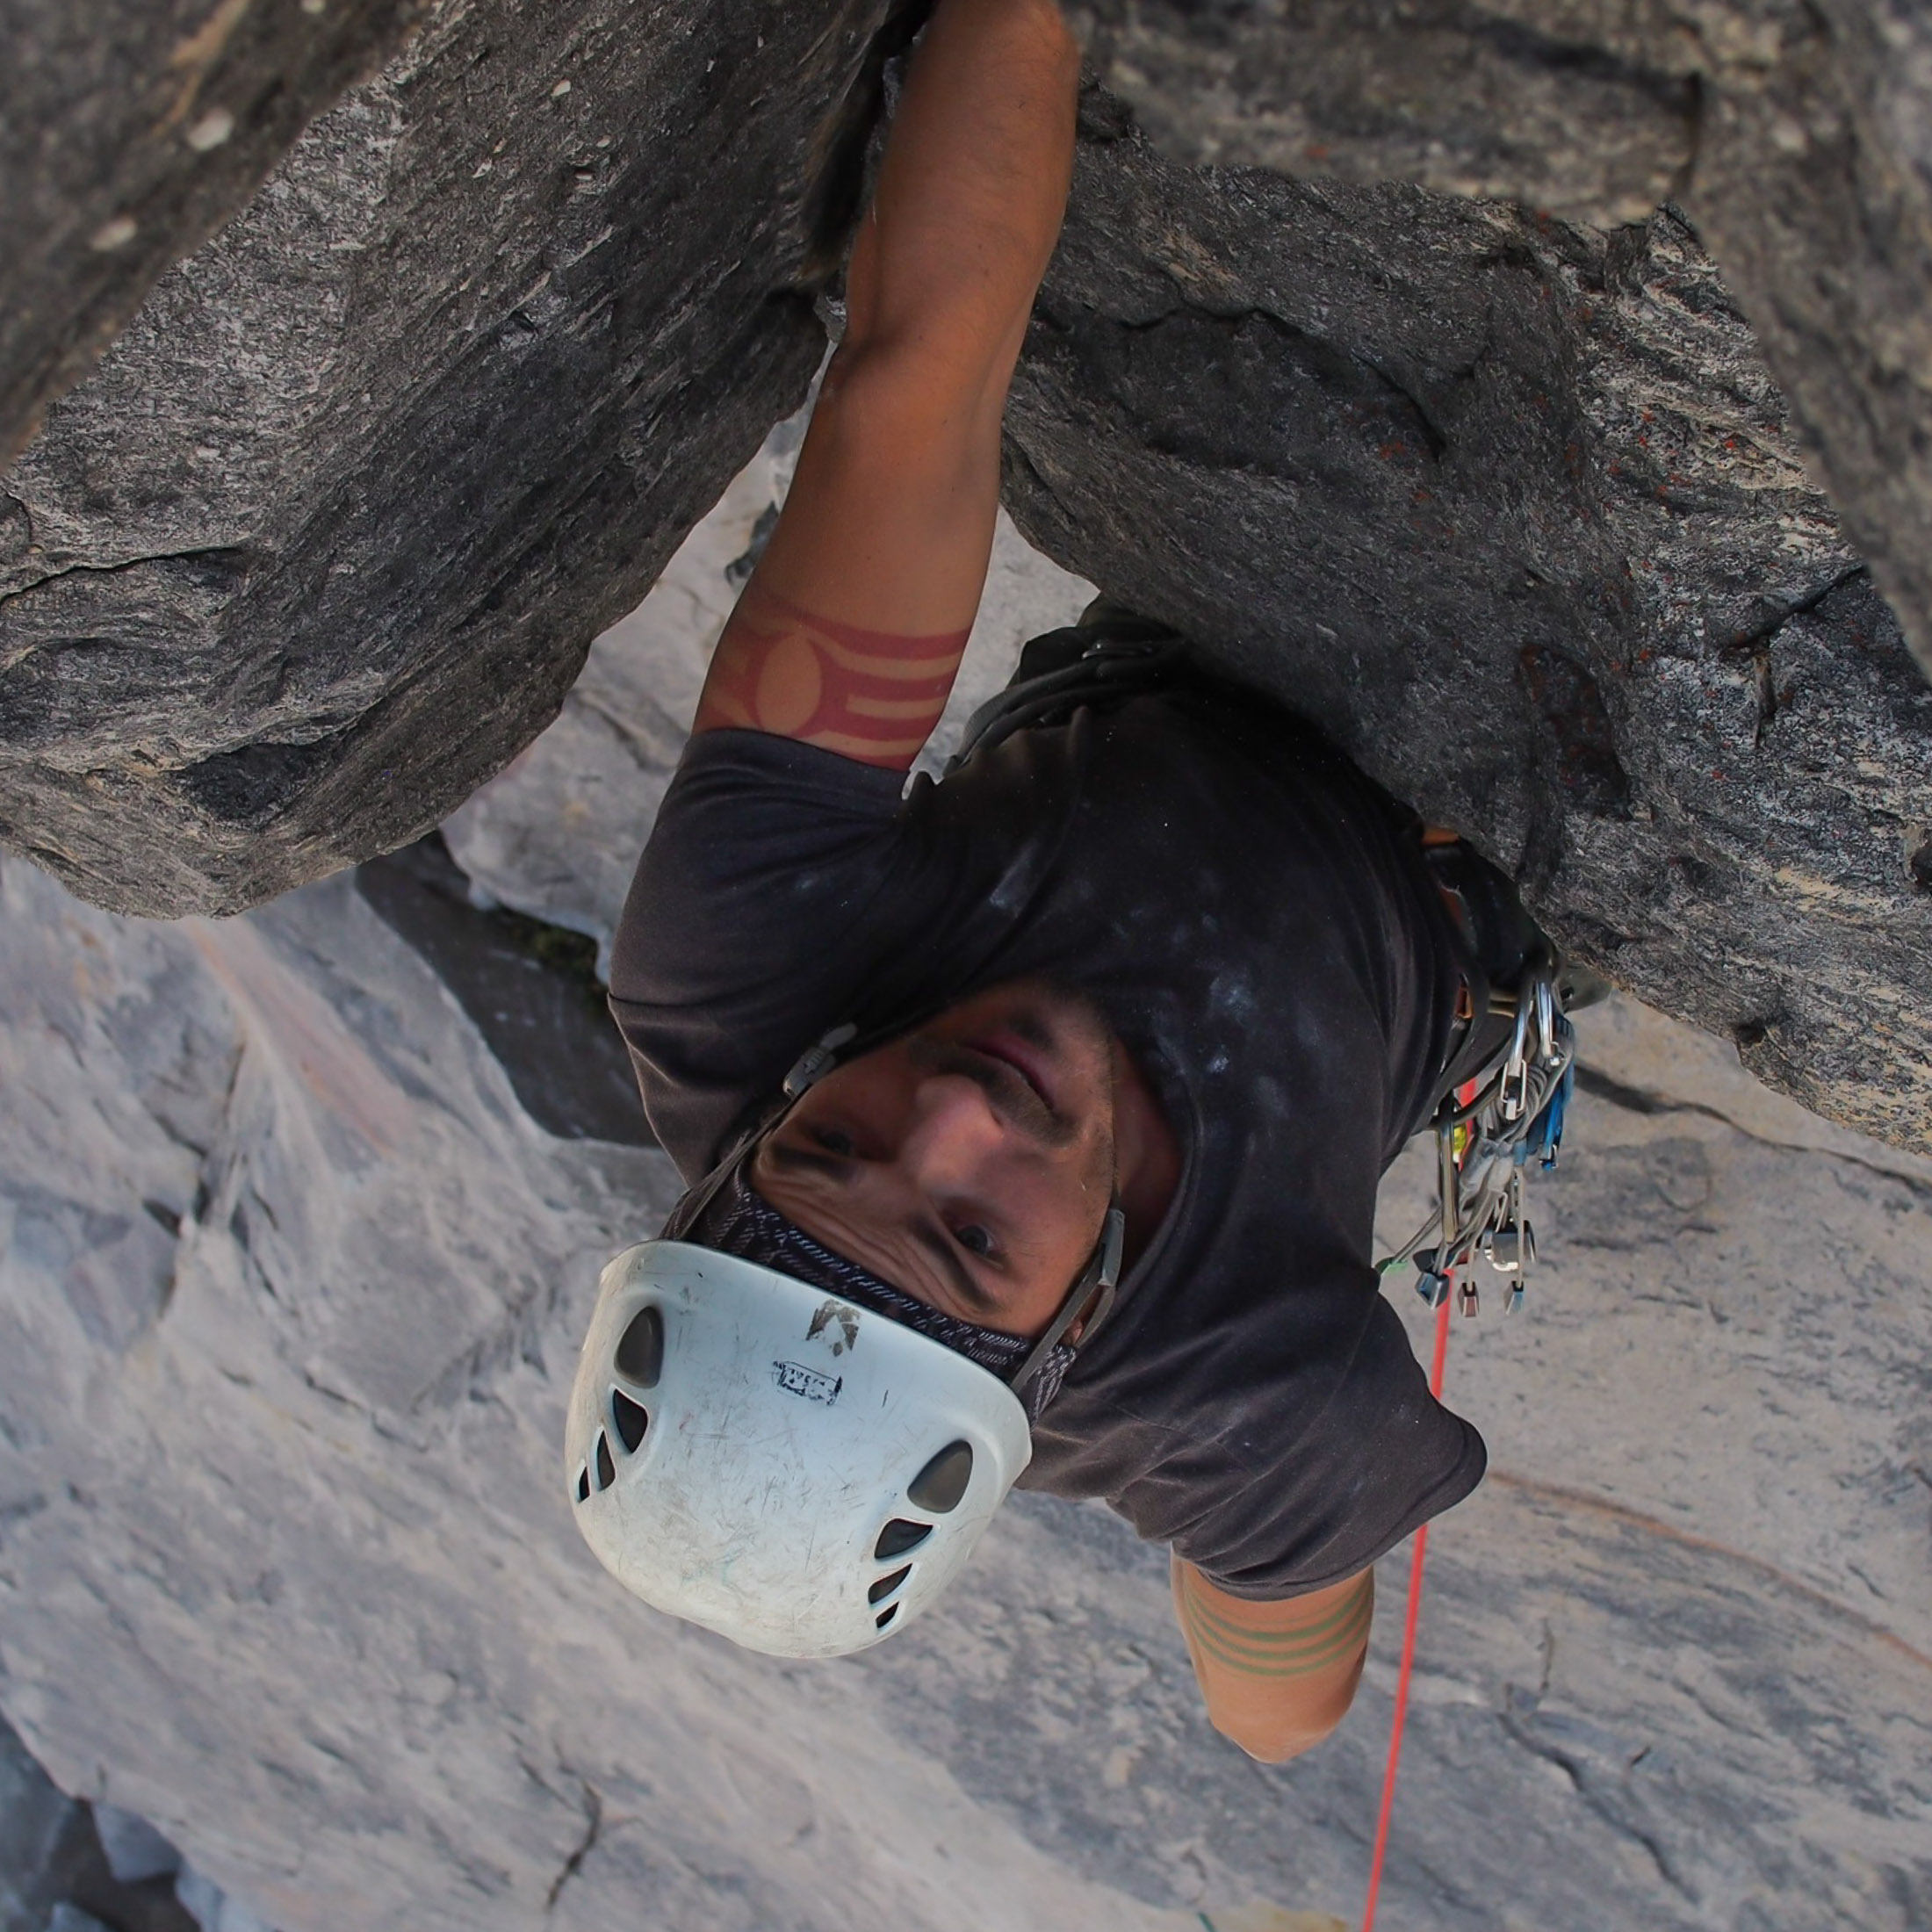
You can read a lot in someone’s facial expression, and many experienced sport photographers will even say that the inclusion of the subject’s face is a rule of good action photography. I’m wary of hard and fast rules regarding creativity (some of my best photos don’t show the subject’s face), but in many shots, facial expression helps make the moment. Think of a climber’s intense gaze as he zeros in on a small and distant hold. If you think the subject's face is going to be an important element in a photo, position yourself so that you can see his face during the crux moves.
Hands & feet
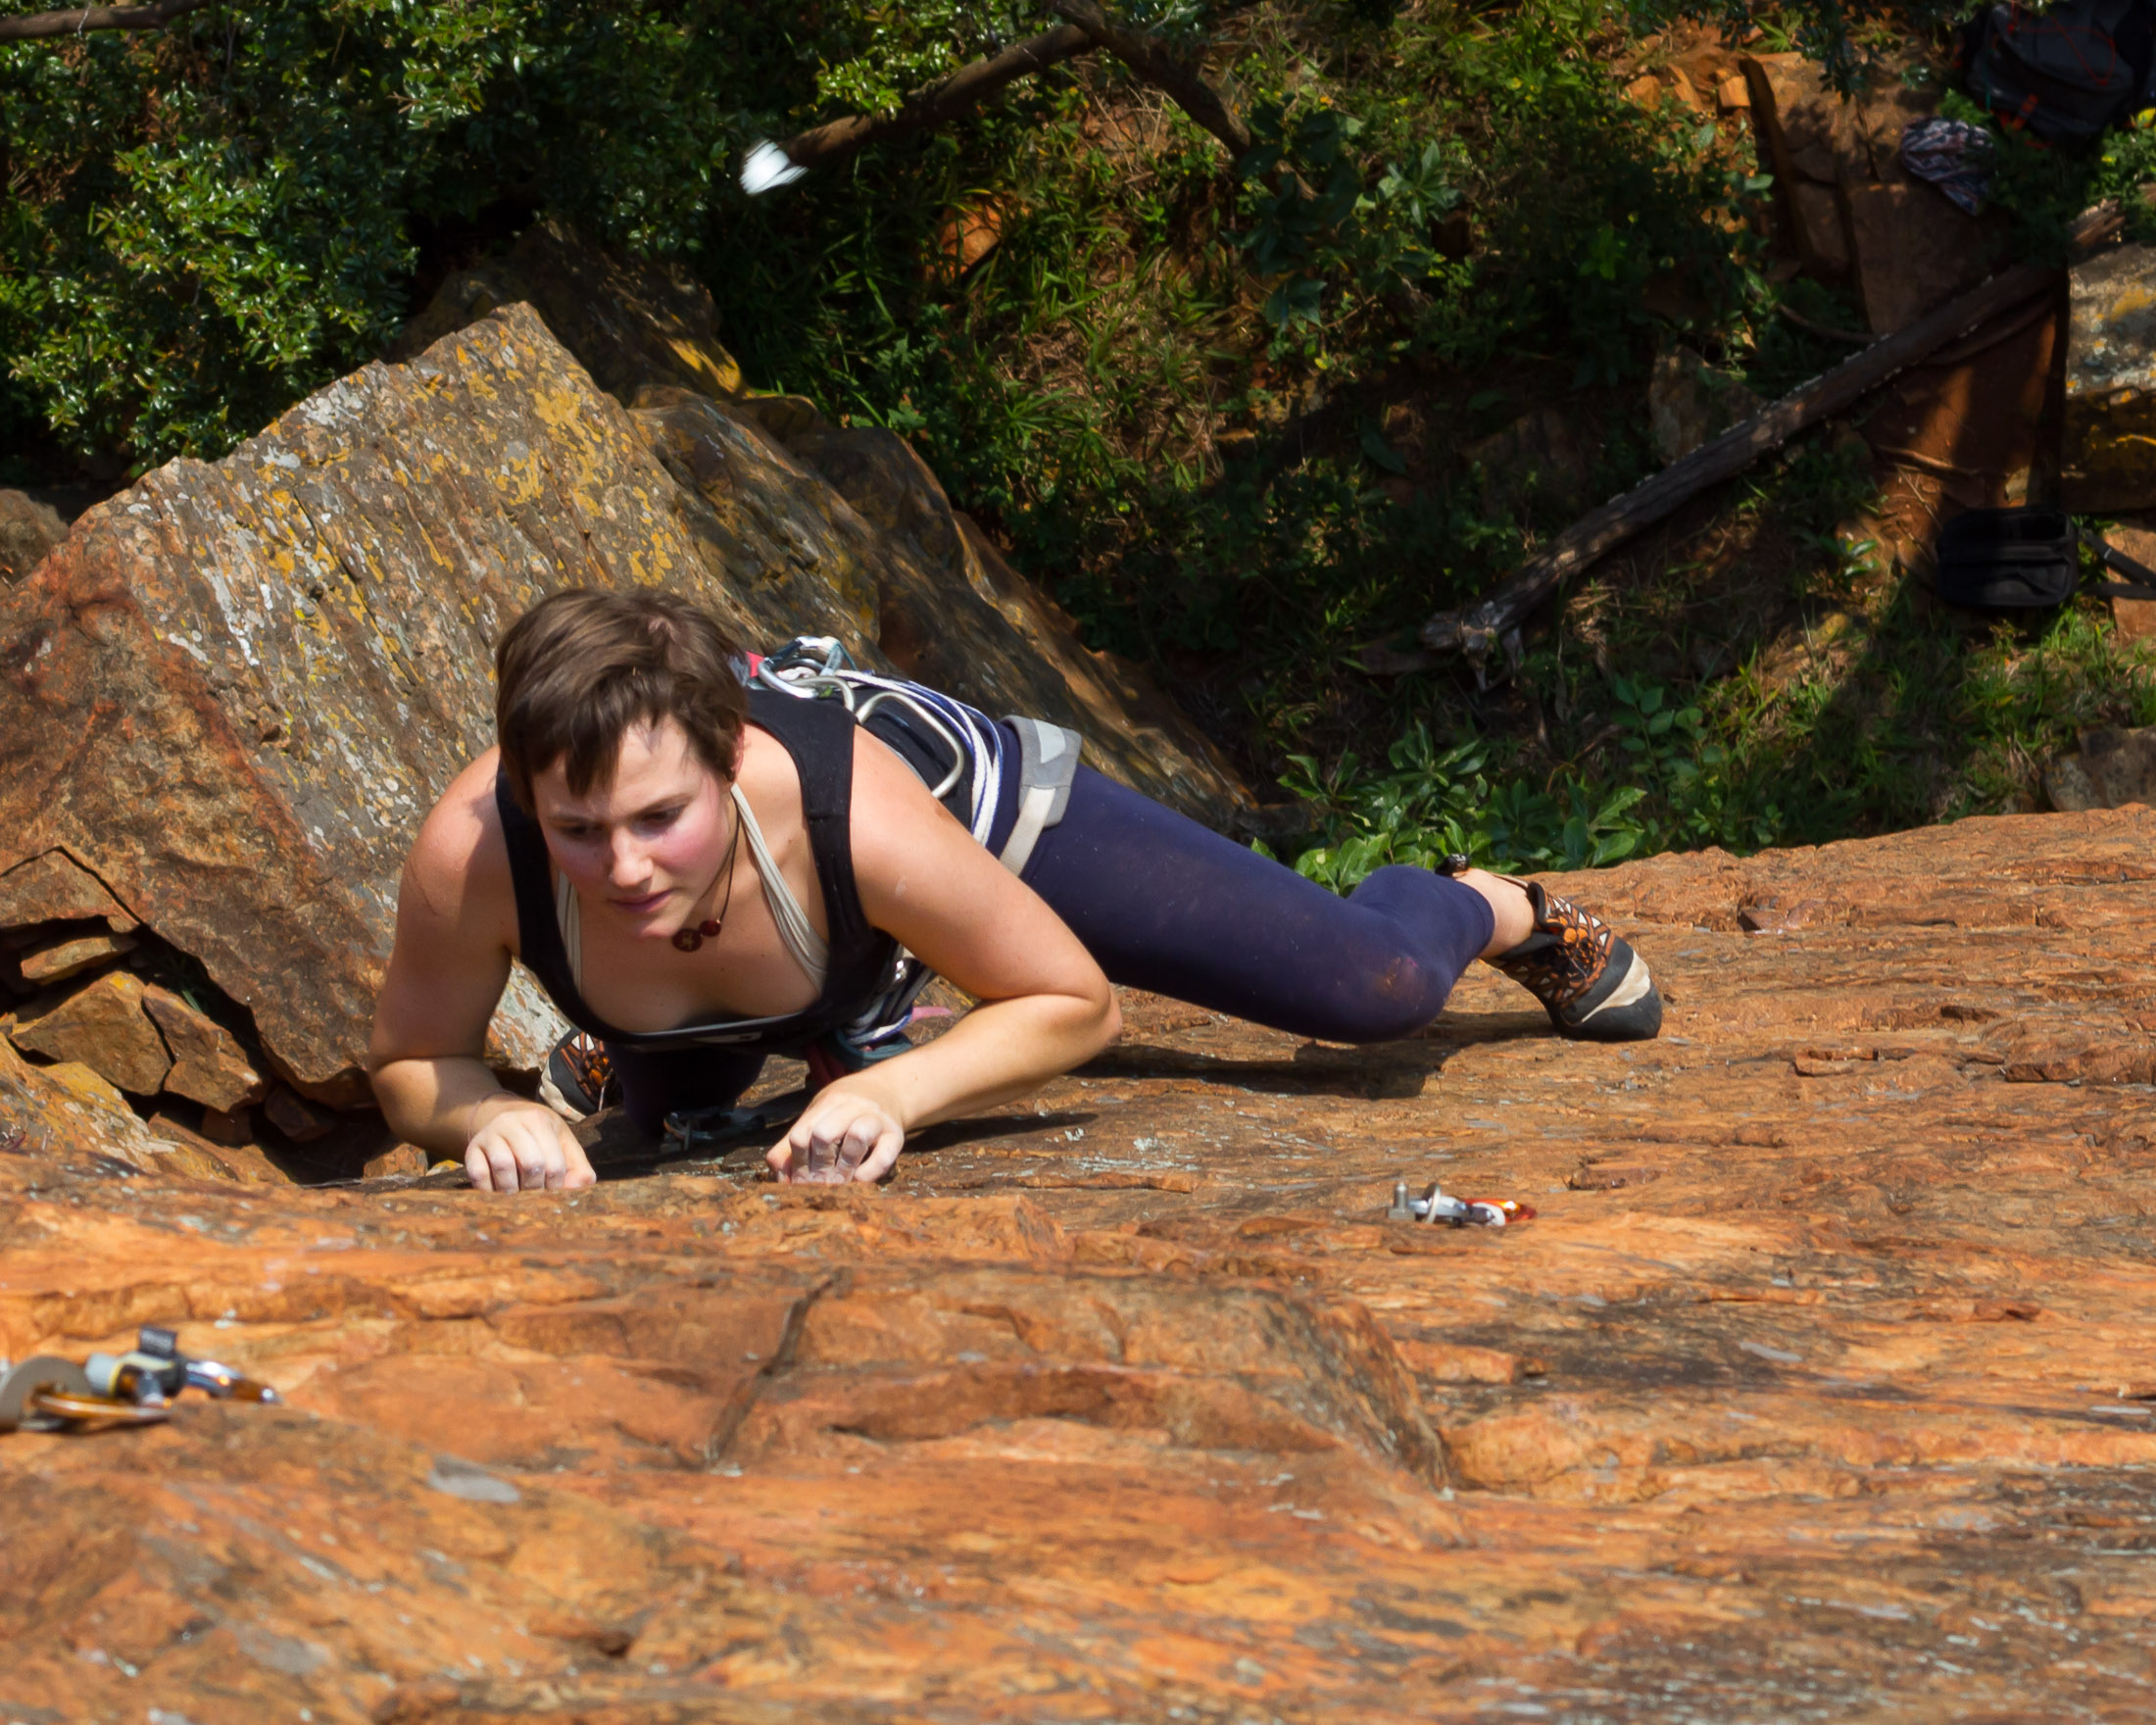
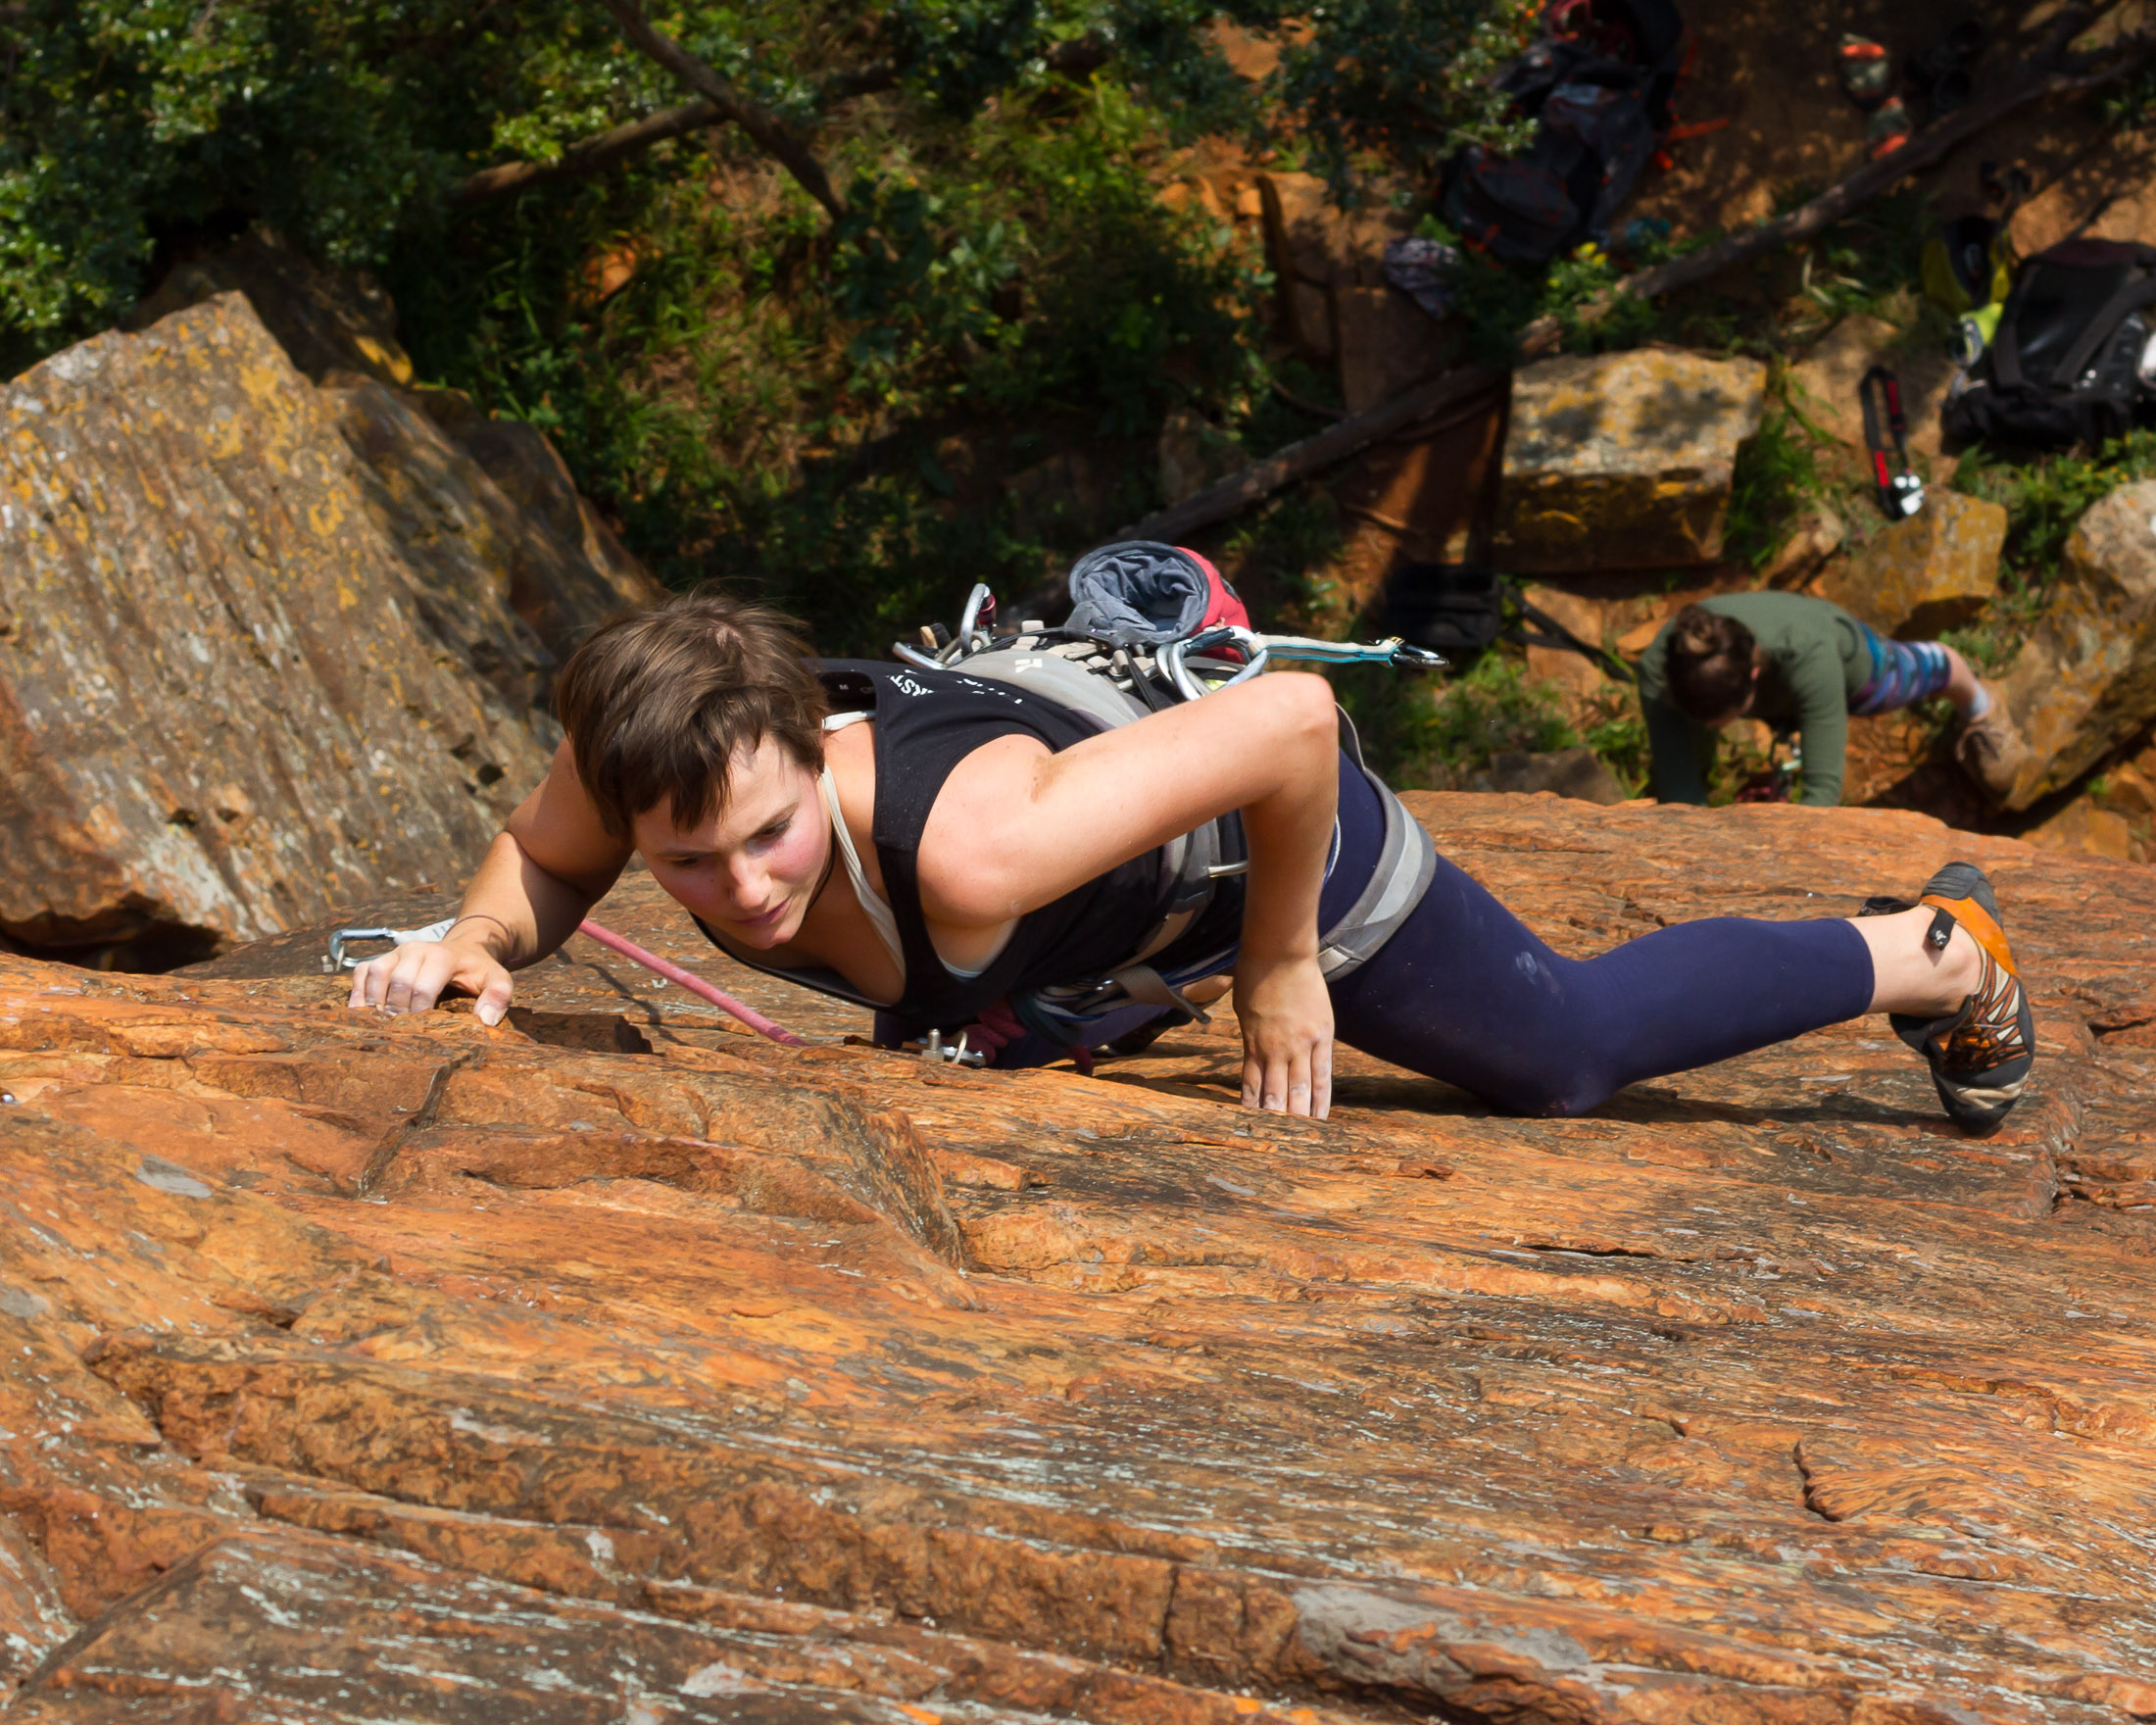
A climber’s points of contact with the rock can also help convey a sense of moment. Novice climbing photographers tend to focus on a climber’s hands, especially when they have to pull on small or tenuous holds. But the position of a subject’s feet are also key to suggesting movement. A climber’s feet have to be high before she can make a long move, and positions in which a climber’s feet are either high or off to one side are a lot more interesting than those where her feet are directly underneath her.
The risk element
Photos of climbers on the sharp end are a lot more interesting than photos of top-roping climbers. And a photo of a climber running it out is better than a photo of a climber with the quickdraw at chest level. The same is true of climbers in exposed positions, even though the risk in such situations is sometimes merely perceived. When scoping out photo opportunities, try to anticipate those moments when a climber will be on the edge. Also be careful to not encourage your subjects to take risks they usually wouldn’t take.
Light
The very best pics make the most of good natural light – early morning or late afternoon light brings out the best colours. Luckily, these are also the times that most climbers are prepared to climb in the sun. However, there’s a challenge here: this prime time accounts for no more than three or four hours of the average day. You will need to do some planning and preparation to make the most of this this valuable time. Ideally, you can scope out photogenic lines the day before, note the time they’ll have the best light, and then sell the idea of a climb at your preferred time to your intended subject.
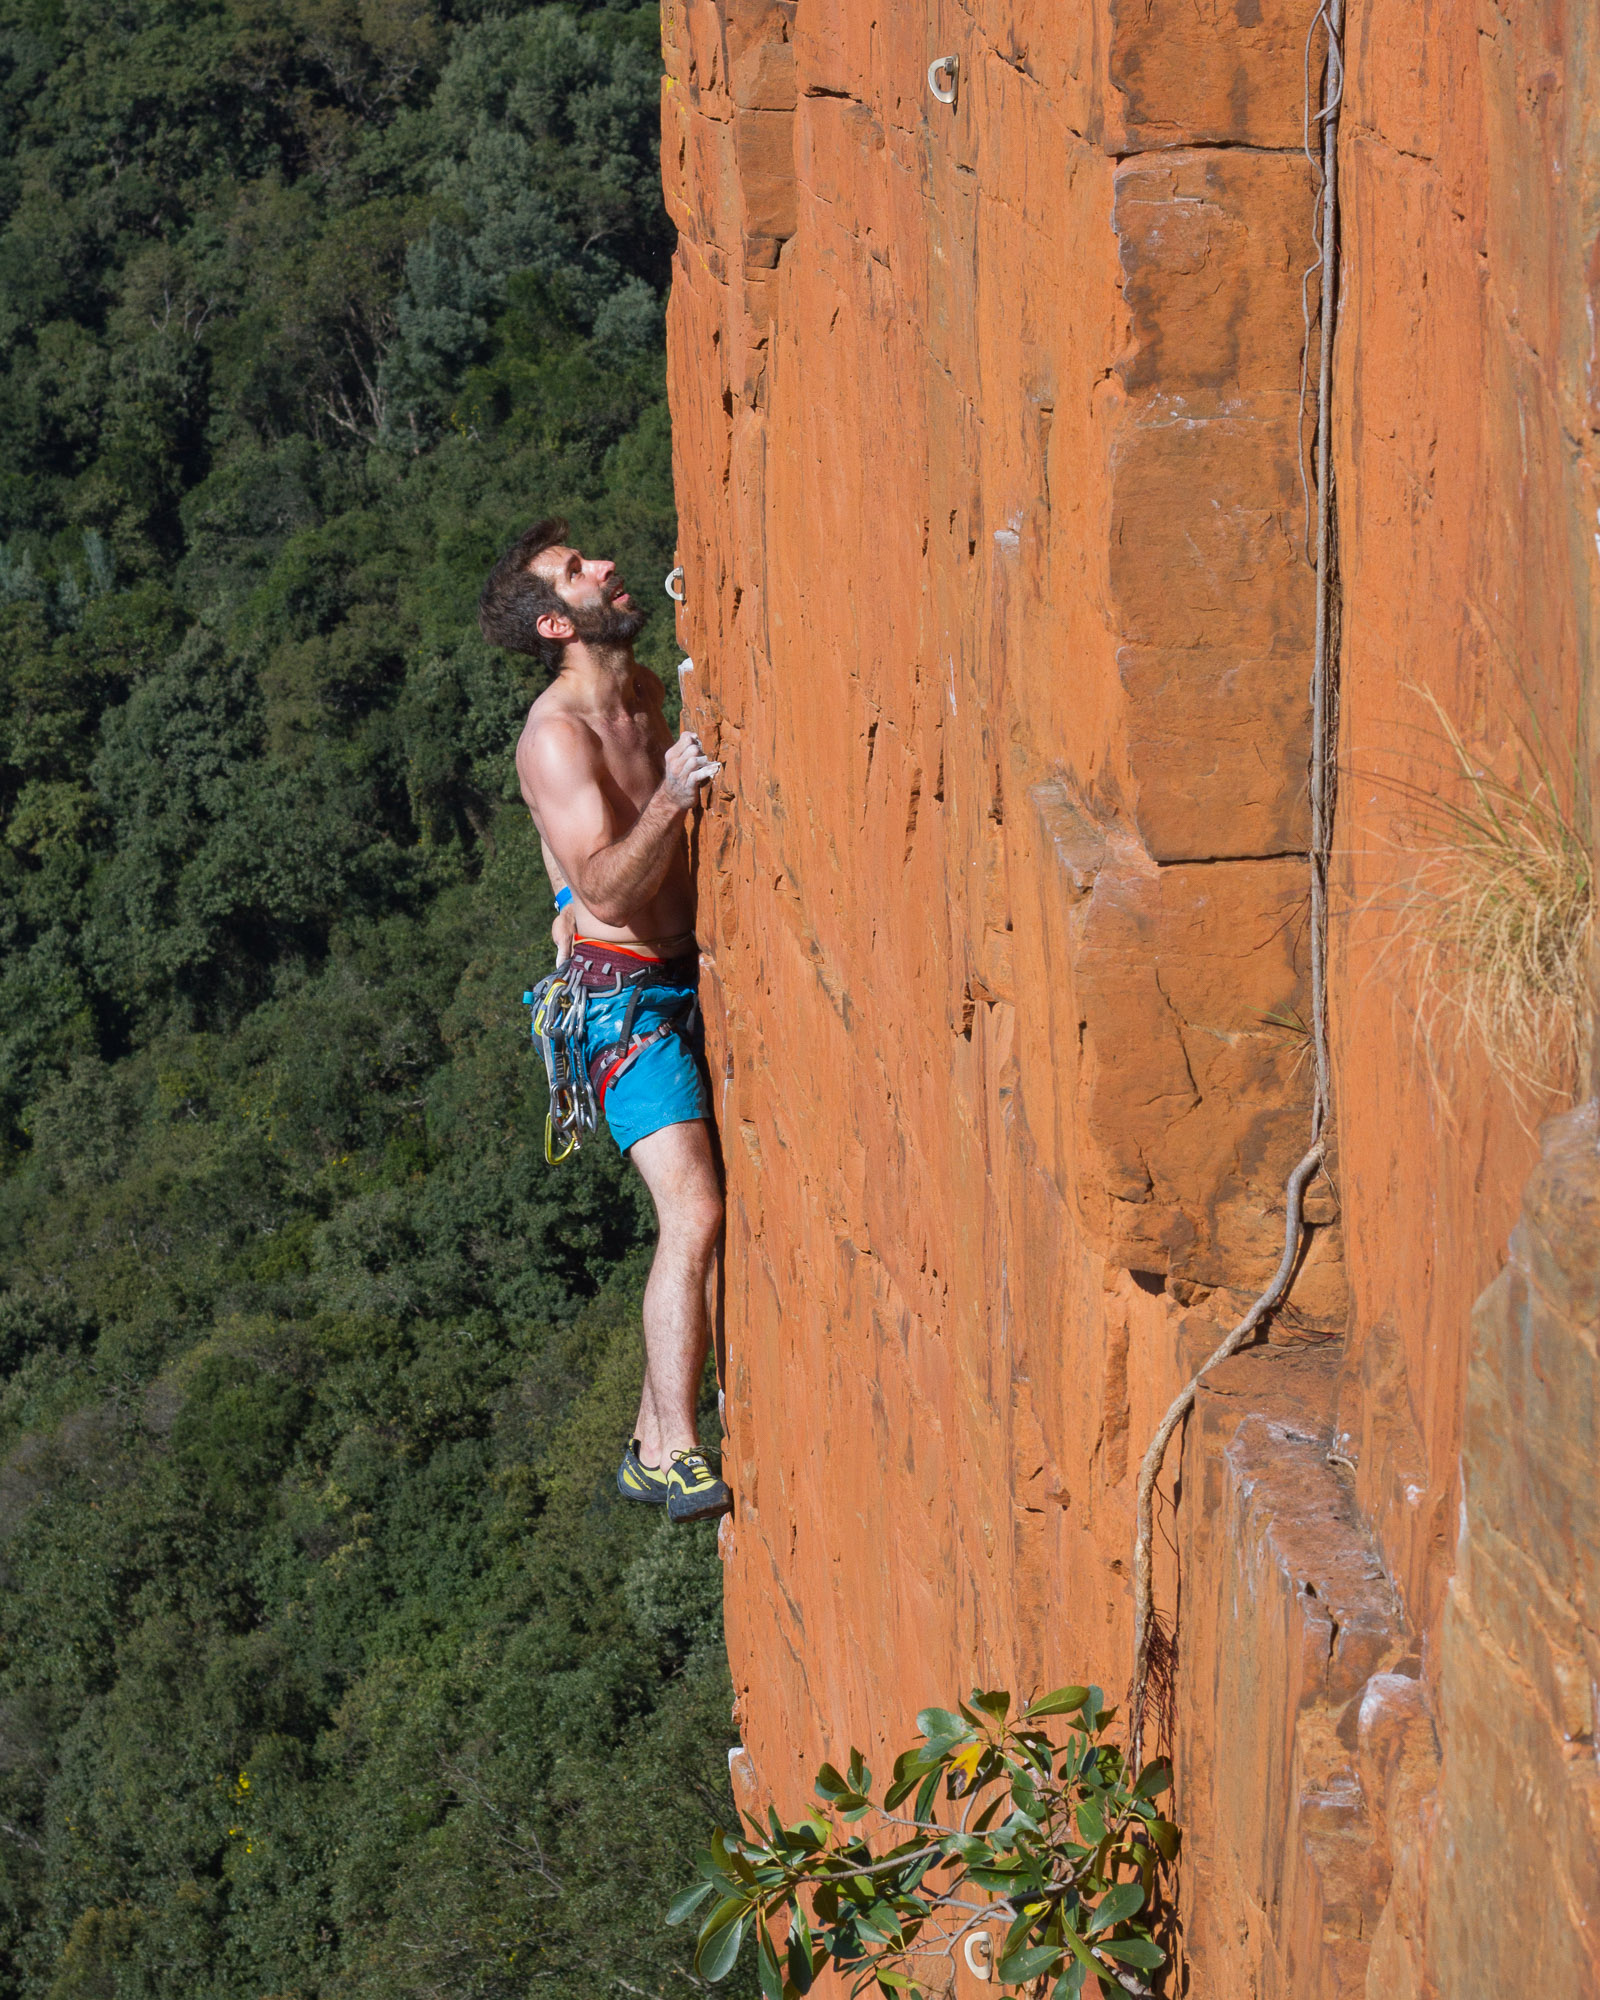
This doesn’t mean you can’t take good photos in indirect light or shade. You can, but you’ll have to rely on aspects other than beautiful highlights to make a photo stand out. One advantage to shooting in shade is that tones are more even – you don’t have the harsh shadows that can be challenge indirect light. As a result, photos taken in shade tend to show more detail, especially in the darker tones – greater for capturing the features in textured rock. Bright artificial colours – like those in some climbing apparel – also stand out best in indirect light.
Preparing the scene
Before you can get to work, you need to prepare the base of the crag so that you can make the most of your session while also mitigating any risk. When asking others to move themselves and their things, it helps to practice a certain level of diplomacy. You are, after all, not directly involved in the act of climbing.
Remove distracting objects from frame
You want to avoid cluttering your background if possible. One way to do this is to use a shallow depth of field, but this approach is not always effective or even possible. To avoid any unwanted distractions, remove objects that will create the strongest contrast. Shiny and bright objects can be particularly problematic as they have the potential to create hot spots. But also consider removing any objects that will detract from the aesthetic appeal of a photo.
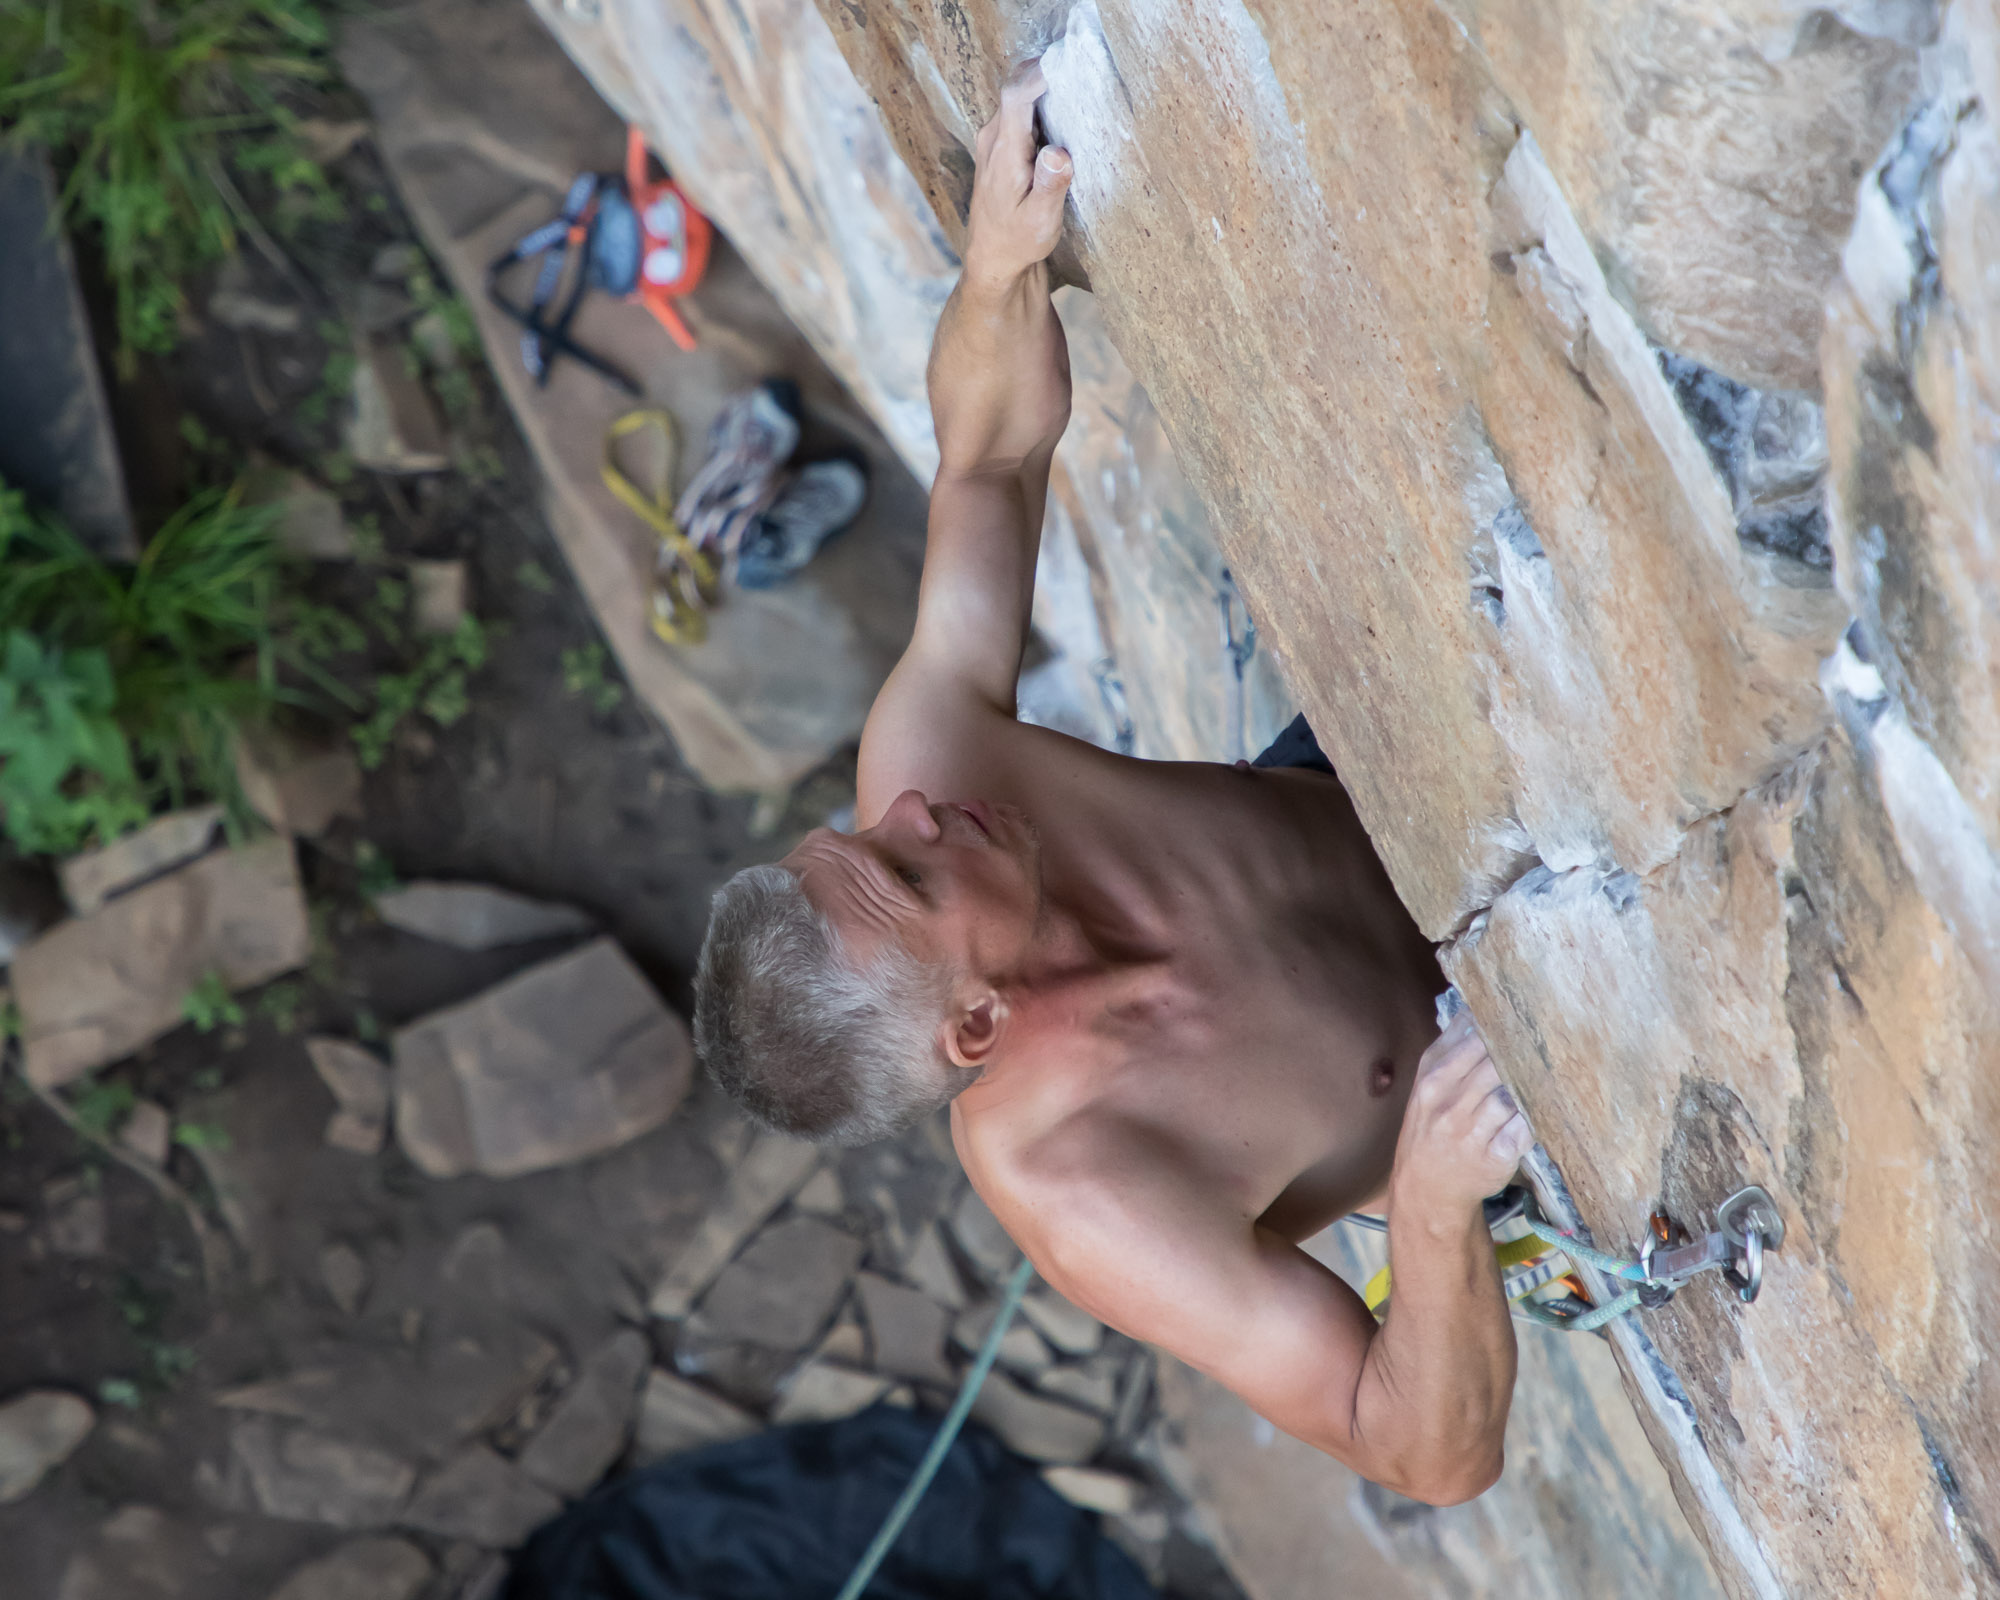
Clear the fall zone
You don’t want to drop anything on those below you, and it’s essential that you try to keep your fall zone clear. This area is probably further from the wall than you think, but you can test this by lowering the loose end of your rope. Always try to avoid having anybody sit or stand directly below you – but if they do, ensure that they’re aware of you. Regularly check the base of the crag to see where everyone is, and remember to look down again when you move laterally.
Get into position
Sometimes you can use the surrounding terrain to gain a suitable vantage point, but to make the most of other opportunities, you will need to get onto the wall. You can do this in two ways:
1. One of your buddies keeps you on belay while you hang around to take photos
2. You position yourself on the wall using a fixed rope, ascender and Grigi
There‘s no prize for guessing which method your friends would prefer you to use. Of course, before you can put yourself on a fixed rope (preferably a static rope), it needs to be secured to a high point. In most cases, this will be the anchors of the route to be climbed or an adjacent route. You can set up the rope yourself by leading the route and tagging the static rope, or you can get another climber to take it up for you – with clear instructions on how to attach it to the top anchors (still to come).
Set up a fixed rope
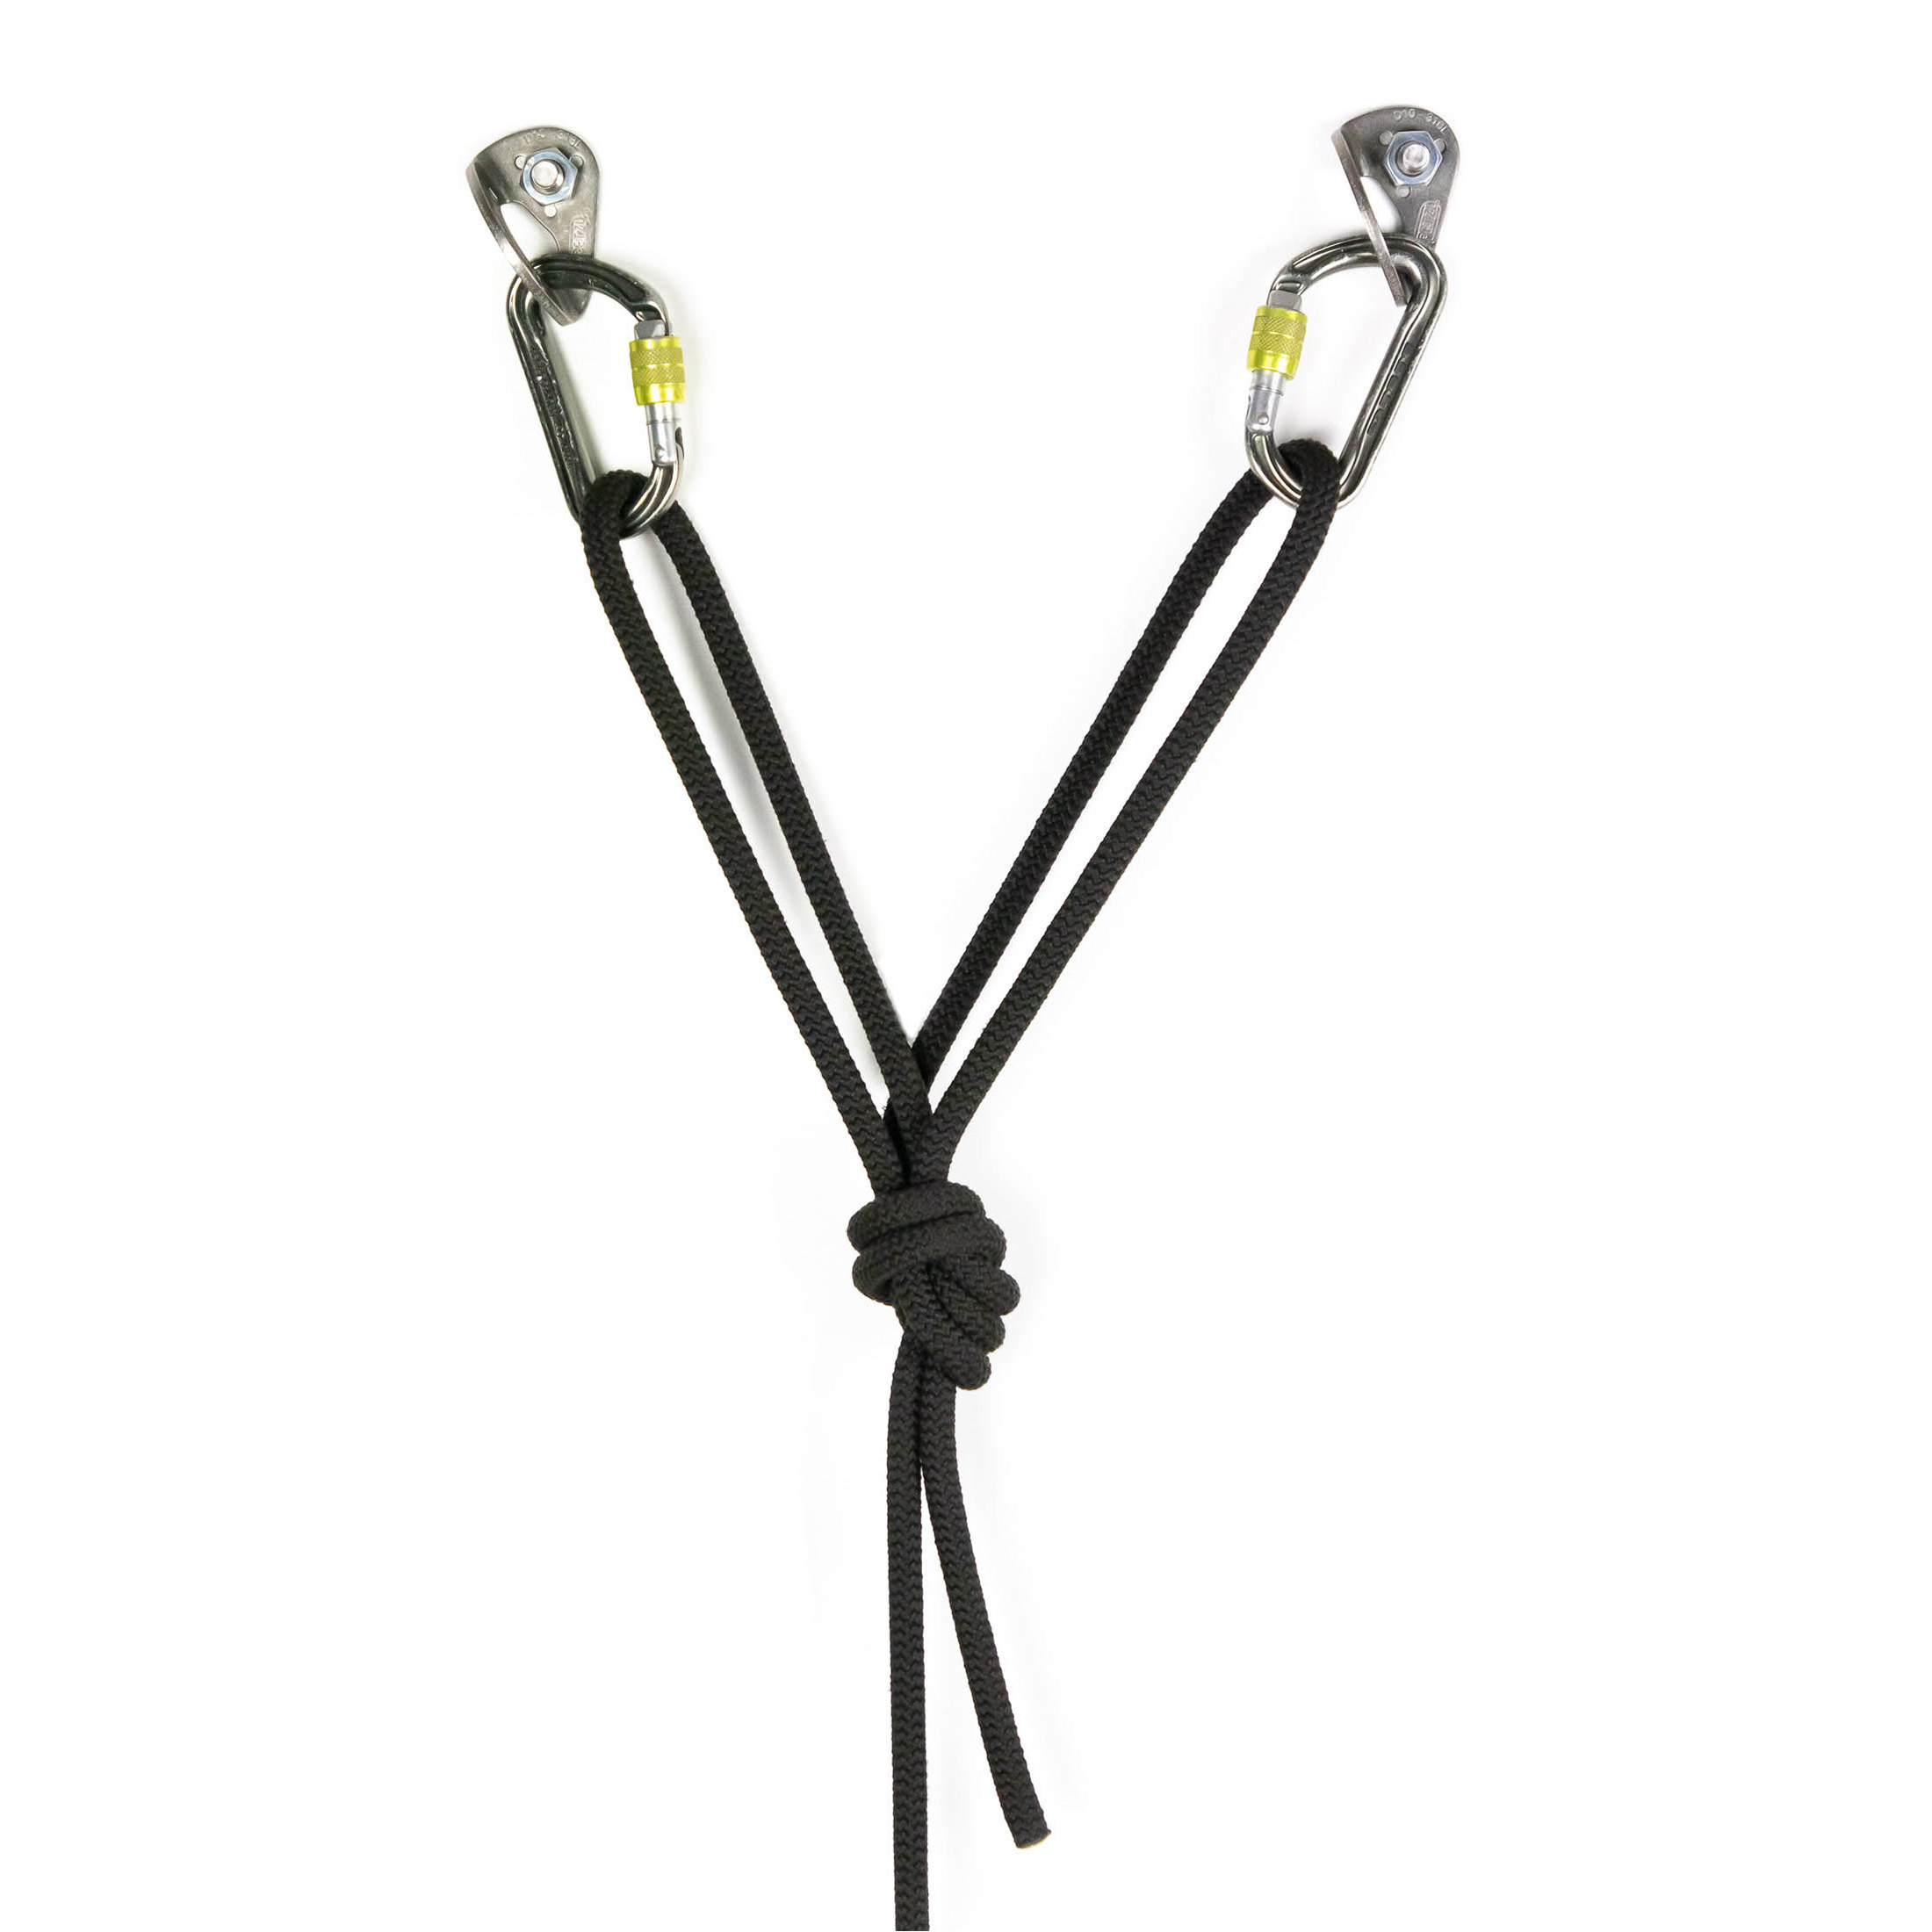
It should go without saying that you should always use a redundant anchor (one with at least two points) when rigging a fixed rope. If you use a trad anchor, you’ll also want to ensure that the load is effectively distributed between components. When using a static rope, you can produce high load forces with even just a small fall, so it’s essential that you build an absolutely bomber anchor. My articles on anchor building fundamentals and rigging techniques can provide detailed instructions on how to do this. Next, you’ll need to attach your rope to the anchor. The best knot for that is the double figure 8 loop. If you have two bolts for anchors, you can clip a loop to each bolt. If you’re using a trad anchor, you should attach both loops to the master point with a locking carabiner.
If you’re using an anchor off to the side of the route being climbed, it will be easy enough to stay out of the climber’s way, but if you’ve attached your rope to the anchors on the climber’s route, you’ll need to make a plan. The best solution is usually to use a redirect in the form of a runner to pull your rope off to one side. You might be able to use a bolt on a nearby route or a piece of trad gear. Just make sure this piece is solid. If it failed at the wrong time, you could swing out and take the climber off the wall. If a redirect is not possible, you’ll need to make another plan to get out of the way when the time comes. On steep routes, often the fastest way to get out of the way is to lower yourself – quickly to get out of the fall zone.
Jug into position
Let’s assume that you are starting on the ground and need to ascend the rope (now fixed to an anchor). For this technique, jugging, you will need two devices: one for gripping the rope while you step up into the foot loop, and another for taking in the slack and holding you in place while you move up the first device. The most popular combination is a Grigi and jumar. With this setup, you load the rope into the Grigri and attach it to your belay loop. Then, you girth-hitch the sling to your waist loop and attach the jumar and foot loop via a locking a carabiner through the hole in the bottom of the ascender. For longer routes, you might want to run the dead end of the rope (from the Grigri) through a carabiner attached to the eye in the top of the jumar. Oval carabiners work best for this purpose. With this modification, you’ll pull the rope down to capture the slack – not up, which can put strain on your shoulders.
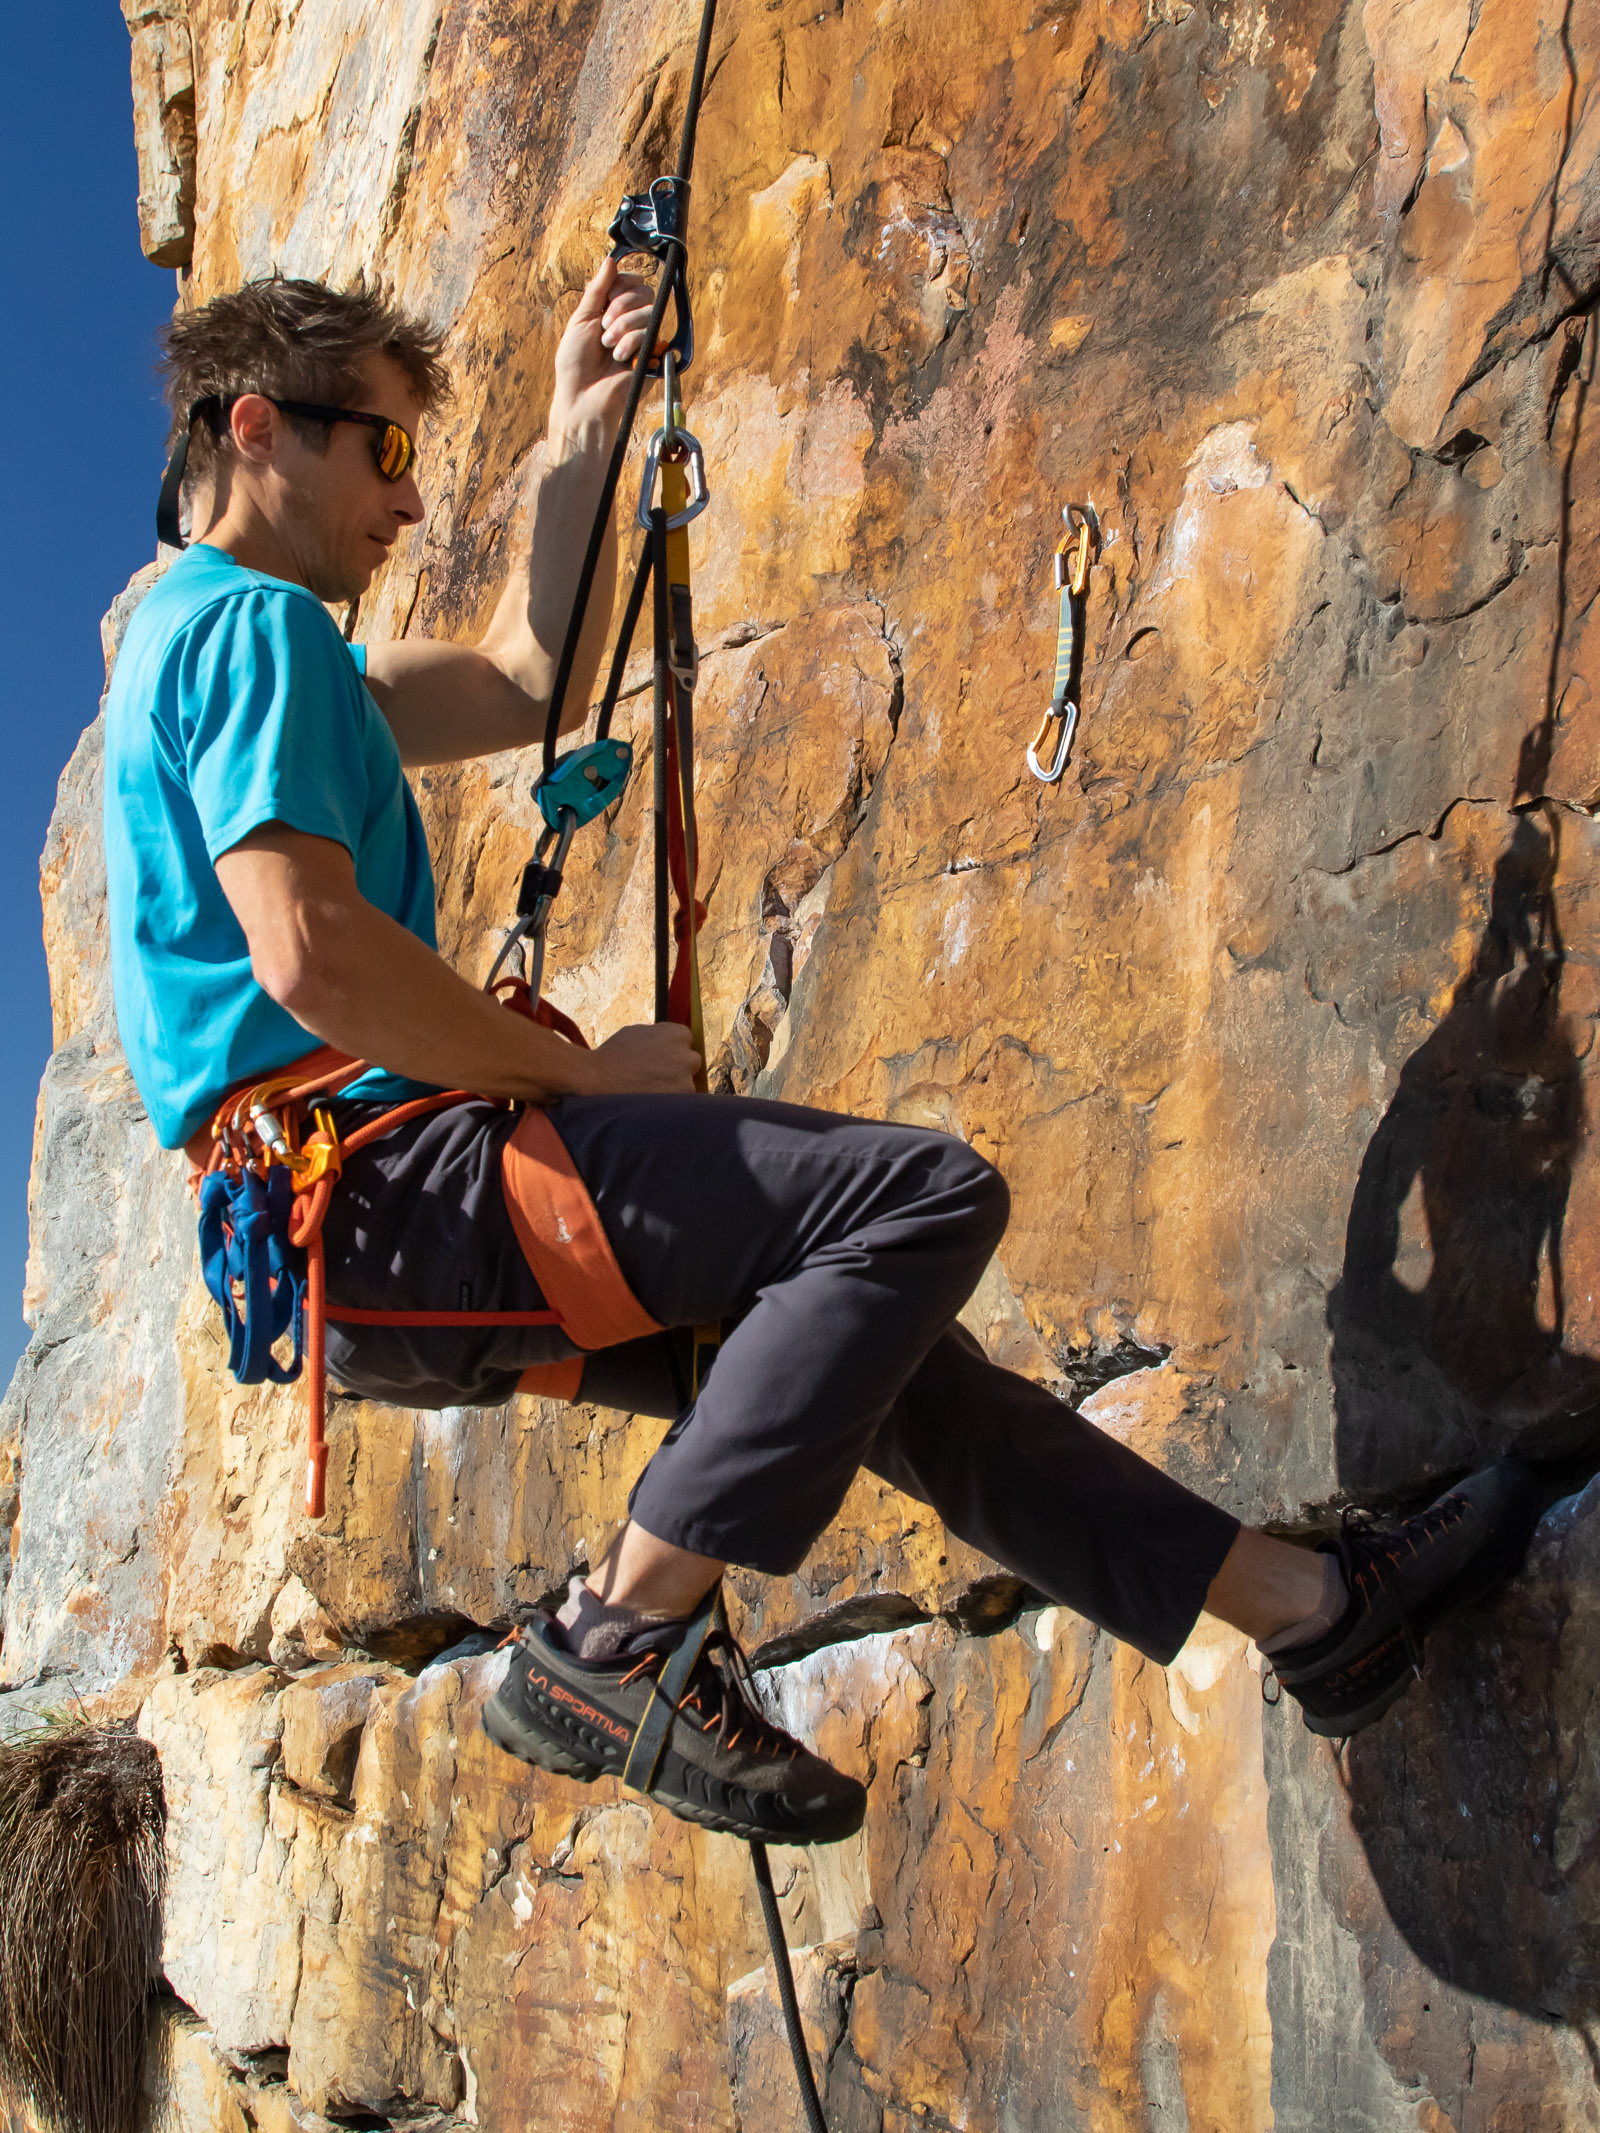
Once you’re set up, getting going can be the hardest part. While you’re still standing, use the jumar to pull on the rope, and take in any slack with the Grigri. When the rope is as tight as you can get it, slide the jumar up as far as it will go and stand up into the footloop, pulling rope through the Grigri as you do so. Then, sit back in the harness. That’s one revolution. Repeat until you reach your destination. Tip: focus on getting your weight directly over the footloop when you stand into it. This way, you will use your legs more than your arms.
Lowering
When you need to lower yourself, unclip the jumar from the rope, and lower yourself with the Grigri. If your rope does not reach the ground (maybe you’ve accessed the wall from above), you should tie a knot in the end of the rope to stop yourself from rappelling off the end (one of the most common accidents in climbing). It’s also a good idea to tie overhand knots at regular intervals in the rope below you. This way, you won’t fall the full length of rope if you pull the lever on the Grigi all the way back and panic, putting yourself into a freefall (A certain function of the Grigri Plus negates this, but more about that later).
I’d also advise you to wear belay gloves (or at least one on your right hand) when lowering. The heat and friction generated during a long single-strand rappel is probably significantly greater than you’ve experienced when lowering climbers from routes. While lowering, also take the opportunity to redirect your rope through quickdraws and slings as needed. I always carry several quickdraws and slings of different lengths for this purpose. If you have trad gear and know how to use it, you can also use this to better position yourself.
Pull up the camera
When you jug into position from the ground, you’ll probably take your camera with you. But it’s generally not a good idea to lead a route with your camera on you (if your plan is to climb the route yourself to set up the static rope). In this case, it’s better to tie your camera bag to the end of your static rope, and haul this up once you are in position. To avoid abrading your camera bag on the rockface, consider using a protective haul bag (you’ll probably need to have one custom made). A bag made of suitably durable material will last a lot longer than your camera bag would without it, and it will be cheaper to replace.
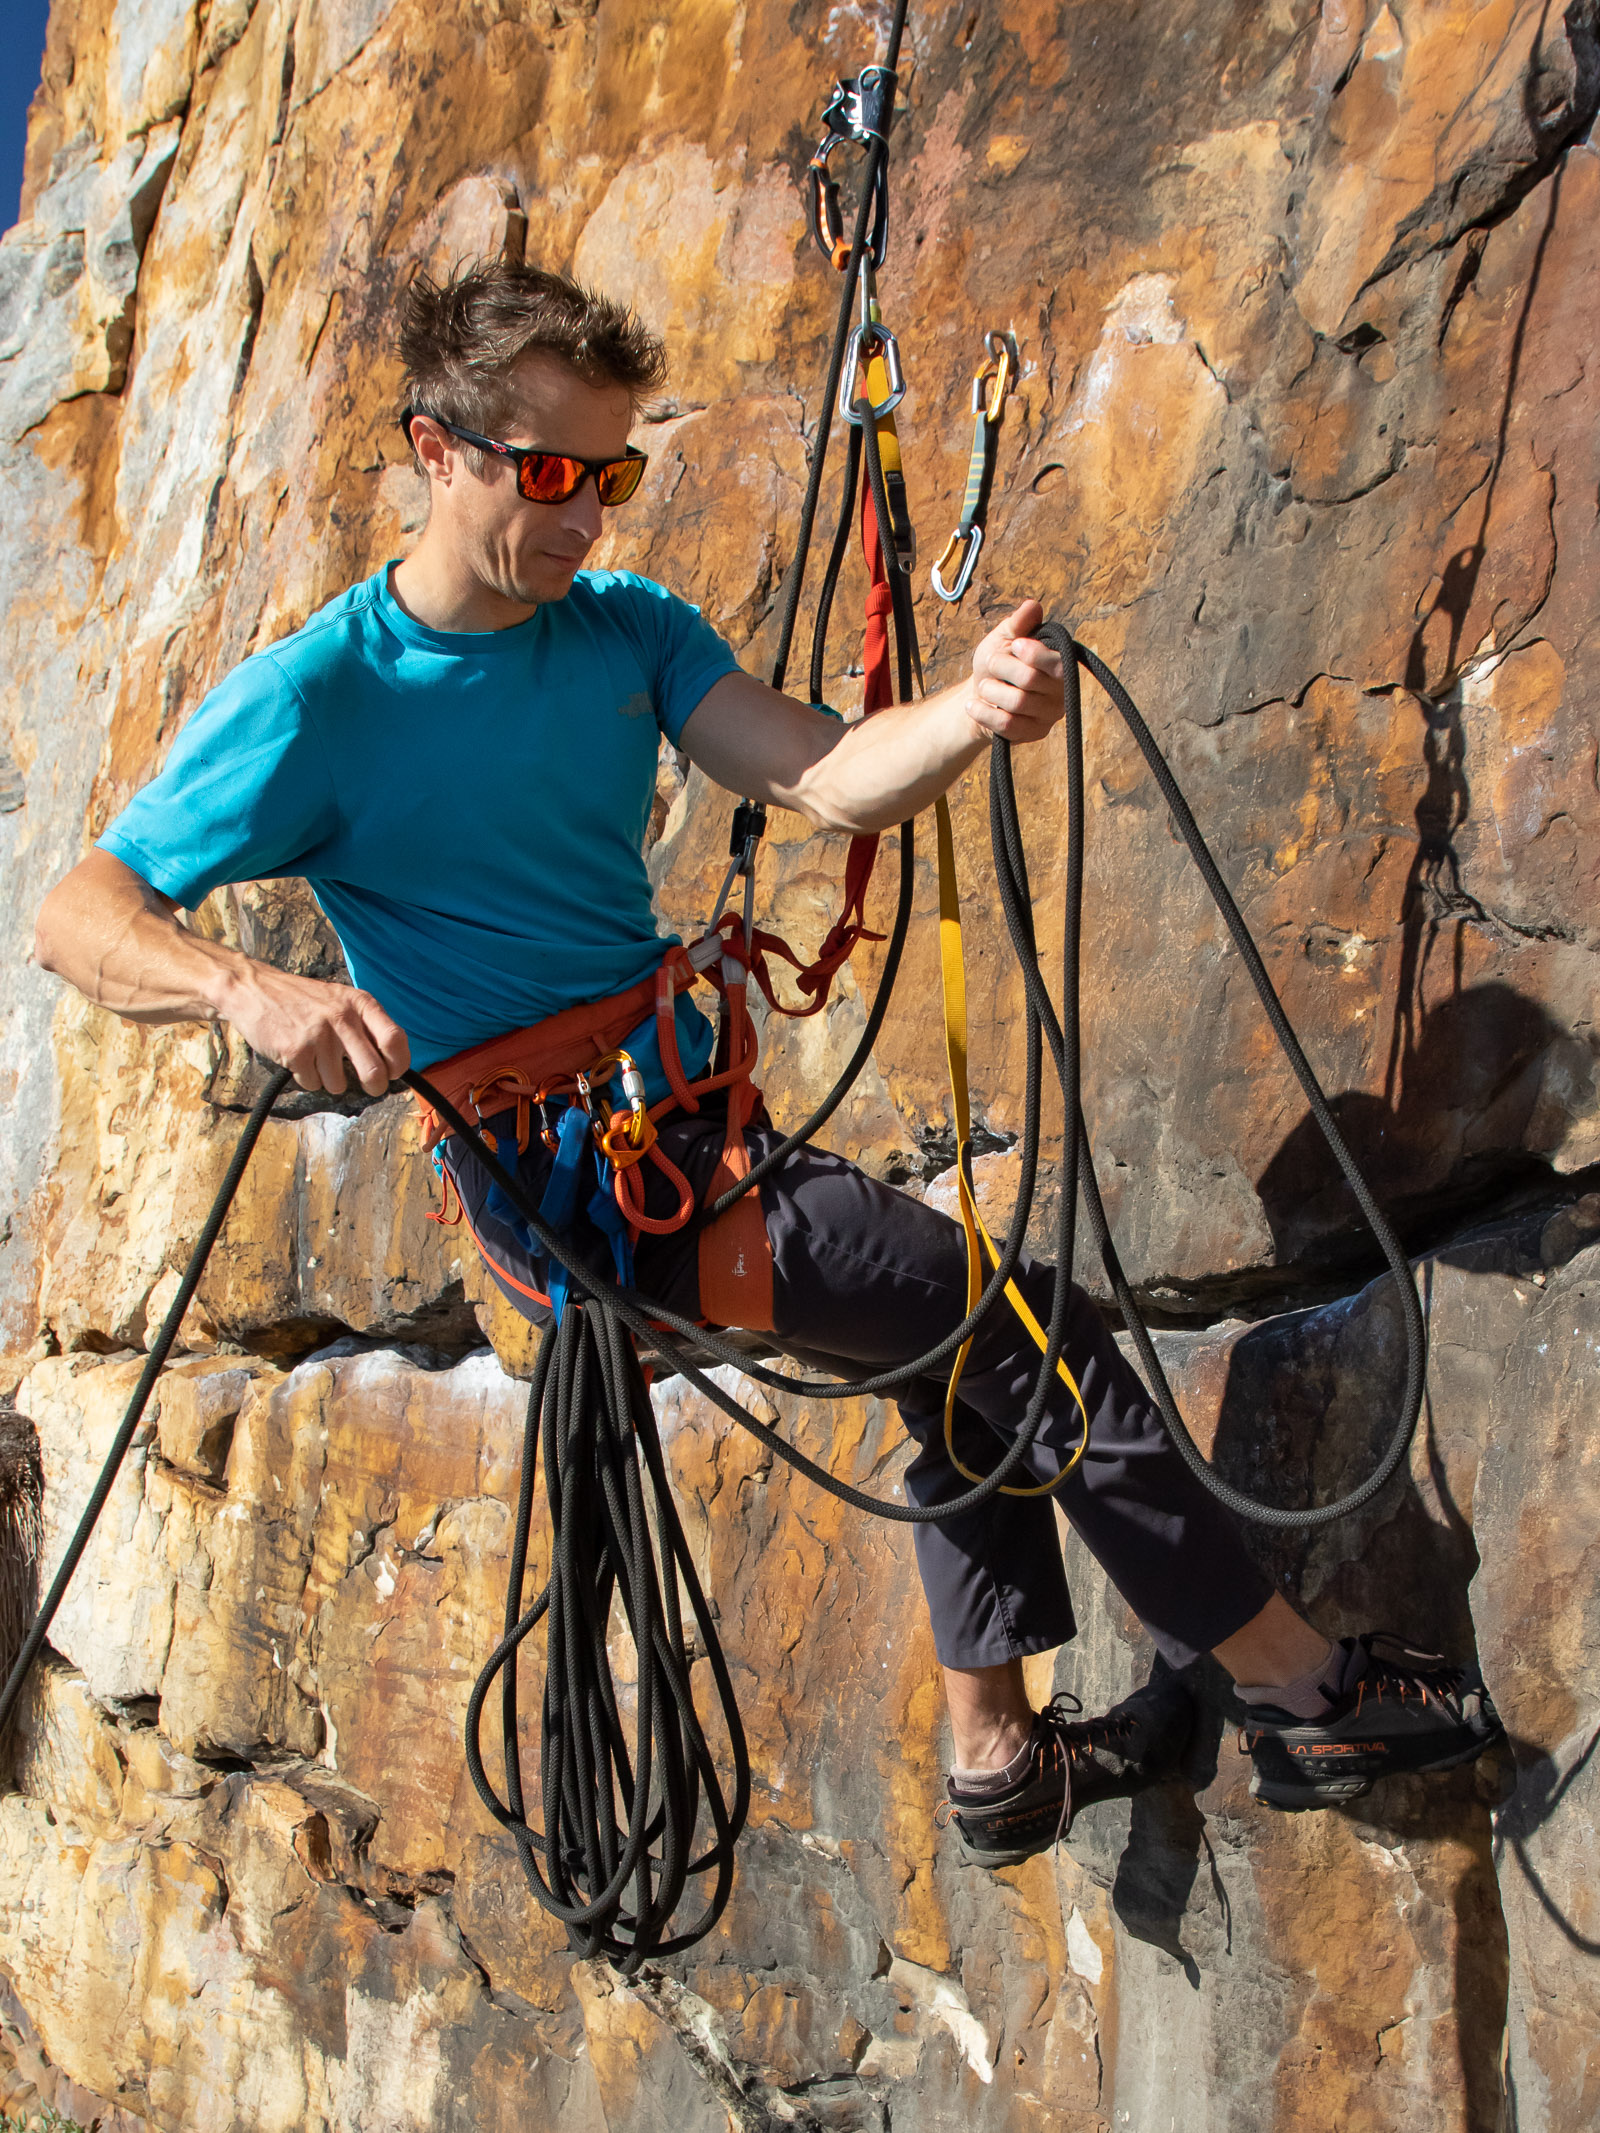
If there’s a chance that your rope could end up in the frame, you should coil it and attach it to your harness. I carry a short piece of webbing with a carabiner at each end for this purpose. One end of this sling gets clipped to a rear gear loop and the other end gets attached to the corresponding front gear loop. Then, once I have a handful of coiled rope, I unclip one end of the sling from its gear loop and slide the coiled rope onto this (after which I return the carabiner to its perch. If the loops of rope are short enough, they won’t appear in the frame. Keeping your feet out of the frame can also be a challenge and can lead to some interesting antics.
Gear
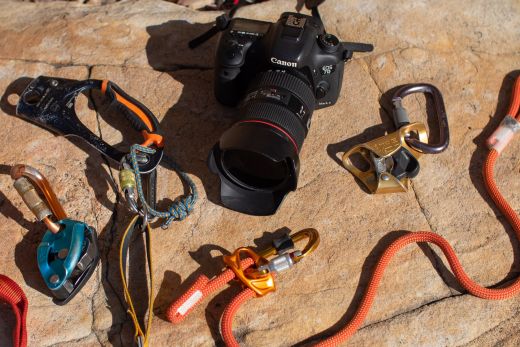
You could start with as little as a Grigri and iPhone, but it’s definitely easier to get better photos when you have an ascender, static rope, and a suitable camera. Here I’m going to list the gear that I recommend starting out with.
Photo kit
If you have a camera, you will use whatever you have. However, if you are looking to build a photo kit from scratch, it helps to know what to look for. To make the most of every opportunity you’ll want a camera that gives you full manual control, interchangeable lenses, and the ability to shoot RAW. That rules out compact point-and-shoot cameras. This is really a two-horse race between DSLRs and mirrorless cameras.
DSLRs vs mirrorless cameras
The main difference between DSLRs and mirrorless cameras is the viewfinder. DSLRs use an optical viewfinder to give you a view of a scene as it will be recorded by the sensor. You see the focussed light as it will fall on the sensor when you fire the shutter – meaning that you see things as they happen real time. Mirrorless cameras, on the other hand, do away with the mirror and prism in favor of a digital viewfinder. This allows mirrorless cameras to be smaller and lighter.

Practically there’s not a huge difference between the two types of camera. Mirrorless cameras have a come a long way, and high-end mirrorless models are as capable as professional DSLRs. If a compact size is important to you, go with a mirrorless camera. Personally, I like the weight and bulk of a DSLR – I find it adds some stability. If I were going to limit myself to a budget of $1000, I’d probably go with a mirrorless camera like the Fuji X-S10, which offers better build quality at the price.
Lenses
Your camera body is only one half of your photographic system. Without a good lens, even a high-end camera is unlikely to produce great results. And that’s why I would look carefully at the kit lens before buying a bundle. Kit lenses are often very average or even sub par. If that’s the case with the camera you have your eyes on, consider buying the body and lens separately. There are reviews on almost every lens out there, so you’ll have plenty to go on. My preferred lens is a standard zoom with a constant aperture, which allows for maximum light gathering at any focal length.
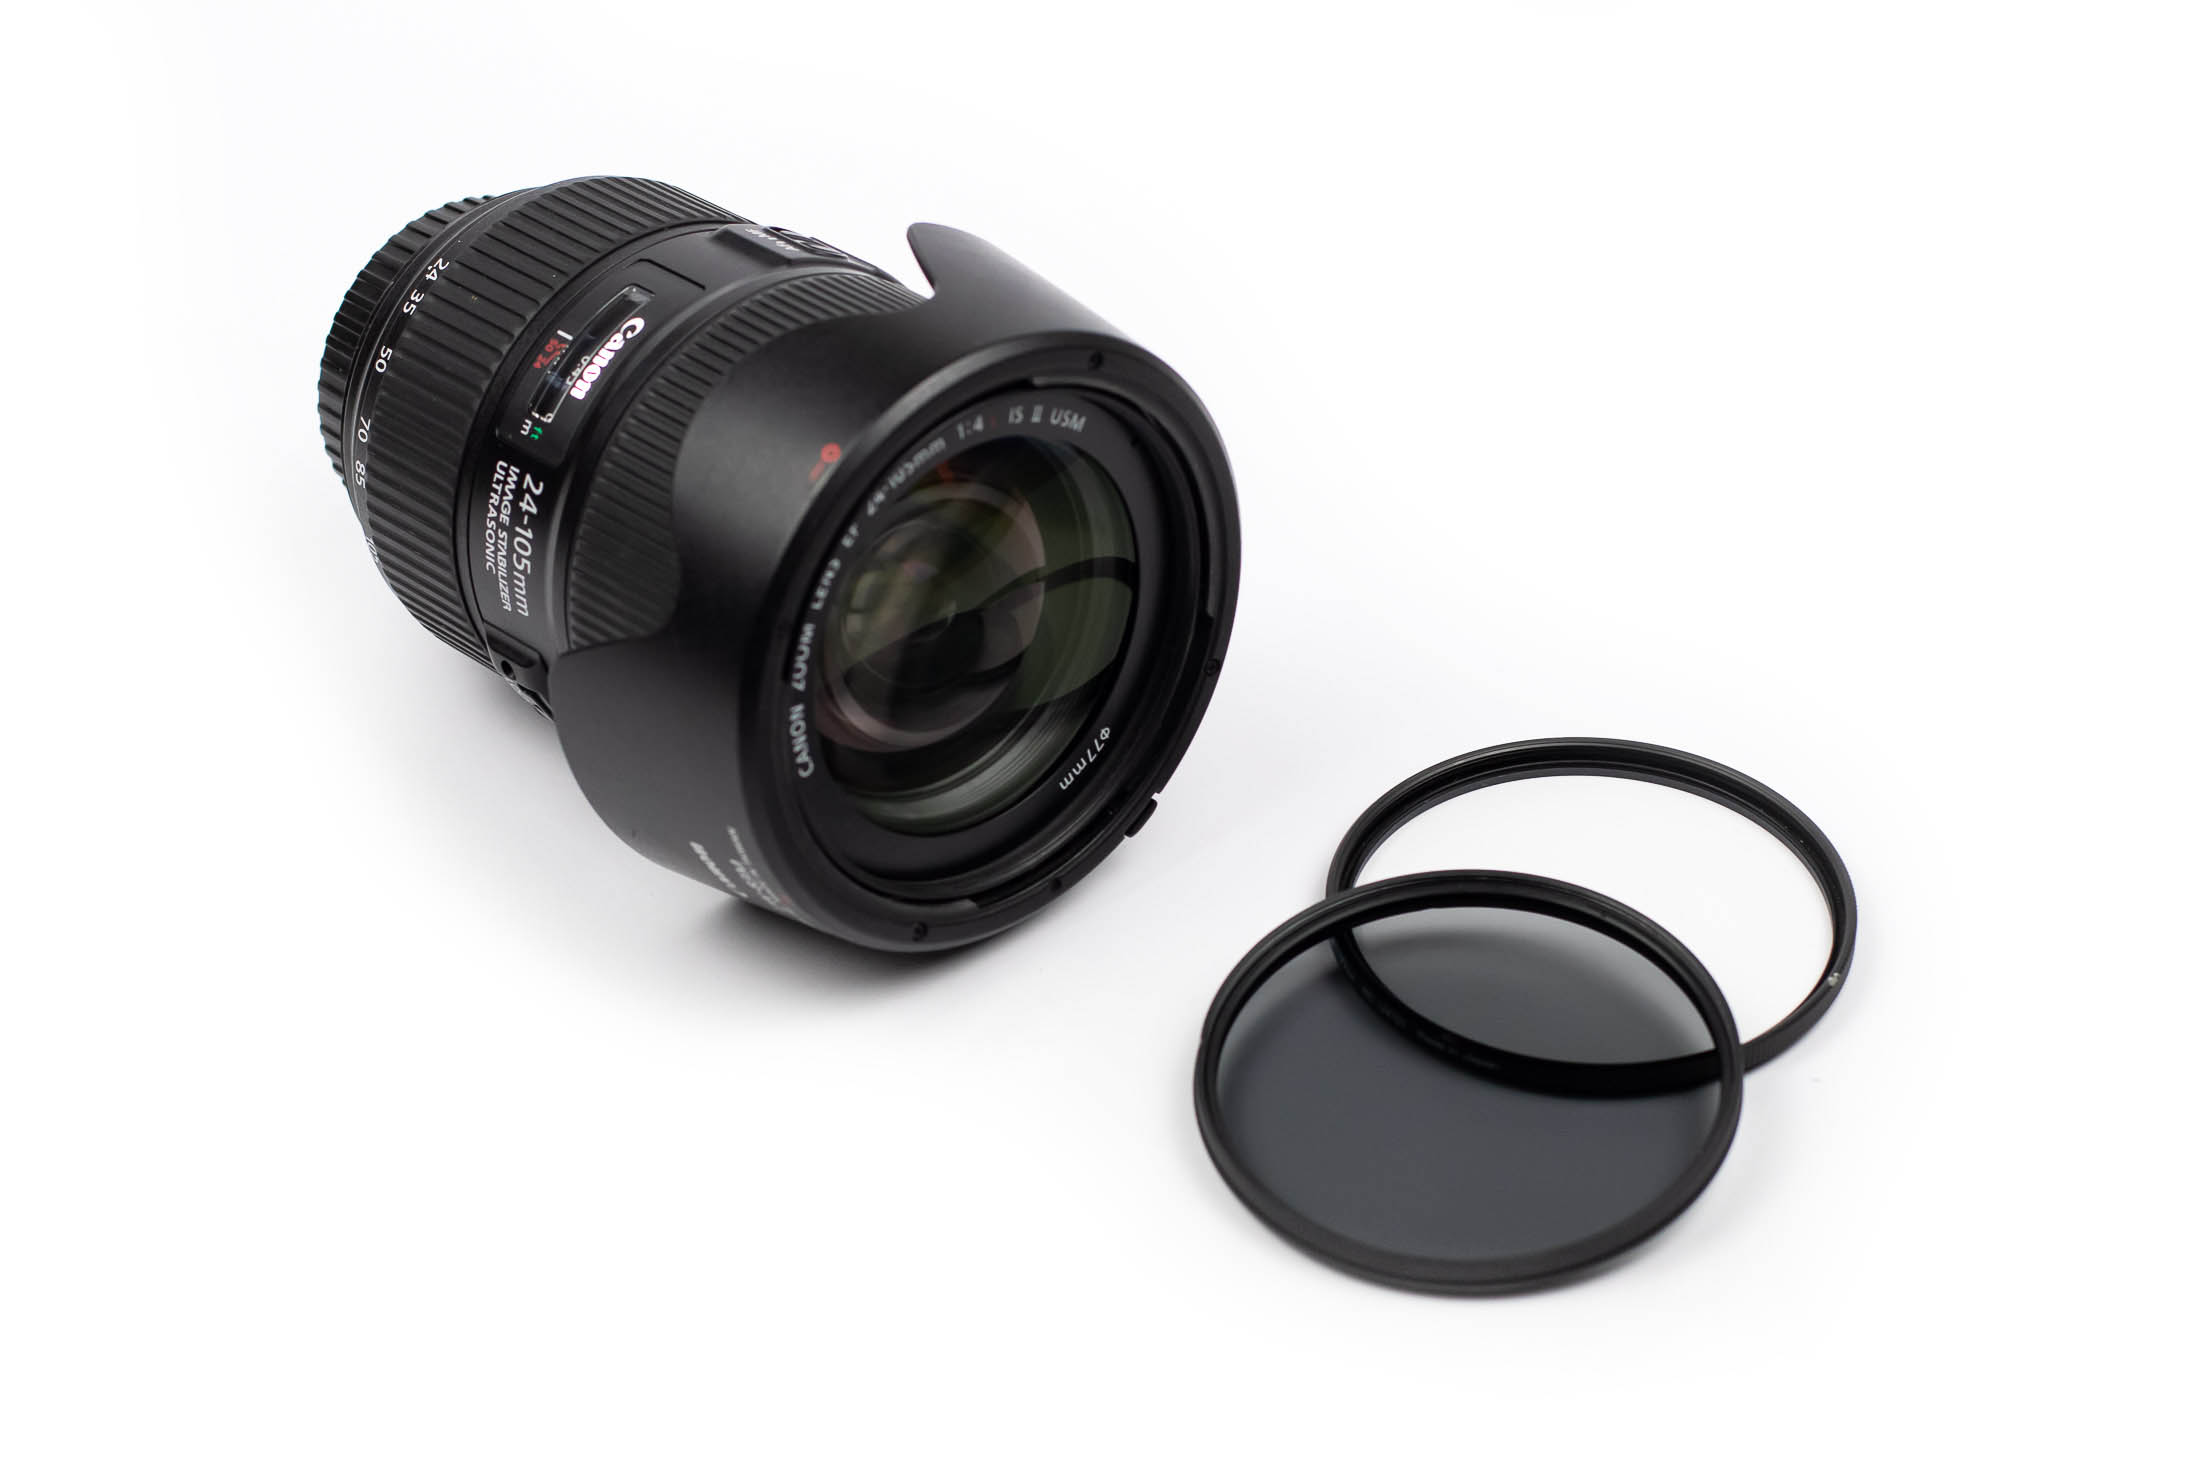
I currently use an EF 24-105 f4.0 L for 90% of my climbing photography. With this focal range, I rarely feel the need to swap lenses, something I’d prefer to not do while dangling from a rope. After a decent zoom lens, I suggest getting a prime lens. This will give you a wide maximum aperture, which enables shallow depth of field and faster shutter speeds in low light conditions – all at a fraction of the price that a f2.8 zoom would cost you. That said, if you can afford a fast zoom lens, do it. You’ll have benefits of a wide aperture through the entire focal range, provided that the lens has a constant aperture.
Filters
Learn from my mistakes and always put a filter on your lens. It’s very easy to scratch a lens when you’re working so close to a rock face. When I’m not using a circular polariser, which I always use when shooting in direct light, I have a clear UV filter on the front of the lens. Even if this does nothing to the image quality, it does a good job of protecting my $1000 zoom and costs only $30.
Climbing gear
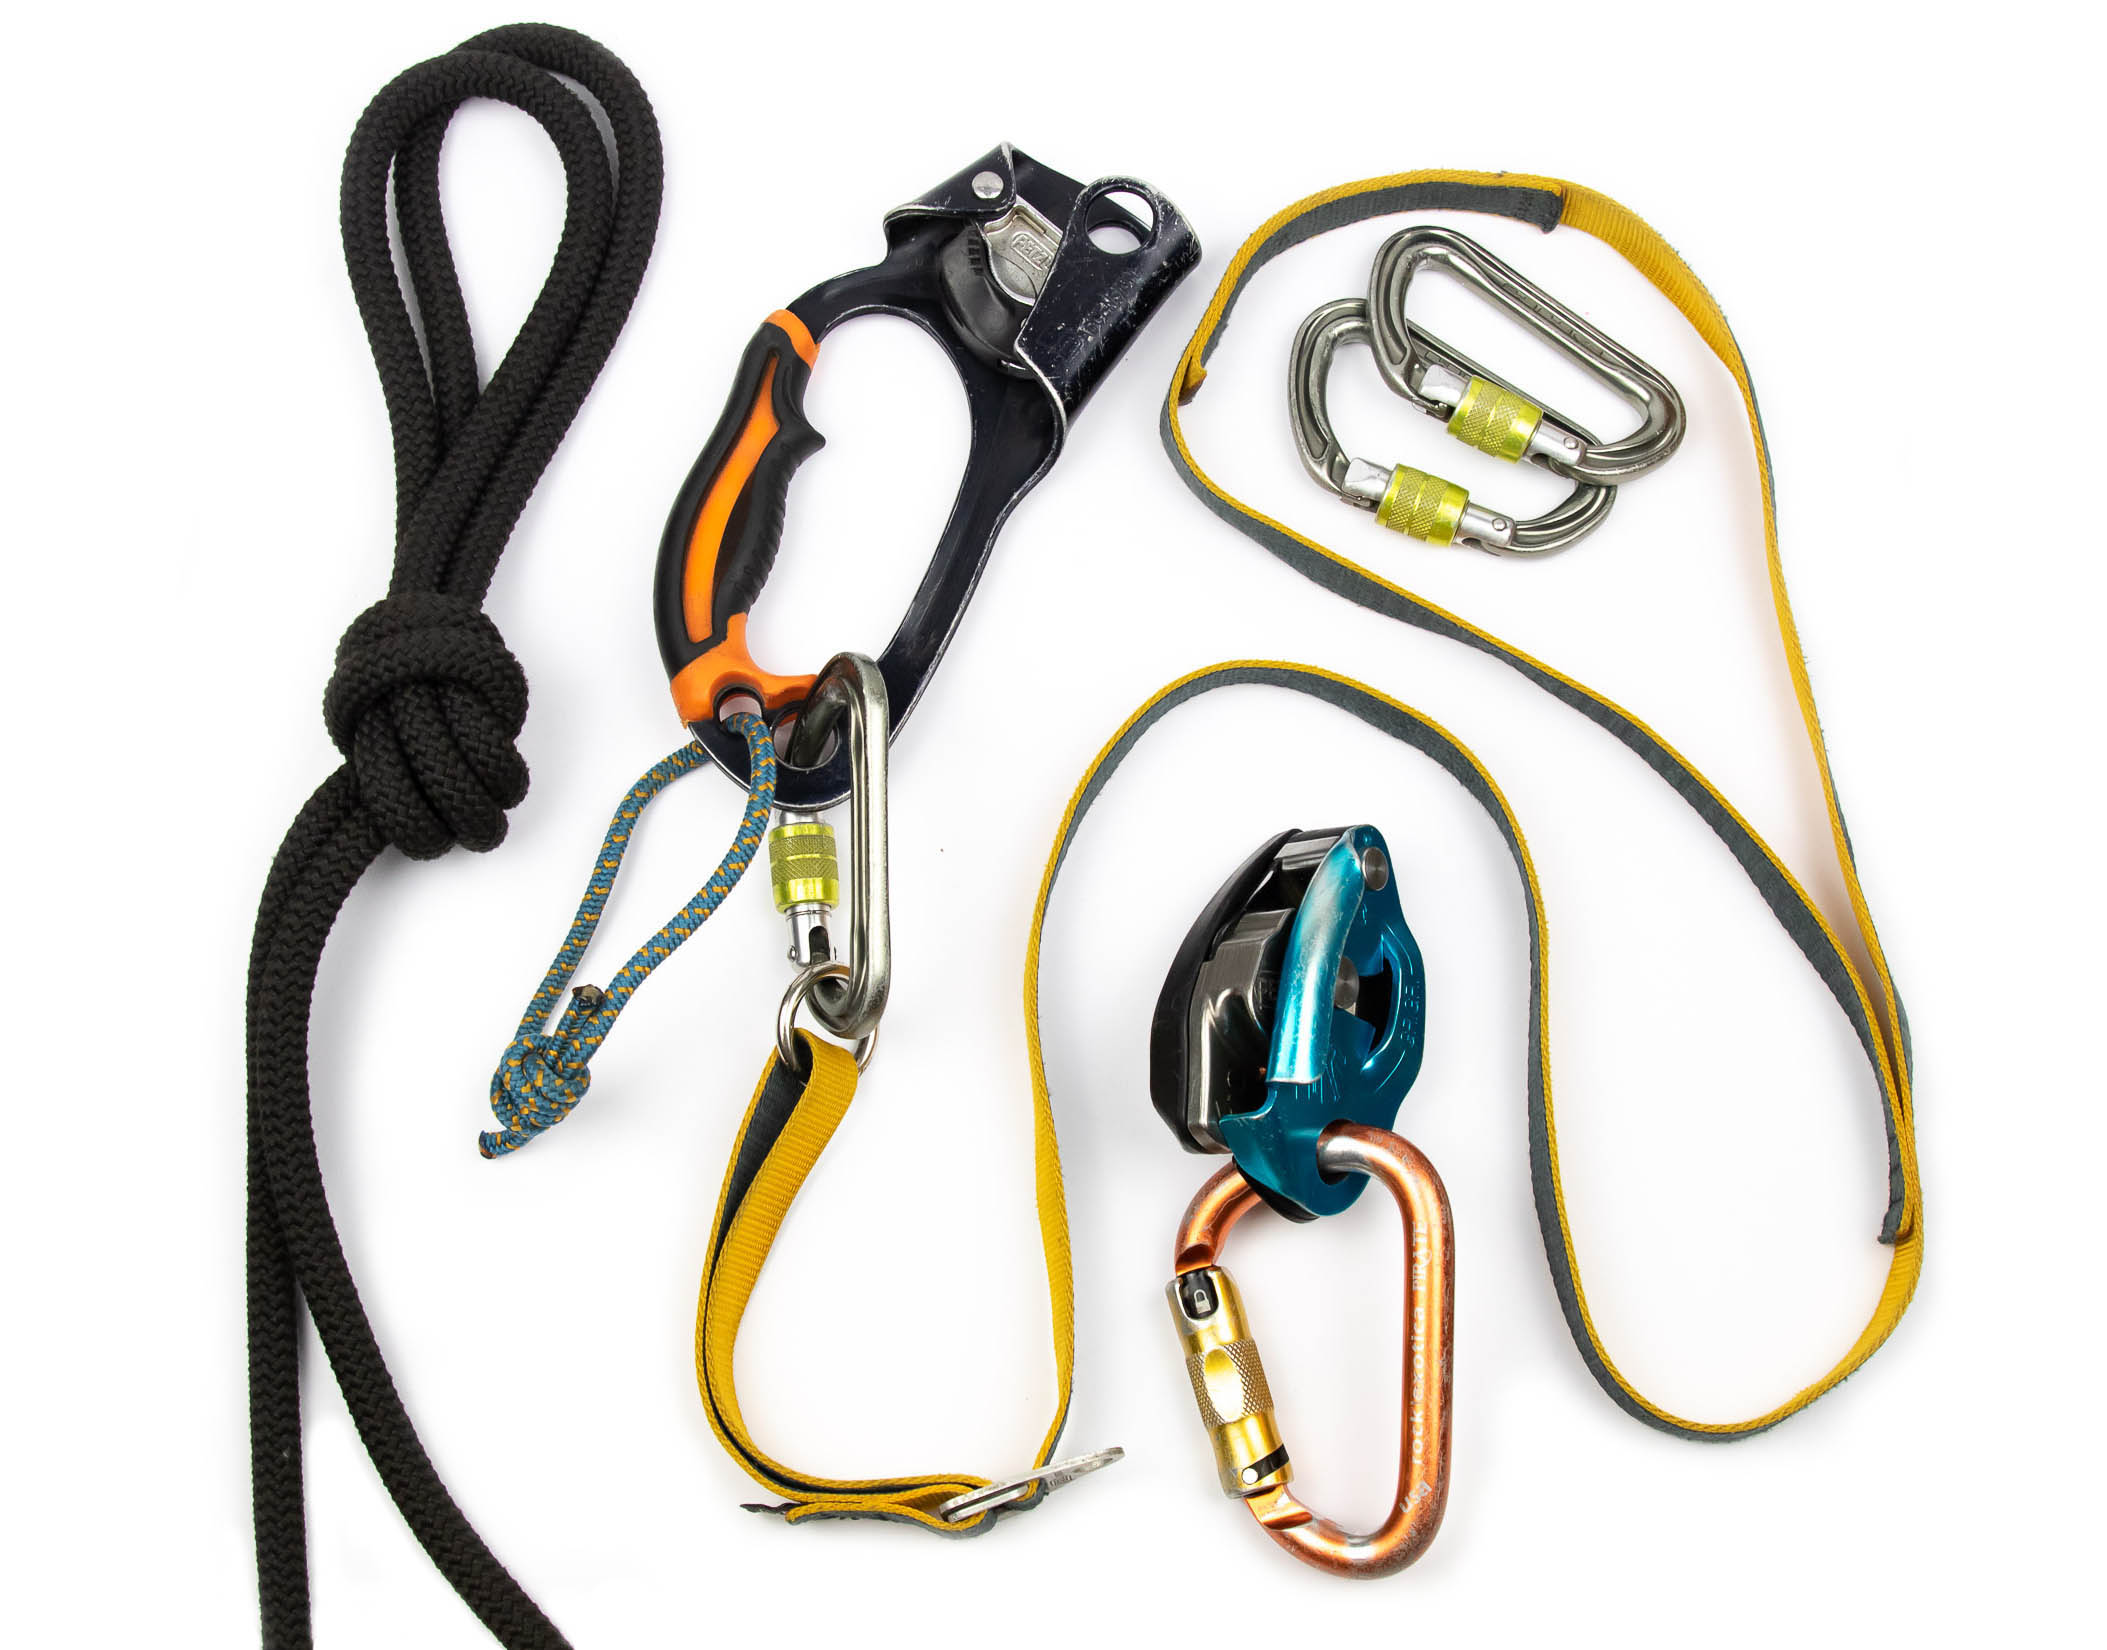
Here, I list the minimum amount of gear needed to ascend and descend a static rope. Gearheads out there might eventually want a Croll to make ascending easier, but when starting out, you only need three pieces of gear in addition to that which you already own.
Handled ascender & foot loop
You can use almost any toothed ascender, but handled ascenders like the Petzl Ascension and Black Diamond Index Ascender are a lot easier to pull on. Right-handed people will find it easier to use a left-handed ascender since they will use their dominant hand to pull the rope through the Grigri. You will also need a foot loop to step into, and here you should choose something simple. You don’t need more than one loop, and anything longer is likely to find its way into frame. It’s possible to tie your own from a section of webbing, but purpose-made froot loops are a lot easier to step into – the bottom section of their loops are sewn with stiffer material to make them hang in an open position.
Auto-braking belay device
Most active auto-braking devices can be used for capturing slack, but the Petzl Grigri is the device that most climbers already own. If you don’t yet own an auto-braking device and are going to buy own, I recommend the Grigri Plus. This device has two functions that make it particularly useful to a photographer. Firstly, it has an anti-panic mechanism that grabs the rope if you pull the handle too far back – makes lowering off safer. Secondly it has a top-rope mode, which makes the camming mechanism more sensitive. This feature is useful when you want to stand on a ledge and shake out your legs. With most devices, rope tends to creep out when the device isn’t fully weighted, but the top-rope mode on the Grigri helps prevent this.
Static rope
If you’ve ever tried to jug up a dynamic rope, you already know why I suggest that you use a static rope. Dynamic ropes have a lot of stretch in them and make for very inefficient ascending. Just bear in mind that a fall on a static rope results in a greater shock load because it has less stretch. It’s important to avoid generating slack in any system that involves such a rope. When considering diameter and length, look for ropes between 10mm and 11m, and keep it short. Single pitch routes don’t require anything longer than a 35 or 40-meter rope. In many situations, you can rely on a climber to retrieve your gear. Alternatively, you can use a full length dynamic rope to rappel off.
Shooting in RAW
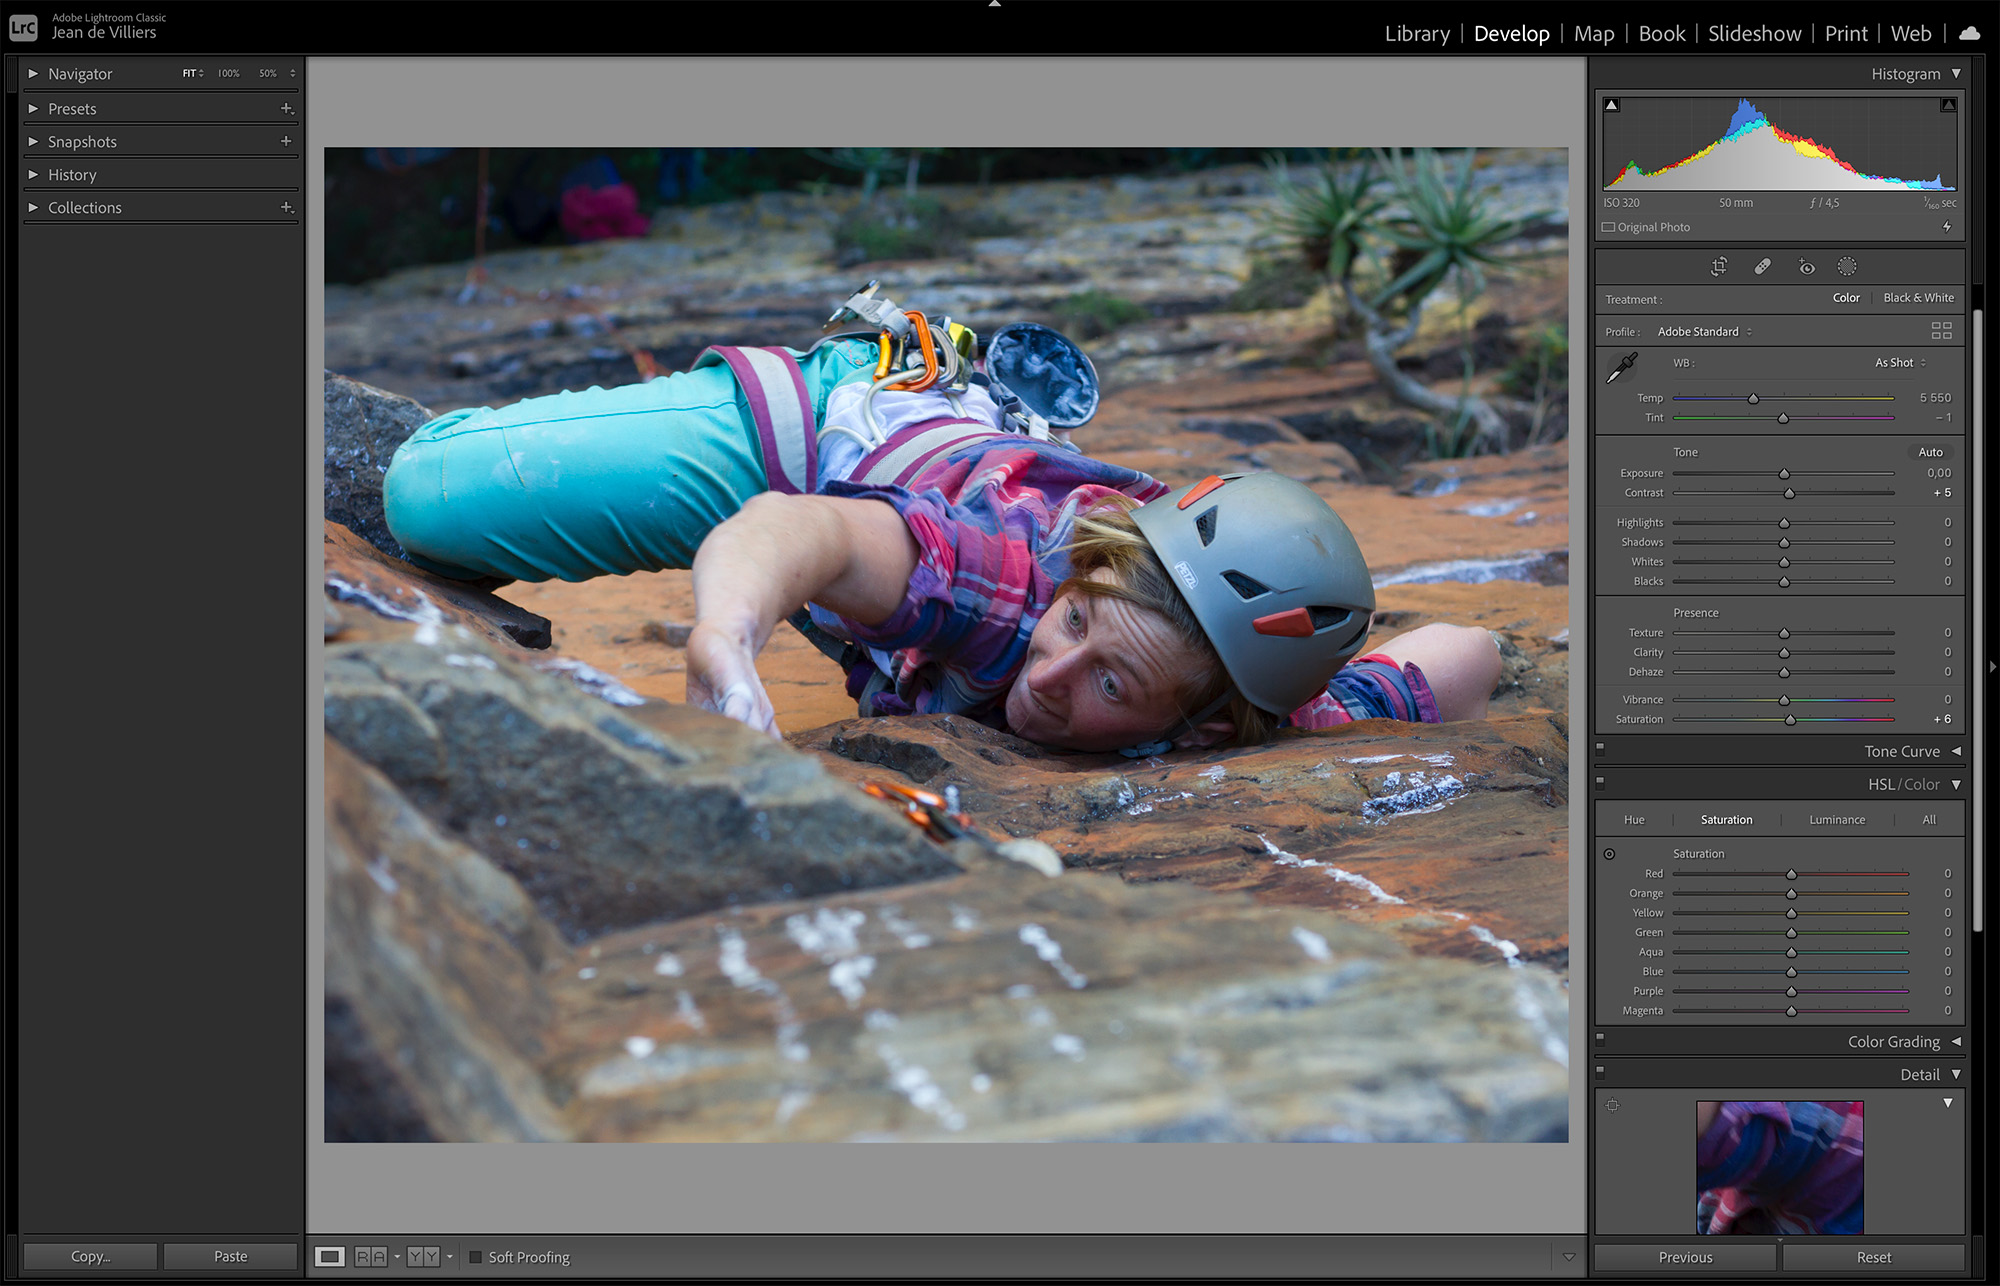
To get the most out of your camera, shoot in RAW and then edit in a program like Adobe Lightroom, which is designed for RAW workflow. RAW files give you far greater control over tonal values and so allow you to recover details in highlights and shadows. See David Manning’s video on editing in Lightroom to see how this is done. Besides Lightroom, the only extras you’ll need to shoot in RAW are larger and faster memory cards. RAW files are larger than JPEGs, and I wouldn’t get anything smaller than 32GB (or at least have two 16GB cards) or slower than 90MB/s (write speed).
Get out there
You now have everything you need to know to improve your climbing photography. But don’t stop here. On this website you’ll find many more in-depth how-to guides on everything from rappelling to backcountry cooking. You can find these under the different sections in the categories menu, or, better yet, sign up for my newsletter to get all the latest from Trail & Crag delivered straight to your inbox.
