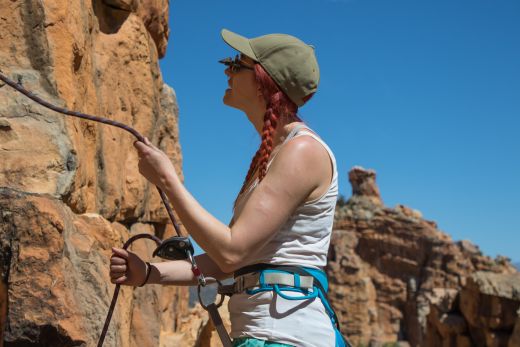
Roped climbing is, in most situations, a two-person activity. Even though only one team member climbs at a time, the partner on the ground plays an equally important role in giving a safe belay. Besides preventing a dangerous fall, a good belay can instil confidence in a leader, inspire her to push the limit, and generally make the whole experience more enjoyable. On the flip side, if you’ve ever been short-roped or given the kind of belay that makes you feel like you’re soloing, you know how a bad belay can handicap you. So, it’s a pretty important skill – belaying – and by learning to give a good catch, you’ll help keep your partner safe and prove to others that you’re the kind of person they want to climb with.
- Belay devices and terminology
- Preparing the belay
- Commands
- Basic technique
- How to lead belay
- Catching a fall
- Lowering a climber
- Safety
Types of belay device
Speaking broadly, there are two categories of belay device: assisted-braking devices and non-assisted-braking devices. Assisted-braking devices are generally safer when used properly and require less physical effort from the belayer – especially when the climber spends a lot of time hanging. But, they have their limitations: most can’t be used for rappelling or belaying with two ropes as they only have one channel. They also require users to learn a specific style of belaying as proper technique differs from one device to the next. And they’re more technically complex and expensive, so are not an obvious choice for beginners.
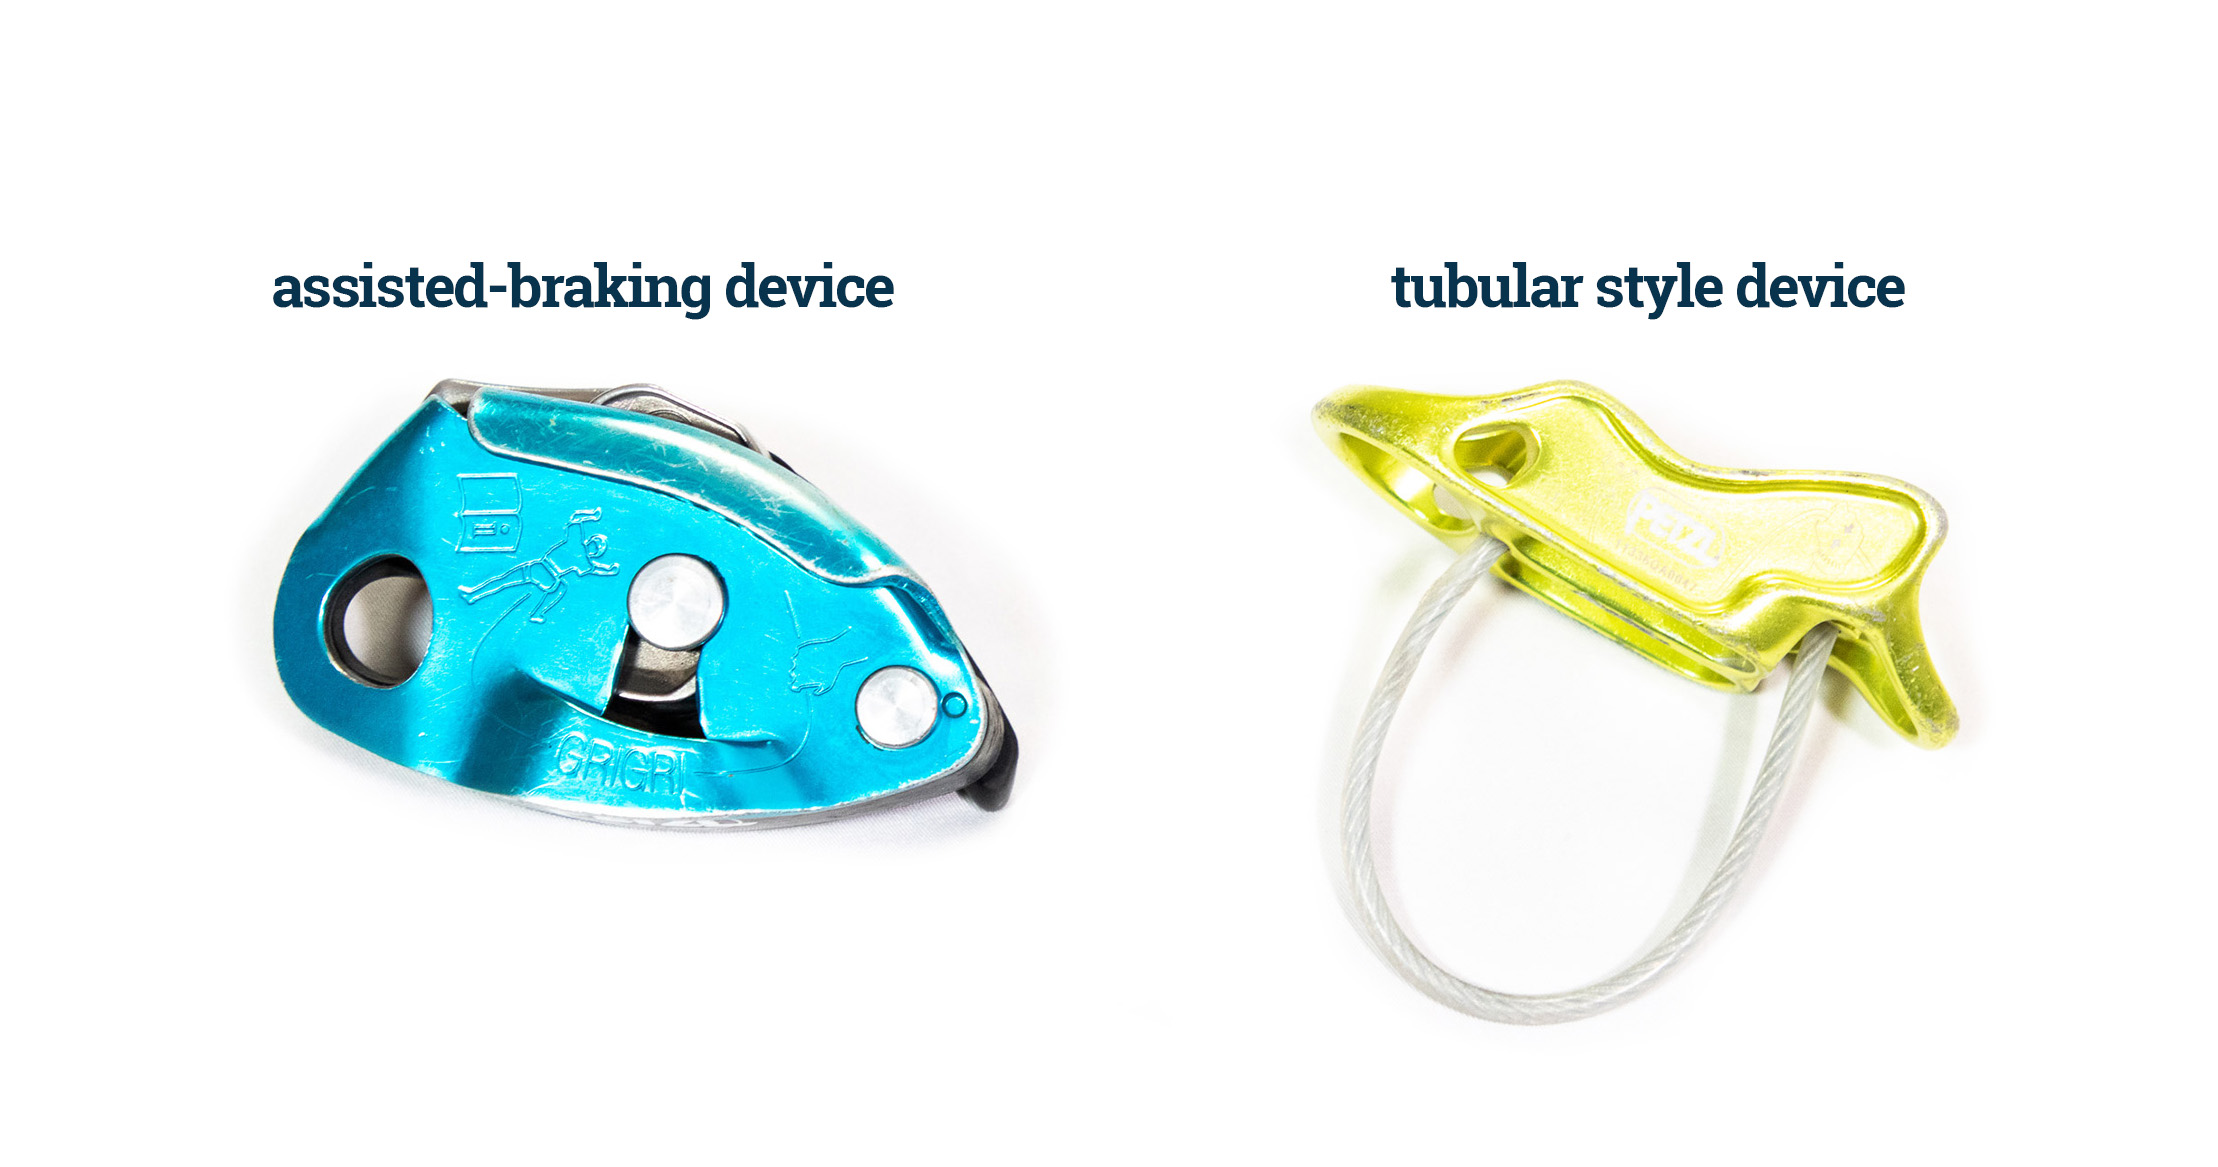
Non-assisted-braking devices, on the other hand, all work pretty much in the same way, can be used with two ropes, and are relatively inexpensive. That’s three reasons why most climbers buy and learn to use a non-assisted-braking device first. And that’s why this article will describe how to use a tubular style device (the most common type of non-assisted-braking device). If you do not use such a device, don’t leave just yet. I will also cover much more than just the technique needed to safely take in and pay out rope with a particular device. Stick around, and you will learn something valuable.
Terminology
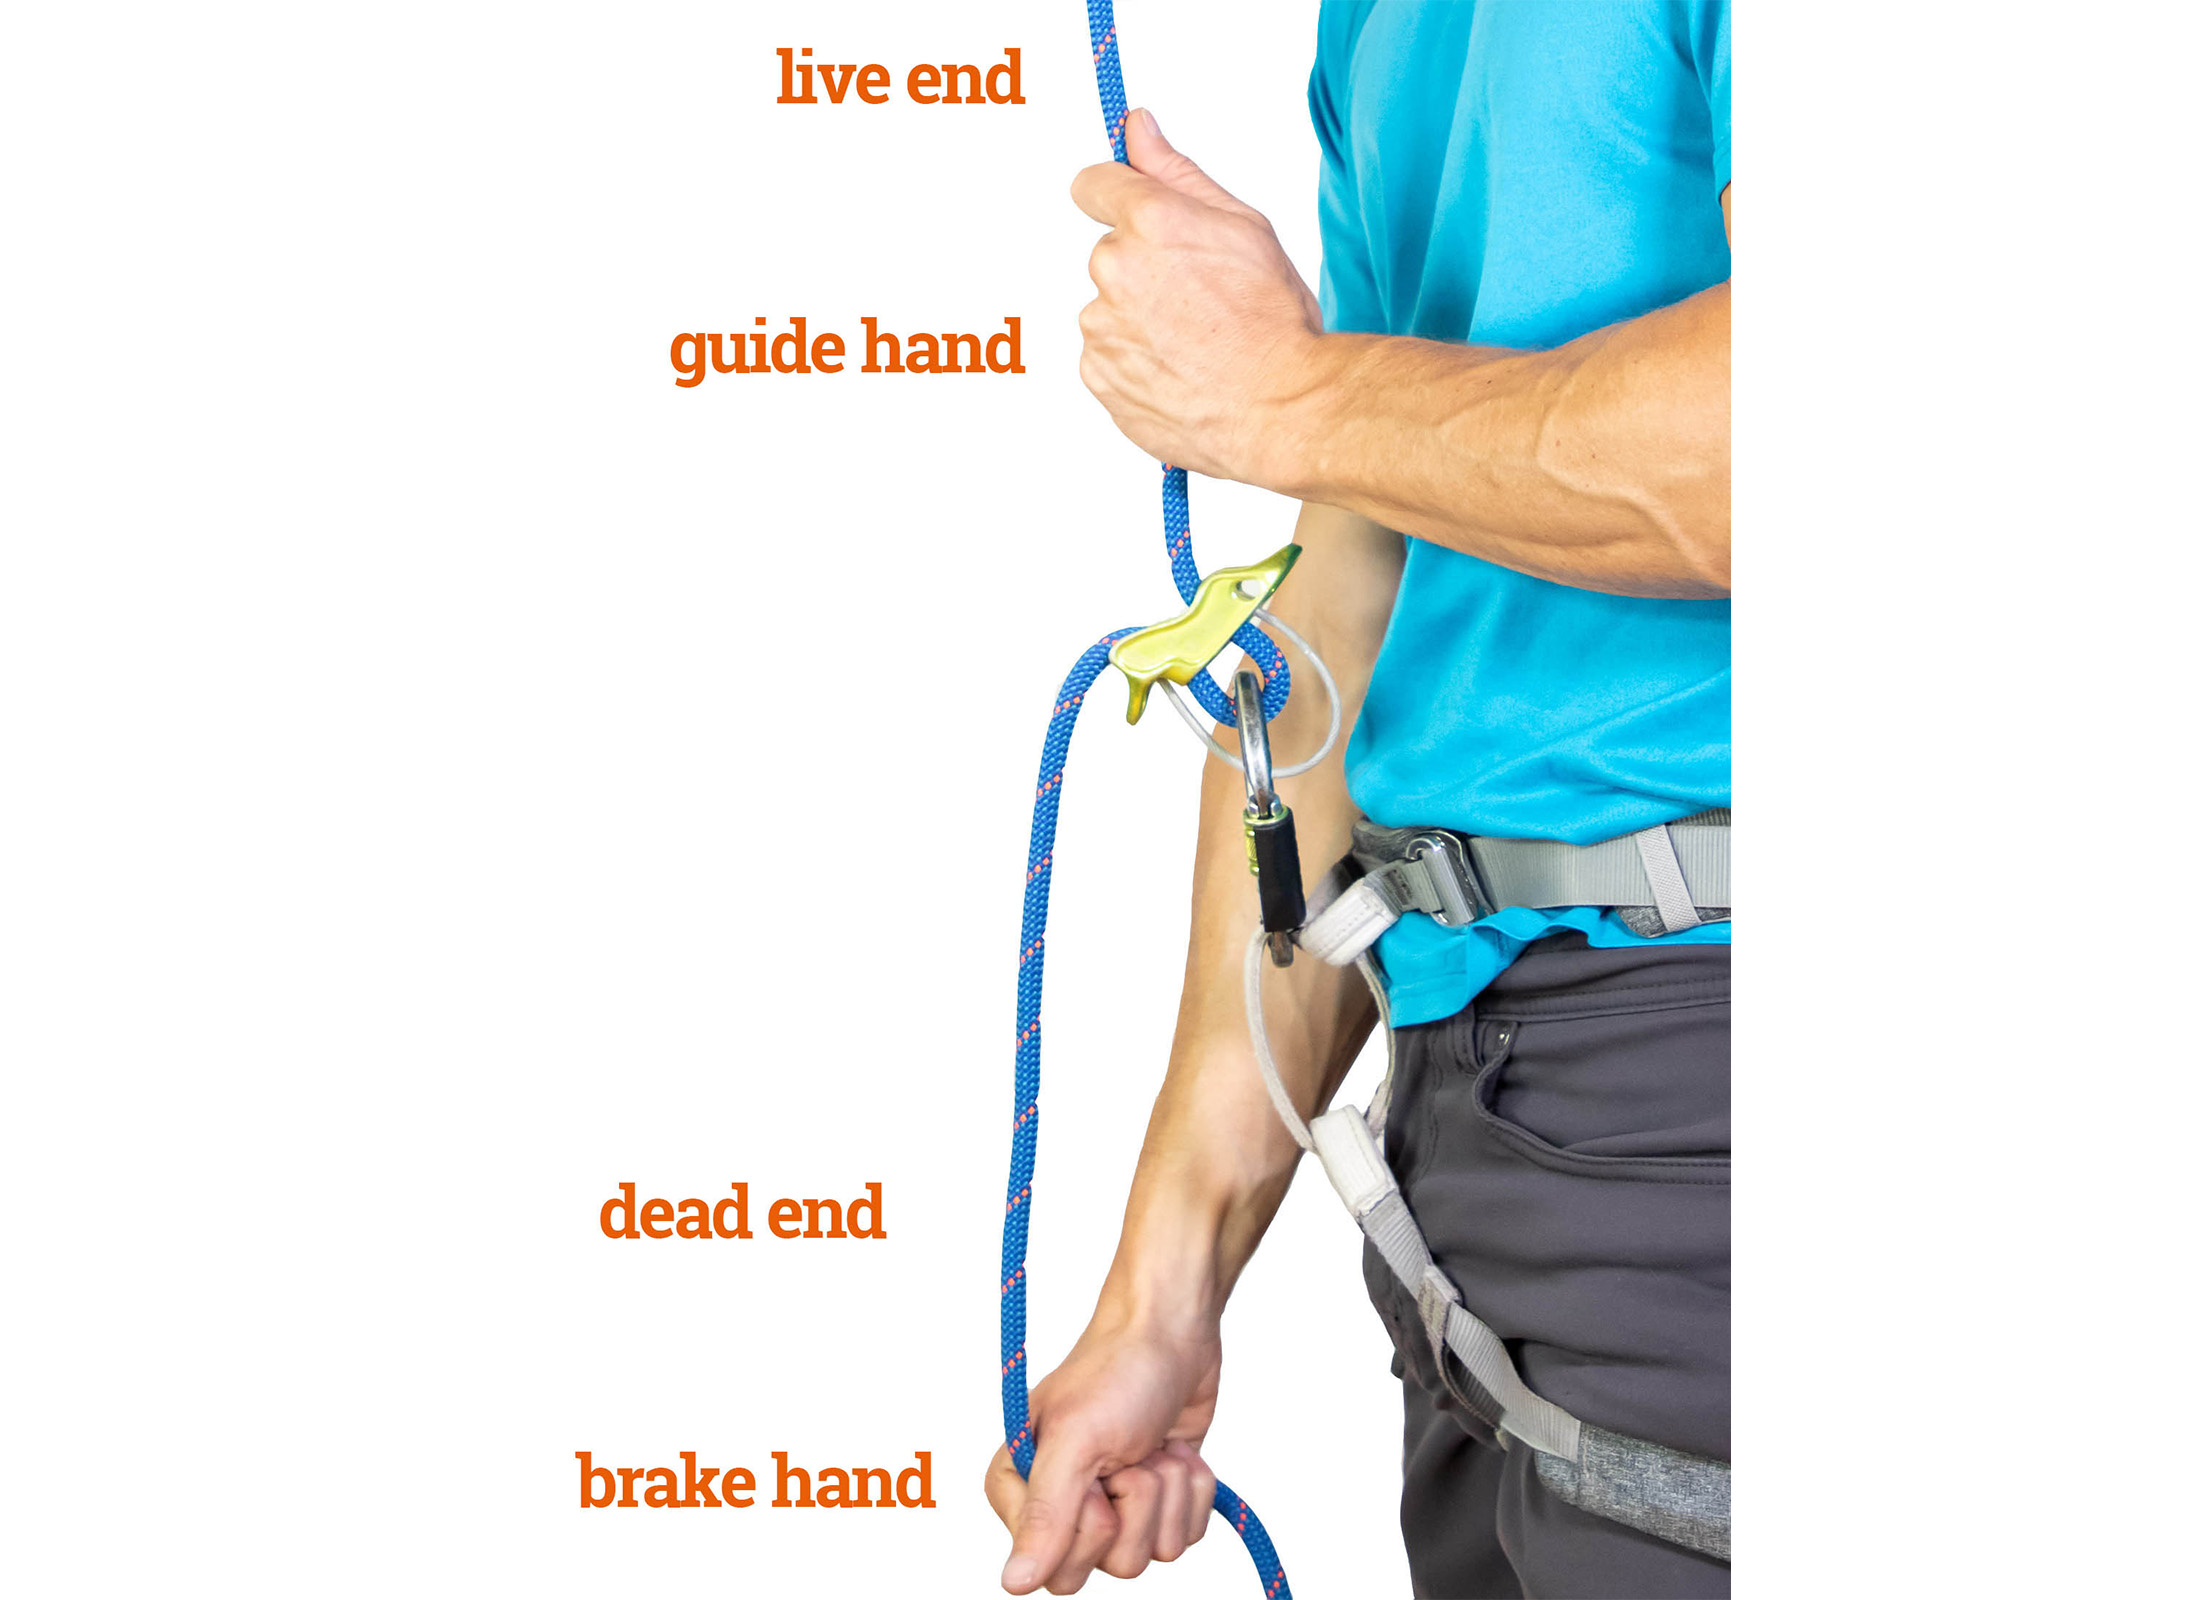
To understand the instructions given in this article, you’ll need to know the names for the two ends of the rope (as split by the belay device) as well as the different roles performed by your dominant hand and non-dominant hand.
Live end
The length of rope between your belay device and the climber. You will normally guide the live end of the rope into the device with your guide hand.
Dead end
The end of the rope that has to be held to ensure that your belay locks off. You should never let go of this end while belaying.
Brake hand
Your dominant hand will always be your brake hand. This hand must always hold the dead end of the rope.
Guide hand
Your non-dominant hand will be your guide hand, which, for most of the time, will be used to guide the live end of the rope in and out of the device.
Preparing the belay
Have you ever seen a gumby trying to untangle the rope even as he belays? Don’t be him. Every smooth belay starts with proper preparations.
Position yourself close to the wall
Consider your position in relation to the first bolt. That is the direction you will be pulled when your climber falls. Try to stand facing this direction while also keeping the climber in your line of sight. On very steep walls, you might have to stand side-on to the wall. Just be careful not to stand directly under a roof. A big fall could pull you up and into it. It’s also important to not stand too far from the wall. You want to be pulled upwards in a fall, not sideways, as you would be if you were standing further from the first bolt.
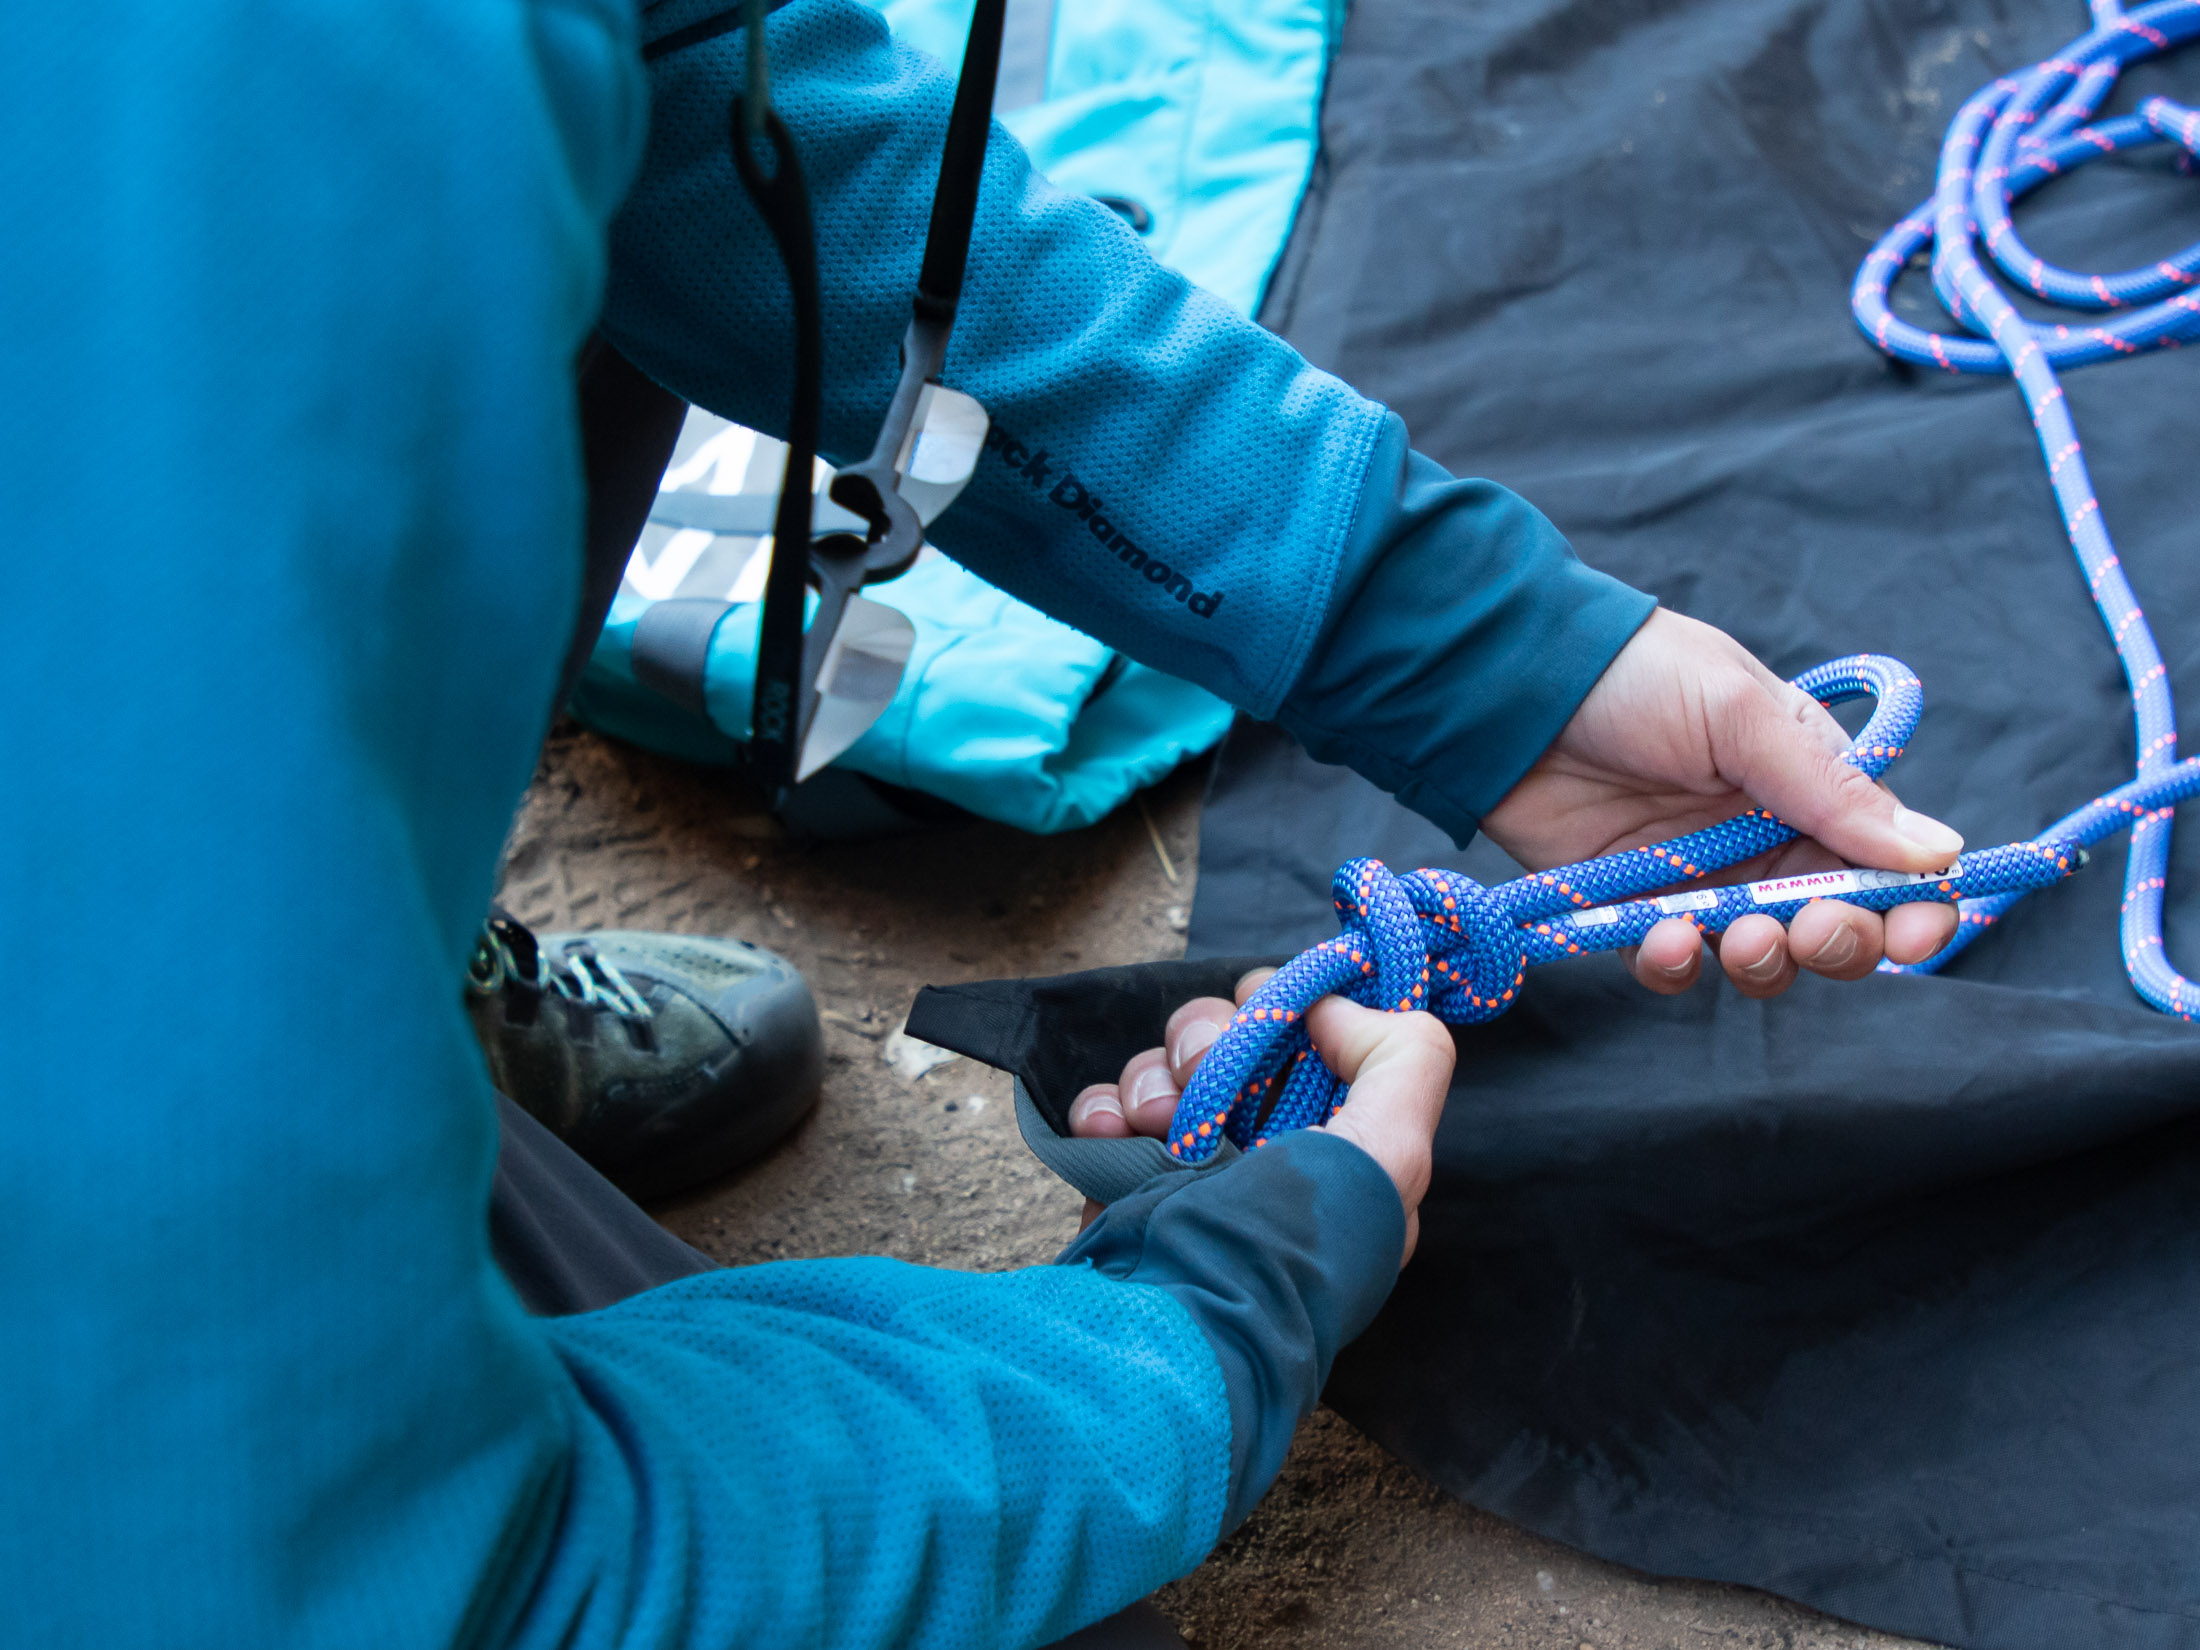
Tie a knot in the other end of the rope
One of the most common and easily avoidable type of accident is that in which a climber is lowered off the end of the rope. You might cut the end of your rope and forget about it – or get on a route longer than you expected. Don’t let small mistakes like these result in accident. Tie a knot in the end of your rope so that it can’t slip through the device, and check regularly to make sure that it’s still there. If you use a rope bag, you can tie the end of the rope to one of the loops sewn into it specifically for this purpose. Tip: When moving your rope between routes, tie the climber’s end to the other loop in the rope mat. This will make it a lot easier to find later.
Flake the rope
To ensure the rope doesn’t tangle during a belay, you should flake it first. Tie one end to the rope bag or mat, and then run the rope through your hands so that it lands in a neat pile on the rope mat. Climb on the end now on top. Do this whenever you think you might have muddled the rope (as happens when you move it) or whenever it’s essential to give a smooth belay (project redpoints and sketchy climbs requiring a perfect rope delivery). Flaking your rope is also a good time to feel for frayed and mushy spots – signs that you should consider retiring your rope.
Load the device
To load a tubular style device, pass a bight of rope into the channel on the same side as your dominant hand. If you’re using a directional device, you should orientate the device so that the dead end of the rope runs out of the grooved part of the channel. Align the loop of rope with the wire, and then clip both the wire and the rope to your belay loop with a locking carabiner. Your choice of belay biner is important since it will affect how smoothly the device works. A large HMS with a smooth rounded profile works best with tubular style devices. See my gear guide on carabiners for more specifics. Finally, lock the carabiner.
Safety checks
Safety checks are not just for newbs. Even experienced climbers make mistakes, and you need to remain diligent in performing your checks even after tying in has become second nature. It takes just the smallest interruption to distract you from finishing a knot properly – the kind of (potentially disastrous) little slip up that you’ll notice only if you perform a buddy check. When tying in or loading the belay device, you should only look up when you’ve finished what you’re doing. And then always check the following four things:
- Other end of the rope is knotted
- Belay device is loaded properly
- Climber’s knot is tied properly through both tie-in points
- Belayer’s and climber’s harness buckles are snug and securely fastened
Commands
Communication is key to climbing safety, and the following commands are important for two reasons. They tell your partner what you’re doing, and they force you to consider what you’re doing. When you say “On belay” you’re a lot more likely to check that you do actually have your climber on belay.
“On Belay?”
The question posed by the climber when she wants to know whether her belayer has her on belay
“Belay on”
The belayer’s response when he has the climber on belay and is ready for her to start climbing
“Climbing”
What the climber tells the belayer when she is about to start climbing.
“Climb on”
The belayer’s confirmation that he is ready to belay and catch a fall if necessary – the final go ahead for the climber to start climbing.
“Slack”
What the climber says when she wants more slack – usually to make a move or gather rope for cleaning the top anchors.
“Clipping”
Another command for more rope but this time for the purpose of clipping
“Up rope”
The command used by the climber when she wants the belayer to take in slack. Can also be used when seconding a route.
“Take”
What the climber says when she wants the belayer to make the rope tight and take her weight – used when the climber wants to rest on the rope or when she reaches the top anchors.
“Ready to lower”
The climber’s announcement that she is ready to be lowered.
“Lowering”
The response given by the belayer to tell the climber that he is about to start lowering her.
The above commands are common, but the exact language used by some climbers might differ to the commands you usually use. When climbing with a new partner, always agree on commands before either of you leave the ground. It’s much easier to negotiate the meaning of a command when you’re still on terra firma and not 50 feet apart and trying to communicate over the sound of the wind. Keep commands concise and unambiguous. Always use your partner's name to make it easy to differentiate your commands from other climbers in the vicinity.
Basic technique
Belaying actually involves two techniques: one for paying out rope and another for taking in rope. The technique used for paying out rope is standard, but there are a few methods for taking in slack. Below, I describe the PBUS (Pull Brake Under Slide) method, which is taught in most gyms. With this technique, your brake hand never leaves the dead end of the rope (unlike other techniques which can involve the swapping of hands). This ensures that the brake-hand is always ready to lock-off quickly, and reduces the chances of the belayer fumbling the rope, as can happen when you have to swap hands.
Taking in rope
Top-rope belays are the most obvious instance in which you have to take in rope, but you’ll also occasionally need to take up slack (moderate the amount of rope out) when belaying a leading climber. In both cases, I recommend that you use the following technique. The advantage of this method is that it is performed without taking your brake hand off the dead end of the rope. Again, never take your hand off the rope.
Locked off position
This is the default position that you will always return to when giving a top rope belay. Bringing your hands back to this position ensures that you’re always ready to take in slack.
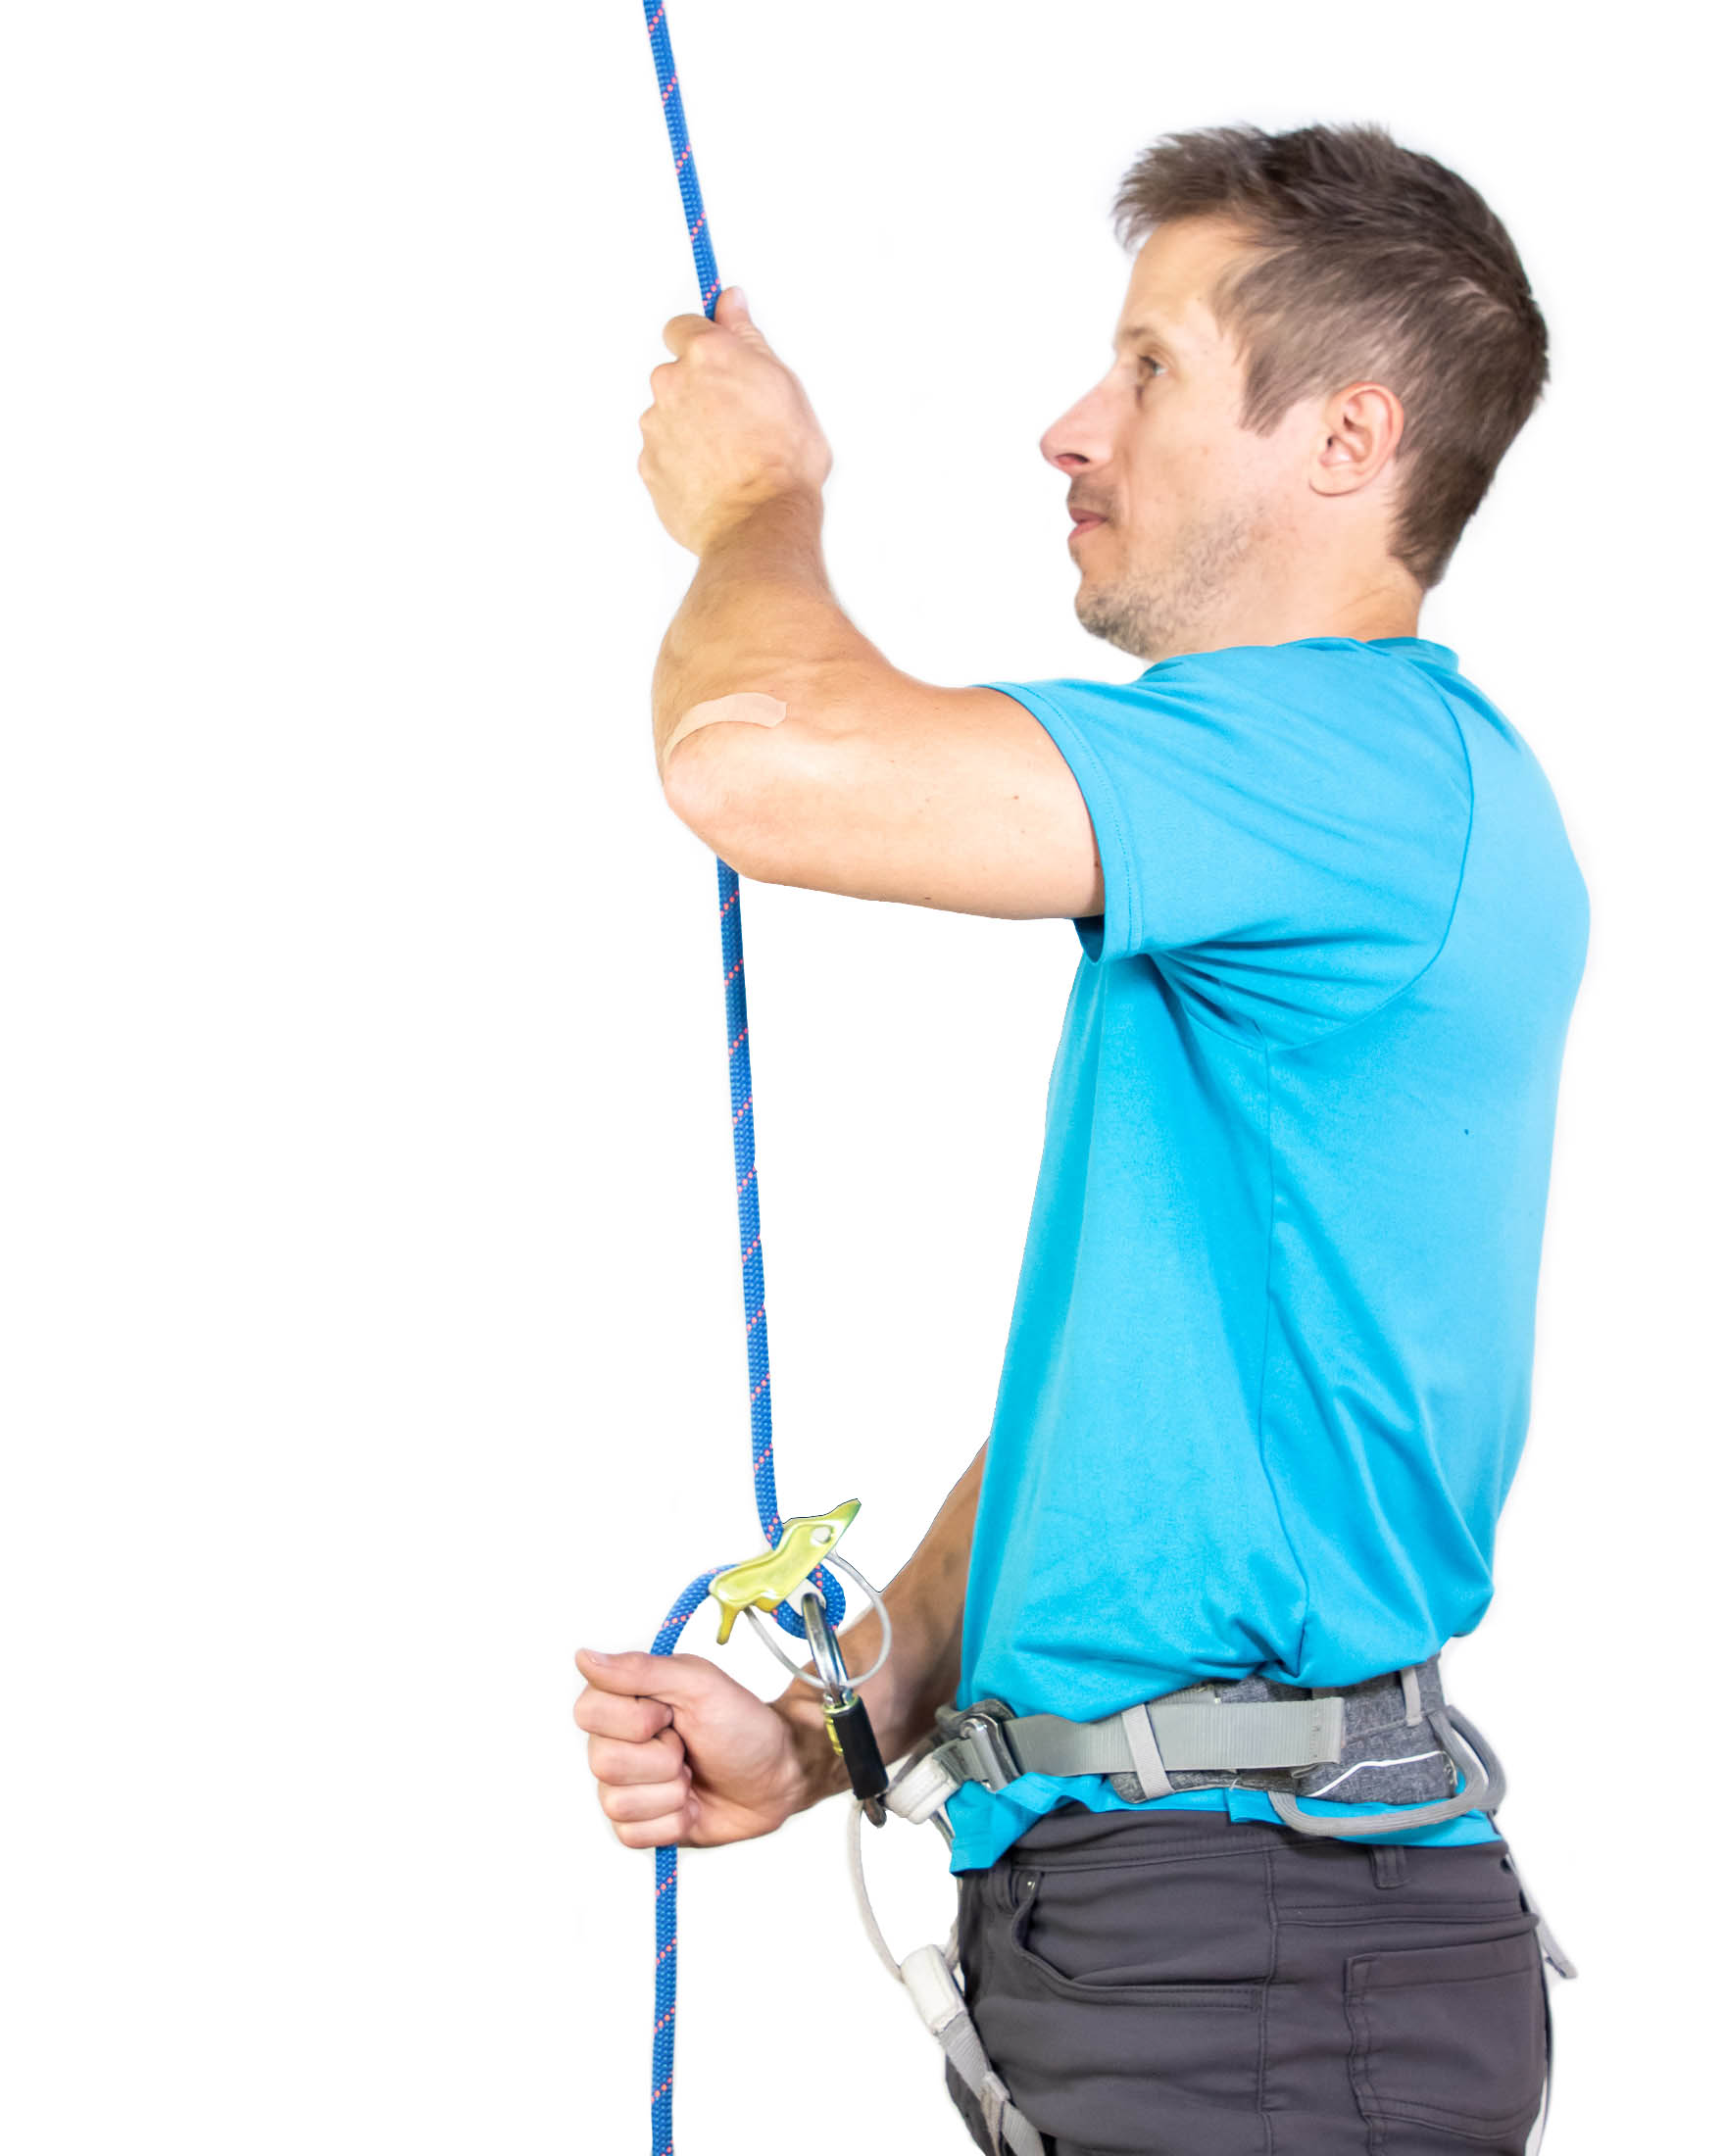
Pull
Pull your guide hand downward while simultaneously pulling the dead end of the rope out and up with your brake hand. This takes in slack as your partner climbs.
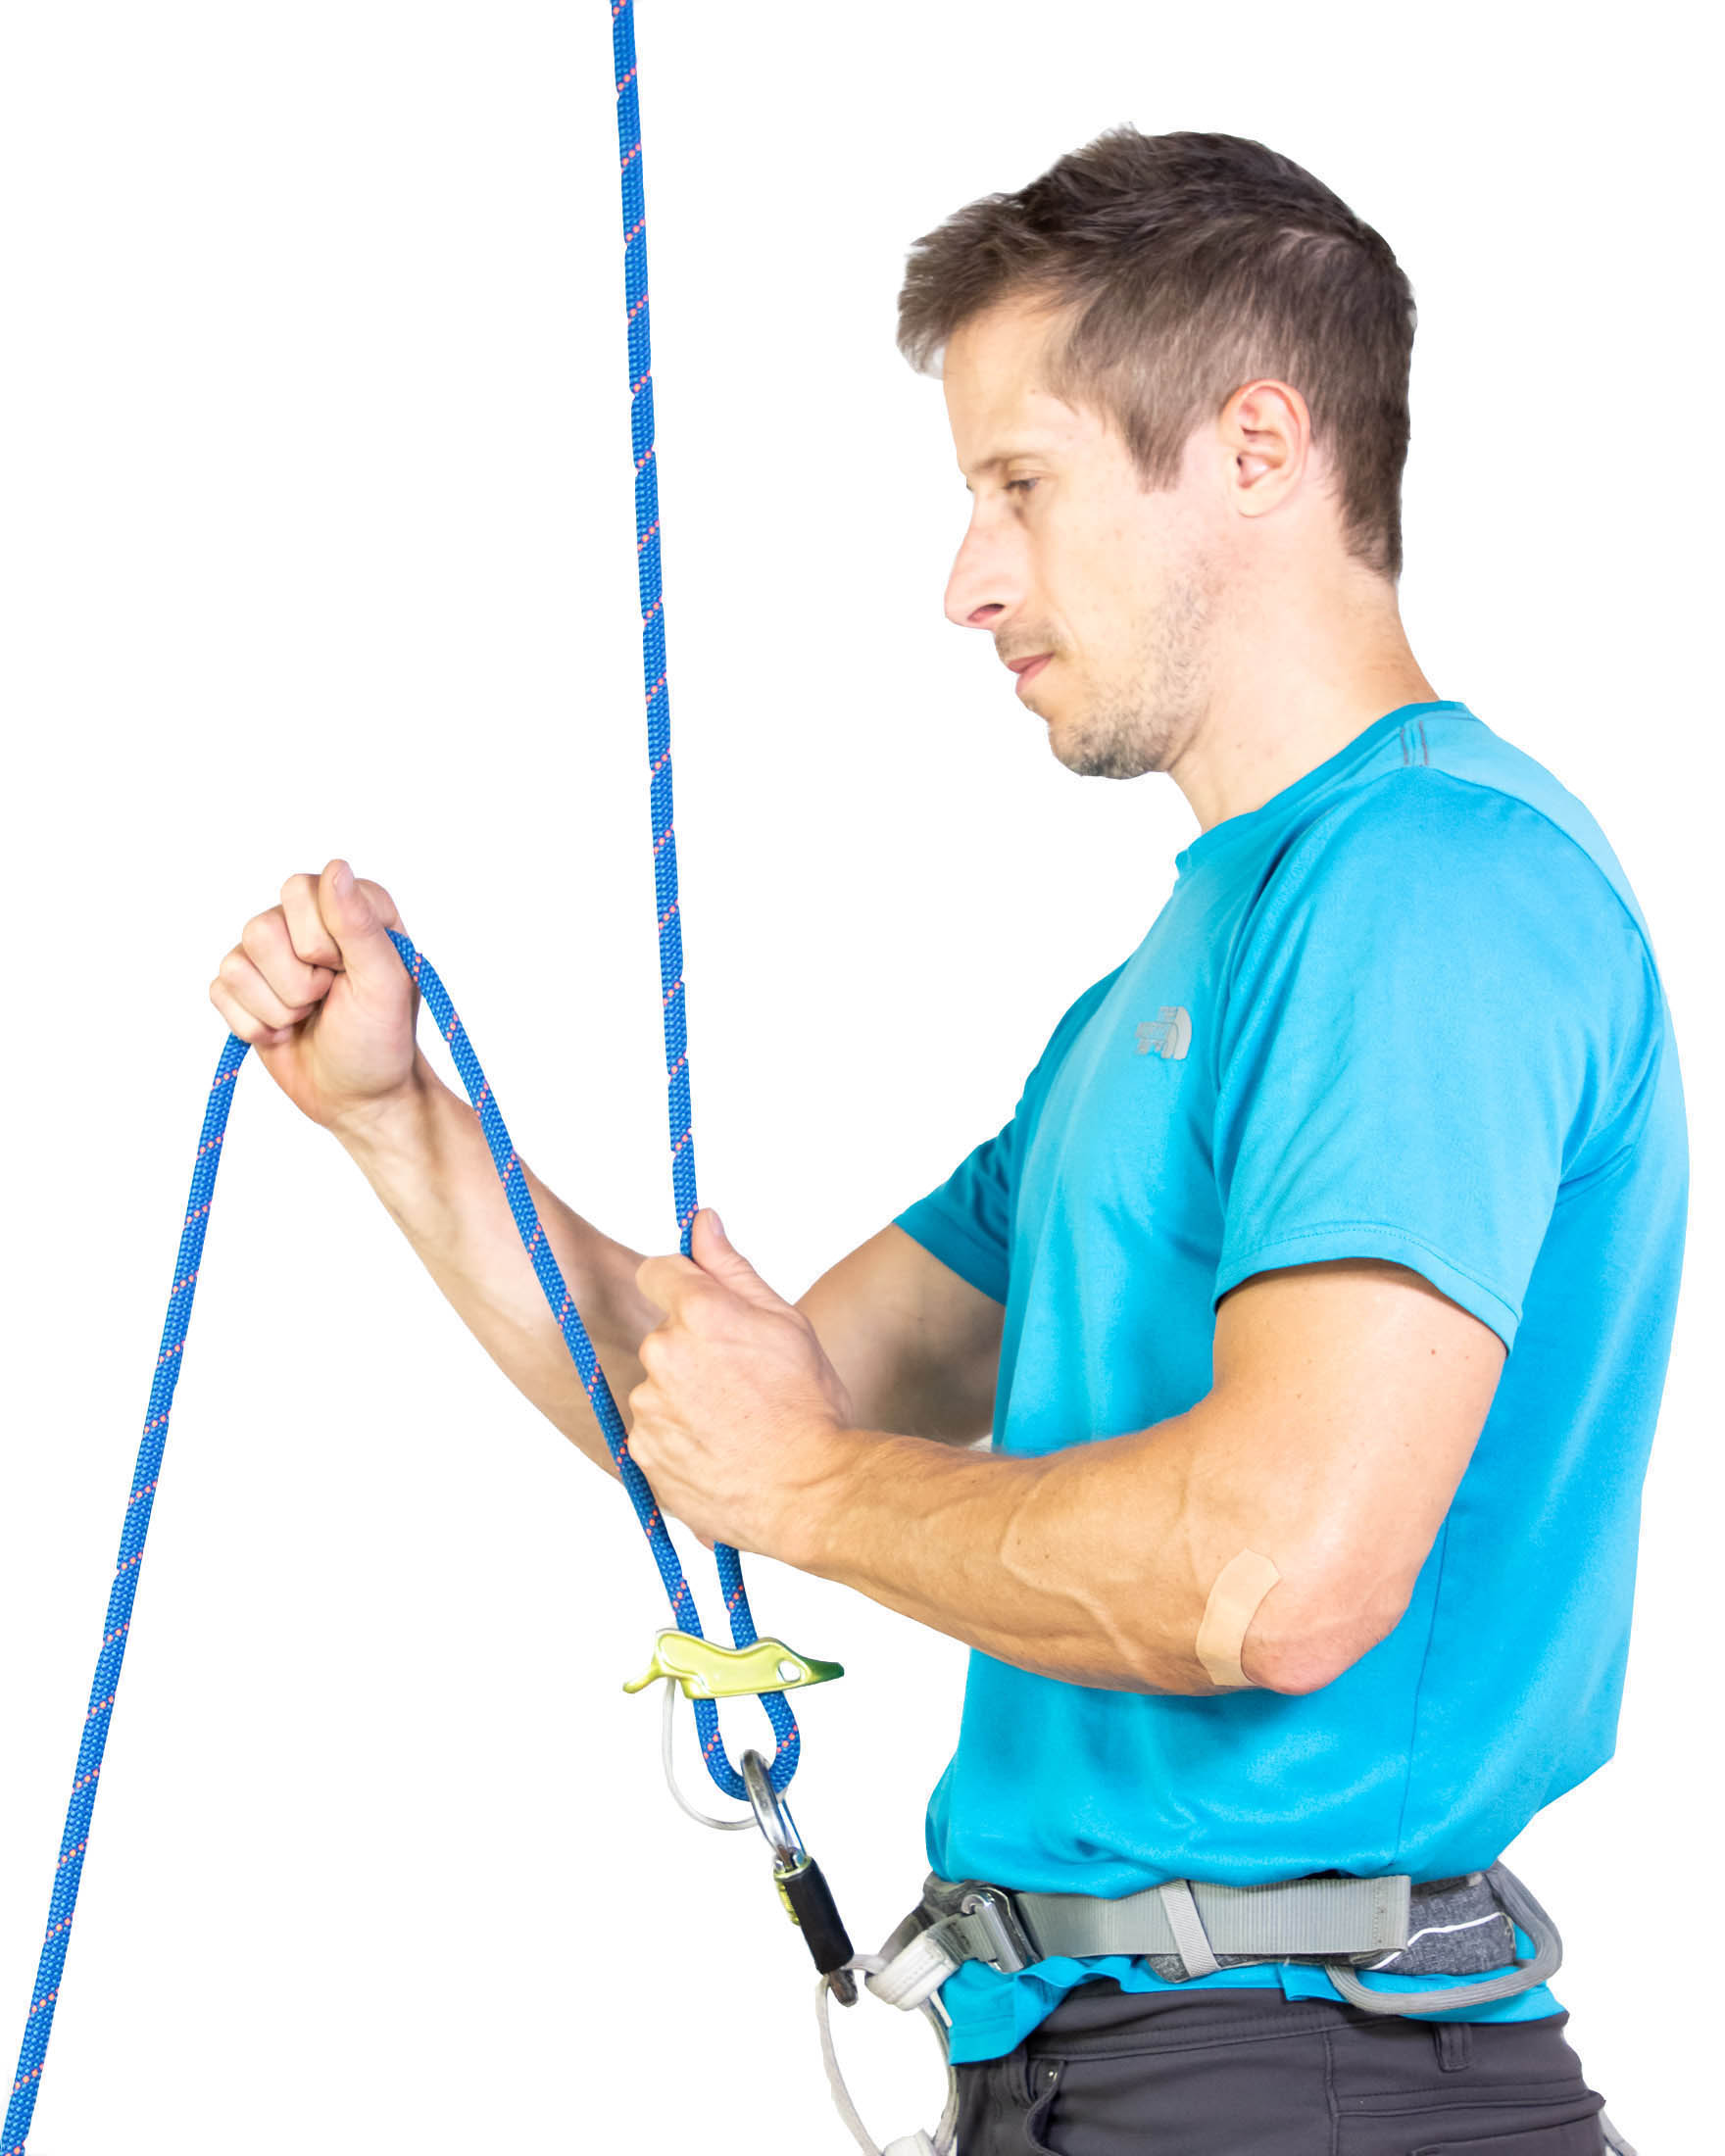
Brake
When the guide hand nears the belay device, lower your brake hand to the locked-off position. The device will grab the rope only when you hold the dead end of the rope in this position. Always return your brake hand to this position when you’re not moving rope in or out of the device.
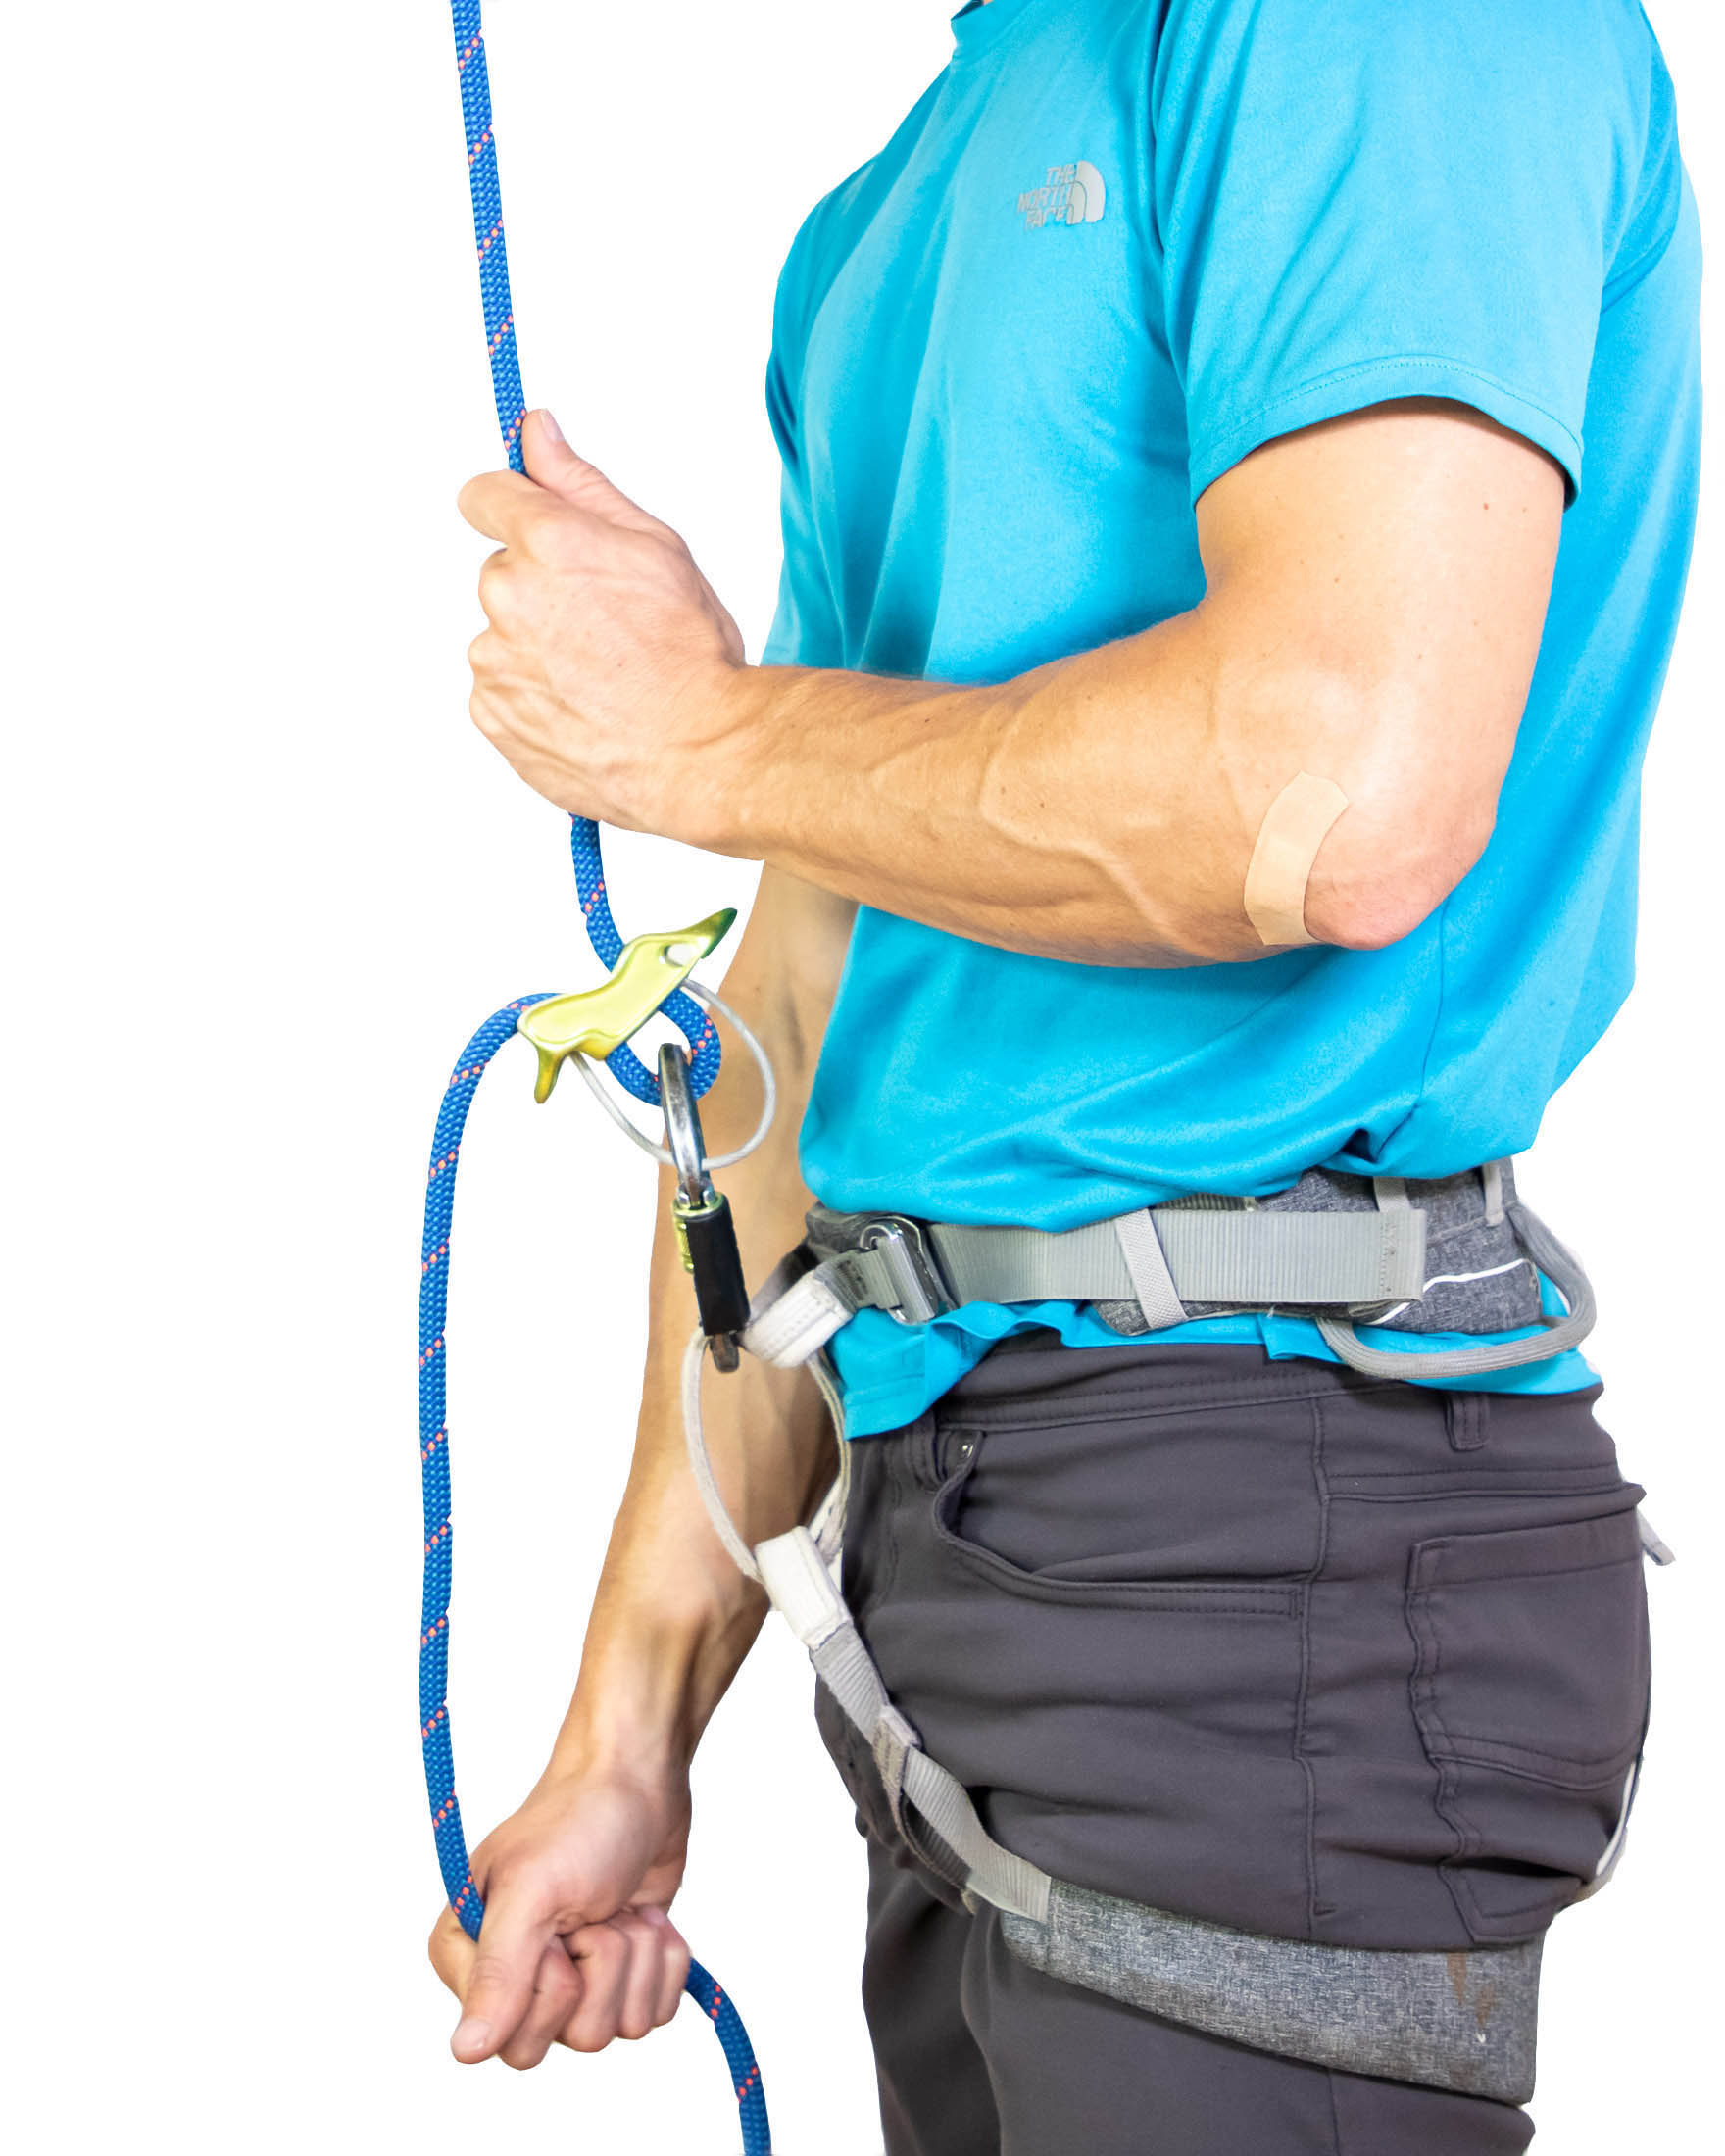
Under
Next, move your guide hand to the dead end of the rope, placing it underneath the brake hand. You’ll need to grip the dead end firmly with your guide hand during the next step, since it will keep the rope locked off while you move your brake hand up.
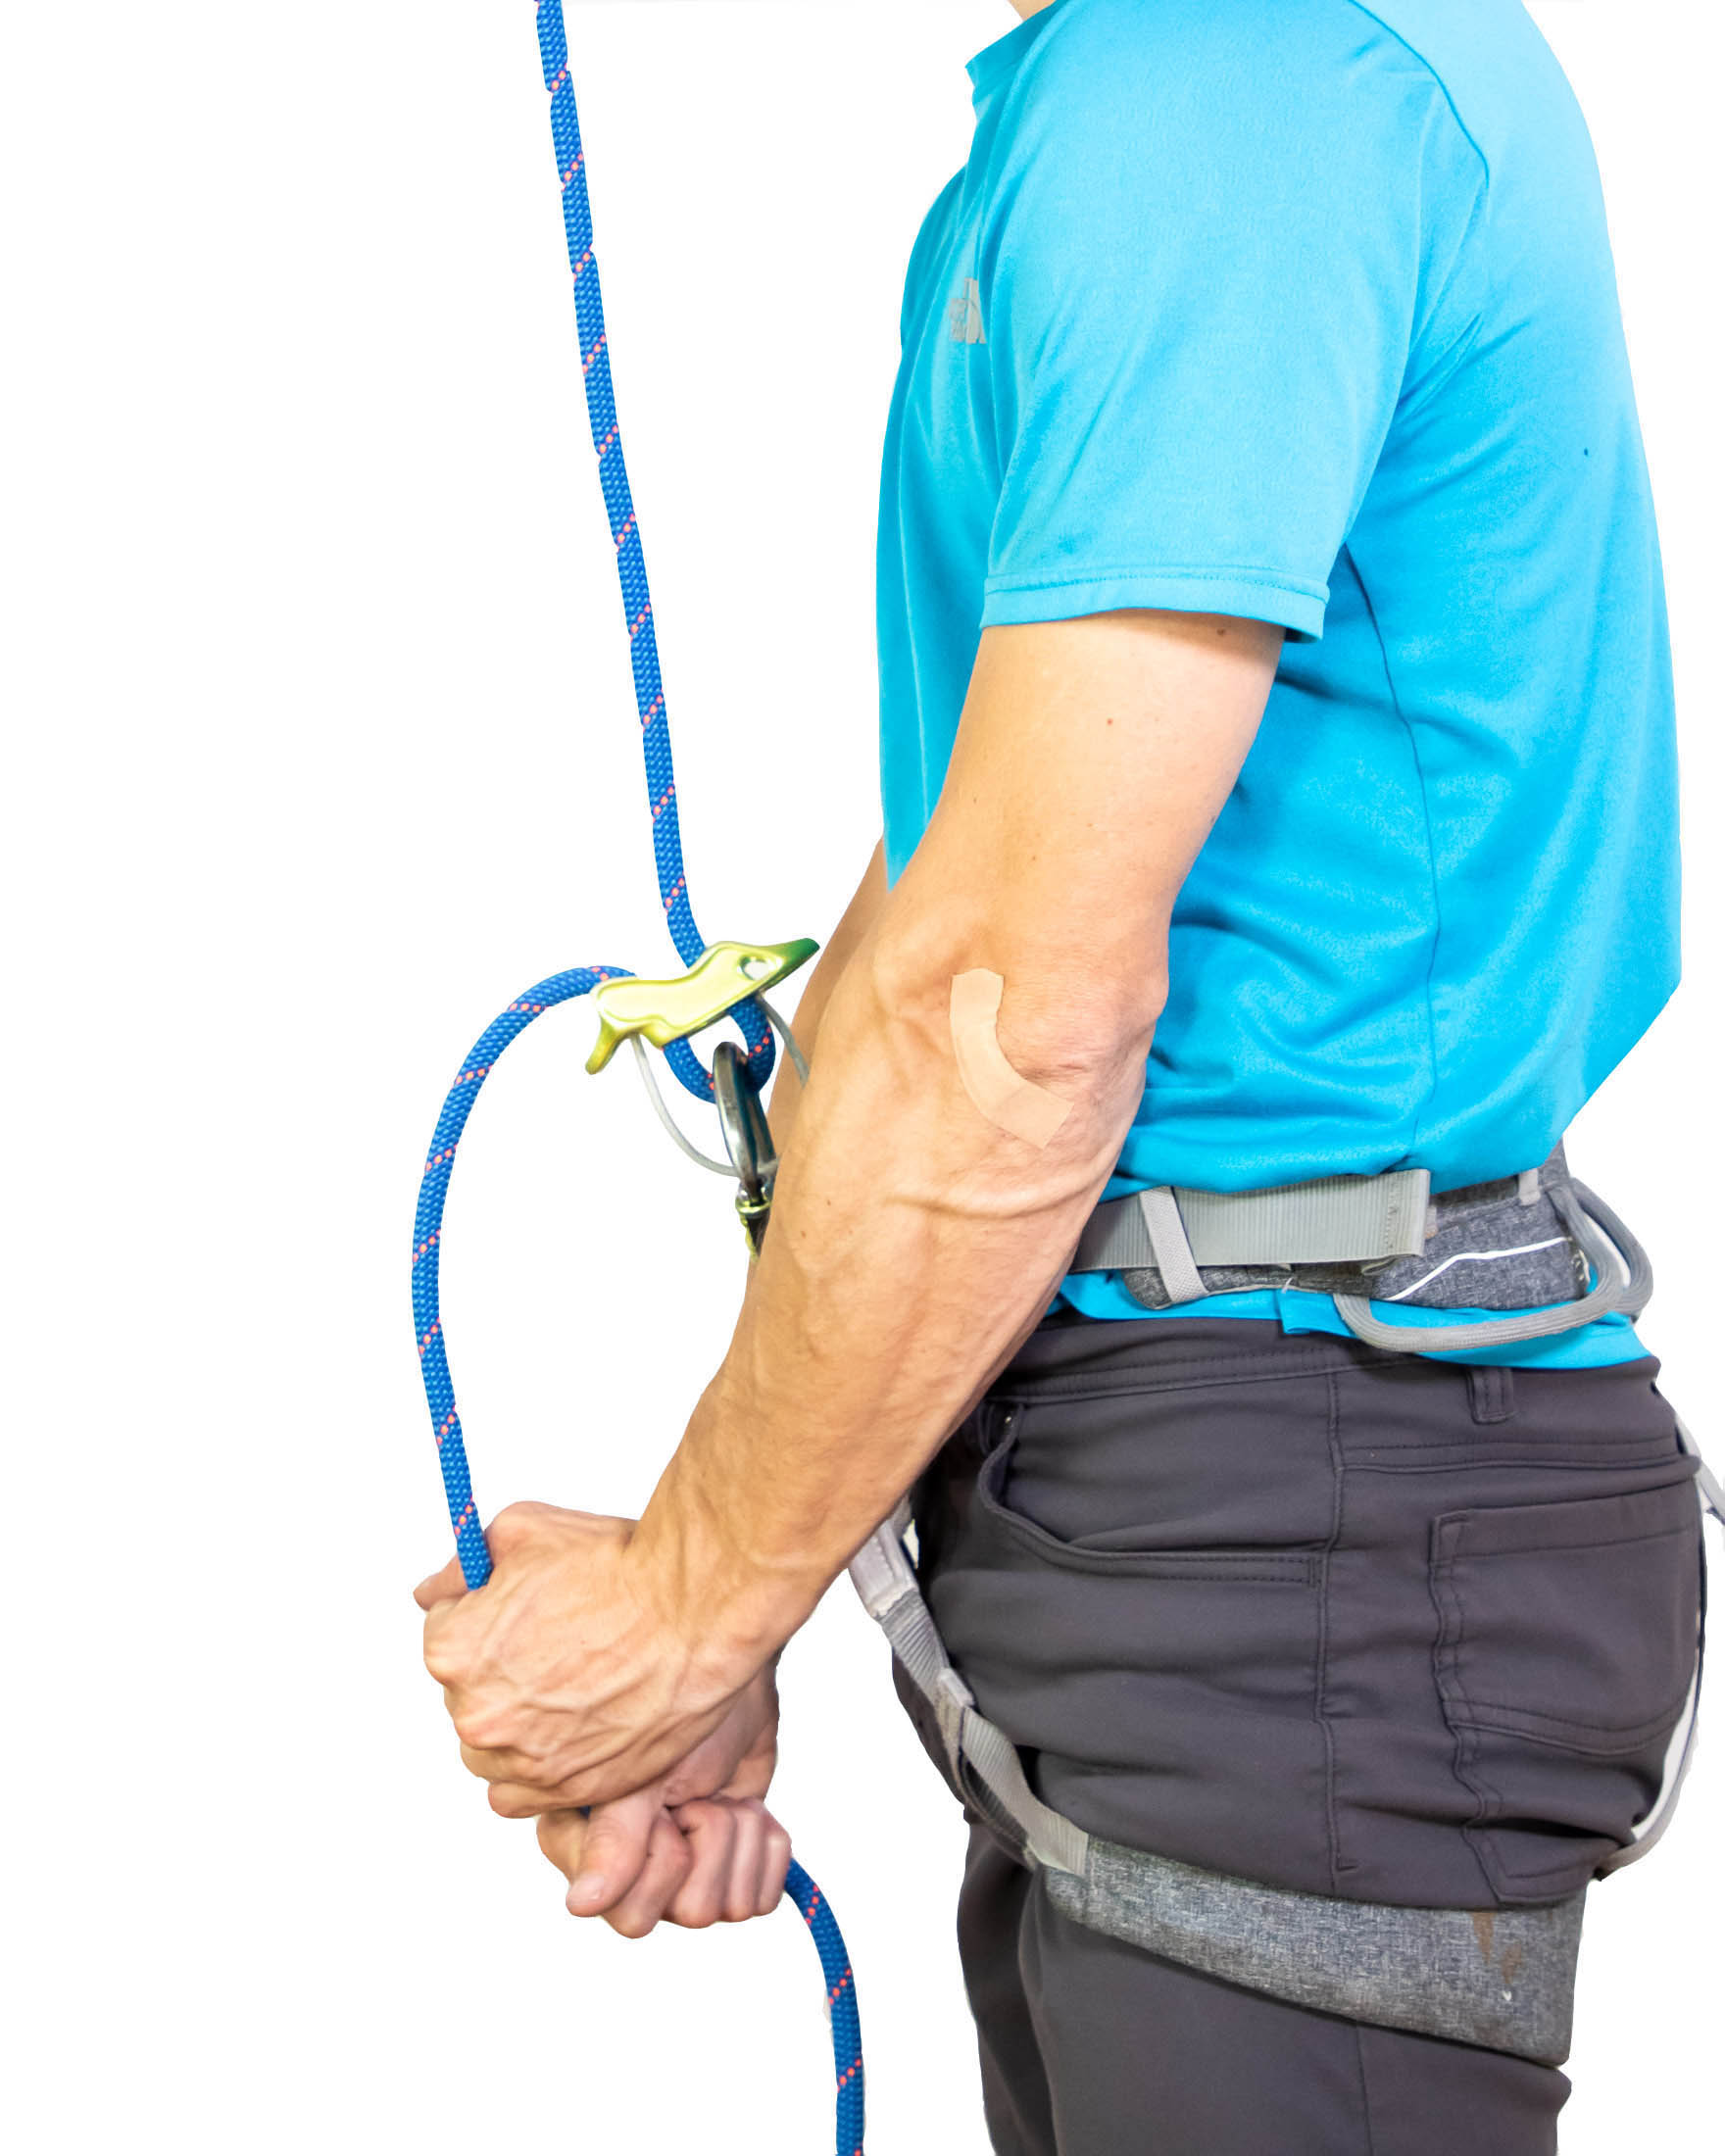
Slide
Loosen the grip on your brake hand, but don’t unfurl your fingers. You want to lighten your hold on the rope just enough so that you can slide your hand up the rope to its starting position, a few inches below the belay device. Once you’re moved your brake hand up, tighten your grip again.
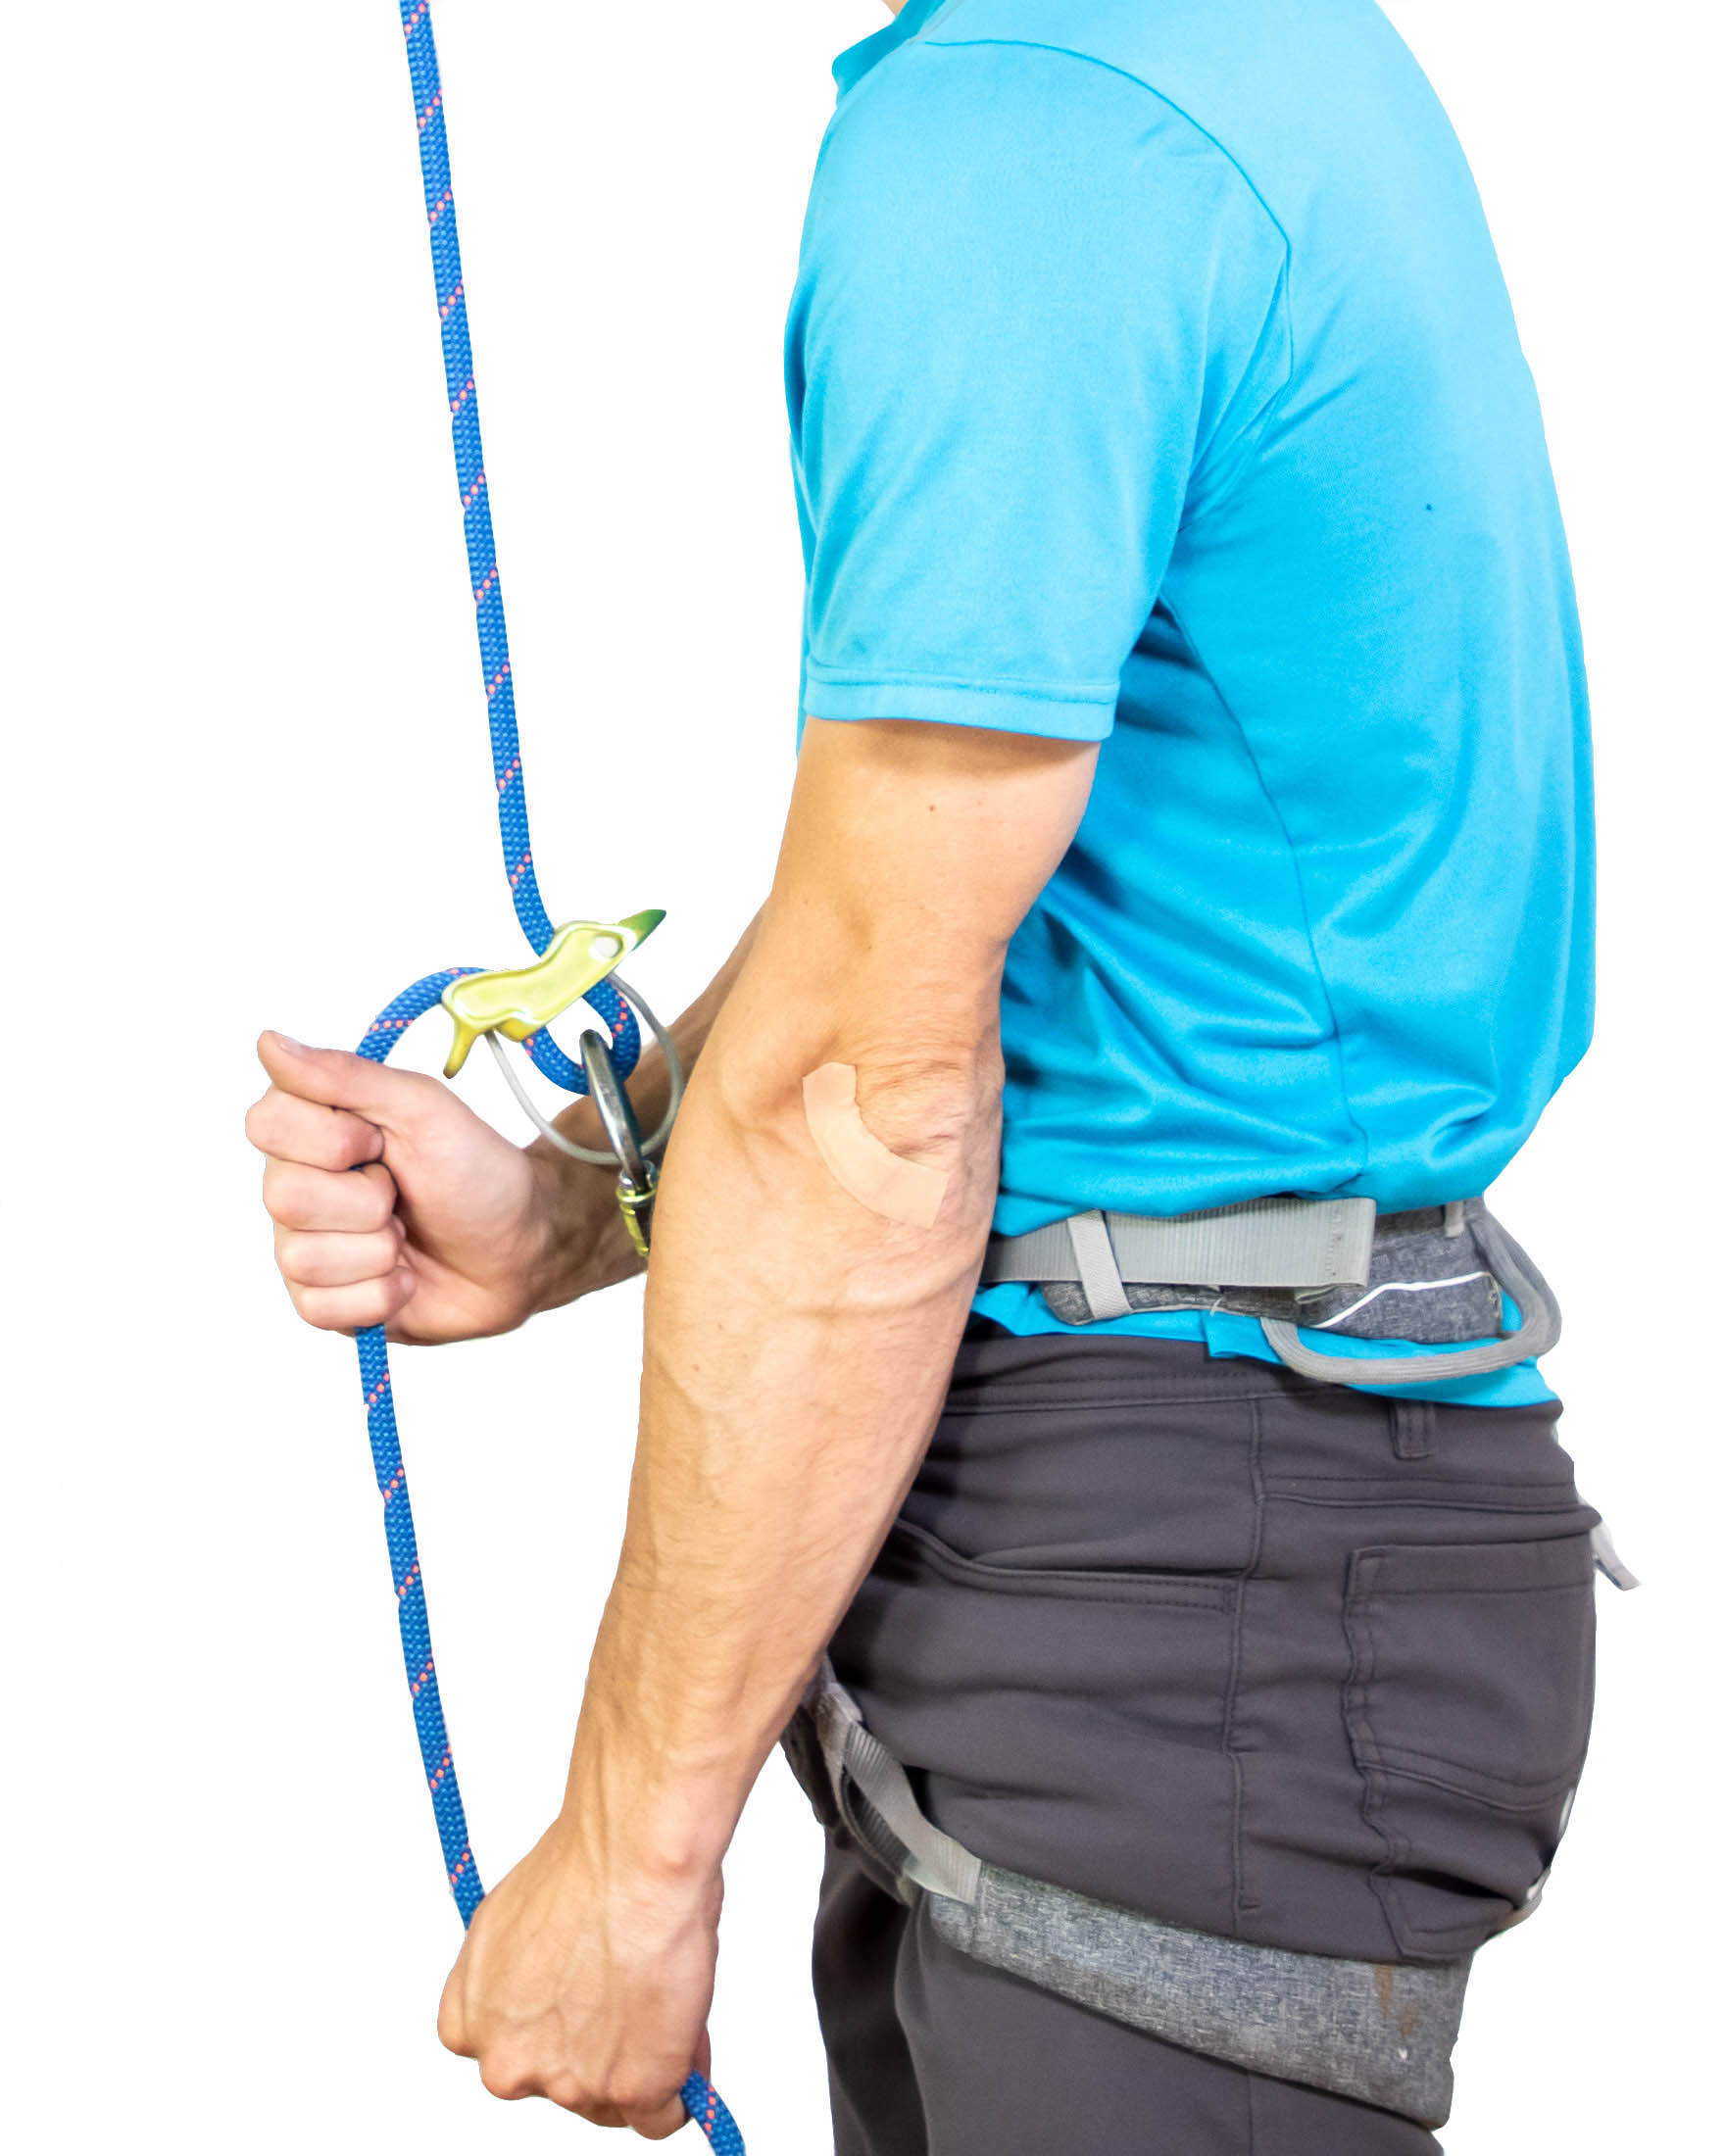
Repeat
You can now return your guide hand to the live end. That’s one sequence. You should learn to do this almost without thinking before progressing to lead belaying.
Paying out rope
The starting positioning for paying out rope is the opposite of that used for taking in rope: you’ll need to have both your guide hand and brake hand in a lowered position. Your guide hand should be just a few inches above the device, and your brake hand should be as low as is comfortably possible on the dead end. To feed out rope, pull rope up and out of the device with your guide hand while simultaneously feeding rope into it with your brake hand. Stop once your brake hand is two inches below the belay device.
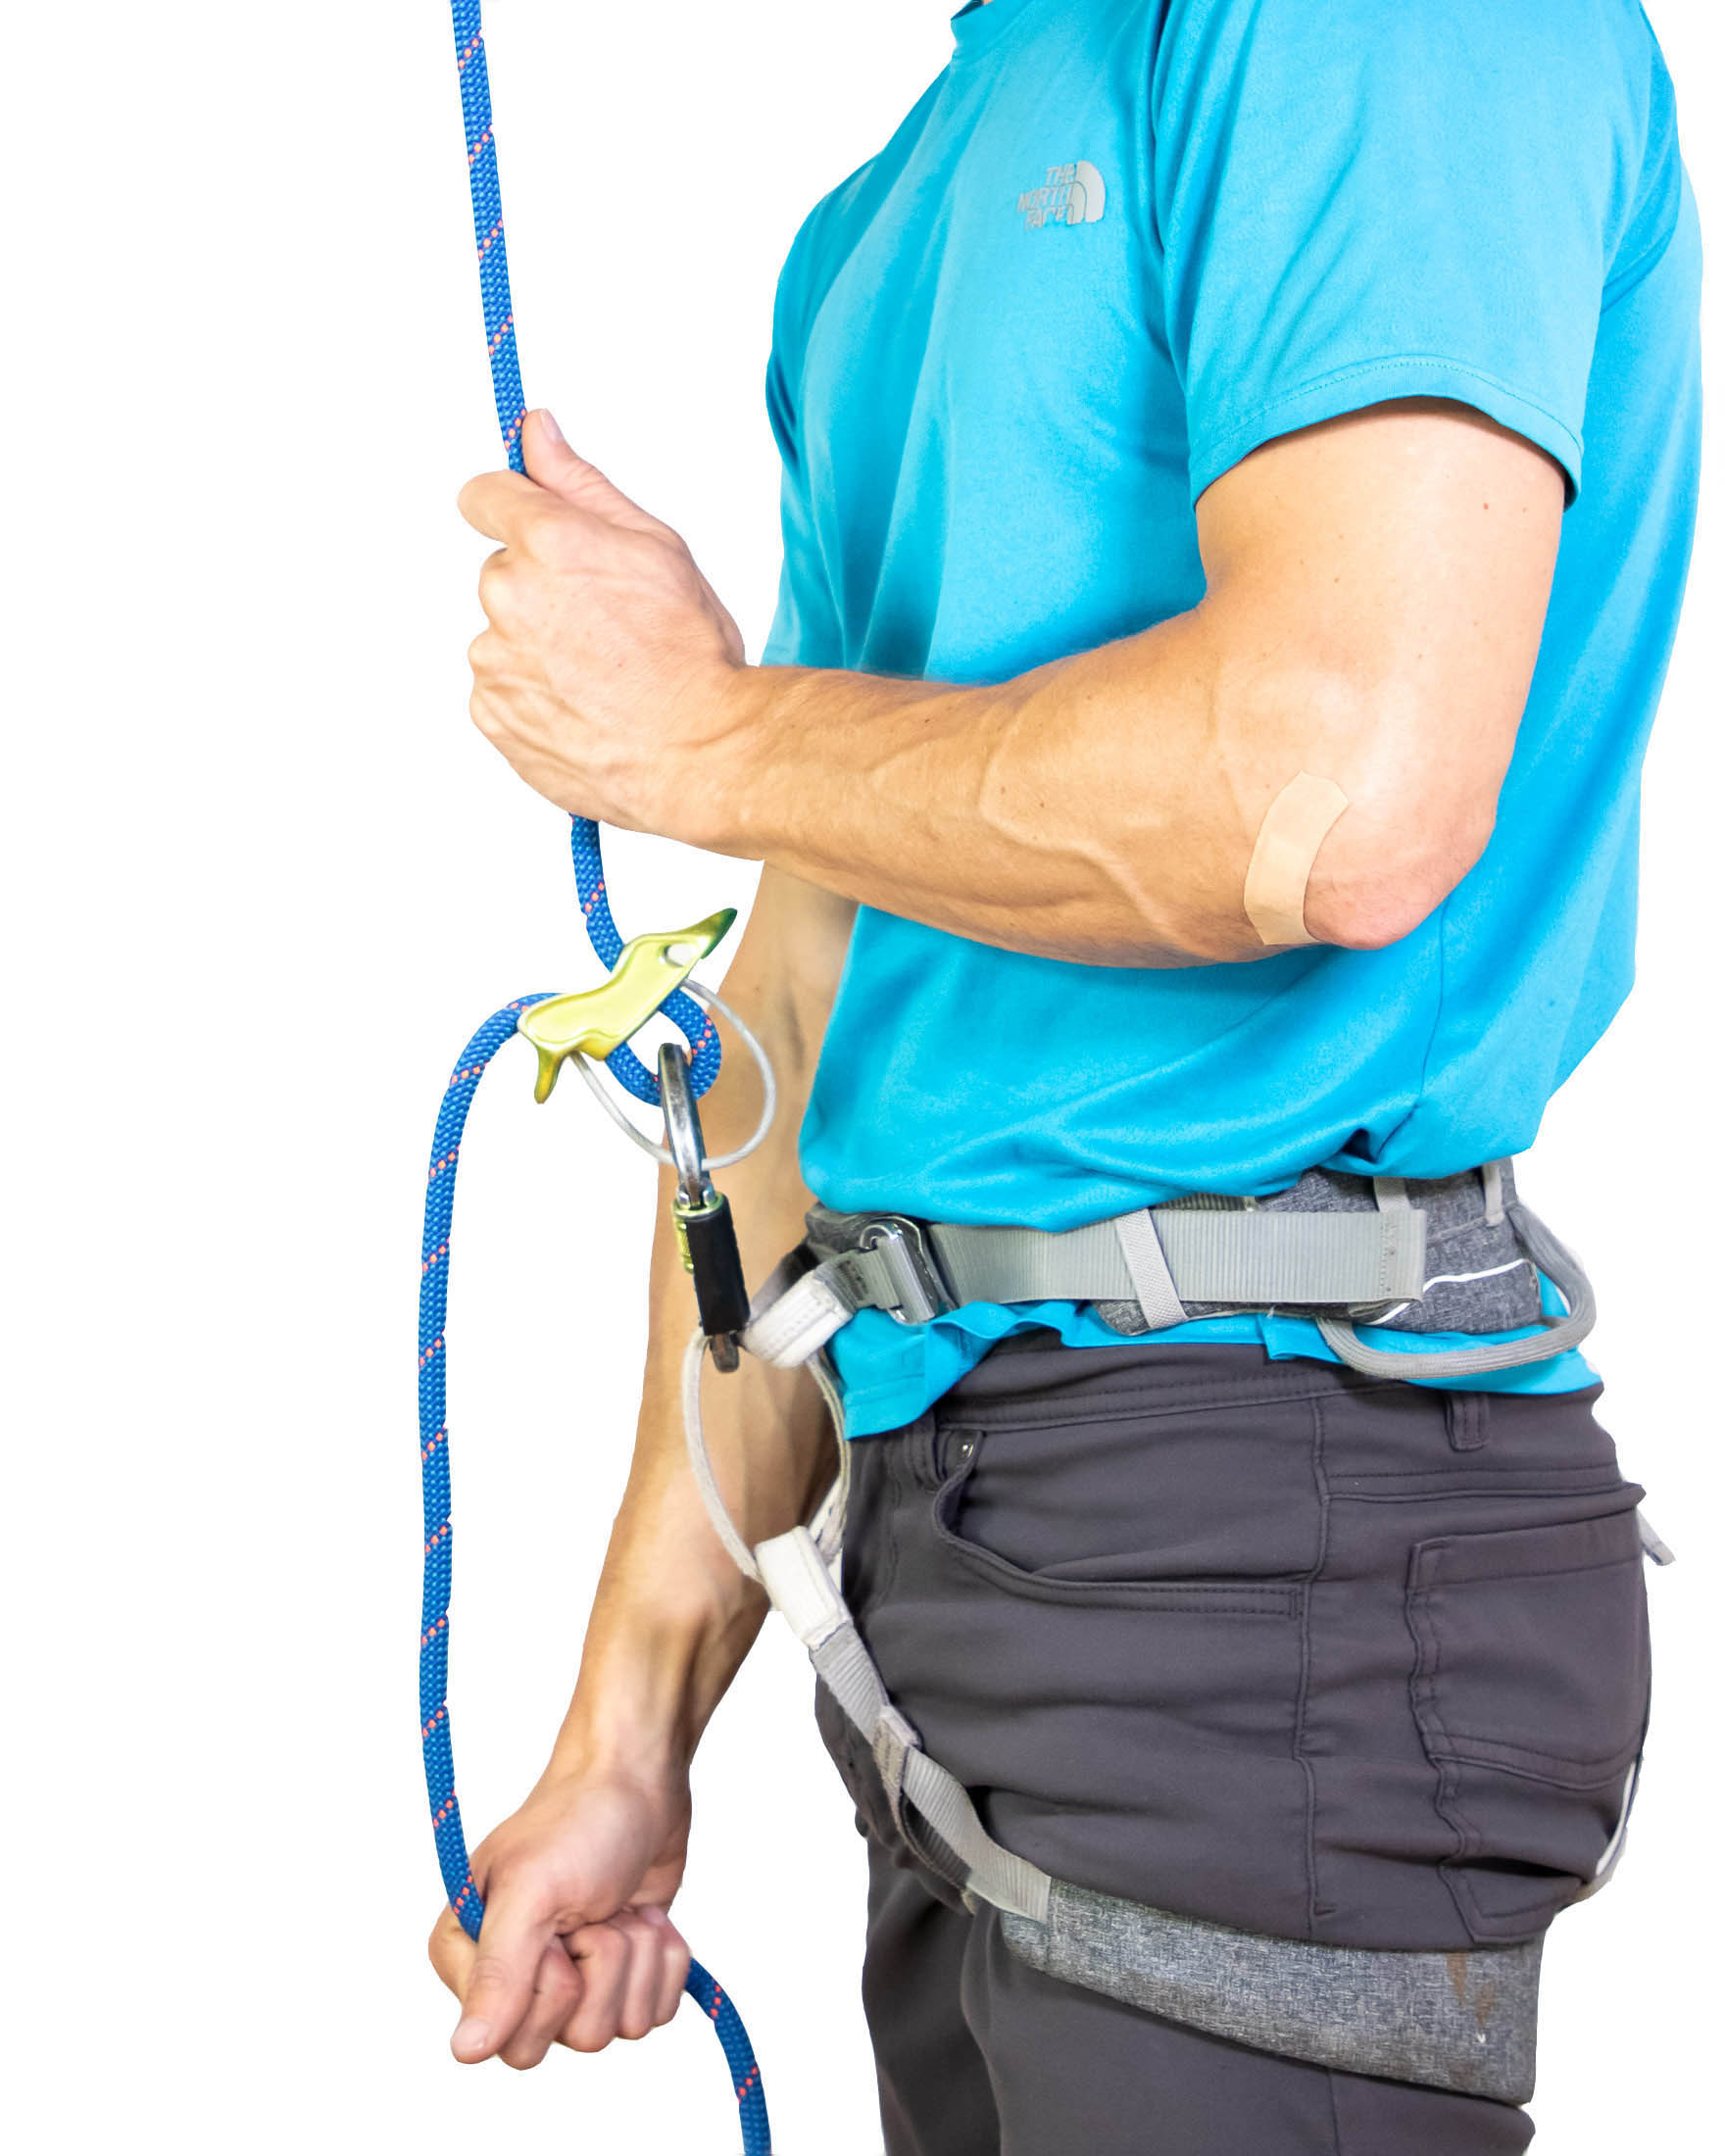
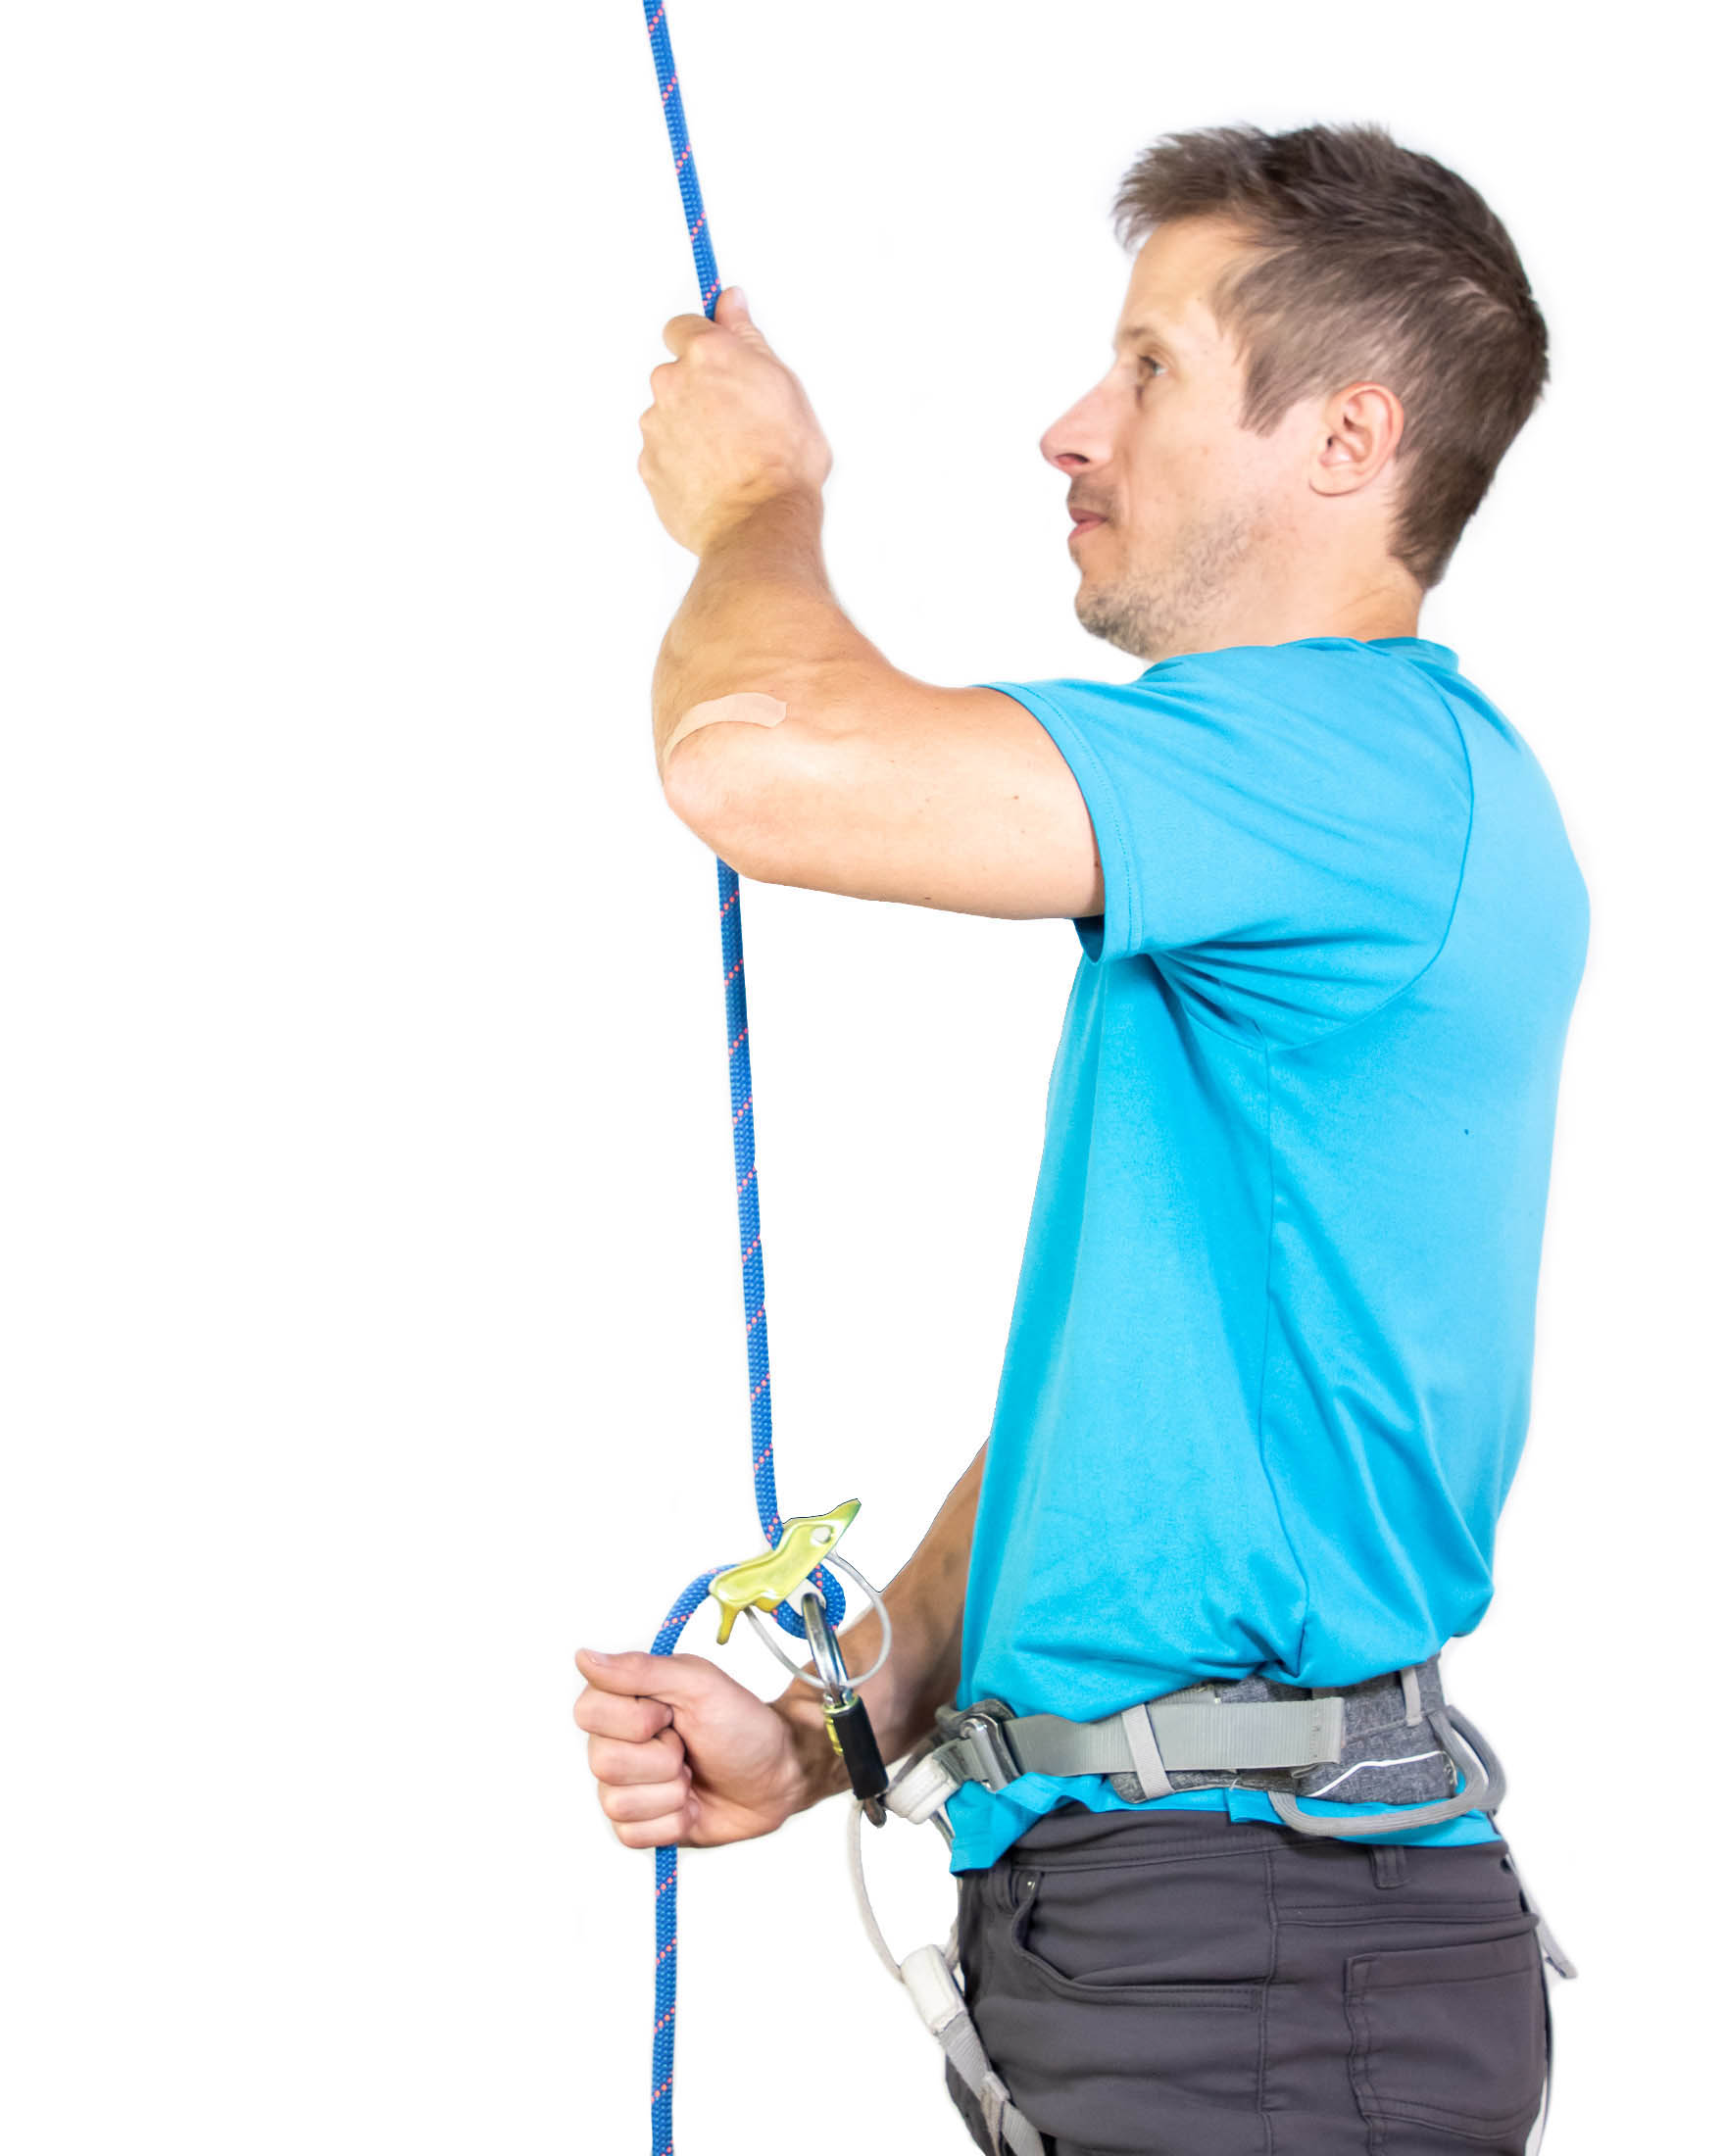
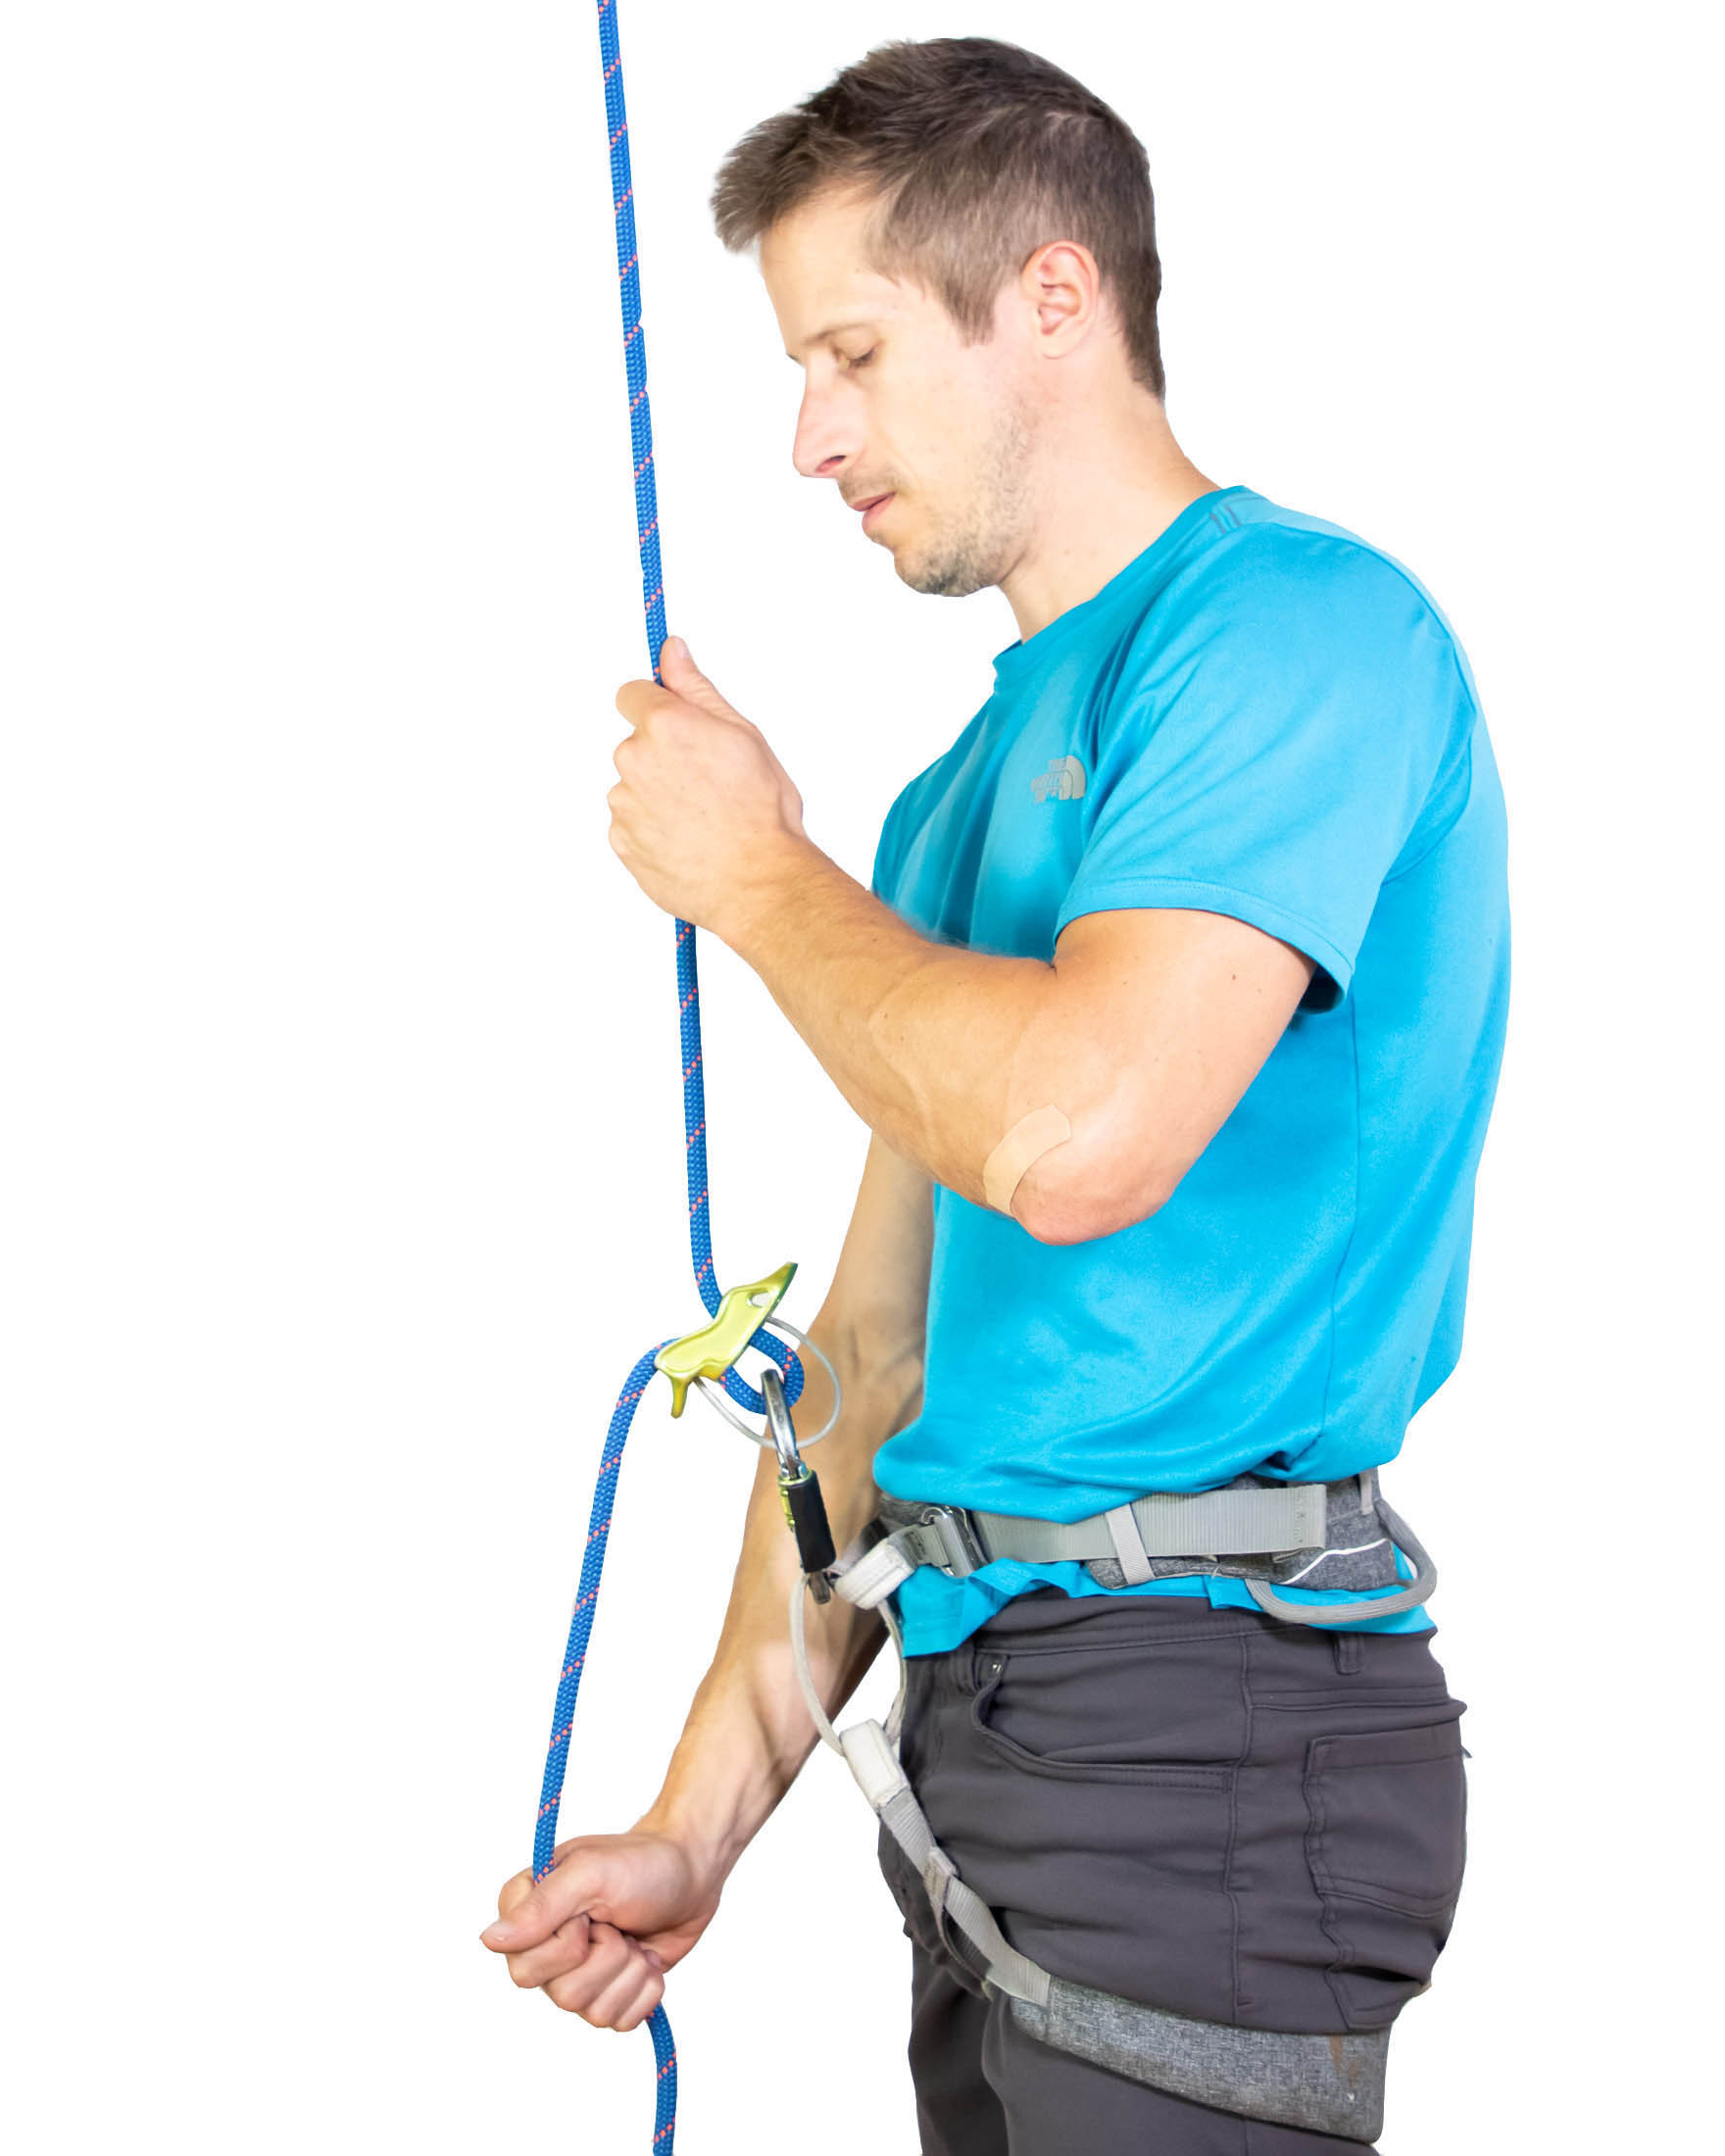
To return your hands to their original position, first slide your guide hand down the rope and then the brake hand. While sliding your brake hand down, it’s important to be ready to grip the rope in an instant if the climber falls. Failing to hold tightly enough could result in a rope burn or worse (and that’s why it’s a good idea to wear rope gloves). Again, your brake hand should never leave the rope.
How to lead belay
Once you’ve mastered the top-rope belay, you can move on to lead belaying. In this role you have to pay out rope as the climber ascends and take in slack when the climber has more than she needs. The perfect belay keeps just enough rope in the system, but that amount is hard to define in feet or meters since the right amount of rope will depend on several factors: distance between bolts, how high the climber is on the route, and the amount of rope needed to make the next clip.
Belaying priorities
Ideally you’d always be able to put out enough rope to ensure a moderately long, soft catch – in which energy is dispersed over several meters. In reality such falls are only possible when the climber has space to fall into – usually from the 4th both and higher. Below that, the belayer has a different priority: keeping the climber from hitting the ground during a fall. You don’t want to give a climber so much rope that she will land on the deck if she comes off, but you also don’t want to make the rope so tight that it restricts her movement or makes it impossible to clip.
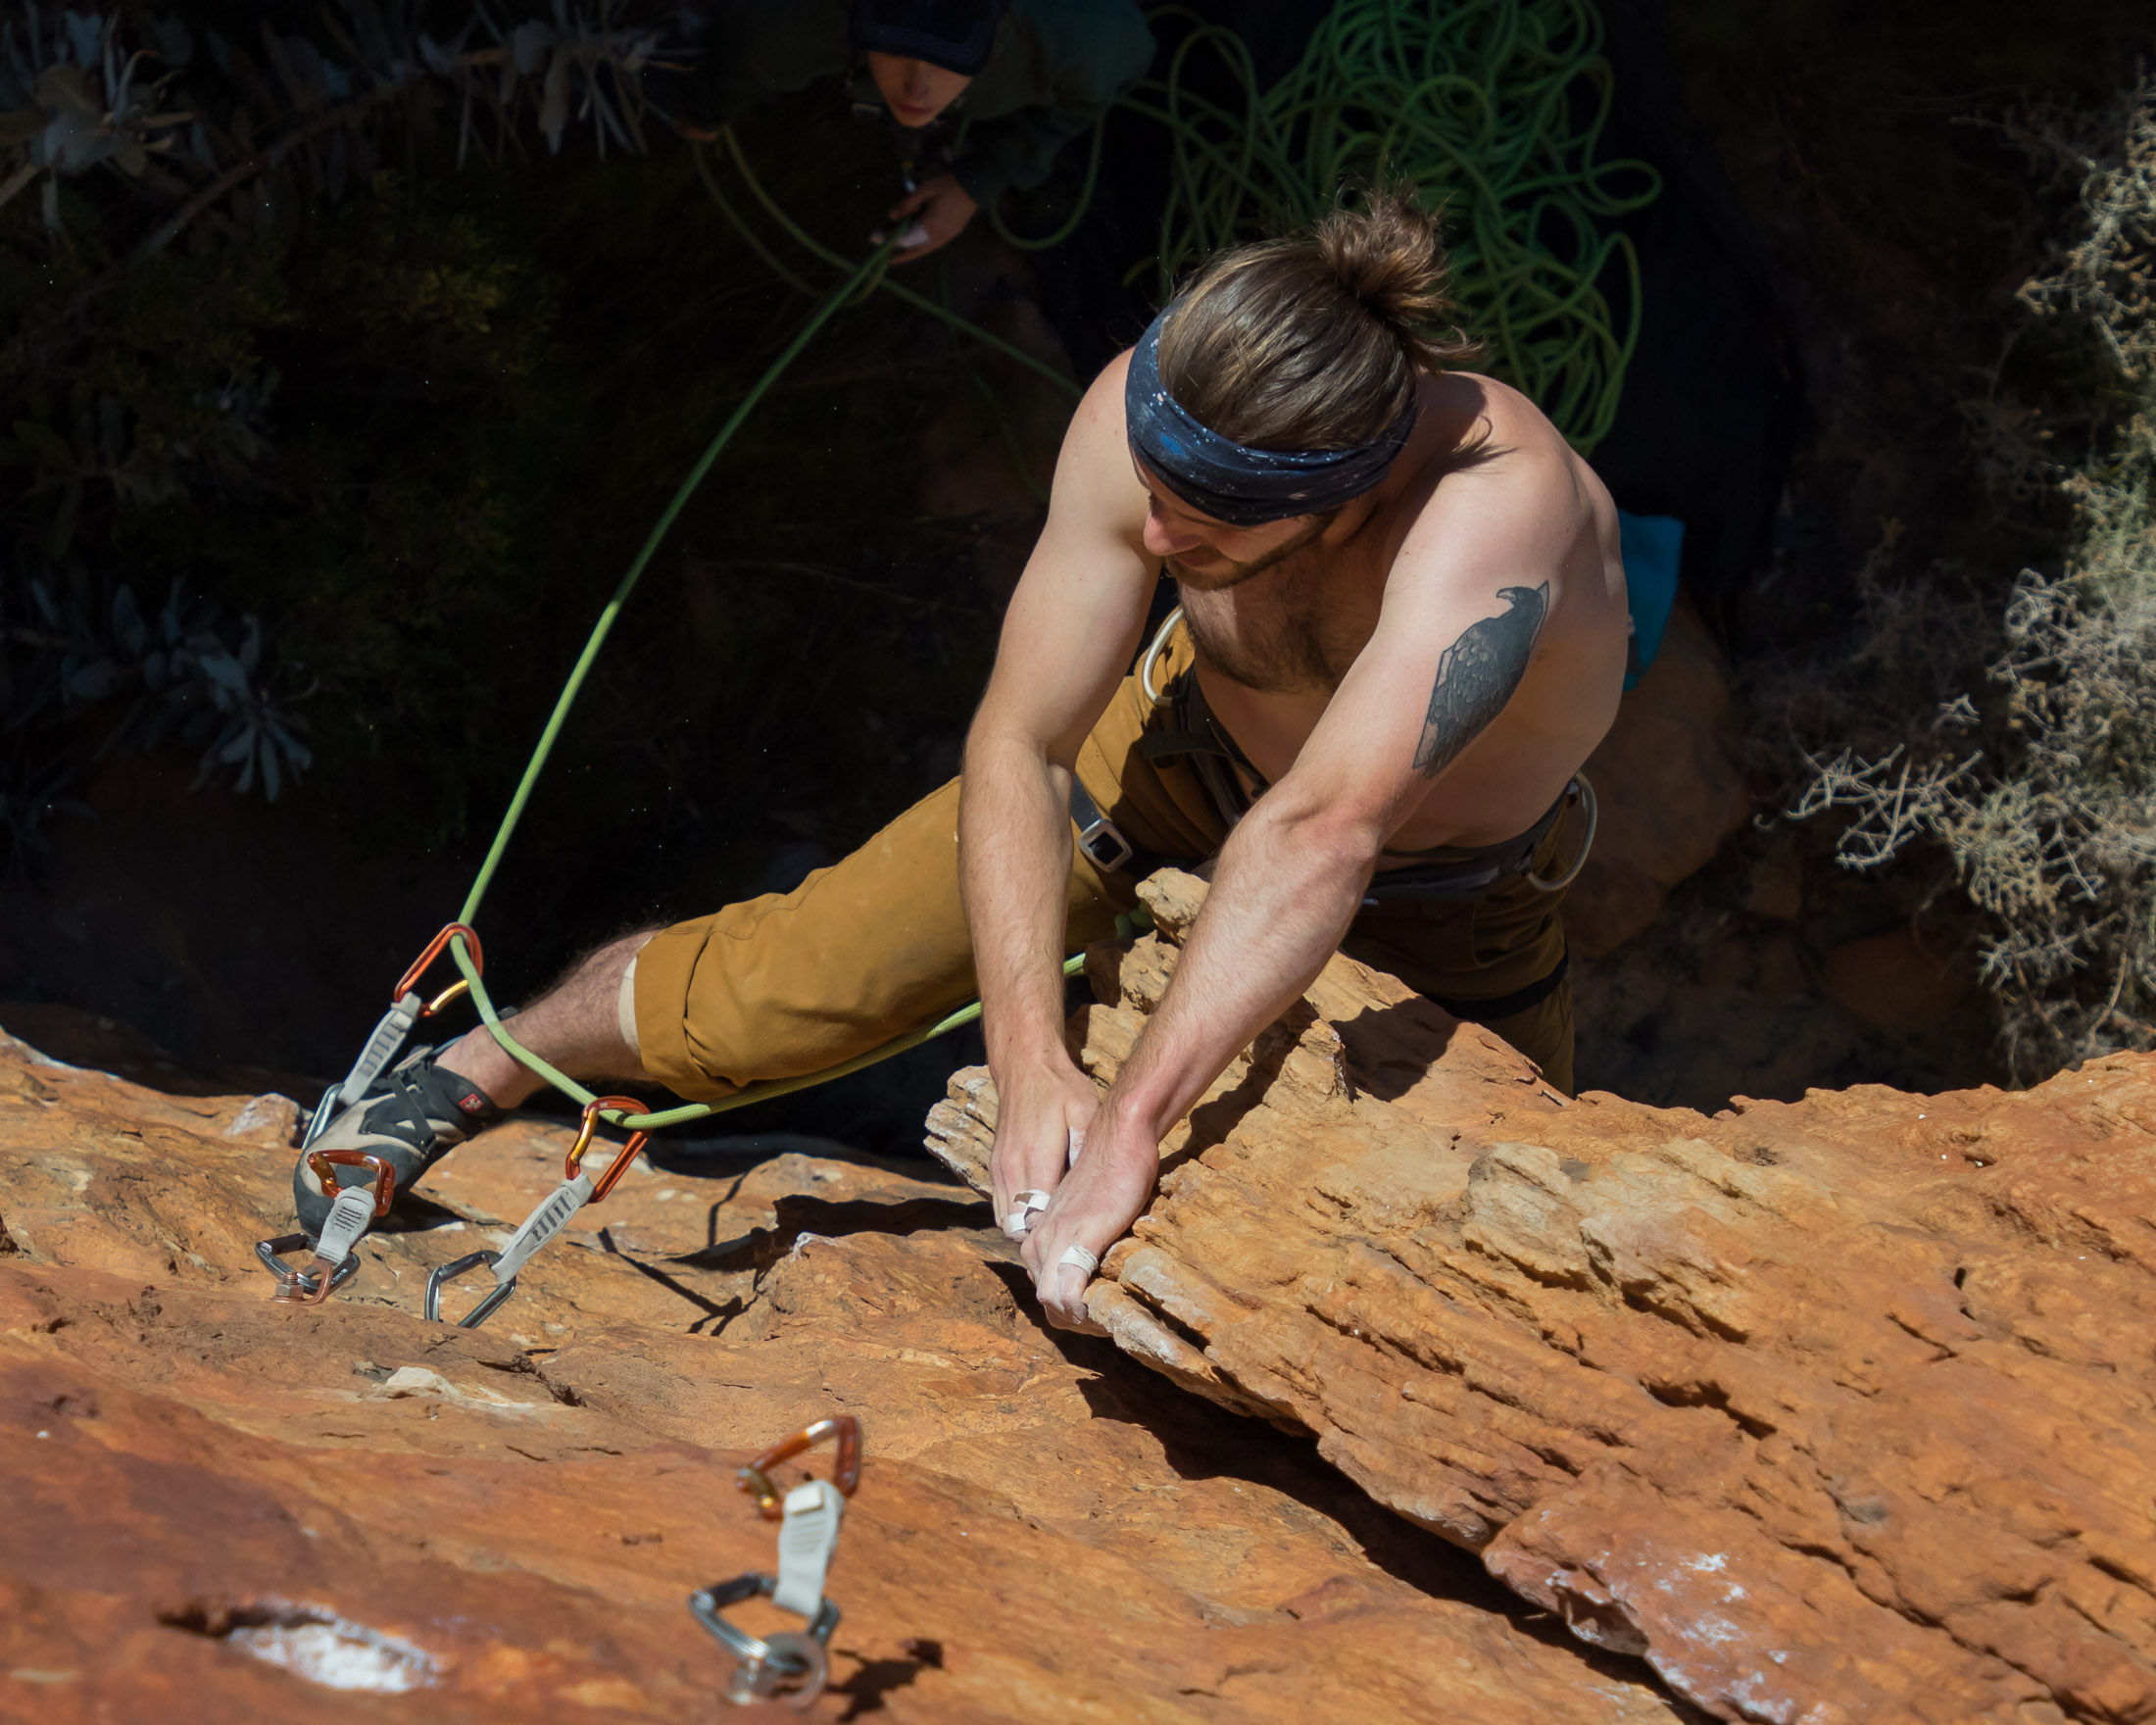
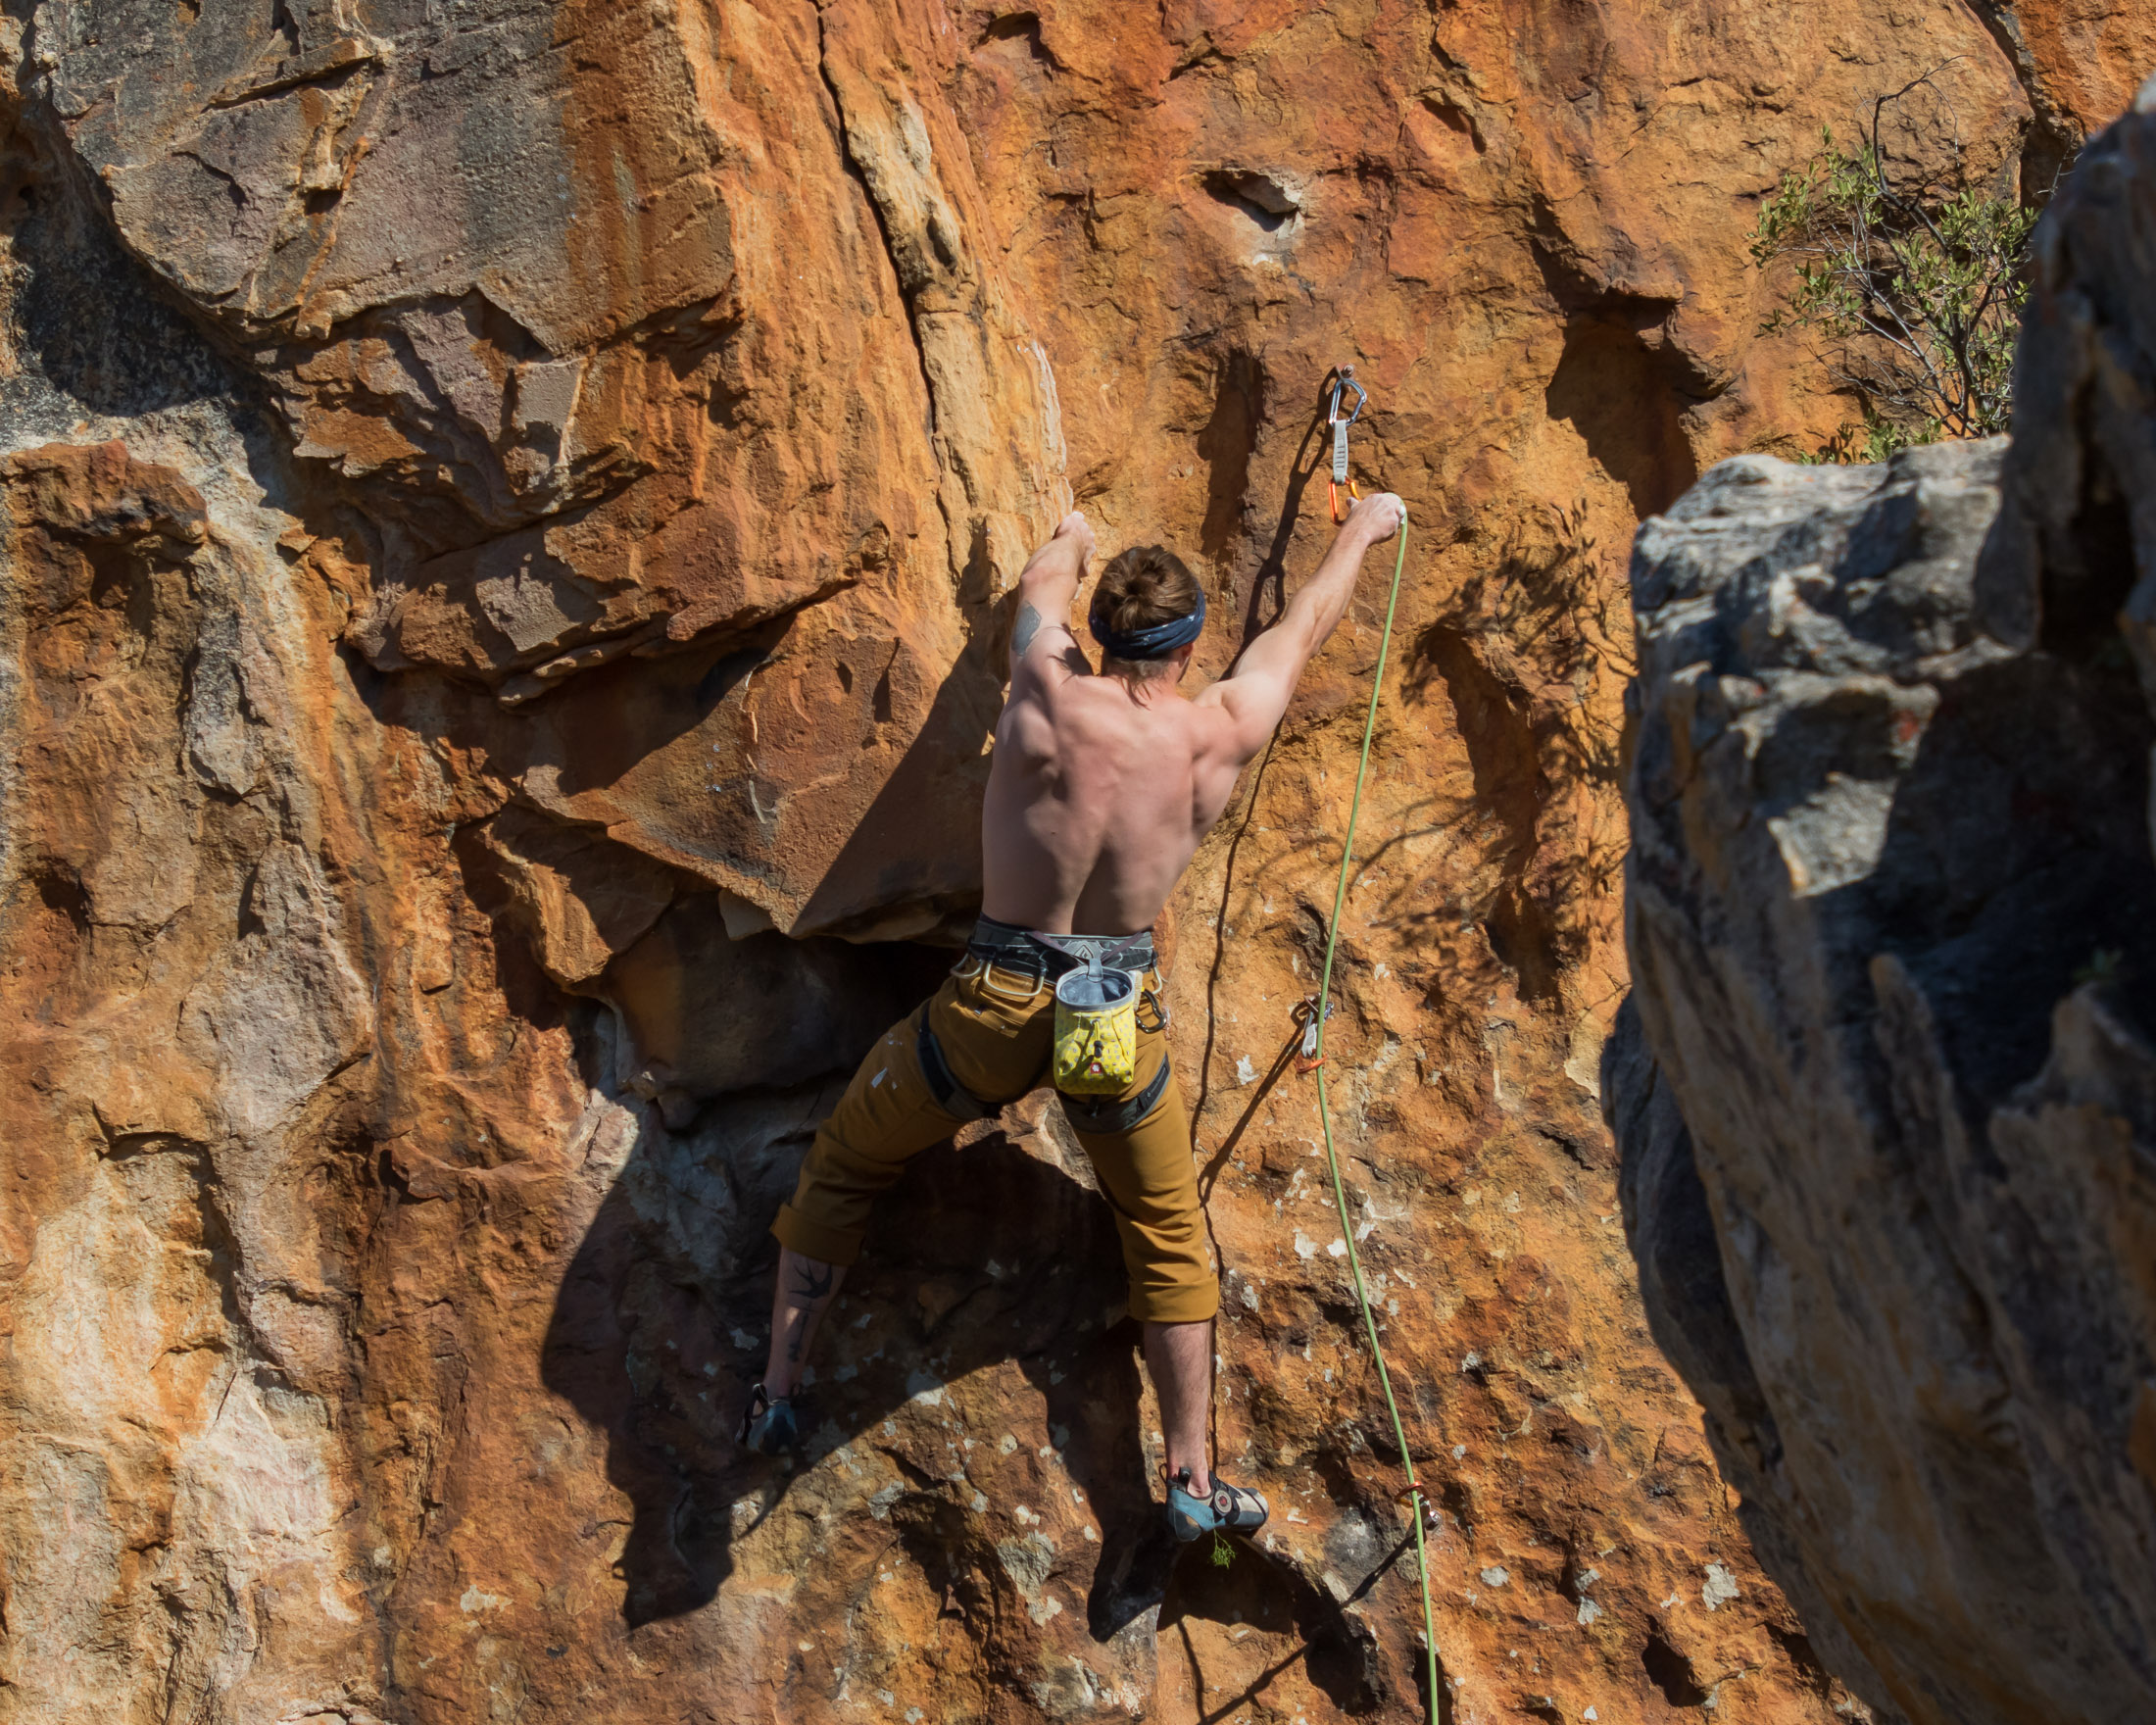
What this means is that a belayer’s priorities change over the course of a belay. While the climber is still low down on a route (first three or four clips), the main aim should be to prevent a ground fall. But then, as the climber gains height, the belayer can put out more rope (where it’s safe) to soften a fall. Below I’ve described how you might adapt your approach for clips at different heights, but it’s important to know that there are two other factors that determine how far a climber will drop in a fall.
Calculating the distance of a potential fall
When trying to calculate the likelihood of a ground fall, look at the height of the last bolt relative to the amount of rope out (not just the height of the climber). Even with a minimal amount of slack in the system, the climber will fall at least twice the distance from the last bolt clipped (usually closer to three times the distance with rope stretch). When the climber takes more slack, as she’d need to when making a reachy clip, it drastically increases the length of a potential fall.
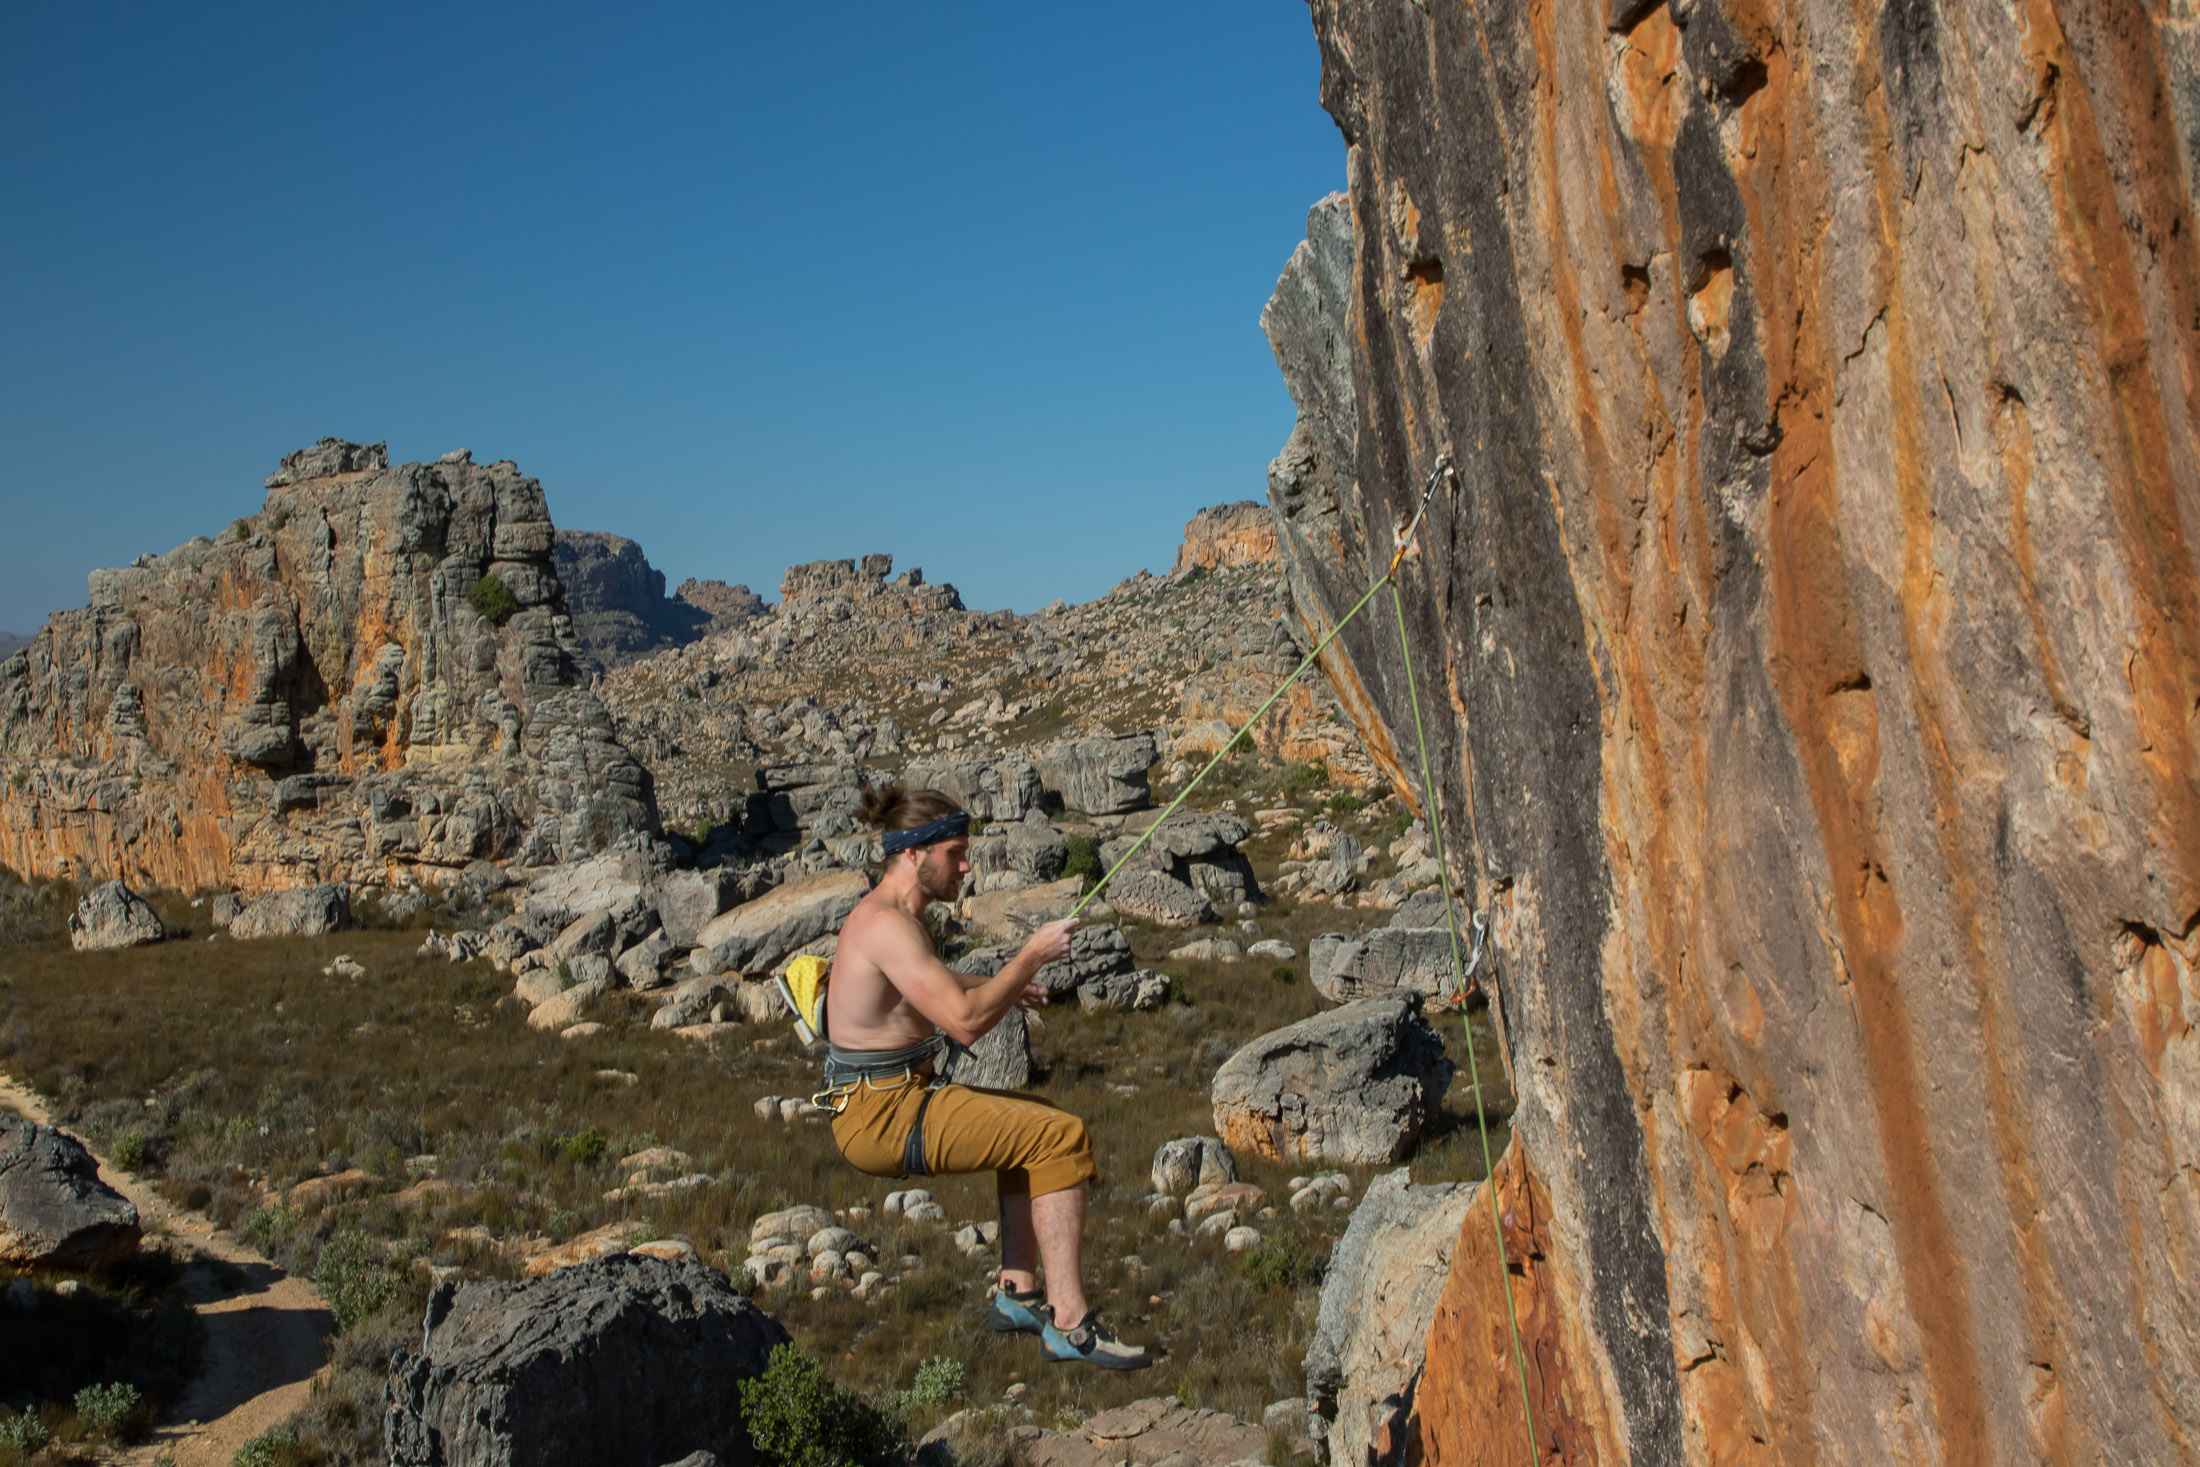
It takes some experience to know how to accurately judge the length of a fall and when to put out more rope or take it in – ledges and roofs require special tactics that are beyond the scope of this article (although these are covered in my book Gym to Crag). In the time it takes you to build up that experience, I recommend that you follow the below guidelines while honing your belaying skills on more consistently vertical (well-bolted) routes – those that offer a clean fall.
1st bolt: spotting
When your climber steps onto the rock, you should already have enough rope in the system to ensure that she can make the clip. If the first few moves look difficult, you should spot the climber – ensuring that if she falls before making the first clip, she doesn’t hit the ground with her head. Keep the rope in your brake hand (under your thumb) even as you raise your hands in preparation to catch the climber. This way you can lower your hand into the locked off position as soon as your climber makes the clip.
2nd & 3rd bolts: rope on demand
Reachy clips are risky because they require the belayer to put out more rope than would be needed if the climber were closer to the bolt. Ideally, your climber would always clip chest-high to the draw, but sometimes that just isn’t possible. When a climber does reach for a clip while still low on the route, she can have enough rope out to put her on the ground if she falls. In this scenario, you want to mitigate this risk by giving rope quickly when it is needed for a clip and retrieving slack quickly when it’s not needed.
4th bolt & higher: keeping enough rope out
Once a climber is beyond the 3rd or 4th clip, you can start putting out more rope. Aim to always have enough rope in the system for the climber to make a clip. Whereas previously you were almost reactive in your rope delivery (giving it just before it was needed), you can now be more proactive in putting out rope – aim to always have a banana arc of rope between you and the first piece of protection. This way you’ll reduce the chances of you short-roping the climber (holding back rope when the climber needs slack) and will give a softer catch.
Catching a fall
To catch a falling climber, you have to have the rope locked off. If your brake hand is not in the locked-off position when your climber falls, you need to lower it as quickly as possible while maintaining a tight grip. Easy enough. But then there’s a lot more to giving a good catch than just locking off and stopping a fall. Short falls that stop suddenly can be pretty unpleasant in that they usually bring a climber into the wall hard and fast. A soft catch, on the other hand, slows the climber’s fall more gradually and over a longer distance. As a result of the increasingly slower fall, the climber comes into the wall more gently.
The one prerequisite for a soft catch is space for the climber to fall into (This technique is feasible only once a climber has reached a certain height – usually around bolt four or five), but you might also need to shorten a climber’s fall if he is above a ledge. When attempting to soften a catch, consider the difference between the weight of the belayer and climber. If the belayer weighs less than the climber, a longer fall will usually lift the belayer into the air, automatically resulting in a softer catch. On the other hand, if the belayer is heavier than the climber, the belayer will need to give a little jump as the rope goes tight. Err on the side of caution when experimenting with this technique for the first time. A long fall can pull a belayer up into the first bolt even when he weighs as much as his climber.
Lowering a climber
To lower the climber, keep your brake hand on the dead end of the rope and your guide hand on the live end. Slowly loosen your grip with the brake hand and let the rope run through the device – slowly and controlled. Go even slower if your climber needs to manoeuvre around roofs or other obstacles. And keep an eye on the end of the rope. You should’ve tied a knot in the end, but you don’t want to rely on it jamming in the device if you run out of rope. If you find yourself and your partner at each end with several metres still to go, you’ll have to create a mid-route lower-off point (a technique I cover in my book Gym to Crag).
Safety
Besides establishing commands, putting a knot in the end of the rope, and performing buddy checks, there are few other things you should do to ensure both your and your climber’s safety.
Closed shoes
If you’re belaying, your eyes should be on your partner and not your feet. Needless to stay, it’s pretty easy to stub your toes when belaying – doubly so if you’re getting pulled onto the wall with every fall your partner takes. Protect your toes by putting them in a pair of real shoes and not just a pair of flip flops. If it’s important to be able to get your shoes on and off quickly, you could go with a pair of canvas loafers like those made by Sanuk, although these won’t offer as much protection as a pair of approach shoes.
Vigilance
As gyms and crags get busier (and they’re all getting busier), it becomes very easy to become distracted. Many easily avoidable accidents are the direct result of climbers losing focus. It’s essential that you concentrate on the task at hand regardless of whether you’re roping up or belaying. When tying in, don’t even look up until you have finished tying the knot.
Alert the climber to a potential bad fall
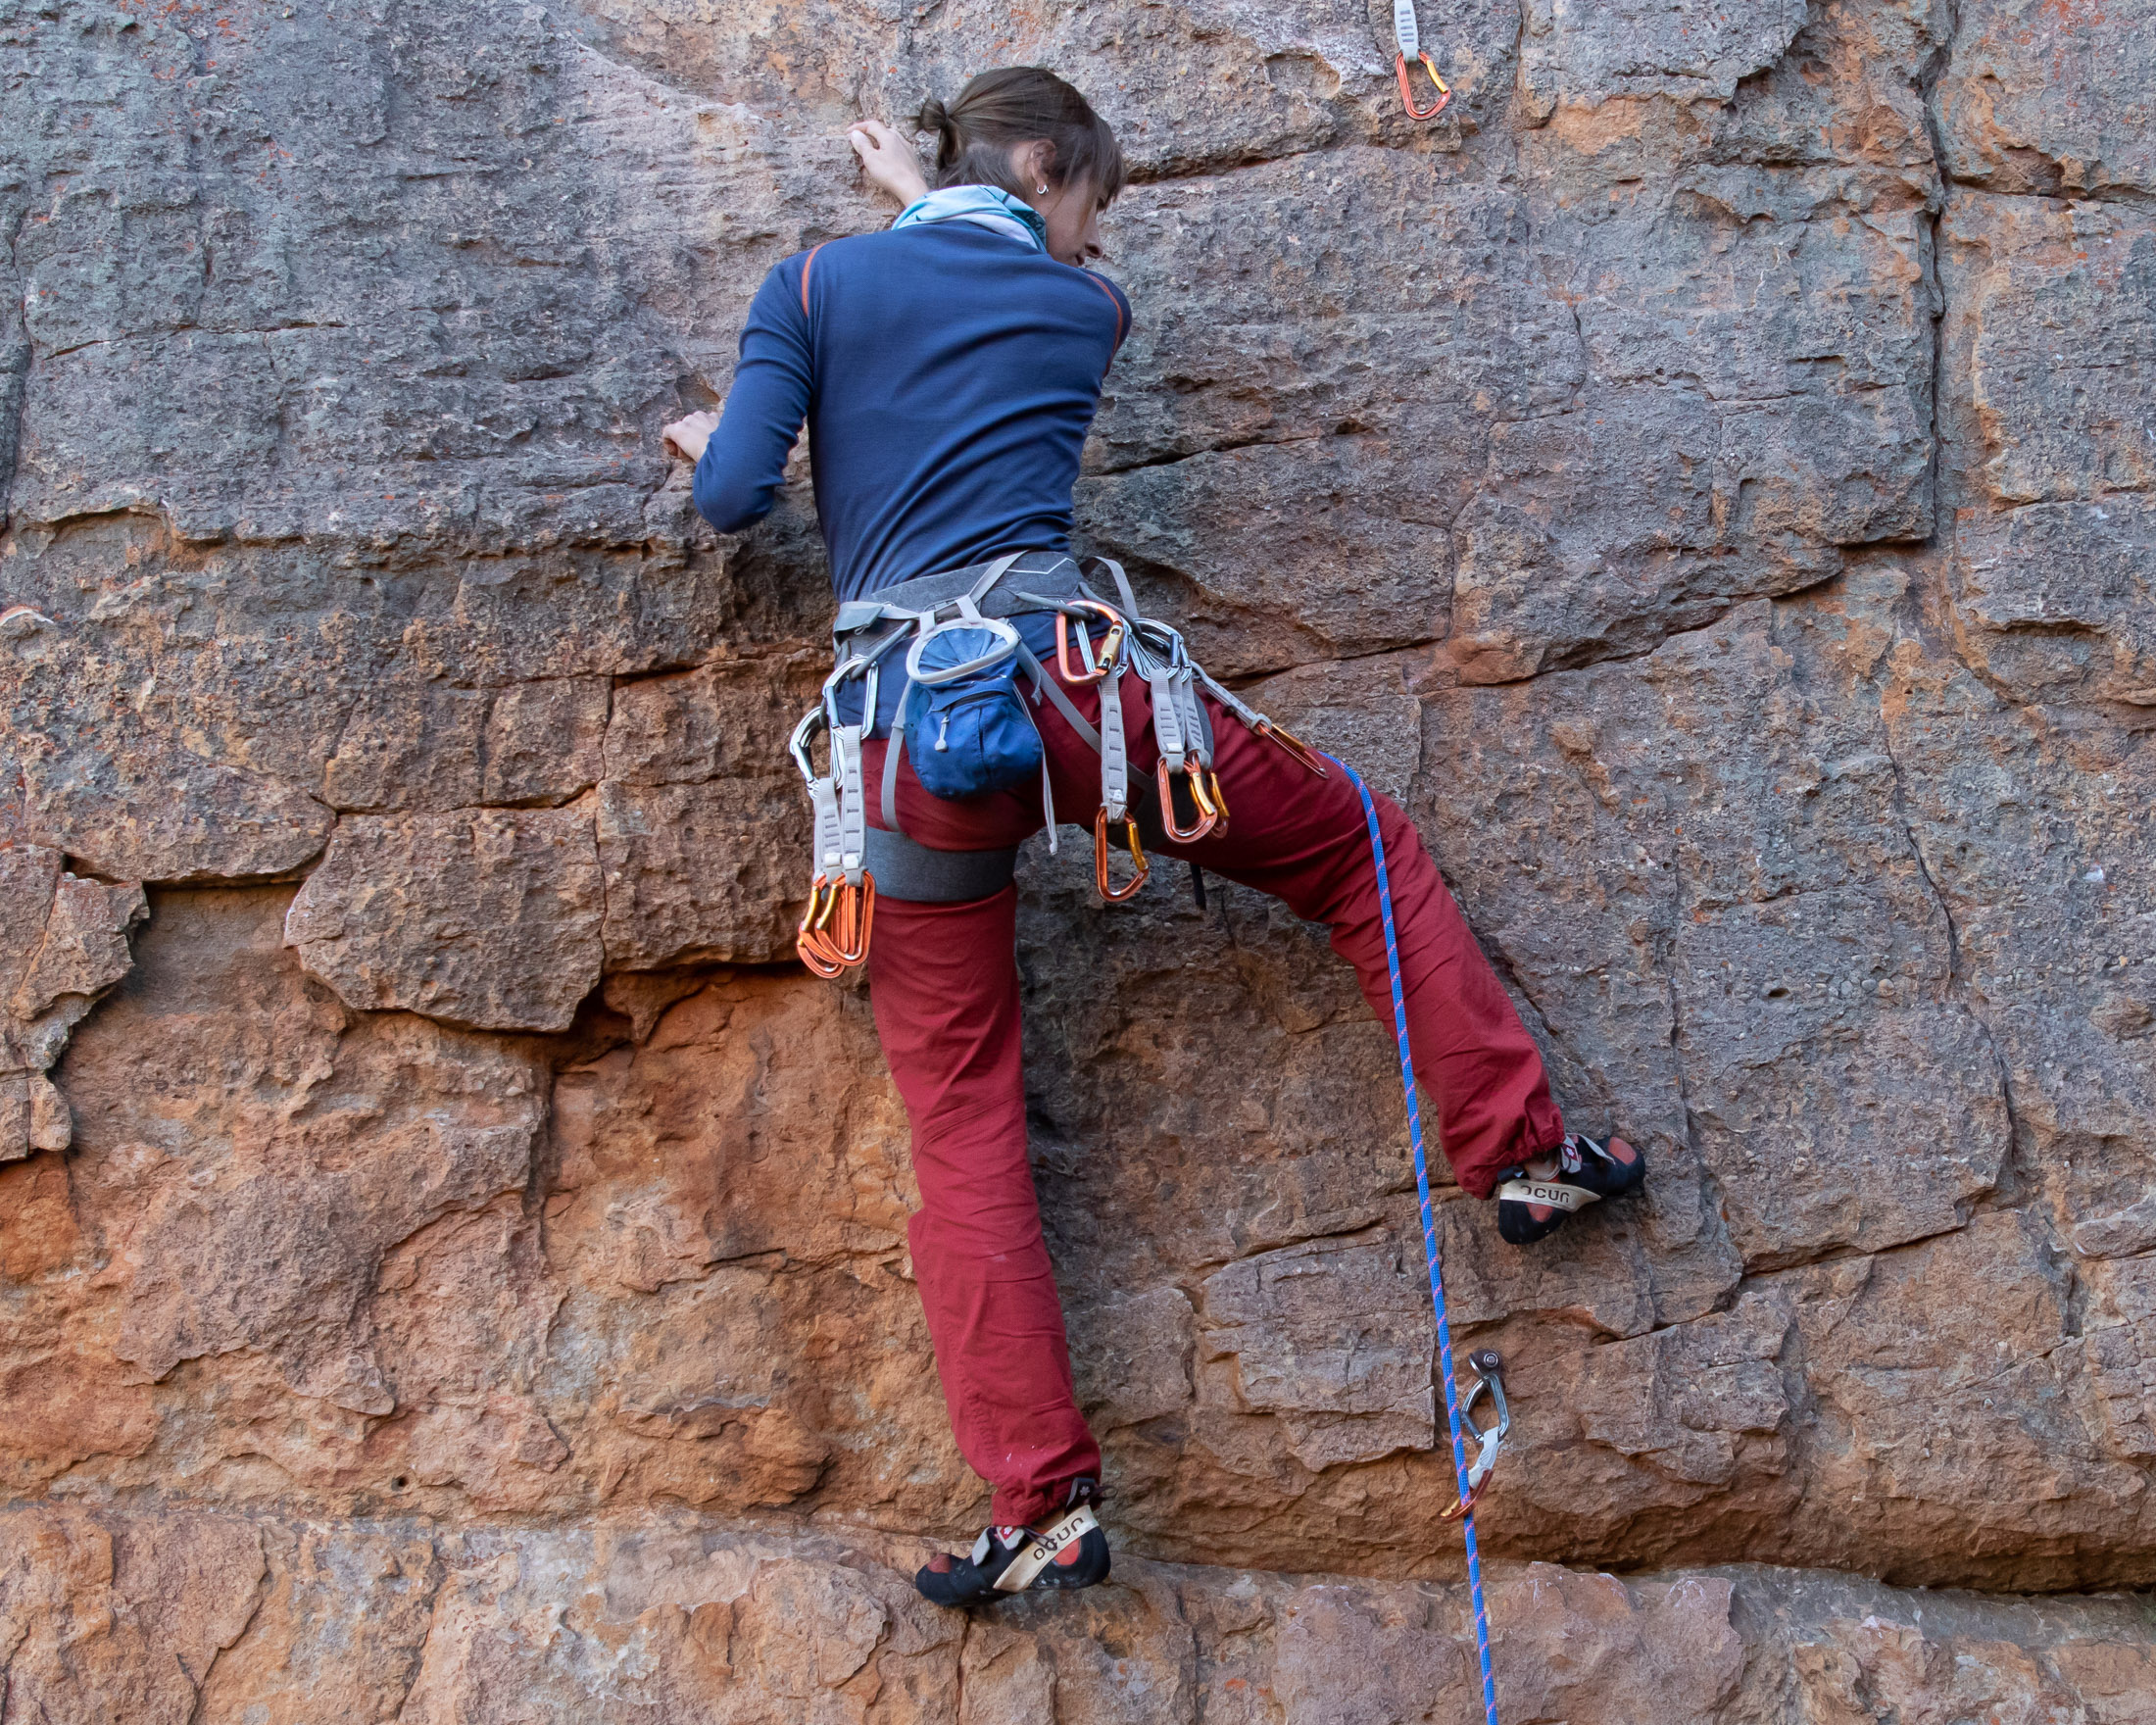
Besides knowing how to give a soft catch, a good belayer will know how to identify dangerous situations, like that in which the rope passes behind the climber's leg. If the climber fell in this position, the rope would hook in the crook of her knee and flip her upside down. If you see the rope wander behind your climber’s leg, alert them immediately. “Watch the rope” should be enough to warn them of the danger.
Assisted-braking devices
An assisted-braking device will not remedy bad belaying technique, but it will offer an extra level of security (braking automatically during a fall) when used correctly by a diligent belayer. This type of device is also very useful when working projects, as it allows the belayer to hold the climber with minimal effort. For a comprehensive guide on belay devices (complete with detailed section on assisted-braking devices) see this article.
Device-rope compatibility
Always check that your belay device is compatible with the rope diameter you intend to use. Ropes that are too thin for a specific device could cause it to slip, while ropes that are too thick could jam. It’s always a good idea to test a potential new purchase (device) with the rope you intend to use it with, if that’s possible. Some devices get a bit sticky at the thick end of their range. This is especially true of devices that can be rigged in guide mode.
Belay gloves and glasses
Belayer’s neck isn’t just uncomfortable – it can be downright debilitating if it starts to manifest as shoulder pain. To avoid giving yourself a stiff neck, use belay glasses. This special type of eyewear allows you to keep your eyes trained on your climber while facing forward with your neck in a neutral position. Belay gloves are also a good idea for cragging, especially if pitches are long. All gloves come in a pair, but for belaying you’ll only really benefit from having one on your brake hand.
Get out there
After you’ve read all this, the only way to hone your belay skills is to get out there and put to work what you have learned here. But also ask for feedback from more experienced climbers – those who know how to give a good belay themselves – and watch how they belay. With continuous and concerted effort, you will become the kind of belayer who partners look for when they go for the send.
