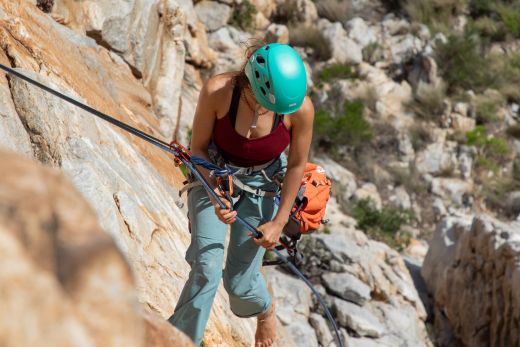
Sometimes you need to make long rappels, but you don’t need a pair of ropes to actually climb the route. In such situations, using a tag line to extend a rappel has certain advantages over double ropes. A tag line can be trailed or carried in a pack until it is needed, allowing the team to climb on a single rope, which in many cases can make things faster and more efficient. But the tag line-single rope combo is also more complicated to rappel with and is not without its limitations. Before shelving your half ropes in favor of a single rope and tag line, you will want to consider the pros and cons of both systems. In this article, I do just that – I look at the kinds of situations where a tag line and single rope offer advantages over double ropes and explain how you can overcome some of a tag line’s limitations so that you can make the most of this useful tool.
Warning: The tag line and single rope rappel is an advanced technique, and this article is intended for readers who already have significant experience in rappelling. Rappelling is one of the most dangerous activities in climbing, and it is essential that you master the fundamentals of rappelling before attempting more complex techniques like those described here.
When to use a tag line
The main advantage of carrying a tag line instead of climbing with a second rope is that it can make climbing and belaying faster and more efficient when a route doesn’t meander. The second advantage is that a tag line and skinny single rope are lighter than a pair of half ropes. This could be a priority if your aim is to go fast and light. And lastly, the single rope and tag line combo works equally well with both a tube style device and a Grigri, which many climbers prefer for belaying a leader.
On the downside, rigging a Reepschnur hitch, which facilitates the pull-cord retrieval, is more complicated than setting up a double-rope rappel, and rappelling with a tag line requires more experience and know-how to use safely. And then there are the limitations that come with not having a second rope. If your only rope is damaged, you don’t have another with which to carry on climbing or rappelling, and if – for any reason – your rope gets stuck mid-pull, you can’t prusik up the tag line. It’s too thin.
These limitations make the single rope and tag line method a poor choice for climbs where a stuck or damaged rope would result in a difficult rescue – meaning that this is not a good option for long routes in remote areas. In my experience, the tag line rappel is best reserved for more easily accessible routes, where there is no really no benefit to having double ropes. Generally, I will only use it on routes where I have to make longer rappels to get back down, but occasionally I will use it on routes that can be rappelled with a single rope.
Given how a tag line rappel is more complicated to set up than a regular single rope rappel, it is usually faster to make shorter rappels, even if you make more of them. The exception to this are climbs on which you carry a pack, since this can be used to store and dispense your rope as you rappel (much more efficiently). But even then, I recommend only using a tag line for leap-frogging rappel stations once you become very familiar with the technique and really have your systems and processes dialed in.
How to rappel with a tag line
The following seven steps explain how to perform a tag-line rappel on a single-pitch route (I will address multi-stage rappels in the next section). Make sure that you secure yourself to the anchor before you start your setup.
Step 1: Rig the Reepschnur hitch
To rig the Reepschnur hitch, thread an end of the rope through the anchor and then, leaving two feet of tail, tie an overhand knot on a bight. Next clip the loop of the overhand knot to the main strand using a locking carabiner. This will block your rope when you weight the rappel strand. Lastly, tie the tag line to the rope using a flat overhand knot. This is not an integrity knot – it’s only purpose is to allow you to retrieve your rope using the tag line. The advantage of the flat overhand knot is that it is less bulky than other knots and has a profile that encourages the knot to roll upright when it passes over an edge, reducing the chance of it snagging.
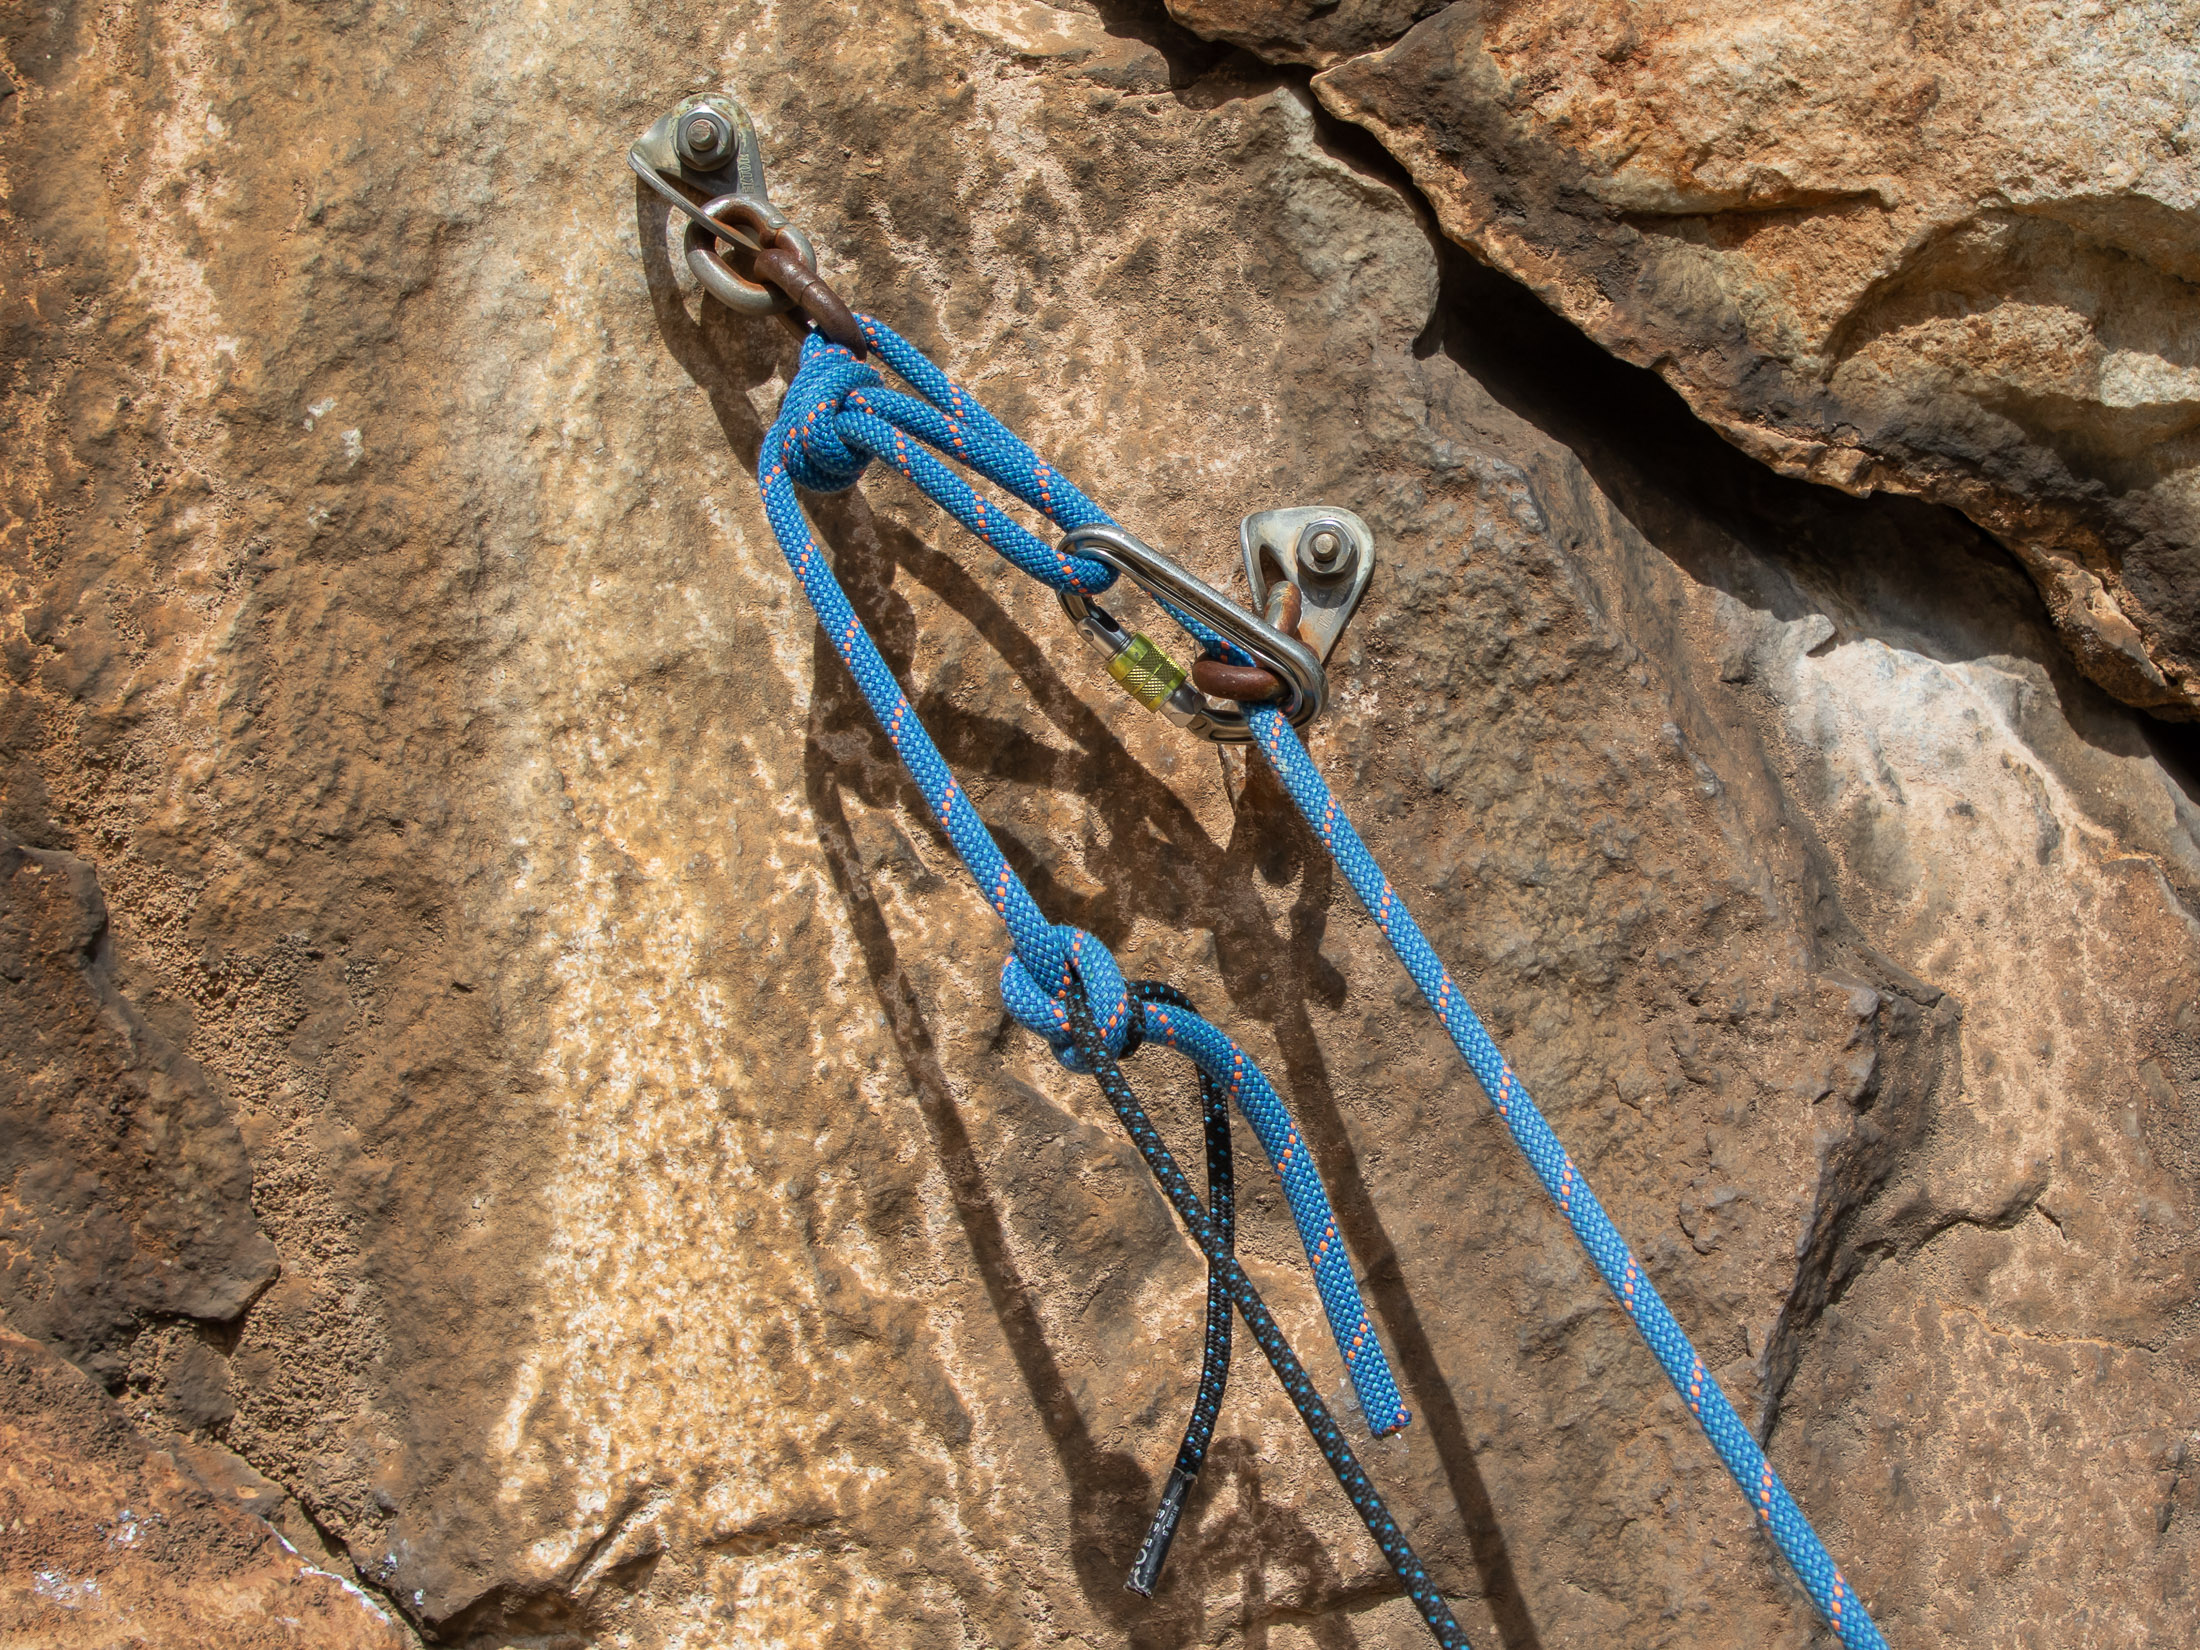
1. Thread the end of the rope through the anchor
2. Tie an overhand knot on a bight two feet from the end
3. Clip the knot to the main strand using a locking carabiner
4. Tie the tag line and rope together with a flat overhand knot
5. Dress the knot, leaving 1.5 foot tails
Step 2: Lower or throw the rope
Throwing your rope increases the chances of it tangling, and in many cases it’s better to simply lower the rope. There are, however, situations – with low angled or highly featured rock that the rope could get hung up on – where it makes more sense to toss the rope. If you decide that it would be better to throw the rope, there are better and worse ways to do this. If you’re on a ledge, it’s best to flake the rope into one or two piles (starting with the end closest to the anchor) and then coil the last 10 to 15 meters. Once the coil has been prepared (with a knot in the end), you can throw it off the cliff. The weight of the falling rope should pull the rest of the rope along with it.
Caution: Only use the above technique to throw your rope if you are on a clean ledge with no loose rock or you are certain there are no climbers below you.
Step 3: Put the tag line into your pack or saddlebag it
If you haven’t trailed your tag line up the climb, it’s best to saddlebag the cord or store it in a follow pack (clipped to a gear loop) from which you can pull it as you need it. Thin cords tangle easily, and if you try to throw your tag line, you’re almost guaranteed to create a spaghetti fest. Fortunately it’s easy enough to stash your tag line in your follow pack. Simply flake it into the open pack starting with the tail end. This way, the working end of the cord will be pulled off the top of the pile. Alternatively, saddlebag your cord using a 60cm dyneema sling (another good reason to always carry an alpine draw).
Step 4: Back up the rappel
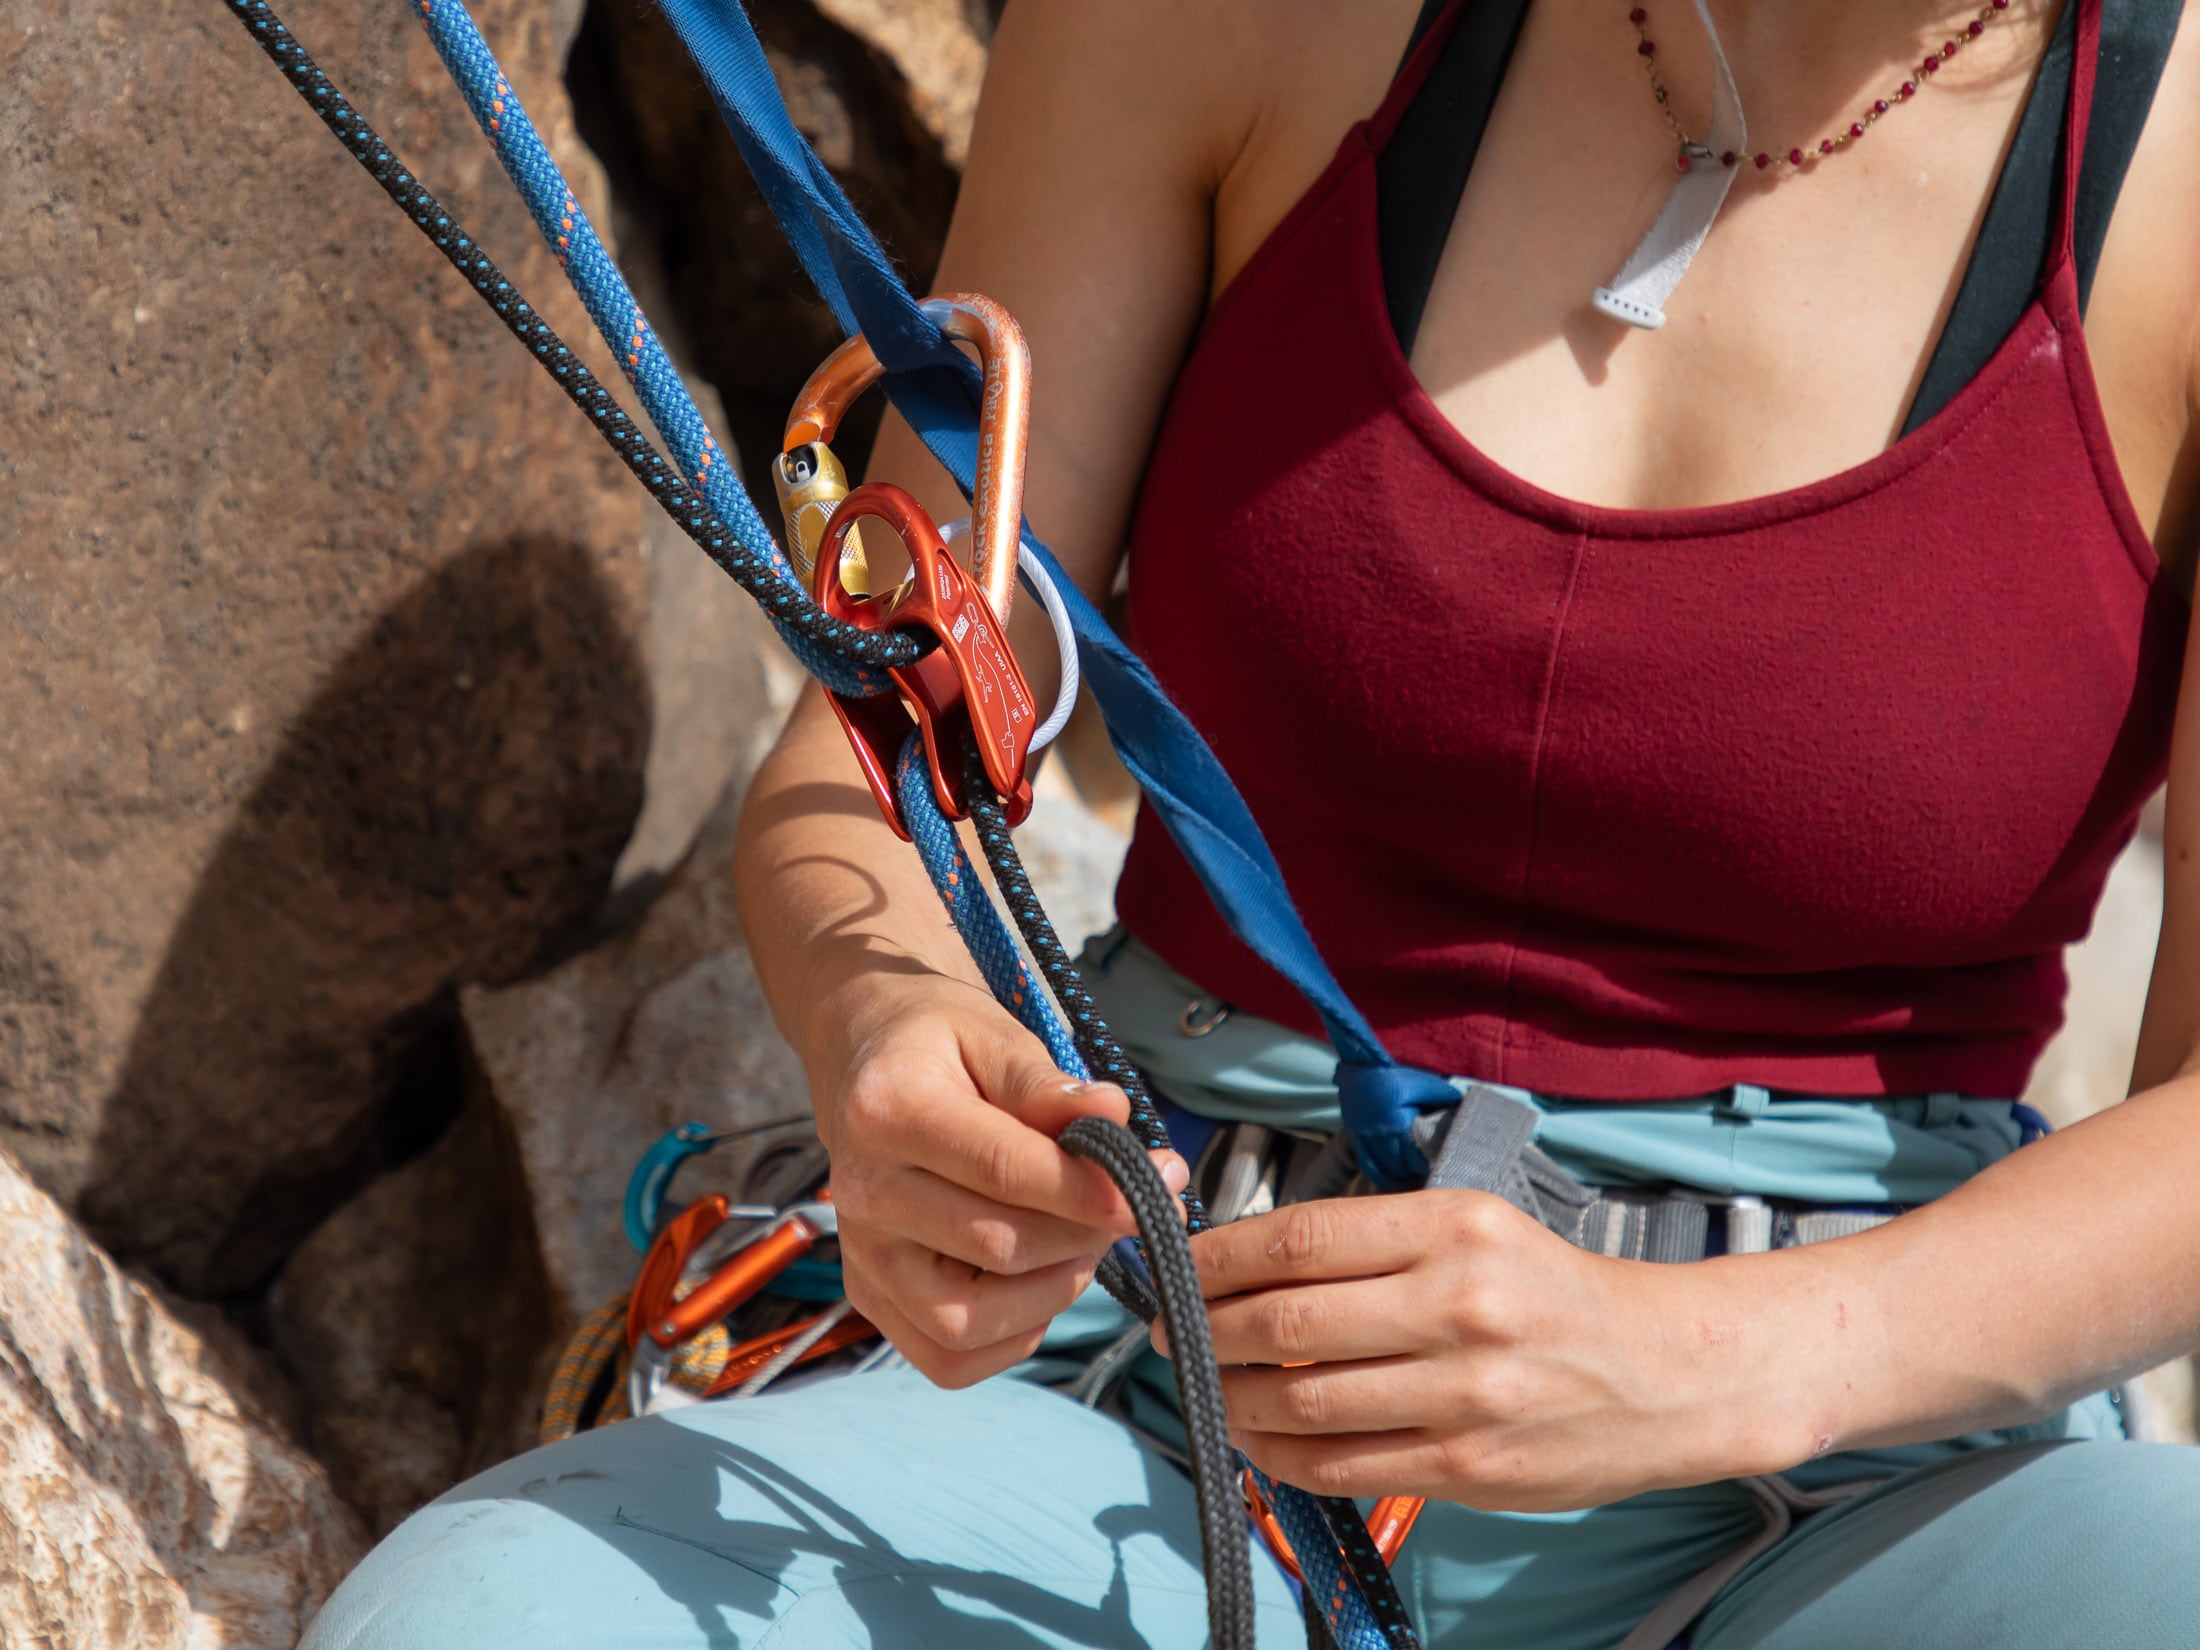
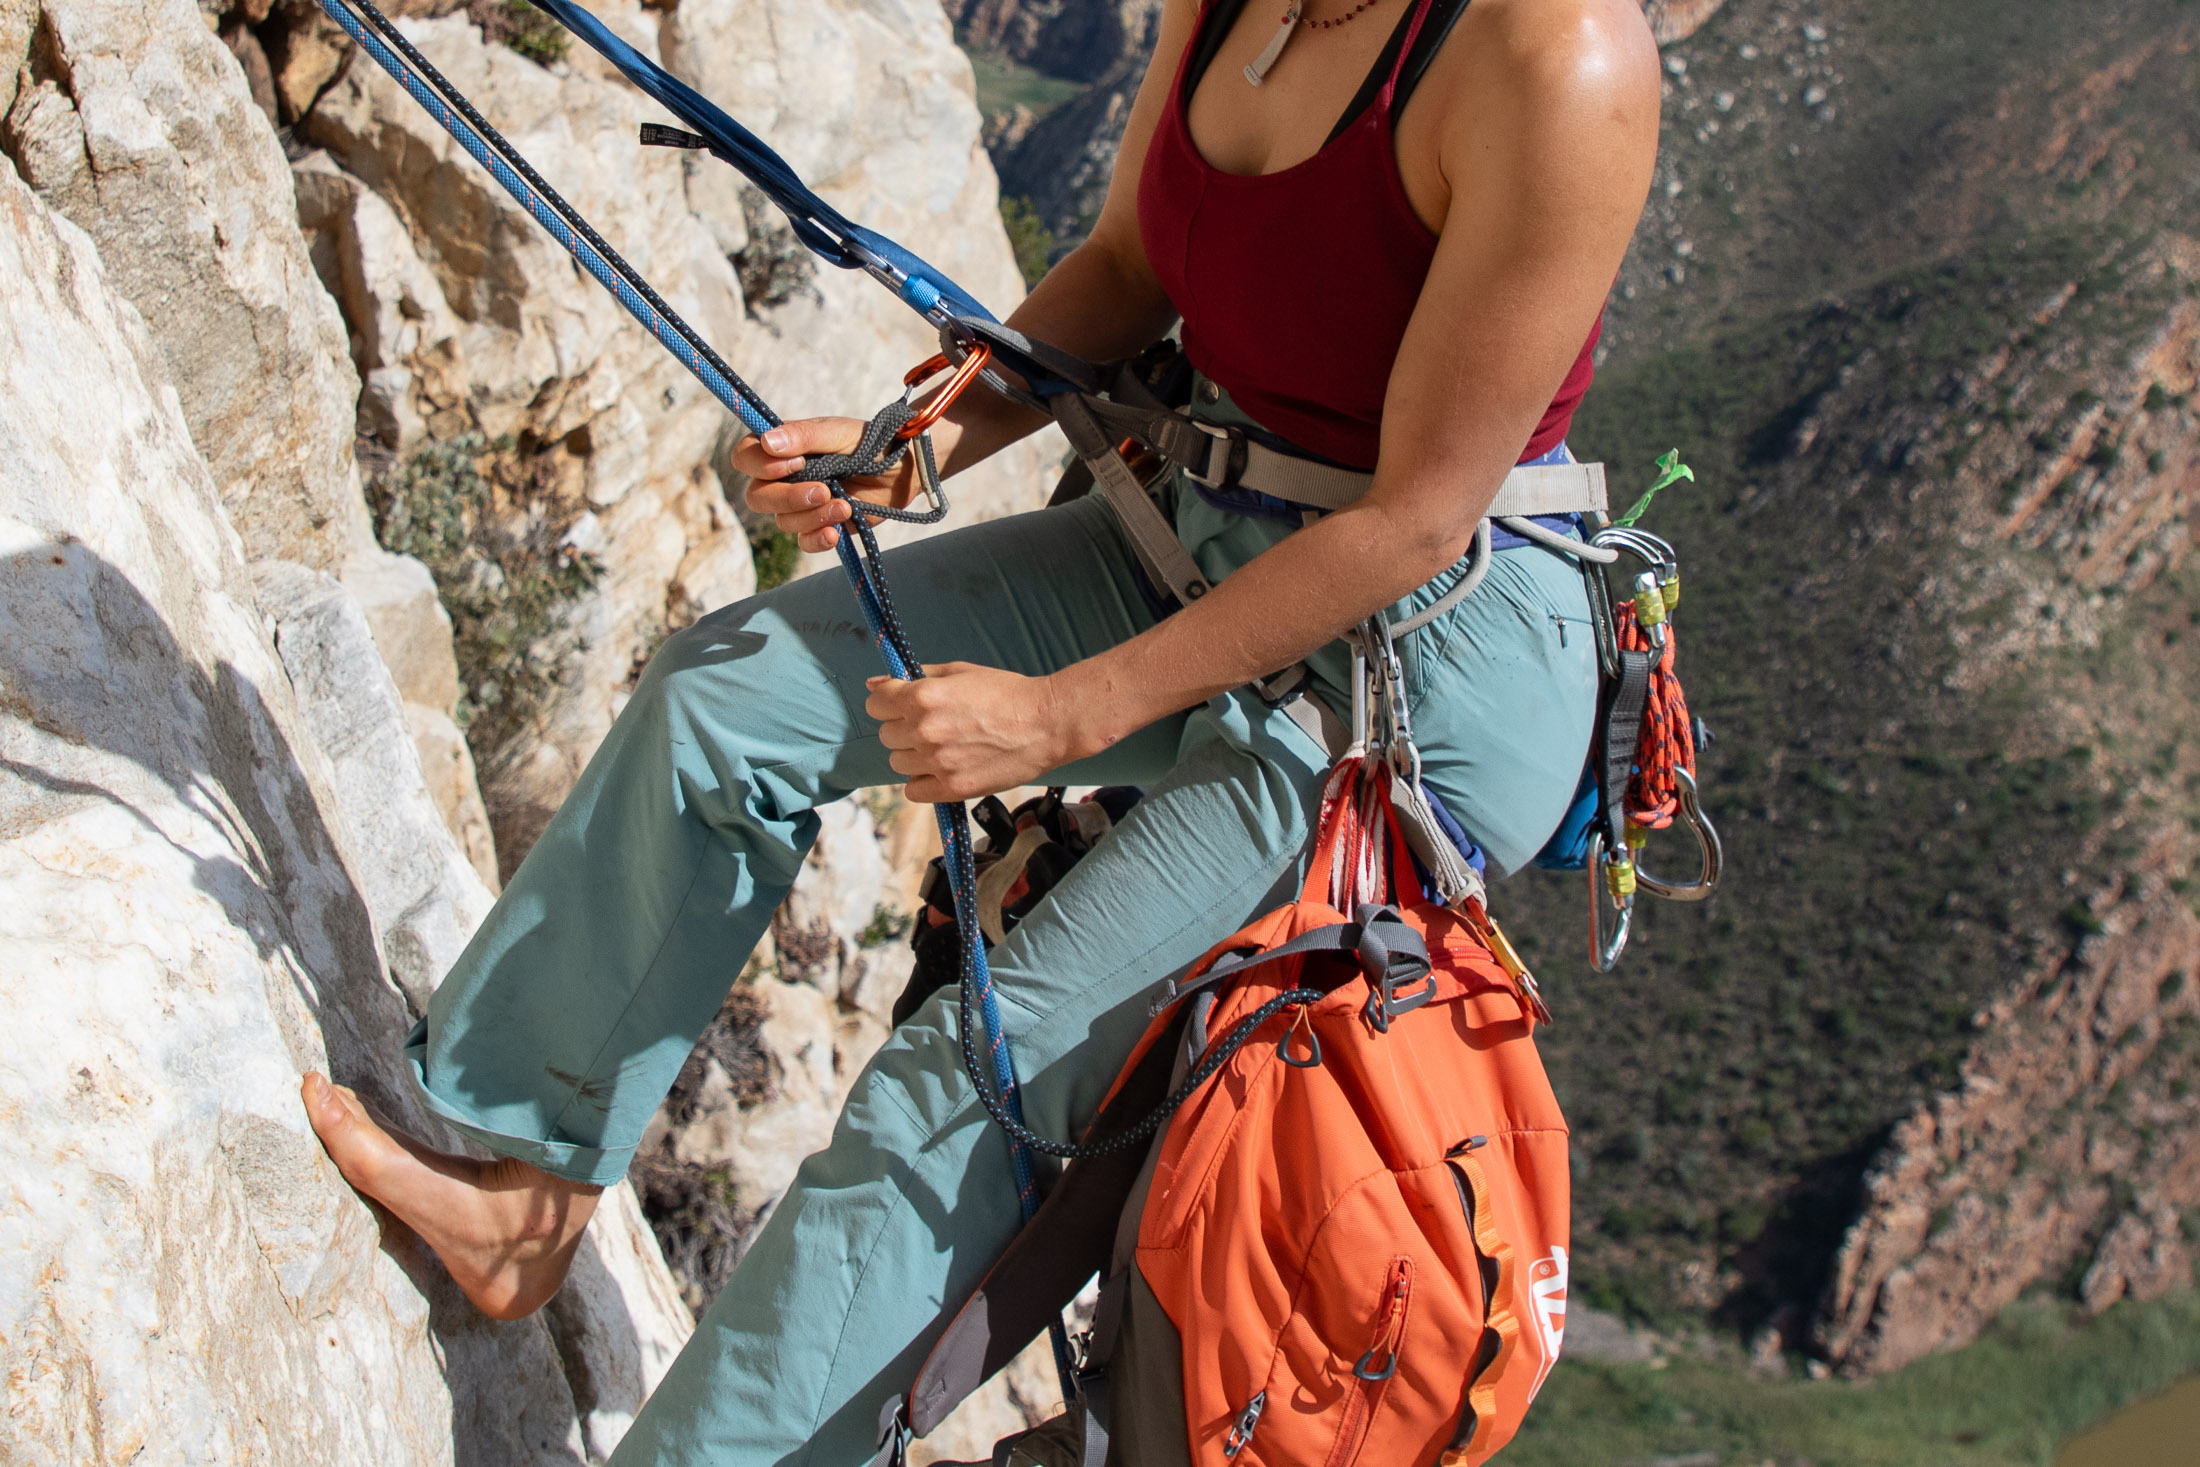
Regardless of whether you rappel with a tube style device or Grigri, it’s essential that you backup your rappel with a friction hitch on the brake strand. The steps below describe how to back up a rappel with an autoblock when using a tube (also shown in the pic above). If you were going to use a Grigri, you would only wrap the prusik loop around the rope (not the tag line) and secure it to your leg loop, not your belay loop.
- Clip the carabiner and prusik loop to your belay loop
- Position the knot or sewn part of the loop right up against the carabiner
- Wrap the prusik loop around both the rope and tag line three or four times
- Clip the end of the prusik loop to the carabiner and screw the gate closed
- Check that the wrapped strands in the hitch are neat and not crossed
Rigged correctly, an autoblock will grab the rope as soon as it is put under tension, and release when slid up the rope – you might need to experiment with the number or wraps to find the setup that works best. I recommend rigging this backup before you set up your device so that the friction hitch can be used to hold the rope while you try to feed the rope into your belay device – something that can be difficult if you also have to contend with the full weight of the rope.
Step 5: Set up your belay device
With your backup in place, you can now set up your rappel. This process can differ depending on whether you’re going to rappel with a tube style device or a Grigri.
Tubular belay device
If you are going to rappel with a tube, you need to extend the device just as you would when setting up a regular-double strand rappel. A shoulder-length nylon sling is particularly useful here, as it can be used as both an extension and lanyard. To use a sling this way, girth-hitch it to your tie-in points, put an overhand knot in the middle of it, and secure your device behind the knot. The section of sling beyond this will act as your lanyard.
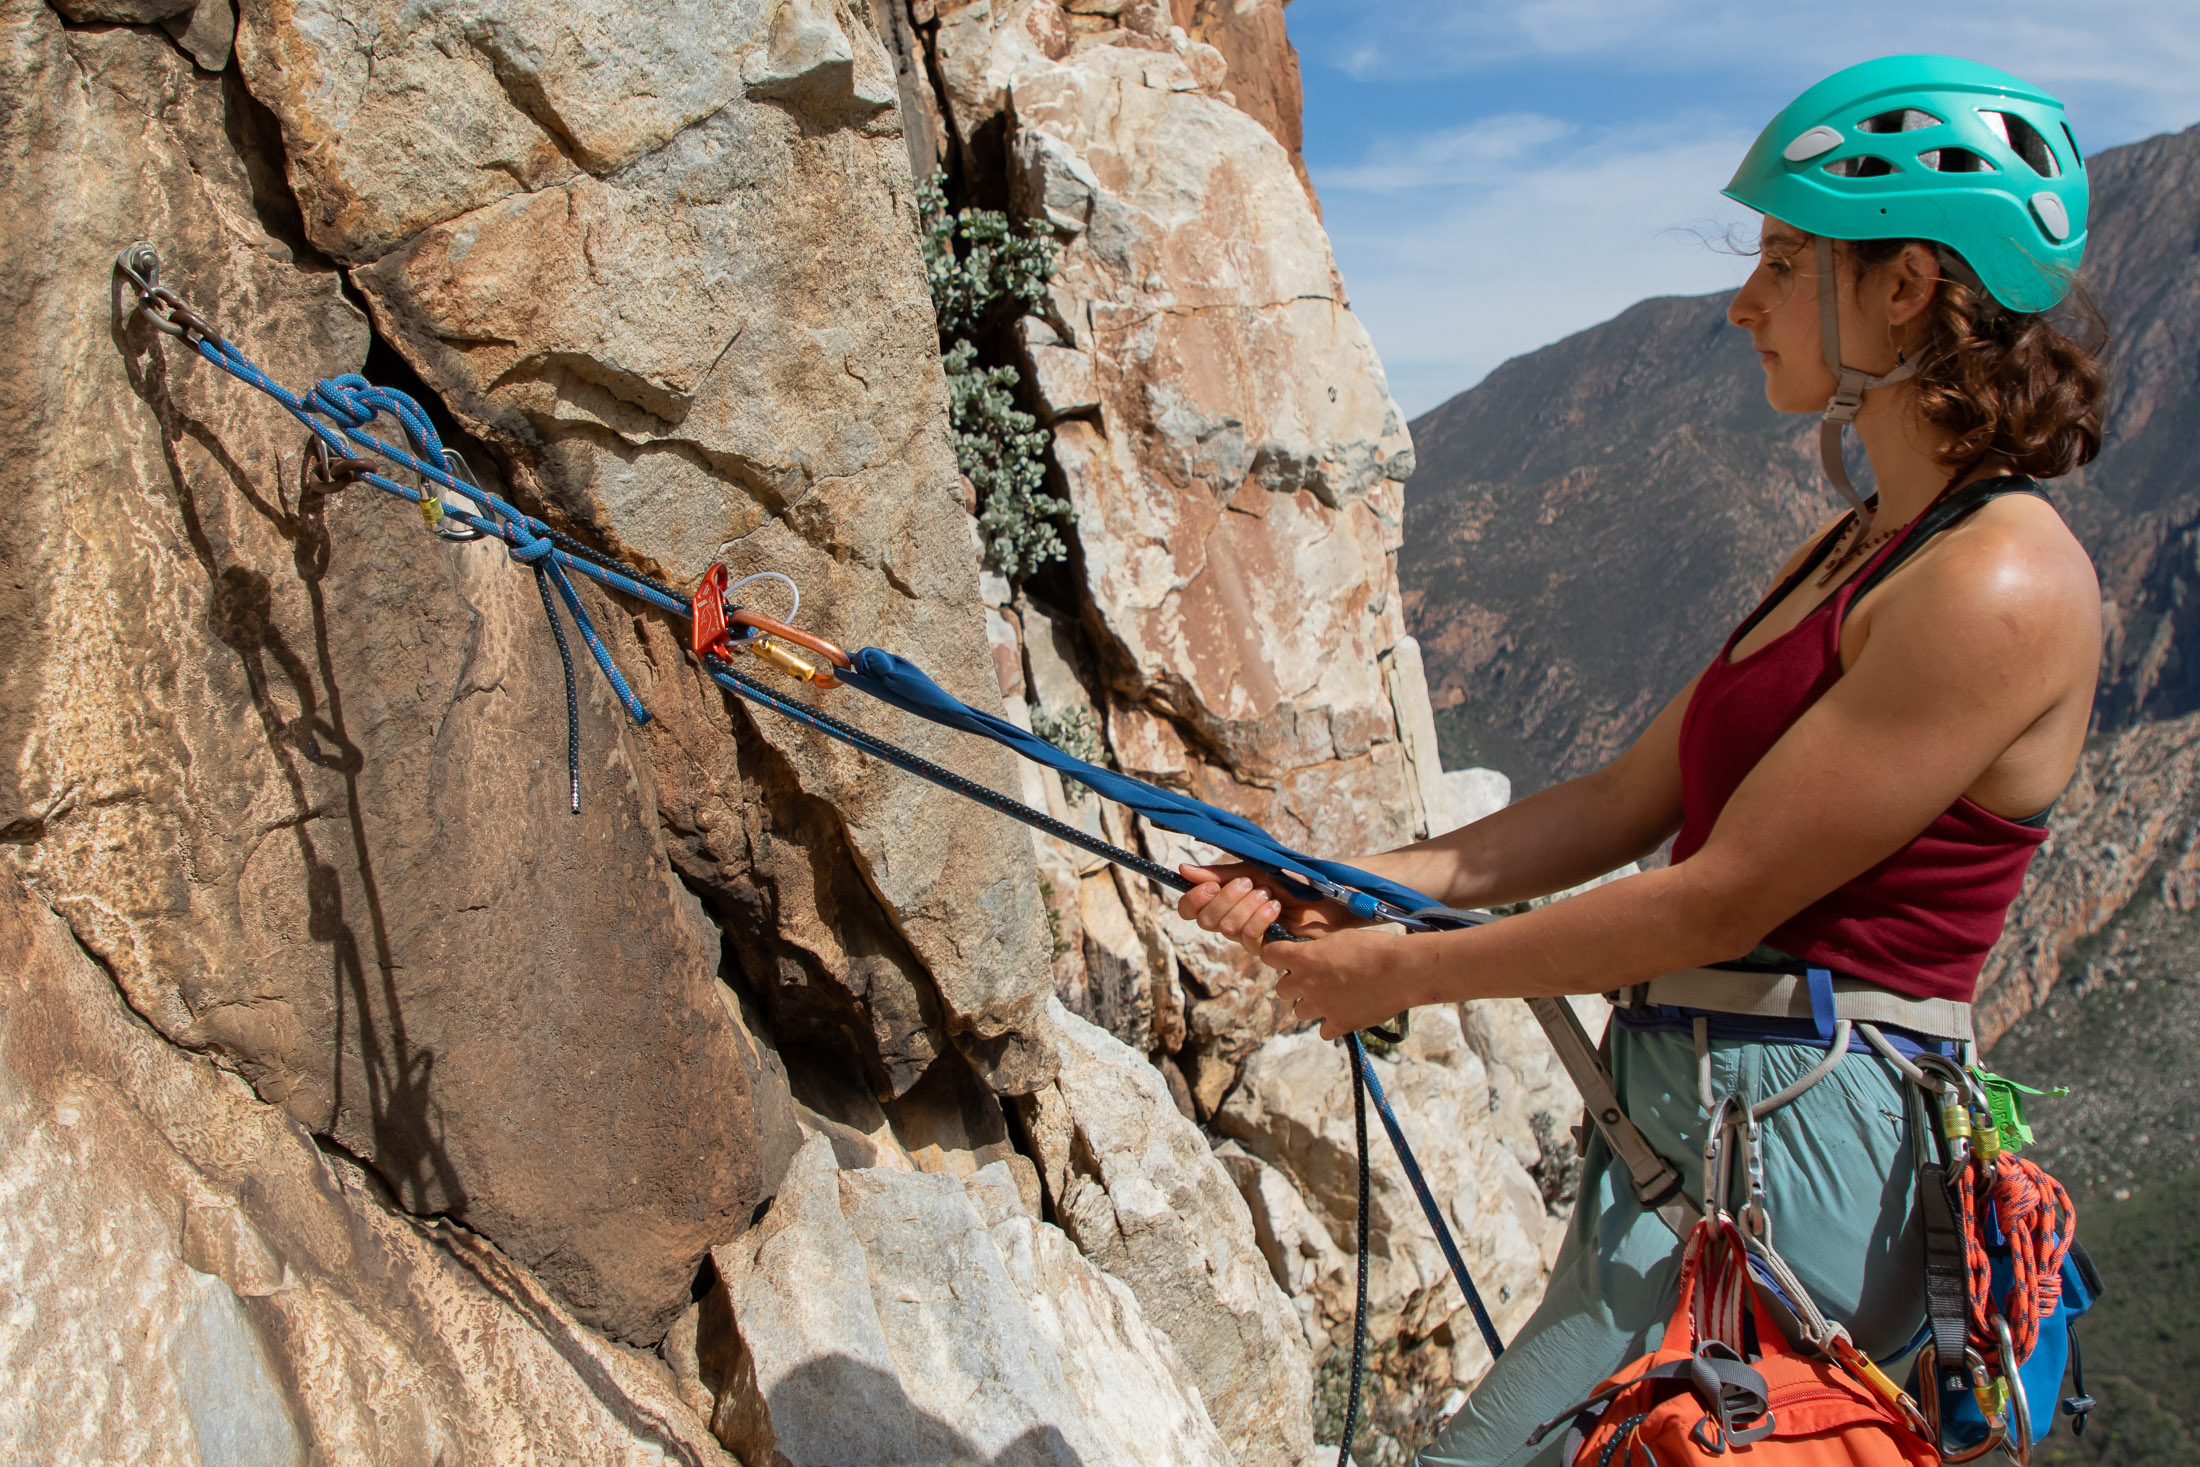
Finally, you can load the two strands into the device. Even though the tag line is not weight bearing, I recommend running it through the device as well. That way the tag line will line up properly with the autoblock from where it exits the device. Keeping the cord tensioned will also make it easier to control as it won’t float all over the place.
Grigri
Setting up a Grigri is significantly simpler than setting up a tube. A Grigri can’t be extended, and you can’t run the tag line through it. So you will simply load the rope into the device and secure it to your belay loop just as you would if you were going to belay with the device. Of course, your tag line now isn’t attached to anything. That’s okay if you have saddlebagged your rope or are storing it in a pack. But if your tag line is hanging below you (as might be the case if you trailed it), you should clip it though a carabiner somewhere on your harness so that it doesn’t stray too far.
Top tip: If you rig your Reepschnur hitch so that the knots are to the left of the anchor, you can clip the tag line to your left leg loop. This will keep the tag line out of the way of your brake hand, which is normally kept against one’s right thigh.
Step 6: Check and test the system
Over the years there have been several rappelling accidents that could have been avoided if those involved had tested their setup before committing their lives to it. To test your system, you need to get your weight off your lanyard and onto the rope. And to do that, you need to reduce the amount of rope between the device and the anchor. If you’re standing on a ledge, this might require you to only stand taller or go onto your toes while you pull rope through the device.
As you do pull rope through the device, slide the autoblock higher so that it captures the rope you’ve gained. Then, when you sit back in harness to weight the system, the autoblock and device should hold you in place (There should be at least a little slack in the lanyard, showing that it is indeed the system and not the lanyard that is supporting you). Lastly, double check that your carabiner gates are closed and that everything is properly connected.
Step 7: Unclip from the anchor and rappel
Once you’ve tested the system and double checked everything, you can unclip your lanyard from the anchor and start to rappel. As you descend, keep an eye on what's below you and on what your tag line is doing. If it comes out of the saddle bag or pack with a knot in it, you should stop immediately and untangle it while it is still within reach. Likewise, if the tag line is hanging below you, you want to keep a look out for tangles below and deal with these while you are still above them. The same goes for the rope.
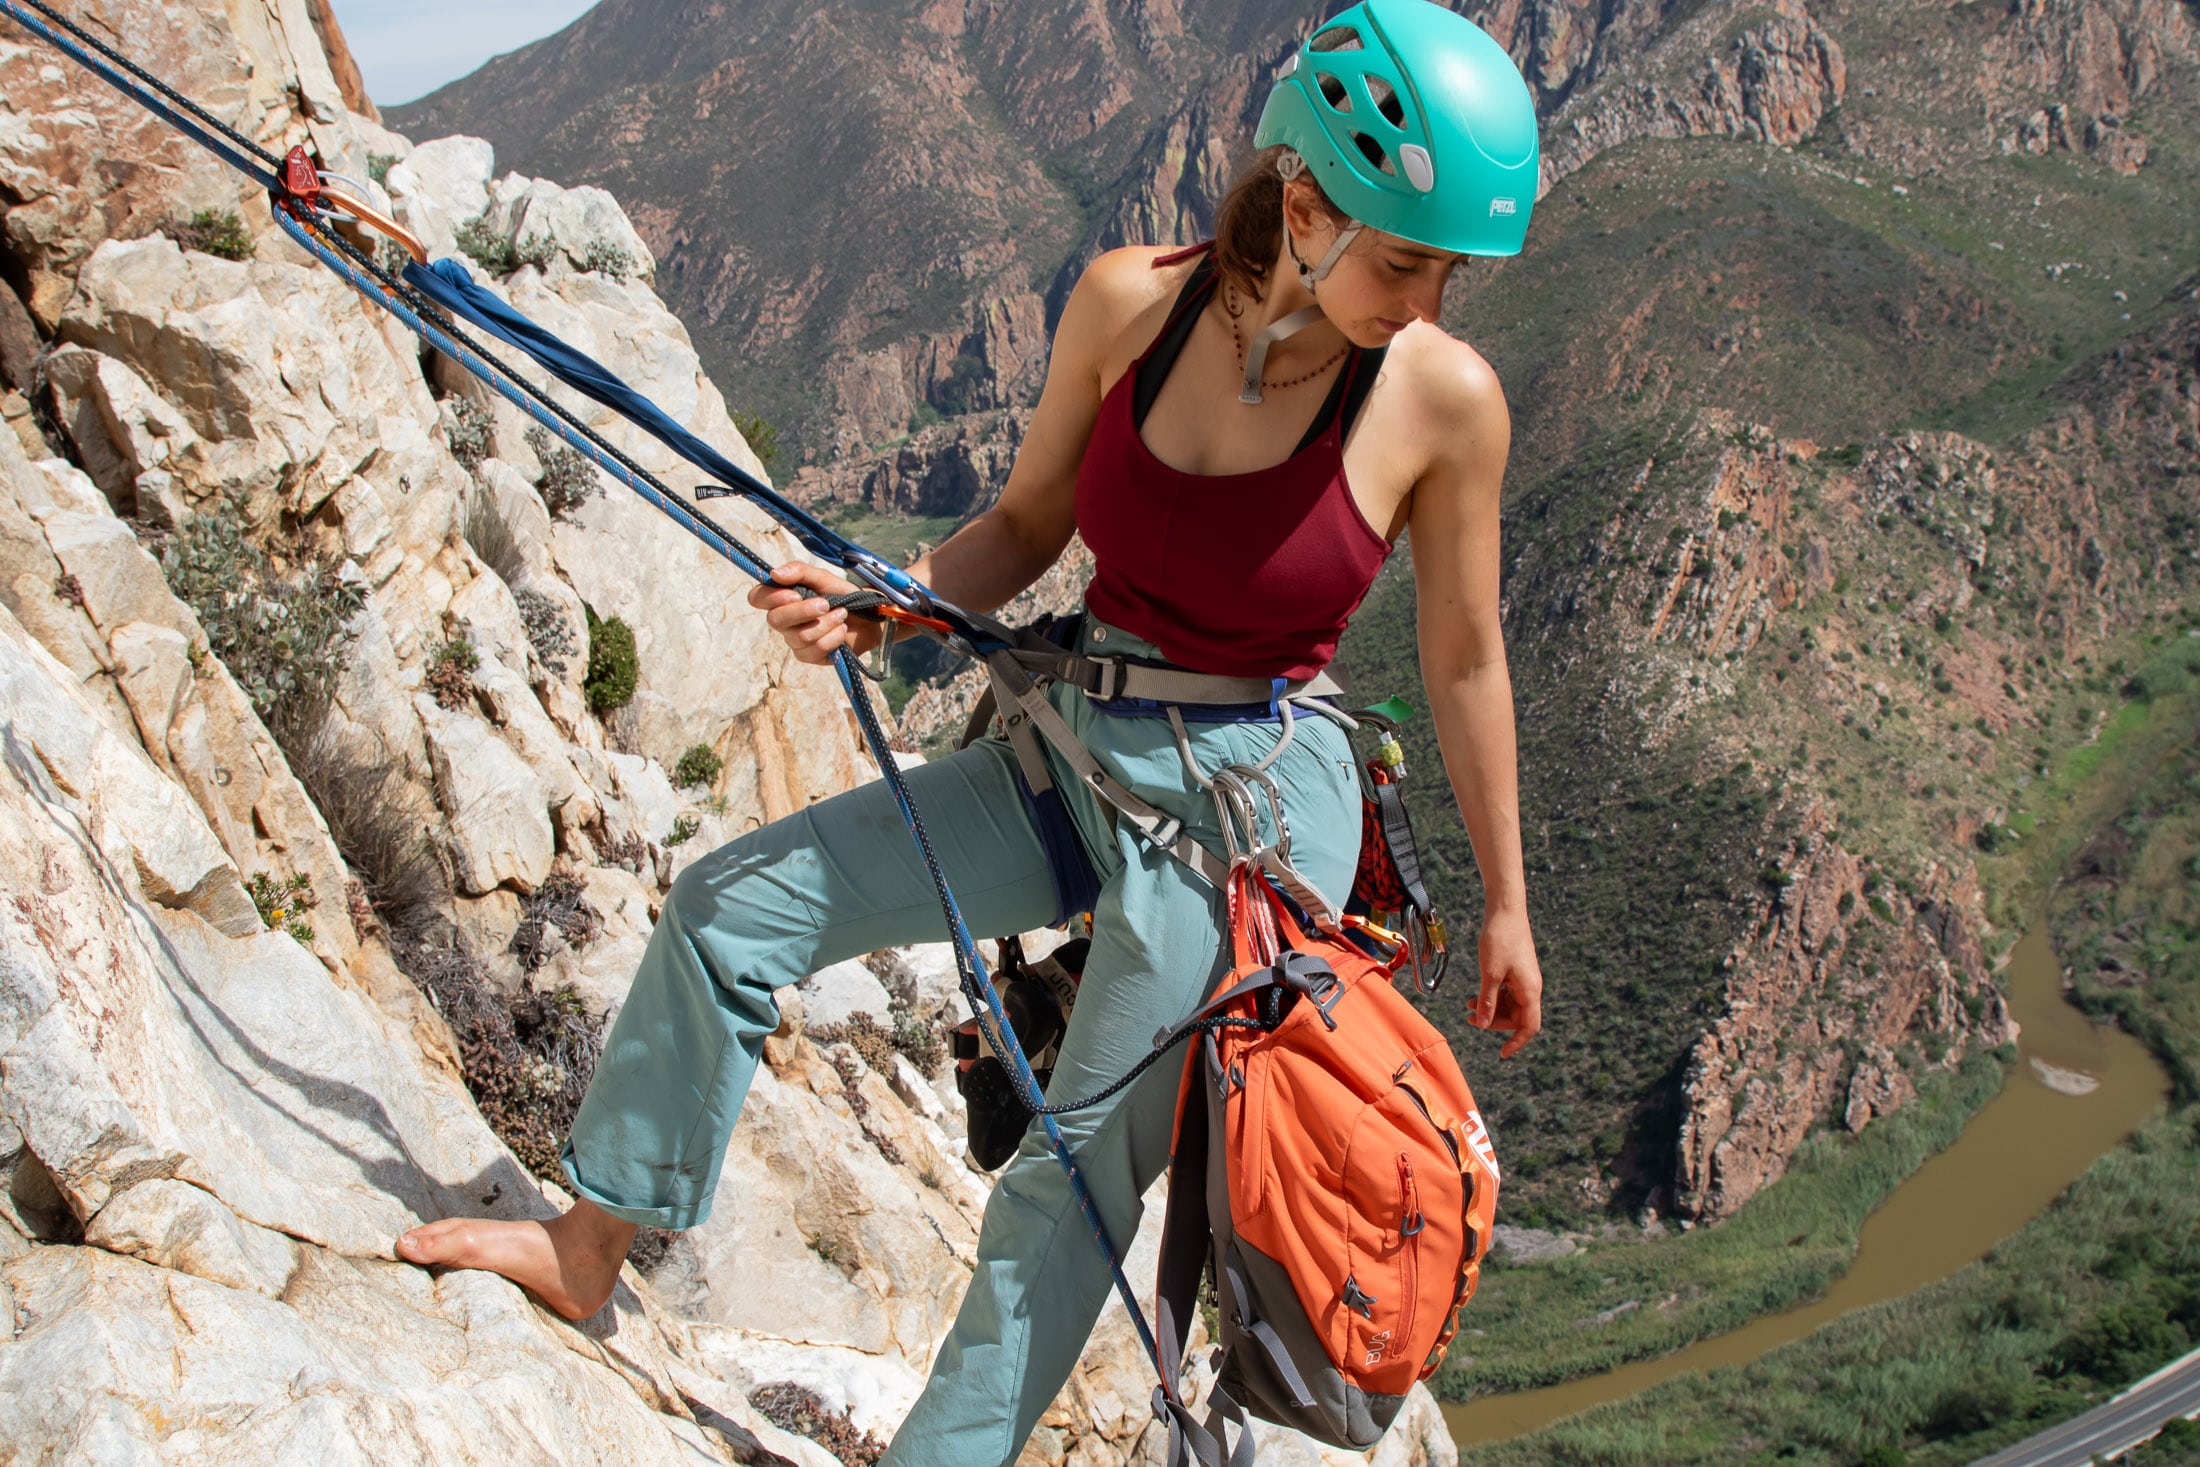
There’s one more thing you need to be aware of when you rappel. Twisting. If you rappel into open space and spin, you need to keep track of how many times and in which direction you spin - you will need to reverse those twists once on the ground. Even strands of a similar diameter are harder to pull when twisted together, and a tag line twisted around a single rope can be almost impossible to pull.
On the ground
Once you and your partner are on the ground and you have reversed any twists, retrieving your rope is as easy as pulling the tag line. I say easy, but a 6mm cord is a lot harder on the hands than a 9mm single rope. And for that reason, I strongly recommend using gloves when rappelling with a tag line.
What to use for a tag line
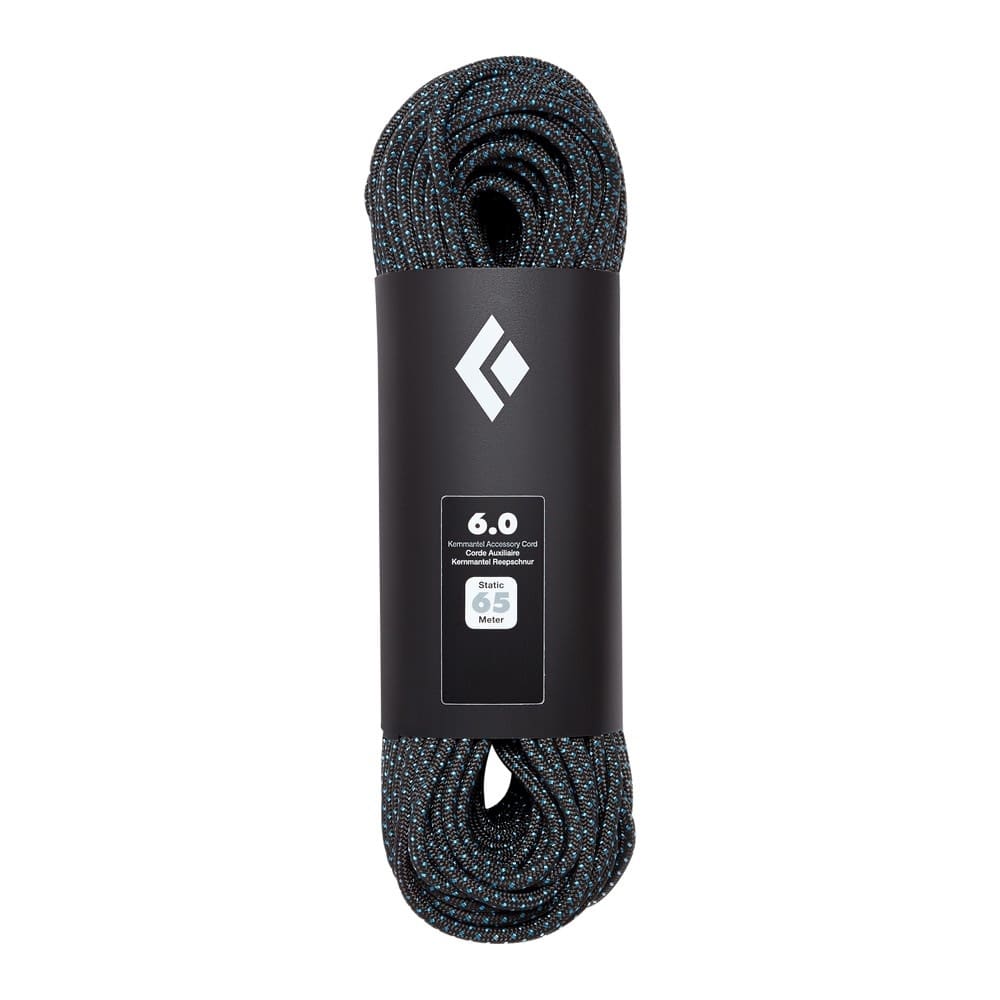
Tag lines are typically made from 6mm or 7mm nylon cord. You can either buy the desired length of accessory cord off the spool or get a cord like the Black Diamond 6mm static line, which is made specifically for this purpose. In terms of length, you’ll need 65 meters for a tag line that will be paired with a 60m rope and 75 meters for a tag line that will be paired with a 70m rope. Why the extra length? Nylon cord is static and, unlike your dynamic rope, doesn’t stretch. Tag lines need to be longer than the ropes that they are used with so that they are the same length when the rope is weighted.
Learn more
Rappelling is a broad topic, and there is far more to this skill set than could fit into one or even two articles. That’s why I have written separate guides on how to rappel with a Grigri, how to rig an impromptu rappel anchor and advanced rappelling techniques. Learn the techniques described in all of these, and you’ll have many more tools at your disposal when you have to make challenging rappels.
