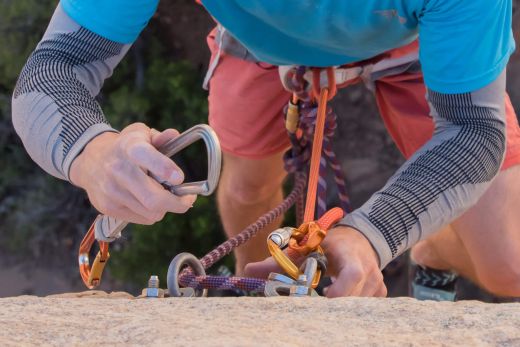
If you have climbed on rock even just a few times, you know that before you can remove your gear and lower off a route, you have to redirect your rope through the anchors themselves. This process is called cleaning. It’s one of the most important techniques a new climber has to learn and one that you’ll practise thousands of times over the course of your climbing career. In this article, you’ll learn how to clean a route safely and efficiently. First, I’ll describe a technique for cleaning anchors large enough to pass a bight through, and then I’ll go on to explain how you can clean anchors that are too narrow for anything more than a single strand of rope. It’s good to know both.
When to clean and lower off
There are two ways you can descend a route on a rope: lowering off and rappelling. Lowering off is your best option when the anchors are equipped with replaceable hardware, like quicklinks, or hardware that wears slowly, like rings. Anchors equipped only with rounded bolts should be rappelled off to avoid putting wear on hardware that will be harder to replace when worn. Lower-off anchors are typically found on sport routes and popular trad crags, while rappel anchors are the norm on less trafficked trad routes and multi-pitch routes.
Communication & Safety
Whenever you perform a task that requires you to break the connection between you and your belayer, it’s important that you communicate clearly, exercise sound judgement, and practise foresight – especially if you have to do something that doesn’t follow an established protocol.
Plan of action
Many cleaning-related accidents are the direct result of miscommunication between climber and belayer. Don’t wait until you’re at the anchors to tell your partner what you’re going to do. It can be almost impossible to communicate clearly with your partner when you’re over 20 meters apart (less if you’re out of sight or there is a breeze blowing).
You should both have a clear idea of how you’re going to clean the anchors before you even leave the ground.

It might not even be obvious to your partner that you’re going to lower off – rappelling is also an option in many cases. If this is the first time you’re climbing together, you’ll need to agree on how you’re going to descend, what protocol you’re going to follow, and which commands you’re going to use. It would also be helpful to know what kind of hardware you’ll find at the top anchors as this will determine whether you will use the first technique or second technique.
Aim for redundancy at every stage
You should never rely on a single bolt when cleaning or lowering off. Some people might say “But we often rely on a single rope as a connection and never use more than one belay carabiner to secure the device to one’s harness.” The difference is that these connections (the rope and carabiner) can be visually inspected for damage.
You can’t look at a mechanical bolt or even some glue-in bolts and say with certainty that it’s structurally sound. Corrosion works nefariously beyond the hanger of an expansion bolt, and a shoddy glue job can prevent the chemical agent from hardening properly. But, besides that, you should always strive for redundancy when it is possible – especially when untying or tying into the system.
Only run the rope through rounded, rope-friendly hardware
You should only run the rope through rounded hardware – usually these will be the rings or maillons attached to the bolts. In some cases a single ring will be attached to two bolts with chain or maillons. In this setup, you can redirect your rope through the single ring as it has a redundant connection to the two bolts. But never run your rope through a bolt hanger. These are sharp and can damage or even cut a rope.
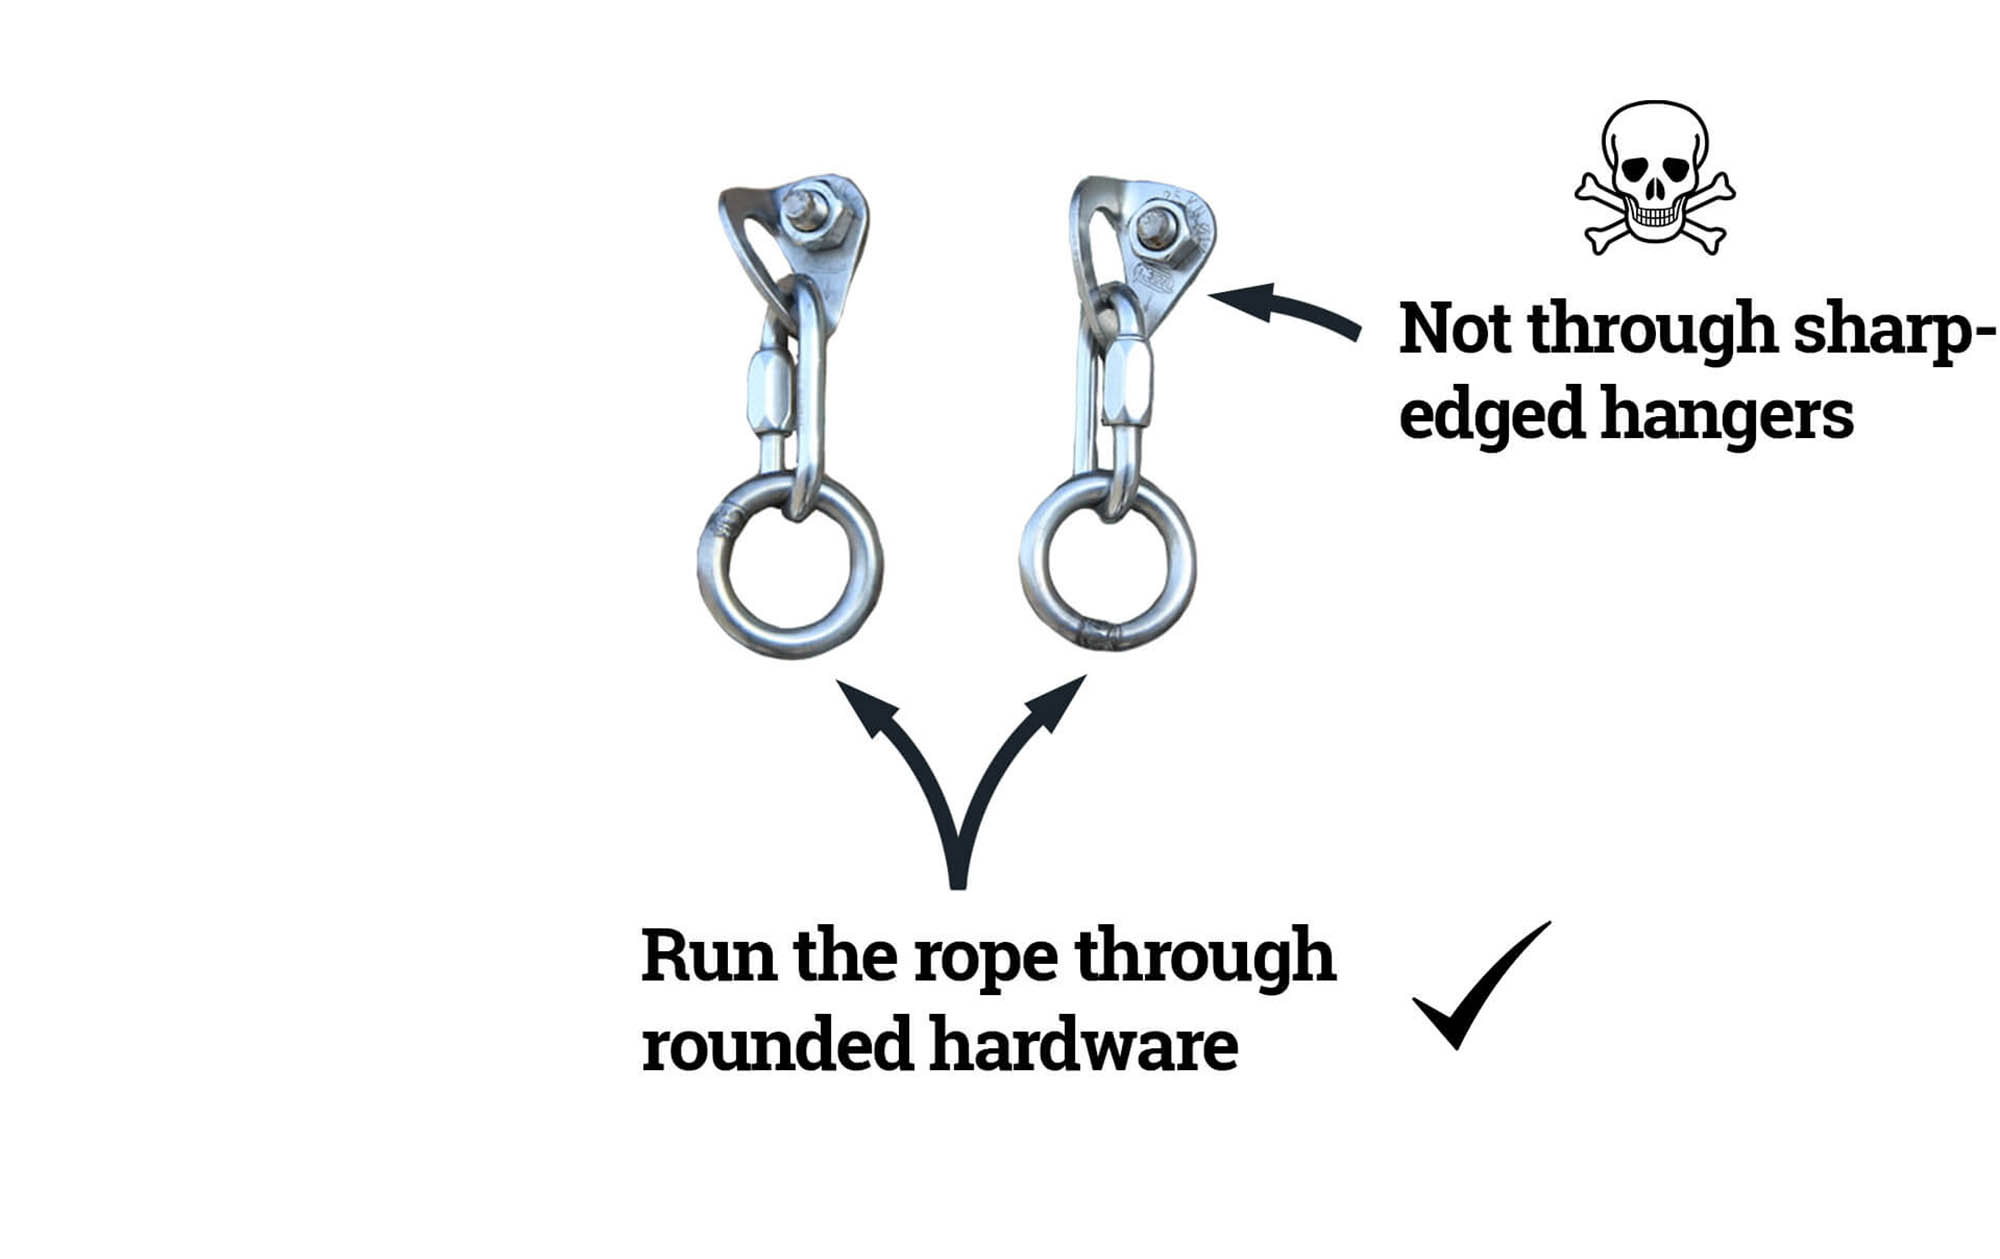
On some routes, you will come across permadraws. You don’t need to clean these. You just clip the carabiners and lower off. You’d think this is obvious enough, but I have seen new climbers clean gear designed to make cleaning unnecessary. A quick side note on permadraw top anchors: permadraw carabiners don’t rotate like rings, so they only wear in one place, which speeds up the rate of wear. Be wary of carabiners with deep grooves in them.
Think before you unclip anything
Every year there are several accidents that could have been avoided if the victims had only practised a little foresight. Before you unclip or unite anything, think about how many connections you would have left and what could happen next. Before you unclip your lanyard (sling, quickdraw or PAS holding you to the anchors), always weight the rope to check that the rope holds you and that you are properly in the system. Be especially vigilant when you’re tired, as this is when you’re most likely to make a mistake.
Don’t say “Off belay” when you’re going to lower off
Do not use the command “Off belay” unless you’re going to rappel. When given this command, many climbers will take you off belay (unload the rope from the device) and walk off. That is what the command “off belay” actually means – I don’t need you anymore. There is no reason to go off belay when cleaning, and asking your partner to go off belay only increases the risk of miscommunication, which in this case could be disastrous.
“Slack” You want more rope
“Take” You want the belayer to put tension on the rope
“Lower” You are ready to be lowered
If you and your partner agree on a protocol while you’re still on the ground (You should have), you don’t need to give them a step by step account of what you’re doing. Communication is best when it’s simple and kept to a minimum. Only tell your partner what you want them to do. Start every instruction by shouting your partner's name. That way both your partner and other climbers know who the instruction is for. It’s not always clear who is shouting instructions.
Technique #1: anchors wide enough to take a bight
You can use this technique only when an anchor's terminal hardware is large enough to thread a loop of rope through. Despite this limitation, this technique is preferred for three reasons:
* It involves fewer steps than alternative techniques
* It requires minimal gear: a locking carabiner and an additional quickdraw
* The climber is always connected to the belayer by a rope that passes through the anchors or quickdraws attached to the anchor.
What you will need
For this method, you will need an extra quickdraw and a locking carabiner.
Step 1: Secure yourself to the top anchors
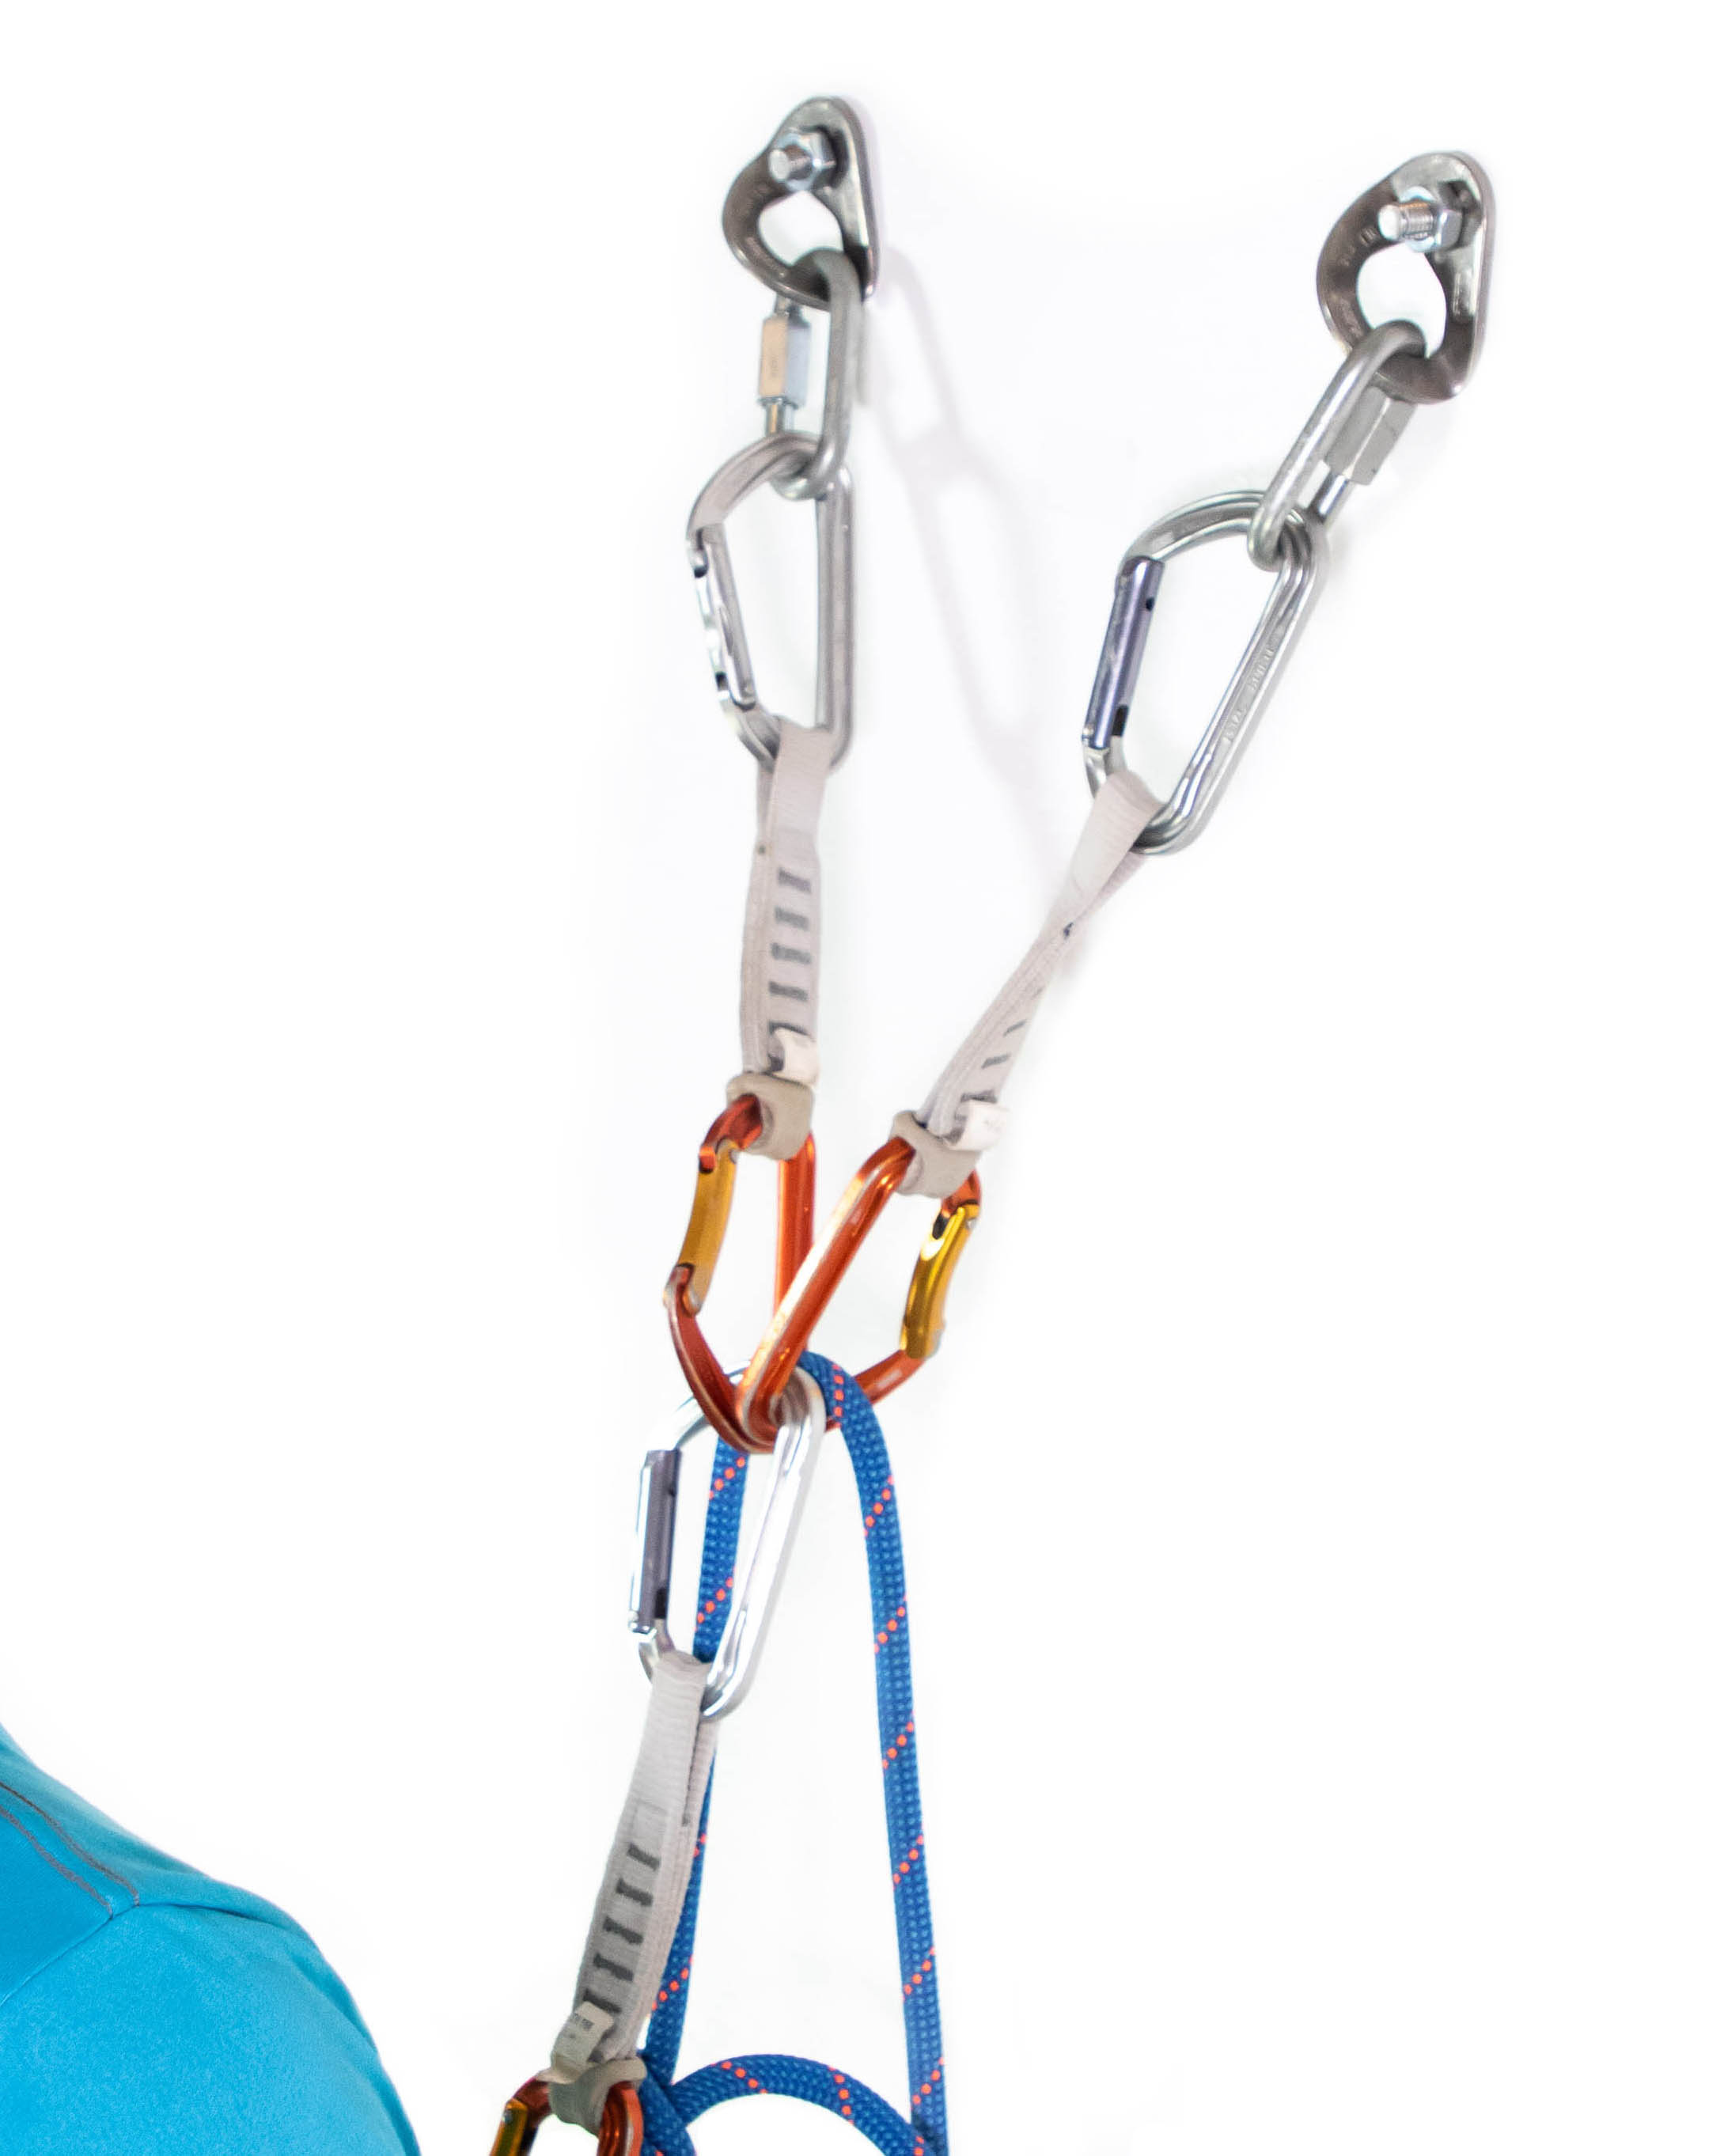
The rope should already be clipped through both quickdraws (gates opposed and each clipped to its own bolt if possible). To attach yourself to the anchor, use your spare quickdraw to clip your belay loop to the rope-side carabiners of both quickdraws.
Step 2: Thread a loop of rope through the anchor
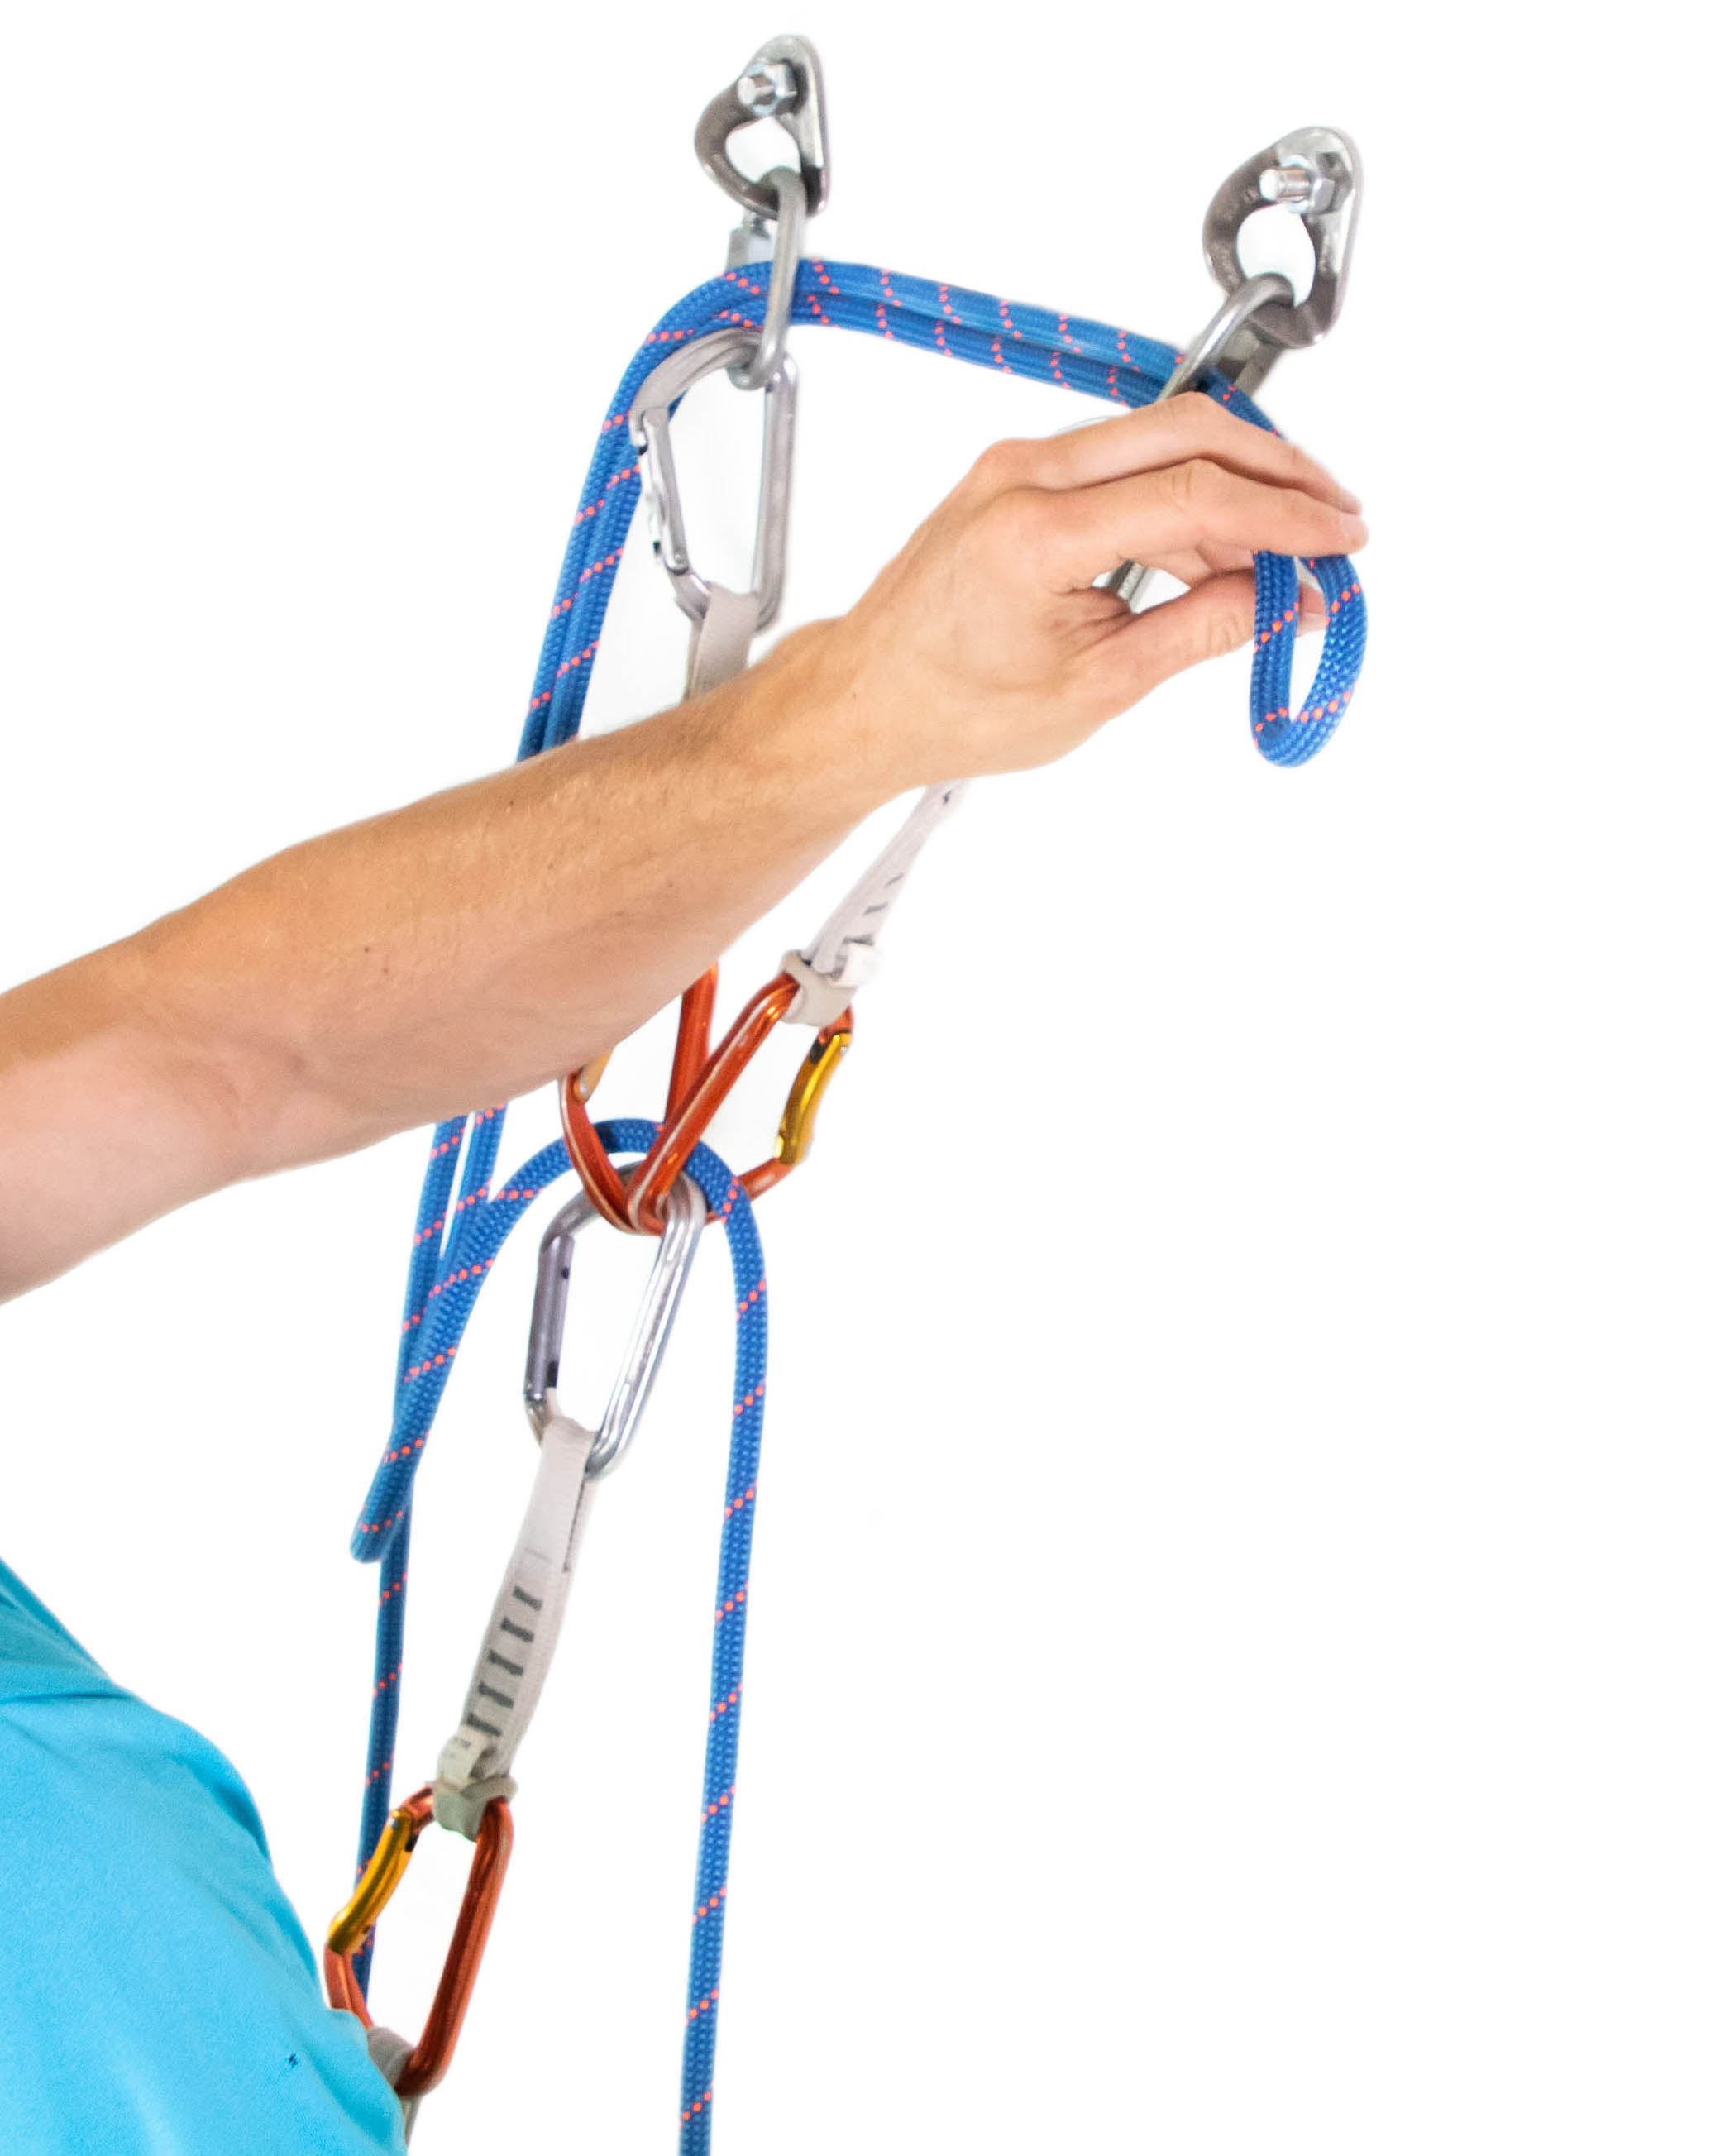
Ask your belayer for slack and pull up 2.5 m (8 ft) of rope. Next, create a bight in the rope roughly half this distance from the knot. Thread the loop through both quicklinks or rings. If there is a single ring secured to both bolts, thread the rope through this.
Step 3: Tie an overhand figure-8 and clip this to your belay loop
Tie an overhand eight on the bight, keeping the loop as short as possible. Attach this to your belay loop with your locking carabiner, making sure to lock the carabiner.
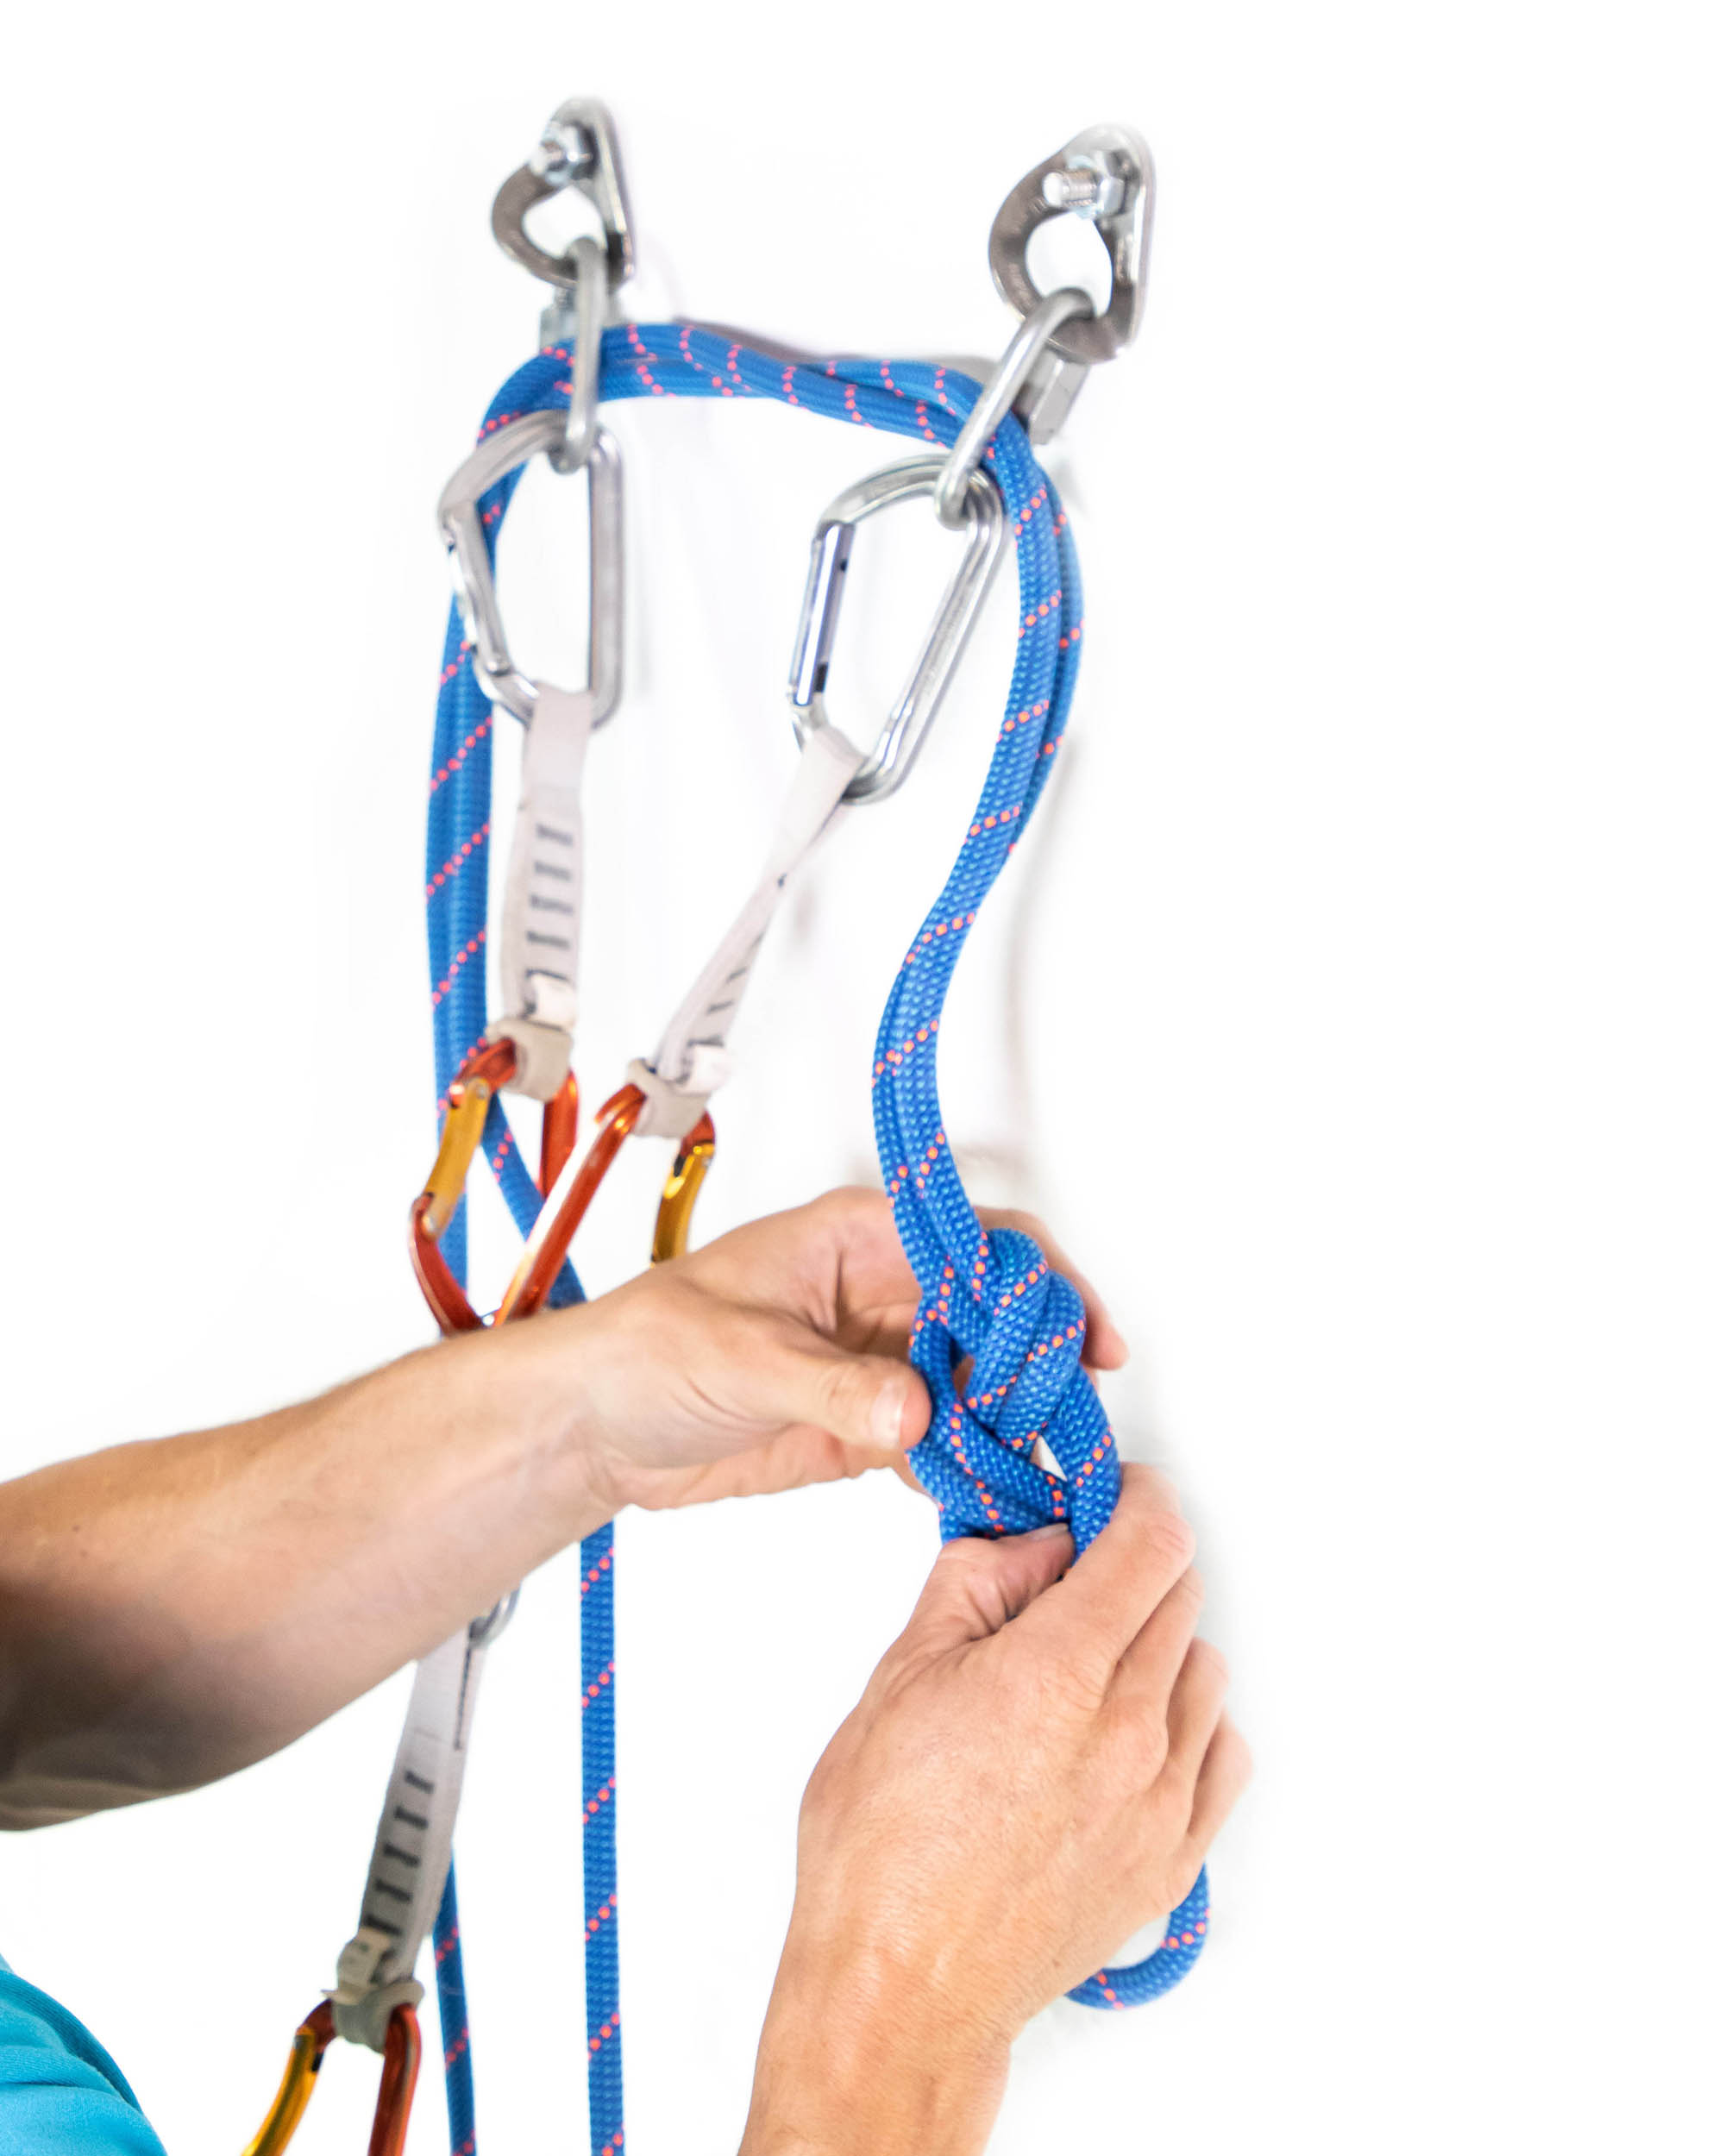
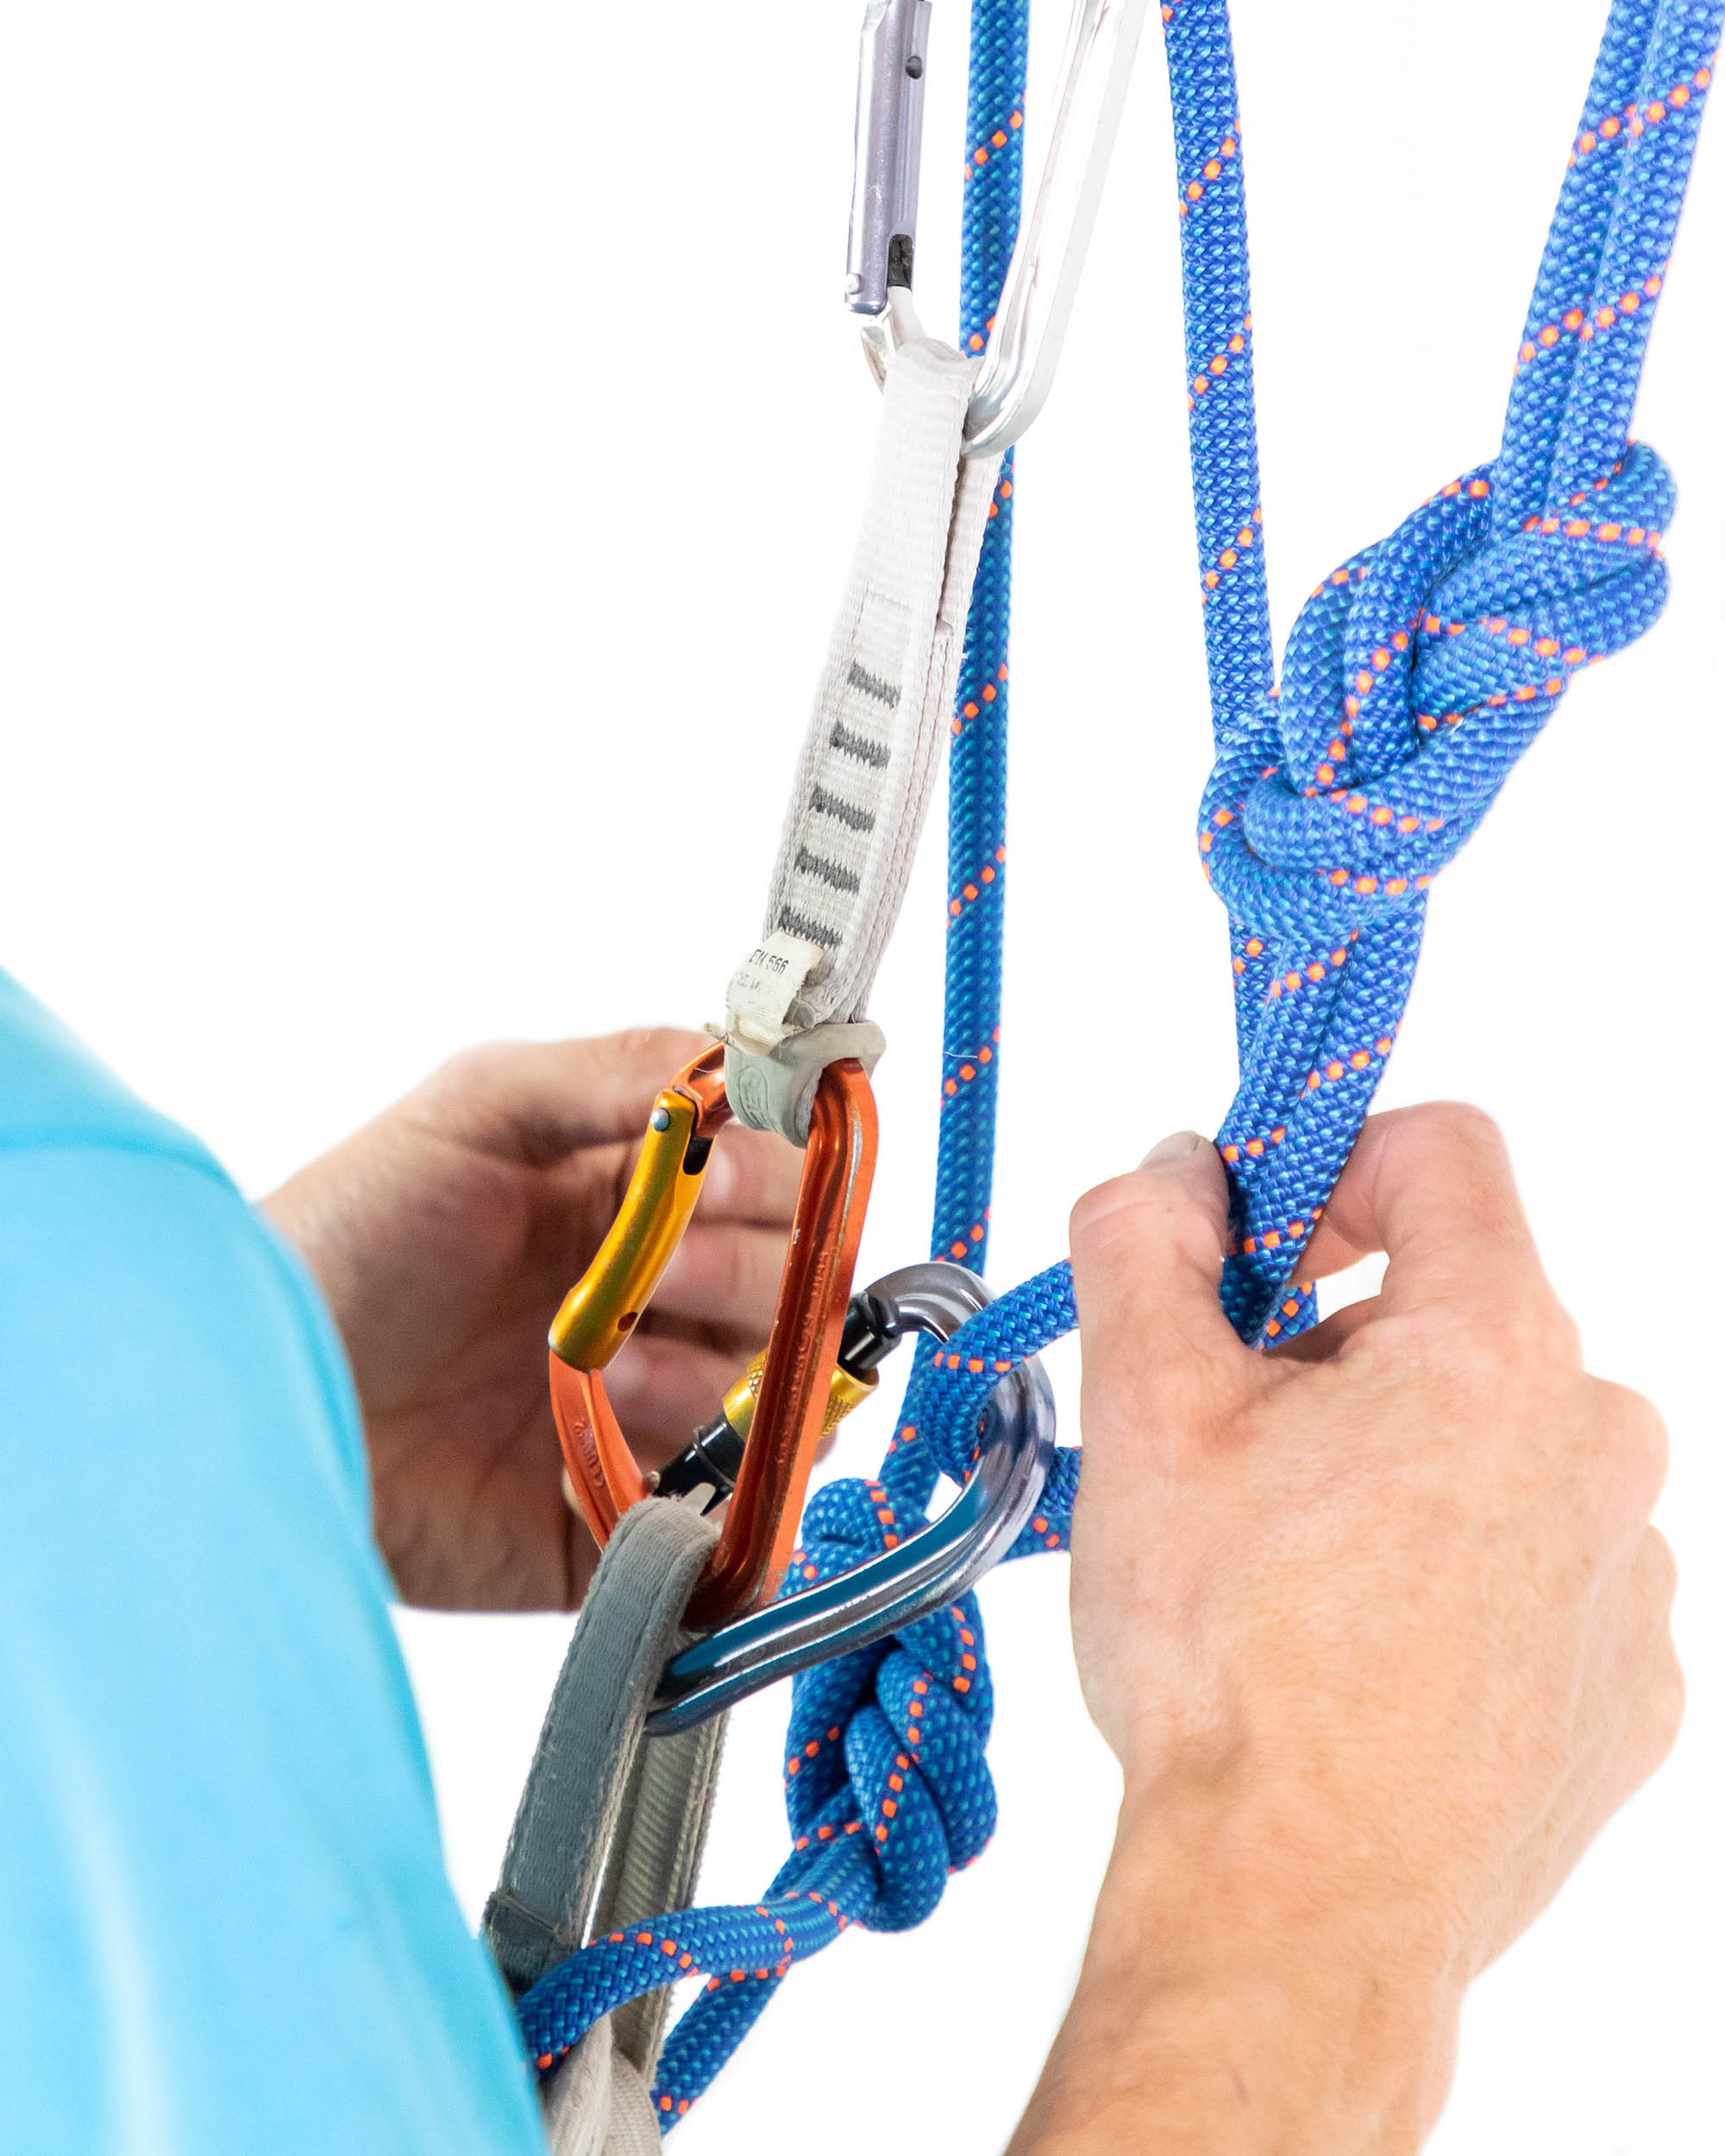
Tip: If you dress a knot neatly and pretension it, will be easier to untie.
Step 4: Untie your original knot and pull the end of the rope through the quickdraws and anchors
Untie your original tie-in knot. This strand is now the tail of the new overhand figure-8 clipped to your belay loop, but at this point it still runs through the quickdraws and the anchors parallel to the stand that you will lower off on. Pull the loose end through the quickdraws and anchors, and let it dangle next to you.
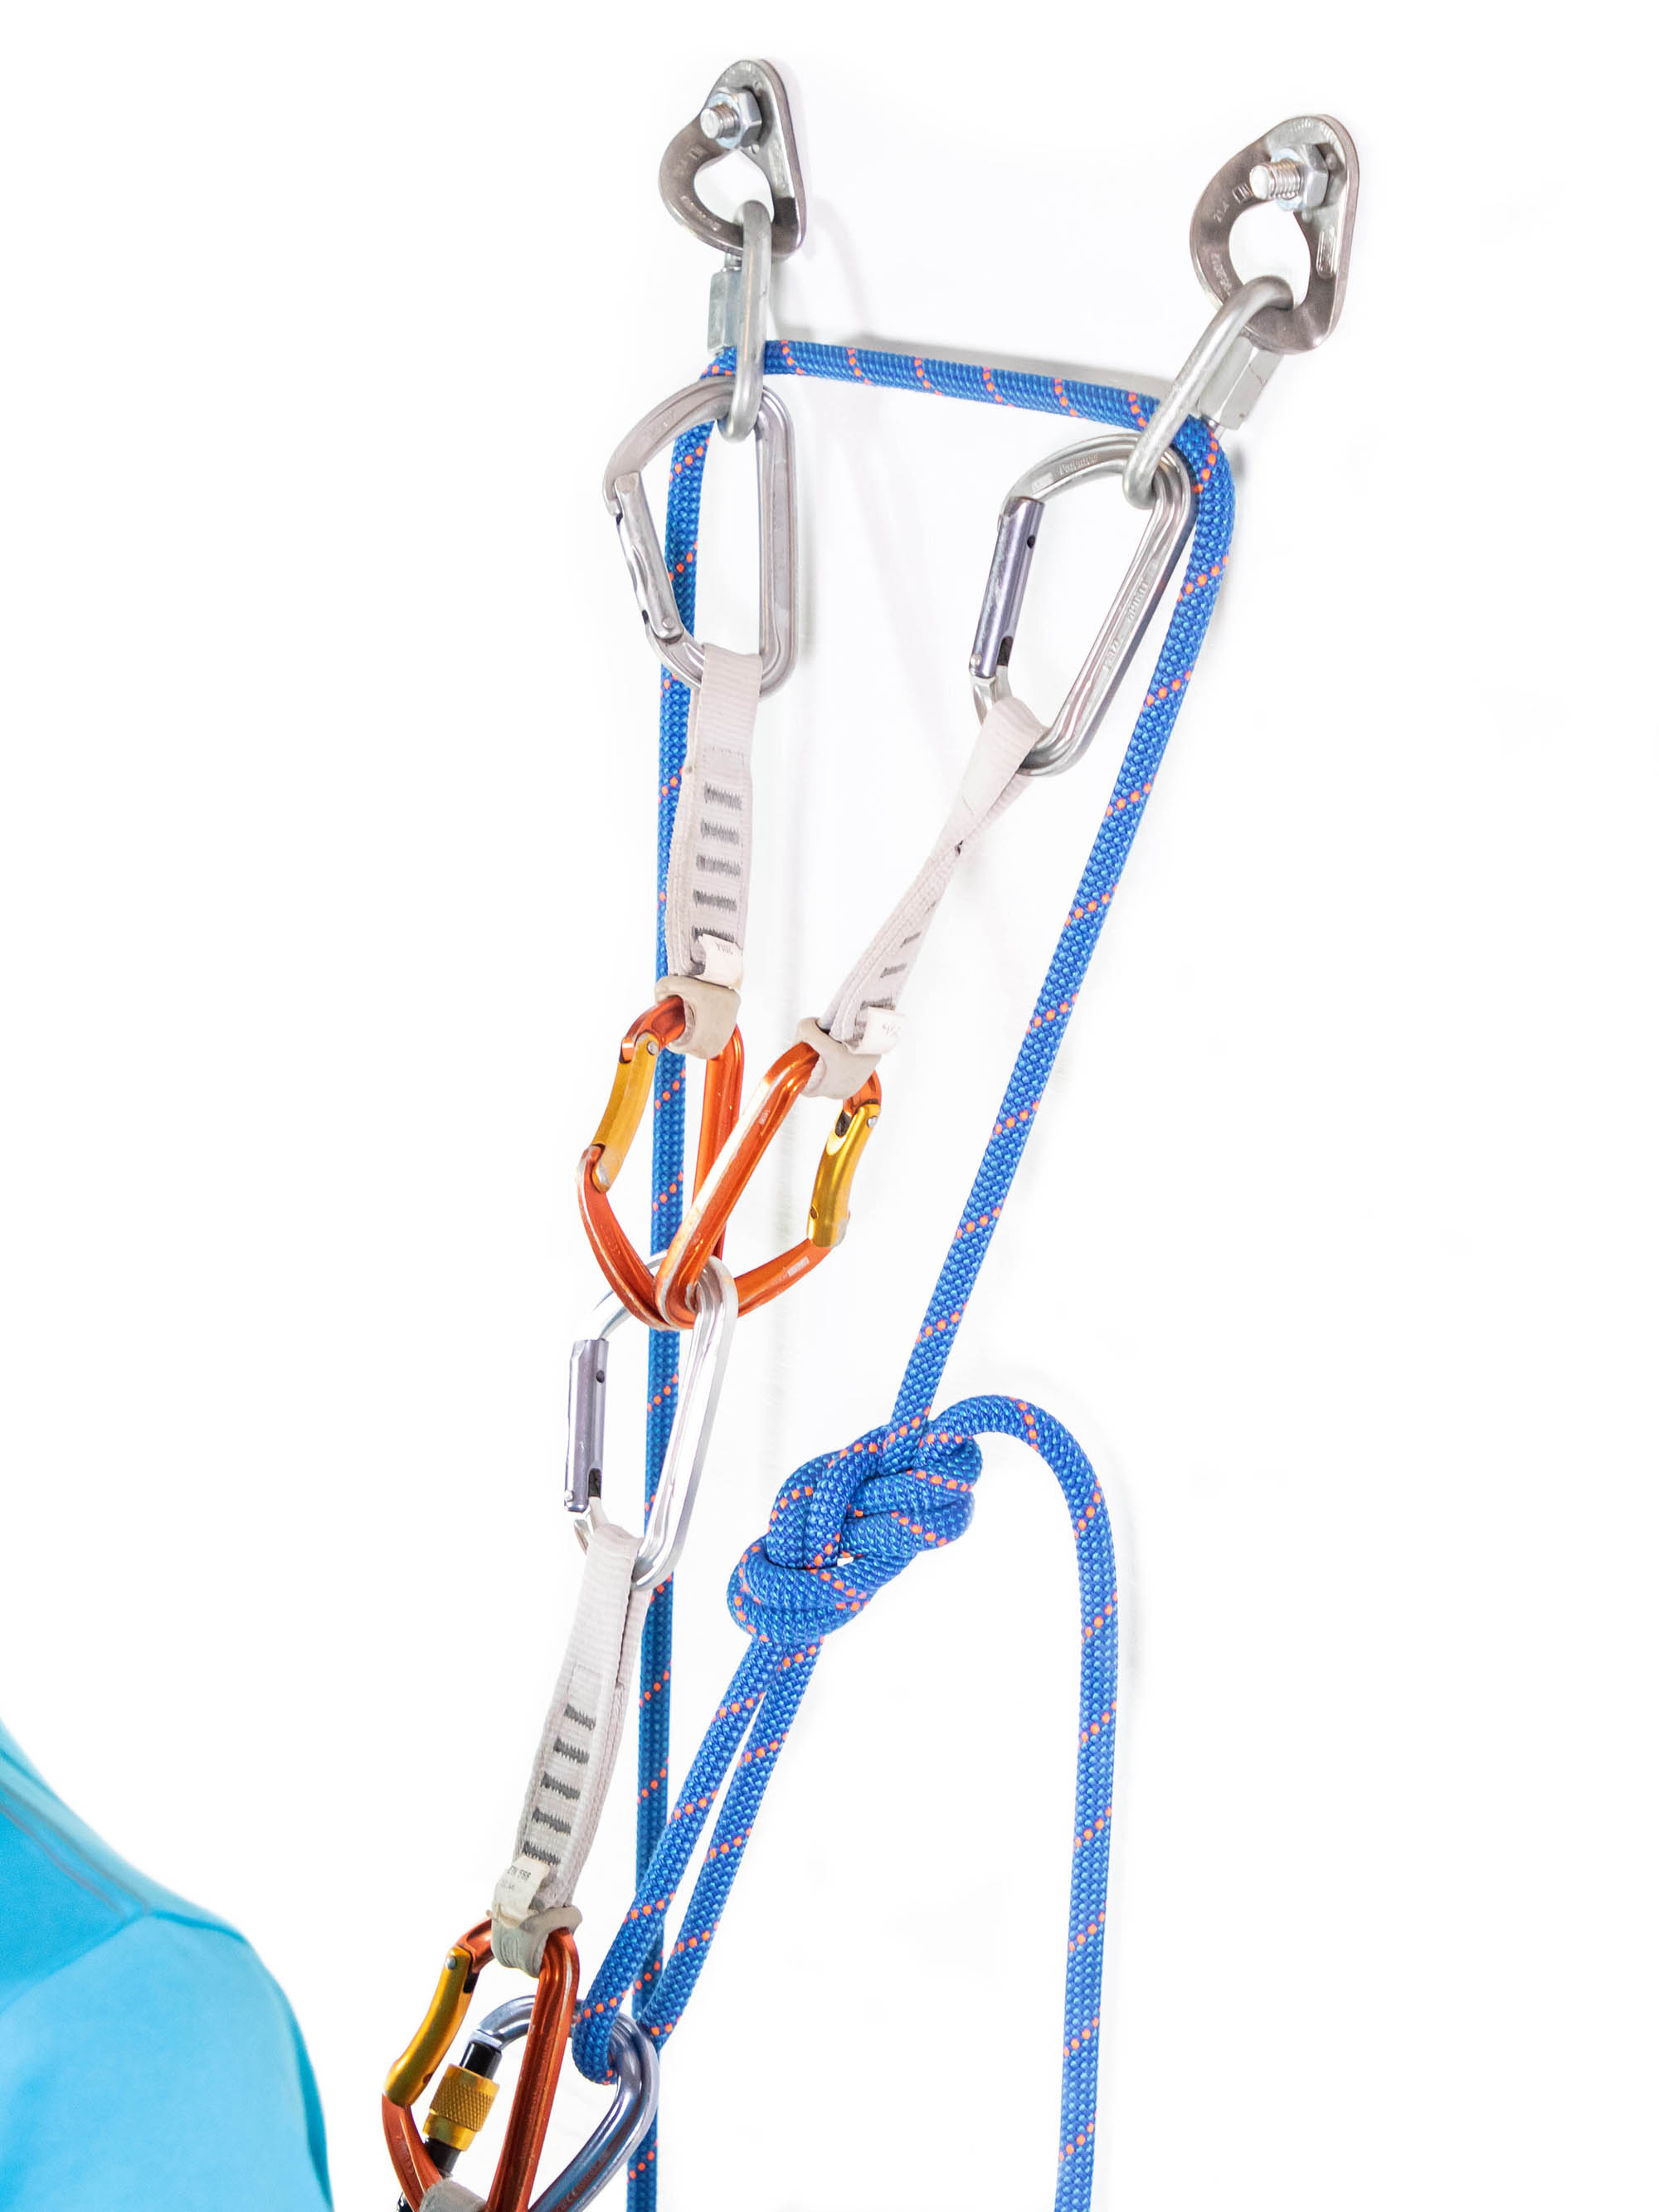
Step 5: Test the system and remove quickdraws
Ask your belayer to take, and pull yourself up and towards the anchors before resting your weight on the rope. Check that the carabiner on your belay loop is locked, that the rope runs through redundantly connected hardware (rings or maillons on two separate bolts or a ring connected to two bolts with a section of chain), and that the belayer is actually holding your weight.
- Belayer is holding your weight
- Rope passes through redundant hardware
- Carabiner is locked
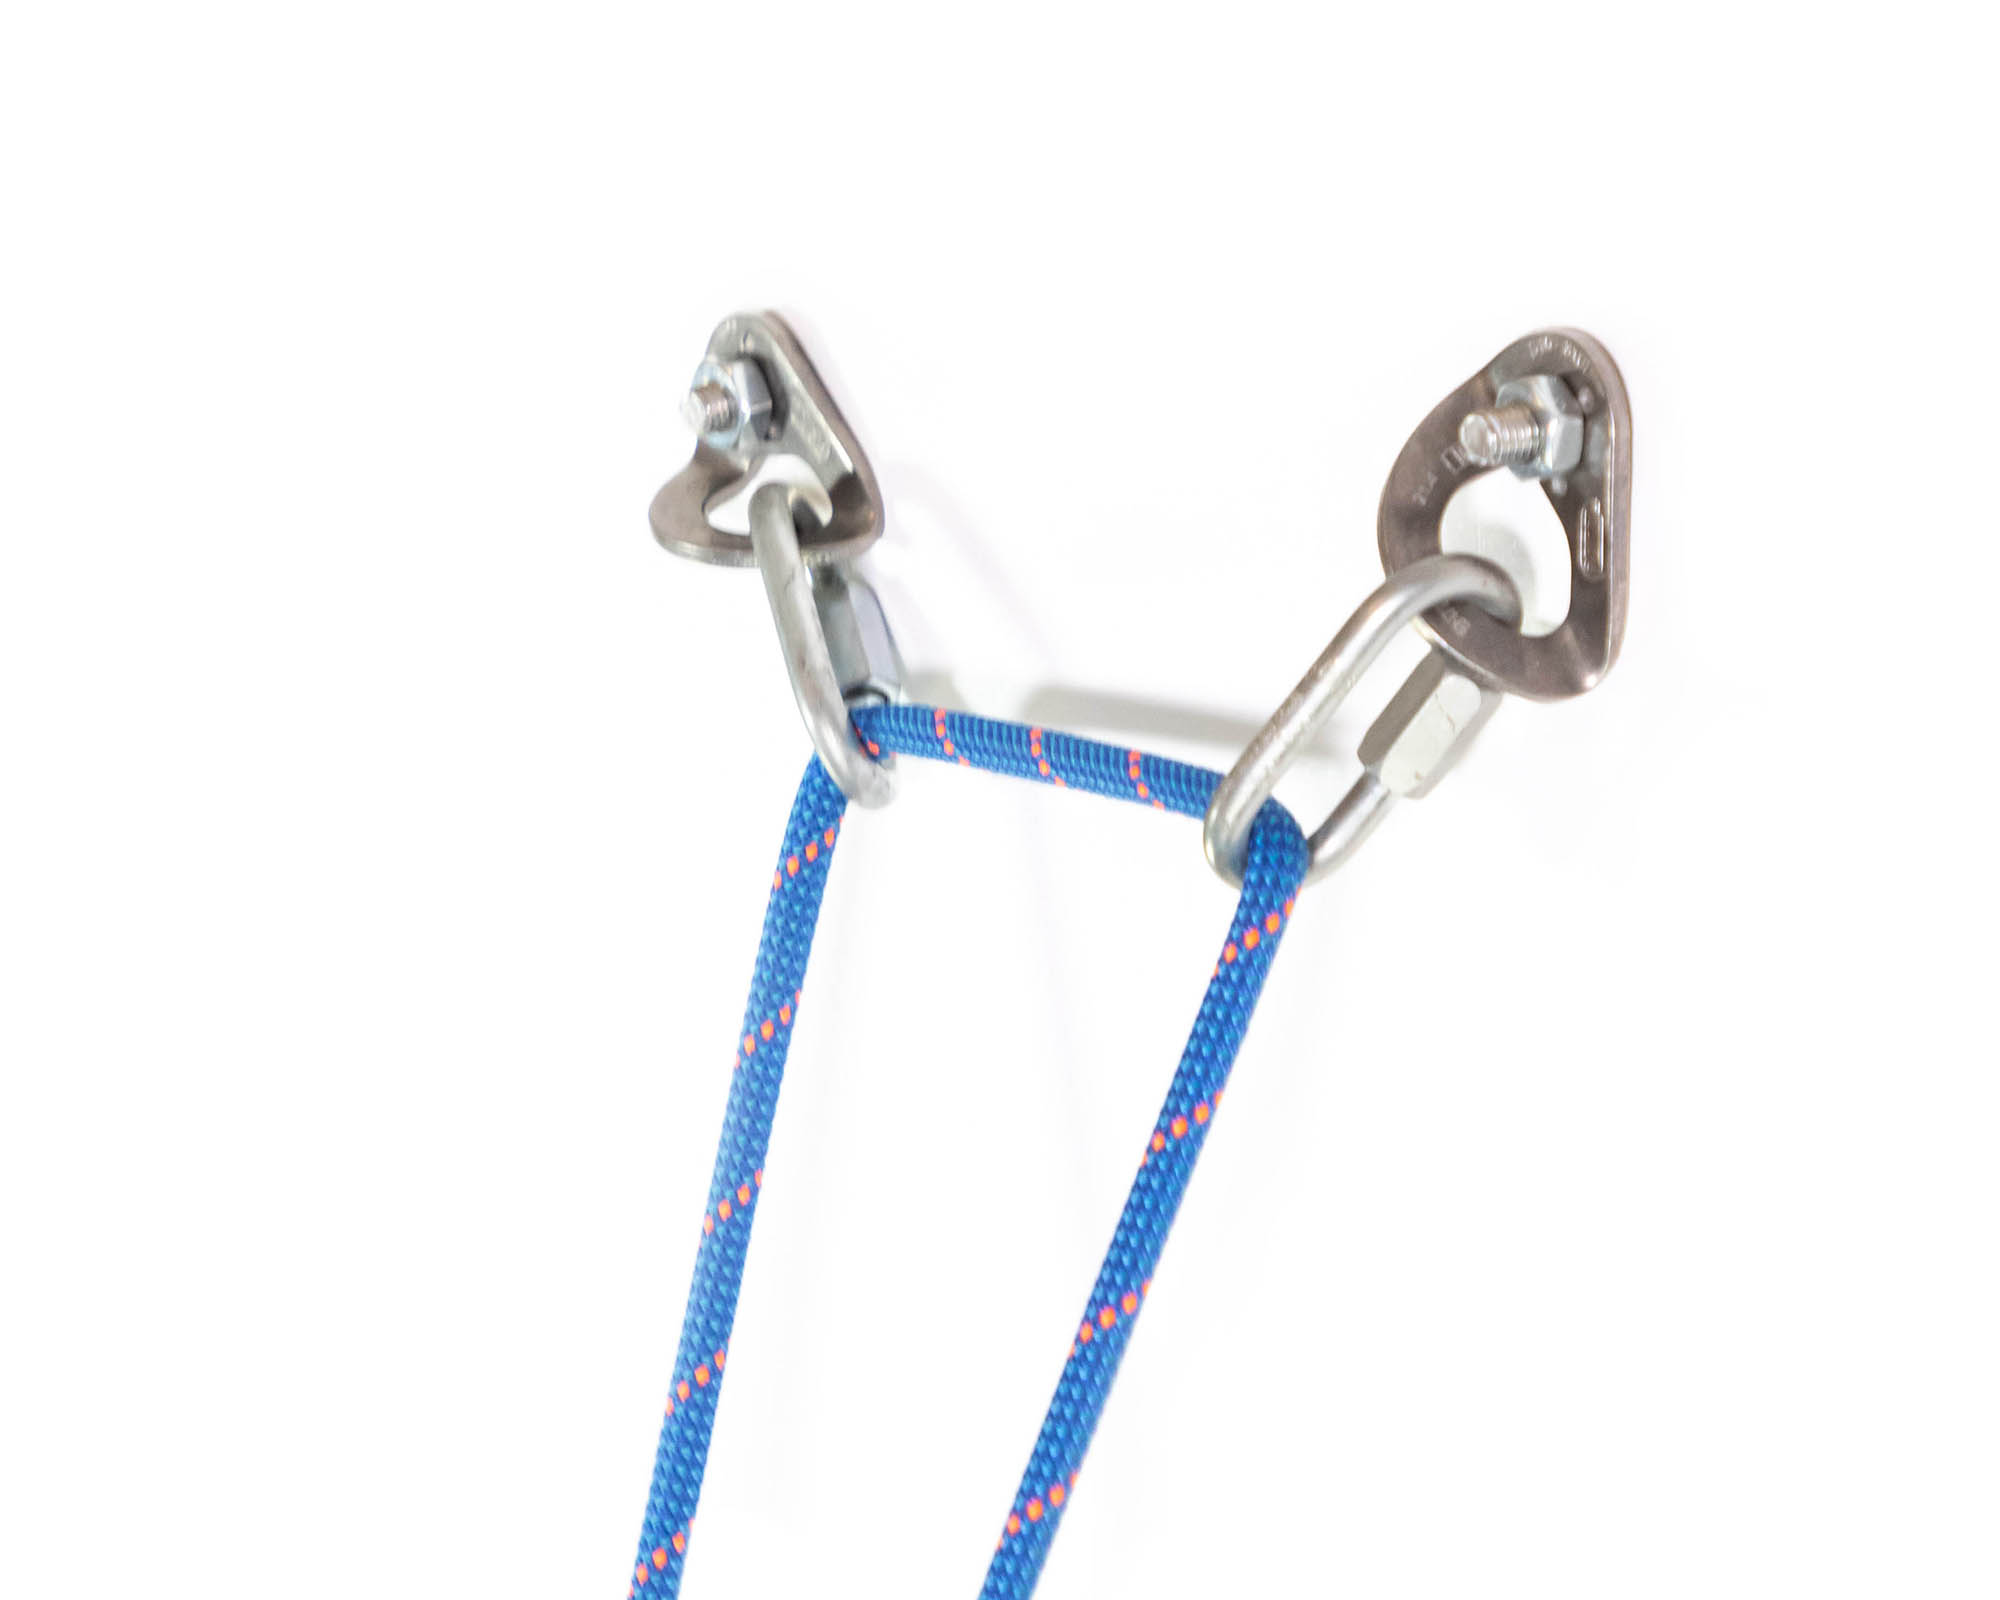
You can now remove the quickdraws and lower off.
Technique #2: anchors that will only accept a single strand
When the anchor hardware is not large enough to take a loop of rope, you’ll have to resort to using this second technique. It’s more complicated than the first and involves more steps, but it can be used to clean almost any anchor. Just make sure that you have the gear needed to perform this technique safely. Unlike the first technique, where the climber doesn’t leave the system (belay), this method requires you to untie from the rope before you thread it through the anchors. Without the rope to create redundancy, you will only be able to ensure your safety by securing yourself to the anchors with two connections.
What you will need
You should never rely on a single connection and bolt. You need at least two lanyards – at least one of which has a locking carabiner – to secure yourself to both anchors. You can use a sewn nylon sling, but I prefer an adjustable personal anchor system like the Petzl Connect Adjust. Besides allowing the climber to adjust her distance from the anchors, the Connect Adjust offers more stretch than a sling when shock loaded. This can reduce the force placed on your anchor if you accidentally fall onto it with slack in your lanyard (something you should avoid at all costs). In the steps below, I explain how to perform this technique using a sling or PAS and two quickdraws as a second lanyard.
Step 1: Secure yourself to the top anchors
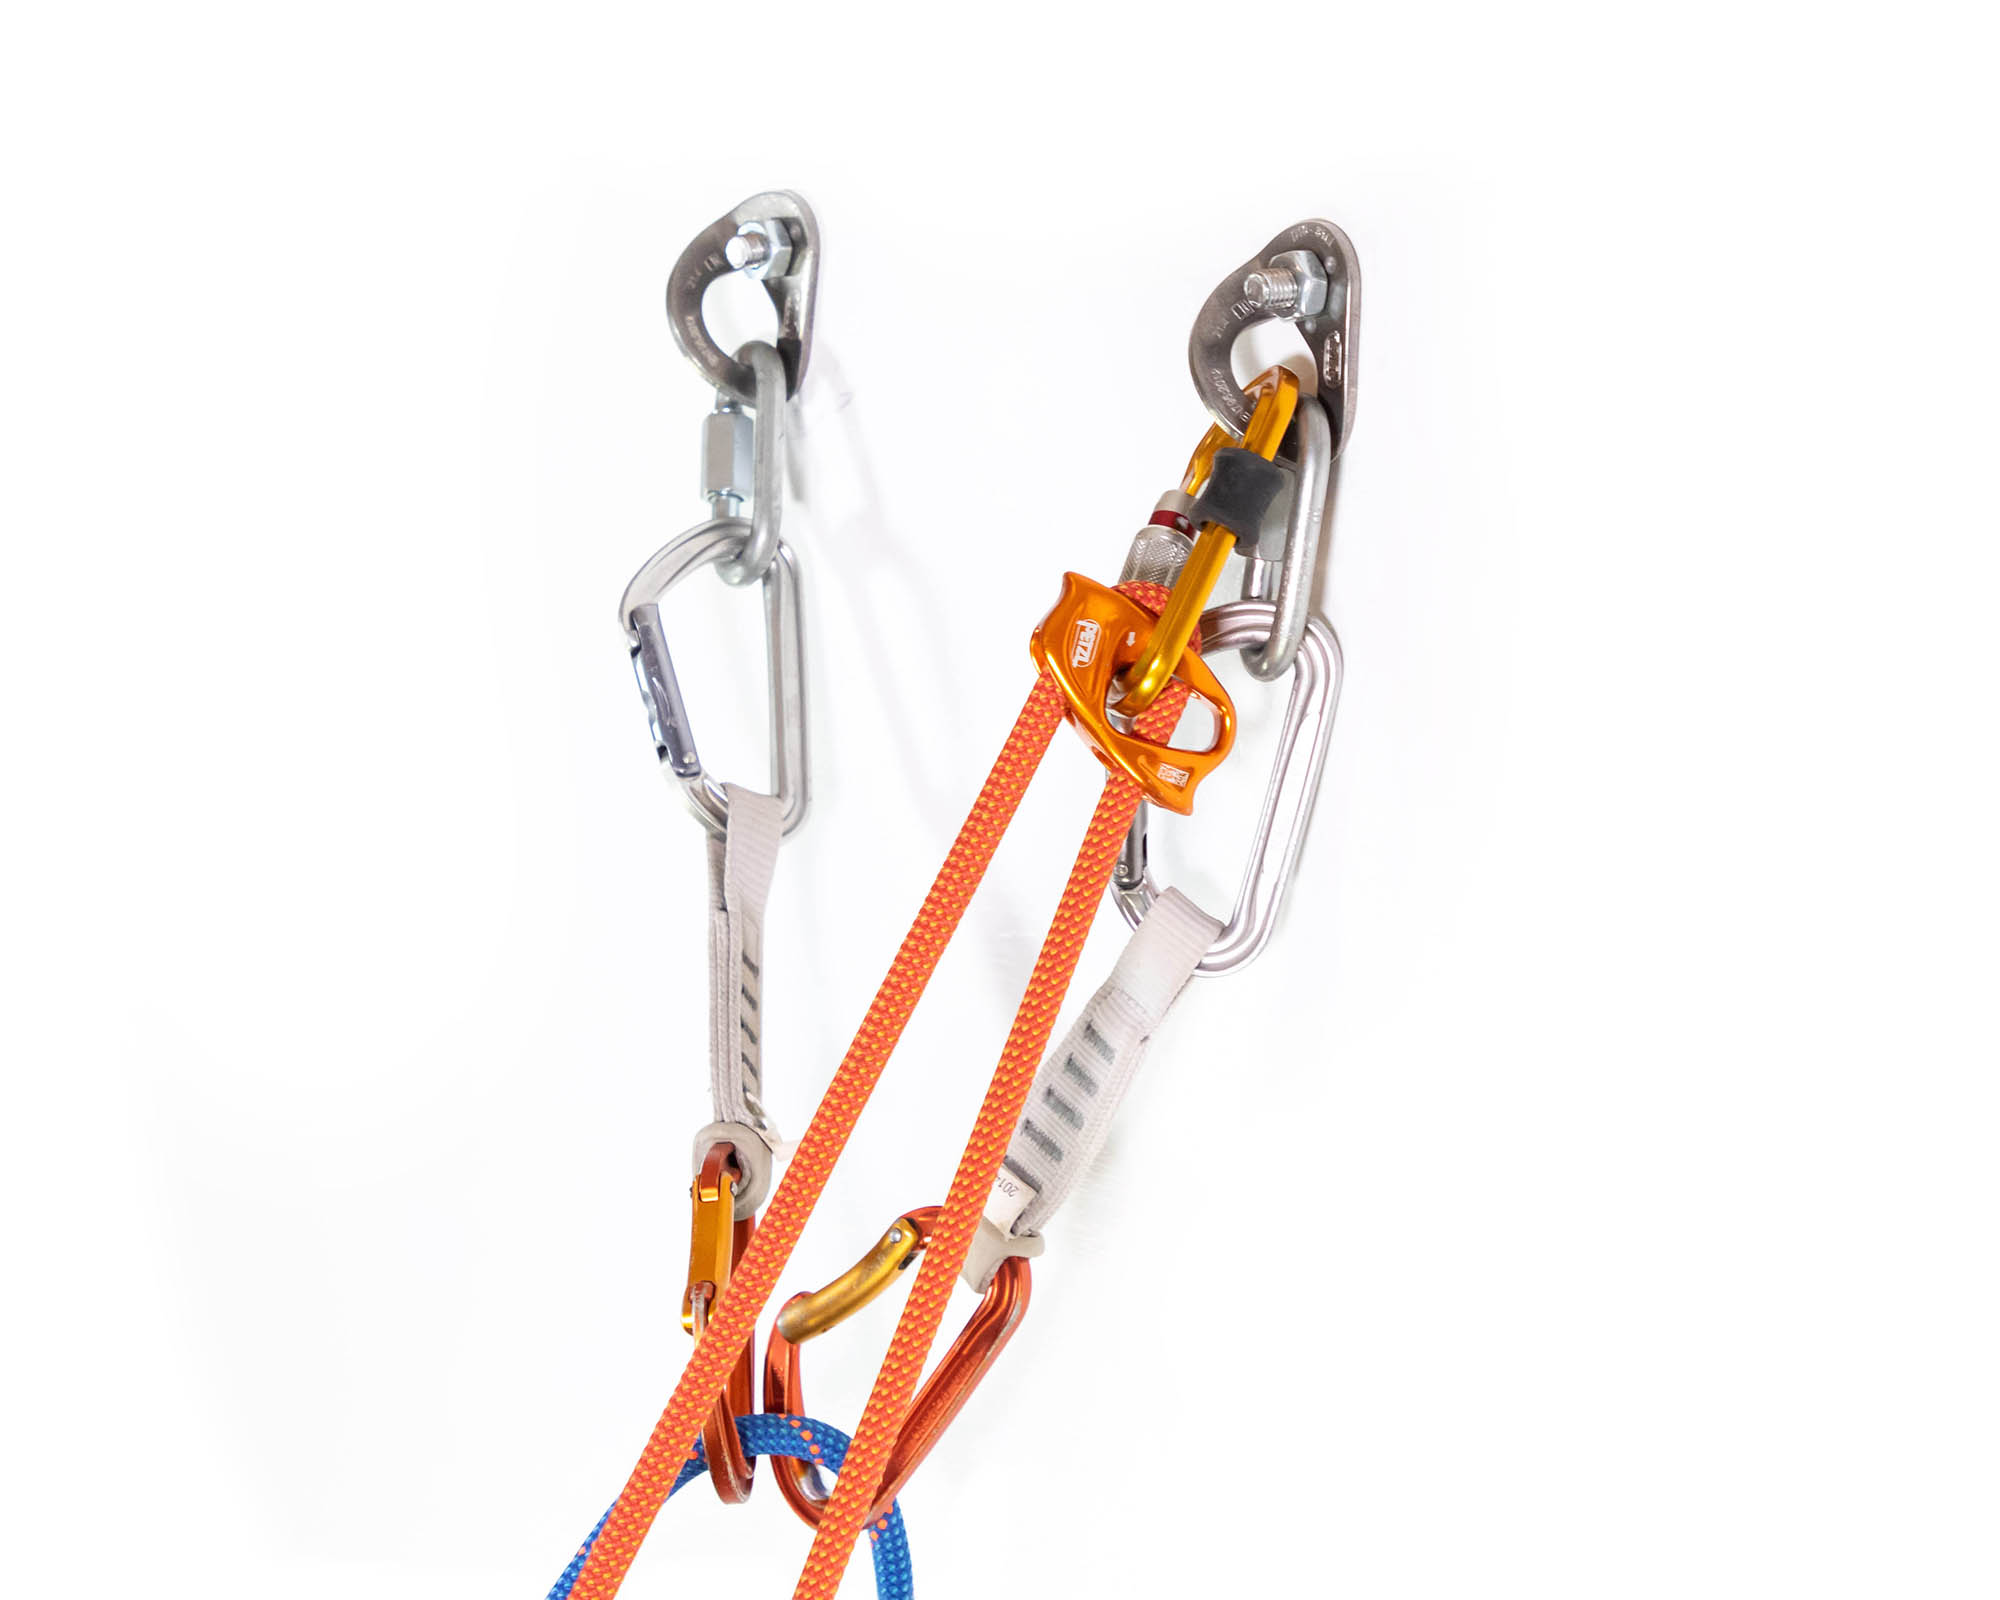
Clip your lanyard to one of the bolts and lock the carabiner. Adjust the length of the lanyard if necessary. Next, unclip the rope from the quickdraw that is directly below the anchor with your lanyard attached to it. Unclip this quickdraw from the anchor and remove the bolt-side carabiner. Clip the empty end of the dogbone to your spare quickdraw. You can now use this joined quickdraw to attach yourself to the other bolt (the one that doesn’t have the PAS attached to it).
Step 2: Tie an overhand knot and clip this to your belay loop
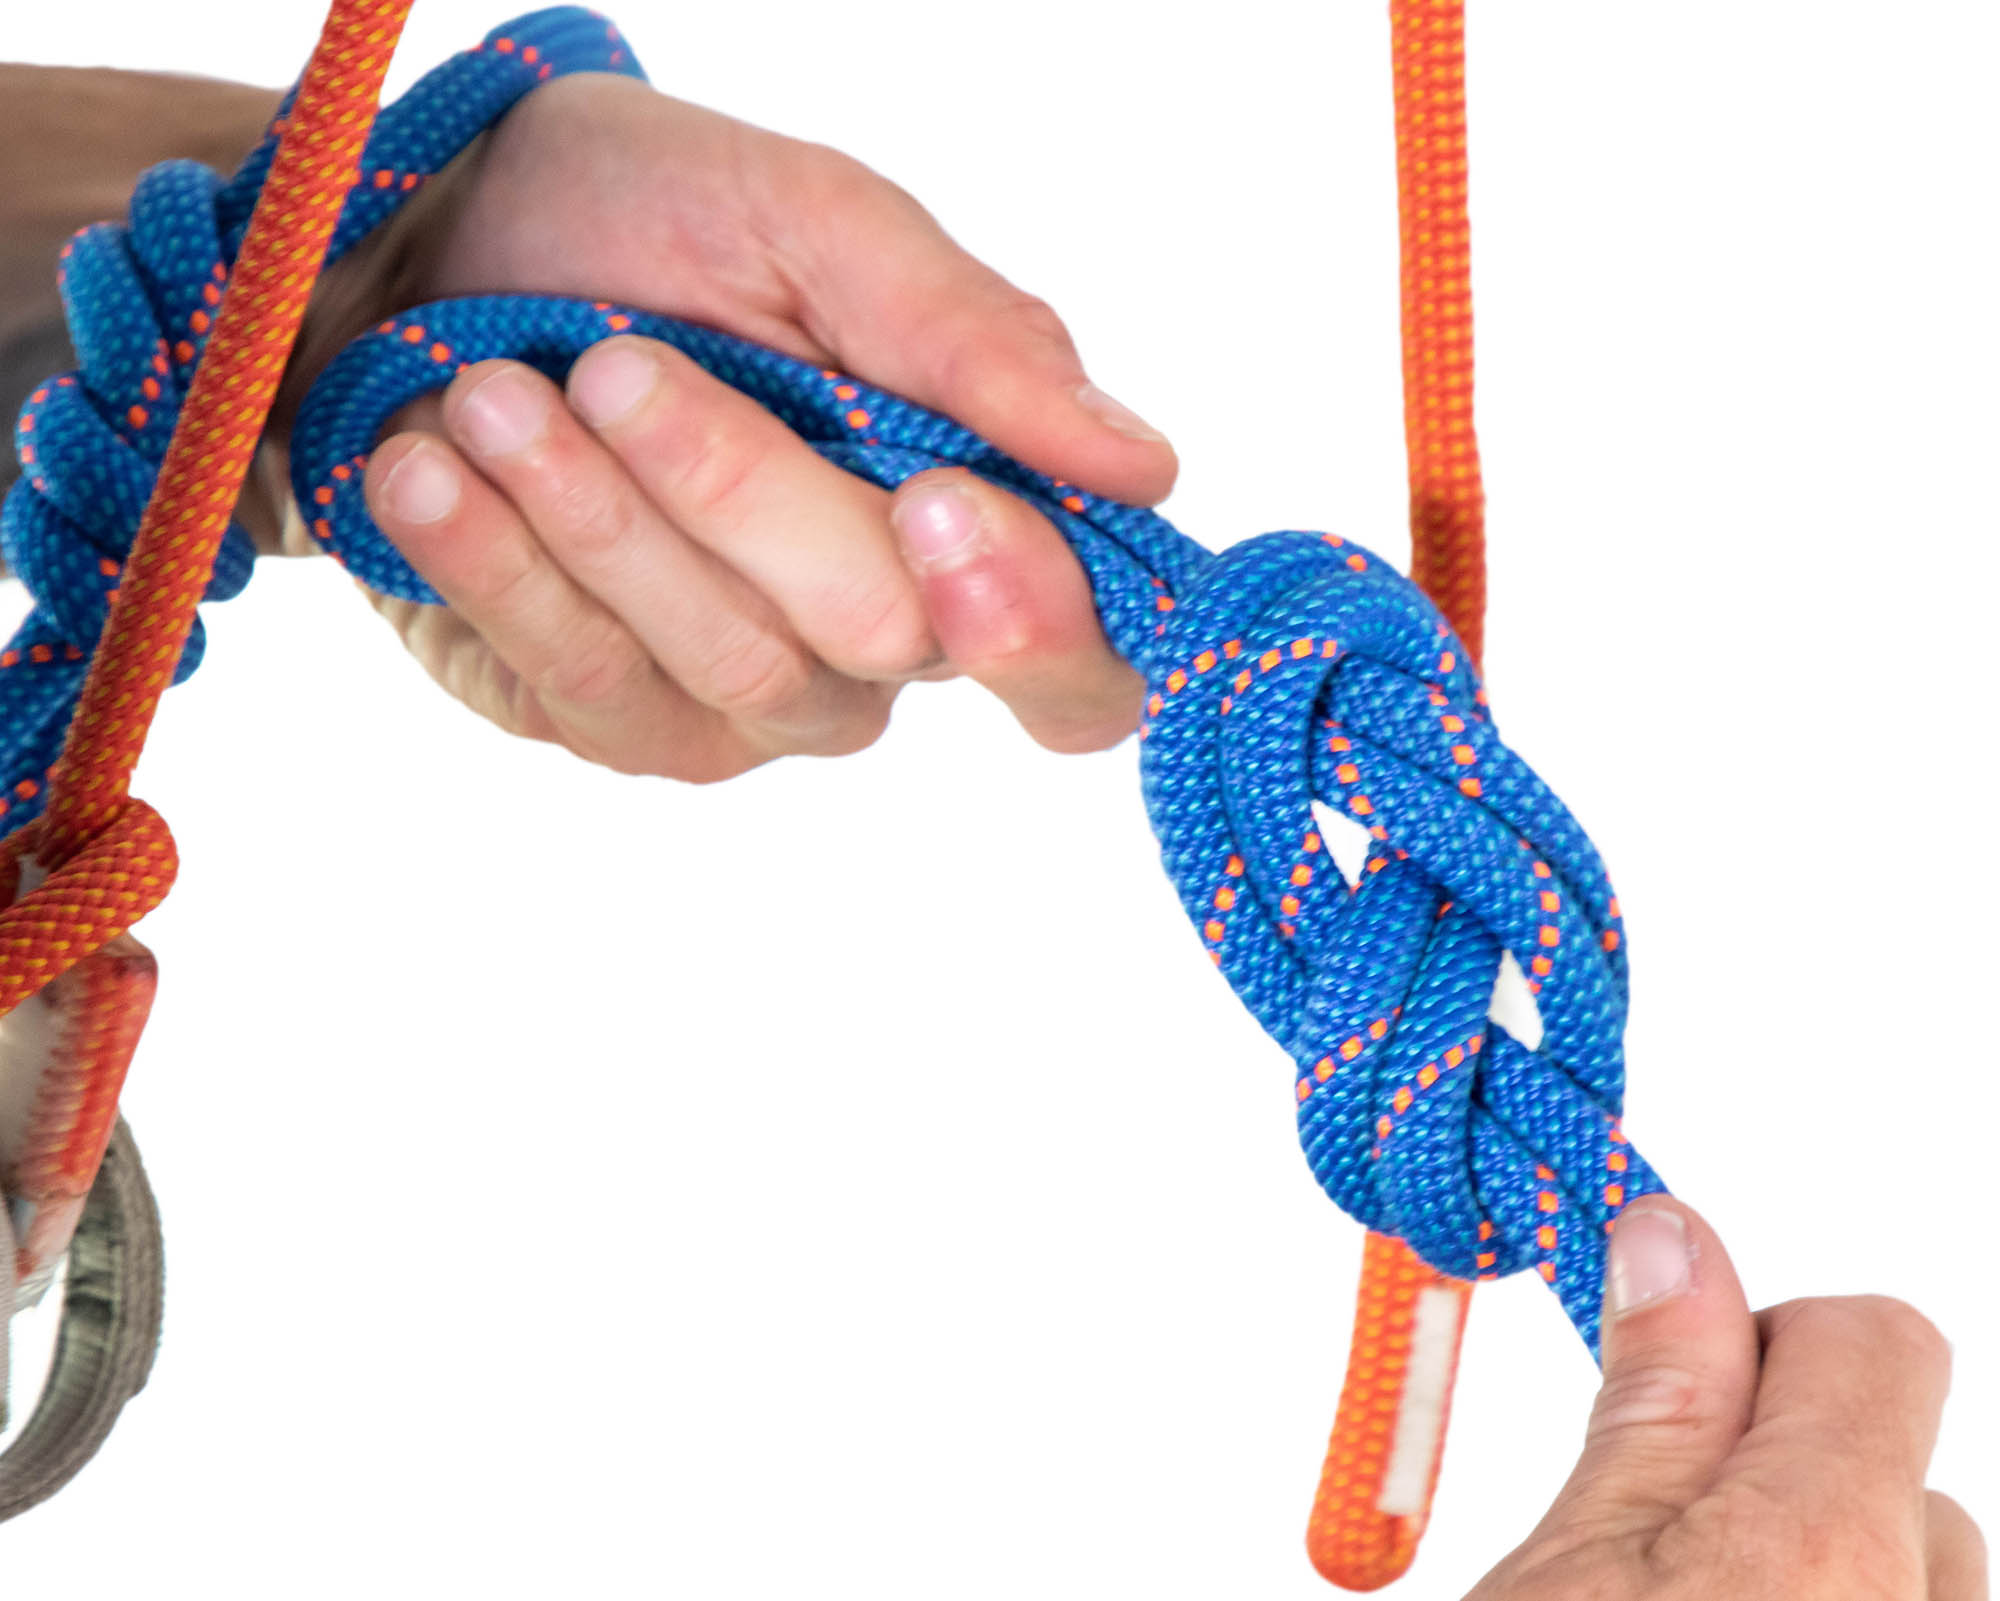
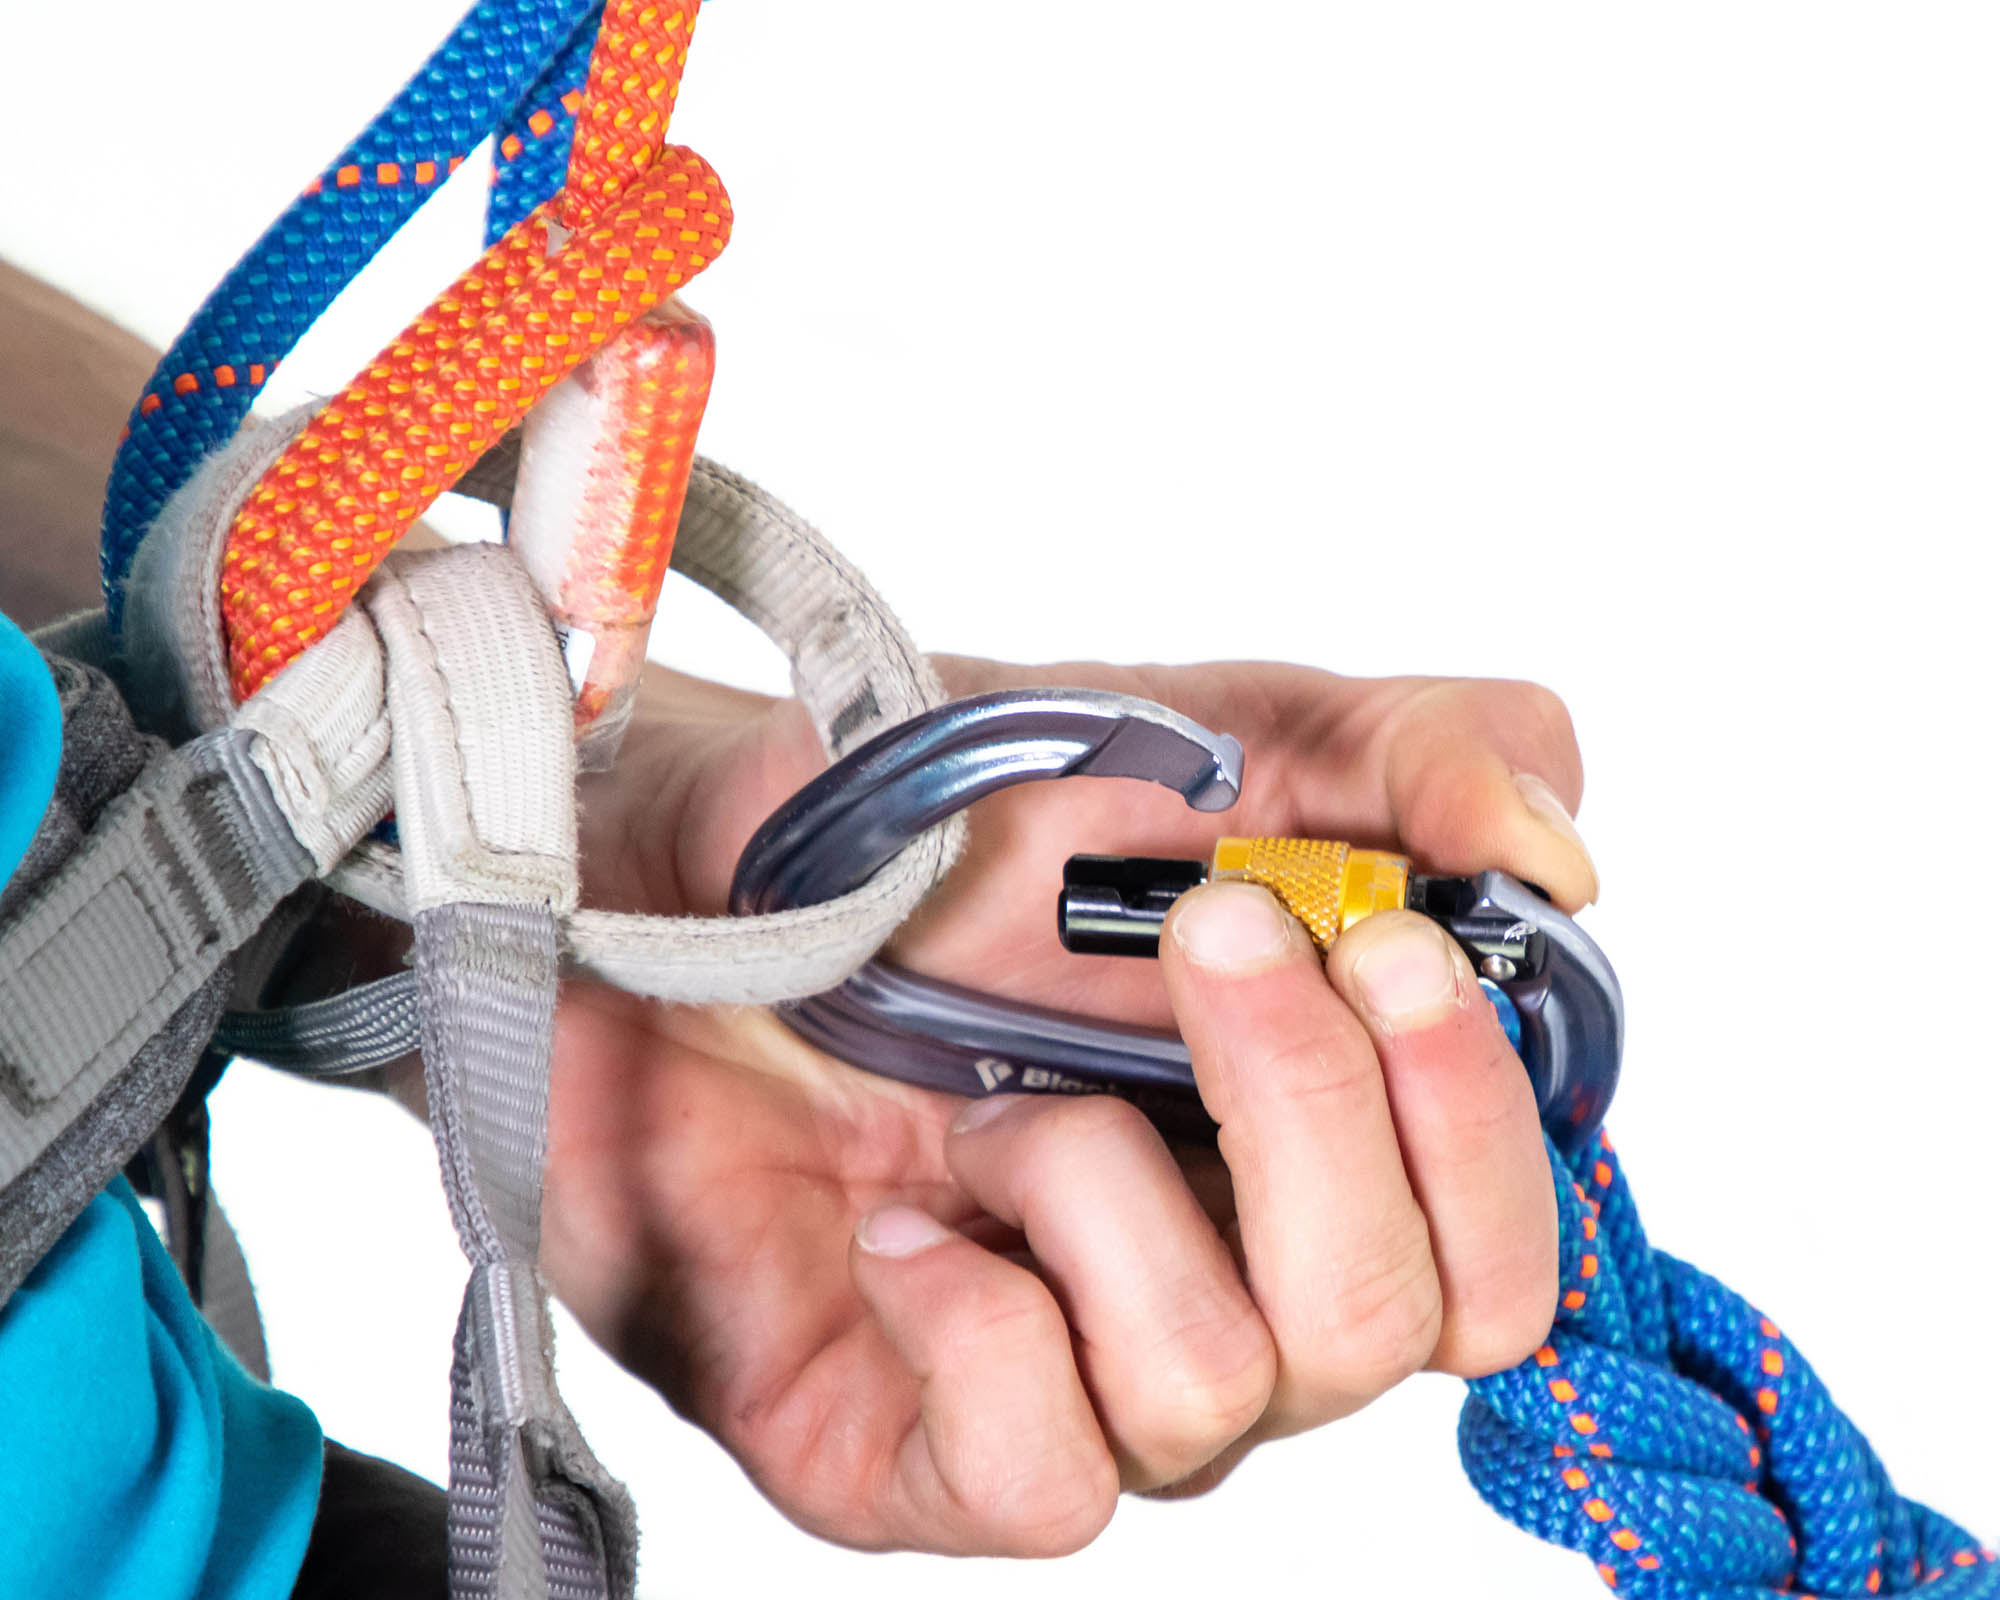
First, pull up 2.5 m (8 ft) of rope. Then, create a loop in the rope and tie an overhand knot (It can be a simple overhand knot as it won’t be weighted). Clip this to your belay loop with the carabiner that was taken off the quickdraw (the one that was used to secure you to the anchor).
Step 3: Untie your first knot and thread it through the anchor
Untie the knot you first tied in with and thread the rope through the chains or quicklinks. If there is only a single ring secured to both bolts, thread the rope through this.
Step 4: Retie the figure-8
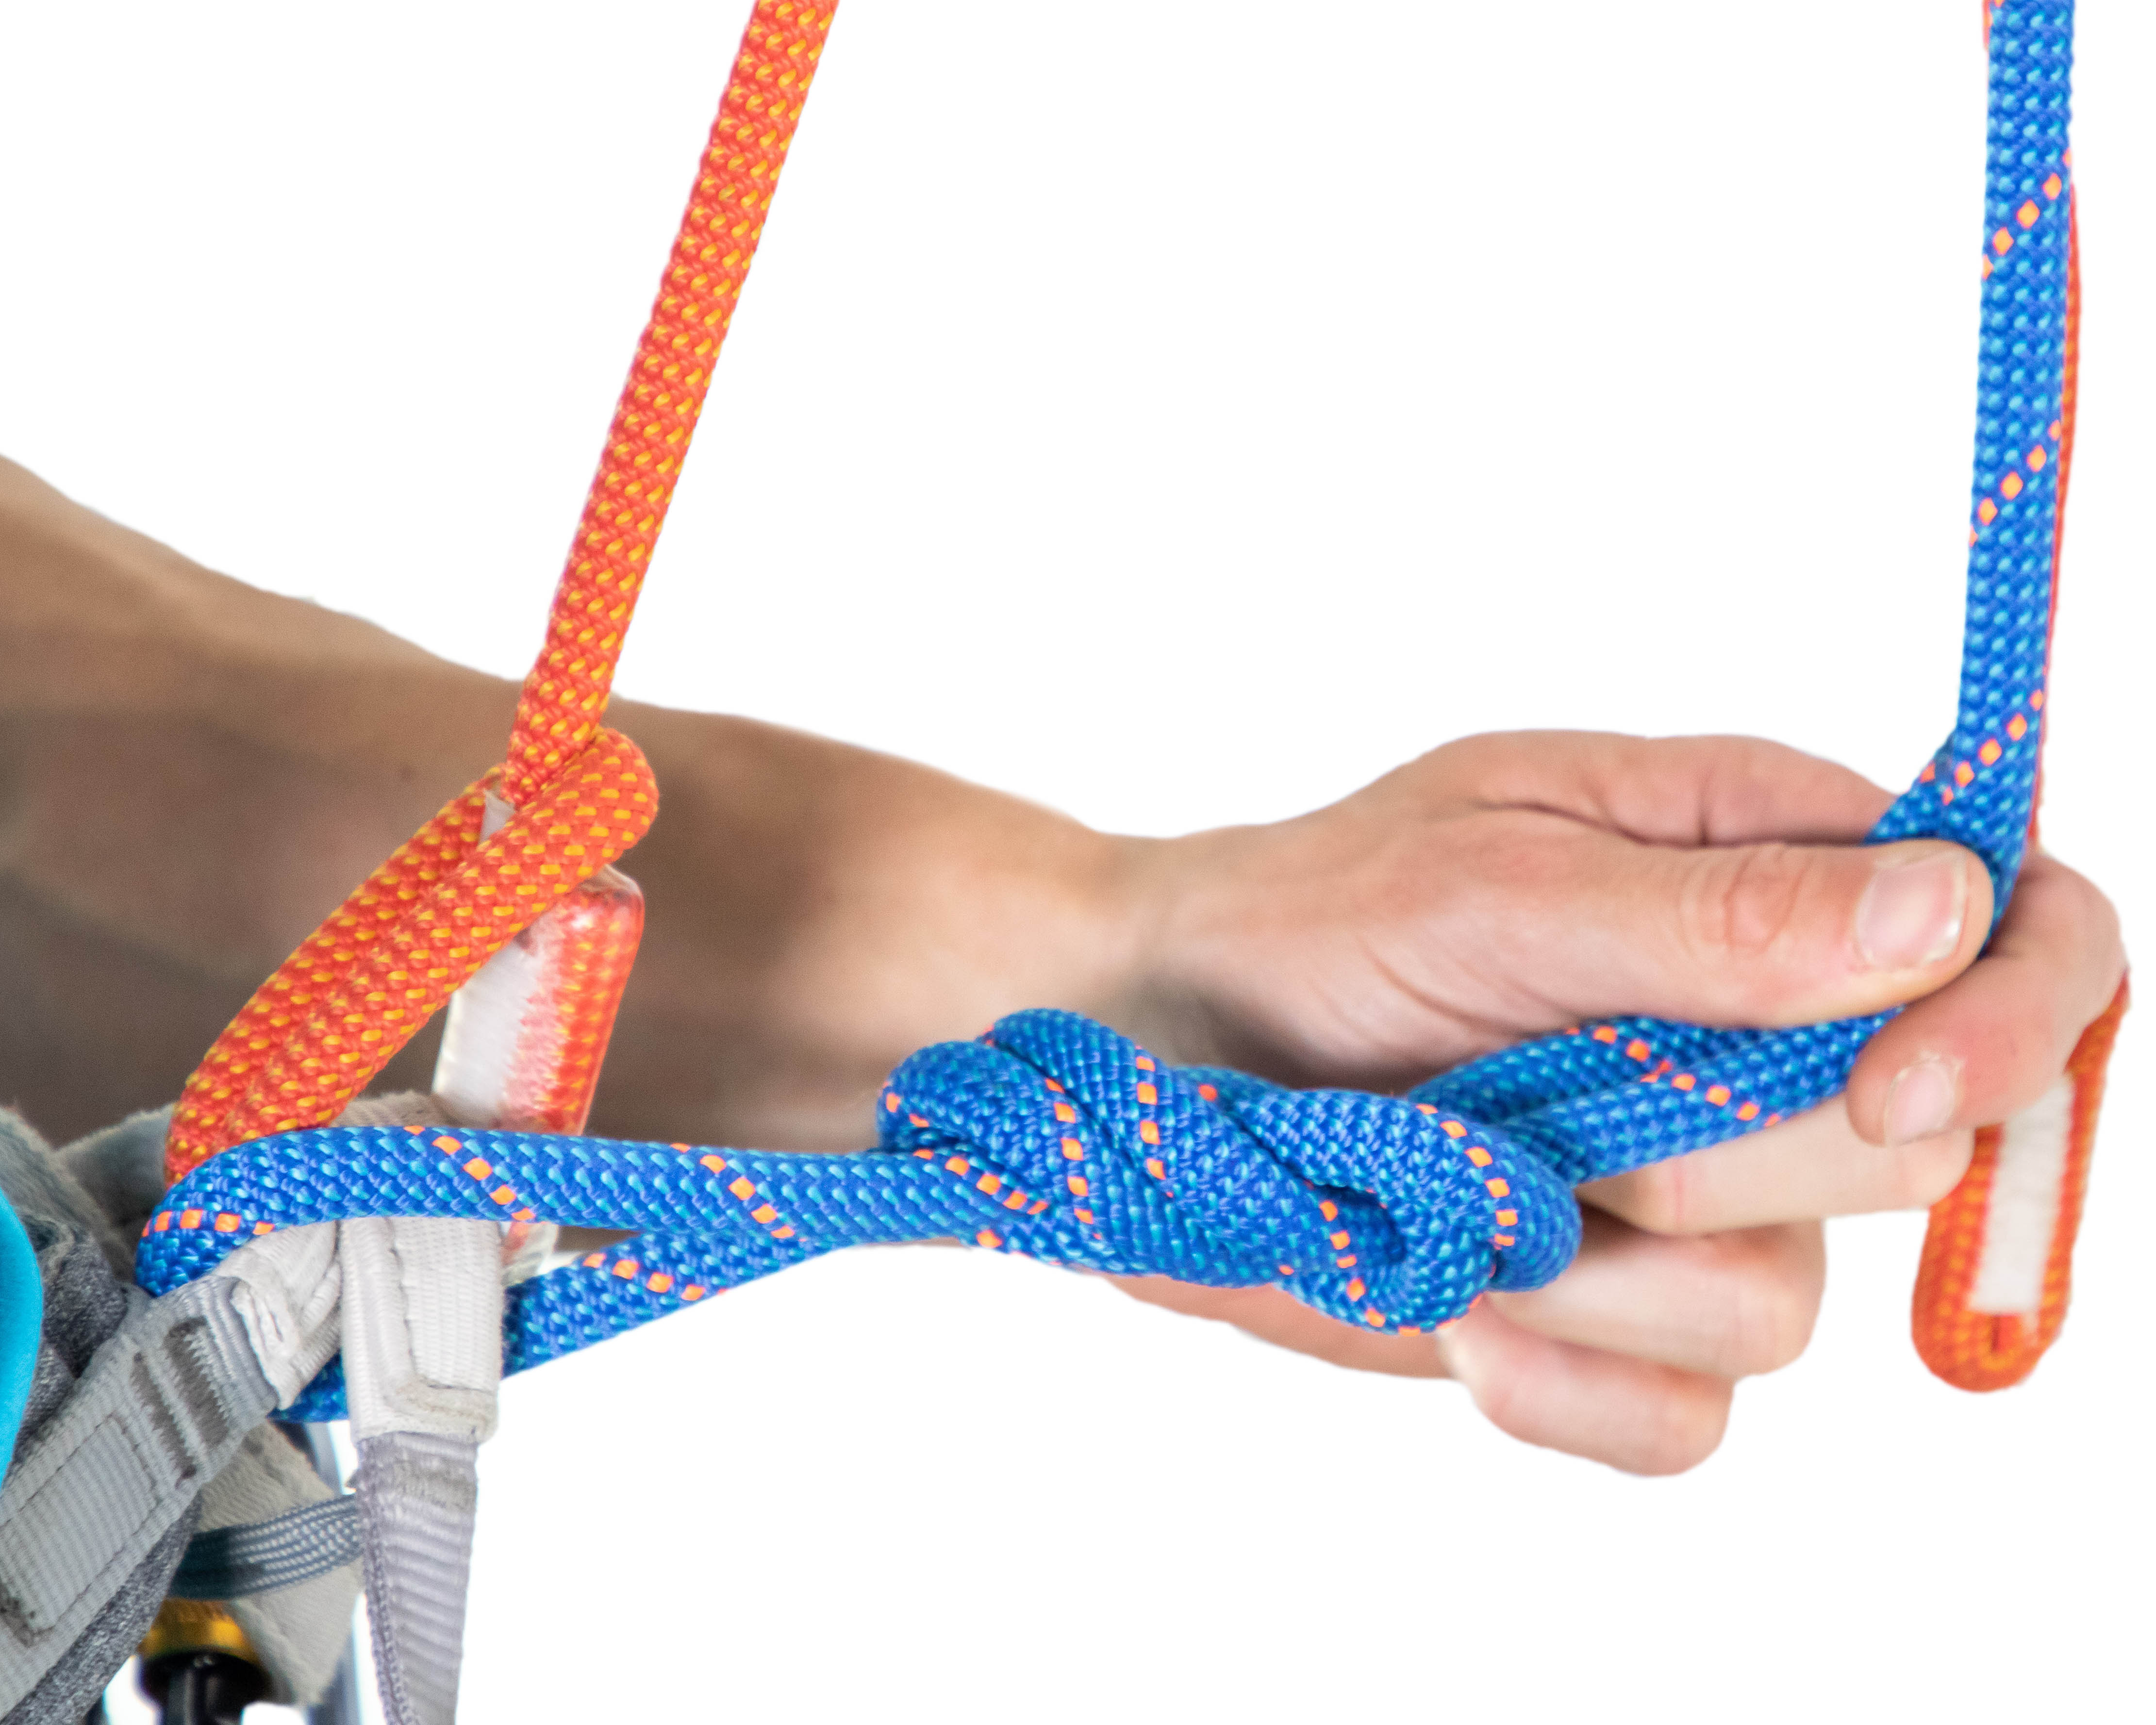
Retie the rope to your harness with a figure-8 knot. Tie the knot as close to your harness as possible. The closer your knot is to your harness, the easier it will be to pull yourself up to the anchor to check that your belayer has you.
Step 5: Unite the overhand knot
This is the part that everybody forgets. Before you ask your belayer to take, unclip the overhand knot from your belay knot and untie it. At this point you are still connected to the anchor with your lanyard and quickdraw chain.
Step 6: Test the system and unclip your PAS
Ask your belayer to take, and pull yourself up and towards the anchors before resting your weight on the rope. Check that your knot has been tied correctly, that the rope runs through both pieces of terminal hardware, and that the belayer is actually holding your weight.
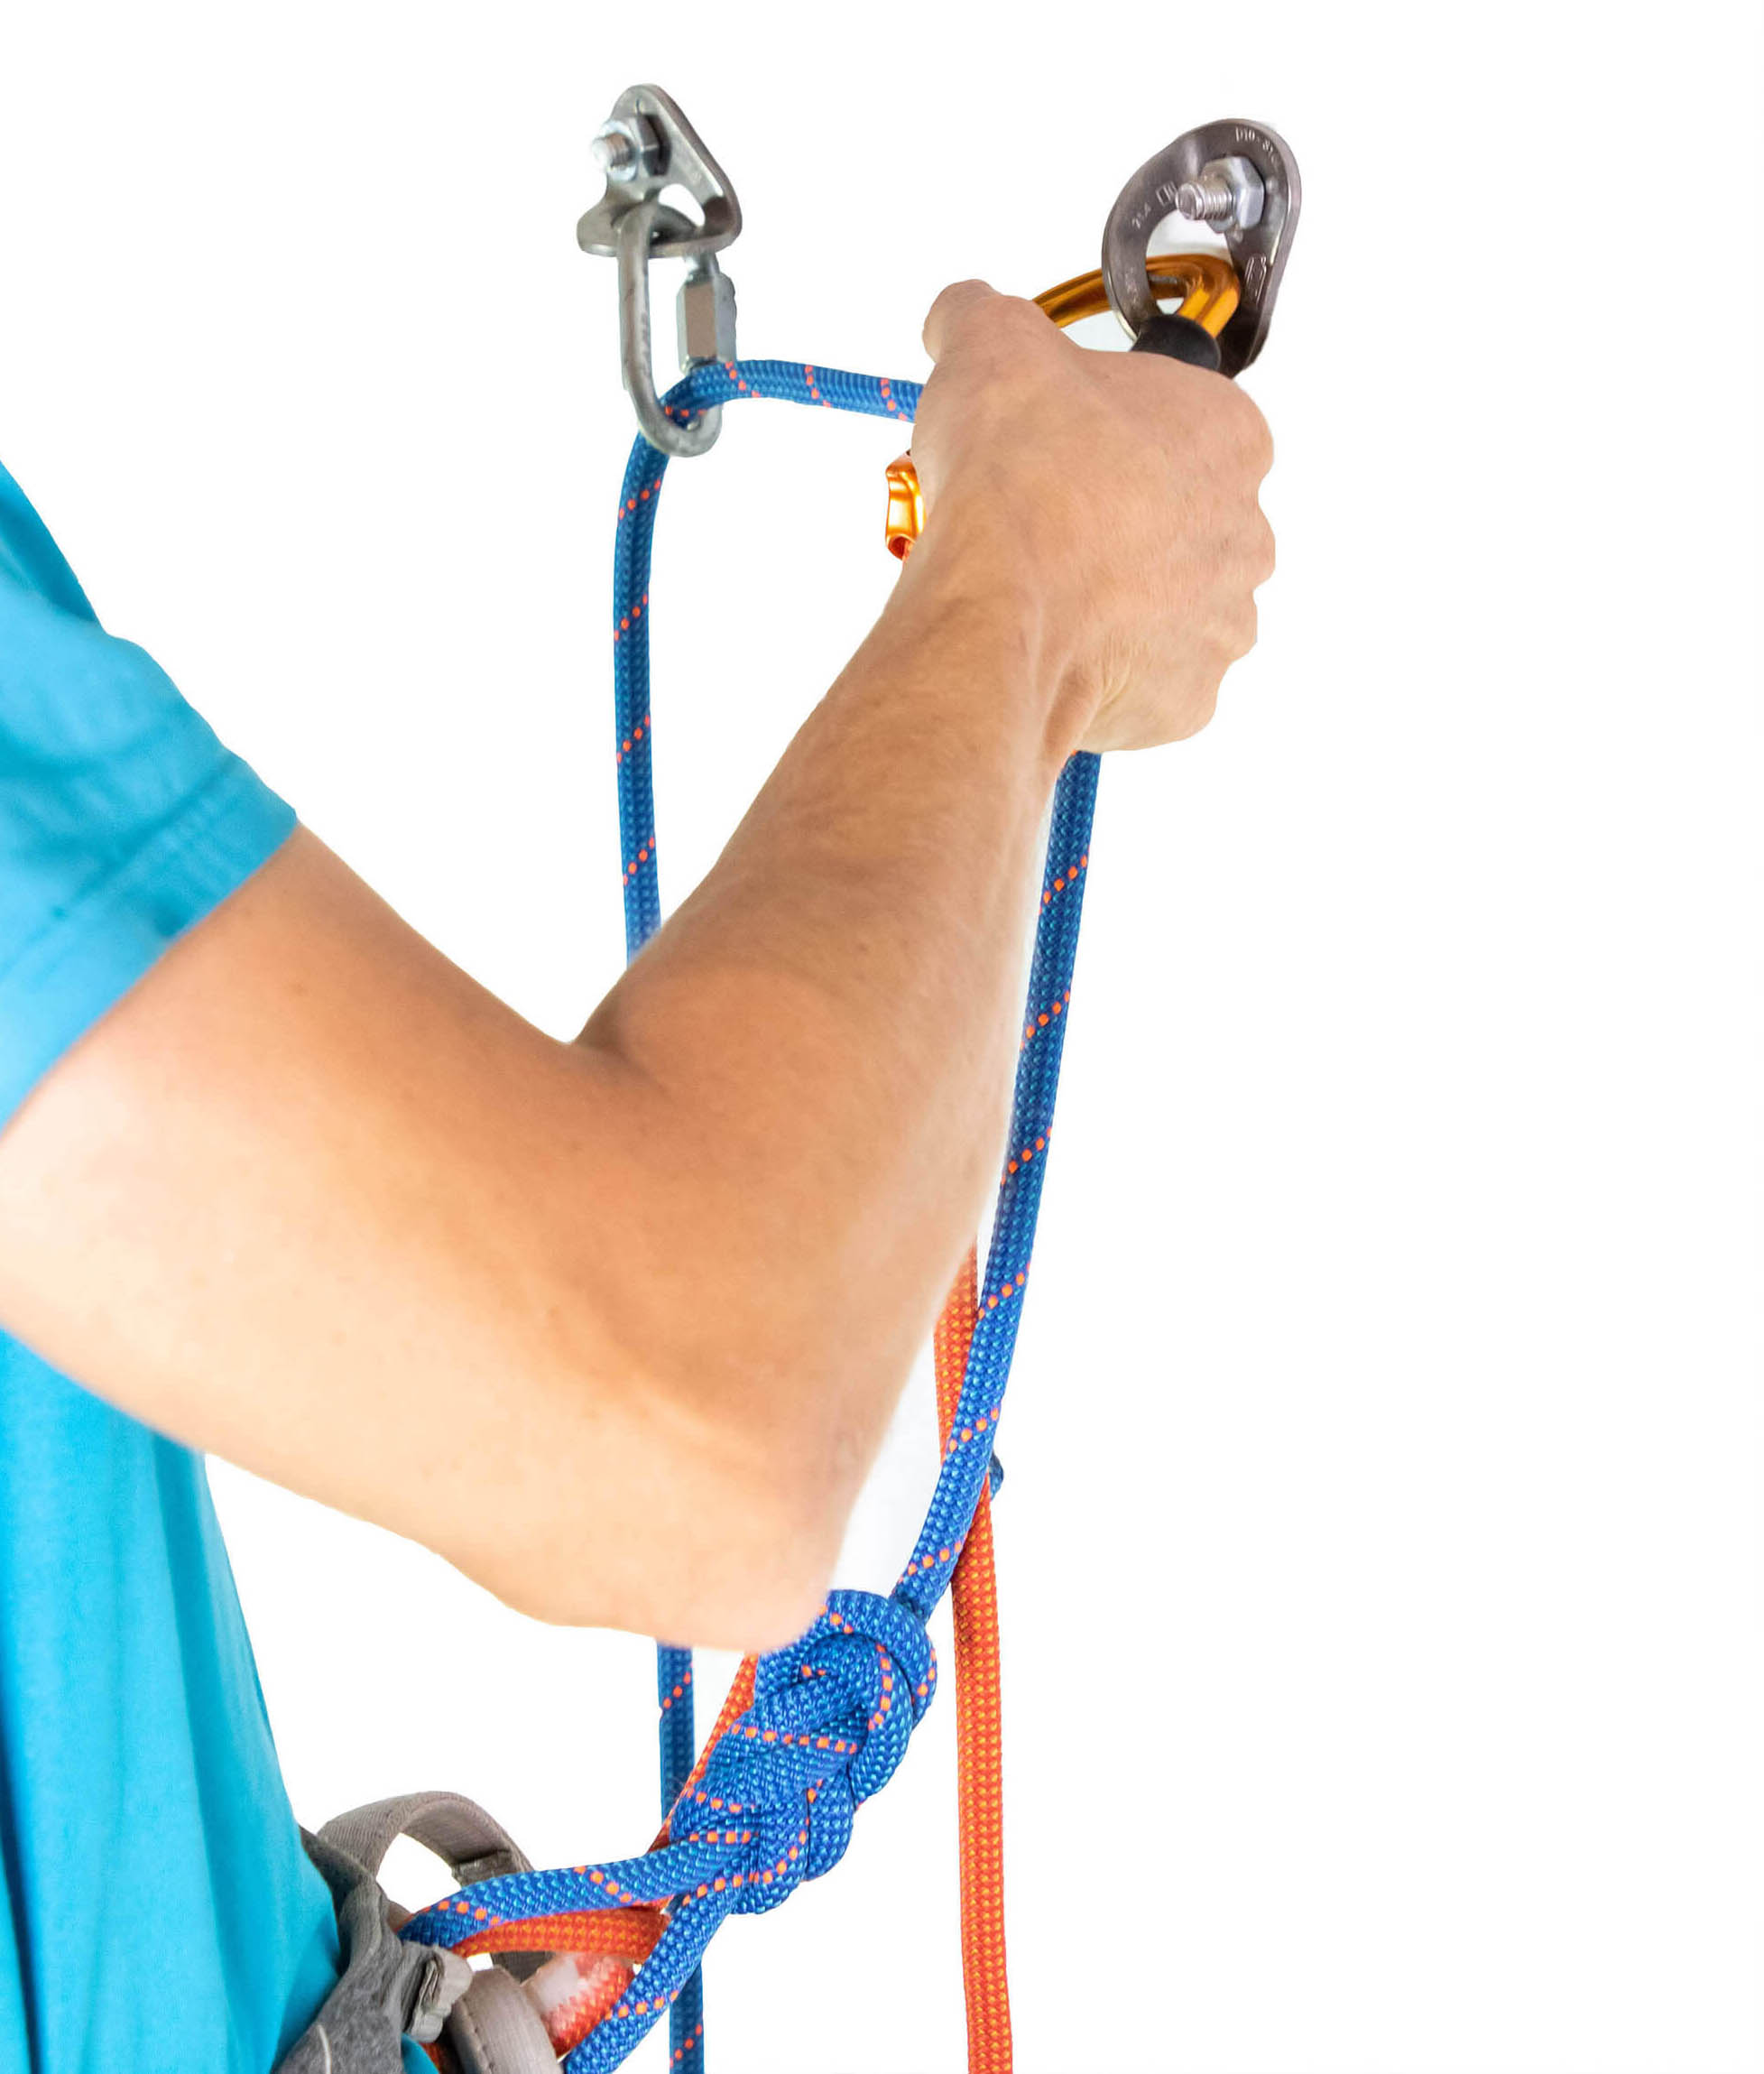
- Belayer is holding your weight
- Rope passes through both rings or quicklinks
- Knot is tied correctly
Having weighted the rope and checked the system, you can unclip your PAS and quickdraw chain and tell your belayer to lower you. Just remember to take your quickdraws with you.
Learn both techniques, one at a time
It would be a good idea to learn both techniques, but aim to master one first. Cleaning is one of those tasks that can easily result in an accident if you get it wrong. Be vigilant, follow a protocol, and think everything through before unclipping or untying anything. I recommend that you practice these techniques under the supervision of a guide or more experienced climber the first time you do them.
Learn more
Once you have cleaned the top anchors, you still have to get your quickdraws off the route. If the rock is close to vertical or slabby, that will be easy enough, but on steeper routes, getting your quickdraws off can be a real challenge. To learn how to do this as quickly, safely, and efficiently as possible, read my article Tips and Tricks for Cleaning Quickdraws off a Steep Sport Route next. It’s just one of many more useful how-to guides covering everything from techniques for aborting a sport route to redpoint tactics for crushing projects.
