If up until now you have only tied-in with a figure 8 knot, you might be wondering why many climber’s prefer to use a bowline. The latter looks more complicated to tie and doesn’t seem to offer the same level of security as your trusty figure 8, so why even consider using a bowline? In this article, I aim to provide answers to these questions by looking at the pros and cons of the two knots and explaining why you would want to use one over the other in certain situations.
Figure 8
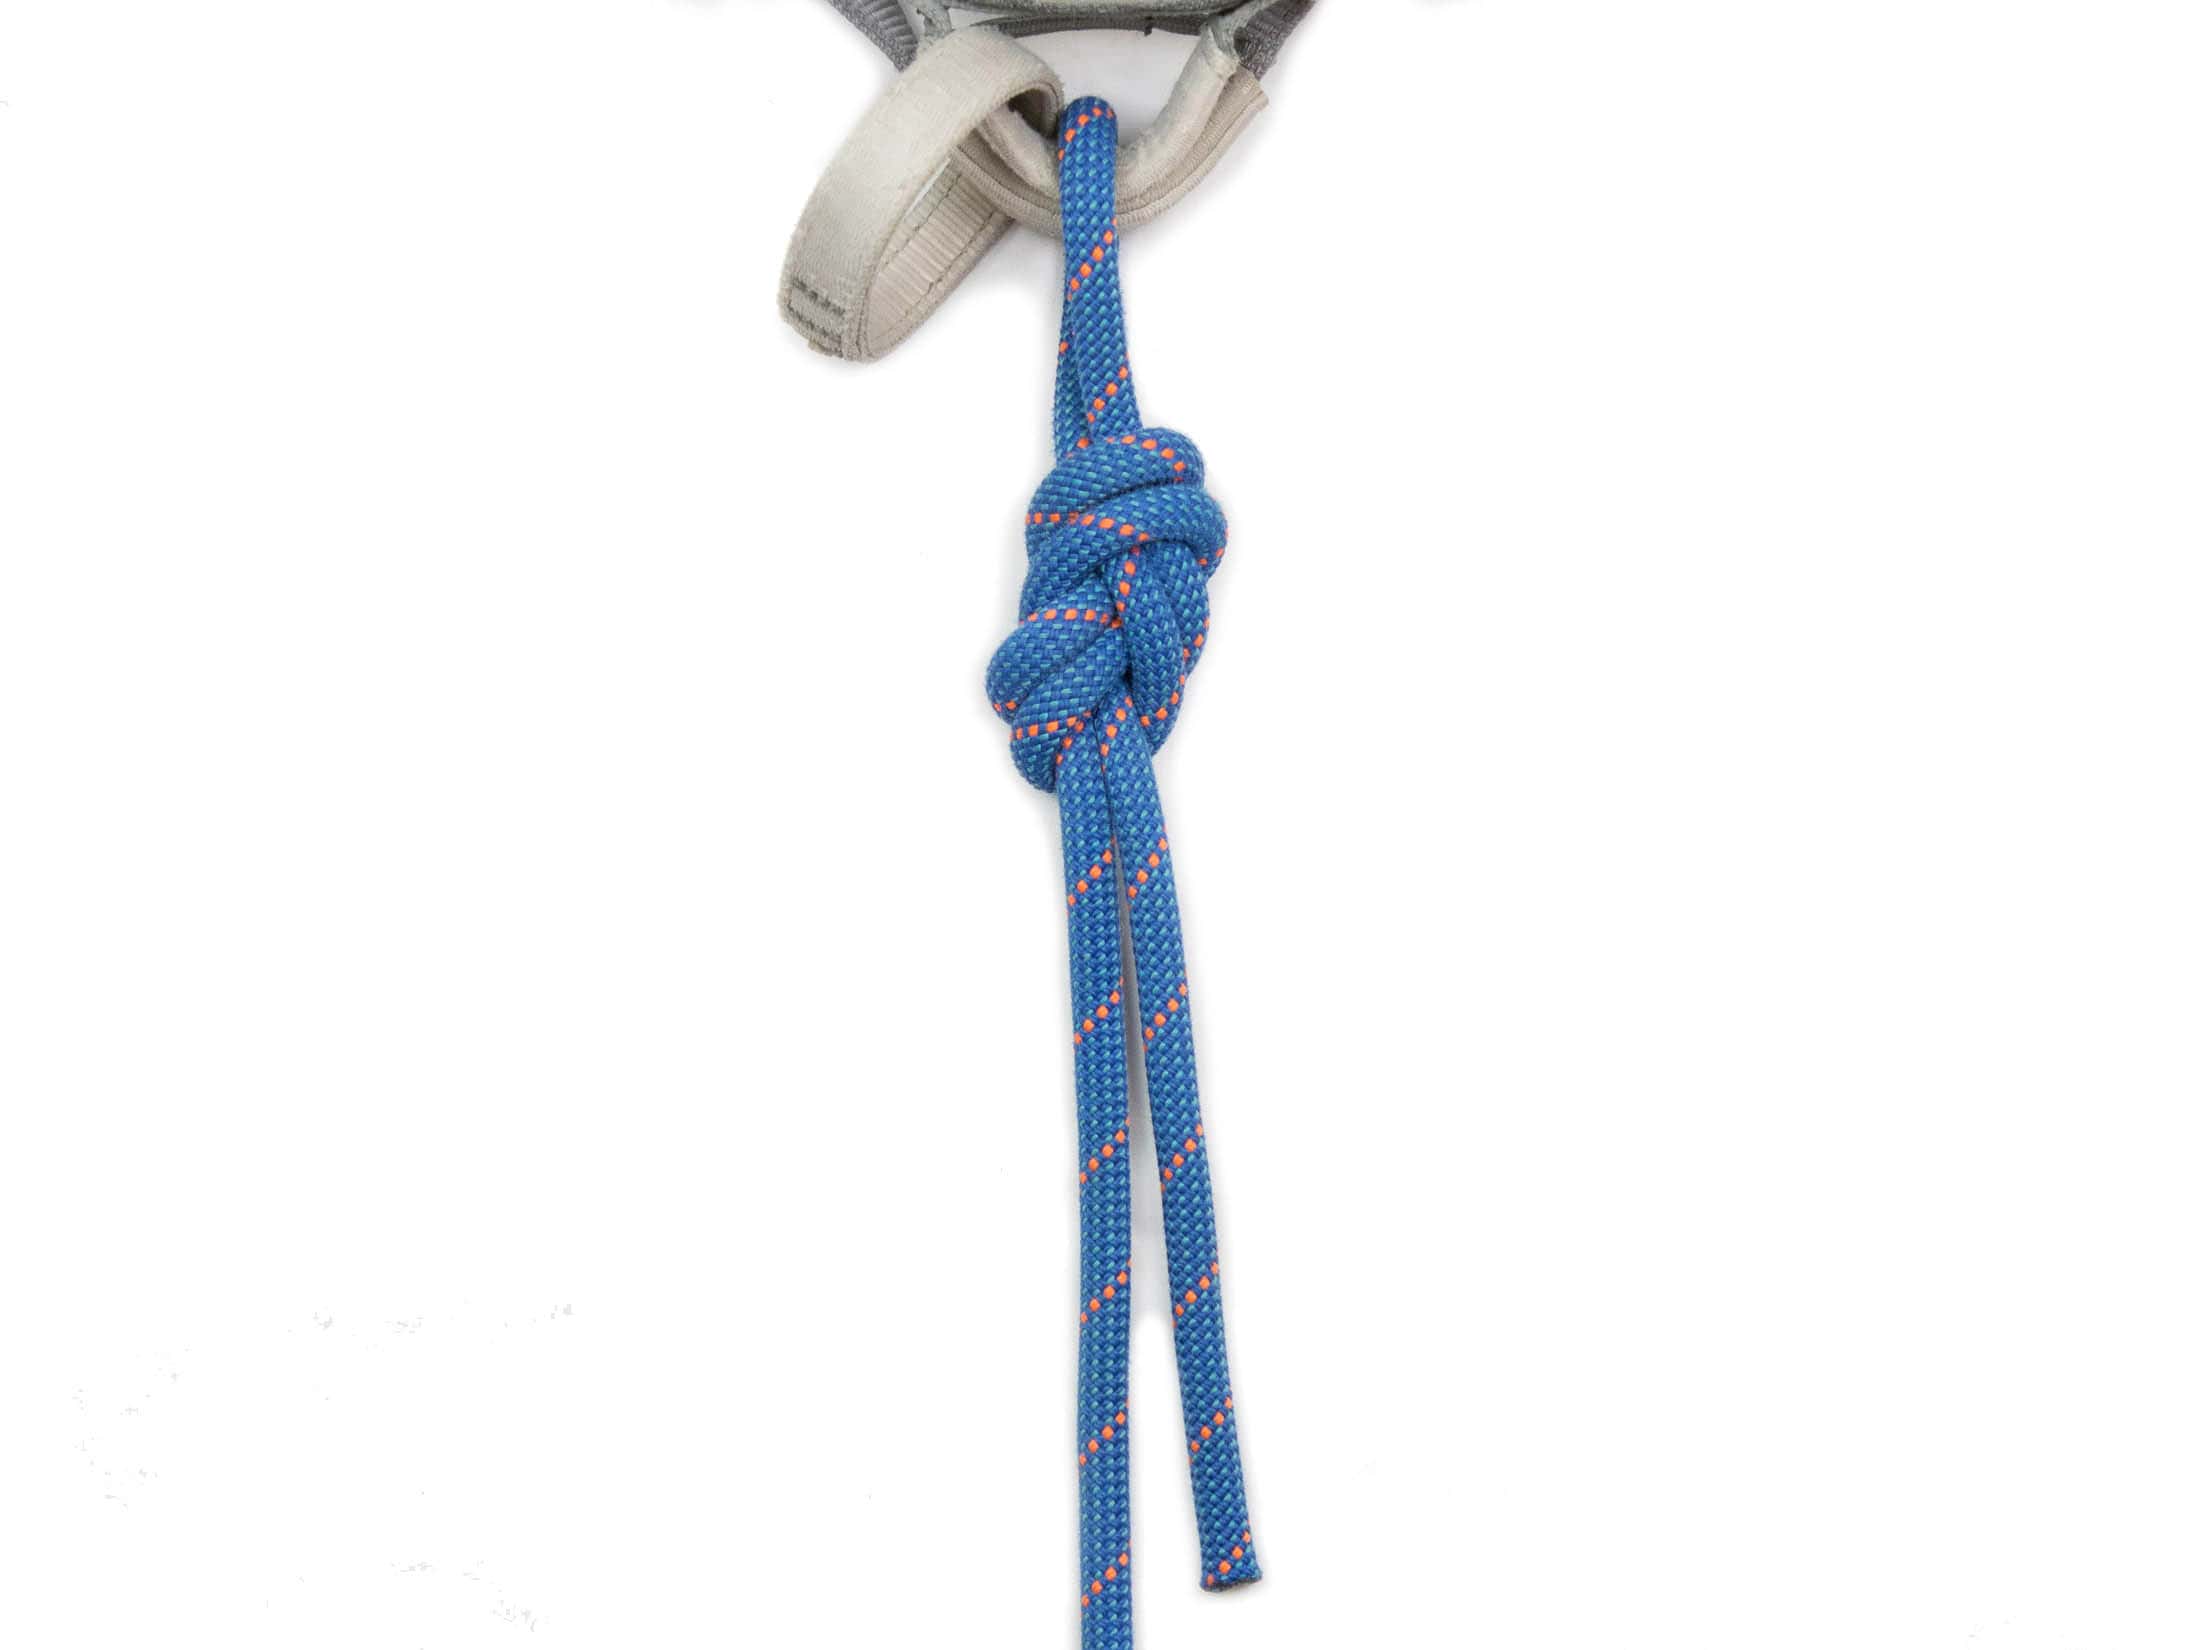
The figure 8 is the first knot that new climbers are taught, and for good reason. It’s easy to tie, easy to inspect, and very secure.
Pros
Besides being easy to tie and inspect visually, the figure 8 is also the most commonly used knot for tying in, meaning that your climber partners will also know how to check it. The same cannot be said for the bowline, which is used by fewer climbers, is more complicated, and can be tied in several different ways – all of which make partner checks less practical. The figure 8 also tightens up more snuggly than a bowline and is less likely to wiggle loose over the course of a long climb. This makes the 8 better suited to multi-pitch climbing and chimneys or offwidth cracks, where the knot could rub against the rock as you climb.
Cons
With so much going for the figure 8, you might wonder why you’d even consider tying in with another kind of knot. The downside to the 8 is that it can be difficult to untie once it has been loaded heavily. Take a big enough fall, and your knot might tighten up so much that you have to have to spend several minutes just trying to get one of the outer loops loose (Commonly employed tricks for loosening a fused 8 include bending it back and forth and rolling it across a flat rock). However, you can reduce the chances of you turning your knot into an impossibly tight pretzel just by dressing it properly and making it less likely that a strand will get pinched under another.

Stopper knot
If you are new to climbing, you might still be tying your figure 8 with a stopper knot just like your instructor showed you. This additional knot is actually unnecessary, but it’s important to understand why you don’t need it. Beginners are taught to use a stopper knot because the extra knot ensures that they tie their figure 8’s with enough tail. The problem is that this is actually too much tail. Having an extra foot of rope above your knot might be okay if you are only top roping, but when you are lead climbing, it gets in the way when you try to clip close to your chest. It’s better to learn to tie a figure 8 with the right amount of tail (roughly 6 inches) and dress it properly.
Dressing a figure 8
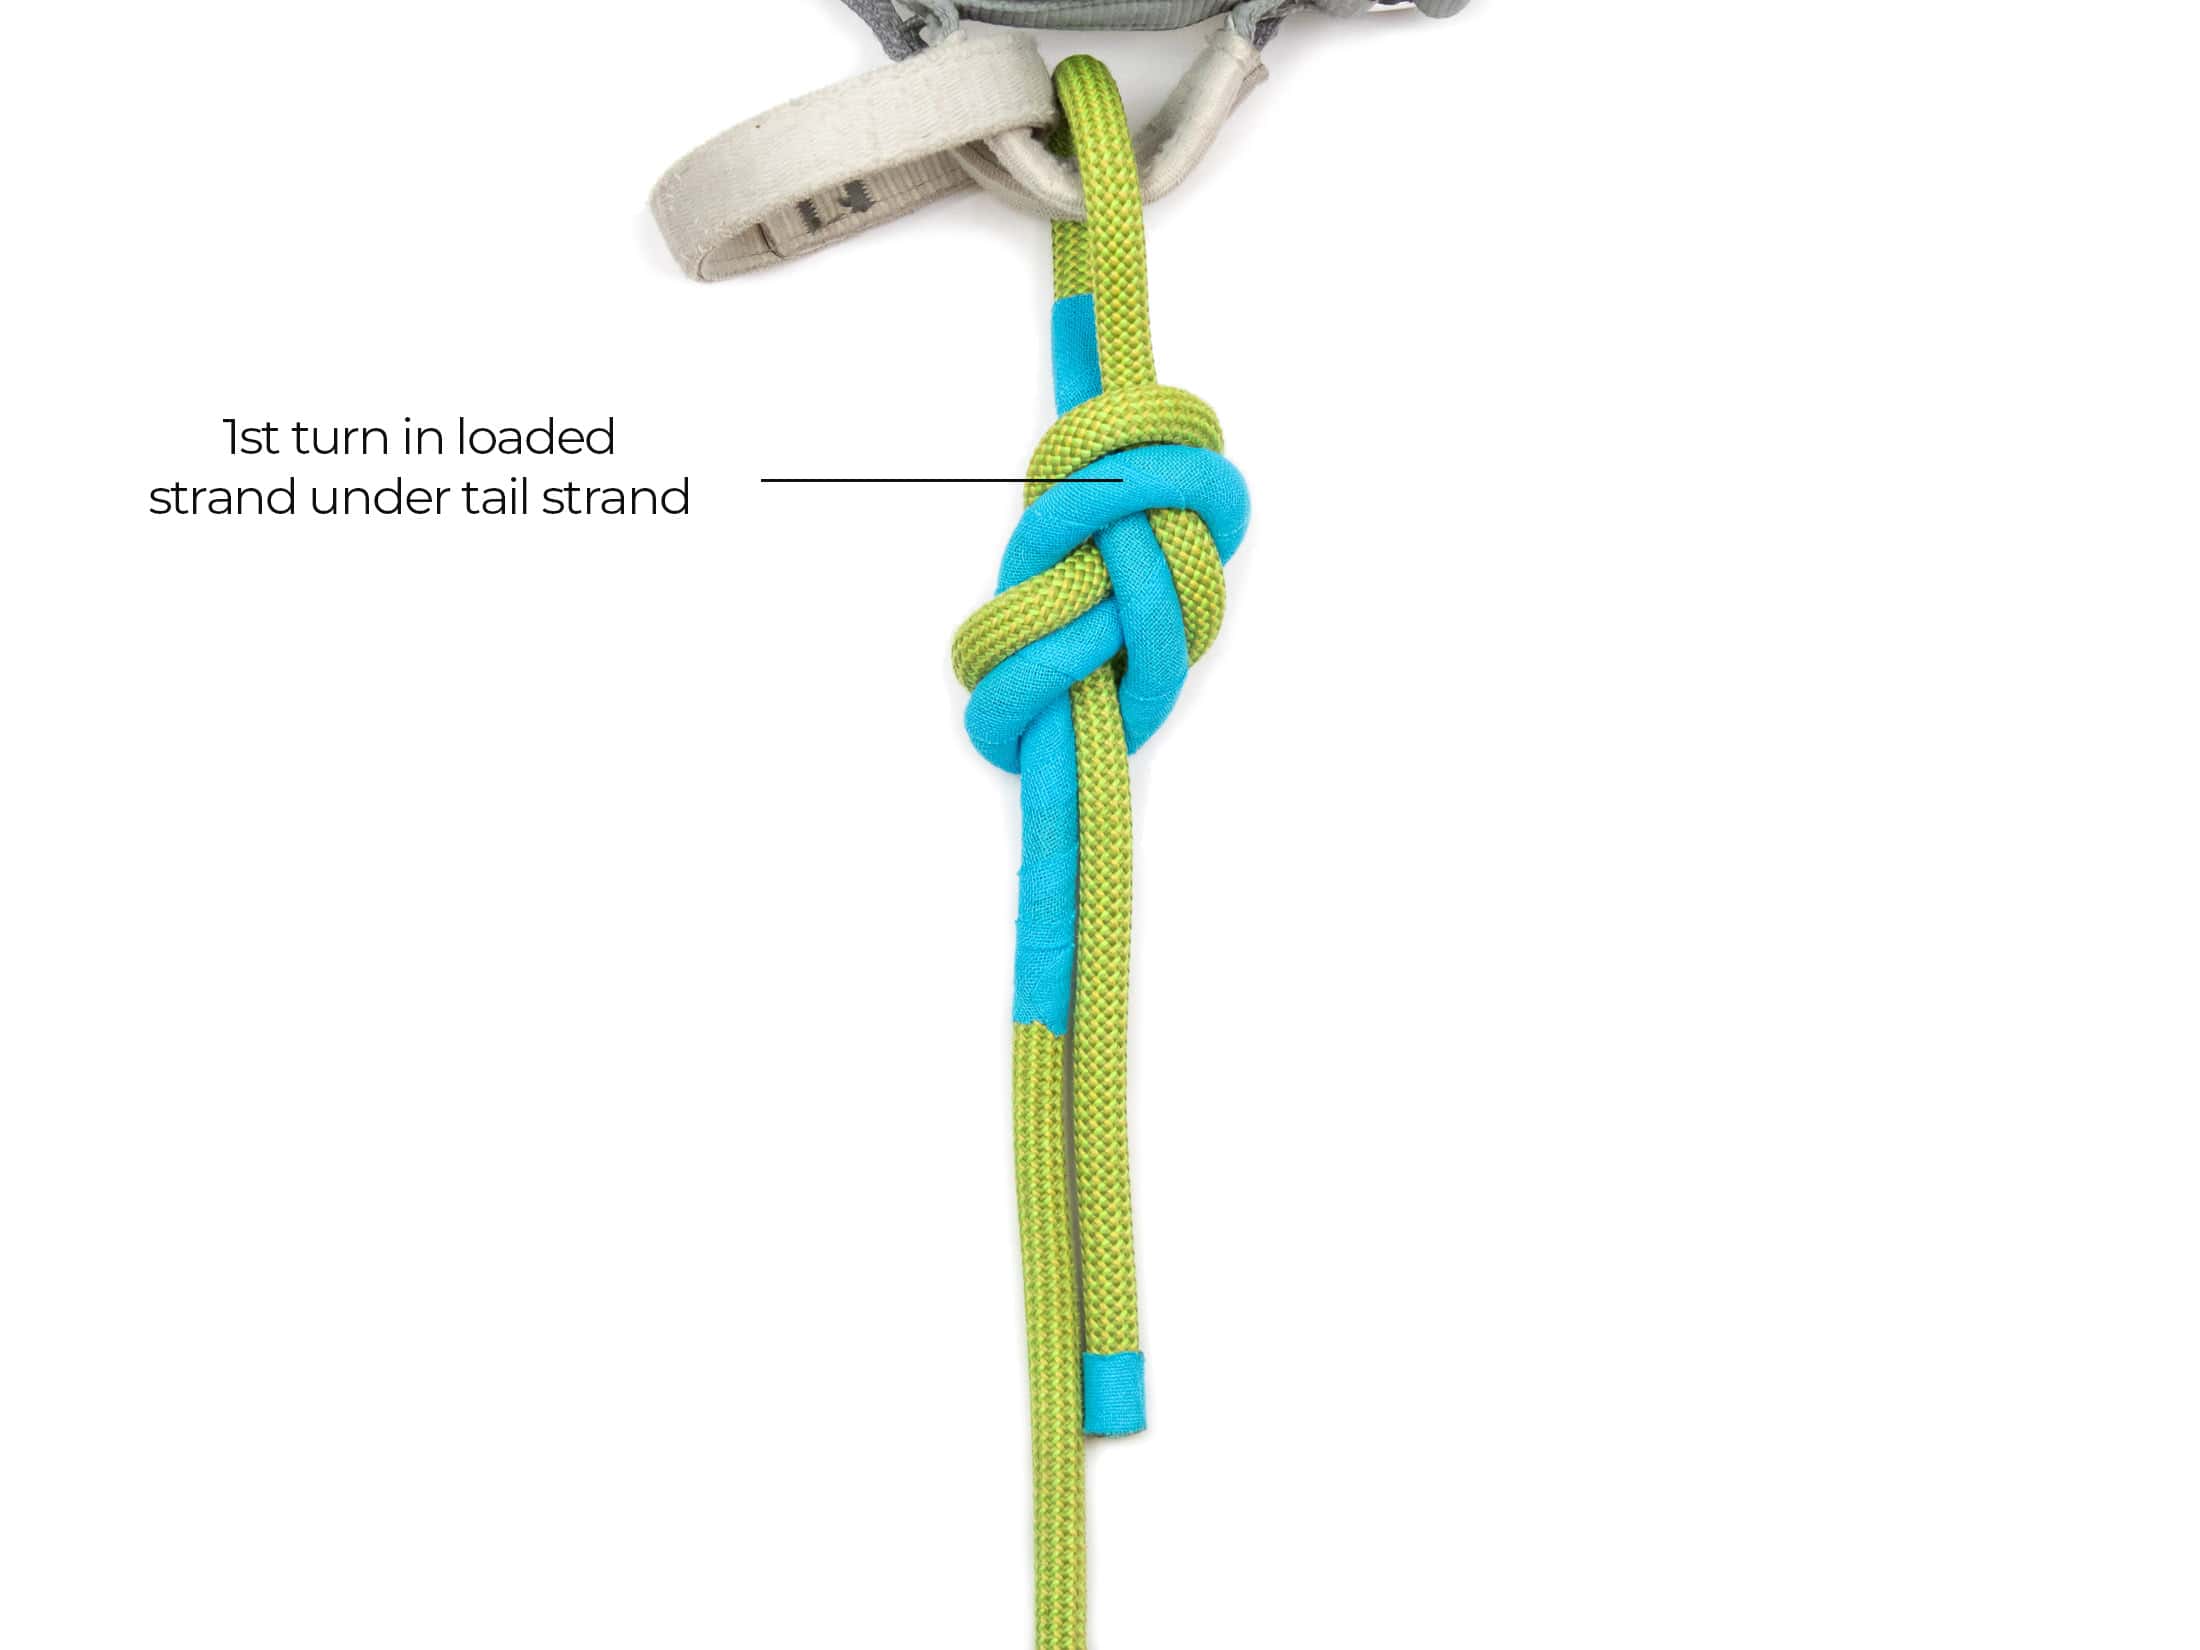
To ensure that your figure 8 is easy to untie after it has been tightened, you need to dress the knot properly. That means making sure that none of the stands cross each other and that each loop is pulled snuggly into place. To achieve this, you will need to make sure that the loop created by loaded strand is on the inside of the tail end loop (see below) and that the tail strand loop is on the outside. The best way to get this right is to move the exiting strand over to make space for the returning strand before you thread the end of the rope back though the knot.

Bowline
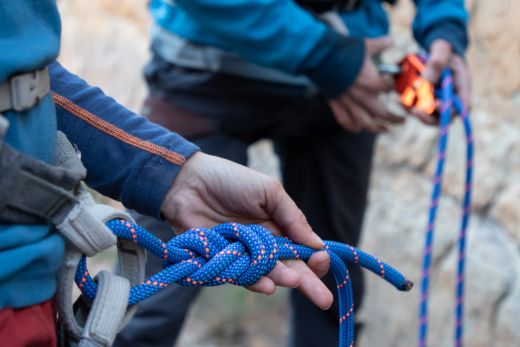
If you’ve ever seen someone tie in with a knot other than a figure 8, it was probably some kind of bowline. This is the knot preferred by experienced climbers who like to push their limits and fall regularly.
Pros
The advantage of the bowline is that it doesn’t tighten up like an 8. Even after you’ve taken a big fall on it, a bowline is still pretty easy to untie. This resistance to cinching up can save you time that would otherwise be wasted trying to untie a stubborn knot – and in the most extreme cases can save from having to cut your knot off the harness as can happen when a figure 8 fuses properly. This one quality makes the bowline popular with climbers who fall frequently – sport climbers and trad climbers who like to push it. If you have already taken one whipper too many onto an 8, you can probably imagine how you might come to appreciate a bowline.
Cons
The bowline’s resistance to tightening up is also its biggest limitation – it can wiggle loose over several hours, making it a poor choice for multi-pitch climbs (the figure 8 is a far better choice here) and even single-pitch routes where your knot might rub against the rock (squeeze chimneys and off-width cracks). The other downsides are that it takes longer to inspect even if you know the knot well and that it isn’t as well known as the figure 8. Many of your partners won’t be familiar with the bowline and won’t be able to check your knot if you use a bowline to tie in. Even if a partner is familiar with the bowline, they might not know the version you use.

Stopper knot
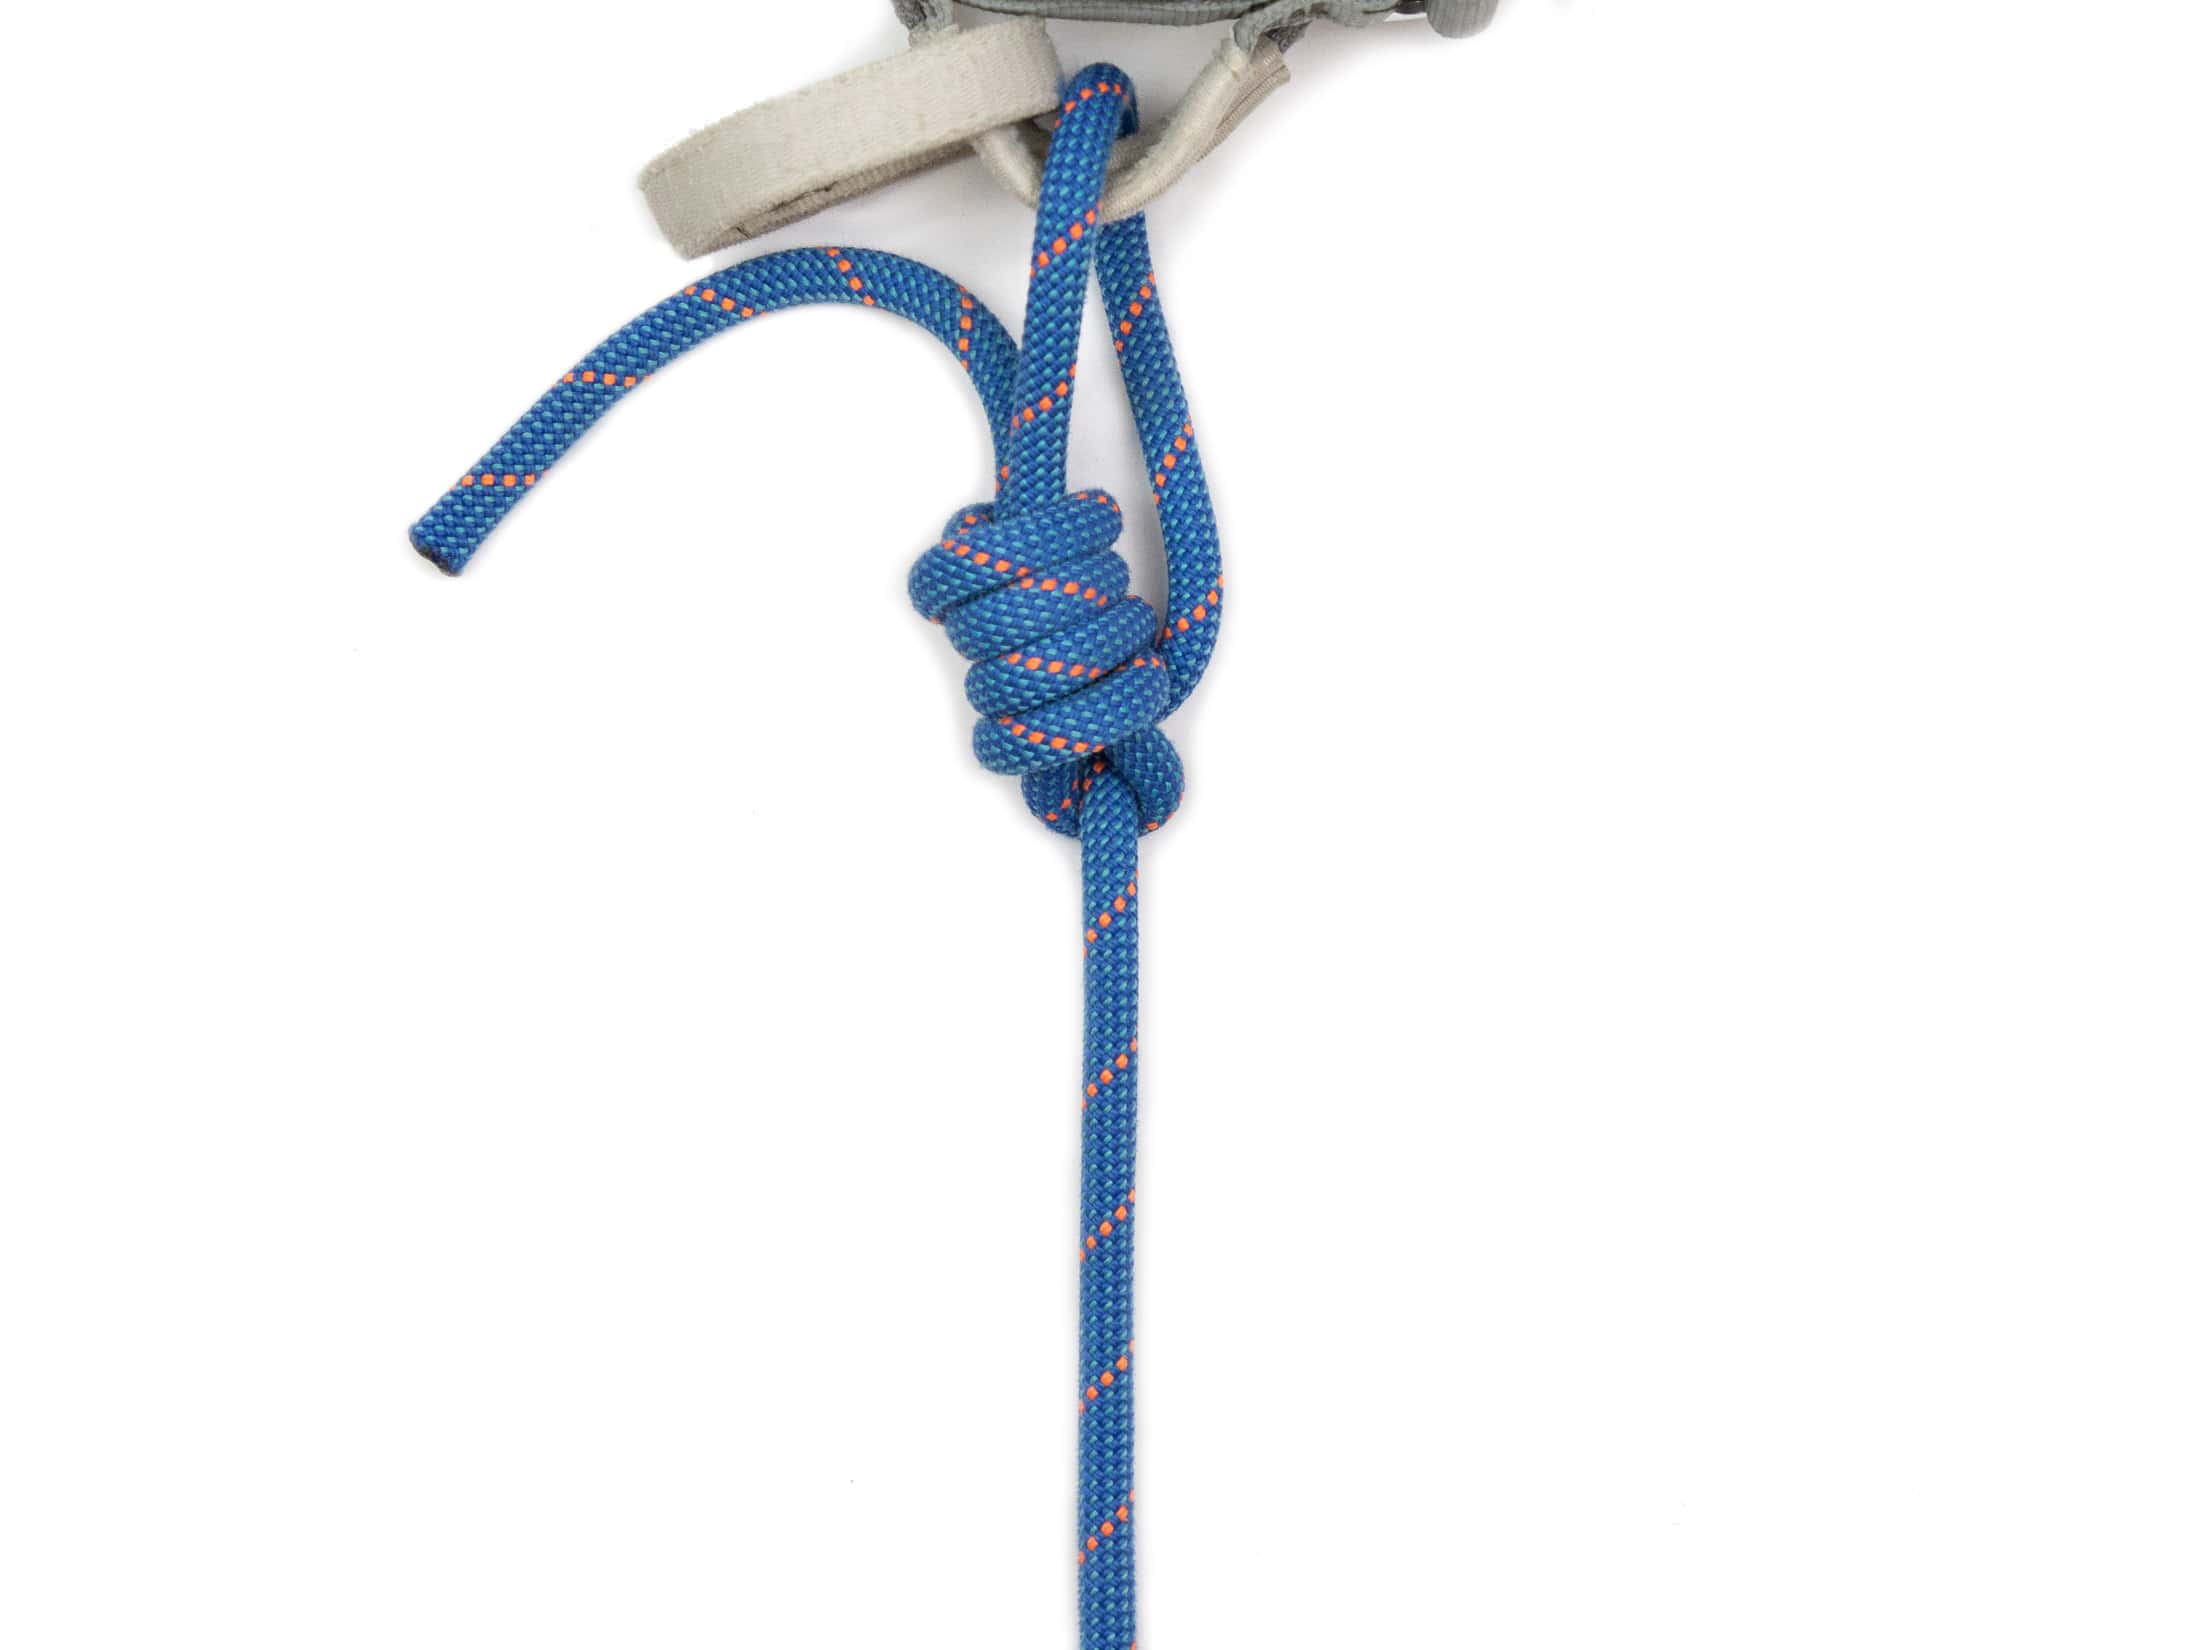
Unlike the figure 8, a bowline has to be tied with a stopper knot to make it secure. In the case of a standard bowline or double bowline, this is tied into the loop created by the bowline (see above) and not on the strand above the knot (as you were taught to do with a figure 8). The rethreaded bowline, on the other hand, is tied onto the main strand (similar to a figure 8) as the tail end of rope exits the knot parallel to the main strand. I recommend tying the stopper knot right up against the bowline to keep everything snug and to limit movement, which could loosen the knot.
Versions of the bowline
There are many types of bowline, but only three are commonly used in climbing: the standard bowline, the double bowline, and the rethreaded bowline. The standard bowline is the easiest to tie; the double bowline adds an extra turn and in that way is a little more secure; and the rethreaded bowline is the most secure but also takes longer to tie. Of these, the double bowline is the most popular, so it’s the one I’ve chosen to demonstrate in the video above. If you want to see how the single bowline and rethreaded bowline are tied, you can see those demonstrations here.
Warning: The Yosemite bowline is also described on some climbing blogs and channels, but this knot isn’t recommended as it isn’t as secure as three bowlines mentioned above – if dressed incorrectly, the whole knot can unravel if the end of the rope slips back into the knot. If the finishing turns come undone on any of the three knots mentioned above, you still have a bowline.
Get more advice from this gearhead
You now have everything you need to know about the different knots used for tying in. But don’t stop here. On this website you’ll find many more in-depth how-to guides on everything from how to lead on trad gear to how to retreat on a sport route. Look for these under the skills section on the climbing page or, better yet, sign up for my newsletter to get all the latest from Trail & Crag delivered straight to your inbox.
