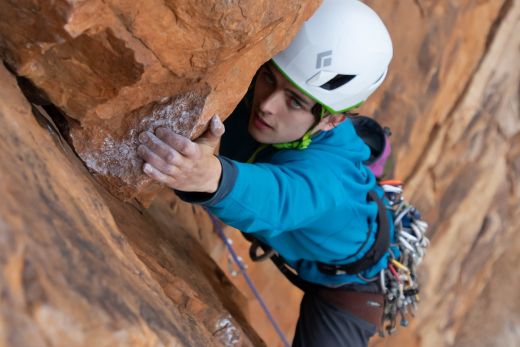
Trad climbing can be a huge amount of fun, but the nature of the protection makes the leader entirely responsible for his or her safety. If you place gear properly and choose routes that are easy to protect, trad climbing can be just as safe as sport climbing. But if you don’t place adequate protection or choose routes that are difficult to protect, it can also be pretty sketchy. If you’re reading this, you’re probably very new to trad climbing, and we can safely assume that you want to avoid sketchy. In that case, you’re doing the right thing by reading this article, possibly the most comprehensive online guide for aspiring trad leaders. By reading this and the other articles linked to here, you’ll learn everything you need to know to lead your first your trad route safely and build up your confidence.
- Risk management
- Understand the limitations of your gear
- Adapting your rack for the route
- The gear placement process
- Deciding what gear to place where
- Placing protection
- Anchor building and belay setup
- Preparing for your first trad lead
Risk management
There are several ways in which the risks in trad climbing can be higher than those in sport climbing. The first is that trad protection is more complex and can fail if not used properly. It’s the climber’s responsibility to mitigate this risk by knowing the limits of their gear and learning how to place it properly. Then there’s the nature of trad routes themselves. While some routes follow lines up perfect rock, there are many more, especially multipitch routes, that pass through patches of dubious rock or sections that simply can’t be protected. In such instances, trad climbers are forced to adopt the old school ethos “The leader does not fall”.
A third type of risk involves the level of commitment required from multipitch trad climbs. Unlike a multipitch sport route, which puts bolts within easy reach if a team needs to abort, trad routes require a leader to, at the very least, devise an emergency rappel before returning to the belay ledge, which may or may not be equipped with gear that can be rappelled off. The short of it is that trad climbers can’t count on a quick and easy descent if weather moves in or the route proves too difficult. And with many adventurous routes taking trad climbers into the high mountains, volatile weather can be a significant risk.
Trad climbing can be as safe as you want it to be
Despite these risks, it’s also true that trad climbing can be as safe as you want it to be. Modern guidebooks publish information on gear placements and the quality of rock found on listed routes, making it much easier to identify easy to protect routes. On the flip side, there are many trad climbers, who will develop an appetite for routes that offer a little more ‘spice’. There’s a certain satisfaction that comes with taking on a certain amount of risk and being able to manage it. Just don’t rush it. It takes years of experience to develop the kind of judgement that will allow you to properly assess the risks involved during a climb.
Understand the limitations of your gear
Before you can place adequate protection, you need to understand the limitations of your gear.
Holding power depends on placement, rock quality, and gear strength
Every piece of protection is rated according to the load, measured in kilonewtons (kN), that it can sustain before it fails. But that doesn’t mean that a piece rated to 6 kN is guaranteed to withstand a 6 kN fall. That piece could rip out of the rock at just 3 kN or less if it was placed badly (with minimal surface contact where it’s needed) or in bad rock. To ensure that your gear has adequate holding power, you have to place it properly and in solid rock. If a certain placement doesn’t tick these boxes, it’s almost always better to look for another for suitable placement.
Smaller gear has to be used with caution
This should be obvious, but I will say it anyway. Smaller gear isn’t as strong as larger pieces of protection, and it has less holding power, meaning that it can rip out of soft rock more easily. Keep this in mind when placing gear low down on a route, especially when the rock isn’t great. Another thing to be aware of when using smaller gear is that it can be finicky and has to be placed more carefully to ensure adequate holding power. Microcams have only a single axle, which means that they have less range than larger double-axle cams, and have to be placed more carefully.
Adapting your rack for the route
Most climbers have what they consider to be their standard rack: a double set of cams up to #3, 12 to 16 nuts, and then some quickdraws, alpine draws and runners. If you’re not sure what kind of gear a route takes, you’re probably going to rack up with this. If, on the other hand, the guidebook tells you that you need some big pieces and very little in the way of smaller protection, you may leave out some micros cams and add a #4 and #5. Likewise, you’d probably add more alpine draws and runners if a route meanders, or leave them out if a route follows a very direct line.
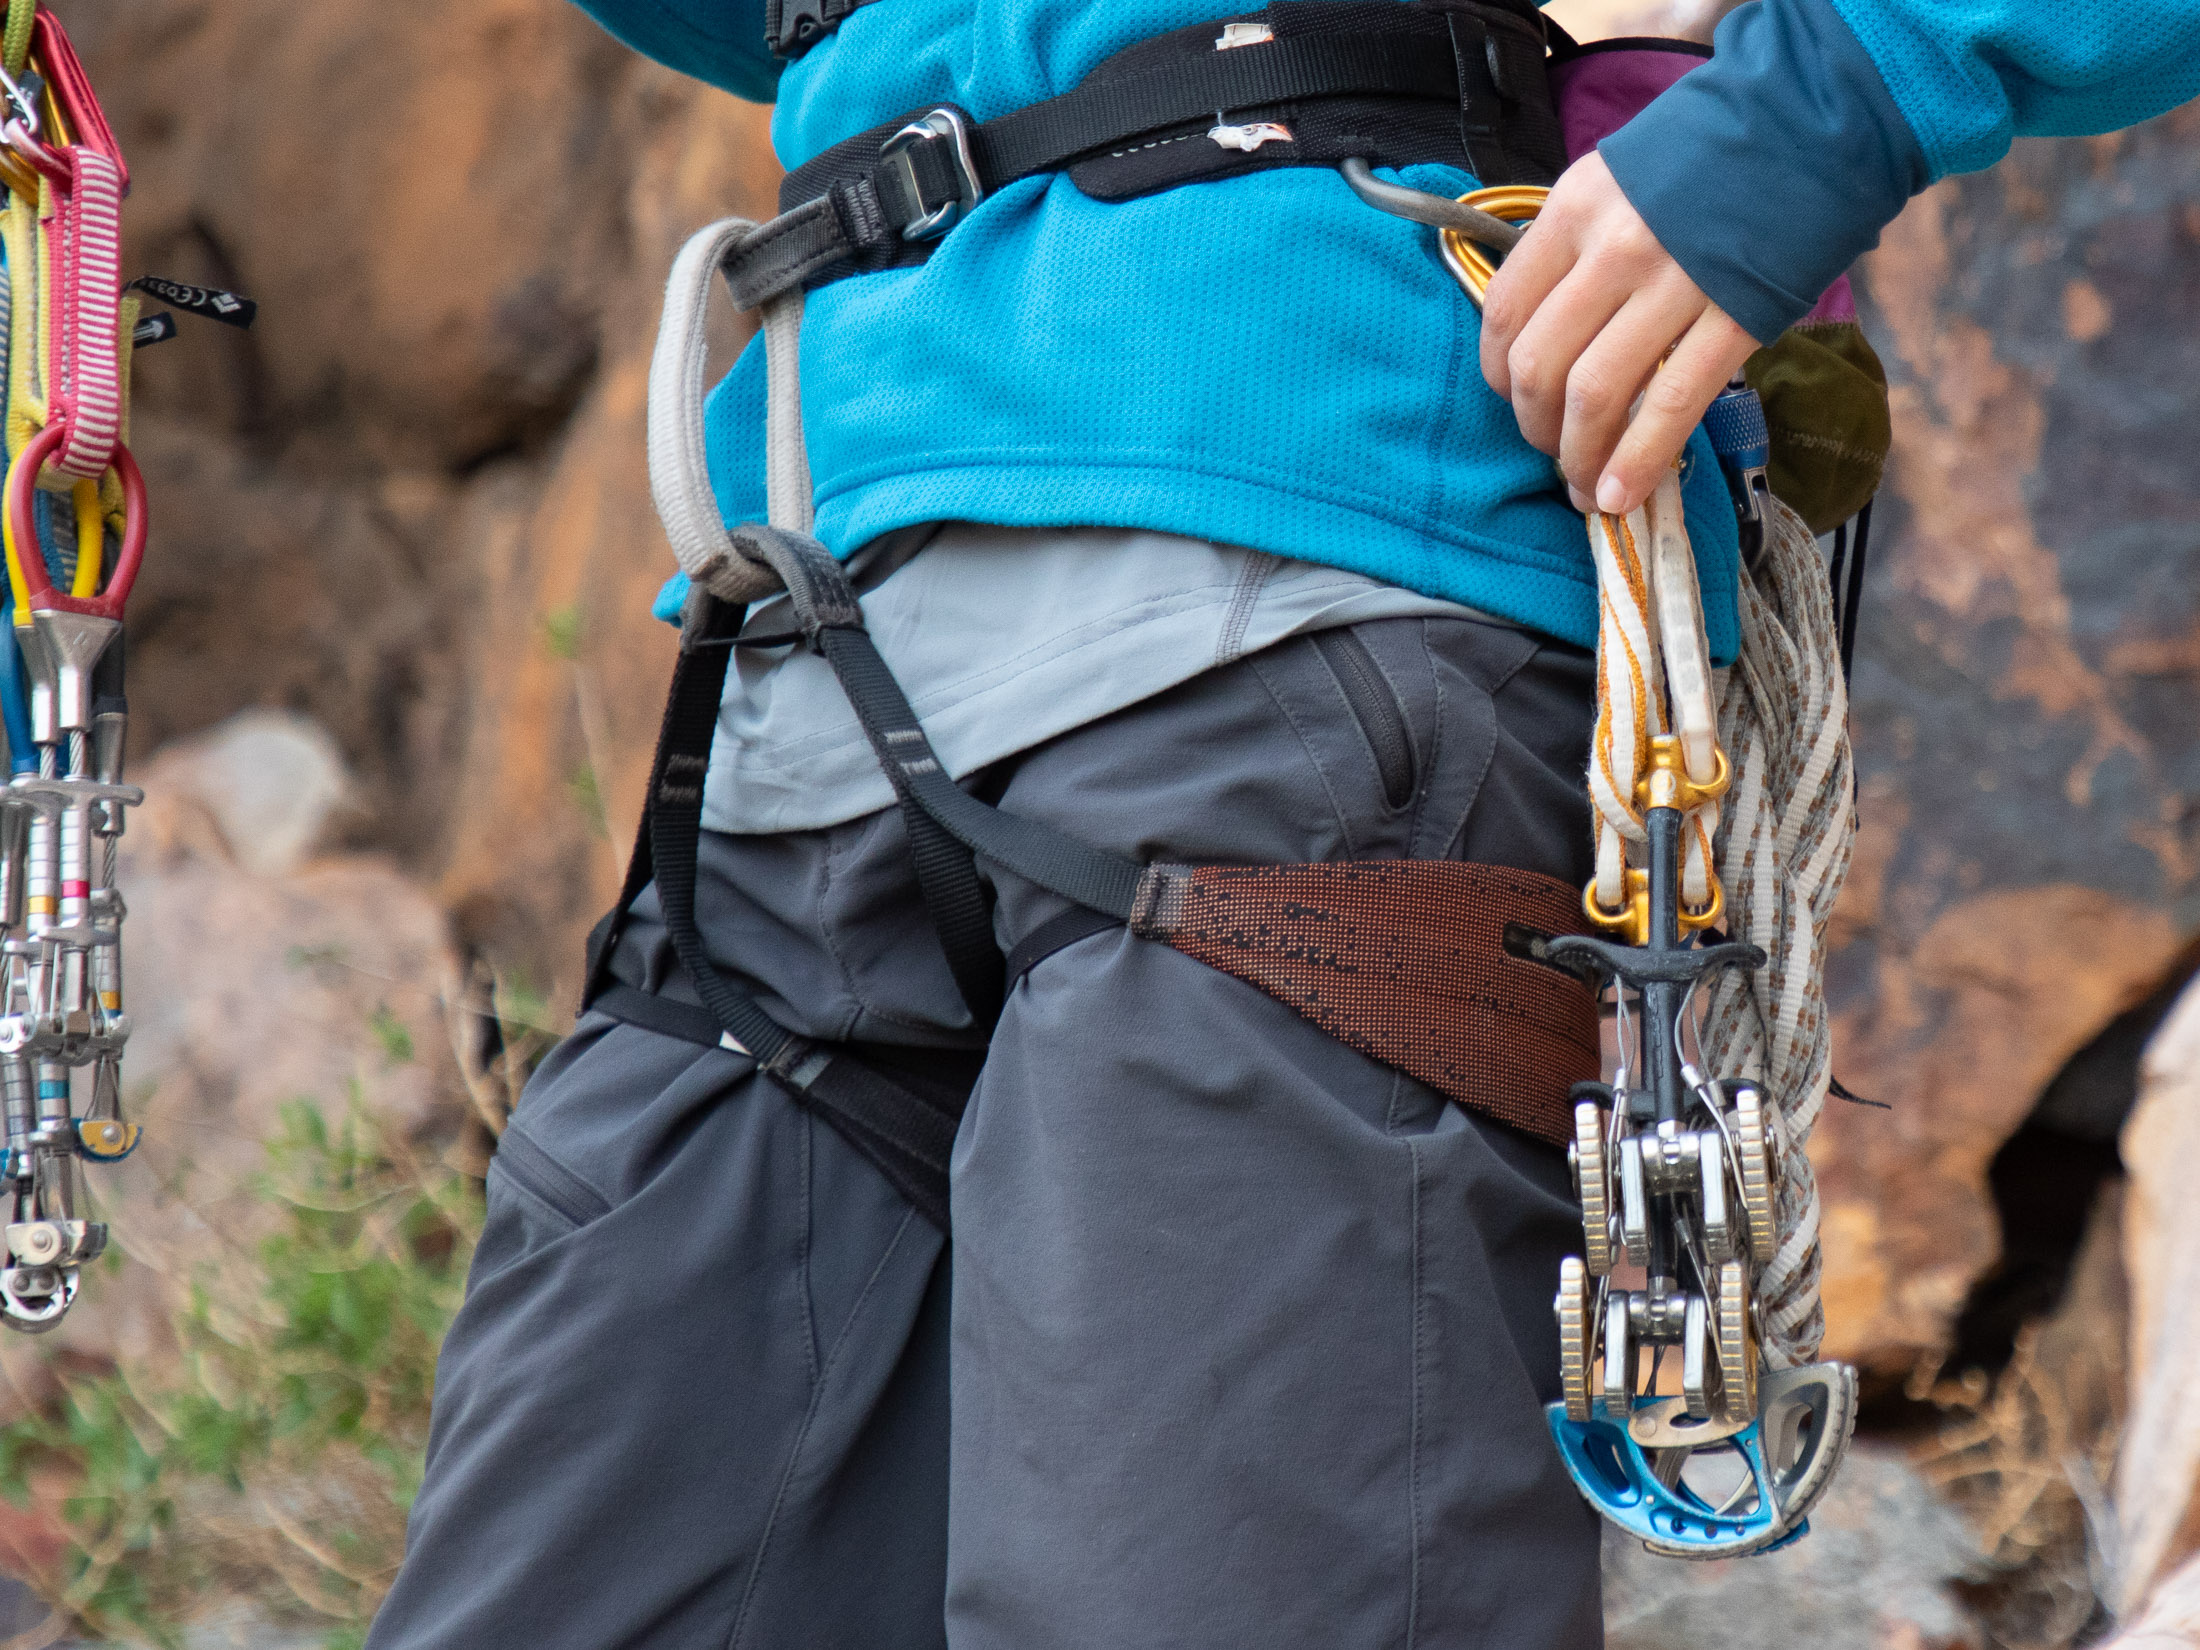
Being able to adapt your rack like this takes some experience, and initially you will probably want to leave the ground with absolutely everything including that Big Bro you will never use. But with experience, you will be able to look at a route (even if that’s a route description or topo) and adapt your rack so that you carry only what you need. This paring away of the unnecessary is key to lightening your load (a full rack isn’t light) and de-cluttering your gear loops. Lastly, and while on the topic of decluttering, it’s also important to rack your gear according to a system that will allow you to find gear easily when you need to place gear quickly.
The gear placement process
There’s a lot to consider when placing protection on lead. Fortunately it can all be broken down into three more easily managed steps - assess the quality of the rock, place your protection, and then extend the gear with a draw or runner.
Rock
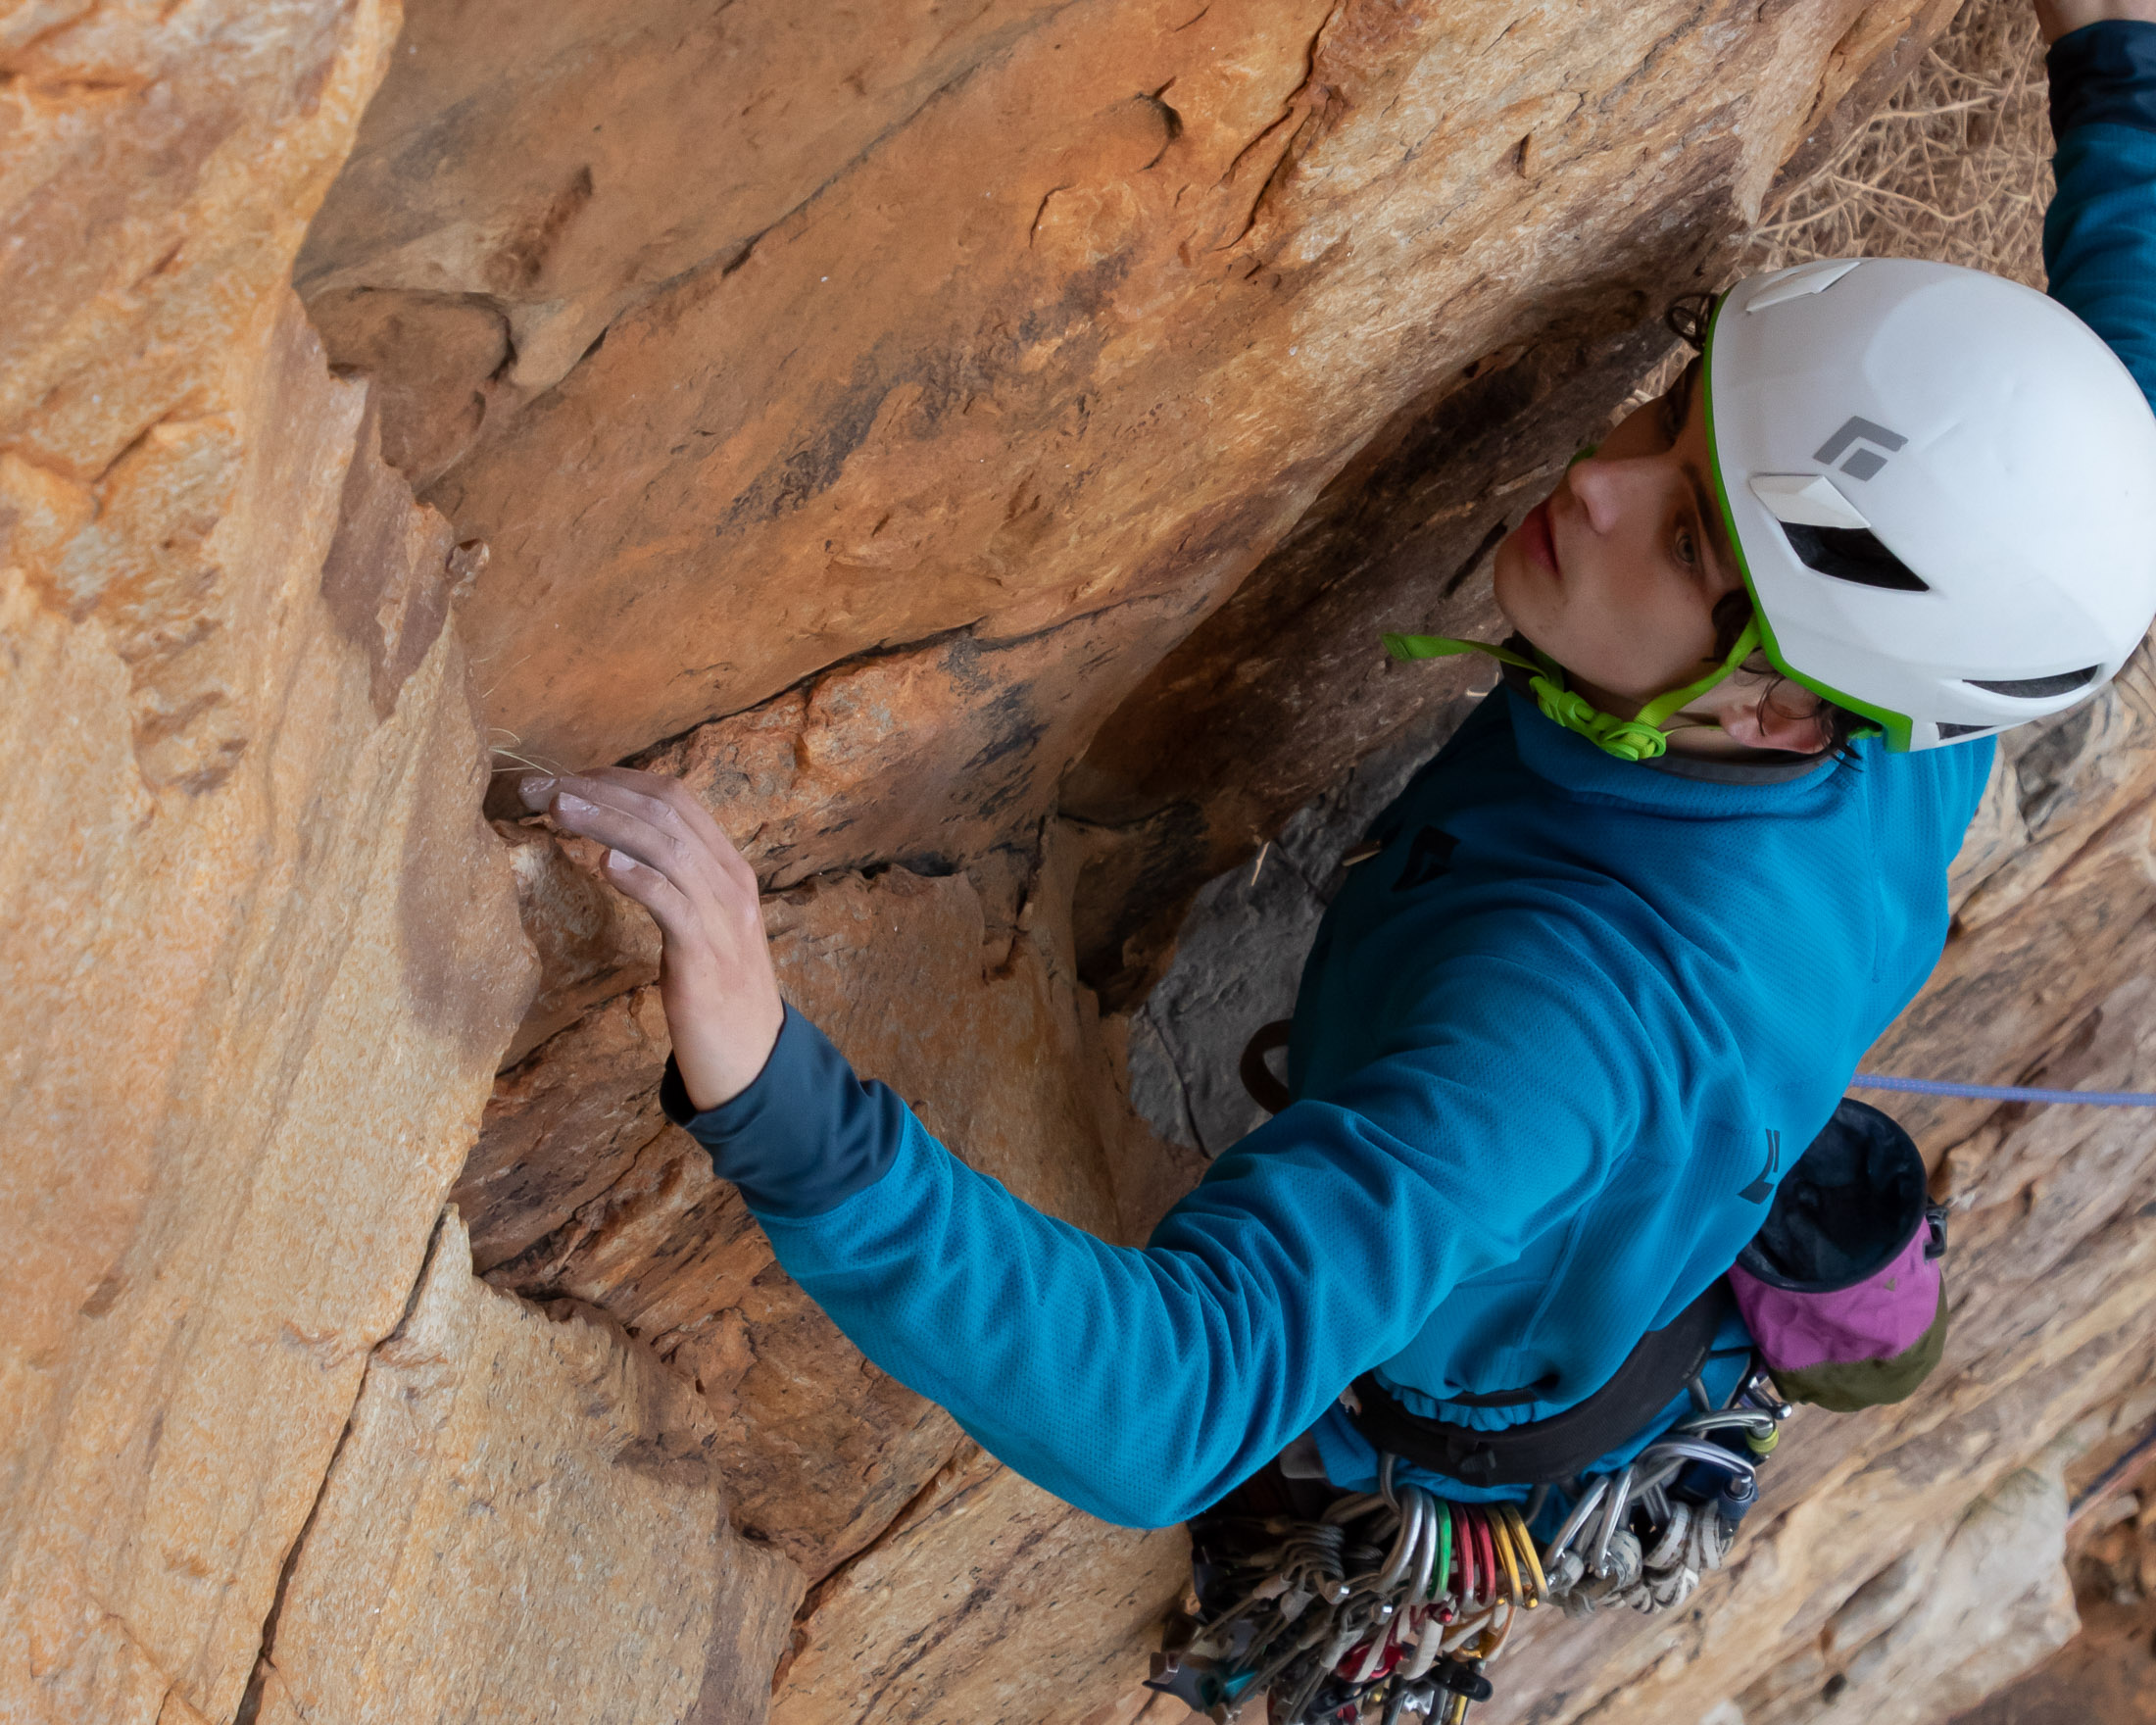
Even if a piece of pro is placed properly, it’s still only as solid as the rock around it. When considering placement opportunities, scrutinise the rock around every potential placement. You can do this visually by looking for fractures that would weaken the rock. Be especially wary of flakes and rock that is broken by intersecting fractures. Suspicious rock should be tested by thumping it with the palm of your hand. If it vibrates or makes a hollow sound, it’s partially detached from the wall and could shear off. Don’t place gear in it. Also be wary of rock that is soft, as smaller pieces could easily pull out of it if even the placements might otherwise look suitable.
When assessing the strength of rock, it’s also important to keep the effects of water in mind. Some types of sandstone can lose up to half their strength when wet and are considered unsafe to climb on after it has rained. In some areas the rock might dry out in 24 hours or less, but in many others, the rock inside chimneys and at the back of recesses can stay damp for days. By climbing these before they are properly dry, you wouldn’t only endanger yourself and your partner, but also risk breaking holds on might be a very popular climb.
Protection
After assessing your options for placements and narrowing them down to those with good rock, you have to decide on what to place and where exactly to place it. You will need to consider what gear can be placed in the features available, what the direction of pull is likely to be, how much force is likely to be generated in a fall (a fall lower down on a route is likely to be harder), how you might conserve gear so that you have what you need higher up the route, and whether one piece will offer sufficient protection. That’s a lot to think about. Fortunately, these decisions can be made easier if you first identify placements that ensure the proper direction of pull, and then narrow down your options even further by asking yourself the following questions.
- How much force is likely to be generated in a fall; what is the smallest piece you can safely rely on?
- Is there any reason, like conserving gear, why you shouldn’t use the largest and strongest of your options?
- Does your best option offer sufficient protection, or should you place a second piece?
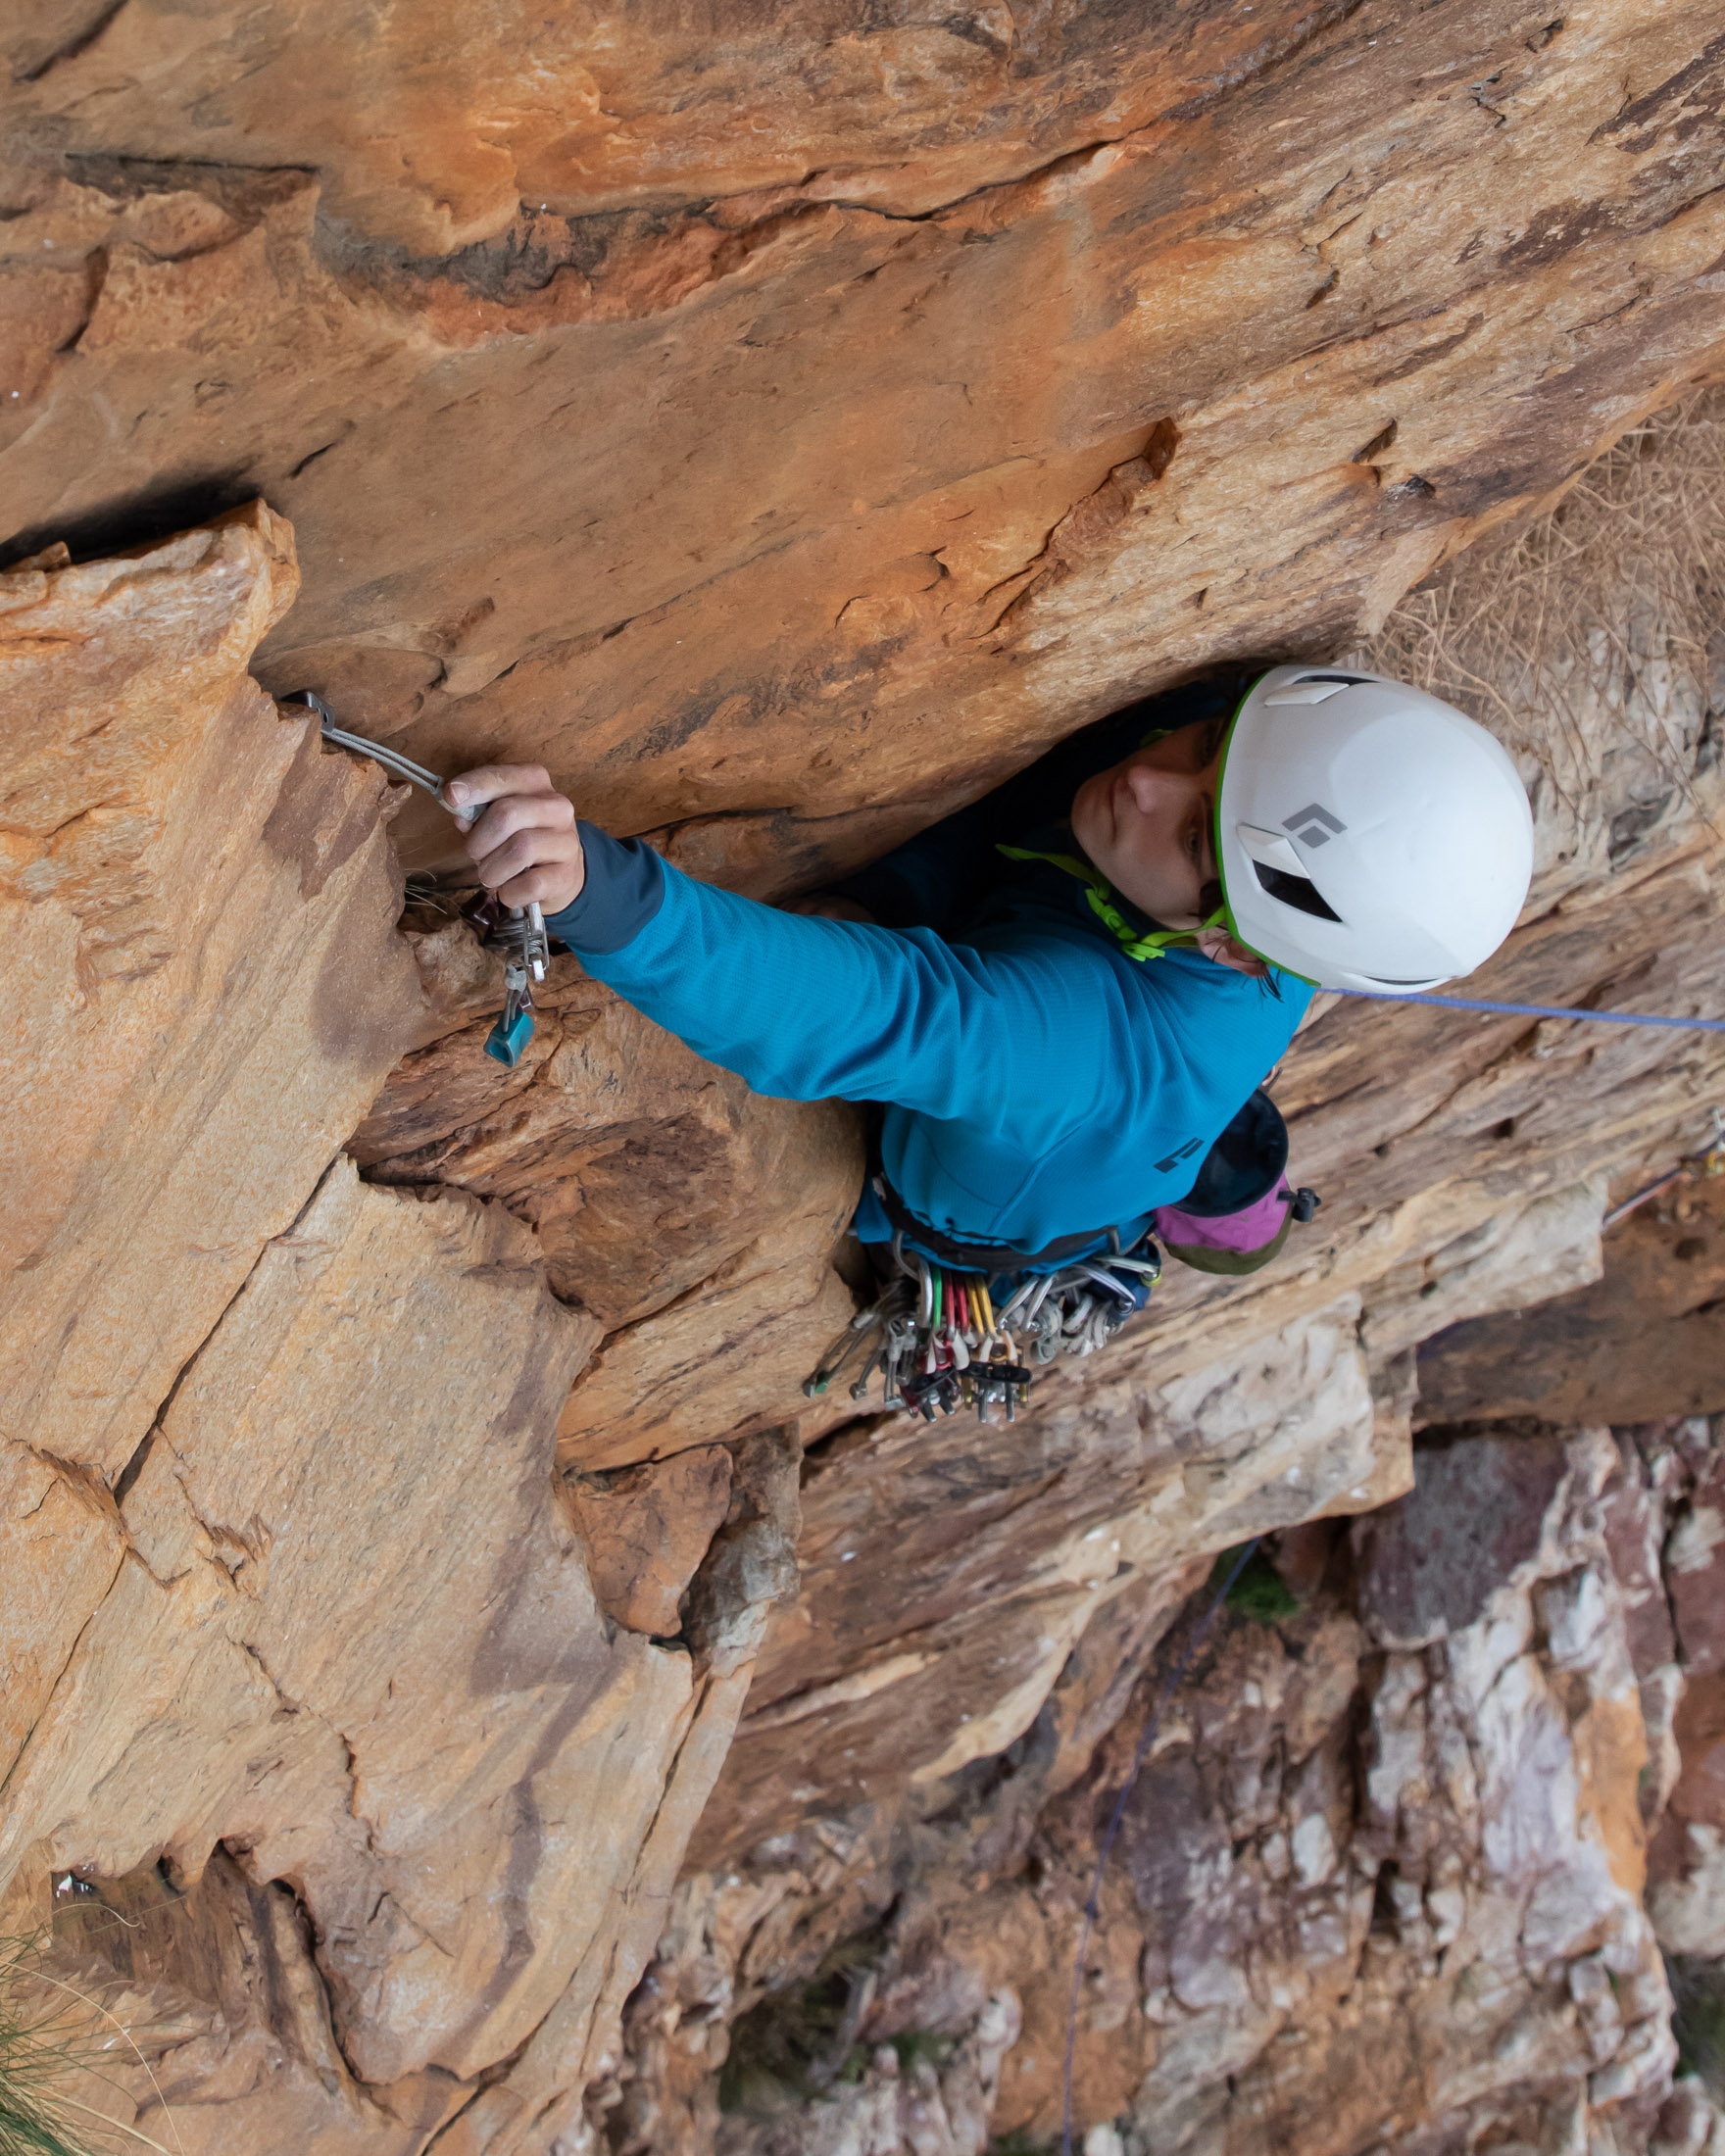
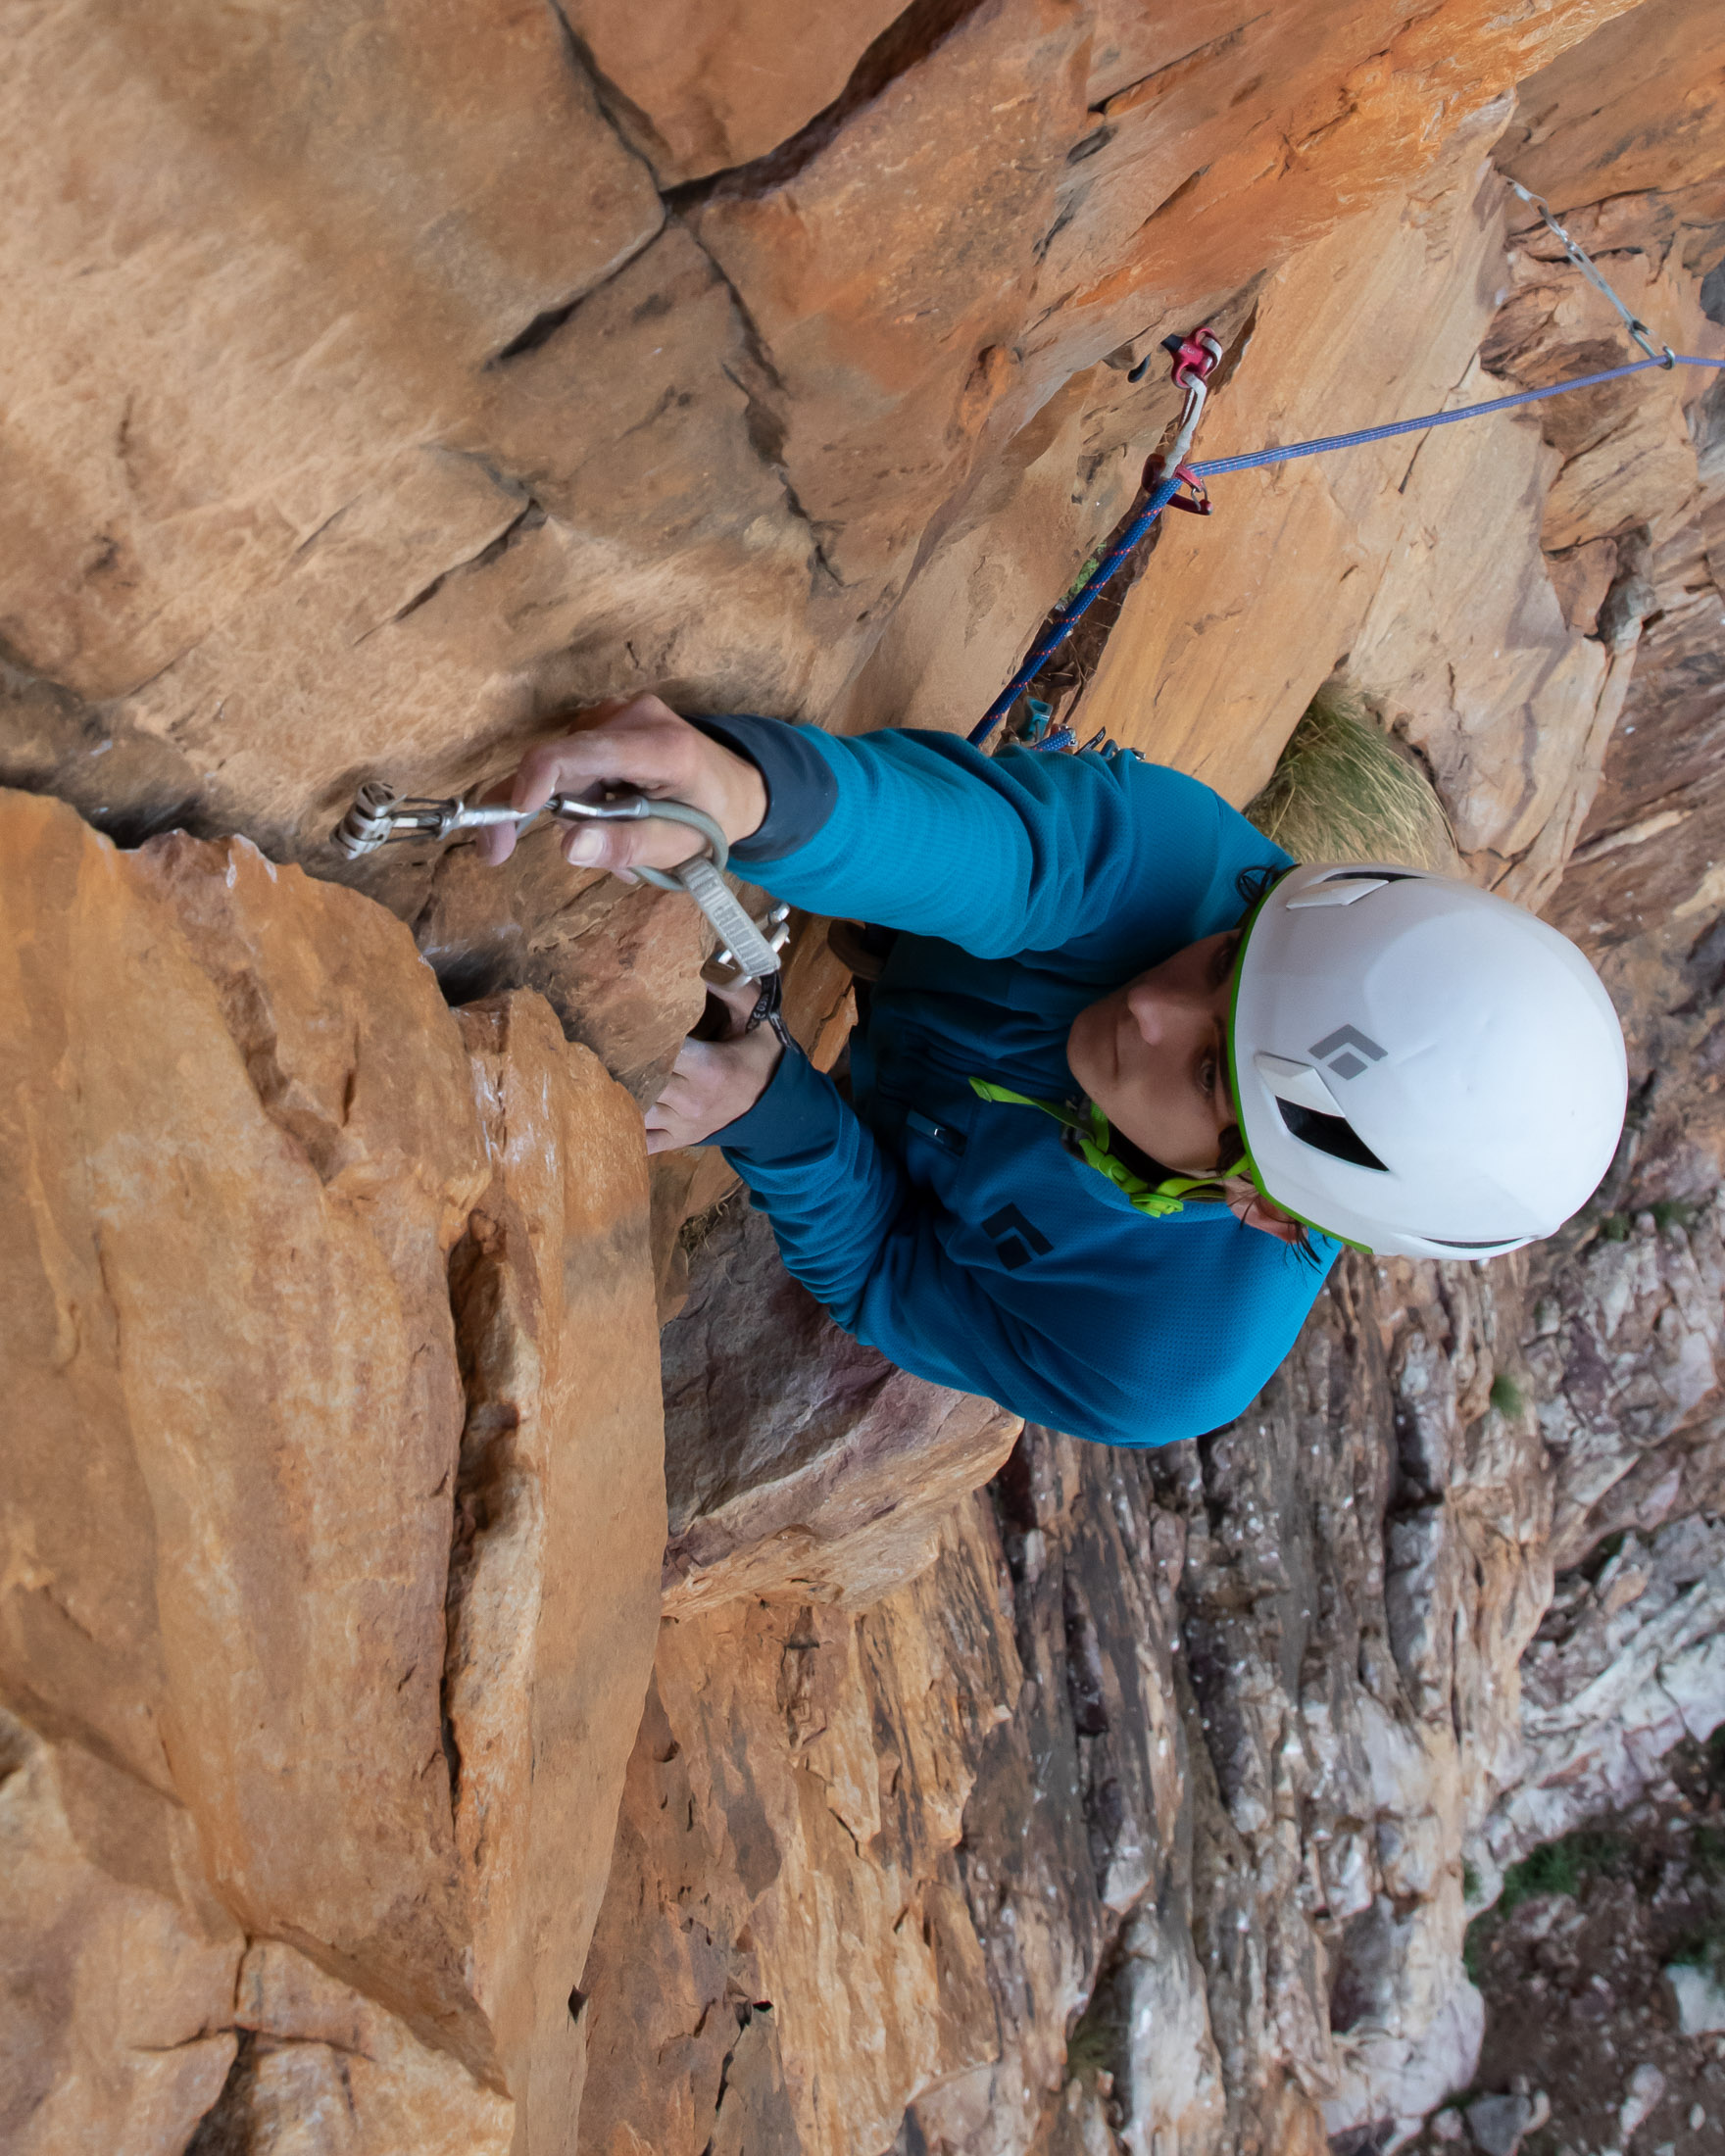
You might need to ask the third question many times as you explore the options identified by the second question. Ultimately it will come down to your assessment of the situation, which will include several factors, some of which I go into in greater depth in the next two sections.
Extension
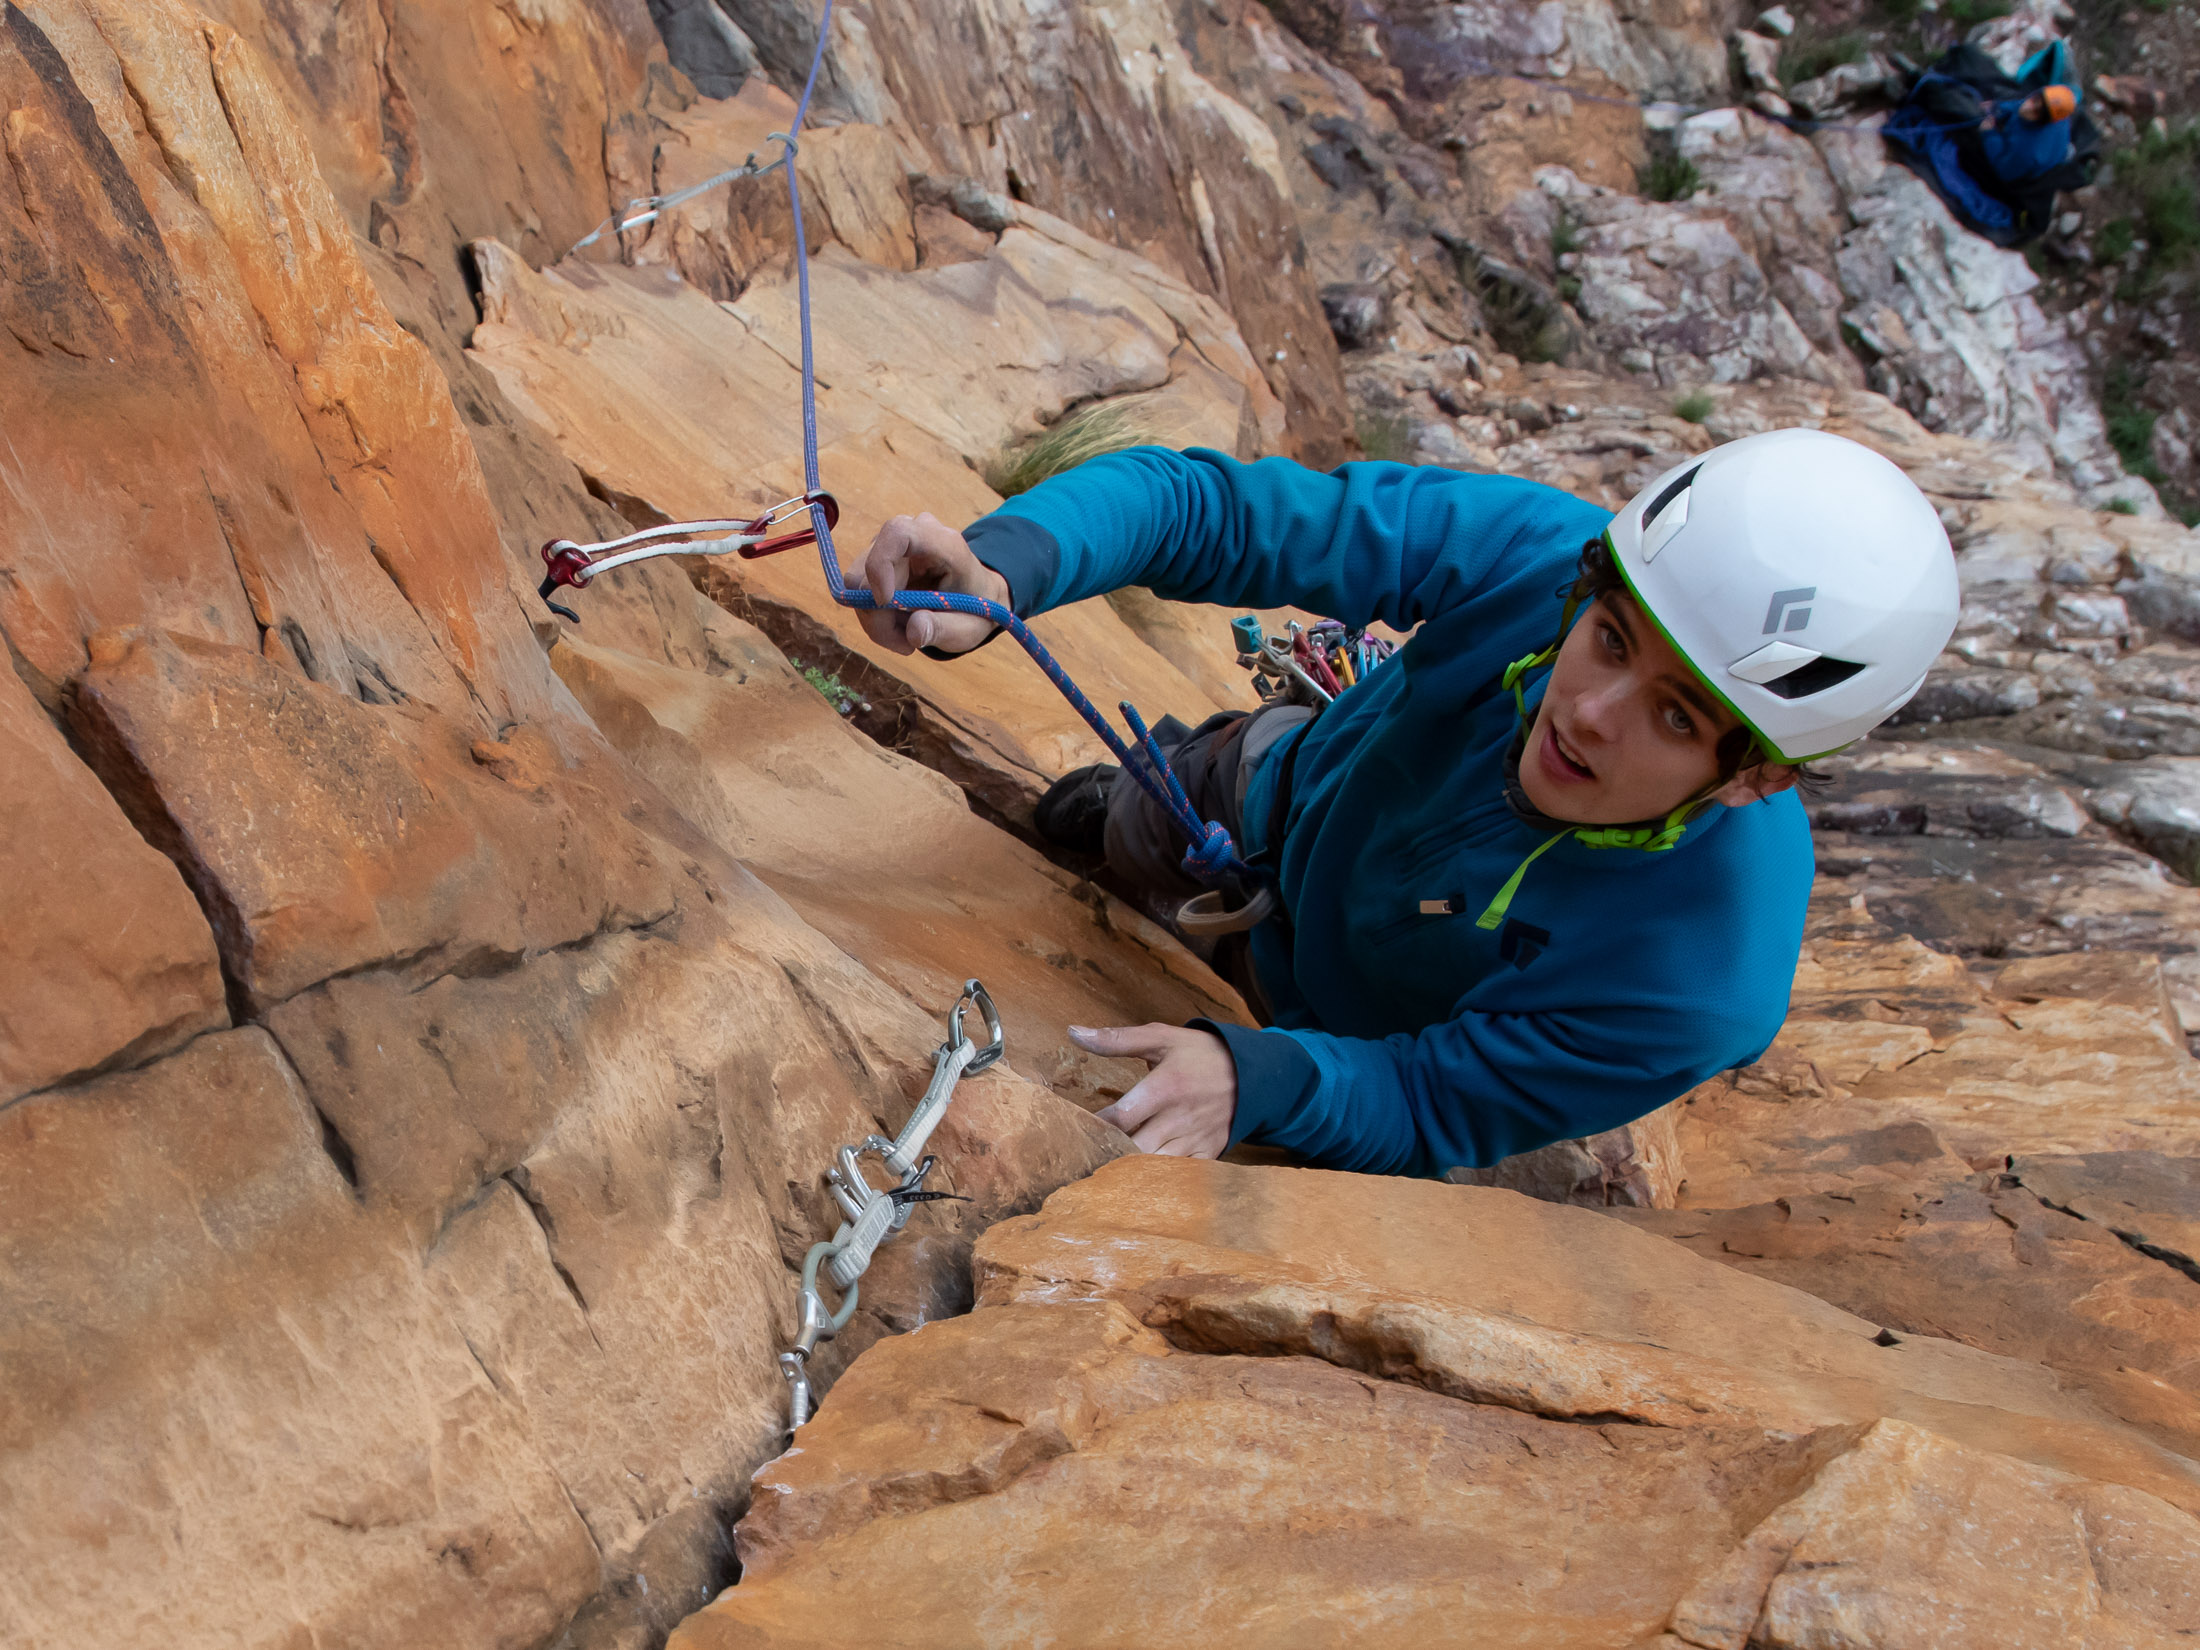
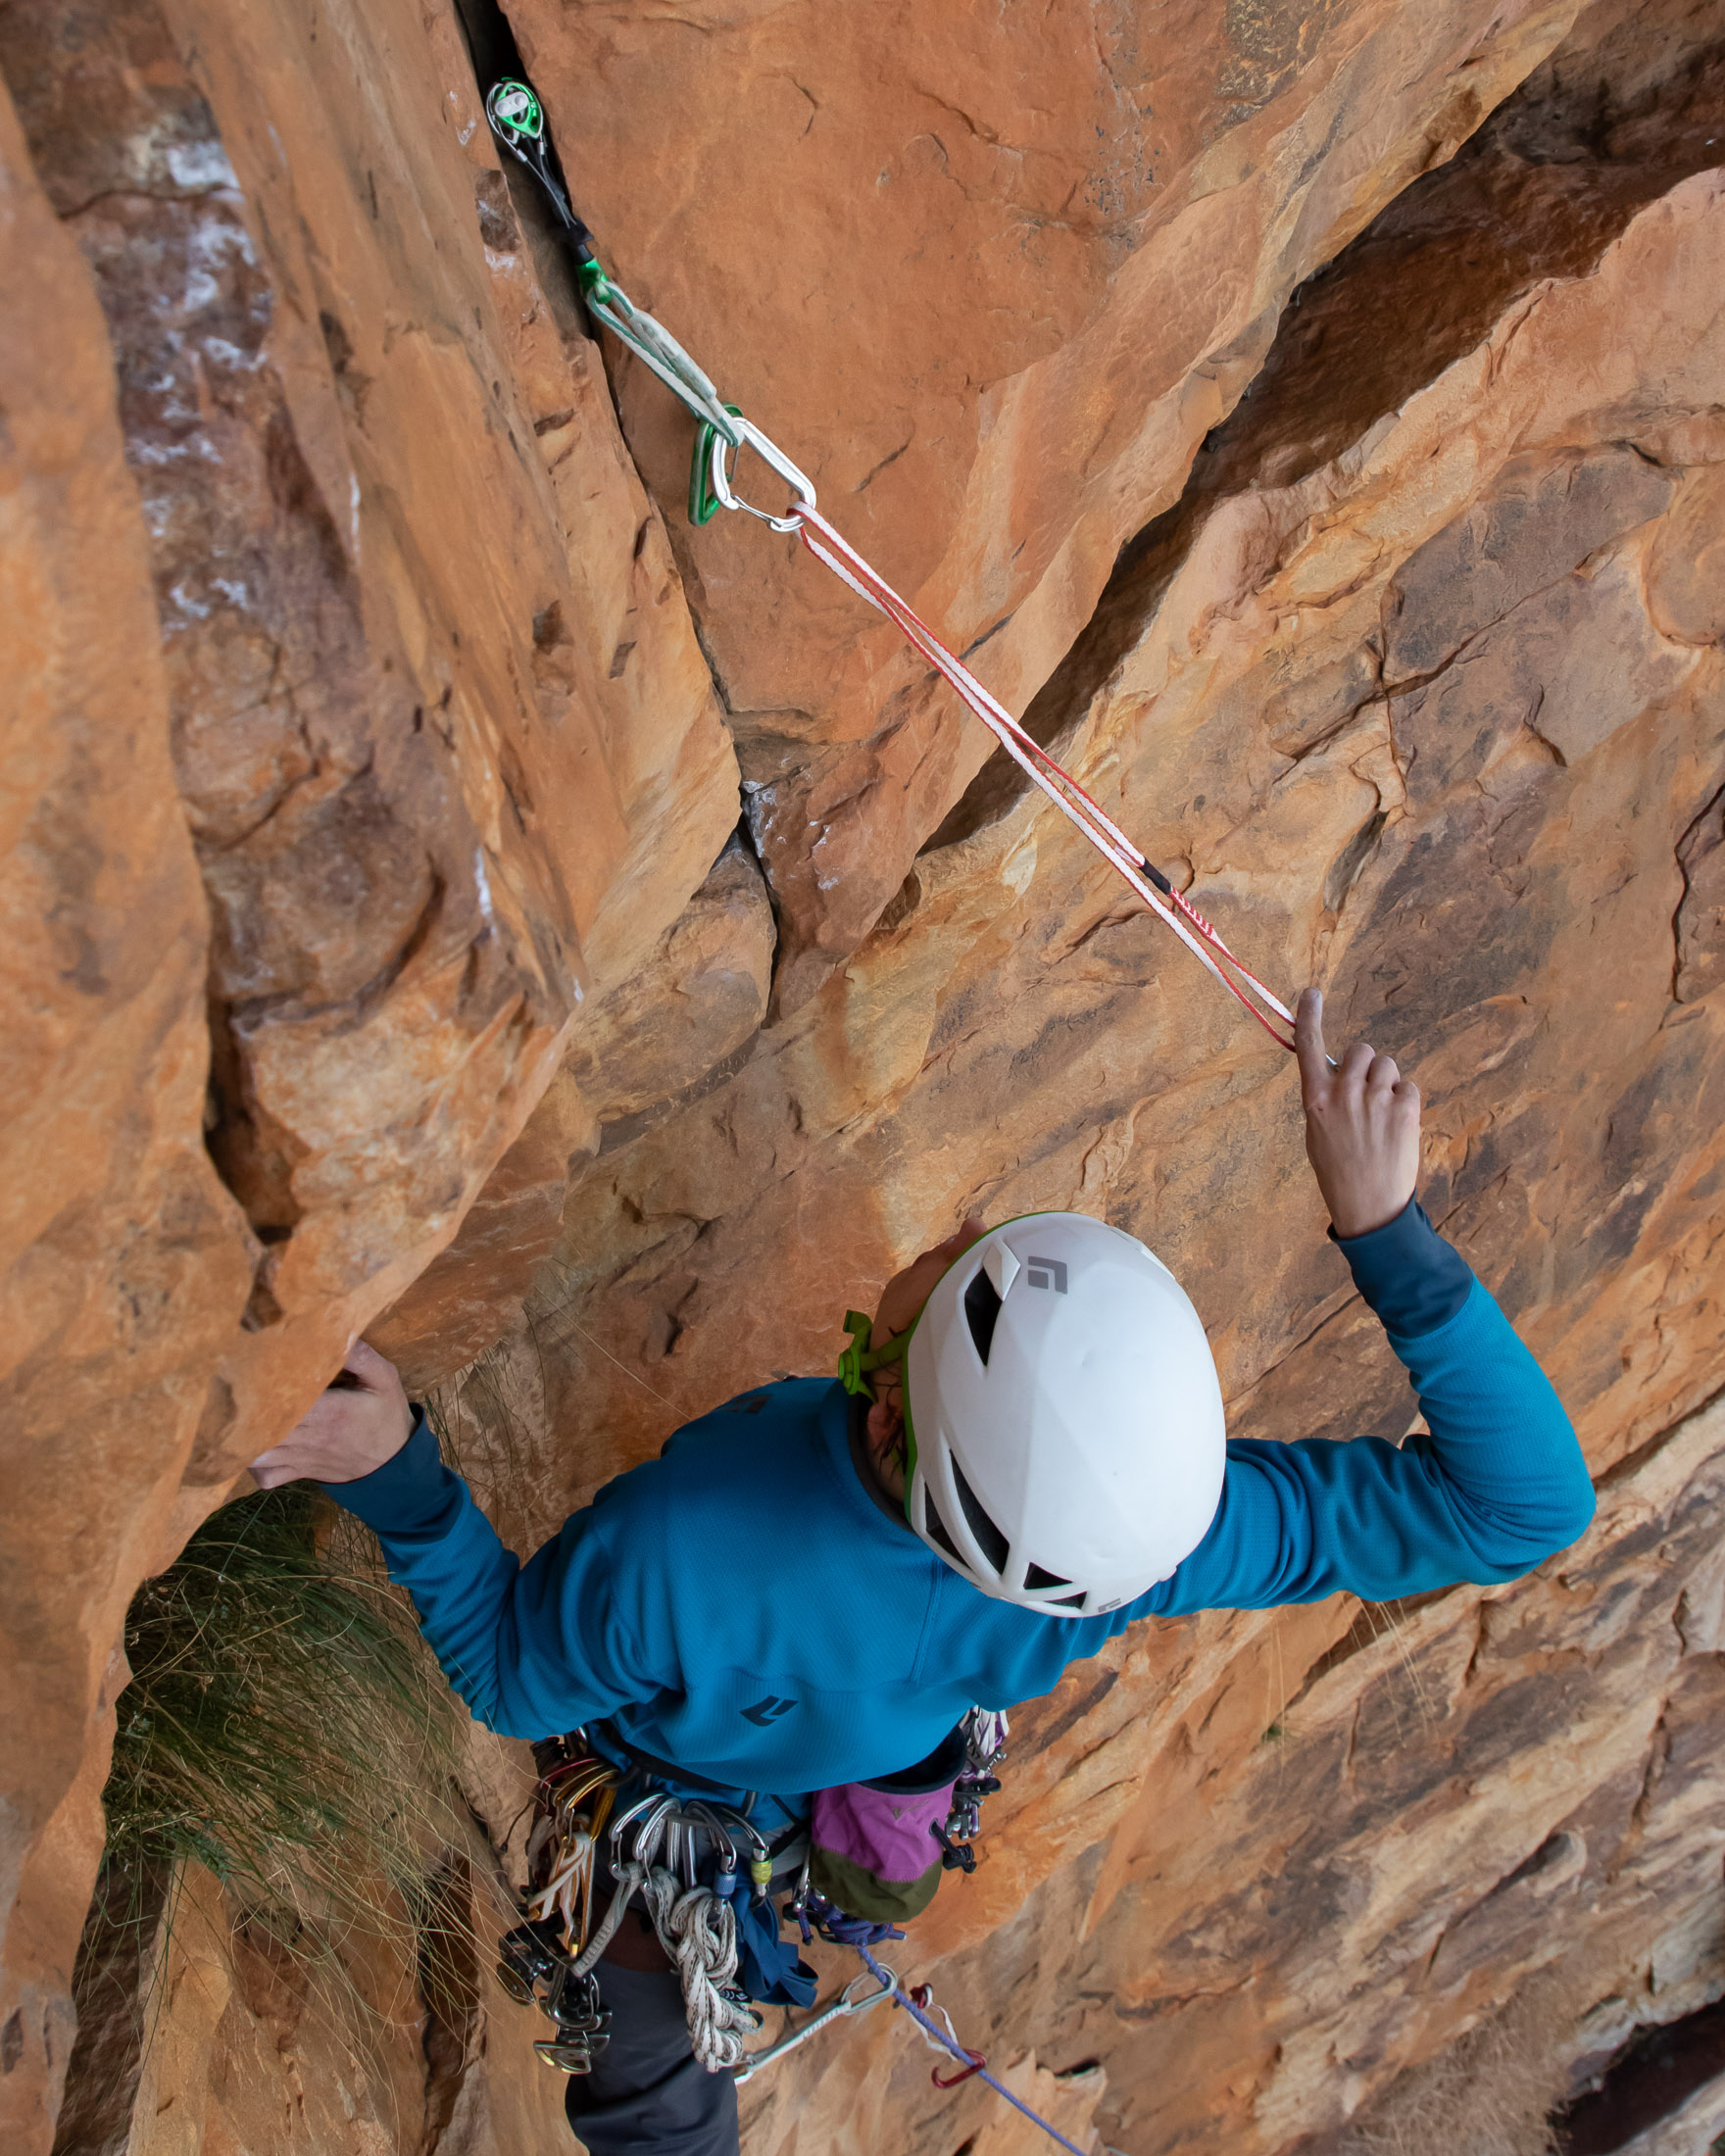
Once you’ve placed your protection, you need to extend it to prevent rope drag and stop the rope from tugging gear out place. How much extension will depend on the nature of the route. If the line wanders only slightly, you can probably extend most pieces with just a quickdraw. But if it meanders several feet in either direction and then passes through roofs and bulges, you will need alpine draws (60 cm when extended) and possibly even double length runners (120 cm) to help prevent horrible rope drag.
After clipping the rope to an extension, it’s best to hold the end of the runner or draw out away from the wall to gauge whether it is long enough to stop the rope from running over a drag-inducing edge.
At first all this decision-making will be taxing and mentally cumbersome, but with time, you will learn to weigh up priorities and make sound gear decisions almost without having to make a concerted effort.
Deciding what gear to place where
Besides knowing how to place gear, you need to know when to place gear. Here the goal is to ensure that the whole route is properly protected, and that means conserving gear when you can and placing the right gear when you need it.
Conserve your rack
You want to properly protect the lower part of the route, where you’ll need to place more gear to prevent a ground fall, but you also don’t want to place all your gear early on and leave nothing for the top. Before starting a climb, it’s worthwhile looking up to try get an idea of what you might need higher up on a route. You want to save gear which you only have one of in a size (like your biggest cams) for when you really need them, but you should also avoid placing two pieces of the same size in quick succession. If you’re still low on the route, there’s a good chance you’ll need the second piece higher up.
Place stronger protection low down on a route
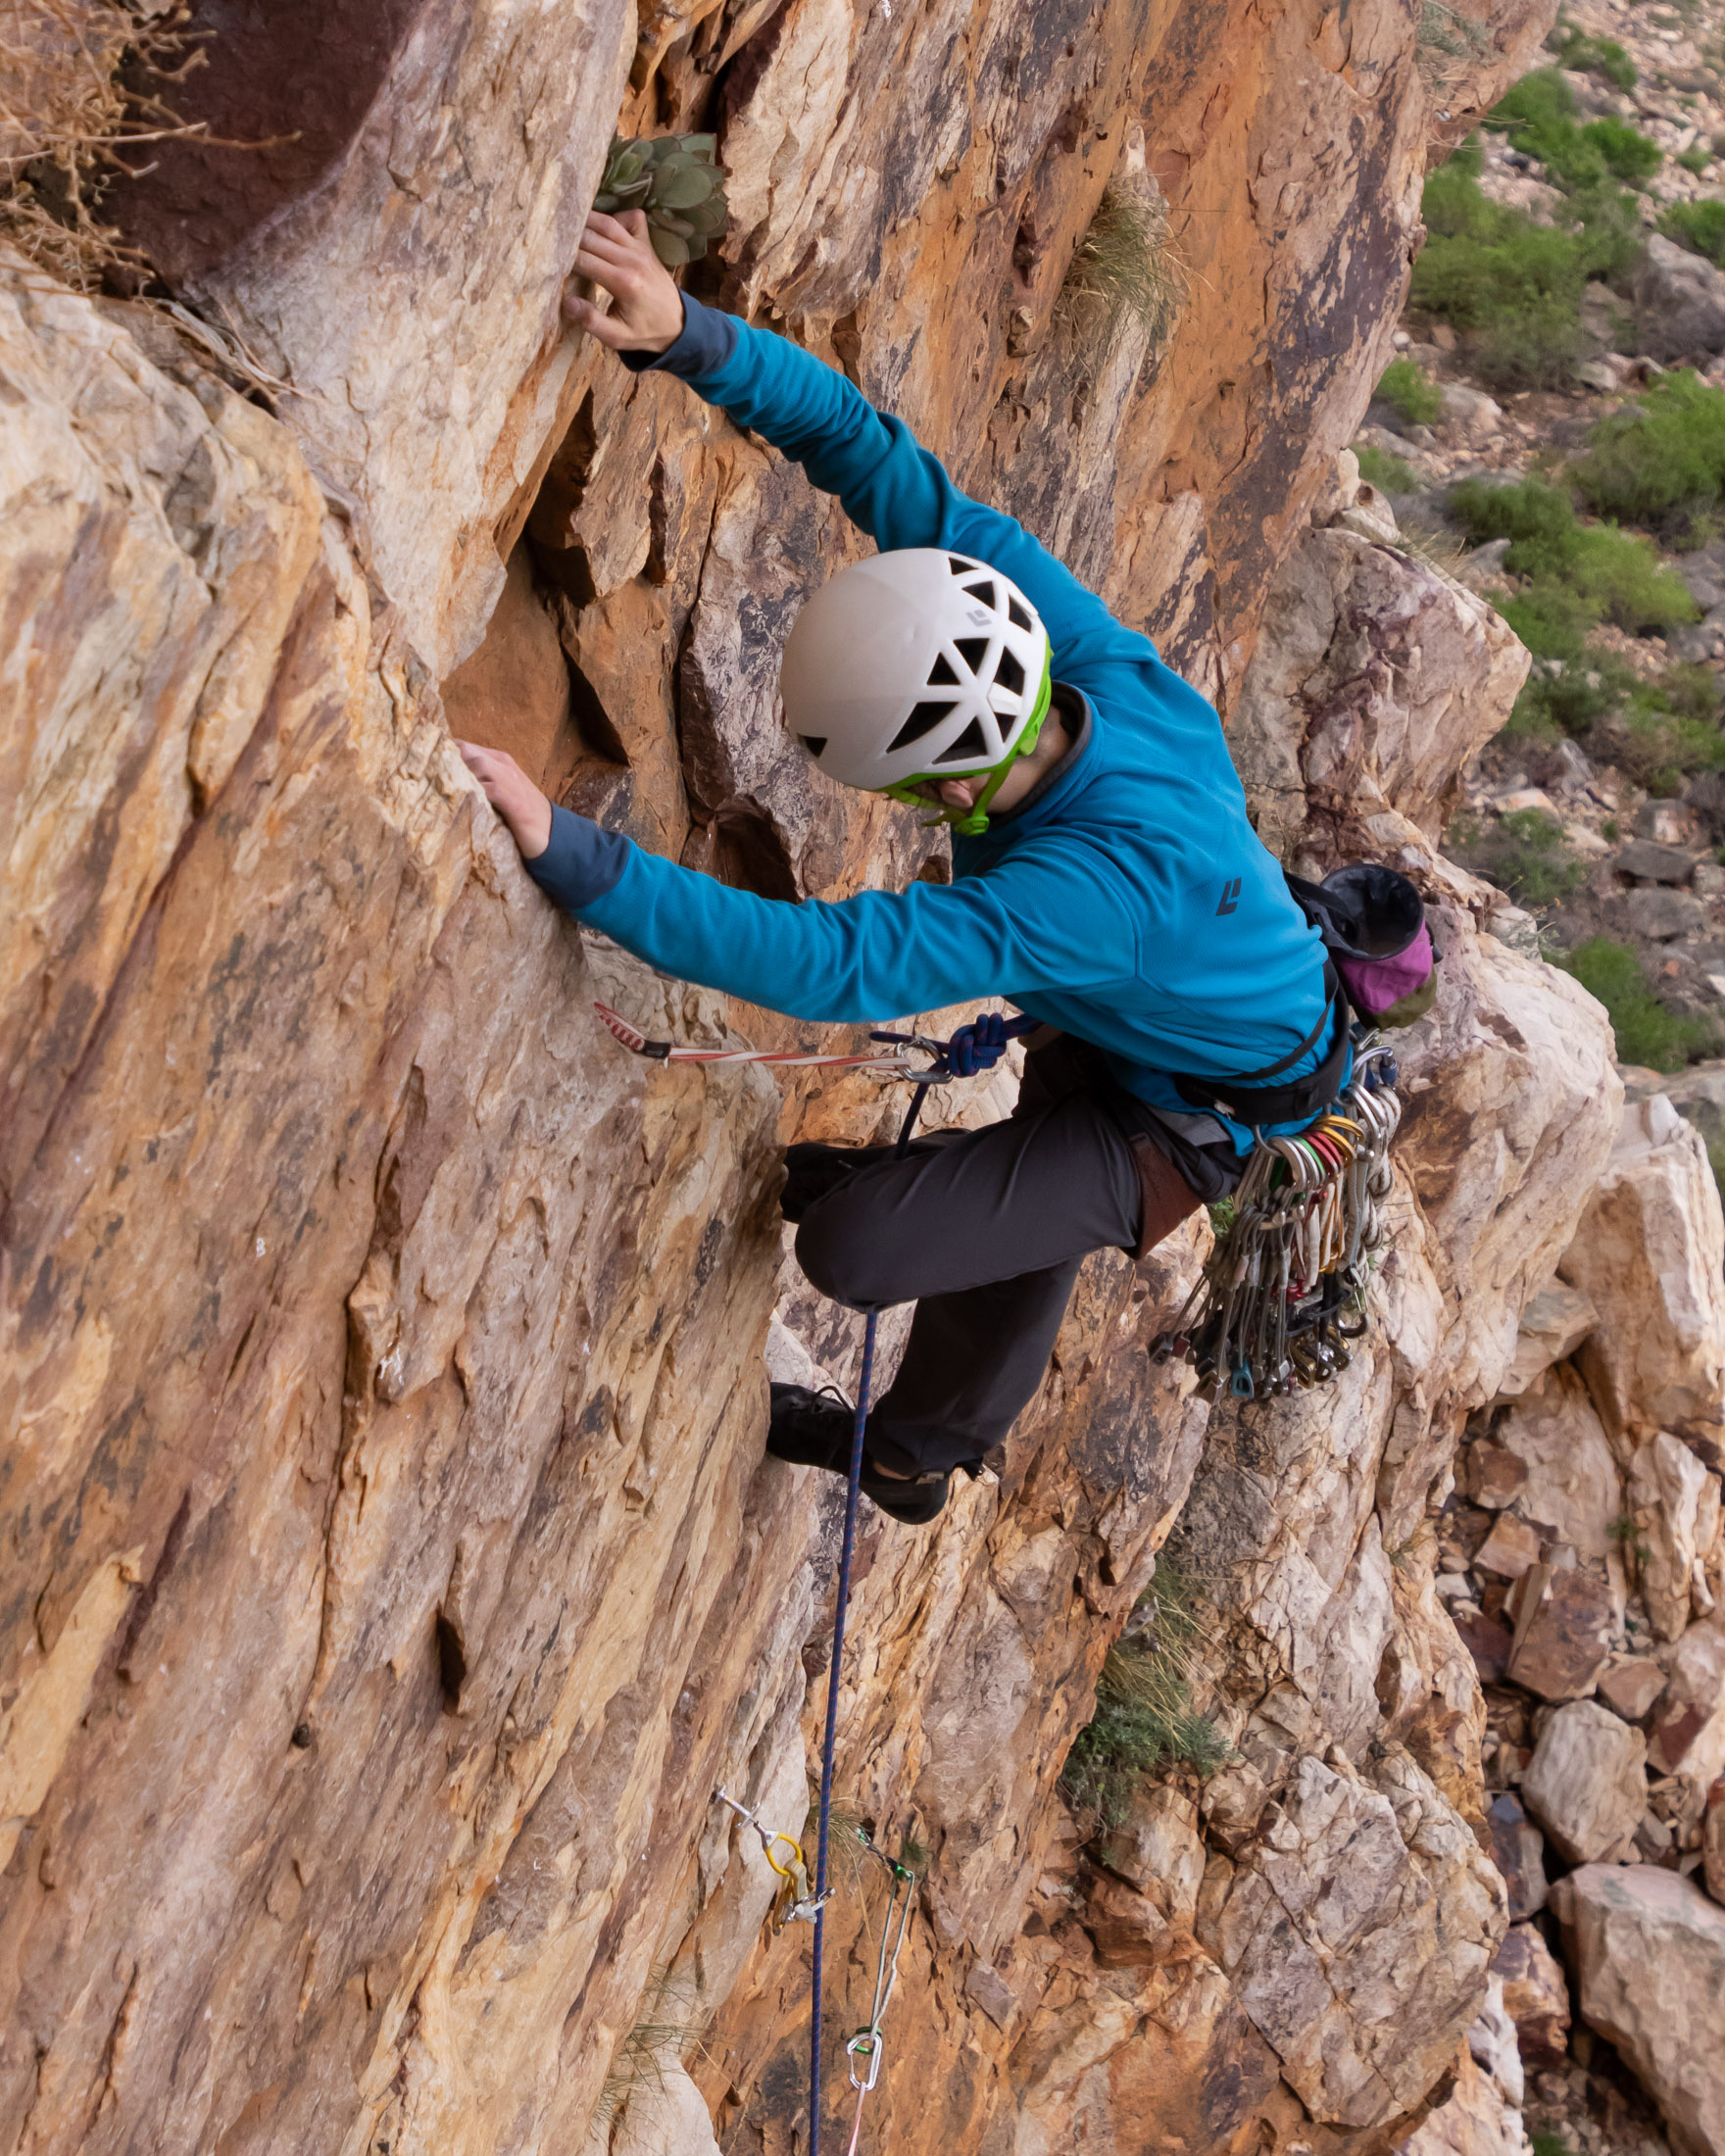
The forces generated in a fall are likely to be higher low down on a route, where the distance you can fall is relatively high compared to the amount of rope in the system (fall factor). You will need to keep this in mind when placing your first few pieces which, if placed in good rock, shouldn’t be rated to anything lower than 8 kN. And when you climb on softer or more brittle rock, you should go with gear rated even higher to ensure greater holding power and reduce the chances that the gear doesn’t rip out.
Use multidirectional protection in key placements
One of the big differences between cams and nuts, besides mechanics, is that cams lend themselves to multidirectional placements – those that can withstand a pull from more than one direction. While it’s not ideal for a cam to rotate in a placement, they can withstand a change in direction of pull if the crack is parallel-sided and allows enough space around the cam. Nuts, on the other hand, are less likely to withstand both a downward and outward pull (horizontally placed nuts are an exception). You’ll need to keep this in mind when placing protection in certain situations.
Under roofs
Gear placed in a roof has to withstand a downward pull, but gear placed just below the roof or at the intersection of the wall and the roof has to withstand outward and downward pulls. A fall from the lip of a roof can pull gear placed in the wall outwards, but it’s just as likely that a climber clips another piece close to the lip and then, falling onto this, creates a redirect that pulls a piece outwards. Always place multi directional protection in such situations.
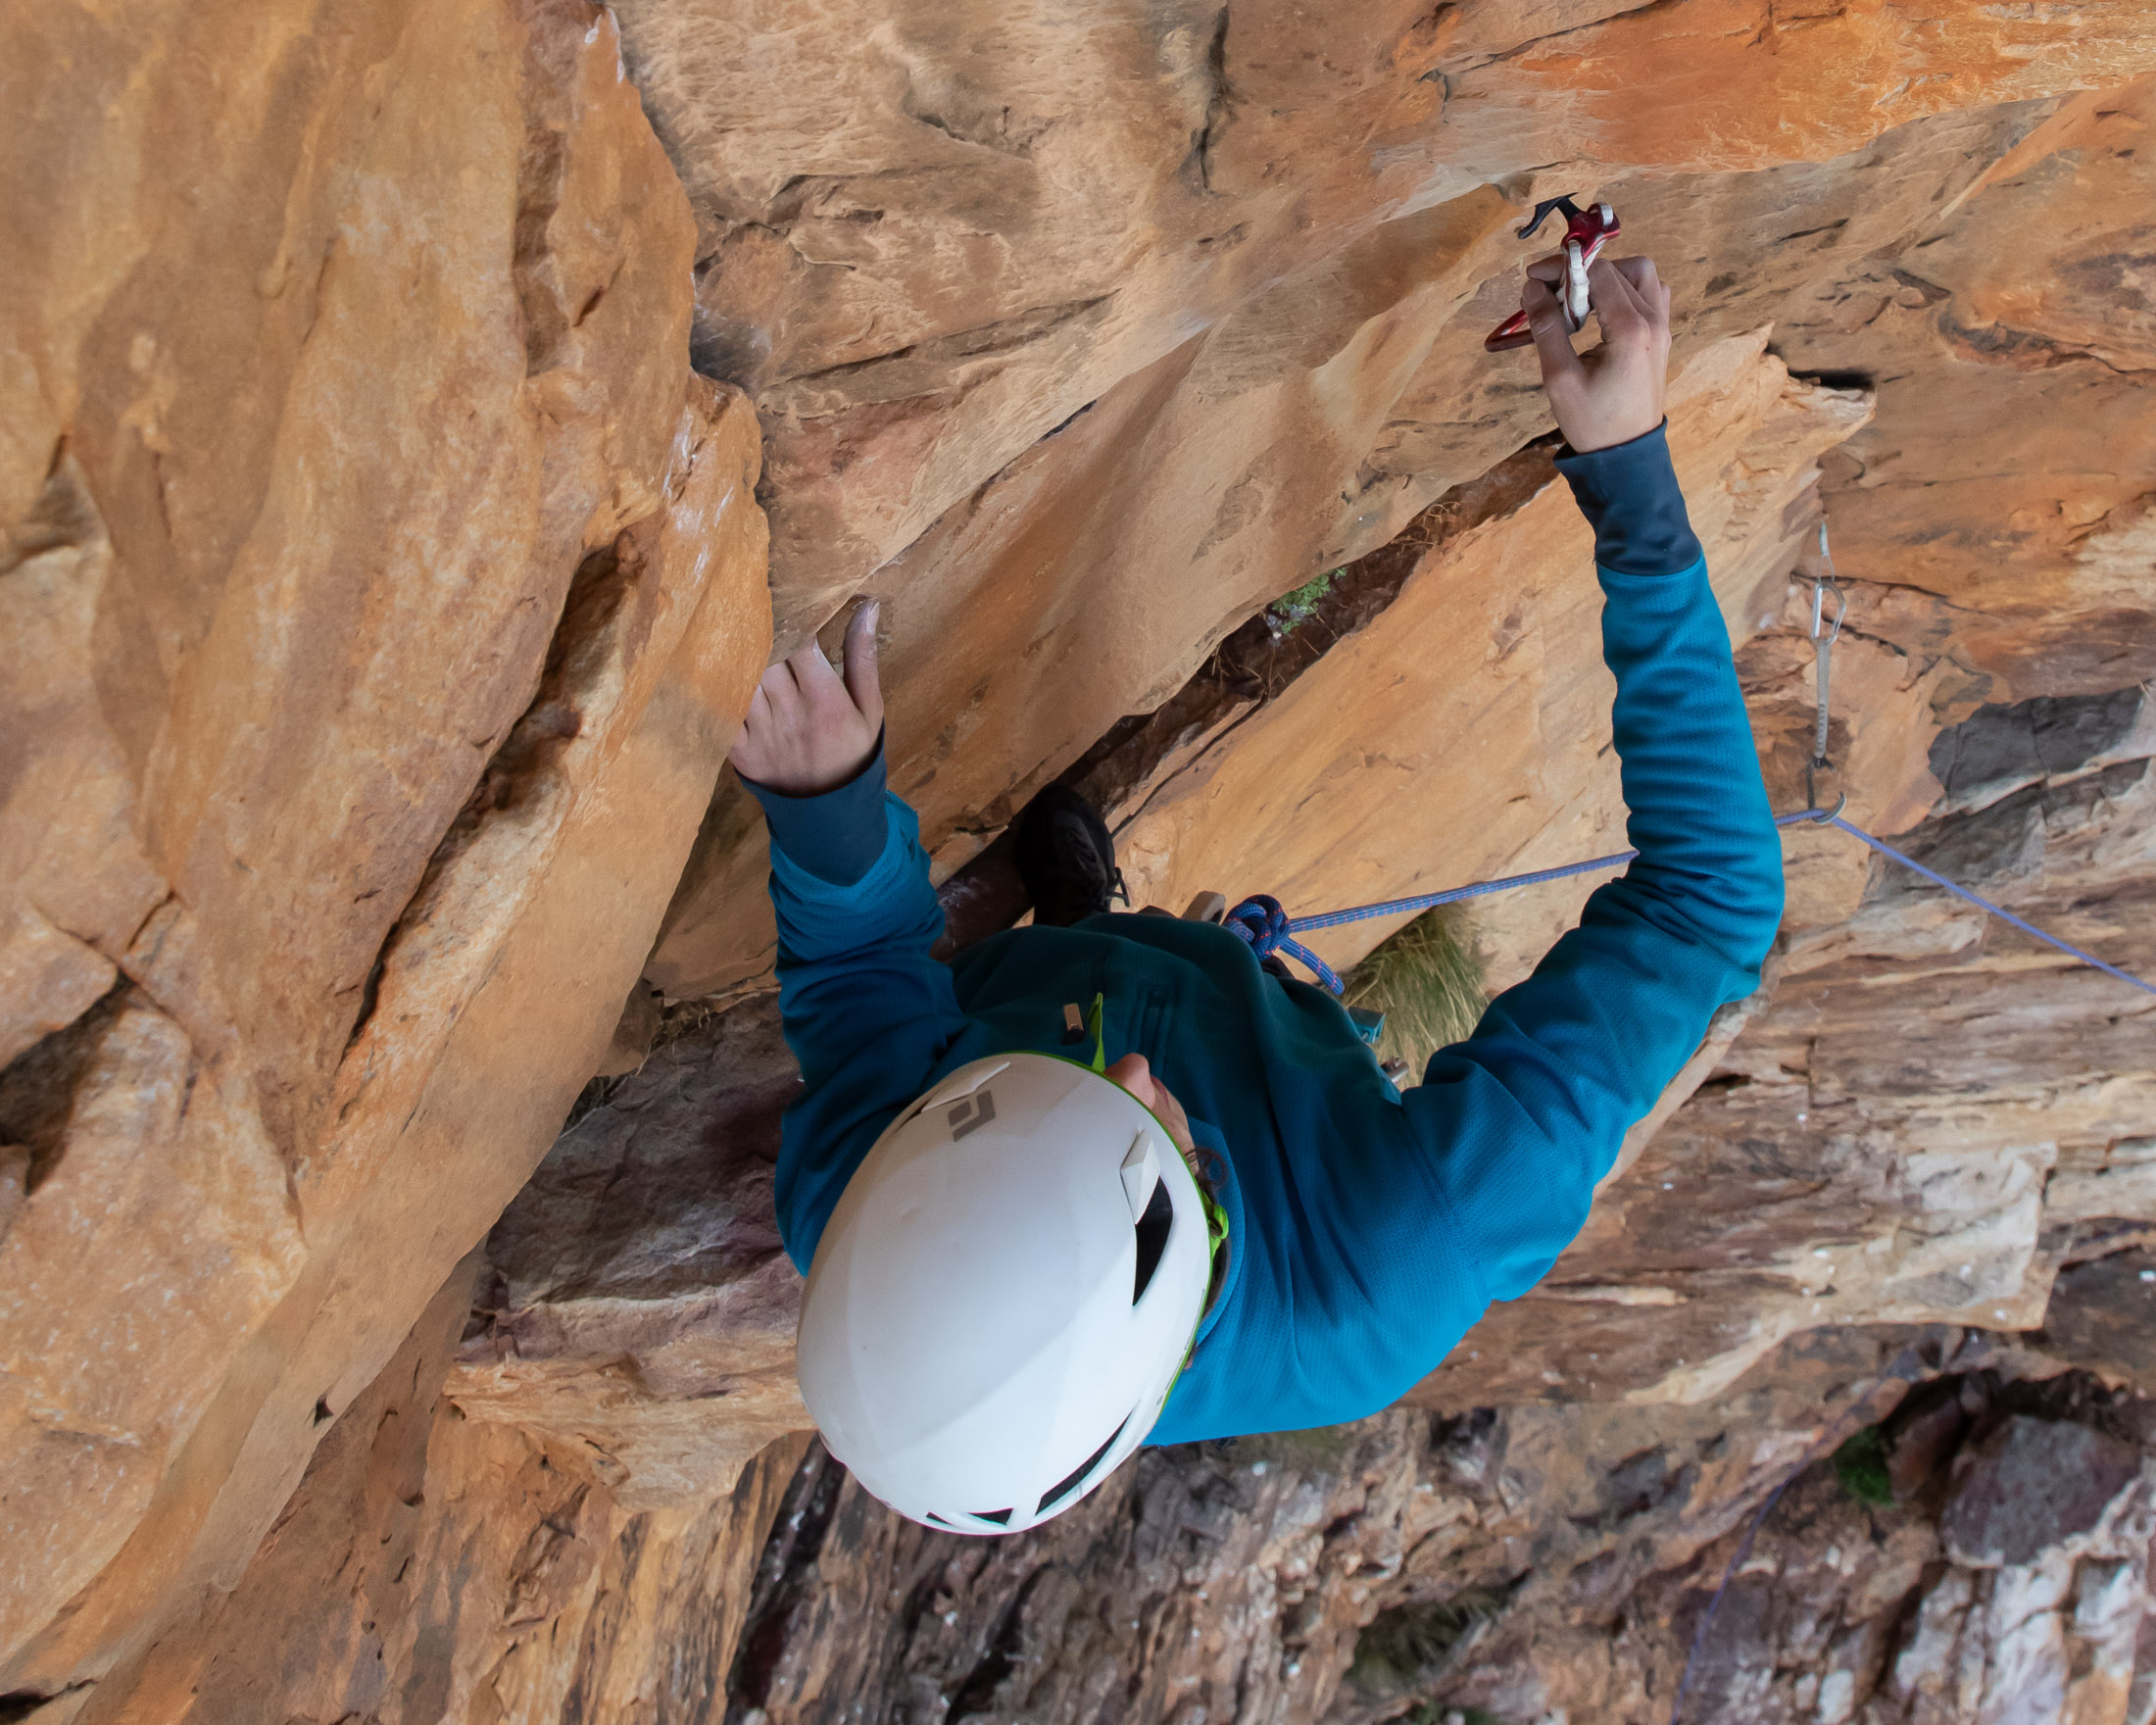
Low down on nut-protected faces and cracks
If it looks likely that your first few or even several pieces could be nuts, consider the angle of the rope between the belayer and the first piece of protection. Unless the belayer is very close to the wall, the rope will probably meet first piece of gear at an angle that pulls the piece outwards. This is would be a problem if the placement can’t withstand an outward pull. Even if you placed another piece underneath it, it might still get pulled out and then put the next piece up at risk (if it wasn’t multidirectional). In such situations, it’s best practice to place a solid mulitdirectional piece like a cam low down to prevent the reverse zipper effect.
Place gear from stances
Try to place gear from stances – positions that allow you to shift most of your weight onto your feet. Don’t wait until you are scared to place gear. At that point you’re probably already short on good holds and gear placements, and are struggling just to stay on the rock. Of course, as you progress through the grades and the terrain gets more technical, you’ll find yourself having to place gear from more strenuous positions. My strategy in such cases is to place nuts when I can weight my feet and compose myself – hang around without expending energy. And then I use my cams when I want to place gear quickly because hanging around would cost me energy. Of course, sometimes such situations require the placement of a nut, but there will also be many occasions where a quick cam placement can save one some strenuous fiddling.
Double up on small and marginal gear when protection is critical
Where there’s the potential for a ground fall or a fall onto a ledge fall, it’s essential that you double up or even triple up marginal or weaker placements. You can either clip two pieces of protection to the rope separately or, even better, use a sliding X to combine them in a single load-distributing anchor. Some climbers actually secure critical connections with a small locking carabiner – always a good idea when that piece is the only protection you have against a dangerous fall.
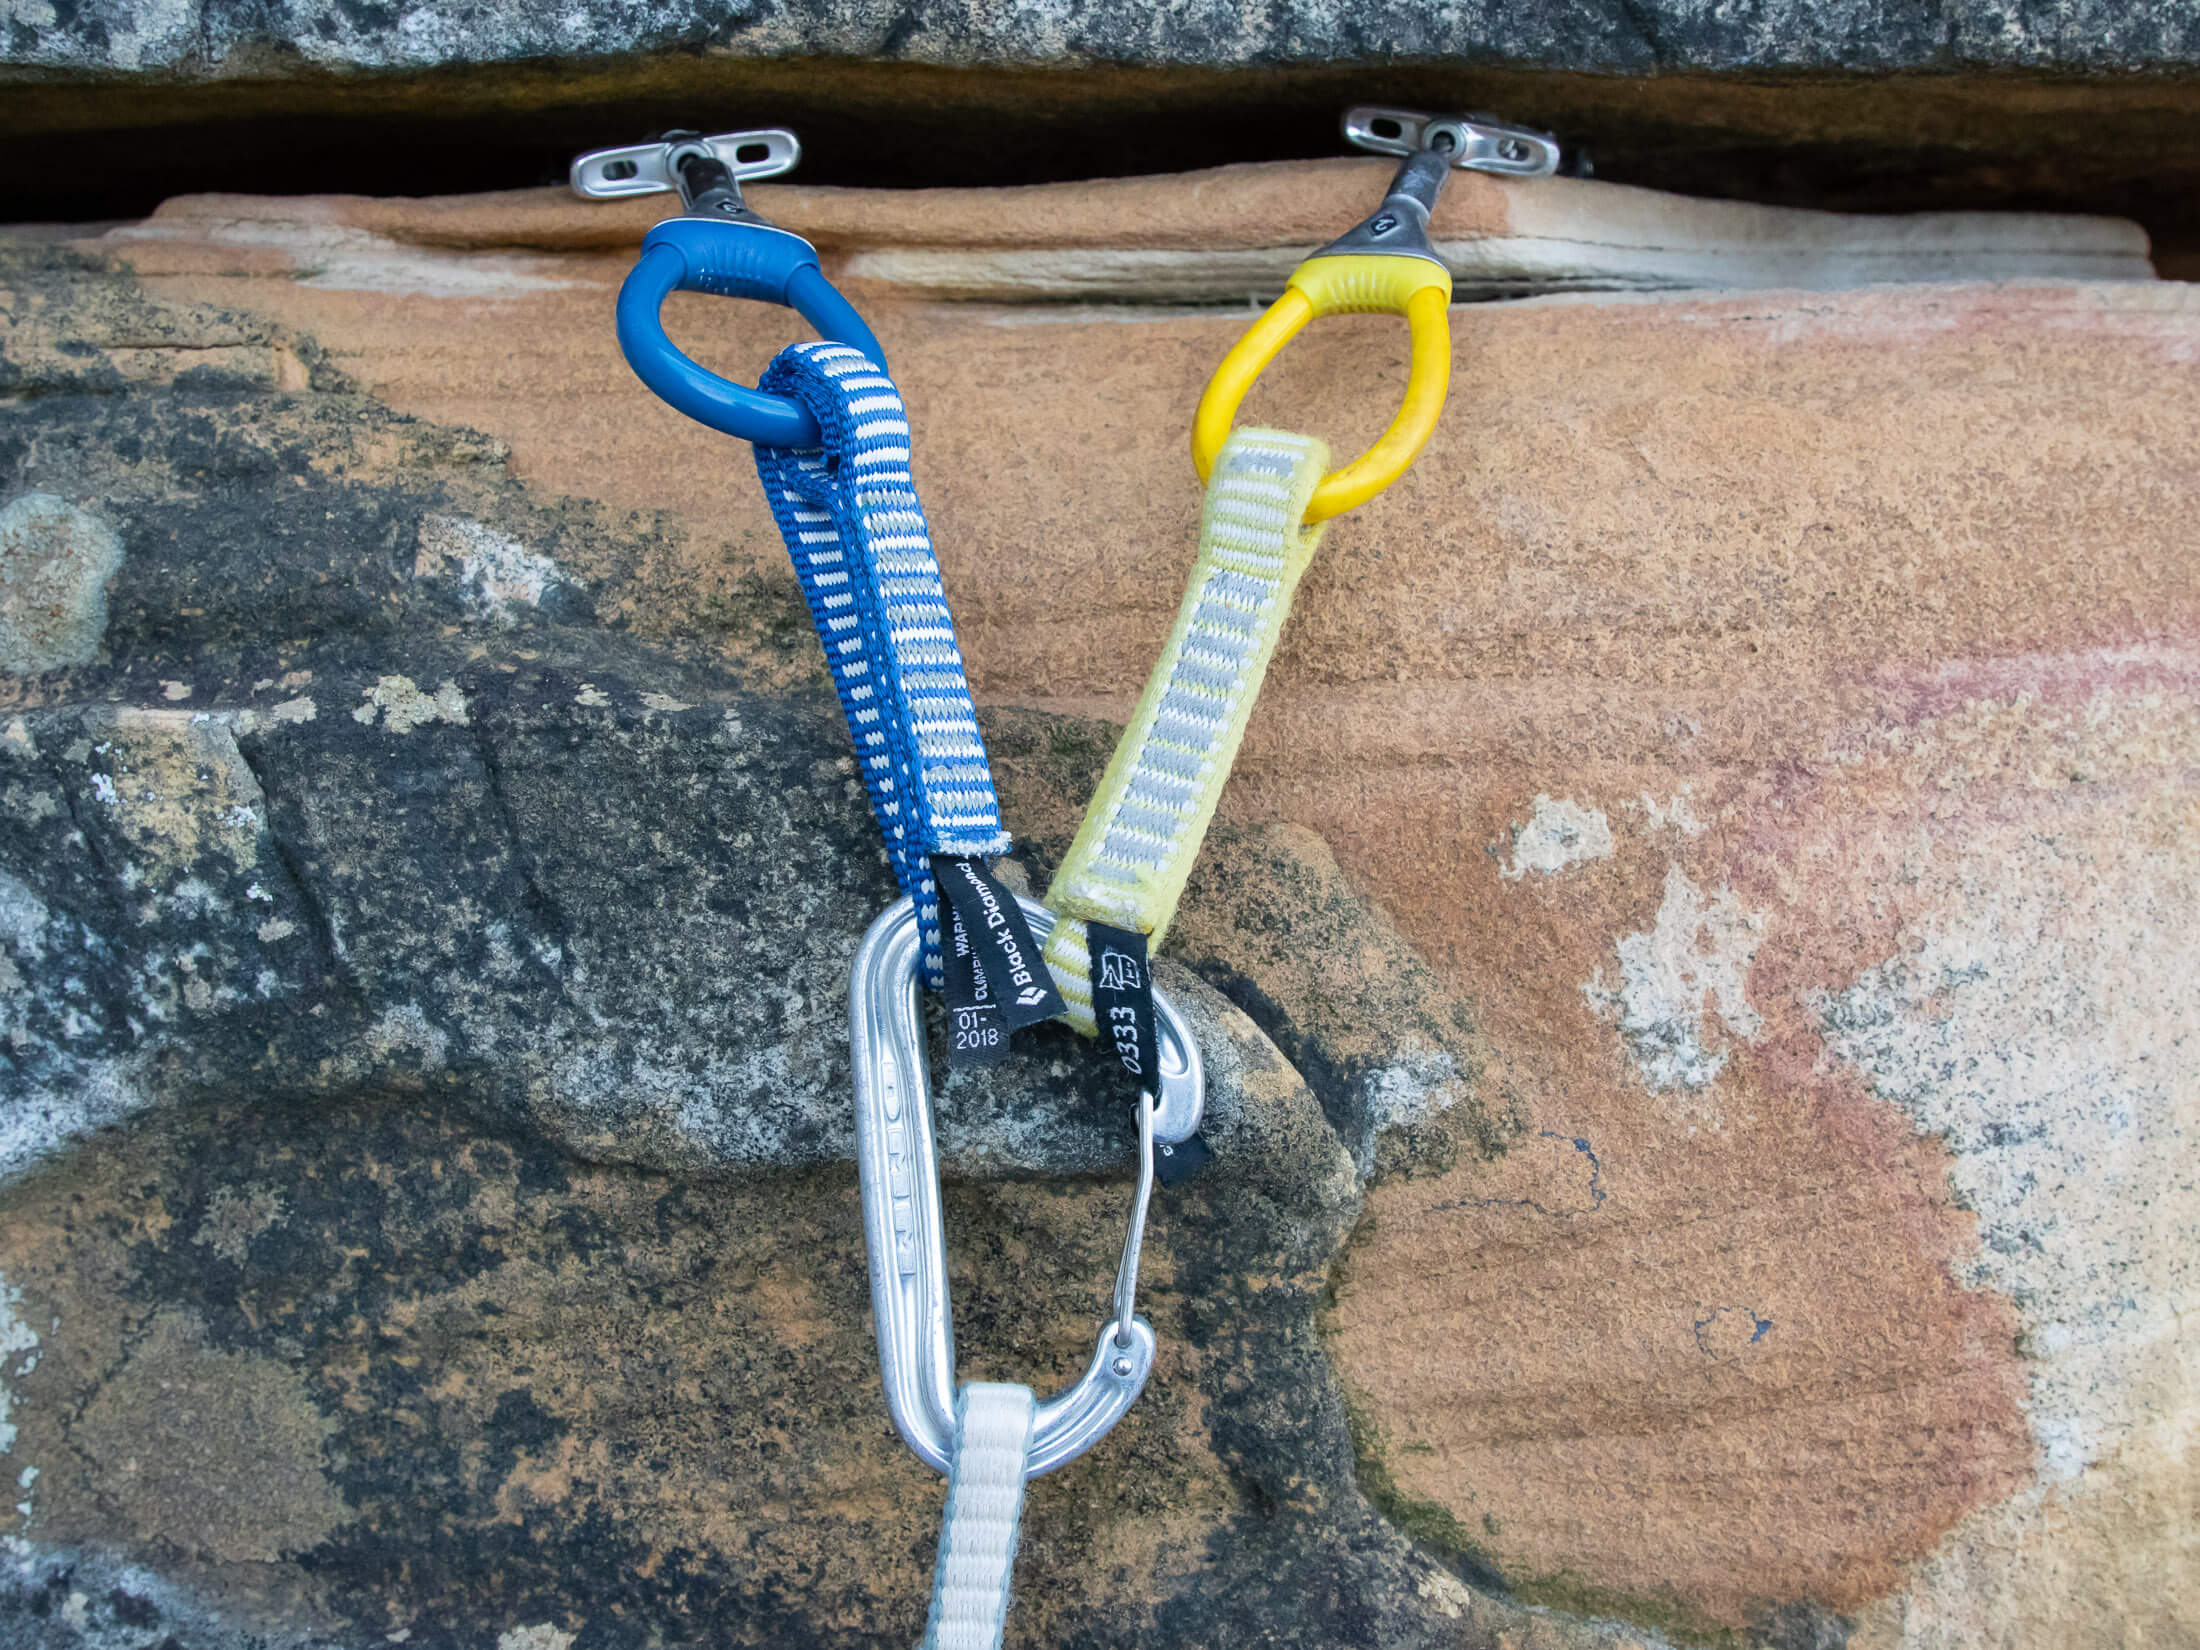
Placing protection
Your safety depends on your ability to place solid protection, but it’s also important to be able to select and place gear quickly so that you can climb efficiently.
Cams
When spring-loaded camming devices first appeared on the scene in the late 1970’s they revolutionised trad climbing. All those parallel cracks that were previously unprotectable could suddenly be protected, and better yet, the new devices were relatively easy to place. To place a cam, you pull the trigger to retract the cam lobes, insert the cam into the crack, and then release the trigger to allow the lobes to expand into the crack. When the cam is loaded, as in a fall, the lobes cam outwards, biting into the rock and generating more friction and purchase – usually more than enough to stop a falling climber. Despite this ease of use, it does still take some know-how and experience to place a cam safely, and you’ll want to spend plenty of time practising this on the ground before taking up the sharp end.
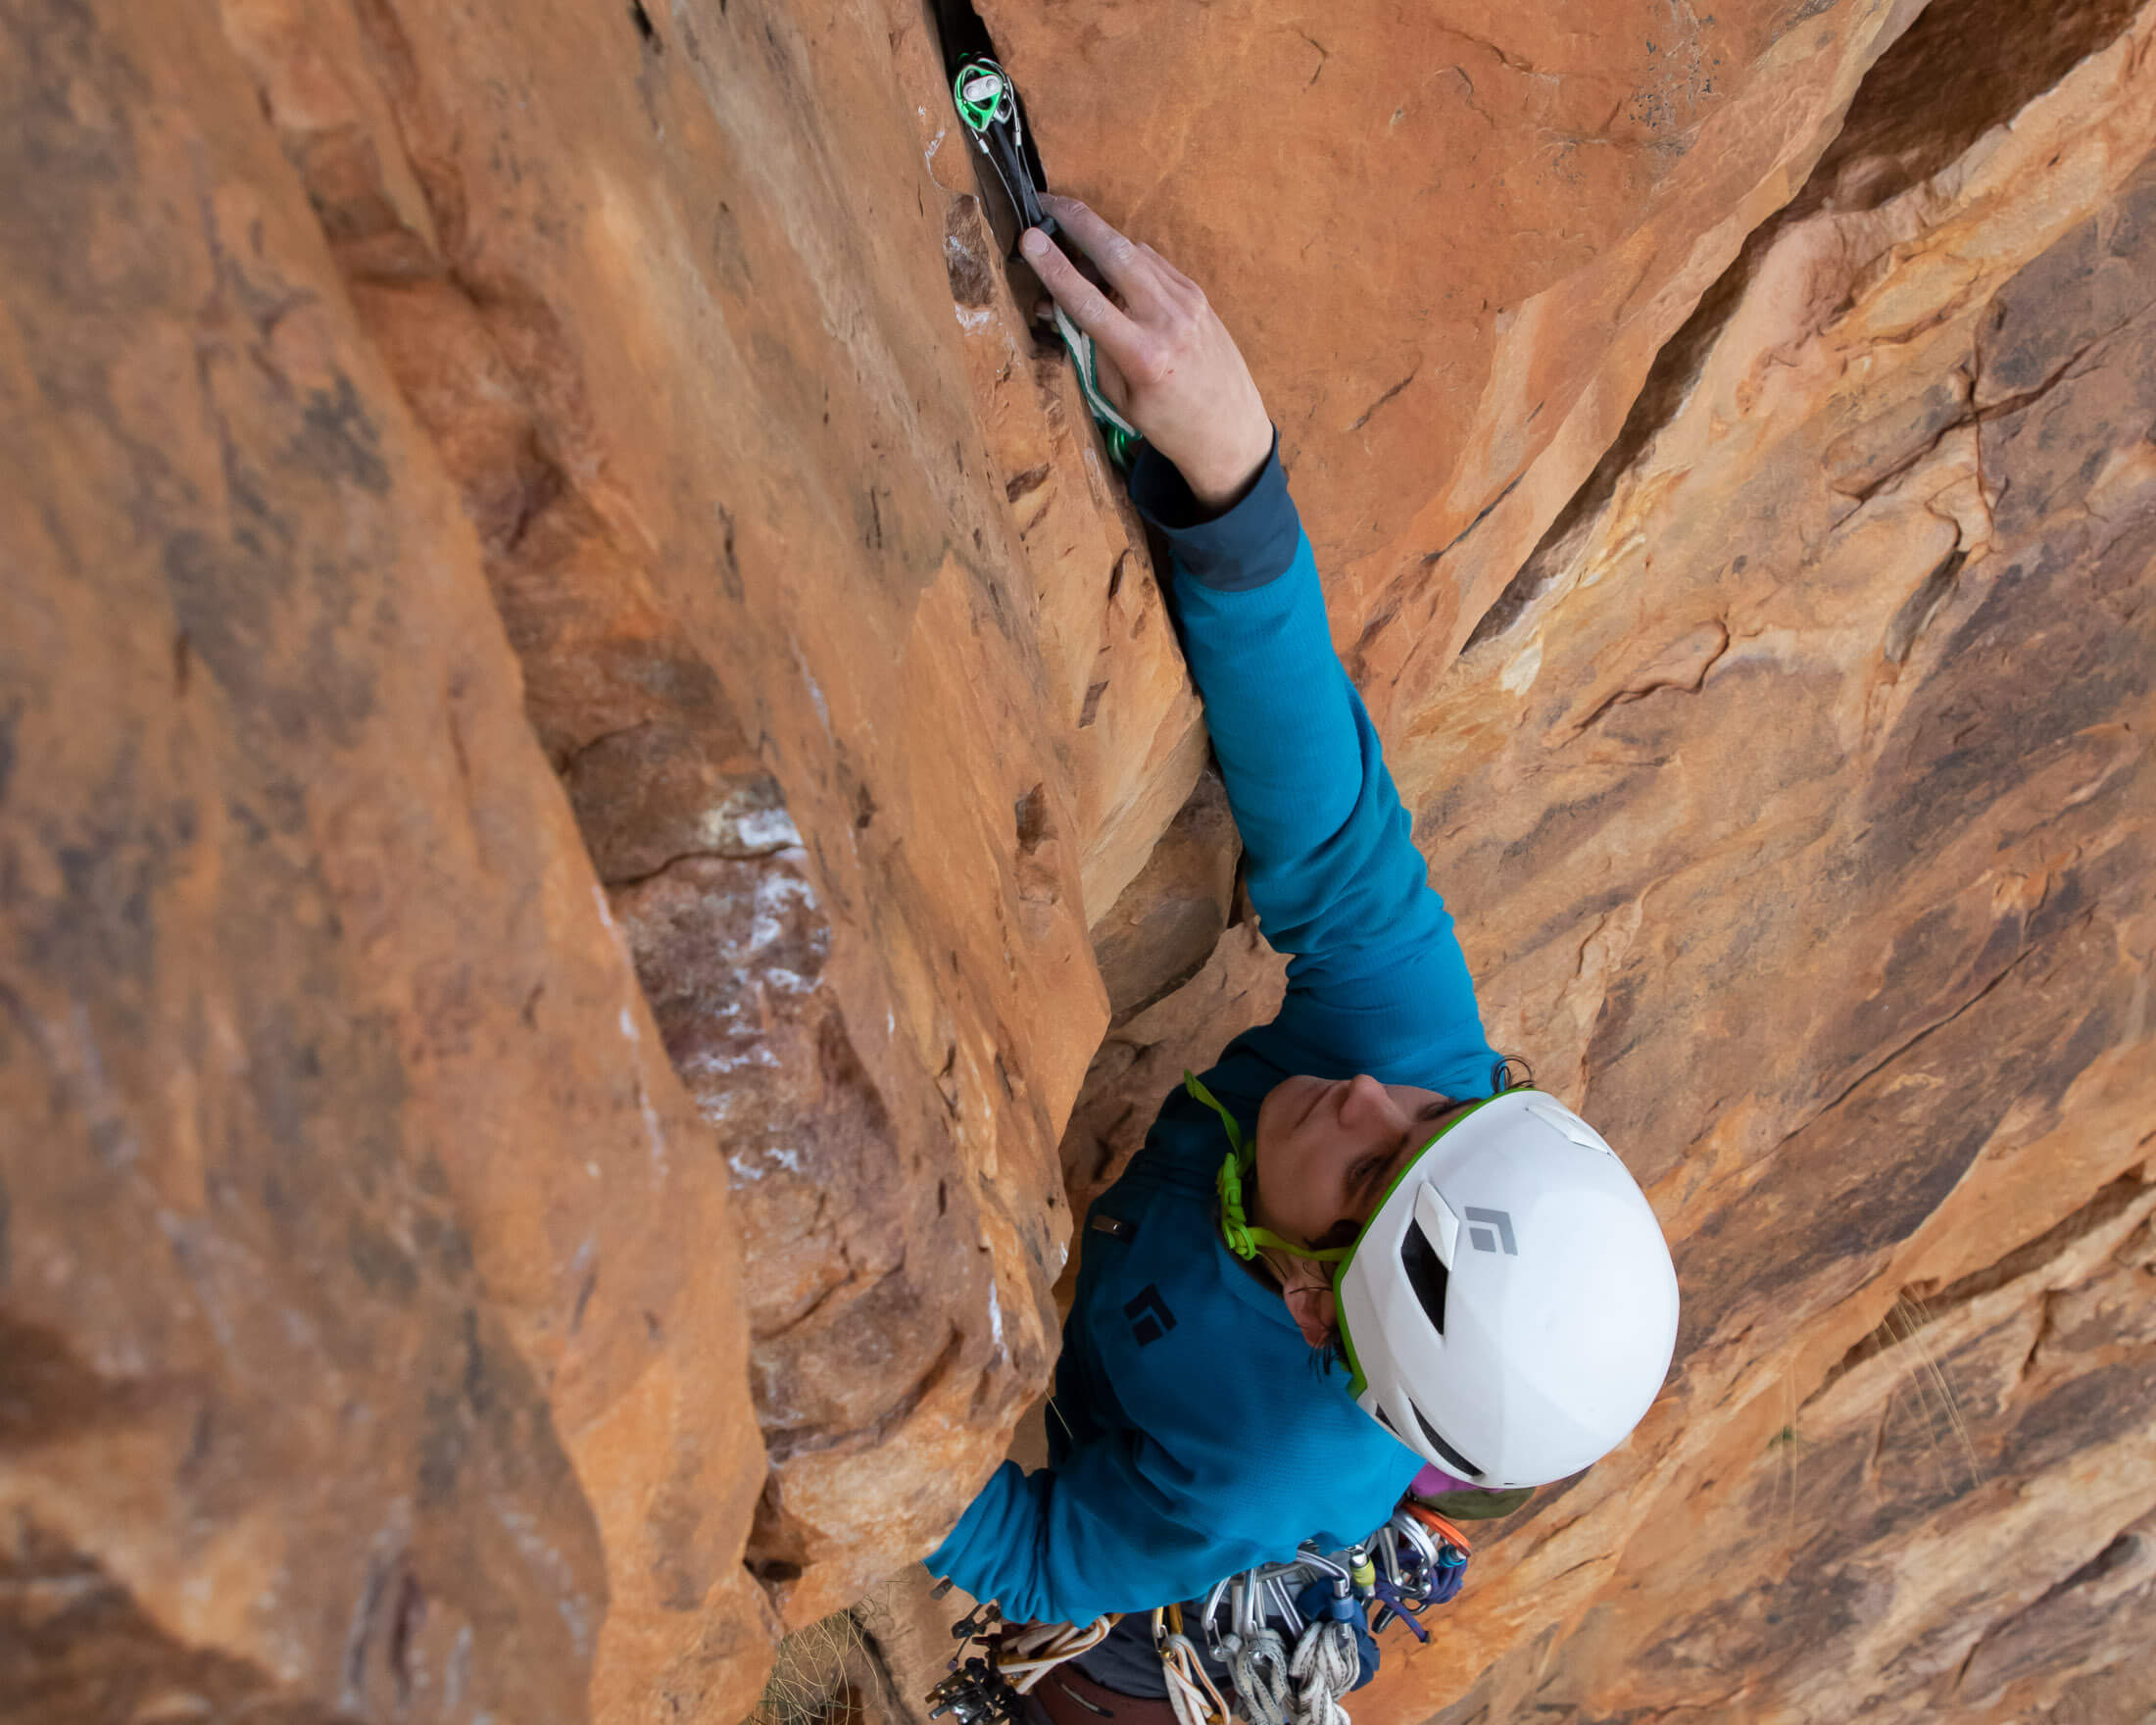
How to place cams
Cams can be placed in vertical, horizontal and diagonal cracks. Regardless of the orientation of the crack, it’s important that you choose the right size cam and orient it so that it will be loaded in the expected direction of pull. Cams come in many sizes, and every cam size has an effective range. Being able to place cams properly means knowing the range of each of your cams. Every manufacturer provides guidelines on the wide limit for each model – that is how retracted the lobes on their cams should be. For most micro cams it’s around 40%, and for bigger cams it's around 60%. Any wider than this, and a cam will be ‘tipped out’, a position in which it can lose strength and become more prone to ‘walking’.
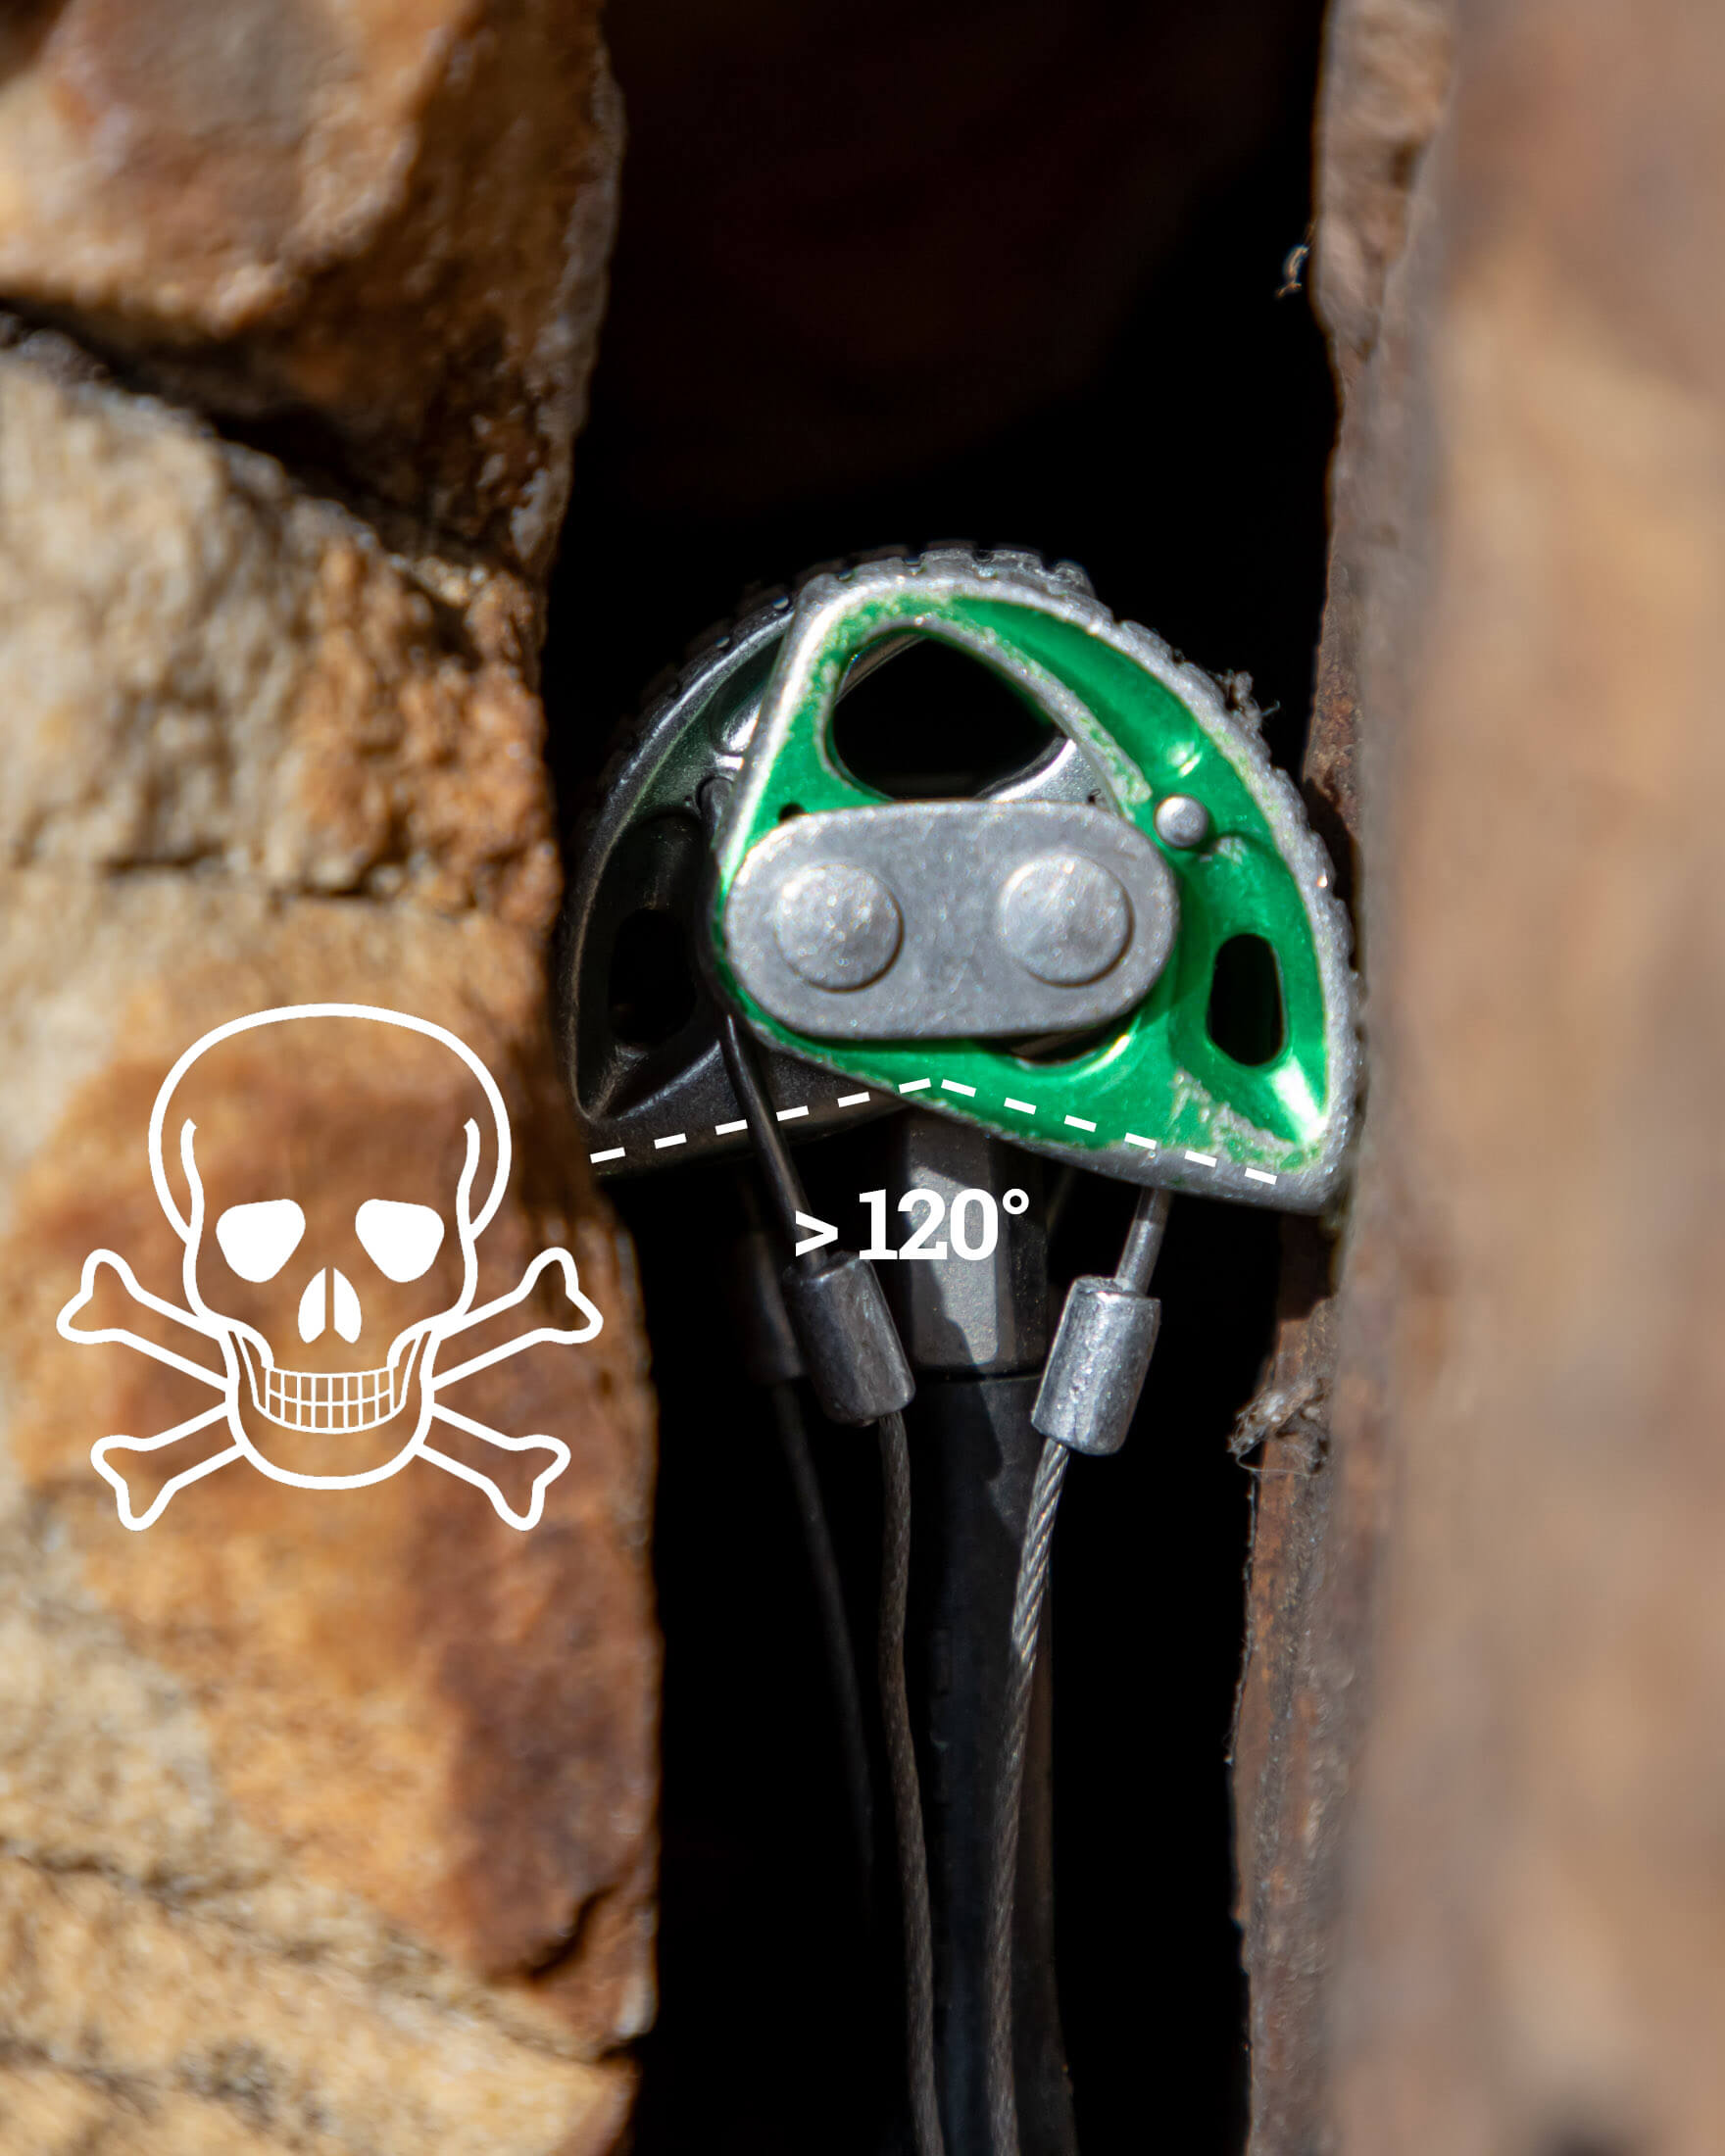
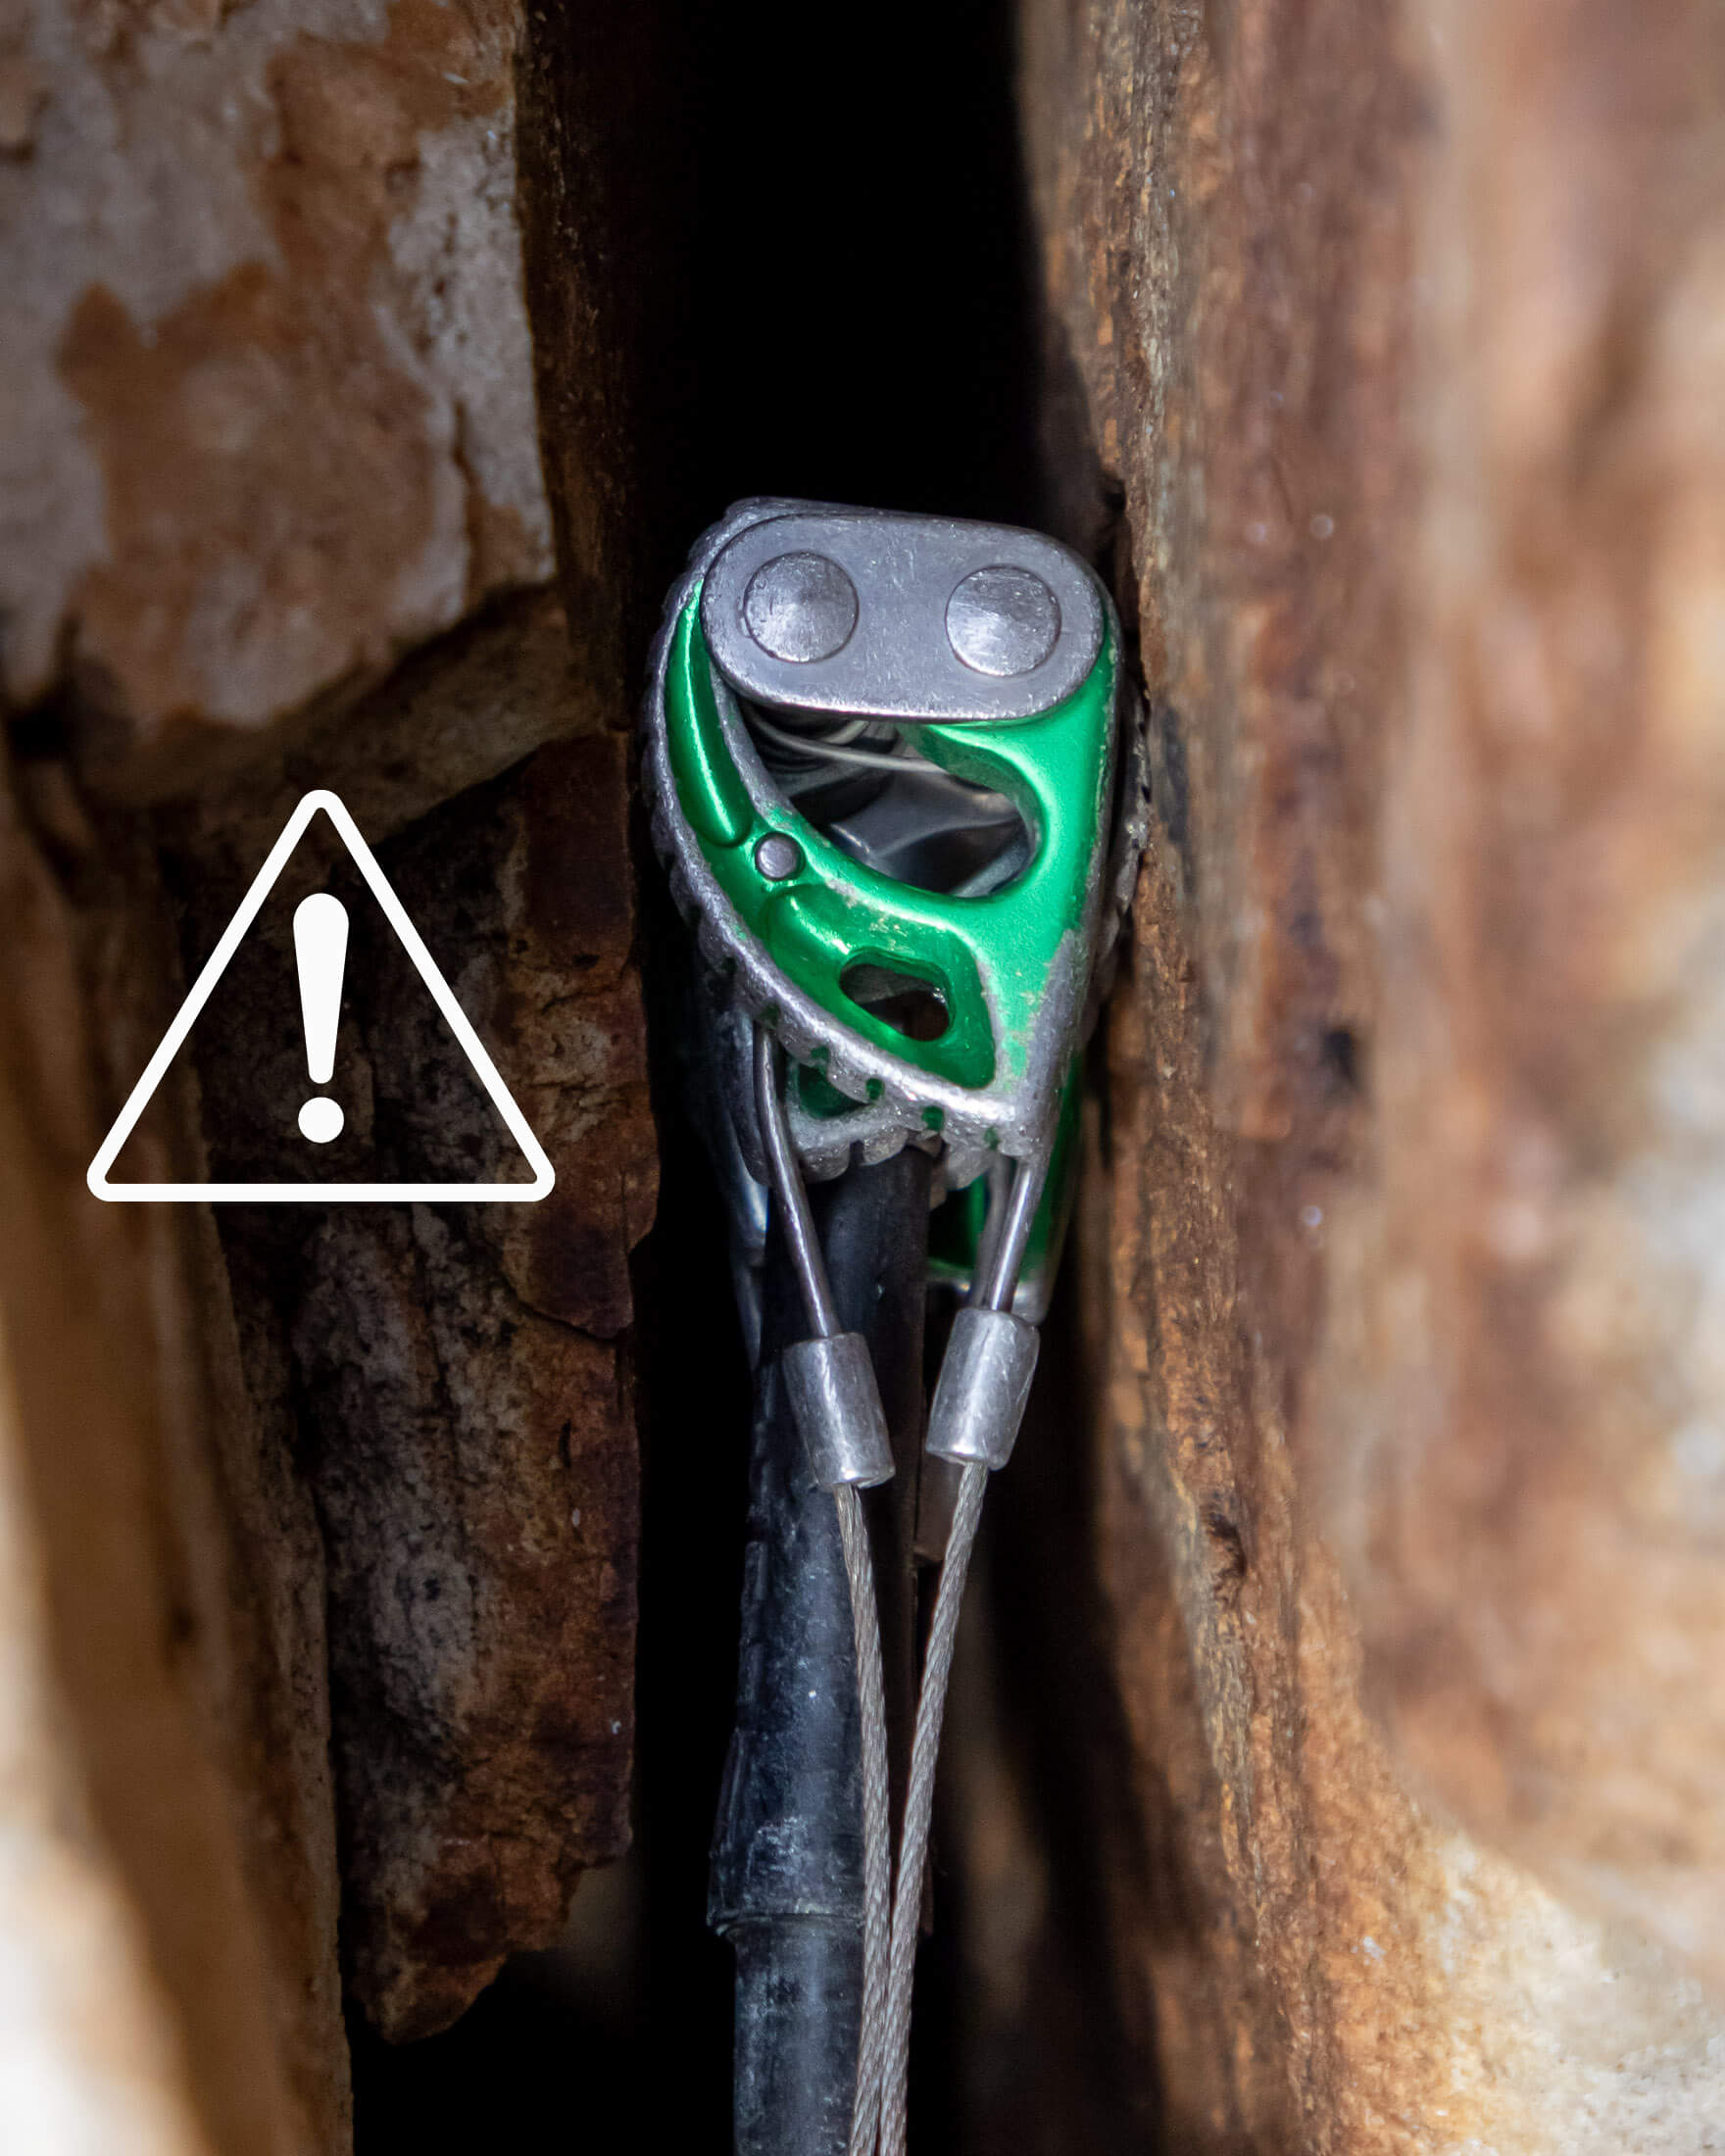
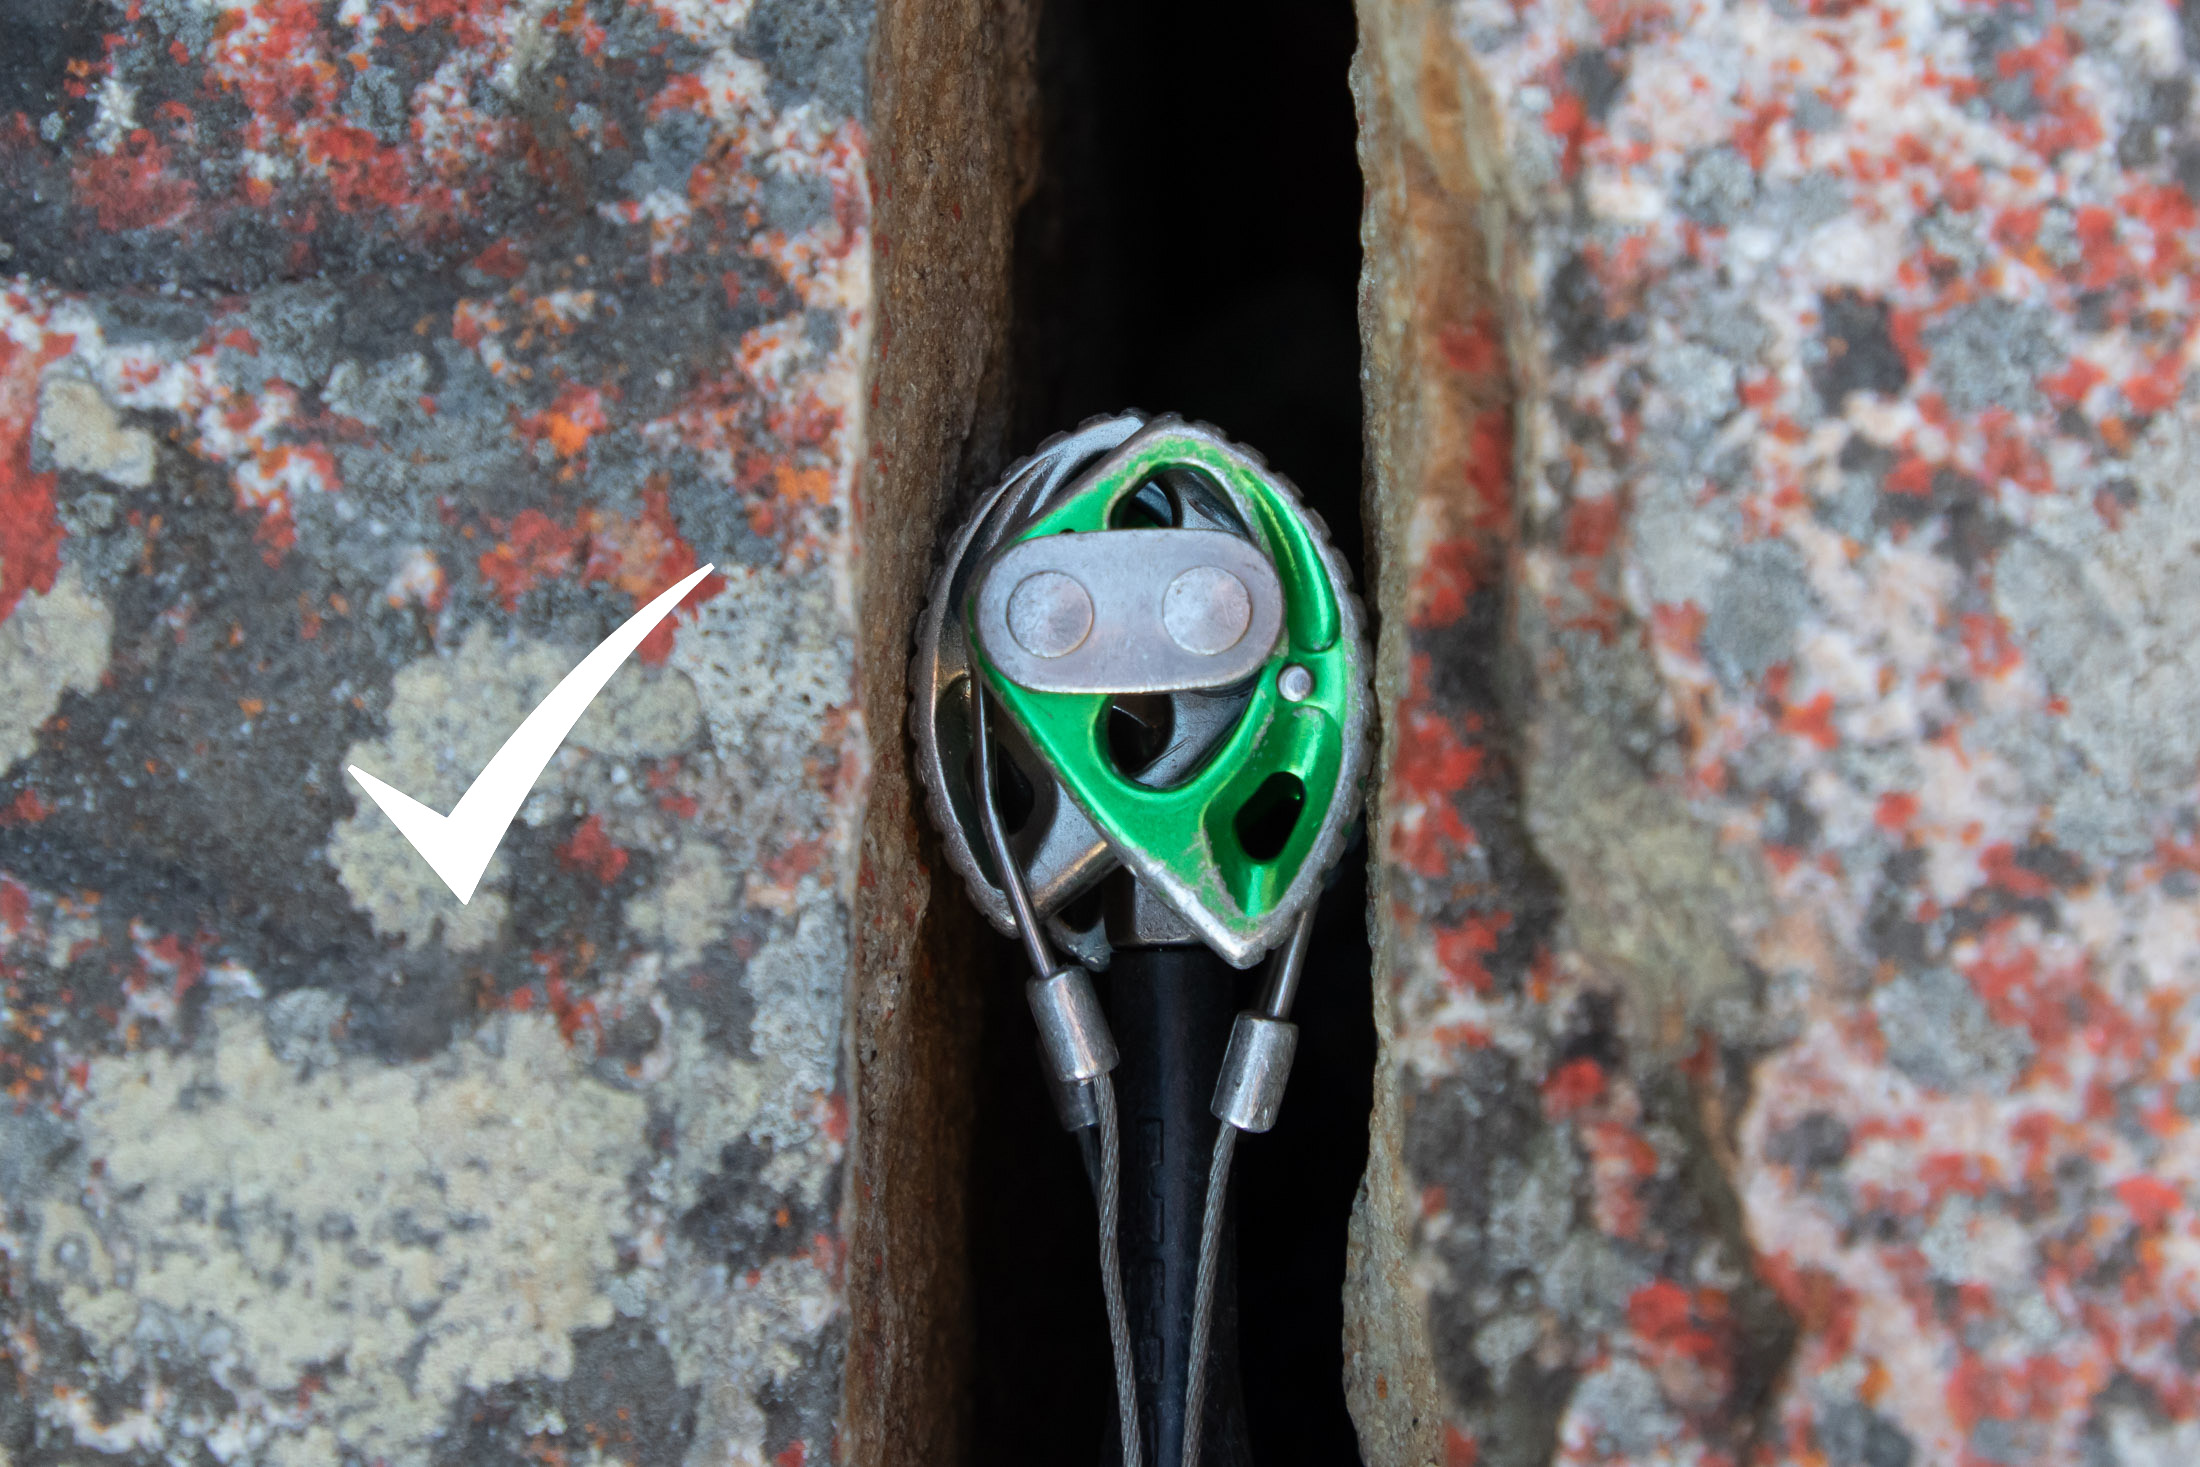
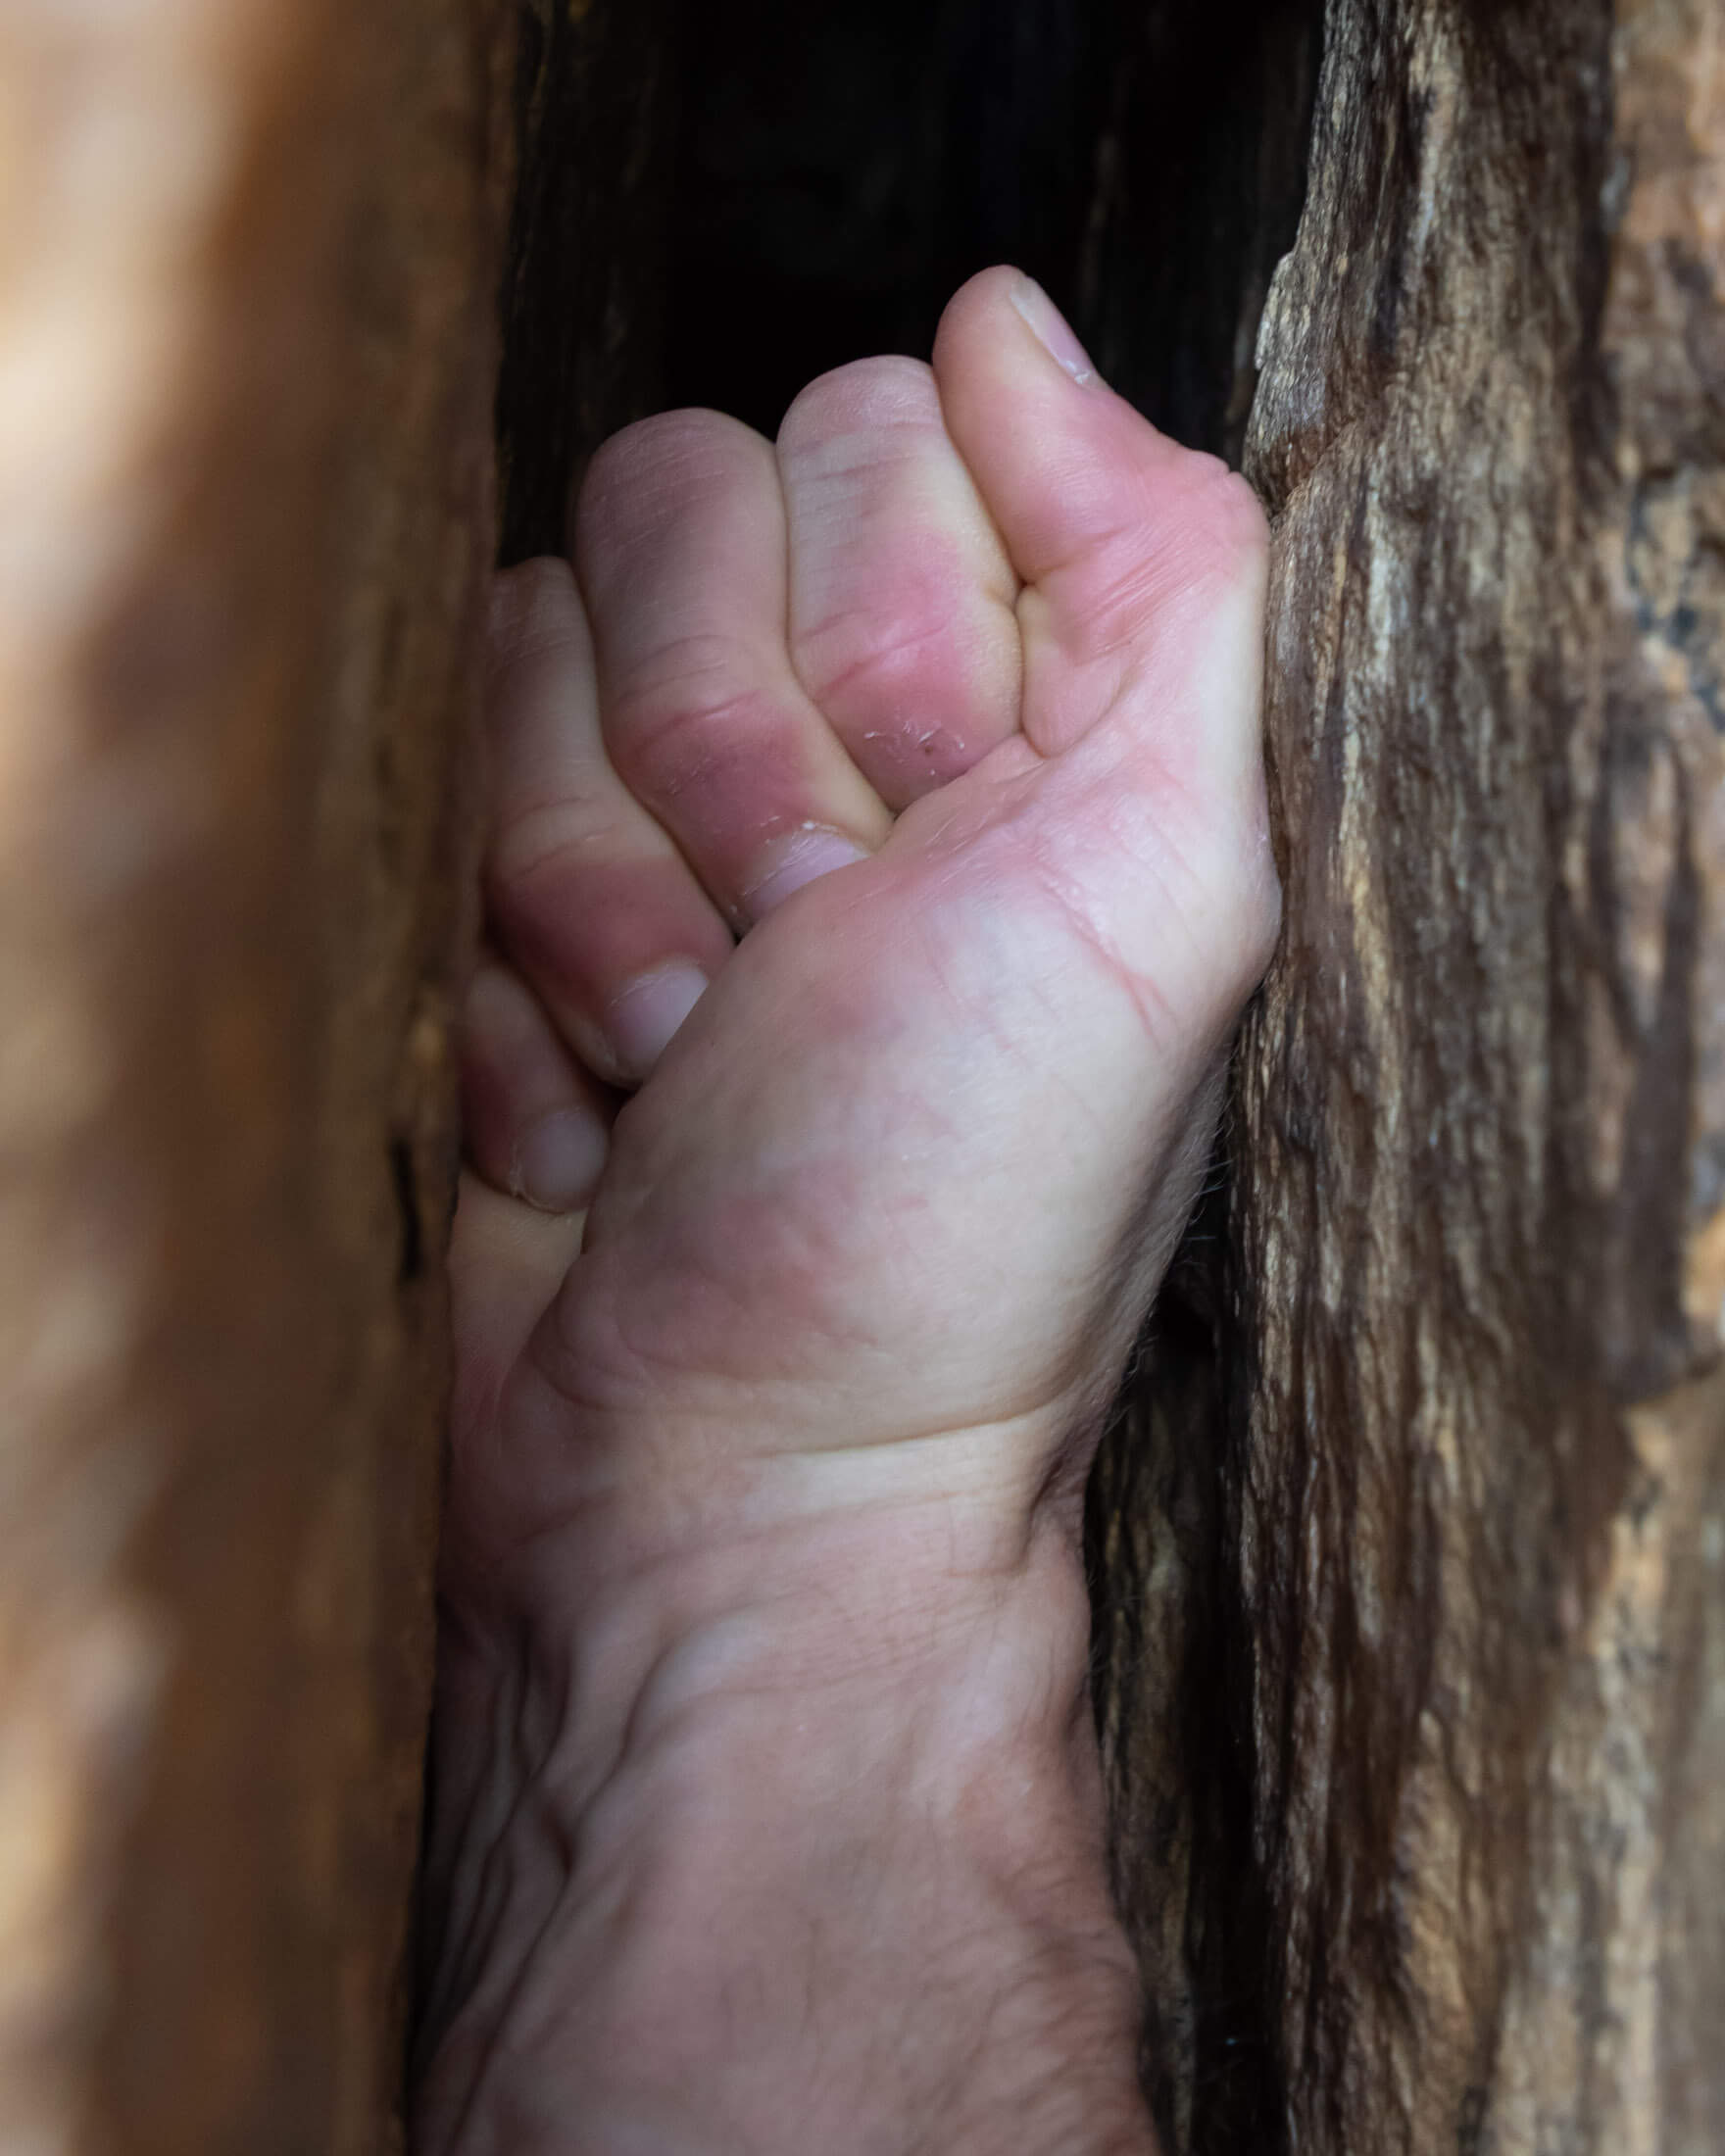
At the narrow end of a cam’s range, you can leave just 10% for a little wiggle room, but the narrower you go, the more likely a cam could become stuck, as happens when a cam’s lobes can’t retract any further. The sweet spot for most placements is between 25% and 40%. You can tell if your cam is in this ideal range because the lobes will form an overlapping angel wings shape. Sometimes you will find that two different size cams fit a placement. In such cases, the bigger cam is usually a better choice unless you anticipate needing that size higher up the route. With experience, you will be able to use your hands and fingers as a way to measure the crack. Hand cracks might be a #2 and fist cracks a #4.
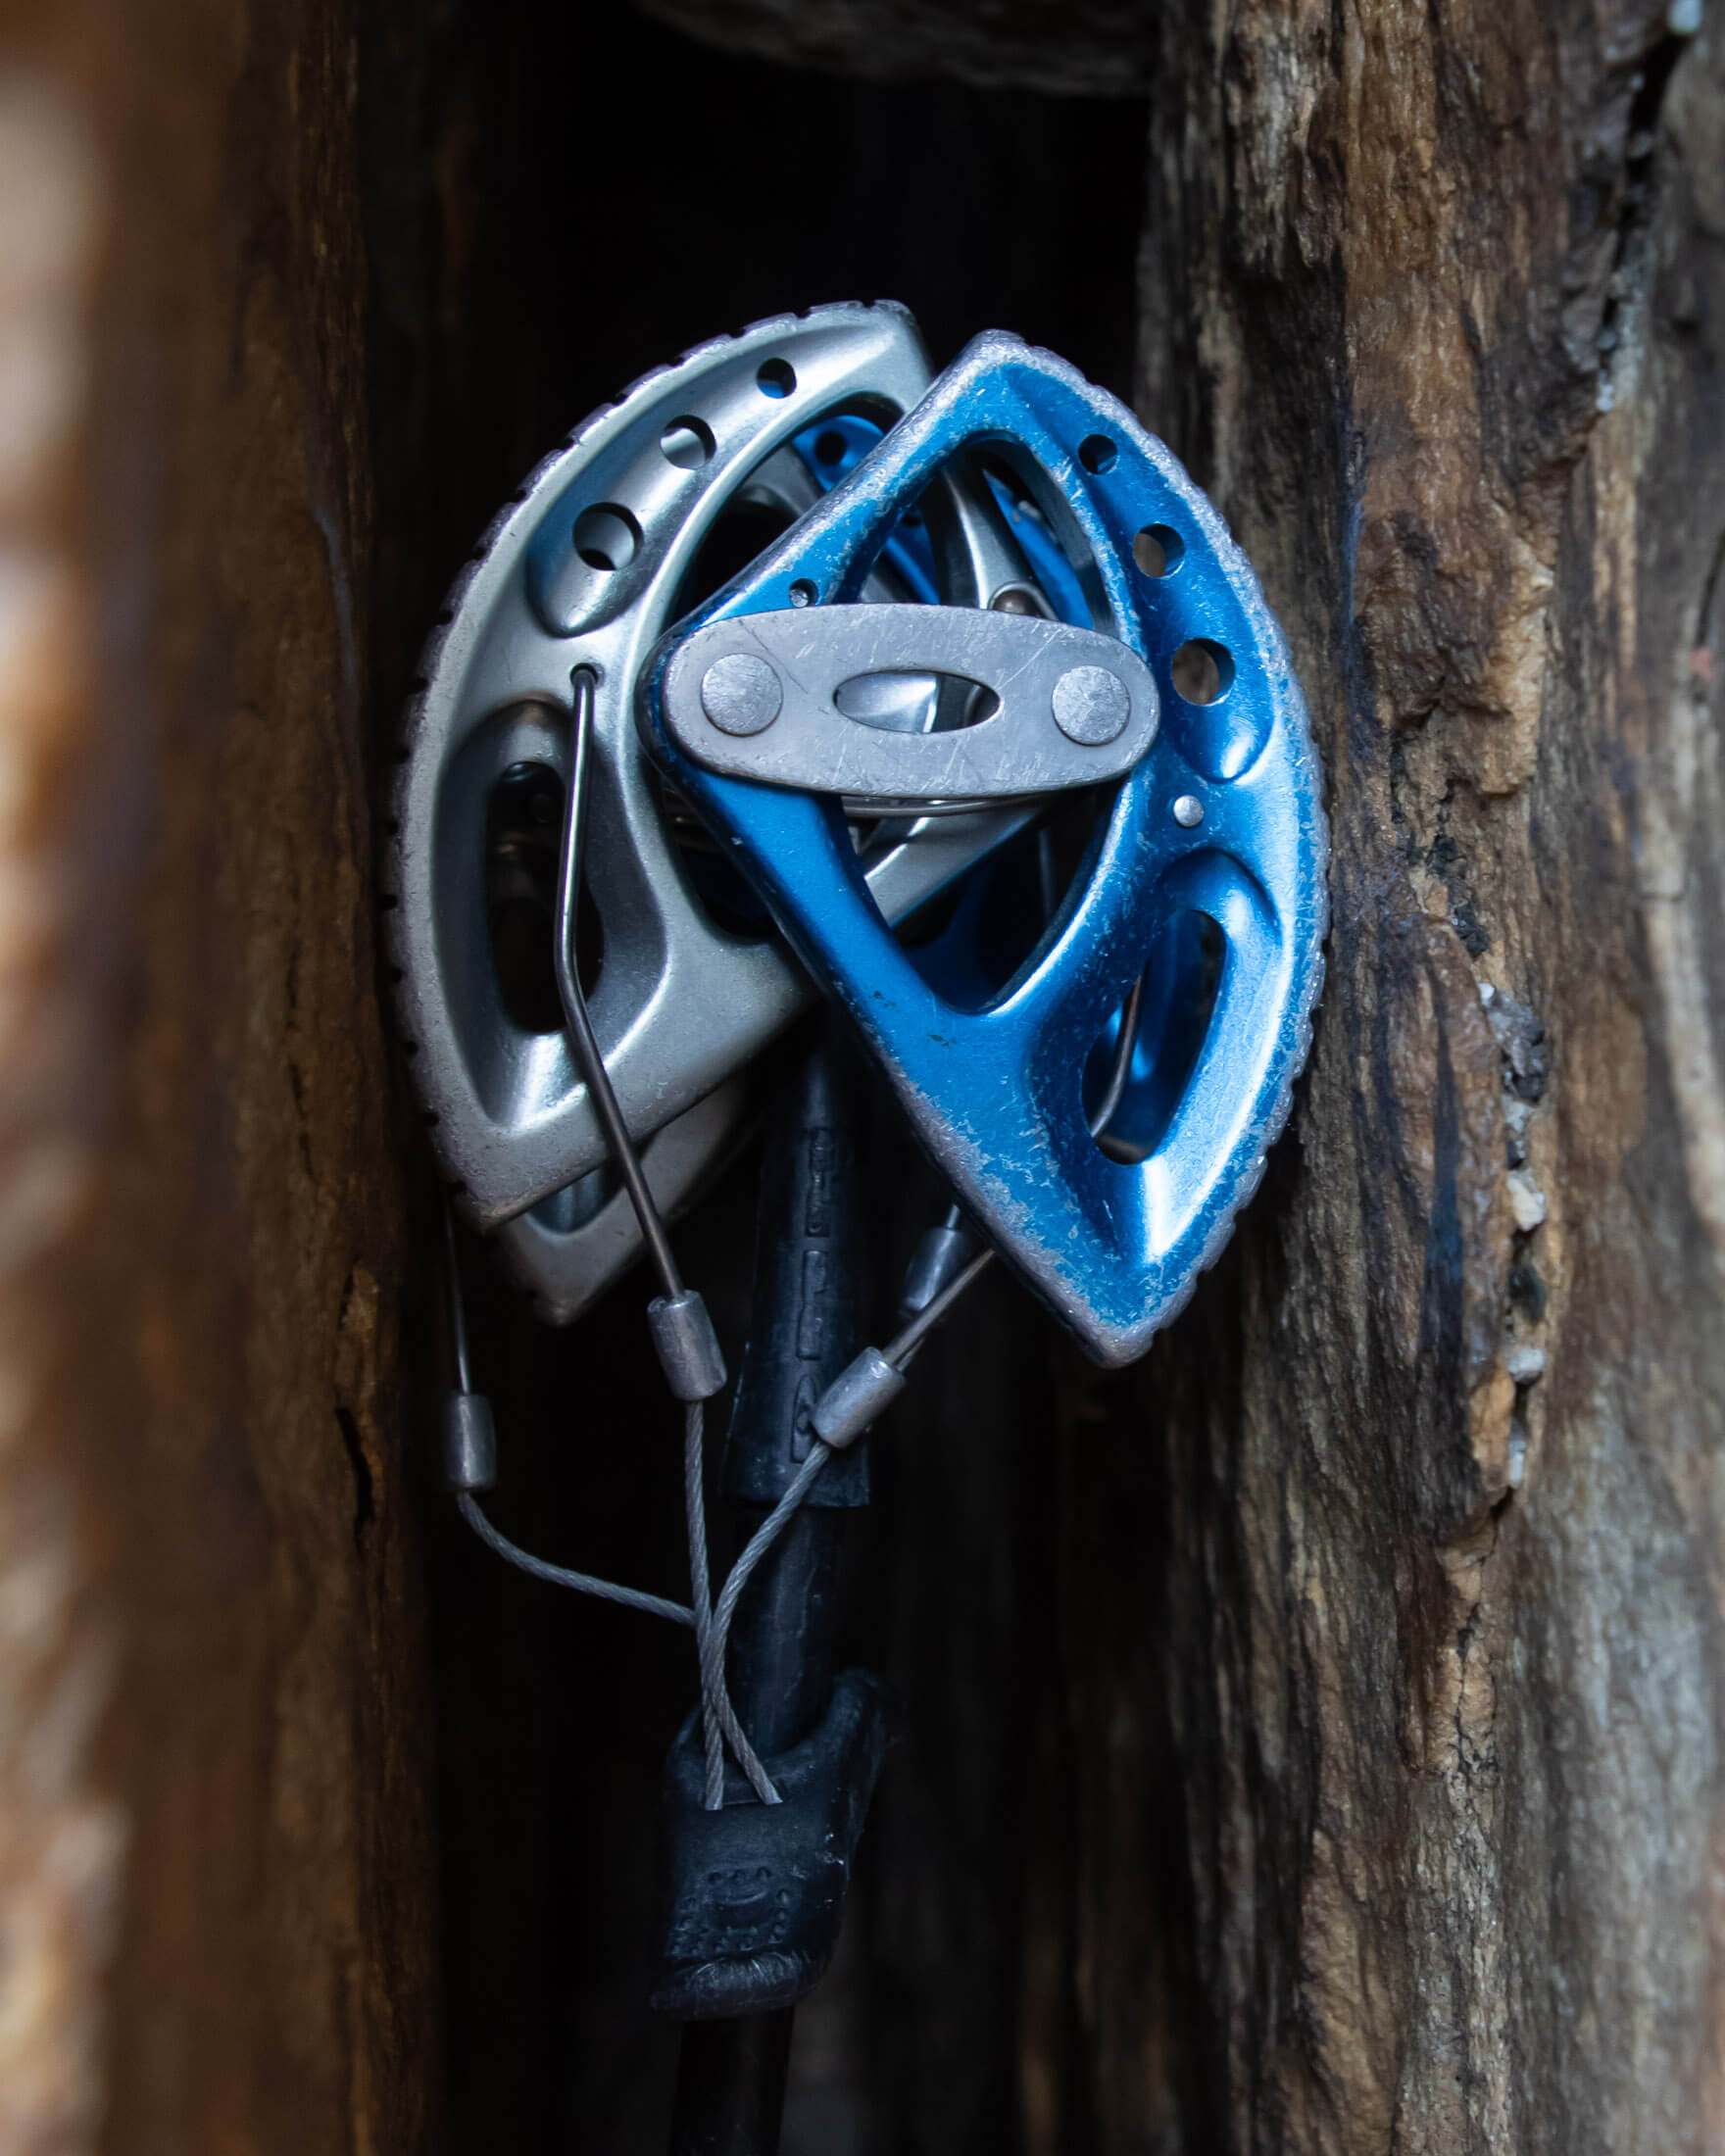
As you place the cam, think about where the direction of pull would be if you fell. You want to position the cam so that the stem is pointed in that direction. This will generally be down, but the direction can vary depending on the route or the specific use of the cam. In the case of horizontal cracks, the stem will likely point straight out of the crack, but then you should also try to place the cam with the wider, coloured lobes facing down as this orientation will ensure a more stable placement.
Where to place a cam in a crack
Cracks that taper downwards are unlikely to hold a cam, and cracks that taper upwards are likely to cause a cam to walk upwards and into the wider part of the crack where it would be tipped out. The best cracks for cams are parallel-sided, but even in these, there are better and worse places to put a cam. A shallow pocket or pod inside a parallel crack will ensure the most secure placement, but even a perfectly uniform crack can make for a solid placement as long as you don’t place the cam too close to the edge.
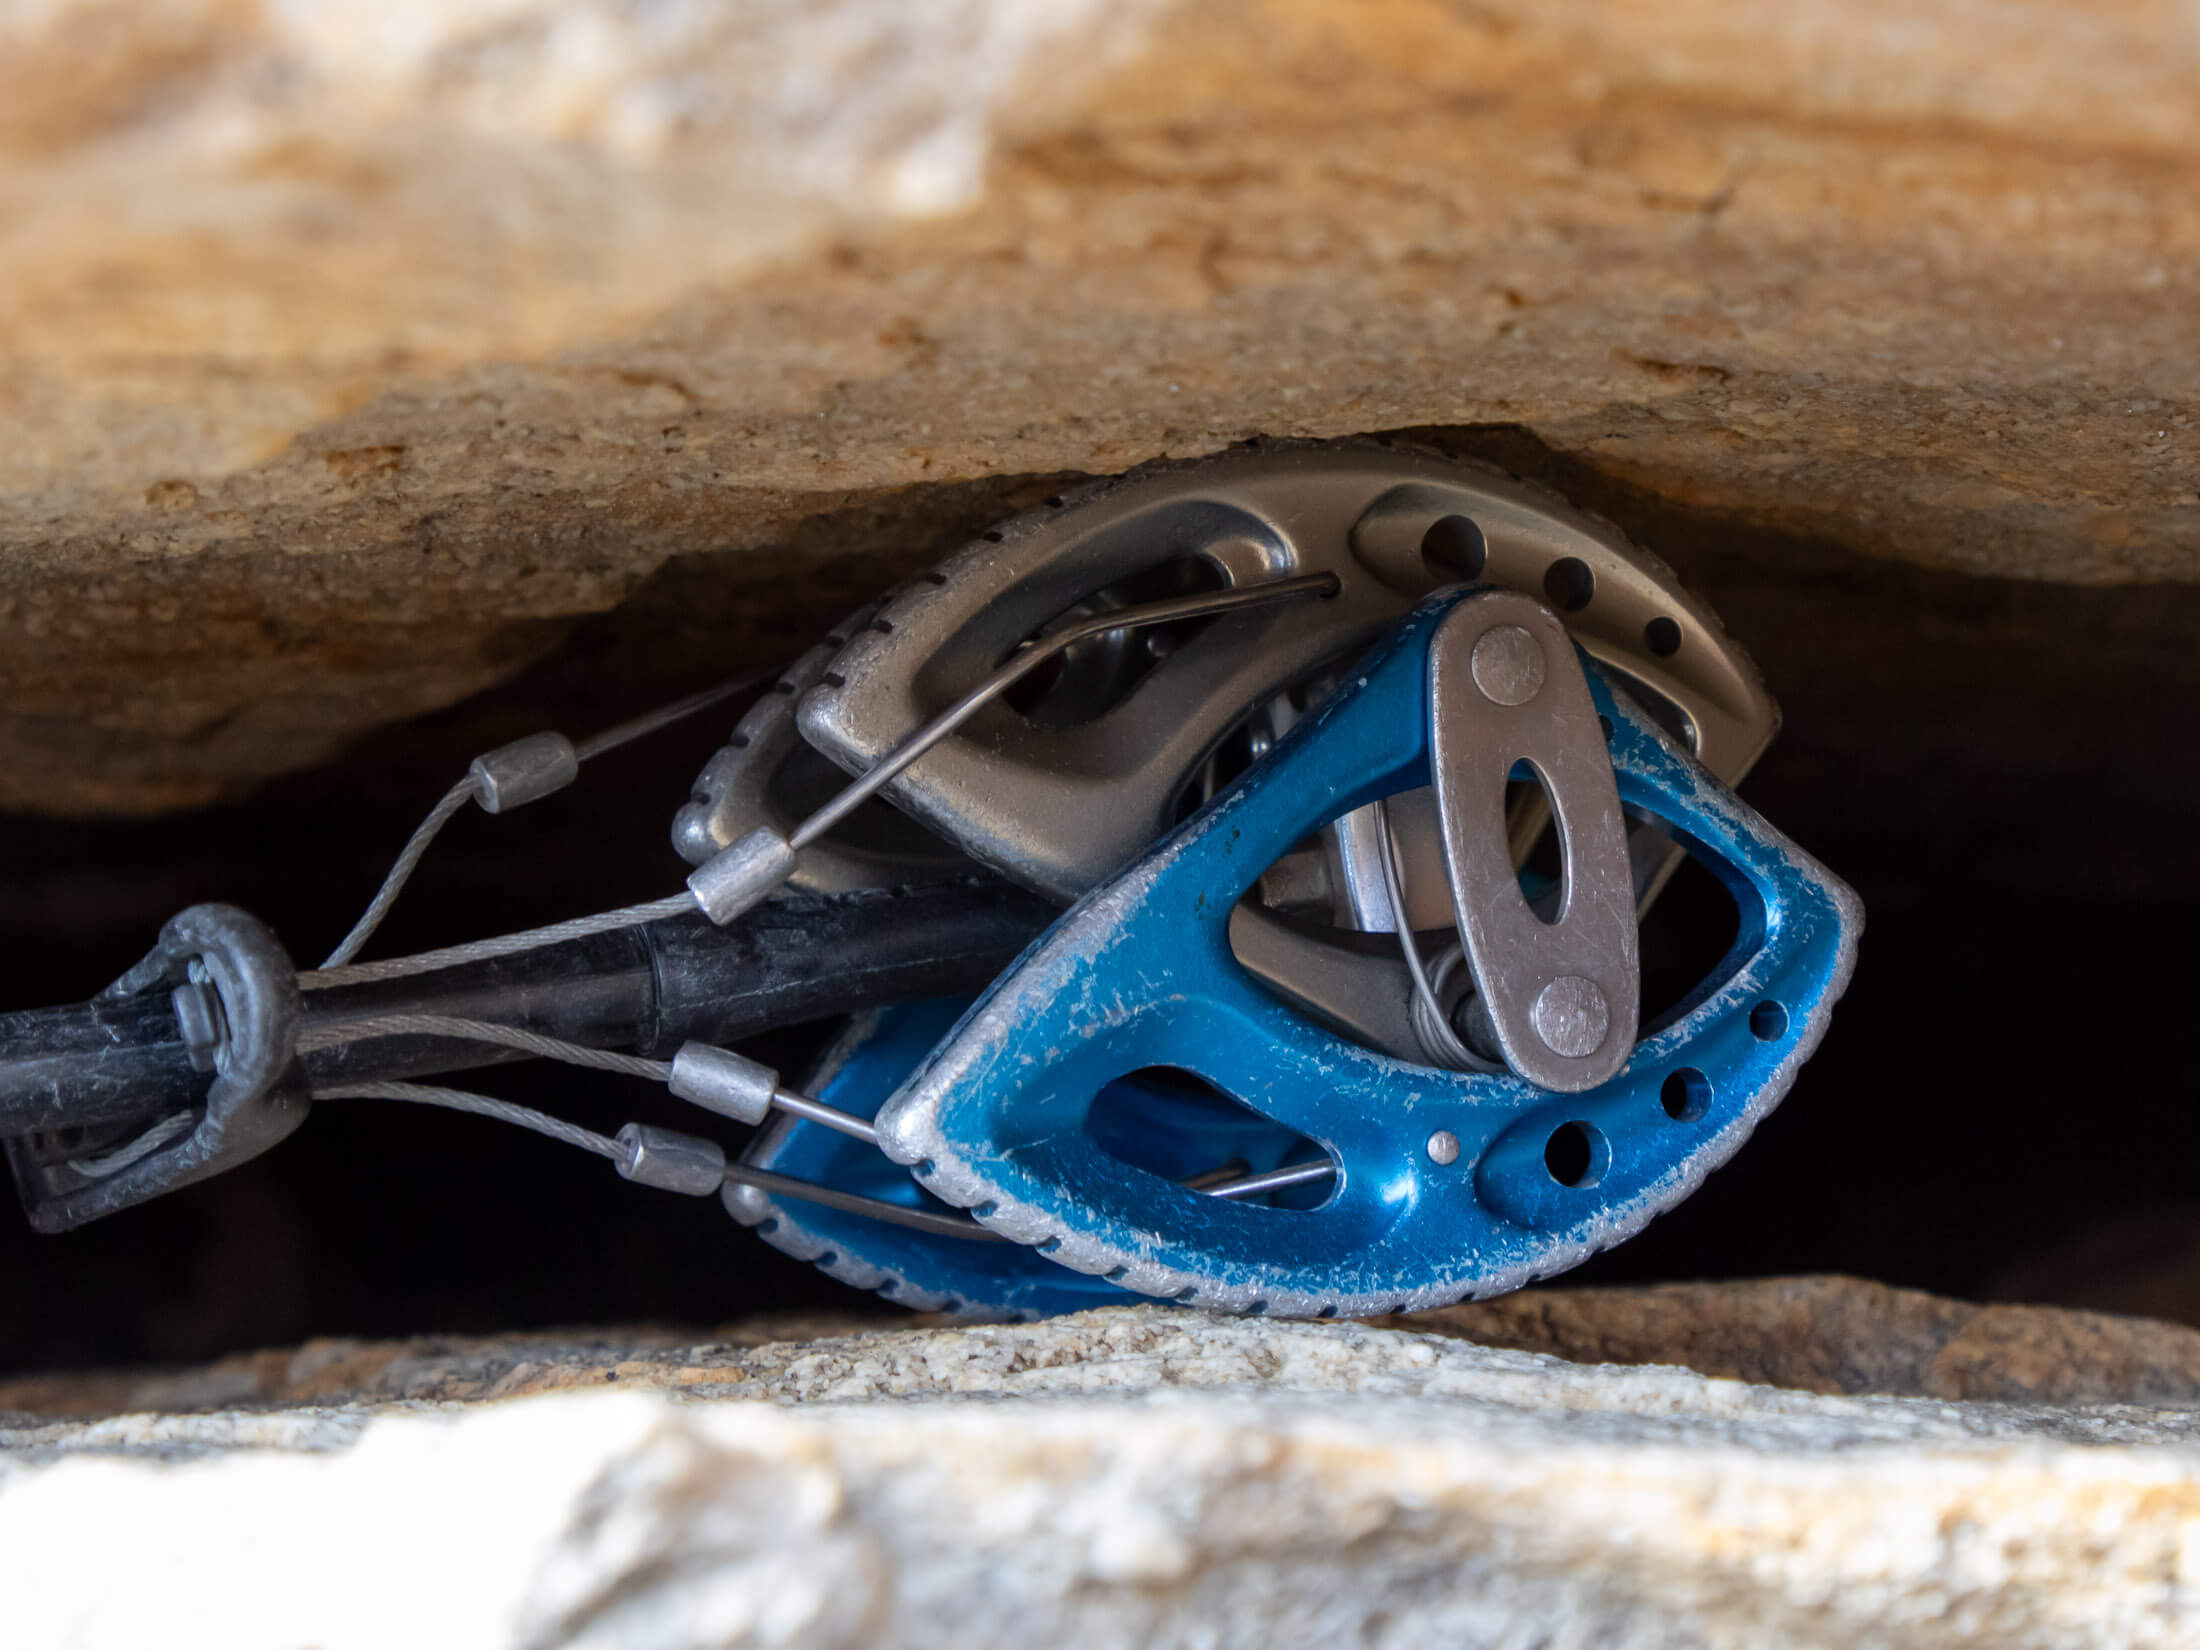
Placing cams deep enough inside a crack but not too deep requires some thought. If you placed a small cam too deep inside a crack, it could make it difficult for your partner to reach the trigger when it’s time to remove it. And if a deeply placed microcam walks just a few centimeters into a crack, it can make it impossible to get it. In such scenarios, the only solution is to use one or even two nut tools to reach and pull on the trigger.
Hexes
Whilst many experienced climbers prefer to carry a double set of cams, some new tradsters will choose to include several hexes in their rack to bring the cost down. Like cams, they can be used to protect parallel-sided cracks, but they tend to work better in cracks that have a slight taper to them. Instead of spring-loaded lobes, hexes rely on the offset sling to generate the camming action by rotating them forward when loaded. Because they have no movable parts to adjust for size, getting the fit right is a little more tricky than it is when placing a cam. Hexes can also be placed like nuts although only along their wide axis.
Some people lump hexes into the category of passive protection because they have no moving parts, but most of the time, they will be used as active or camming placements and have to be placed in a way that ensures that they do just that. When placing a hex in a horizontal crack, always orient it so that the corner of the hex with the sling coming out of it is up against the roof of the crack. This way, it will be rotated downwards and actually generate a camming action when it is loaded in a fall. If placed the other way around, the hex wouldn’t cam and would probably be pulled out of the crack.
Nuts
Nuts are the go-to protection for tapered cracks. To place one, a climber inserts the nut into the wider, upper end of the V, pulls it down into the constriction, and then gives it a good tug to seat it properly. While very simple in principle, this is not always easy in practice. Unlike cams, which can work well in cracks that vary in size and shape (within a range), nuts will only fit cracks that are the right size and shape. And knowing which nut will go into a certain crack takes a bit of skill and experience.
How to place nuts
In their primary orientation, curved nuts are designed to be placed so that the top and bottom of the concave face are in contact with one side of the crack and the apex of the convex face is in contact with the other. As long as the crack tapers enough below the nut and it doesn’t flare inward or outward, this should ensure a secure and strong placement.
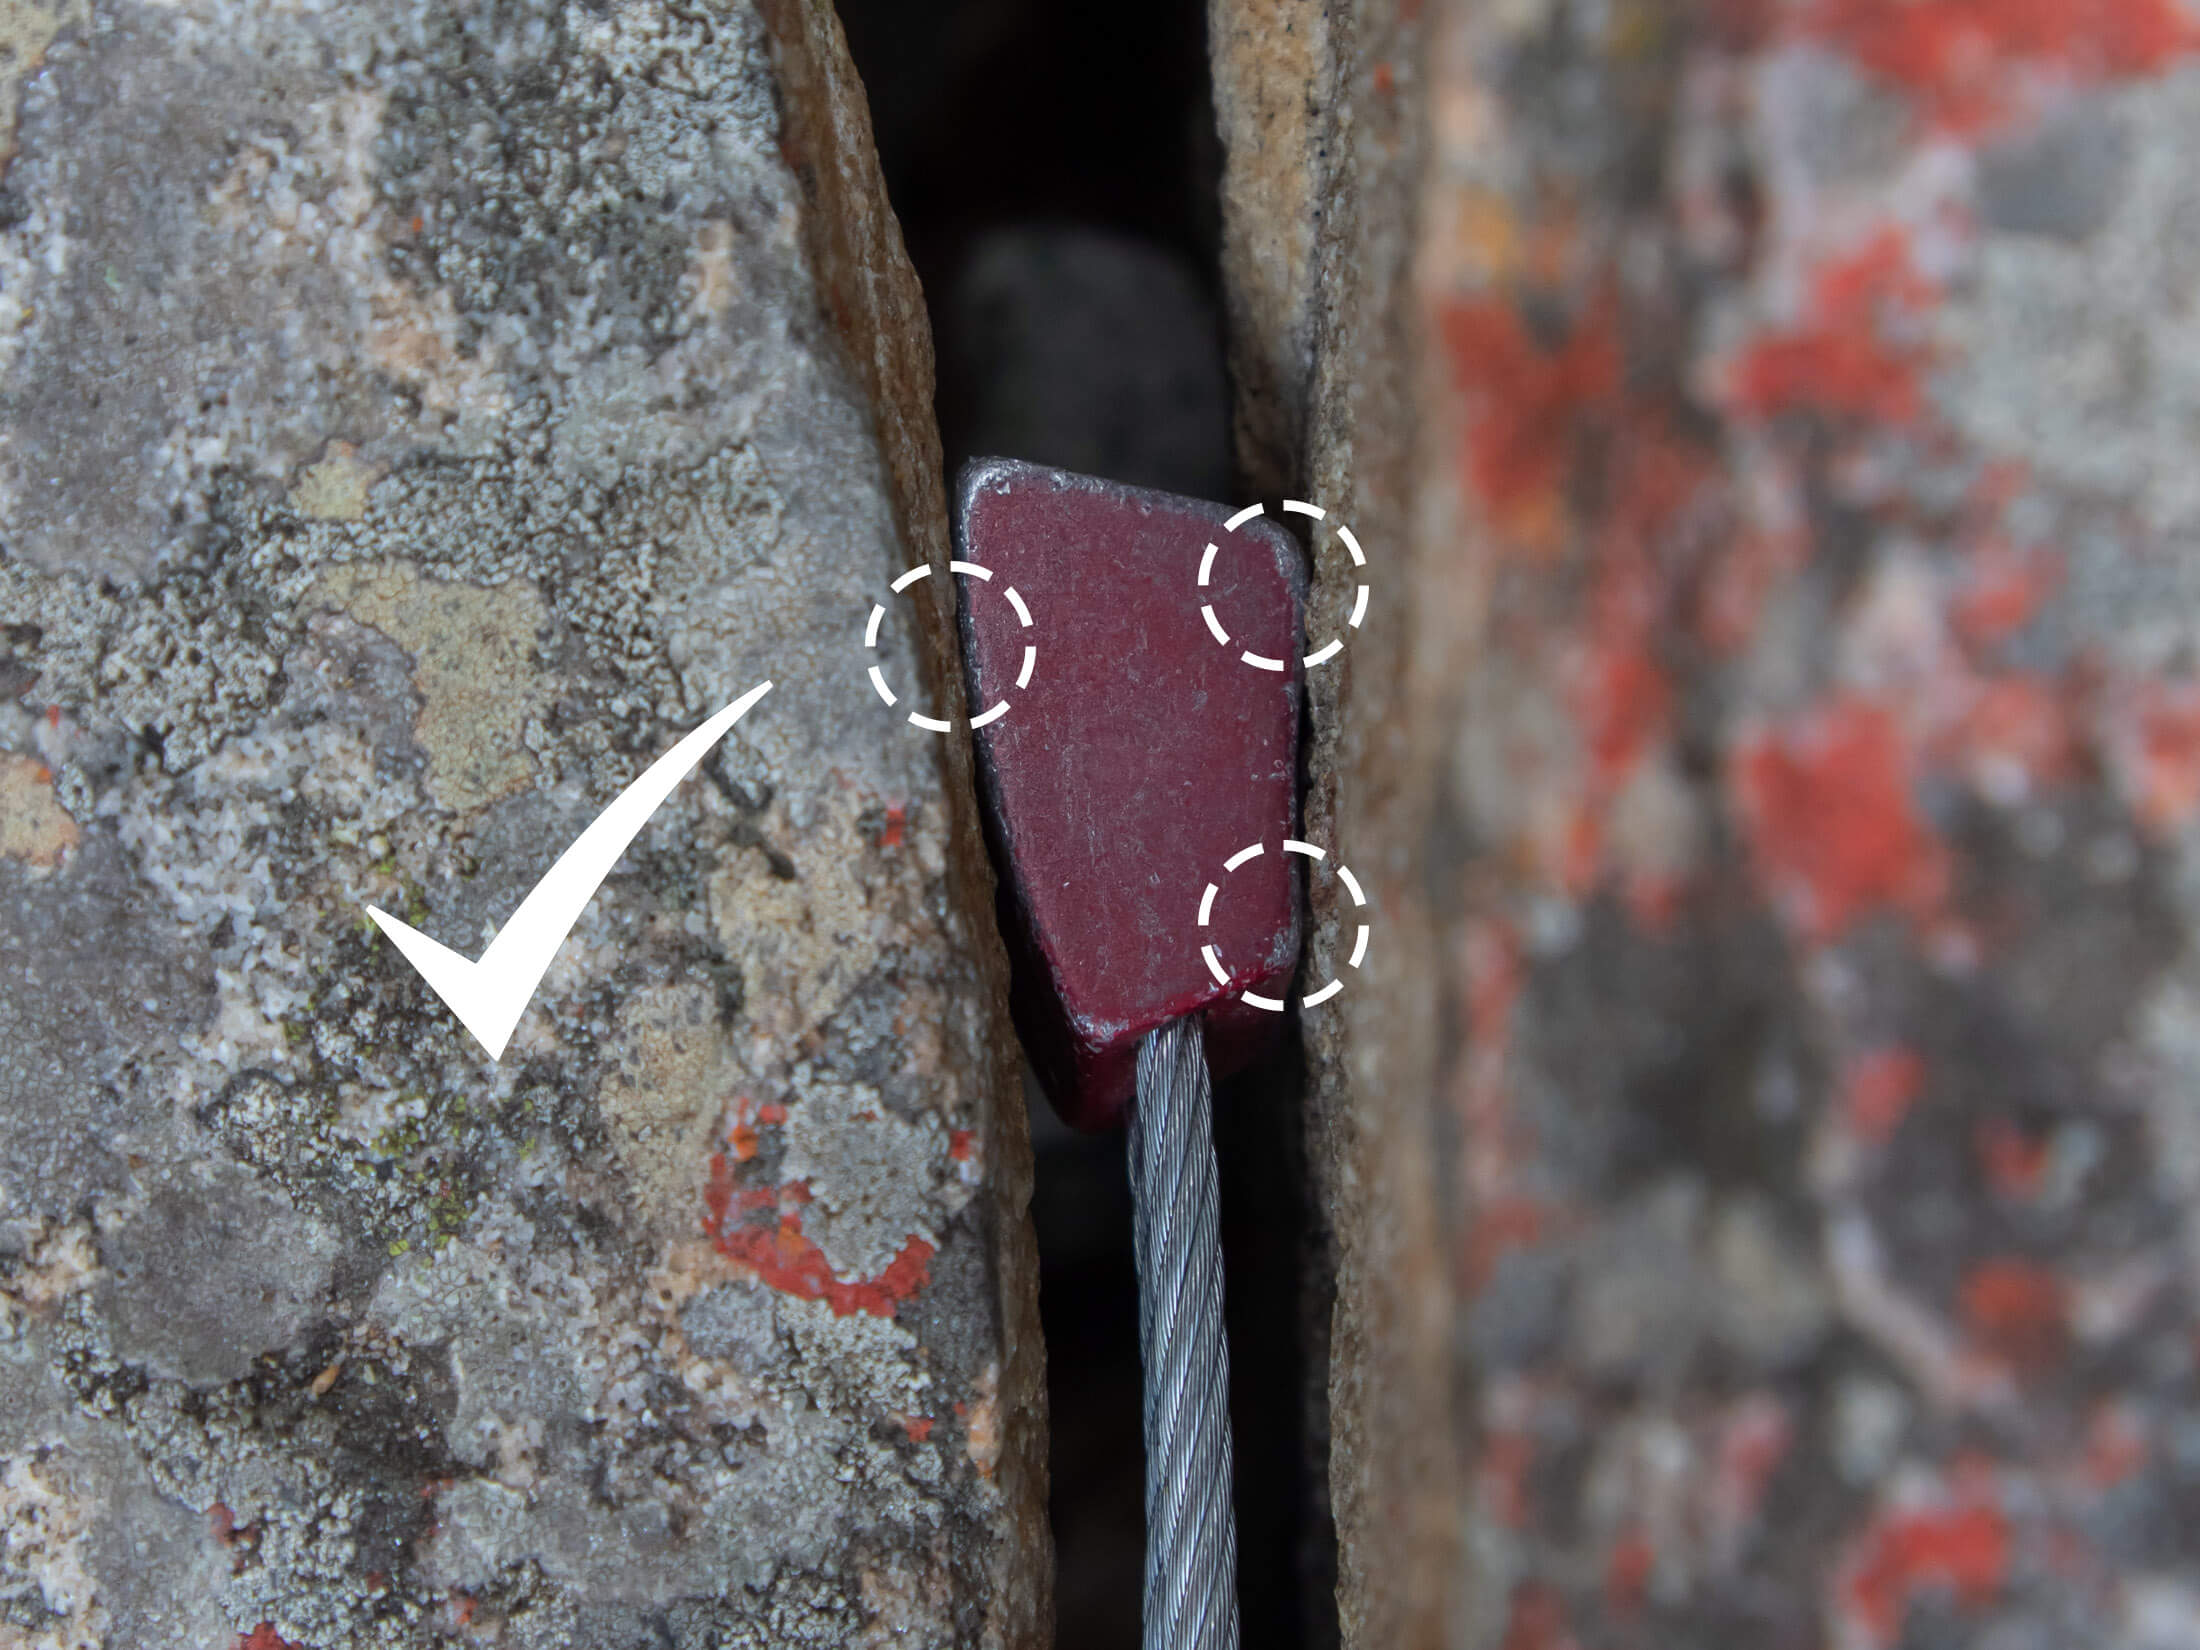
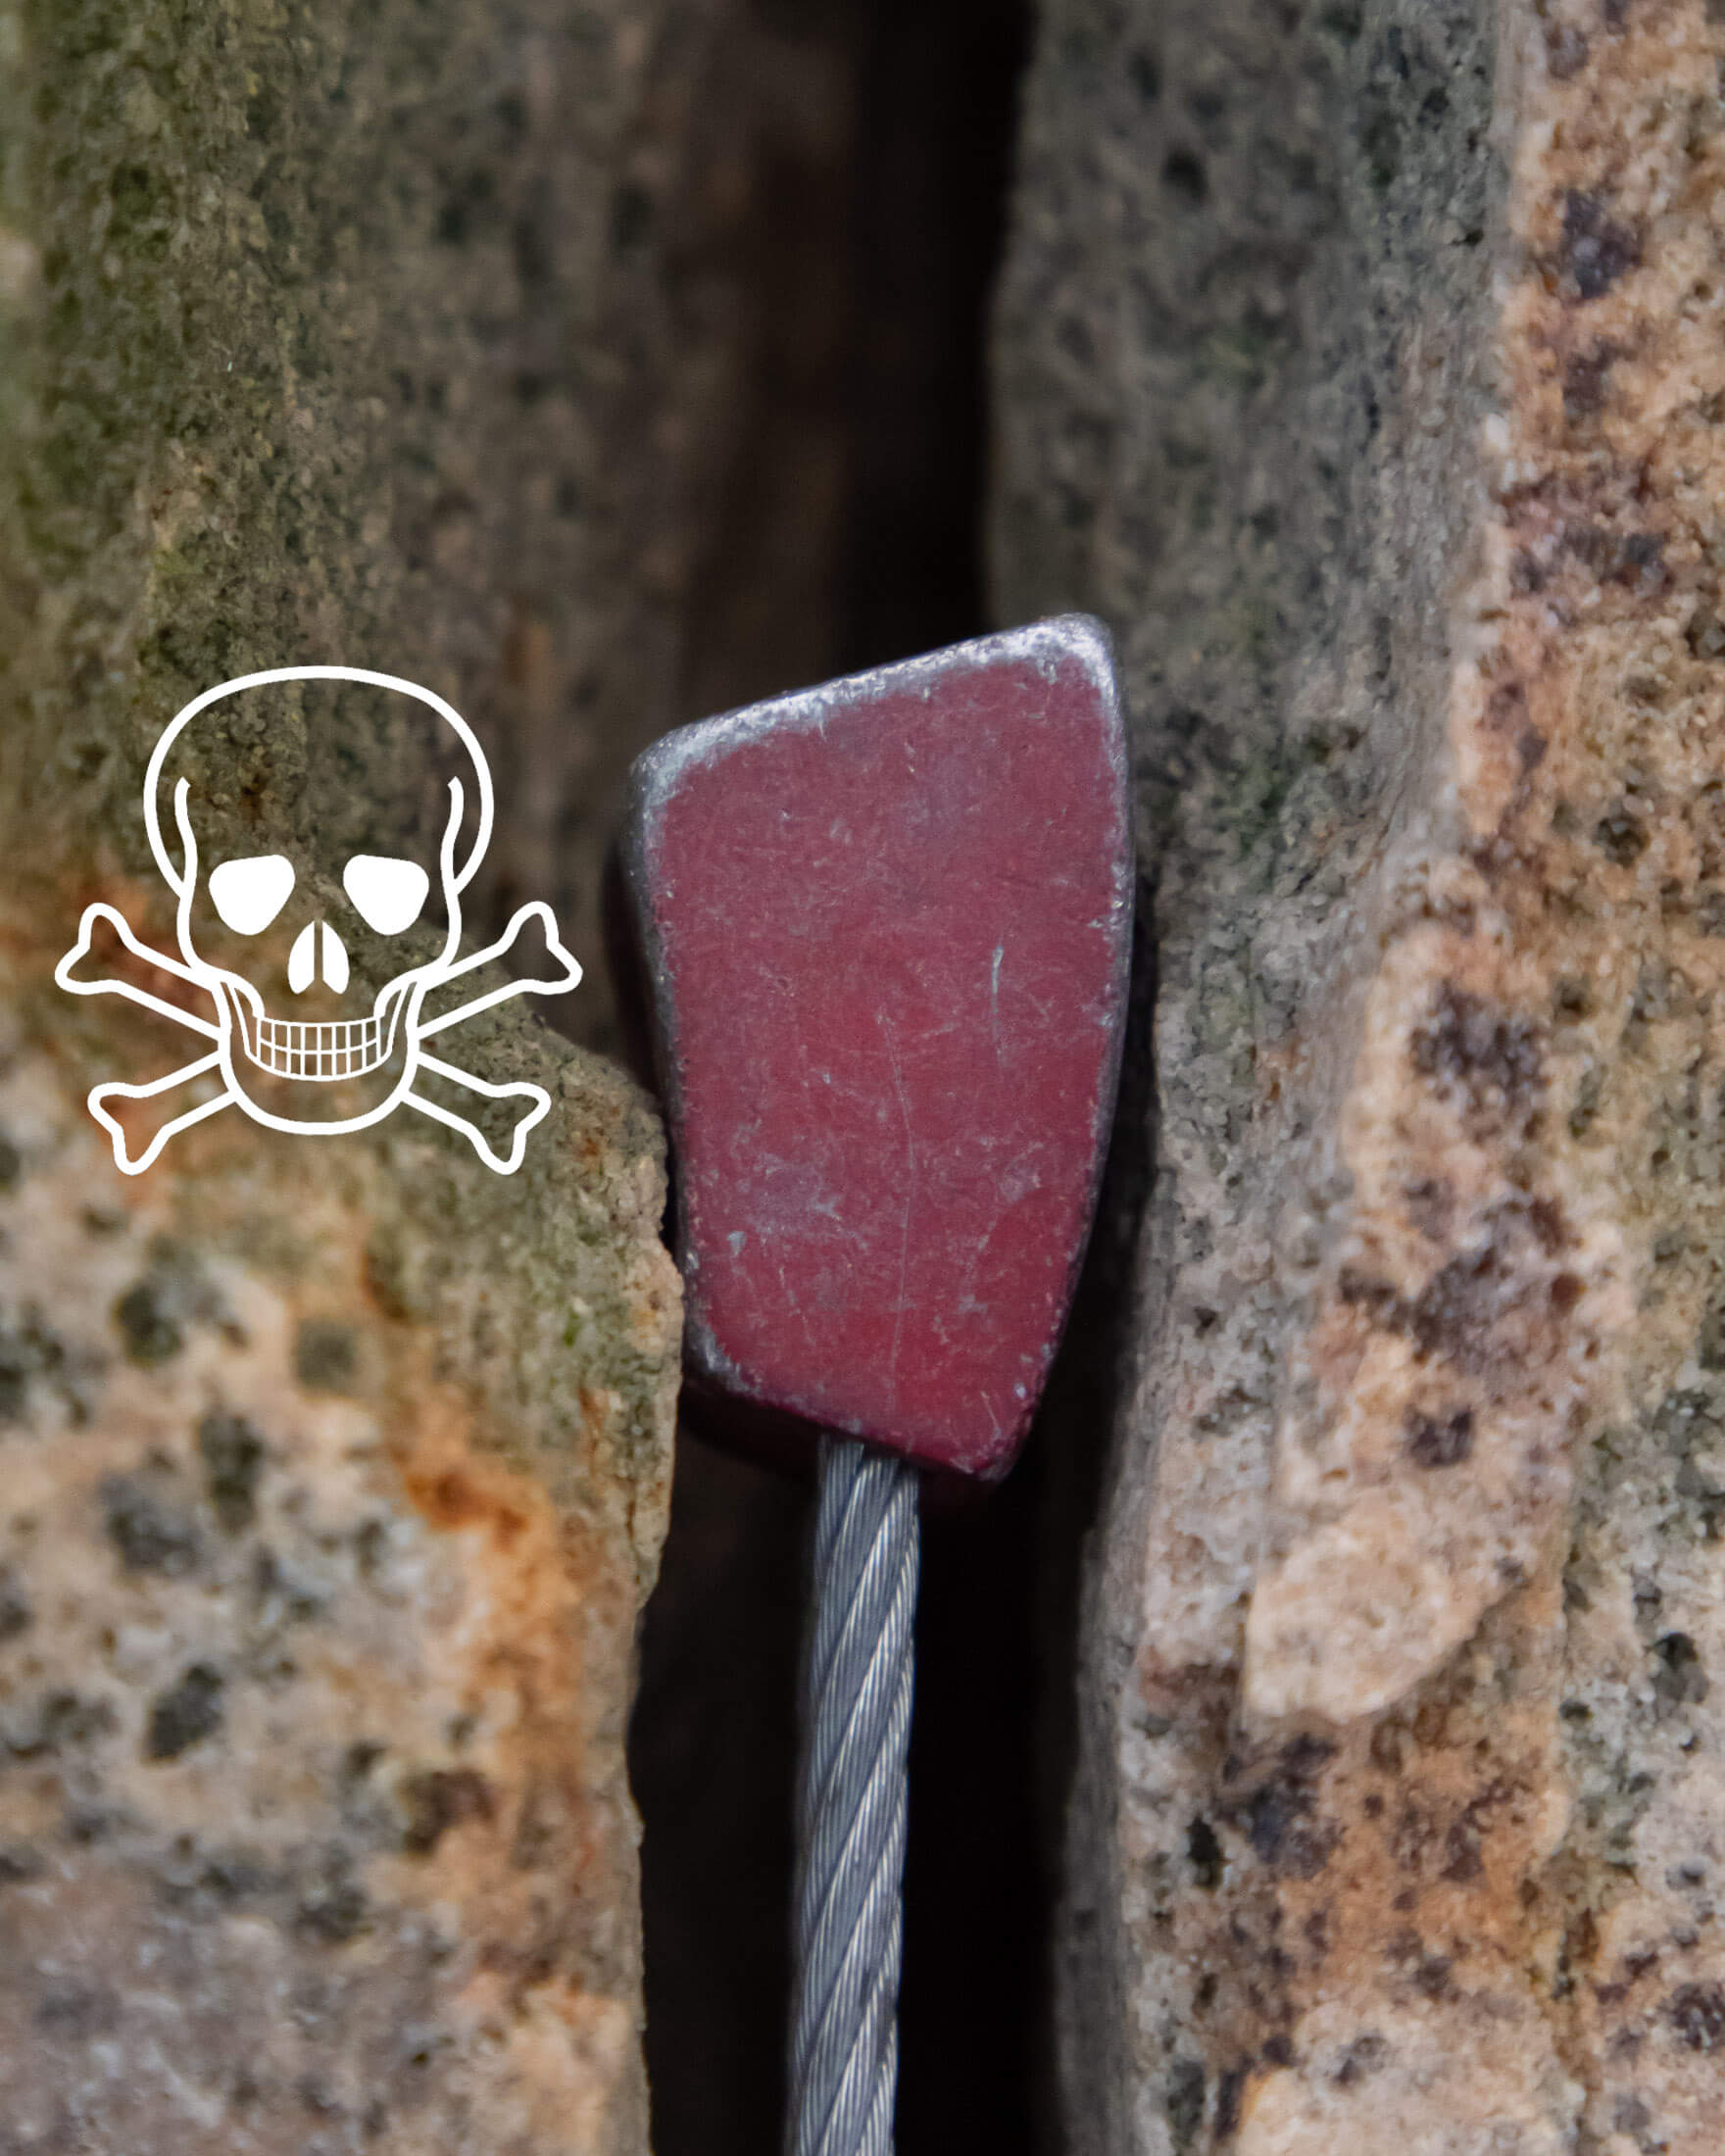
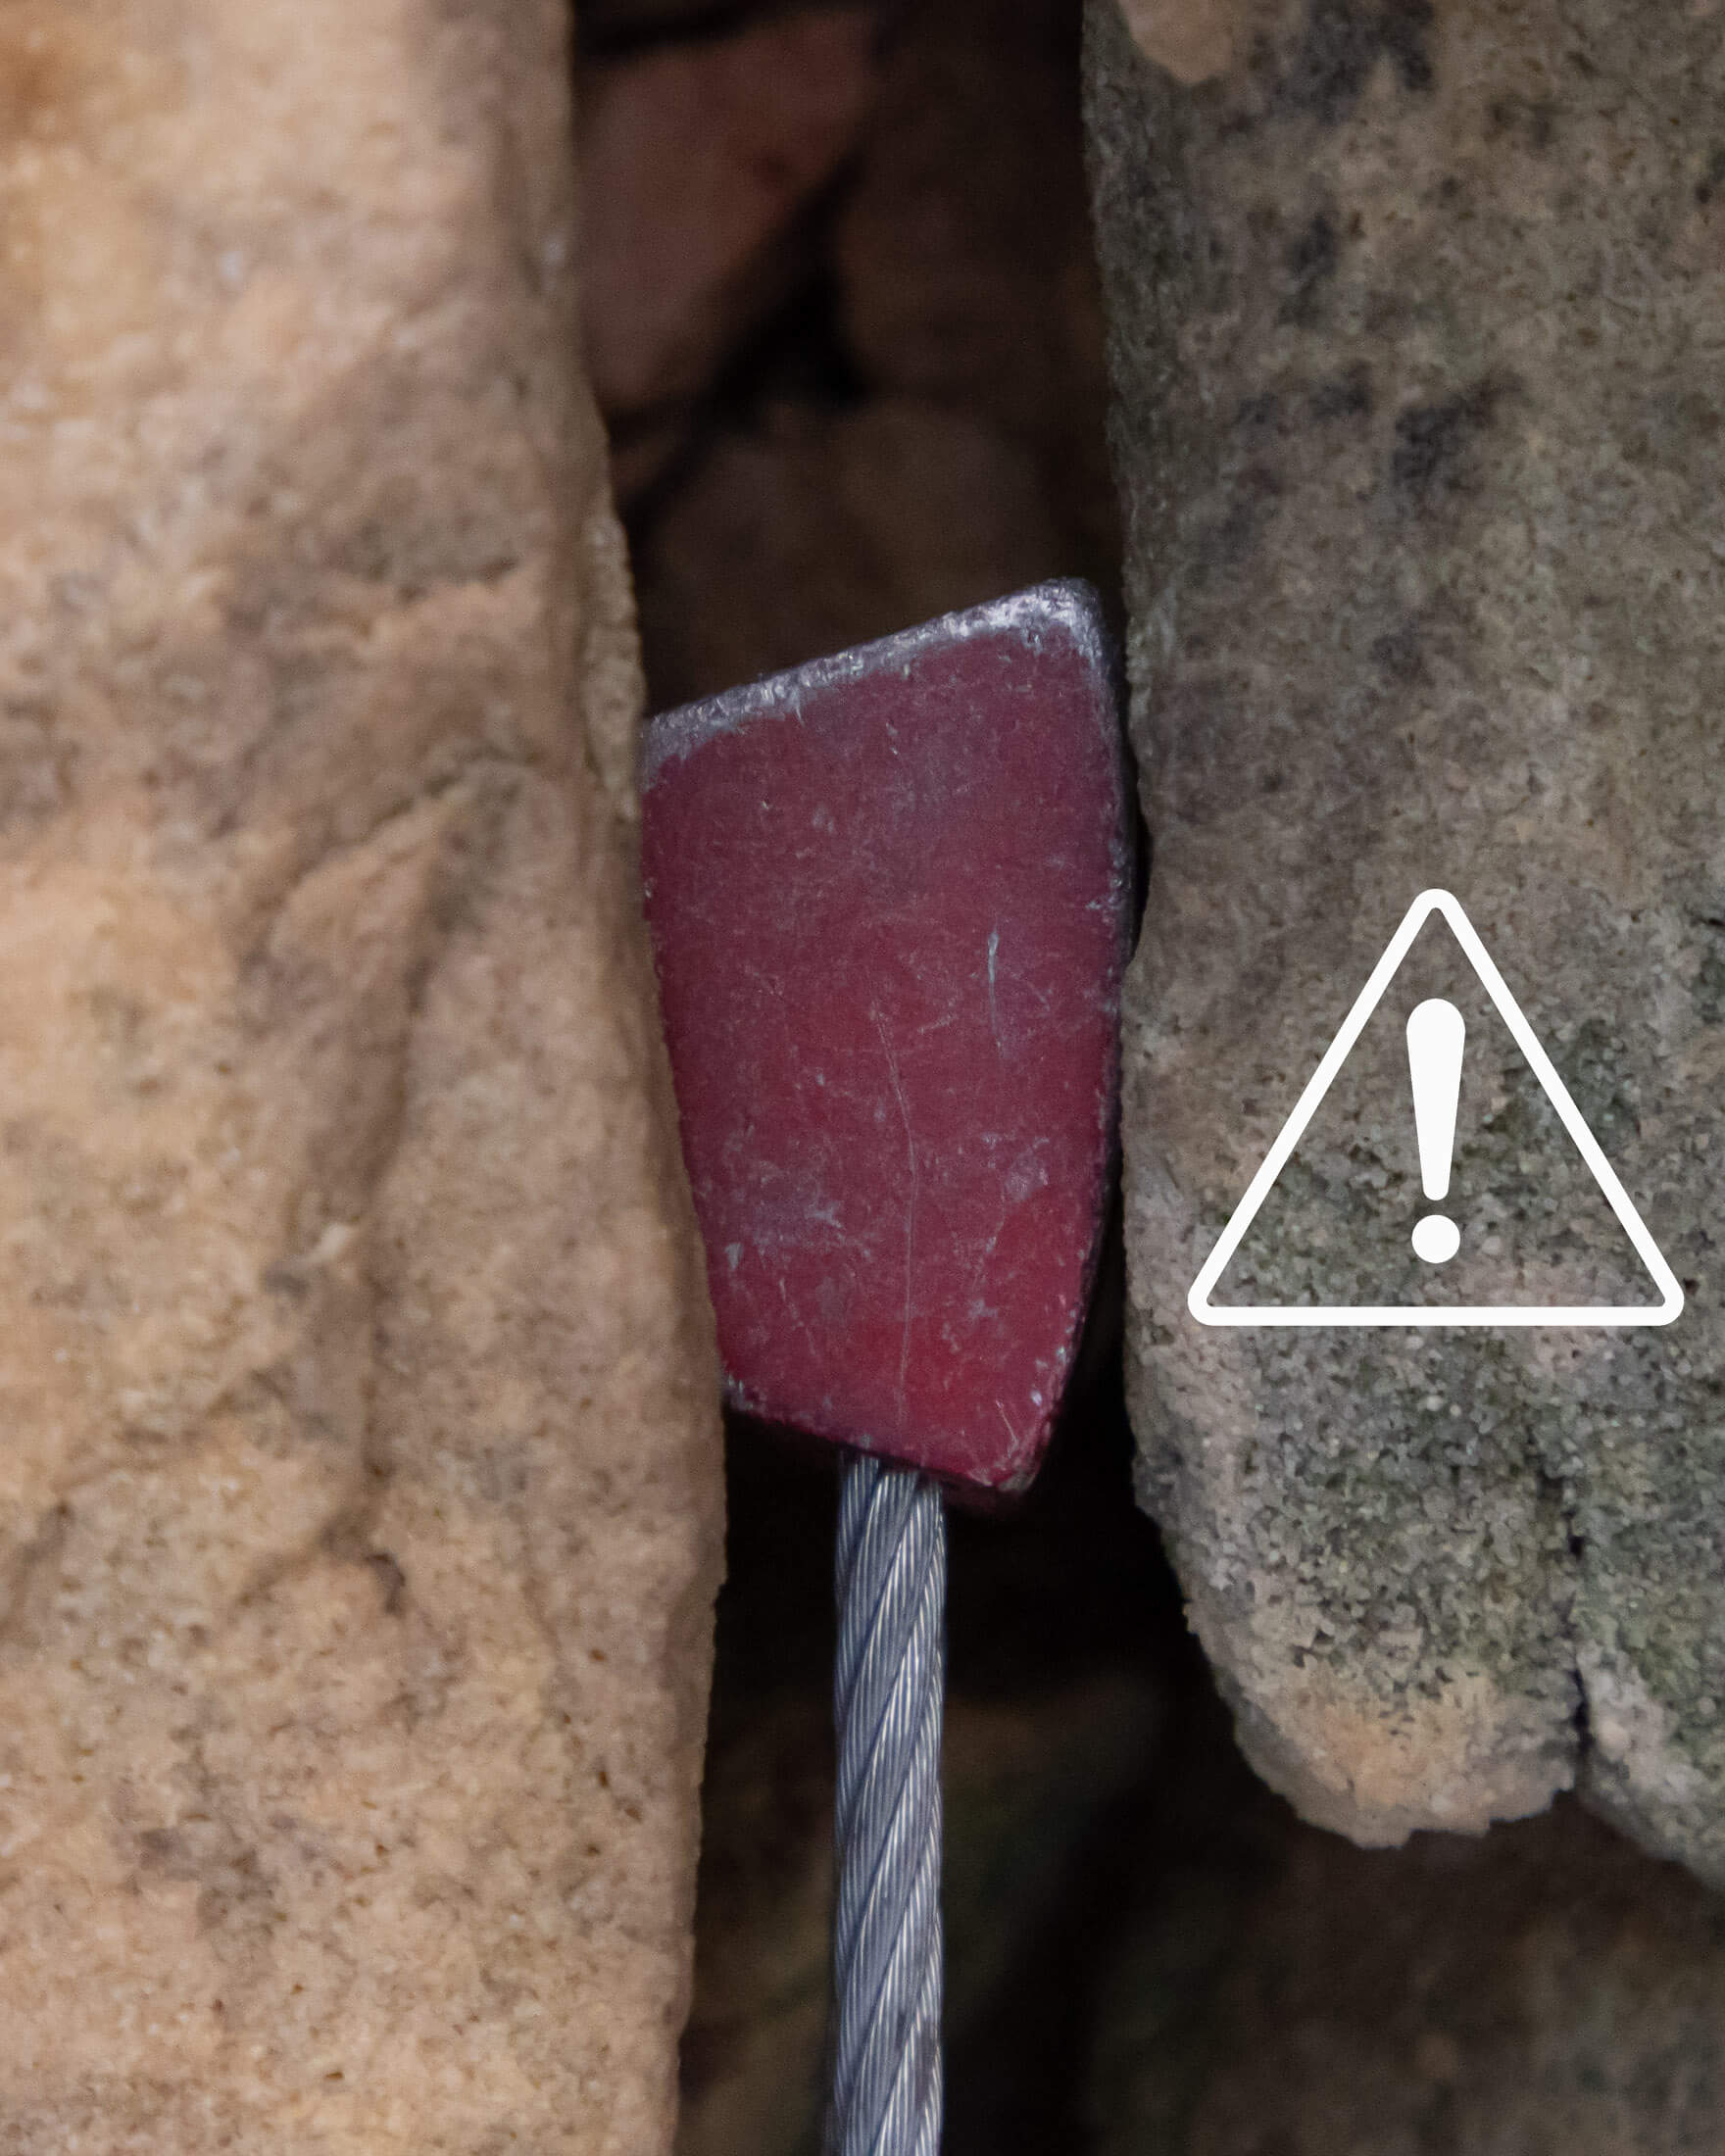
Some cracks have pod-like constrictions, which at glance, seem to offer good placements. These can be great, but you have to make sure that the pod doesn’t flare outwards or inwards, which can result in sufficient surface contact on the one side on the nut (inside or outside of the crack) but not on the other. Such placements are better protected with an offset nut or by placing a nut in its secondary orientation.
Curved nuts can be placed in more than one orientation
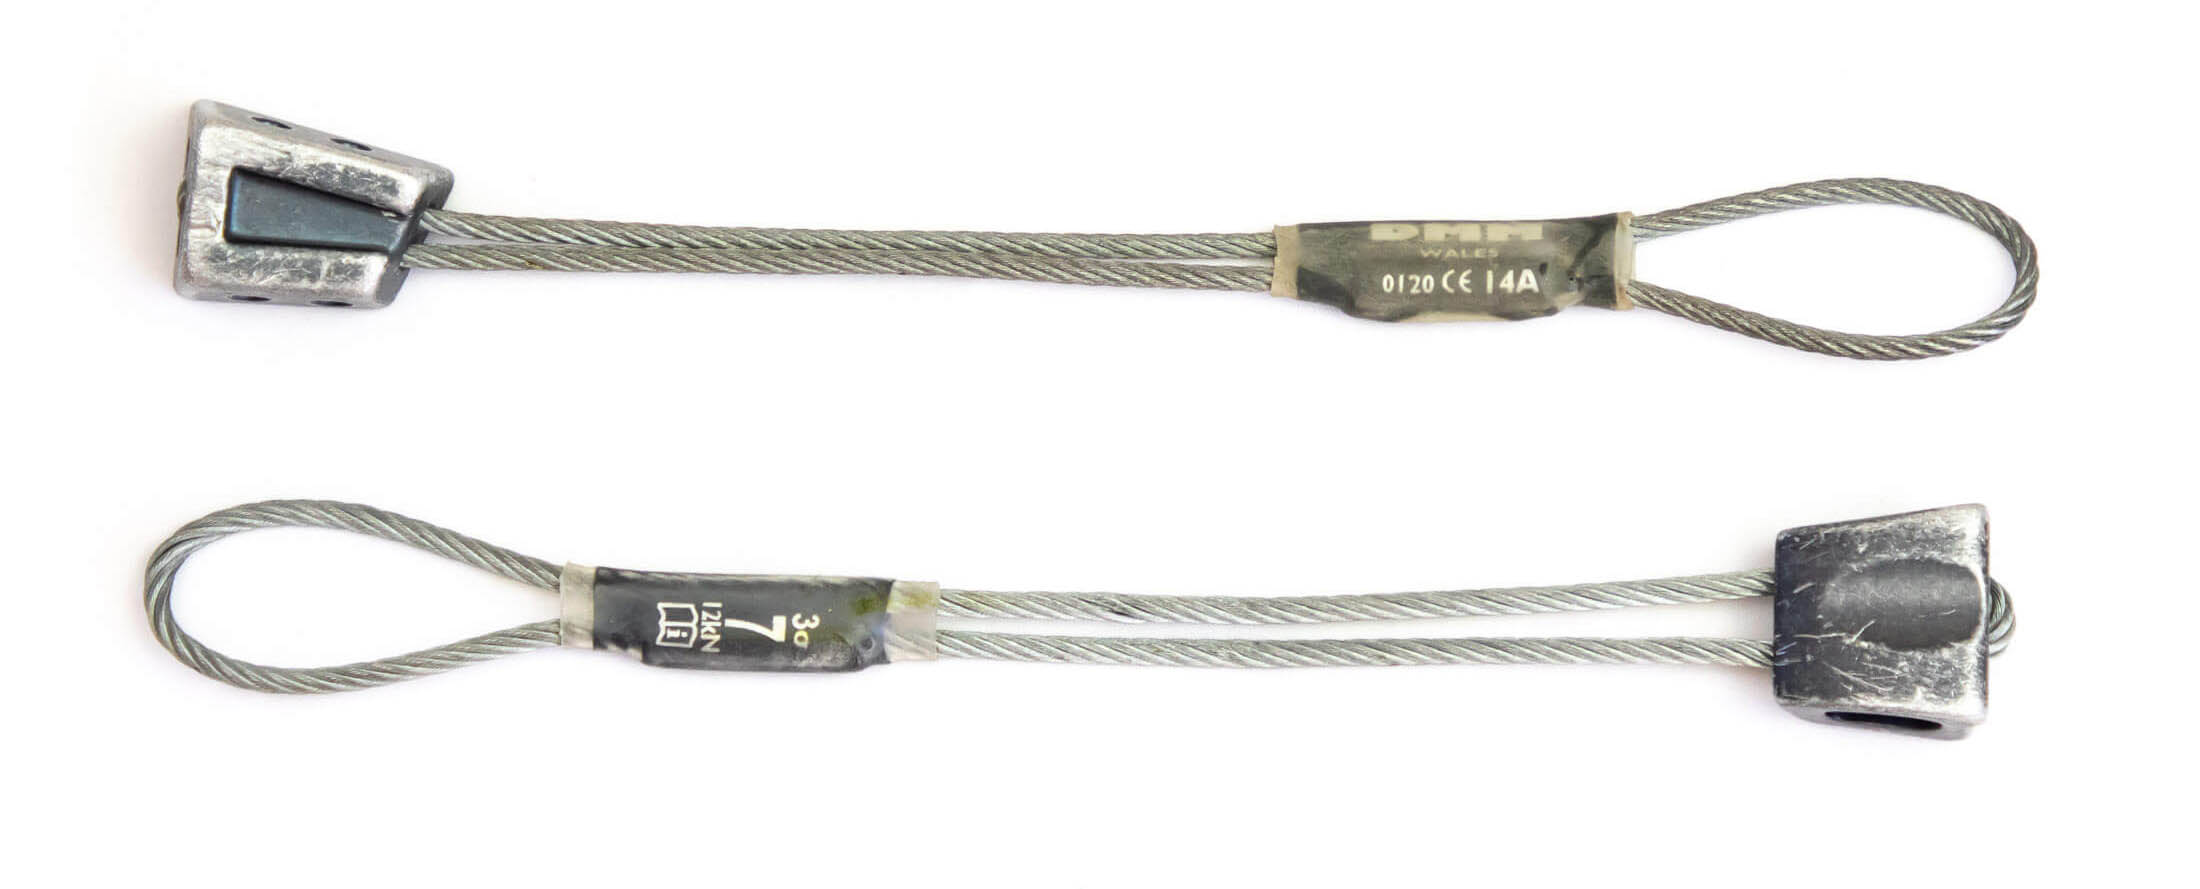
Nuts are generally asymmetrical. Besides being curved, their concave faces are usually narrower than their convex faces. This design allows a curved nut to be placed in two additional orientations: with the convex surface of the nut facing out of the crack (for cracks that flare outwards – more common) and with the convex surface facing into the crack (for cracks that flare inwards).
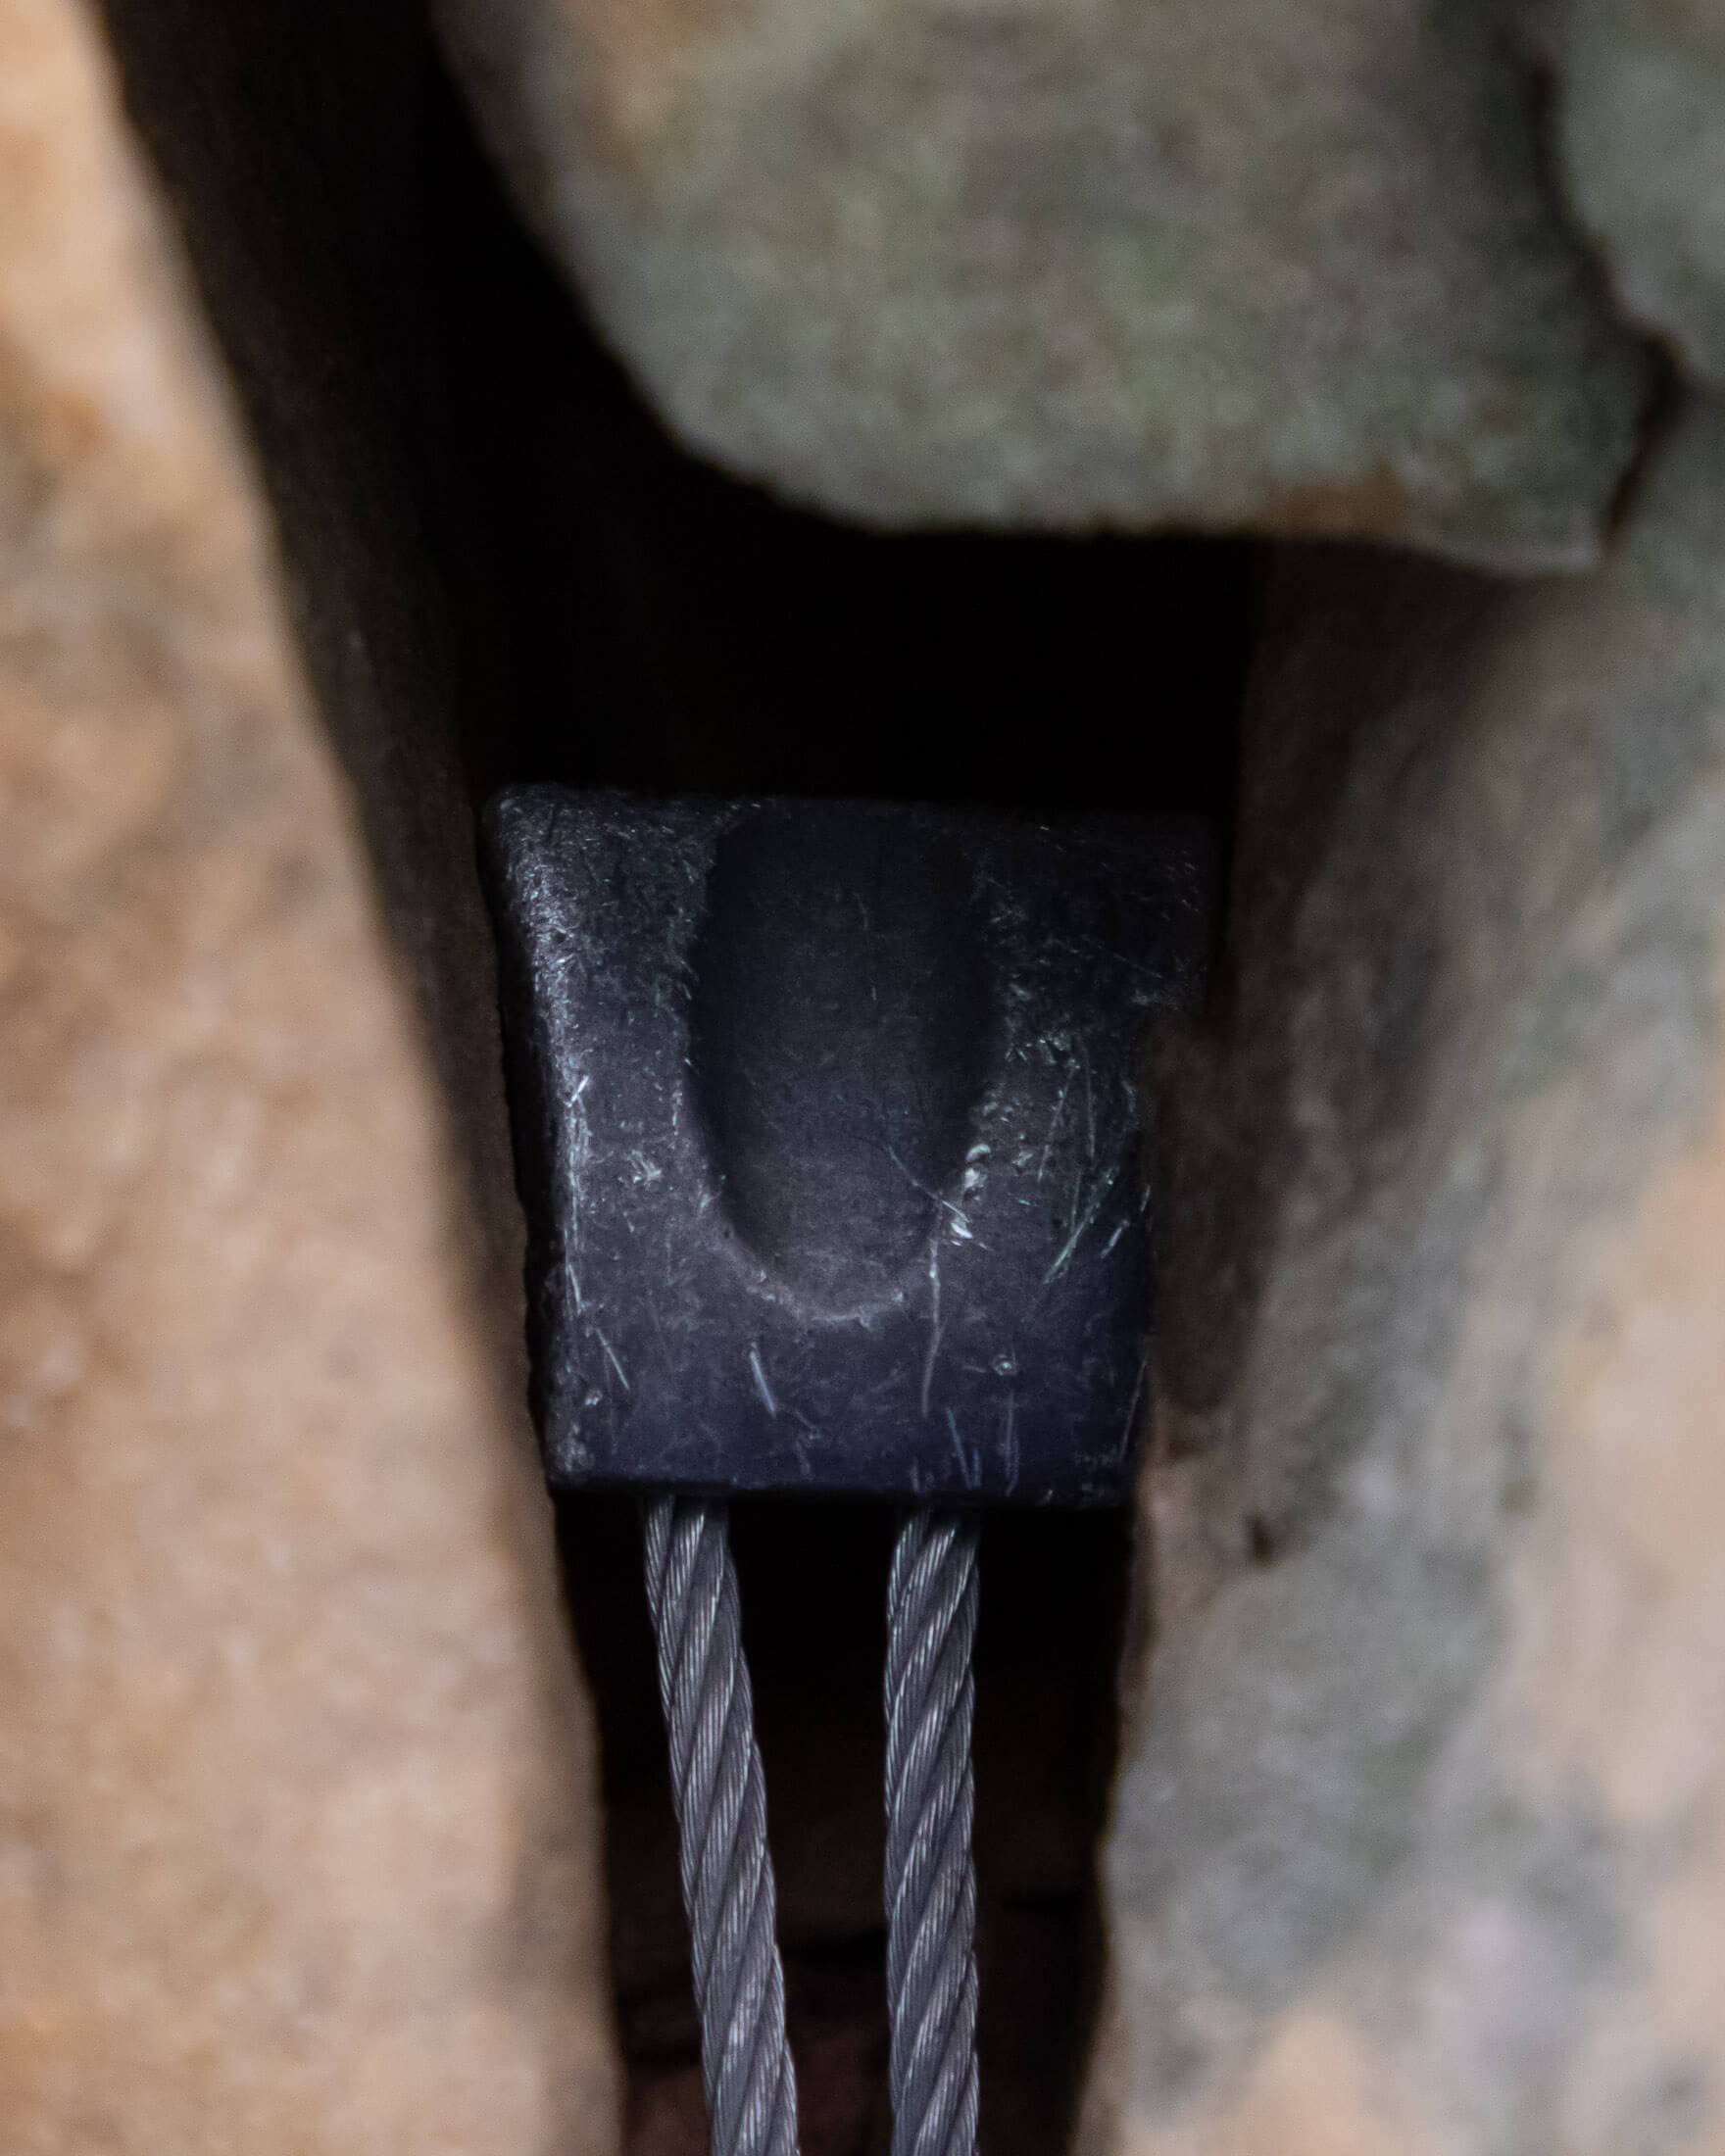
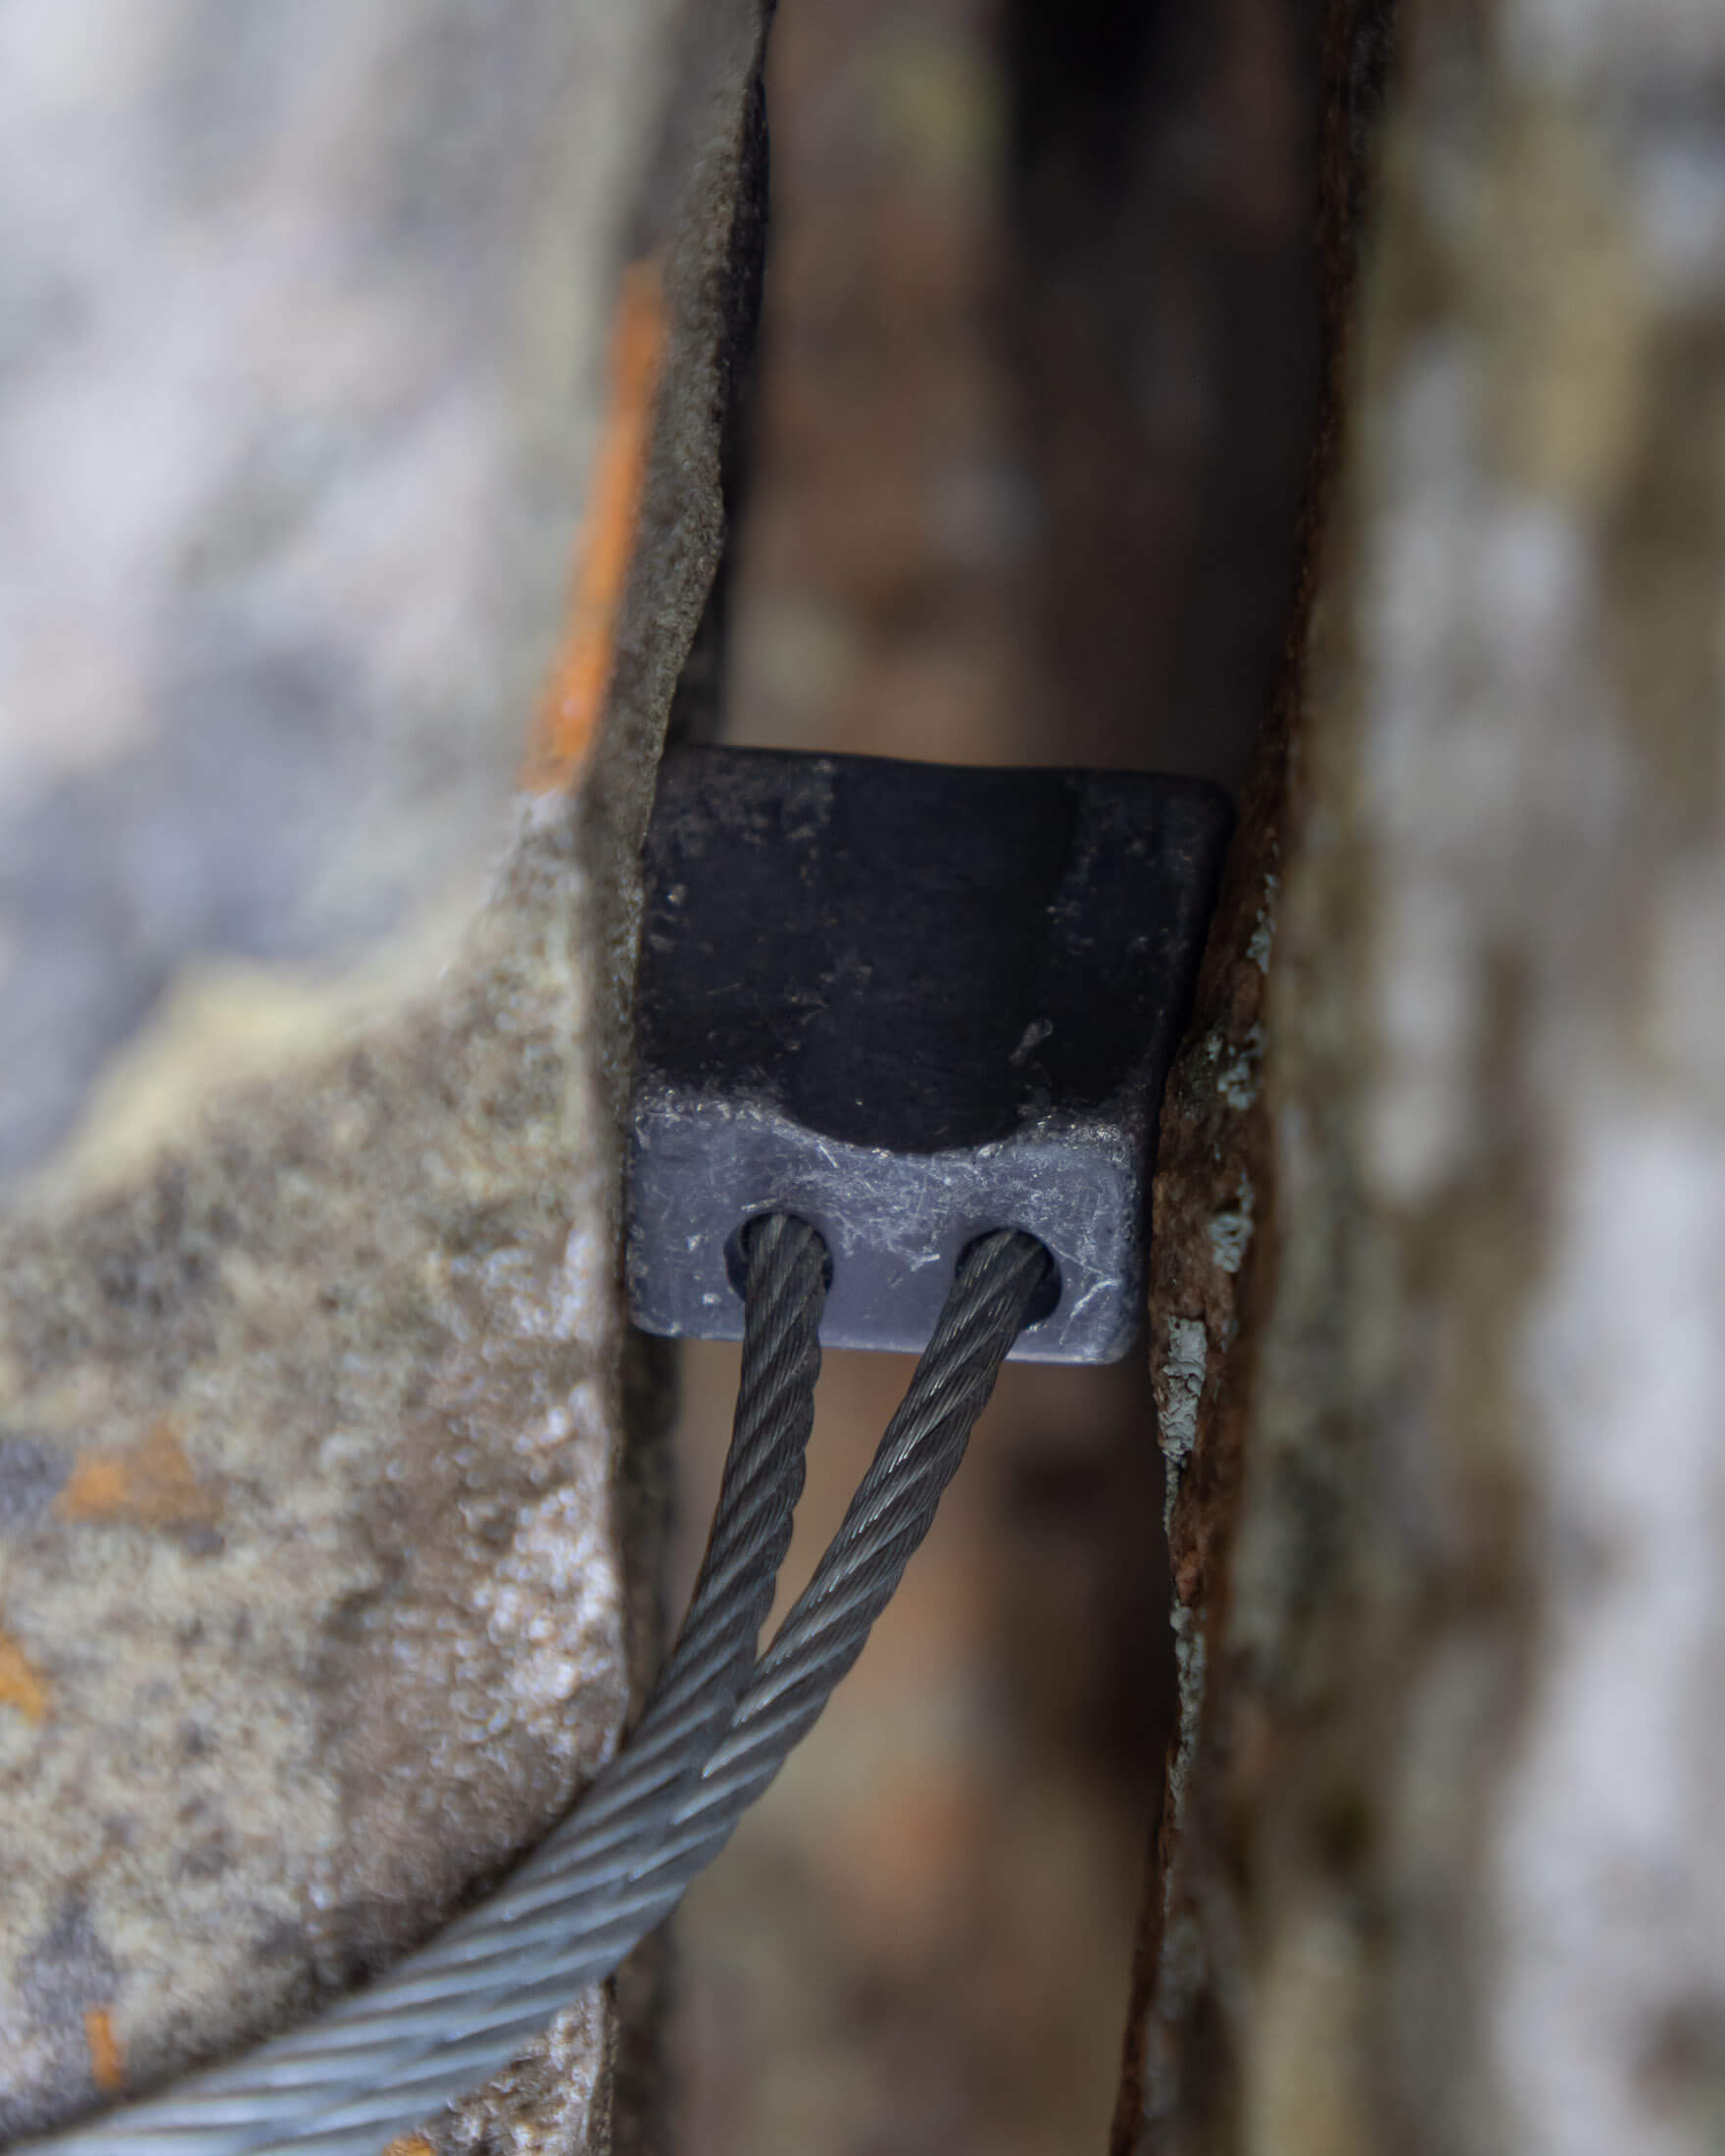
As useful as these options are, it’s important to note that such placements are only possible if a crack or pod flares only slightly, matching the angle on the sides of a nut. If a feature is more flared, you will probably need to use an offset nut to protect it. Most climbers carry both curved and offset nuts for this reason.
Nuts can also be placed in horizontal cracks
In addition to these vertical placements, nuts can also be placed in rails (horizontal racks) that are wider on the inside than they are at the entrance. Typically, this type of placement is achieved by inserting a nut into the rail through a wider opening, sliding it sideways into a position where the opening is significantly narrower than the inside of the crack, and then pulling the nut outwards into the constriction.
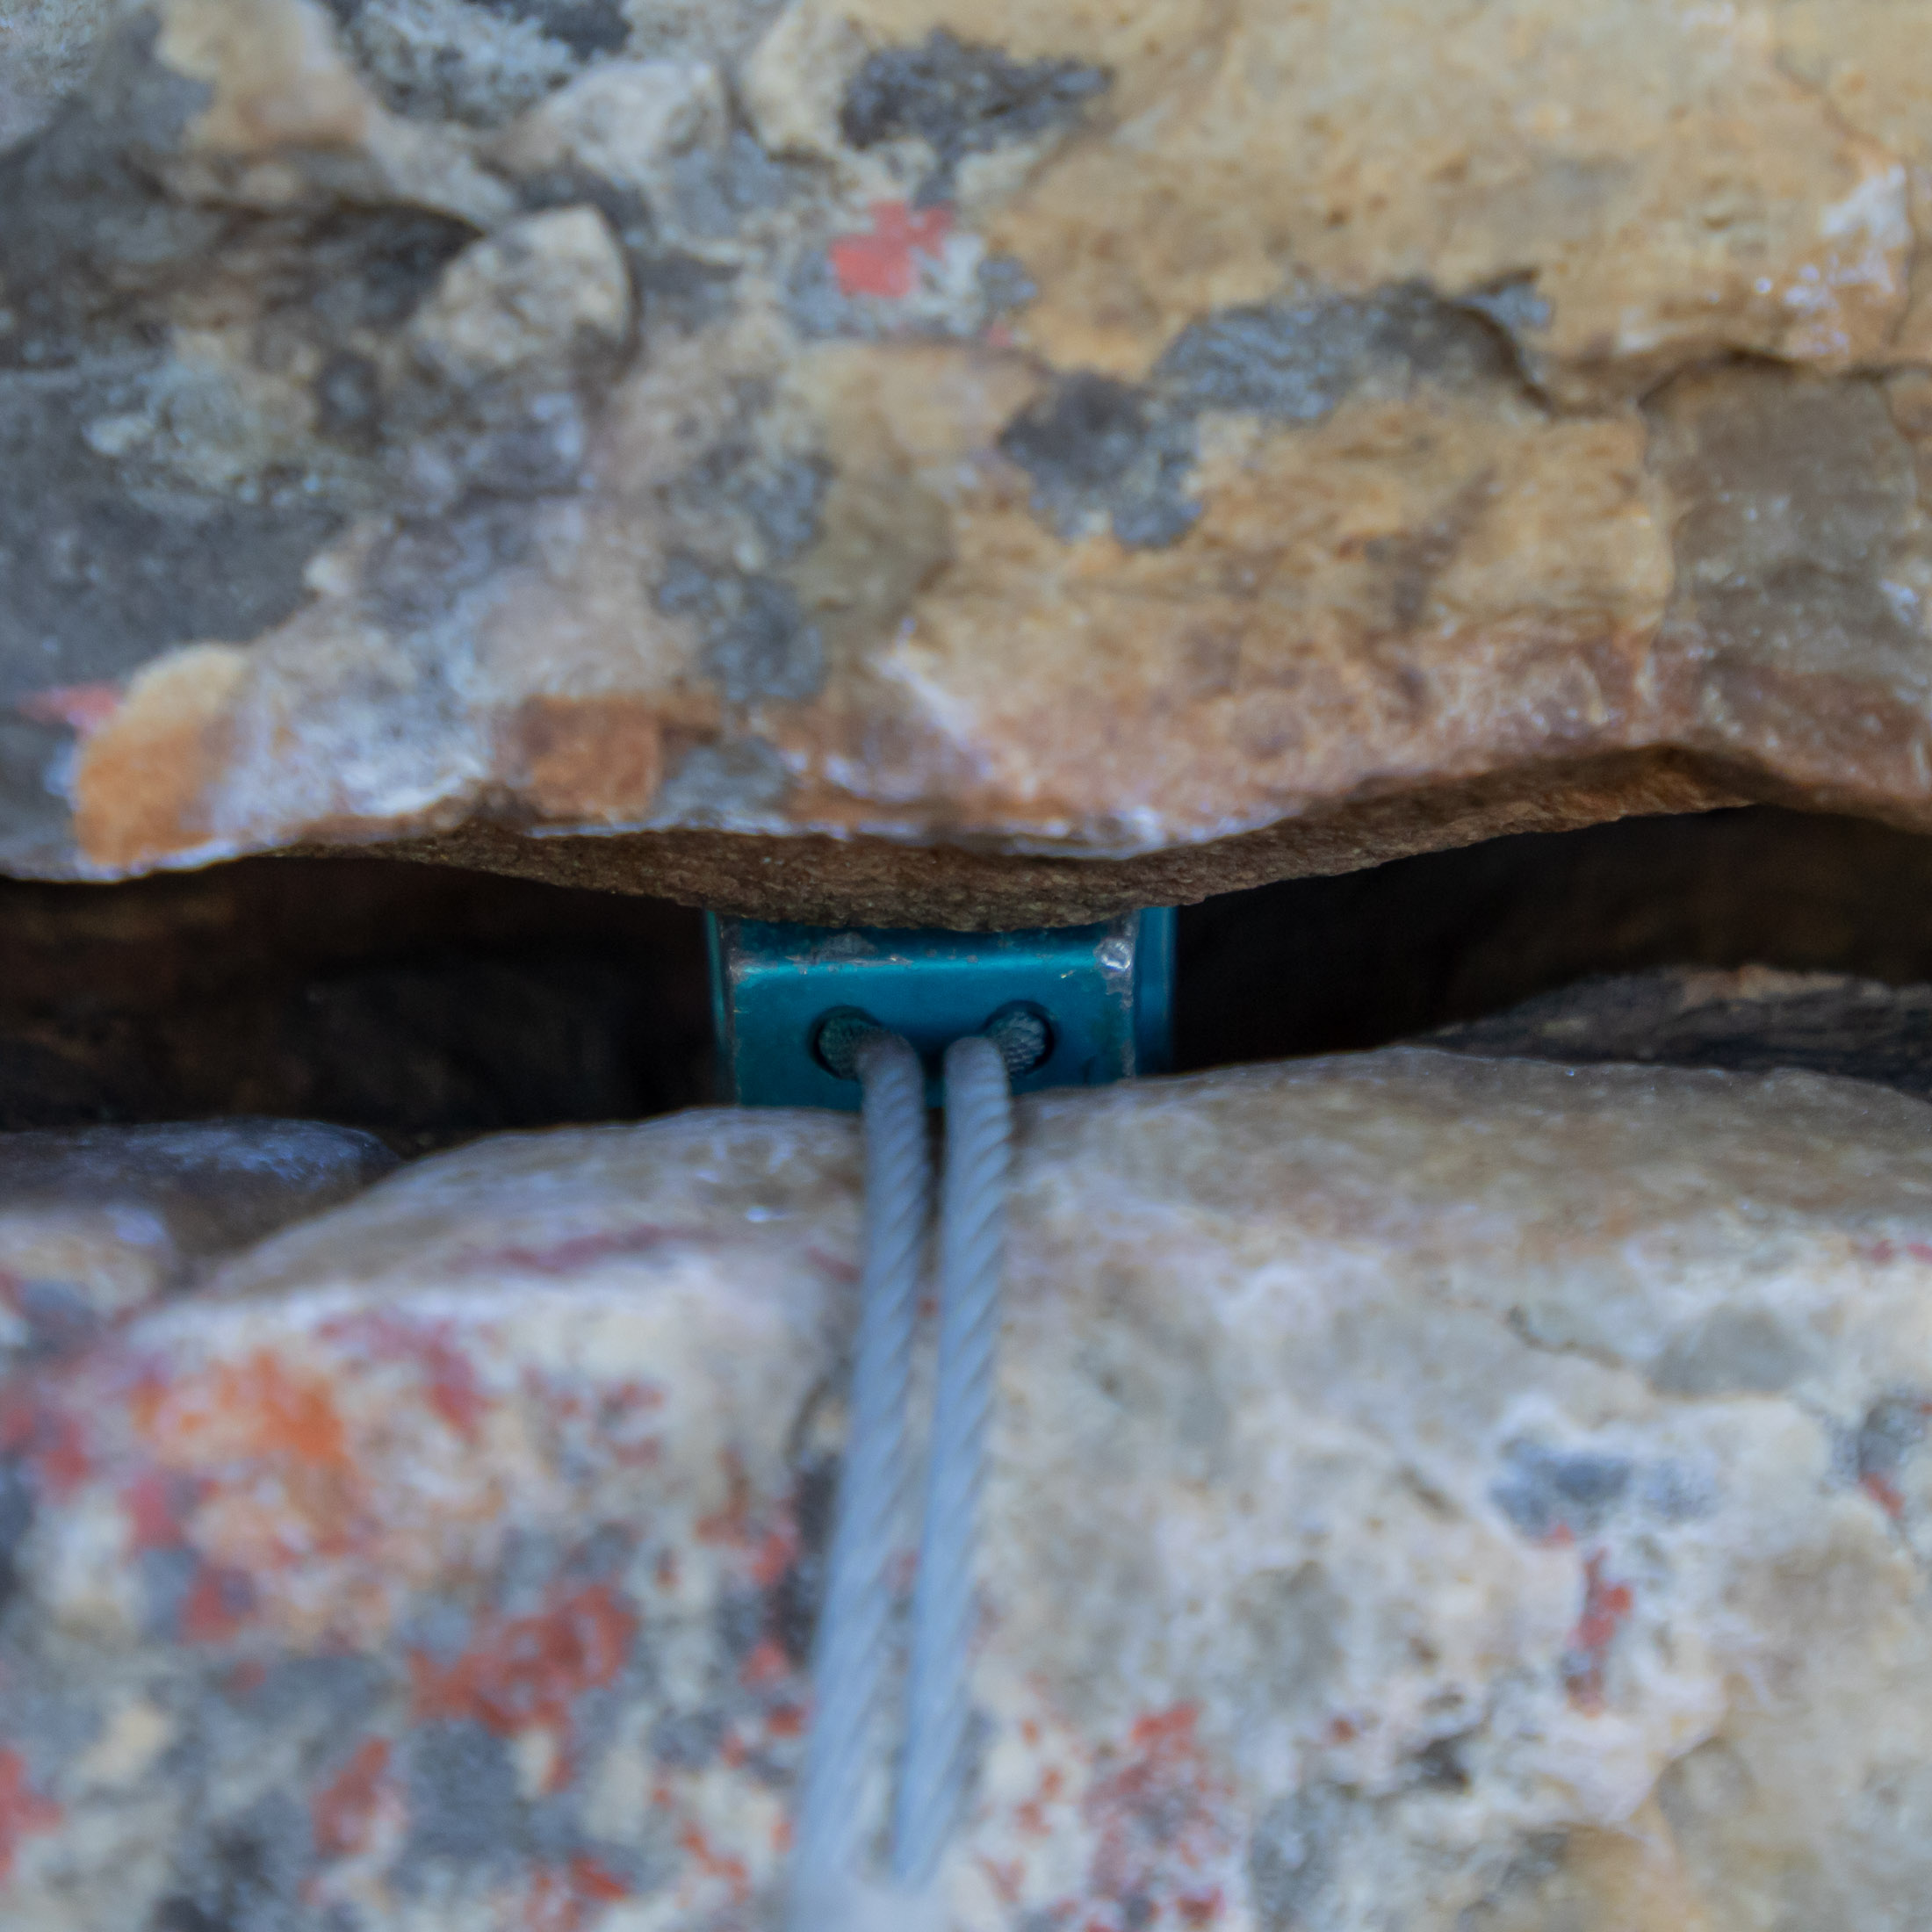
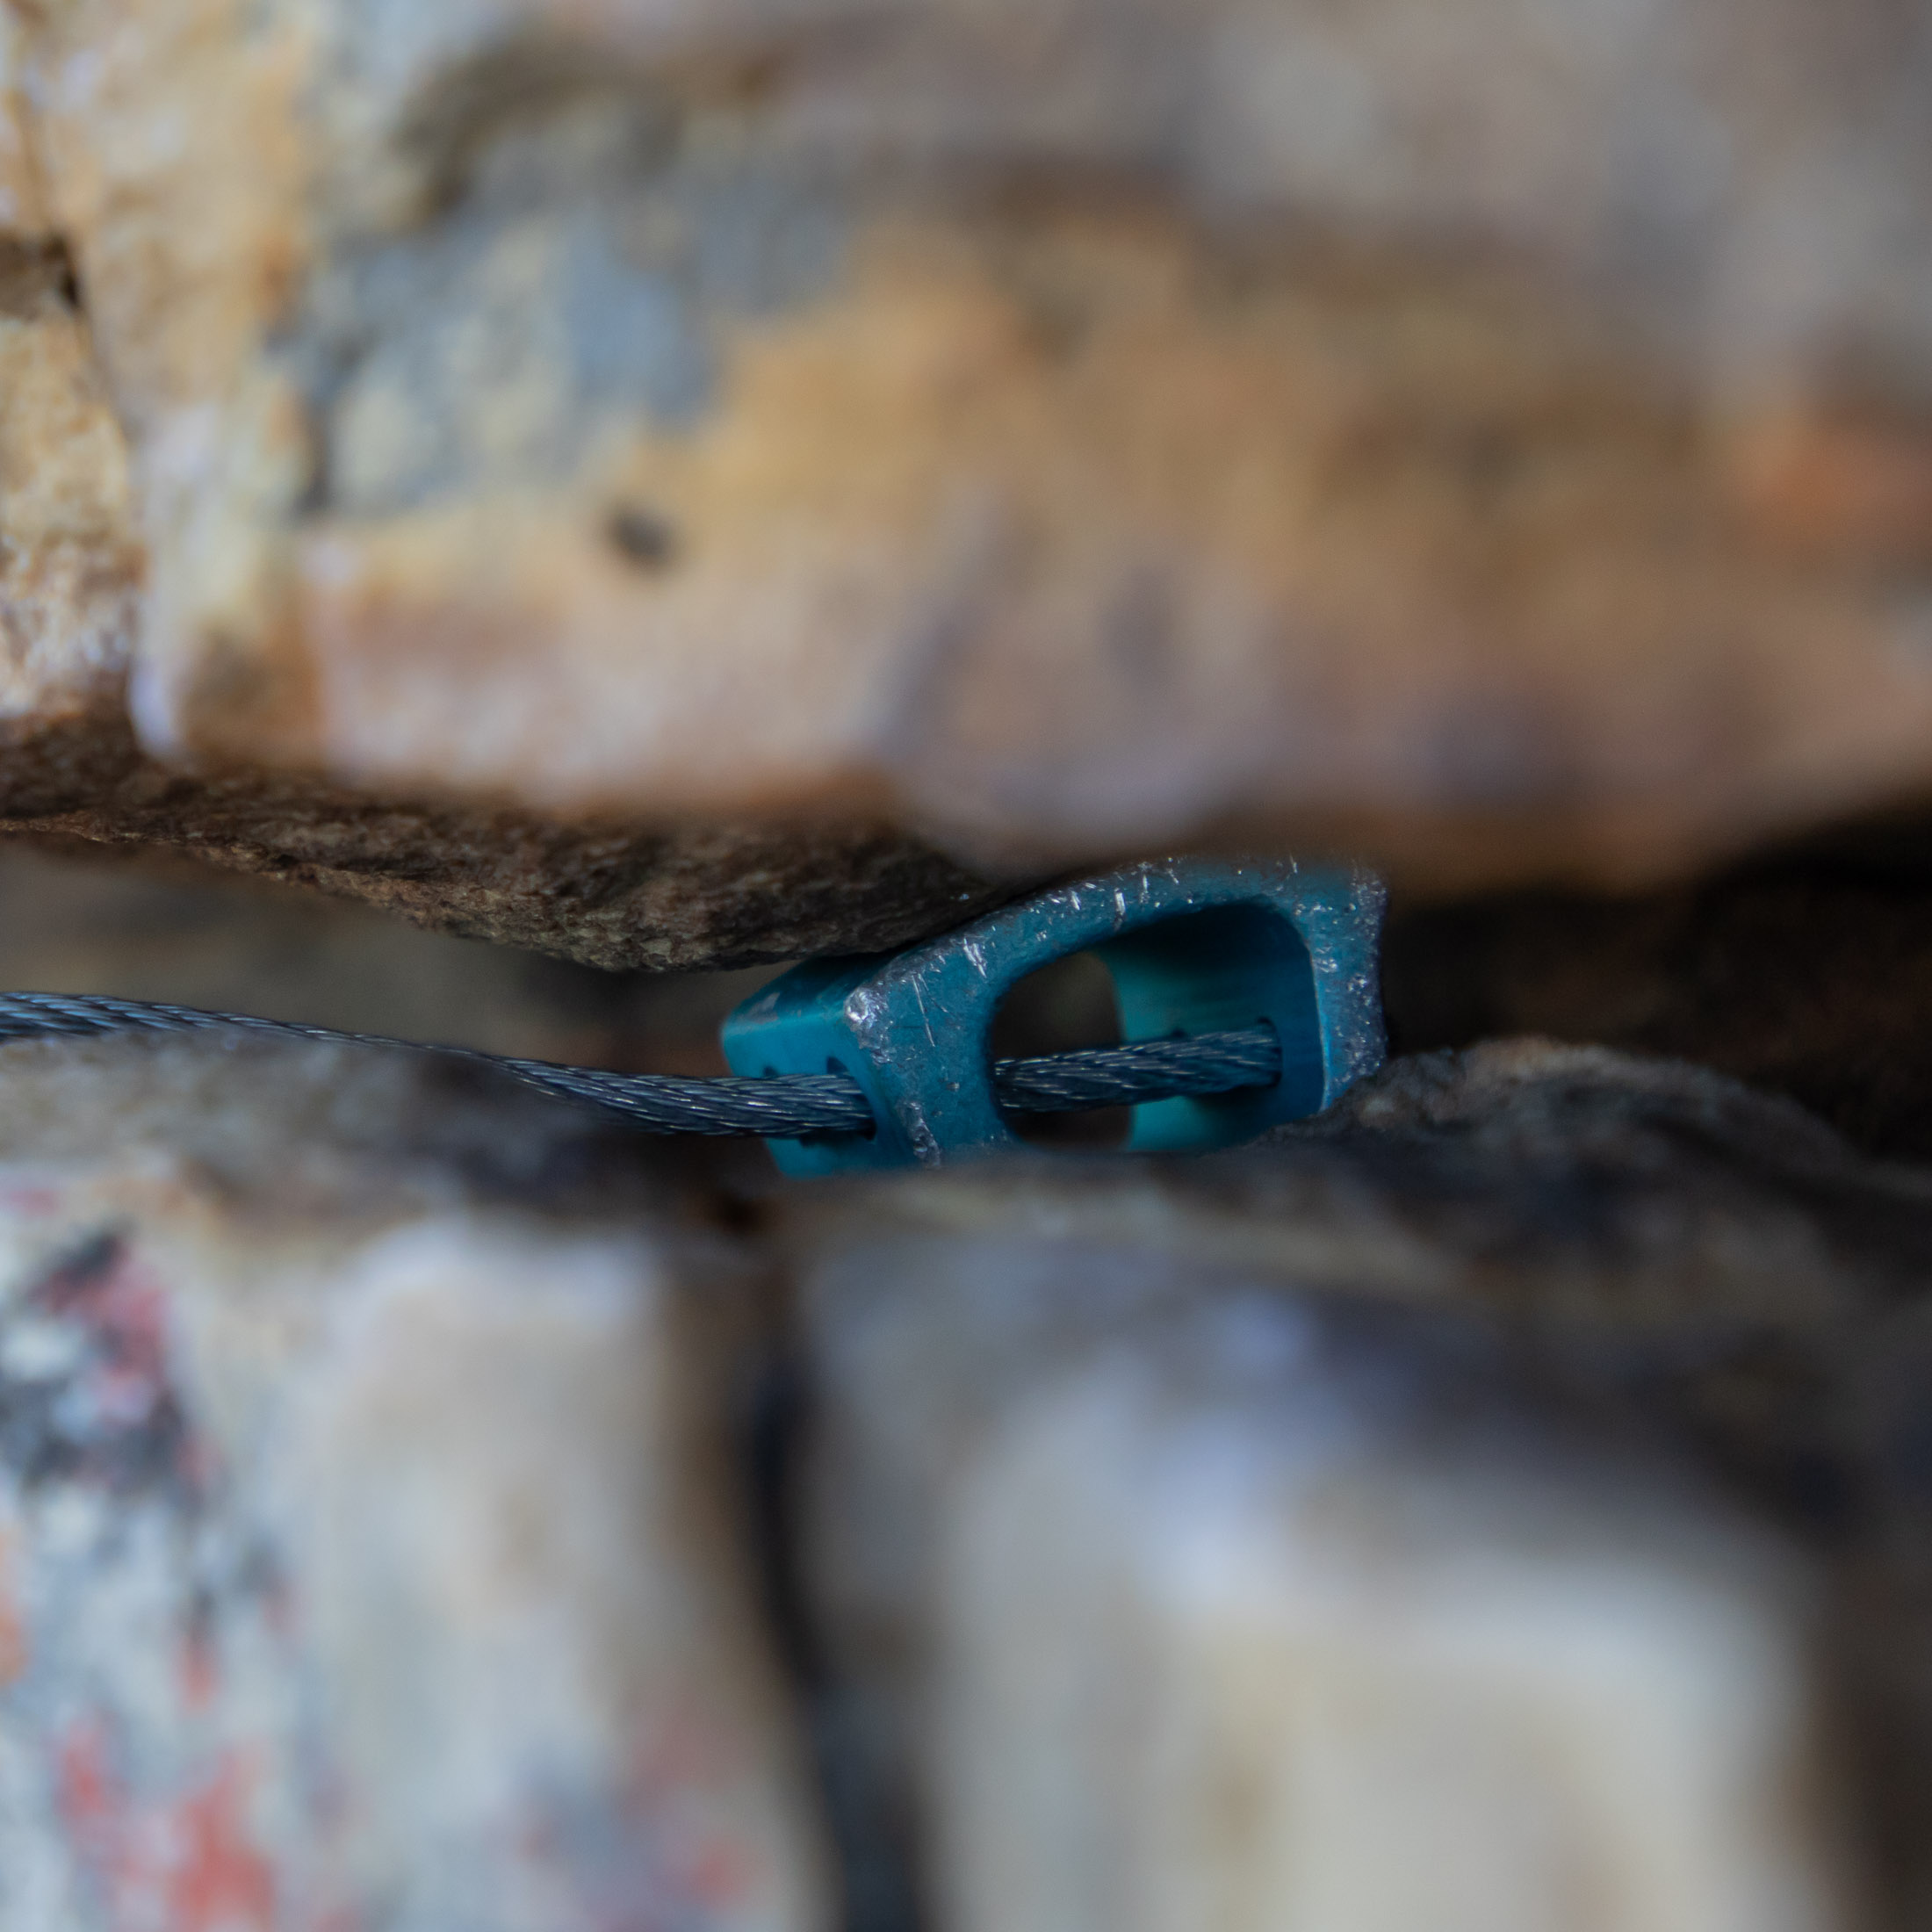
Good horizontal nut placements are multidirectional in that they can take downward, outward and upward pulls. However they can also be difficult for a follower to remove. If your partner is within earshot, it can be helpful to tell them whether the nut went into the rail from the left or the right.
Place nuts for the expected direction of pull
When placing nuts, it’s also important to remember that the holding power of a placement is often dependent on the direction of pull. The best vertical placements will withstand an outward pull, but such placements aren’t always possible. When there’s nothing else available, you might have to settle for placements that will only withstand a downward pull. You’ll need to keep this in mind when placing gear under a roof or using nuts in a belay anchor – instances where it’s essential to have at least one multidirectional piece to withstand an outward pull.
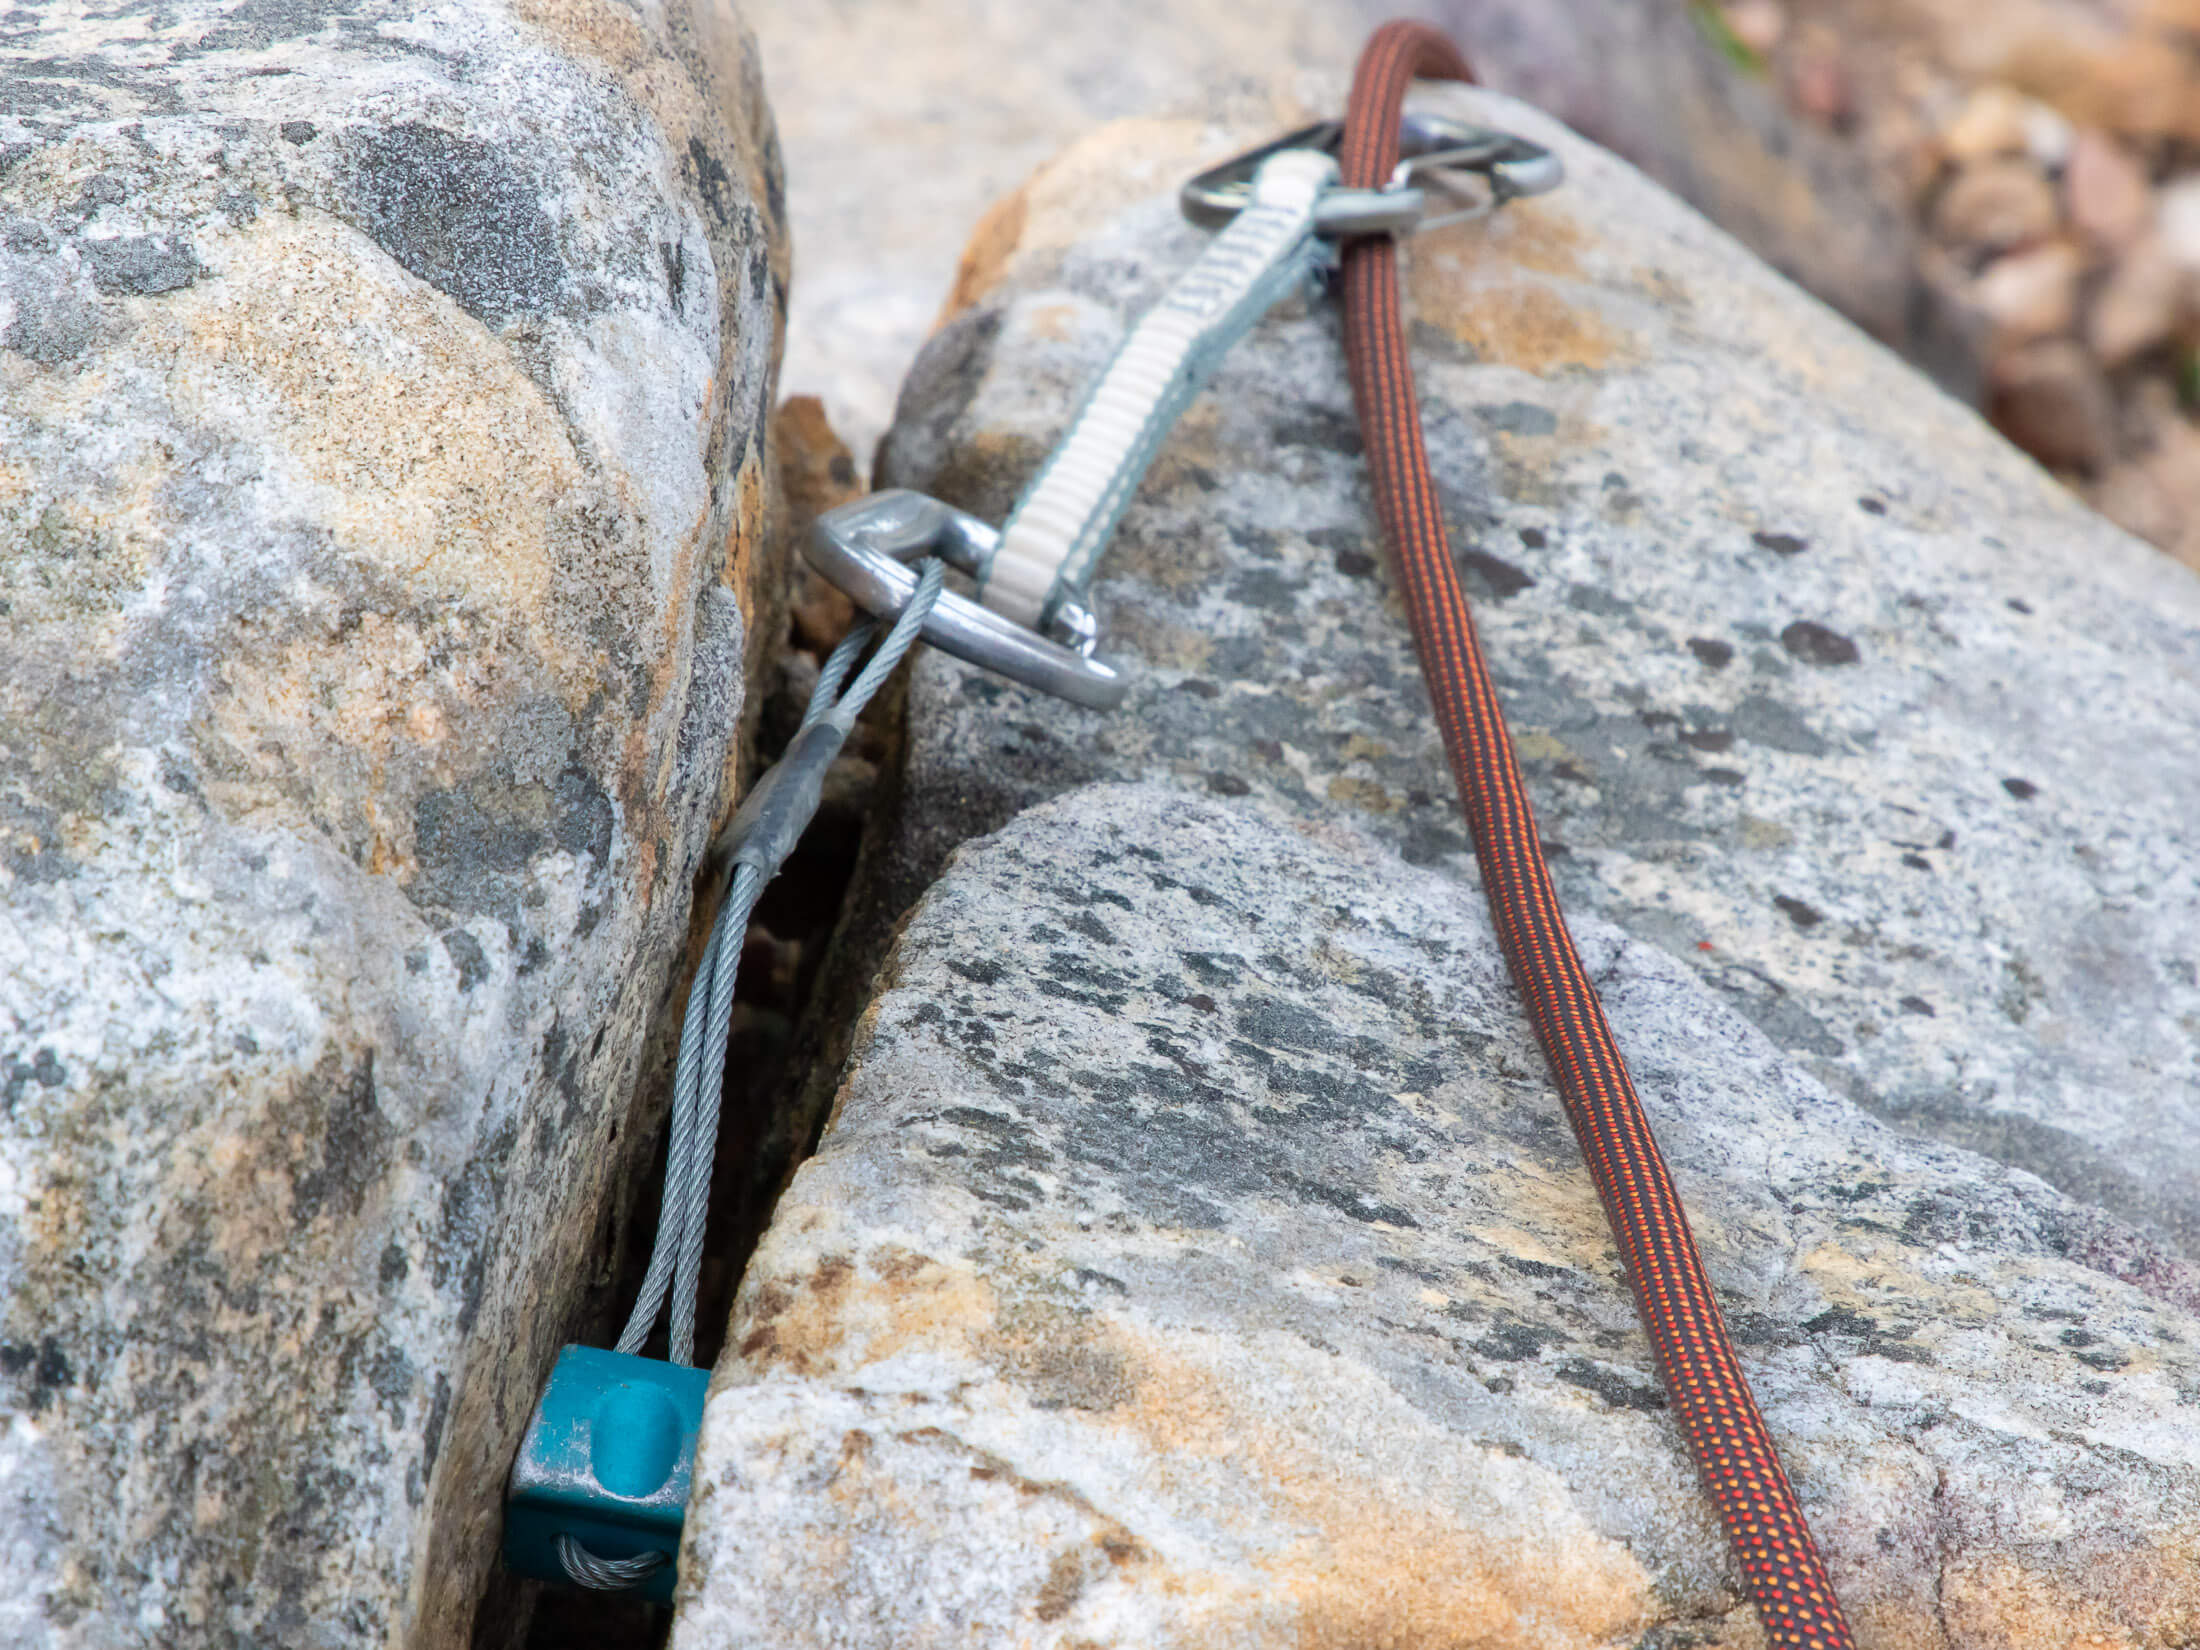
There’s a lot more to placing nuts that can’t be included here, so I also have also written an article just on nut craft. To become truly proficient at trad, you have to learn how to make the most of every piece of protection in your rack, and this practical how-to guide gives you everything you need to know about how to use one of the most fundamental tools in trad climbing.
Natural features
On highly featured rock, you’ll find plenty of flakes, chicken heads, horns, huecos and tunnels to put slings over and through. These can be secured either with a girth hitch or a carabiner-secured loop. A girth hitch will ensure that the sling sits more snuggly around a feature, but in many instances where you don’t need the extra security, it’s actually better to use a carabiner-secured loop.
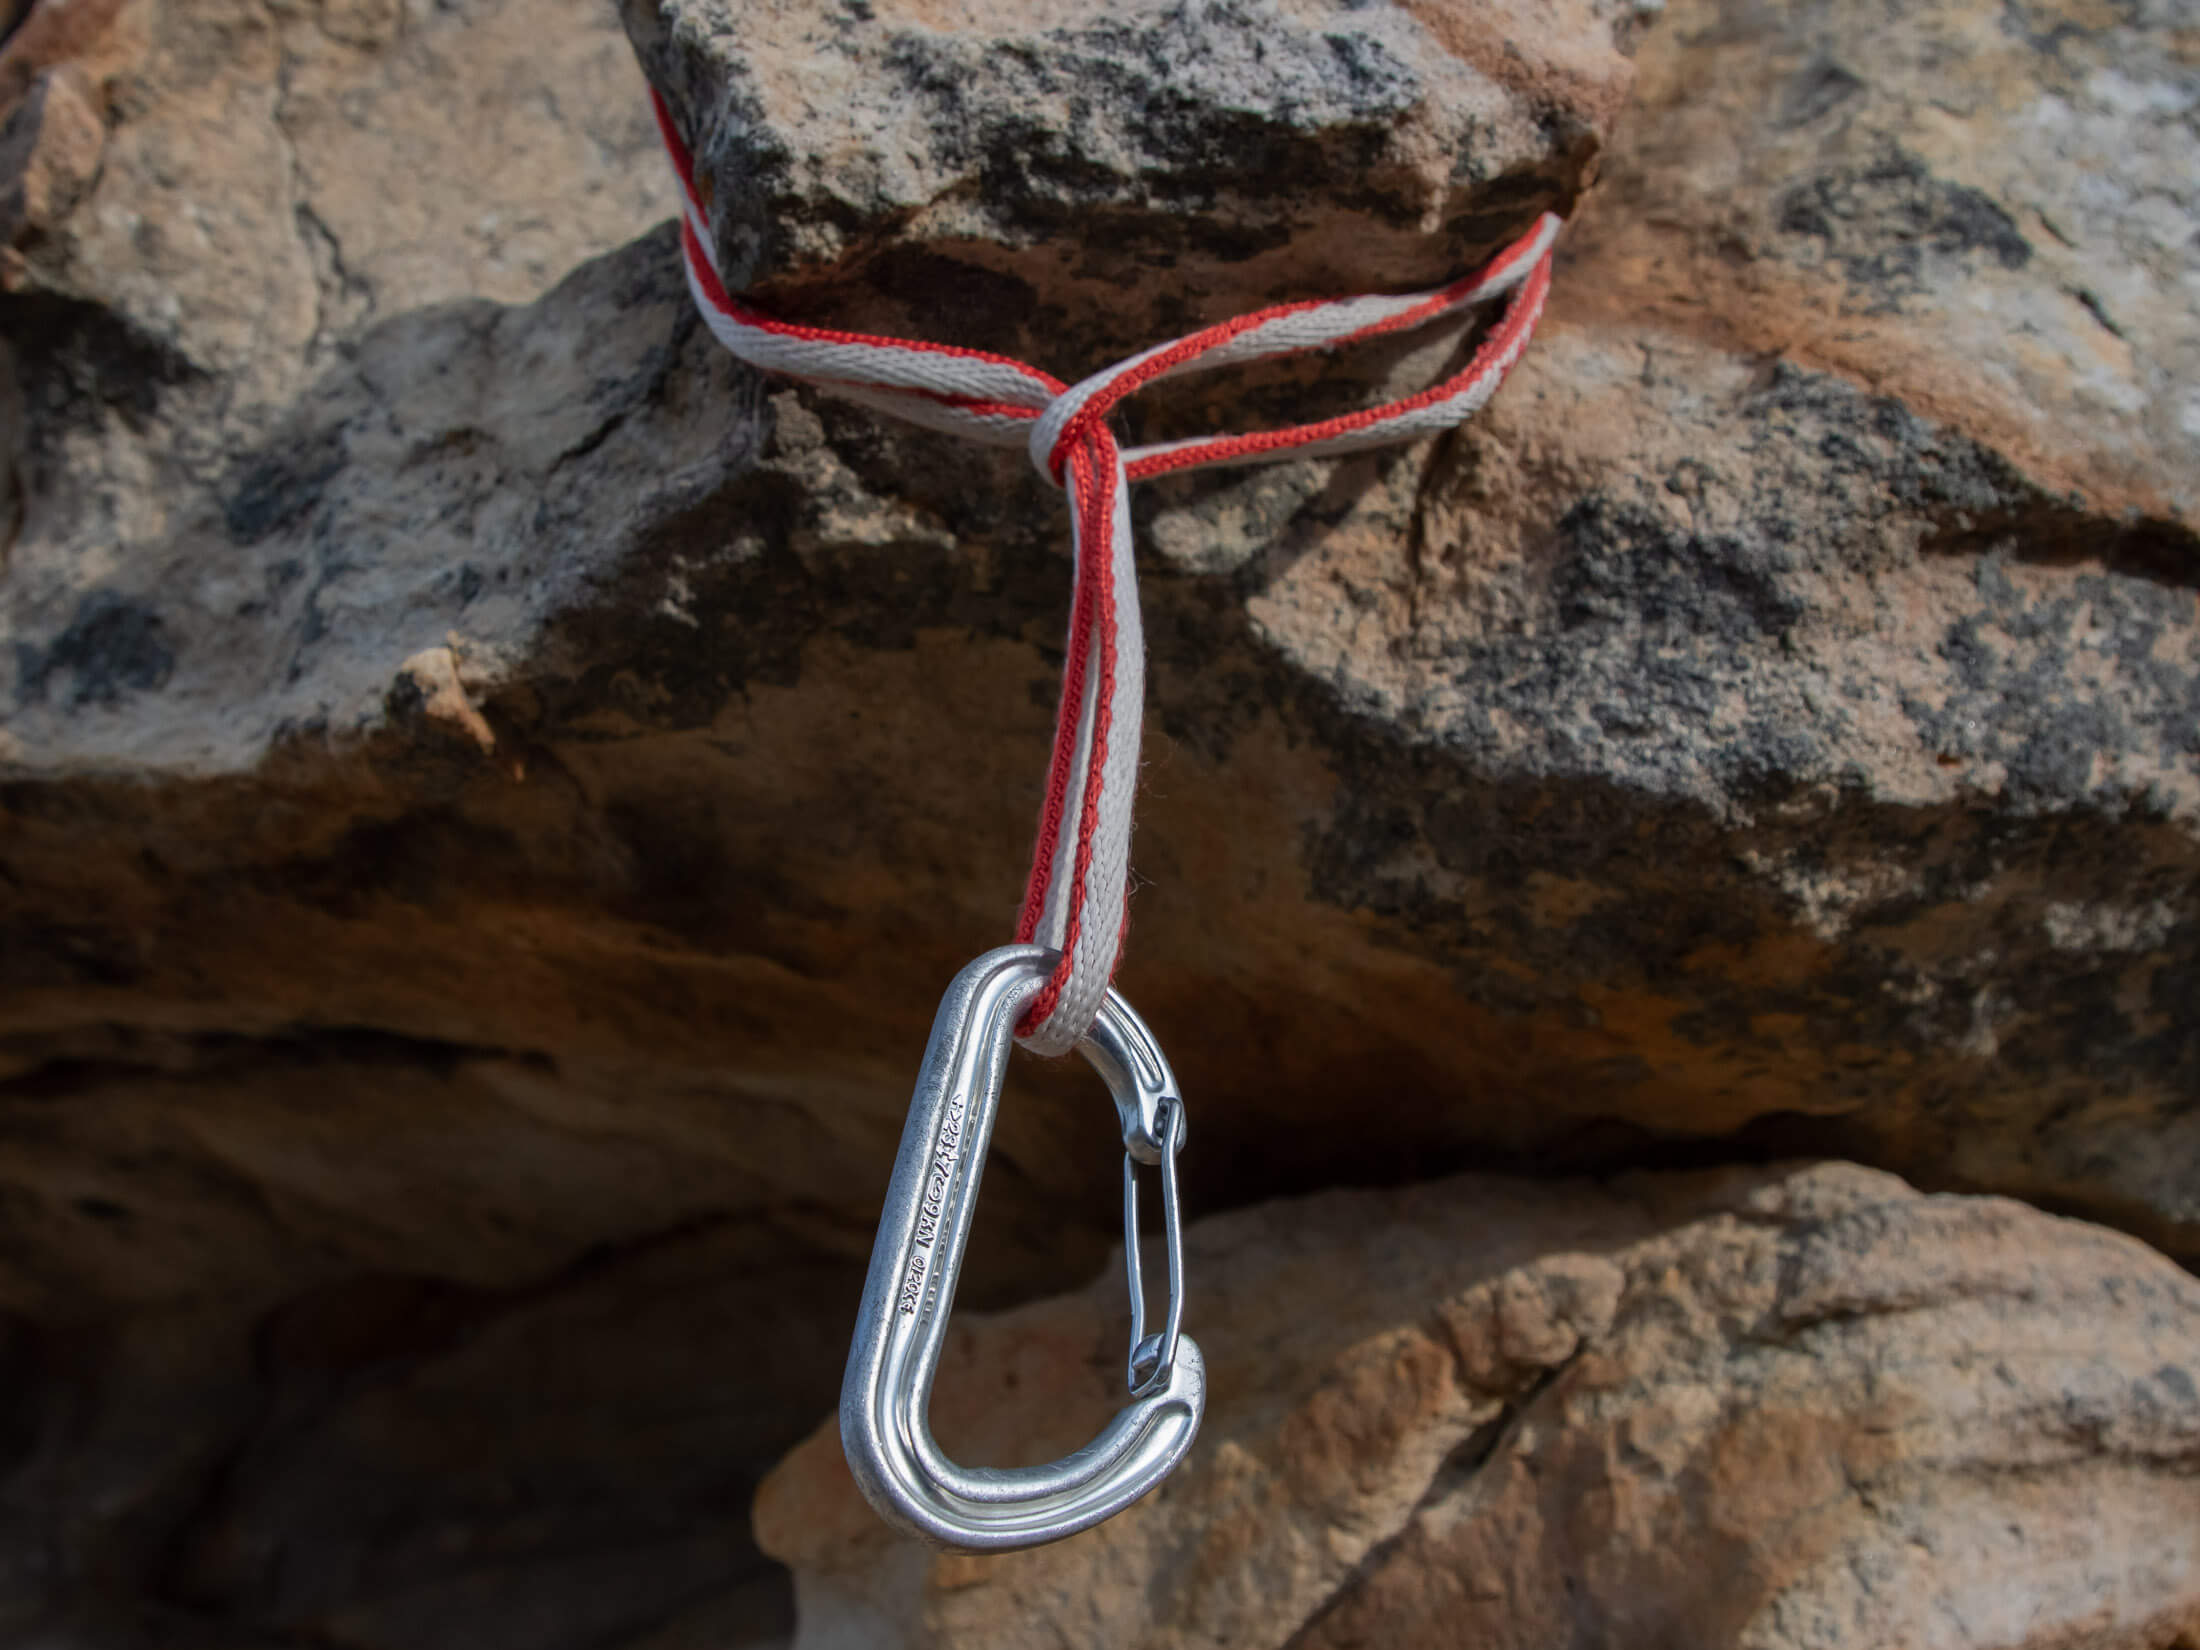
Trees also offer great opportunities for natural protection, but first they have to meet three criteria. To be considered safe to use, a tree should be at least as thick as your wrist, be alive and healthy, and be properly rooted. If you give the base of the tree an experimental tug and there is any movement, don’t use it. Certain types of trees, like Joshua Trees, have a reputation for shallow root systems, and in some areas where they are common, rappelling off such trees is banned for good reason. When you do find a sturdy tree that you want to use as protection, you can girth hitch it with a sling or use a carabiner secured loop depending on its size.
Fixed gear
To many climbers, bolts represent security and are clipped with great relief when things get a little run-out. But the reality is that many of the bolts on older trad routes are not safe. Most older bolts, like the ¼ inch relics that were popular during the 60’s and 70’s, had low strength ratings to start with and are now even weaker after decades of exposure to the elements. Always back these up with a piece from your rack when possible. The only bolts you should trust are ⅜ inch and ½ inch expansion bolts and glue-ins, but even then you should trust your judgement. Rust can severely damage hardware, especially those on seaside cliffs, and the most insidious corrosion exists beyond what is visible to the eye.
Anchor building and belay setup
Anchor building and top-down belays involve techniques that are beyond the scope of this article and which are already covered in my articles How to Build a Trad Anchor, and How to Belay From Above. So I’m only going to cover anchor building and belay setup very briefly here. When you reach the top of a climb, you will need to build an anchor to secure yourself to and belay your follower from. If the stance is equipped with two bolts, you can use a two-point quad, which is simple enough. But if there is no fixed gear, as is often the case, you will have to build a trad anchor from three or more pieces of trad gear. Knowing how to rig such an anchor is a skill in itself, one that you should learn while still on the ground and being supervised by an experienced trad climber.
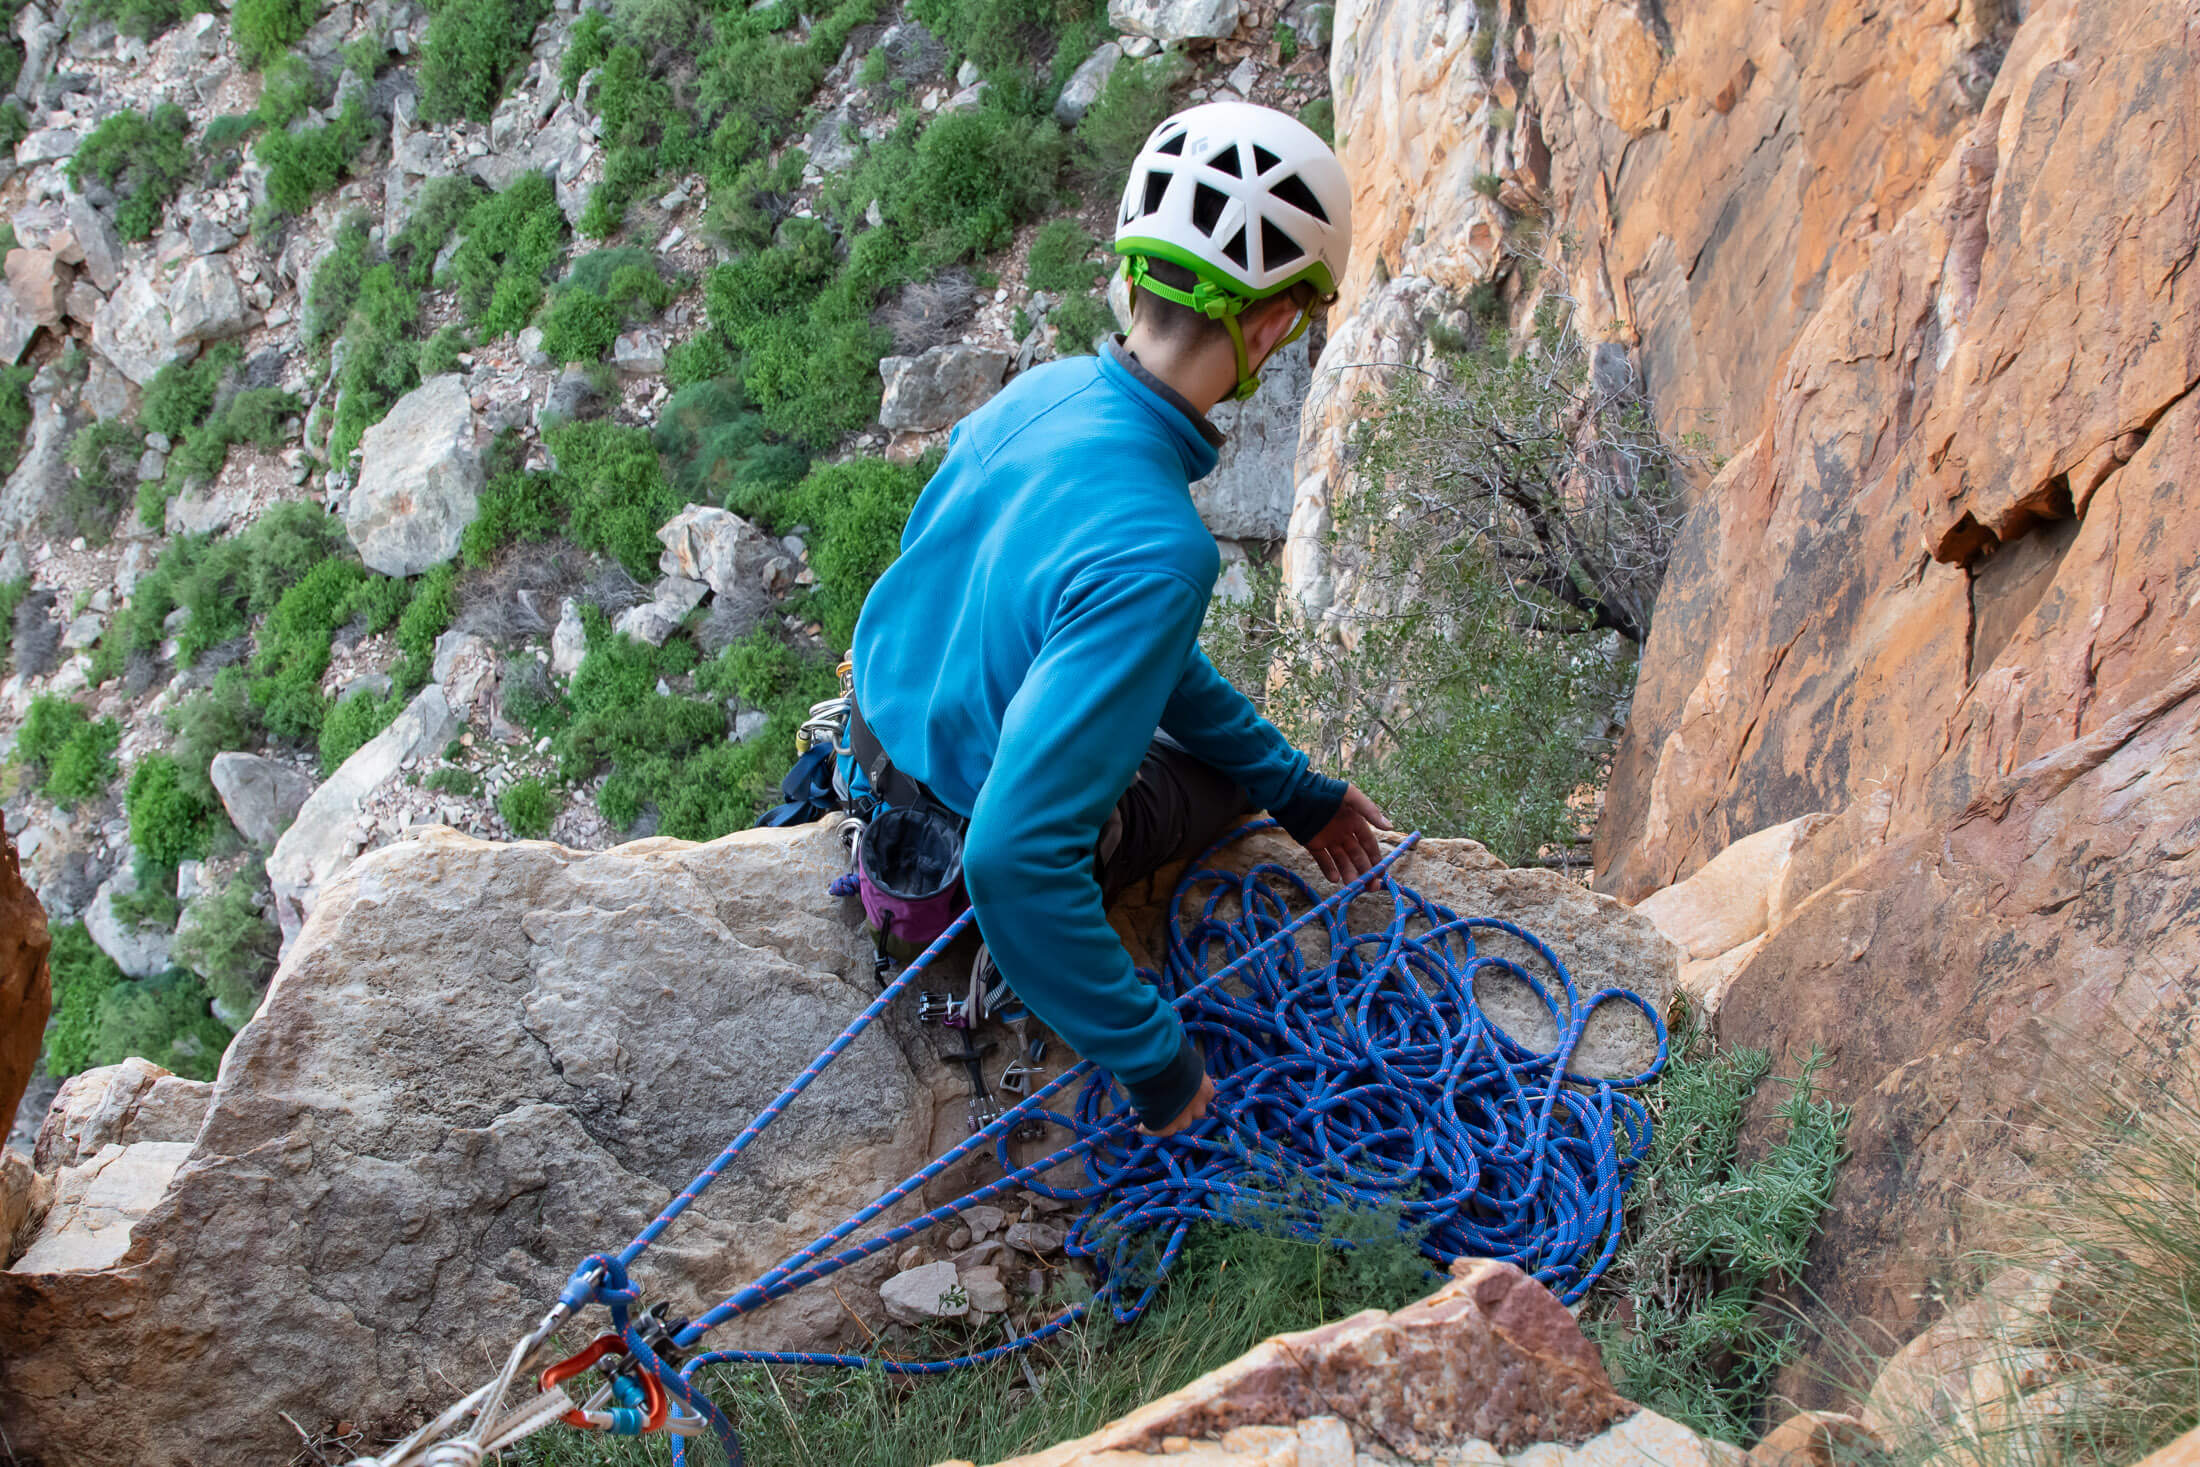
Once you’ve built an anchor and secured yourself to it, you still have to set up the belay. For trad climbing, a guide mode type device like the ATC Guide is the preferred choice of most climbers as it allows for double-rope belaying, rappelling, and a brake-assisted top-down belay (guide mode). To set the device up in guide mode, you secure a loop of rope behind the plate as you normally would, but then you don’t clip the belay biner to your harness. Instead, you attach the device to your anchor’s master point using the guide mode attachment point on the rear of the device. This needs to be a secure connection, so you will need to use a locking carabiner.
Note: Guide mode devices offer significant advantages over other types of belay device, but it’s important to learn how to use one properly to ensure the safety of yourself and your partner. See my article on top-down belaying for more information.
Preparing for your first trad lead
Before you lead your first trad route, there are several things you should do. First, follow lots, as this will give you the opportunity to see how gear is placed and extended by an experienced climber. Second, practice placing gear while on the ground and under the supervision of an experienced climber. Once you’ve gotten that down (It will take time), you can progress to building trad anchors, again under the supervision of an experienced trad climber. As with learning to place gear, you’ll want to take your time with this and make sure you are truly competent before taking up the sharp end and trusting your life to your anchor building skills. And lastly, you will do a mock lead.
Mock leading means top-roping a route while simultaneously trailing a second rope tied to the belay loop. The purpose of the second rope is only to simulate a real lead – as the climber ascends, he clips it to placed gear while paying attention to rope drag and the potential for gear to walk if it isn’t properly extended. When he lowers off, the climber can test each placement by weighting it (a cows tail or dynamic PAS is useful for this purpose), after which it’s best for the mentor to back climb the route so that she can inspect and critique it. I’ve found a camera phone very useful for the purpose, as it allows me to show a student exactly what they could have improved on.
Learn more about trad
This was just one article in a whole series on trad climbing. Others include the introduction to this series Trad Climbing 101, then Essential Trad Skills, How to Rack Climbing Gear, How to Build a Trad Rack, How to Build a Trad Anchor, and How to Belay from Above. Read them all, and you’ll have a pretty good understanding of how to go about developing the most important skills in trad climbing. It’s a whole new world out there waiting for you. Happy reading.
