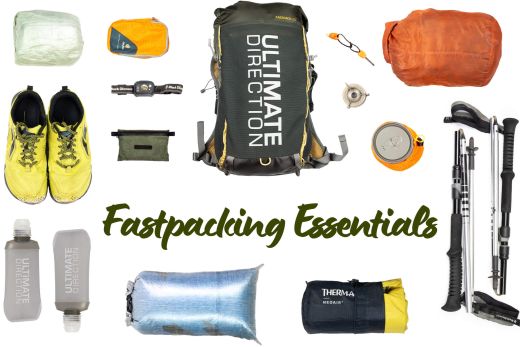
There’s little that can inspire a sense of freedom quite like fastpacking. The fast and light approach allows runners to venture well beyond their usual range to explore distant valleys and peaks that would otherwise be out of reach. But there’s a real challenge in this minimalism. Putting together a kit that weighs five kilograms is no small feat. Experienced fastpackers experiment with different gear and weight saving strategies season after season to develop the perfect kit, and even then they’ll often add something here or take out something there depending on their needs for a specific trip. But ultralight gear is expensive, and you might not want to go through seven whatsits before you find one that works for you. And that’s where this guide can help.
By giving you the information you need to make more informed decisions, the following paragraphs can help you avoid much of the trial and error that was part and parcel of pioneer fastpacking. Read on, and you’ll get a pretty good idea of what you need and why you need it.
Principles for choosing fastpacking gear
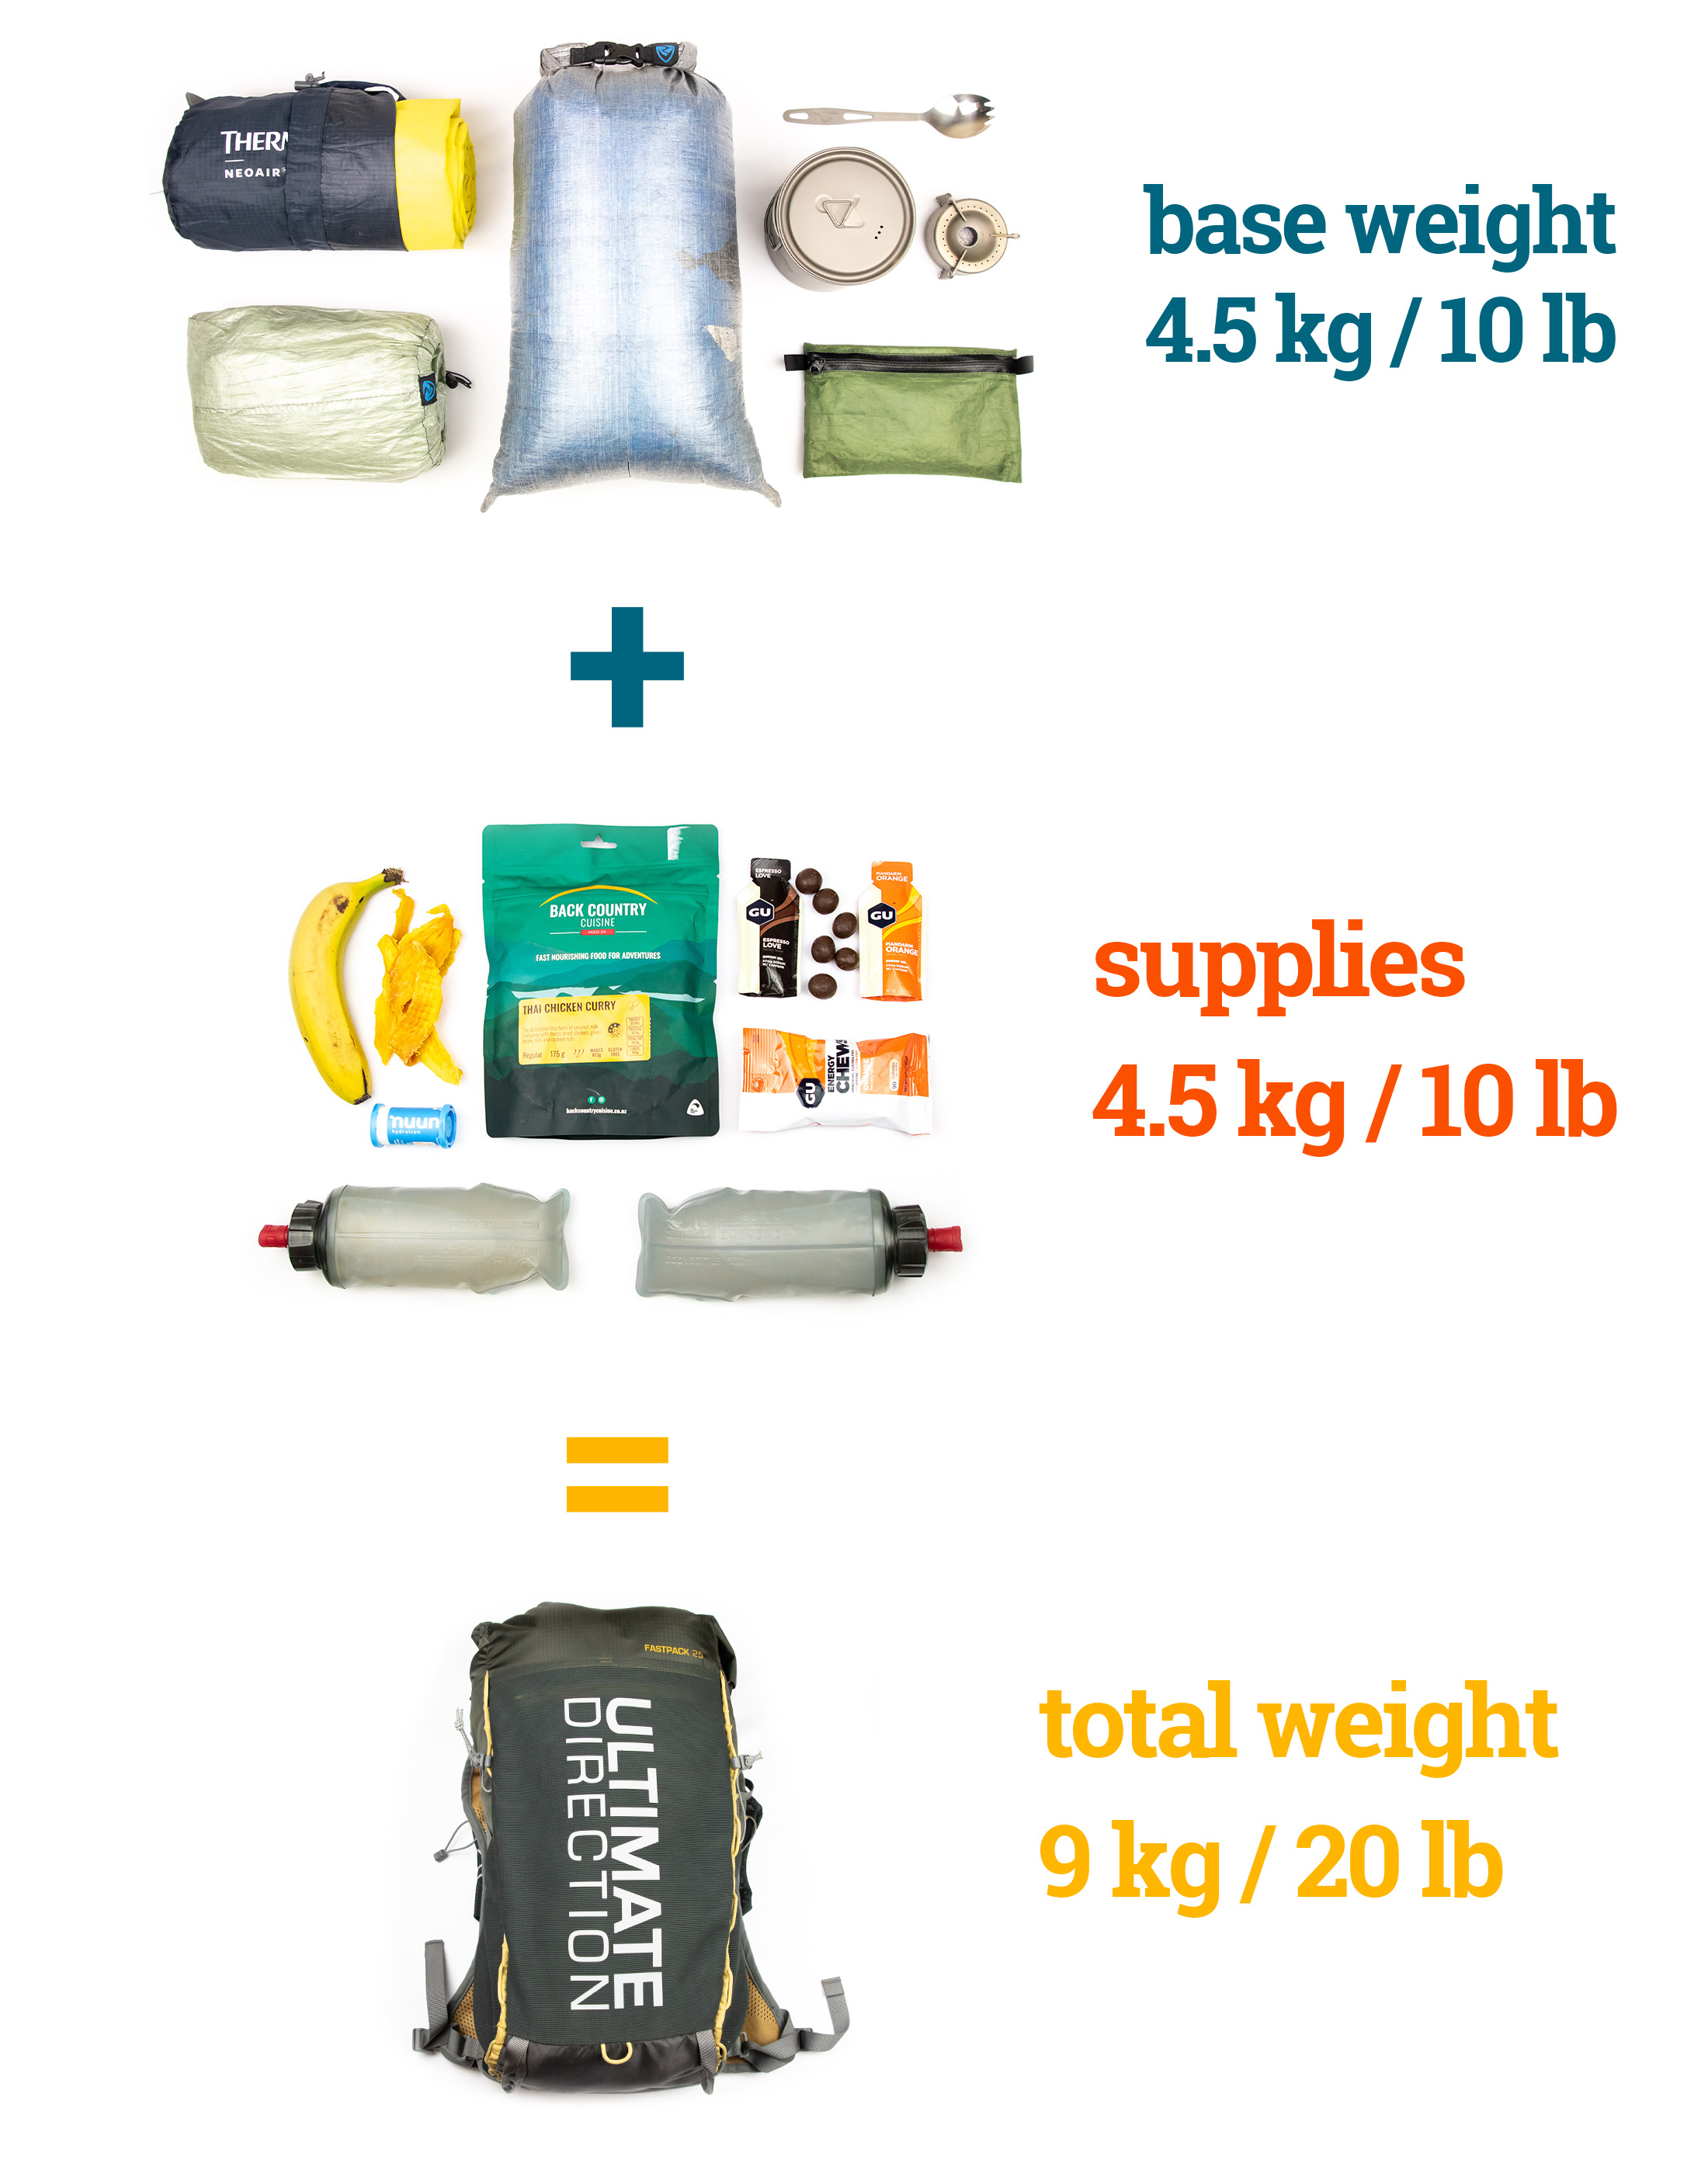
It’s almost impossible to run any real distance with too much weight on your back. How much is too much? 12 kg (26 lb) is about the limit, and most fastpackers aim for a total pack weight under 9 kg (20 lb). Since half of that weight budget will go to food and water, the weight of your kit (base weight) will need to be limited to 4.5 kg (10 lb) if you want to hit your total target weight. With space and weight at a premium, choosing the right fastpacking gear is essential. Consider the following seven principles before adding anything to your kit.
Essentials first
Safety and survival imperatives should come first, but even the essentials can fill a 30-litre pack depending on the conditions and the ability to share gear. On a three-day trip in mild conditions and with partners you can share gear with, it’s very possible to keep your base weight to under 4 kg (9 lb). On the other hand, you might need as much as 5.5 kg (12 lb) of gear for a trip in cold or wet conditions. Don’t skimp on kit you need to keep you warm, dry, and prepared for emergencies.
Prioritise multipurpose gear
One of the best ways to save weight is to use gear that can serve multiple purposes. The most obvious example is trekking poles. If your shelter or tarp can be rigged with trekking poles, you don’t need tent poles, which can weigh around 400 grams (14oz) for even an ultralight tent. And a pot can do double duty as a serving vessel (mug and bowl) if it’s the right shape and size.
Ultralight gear means more for less
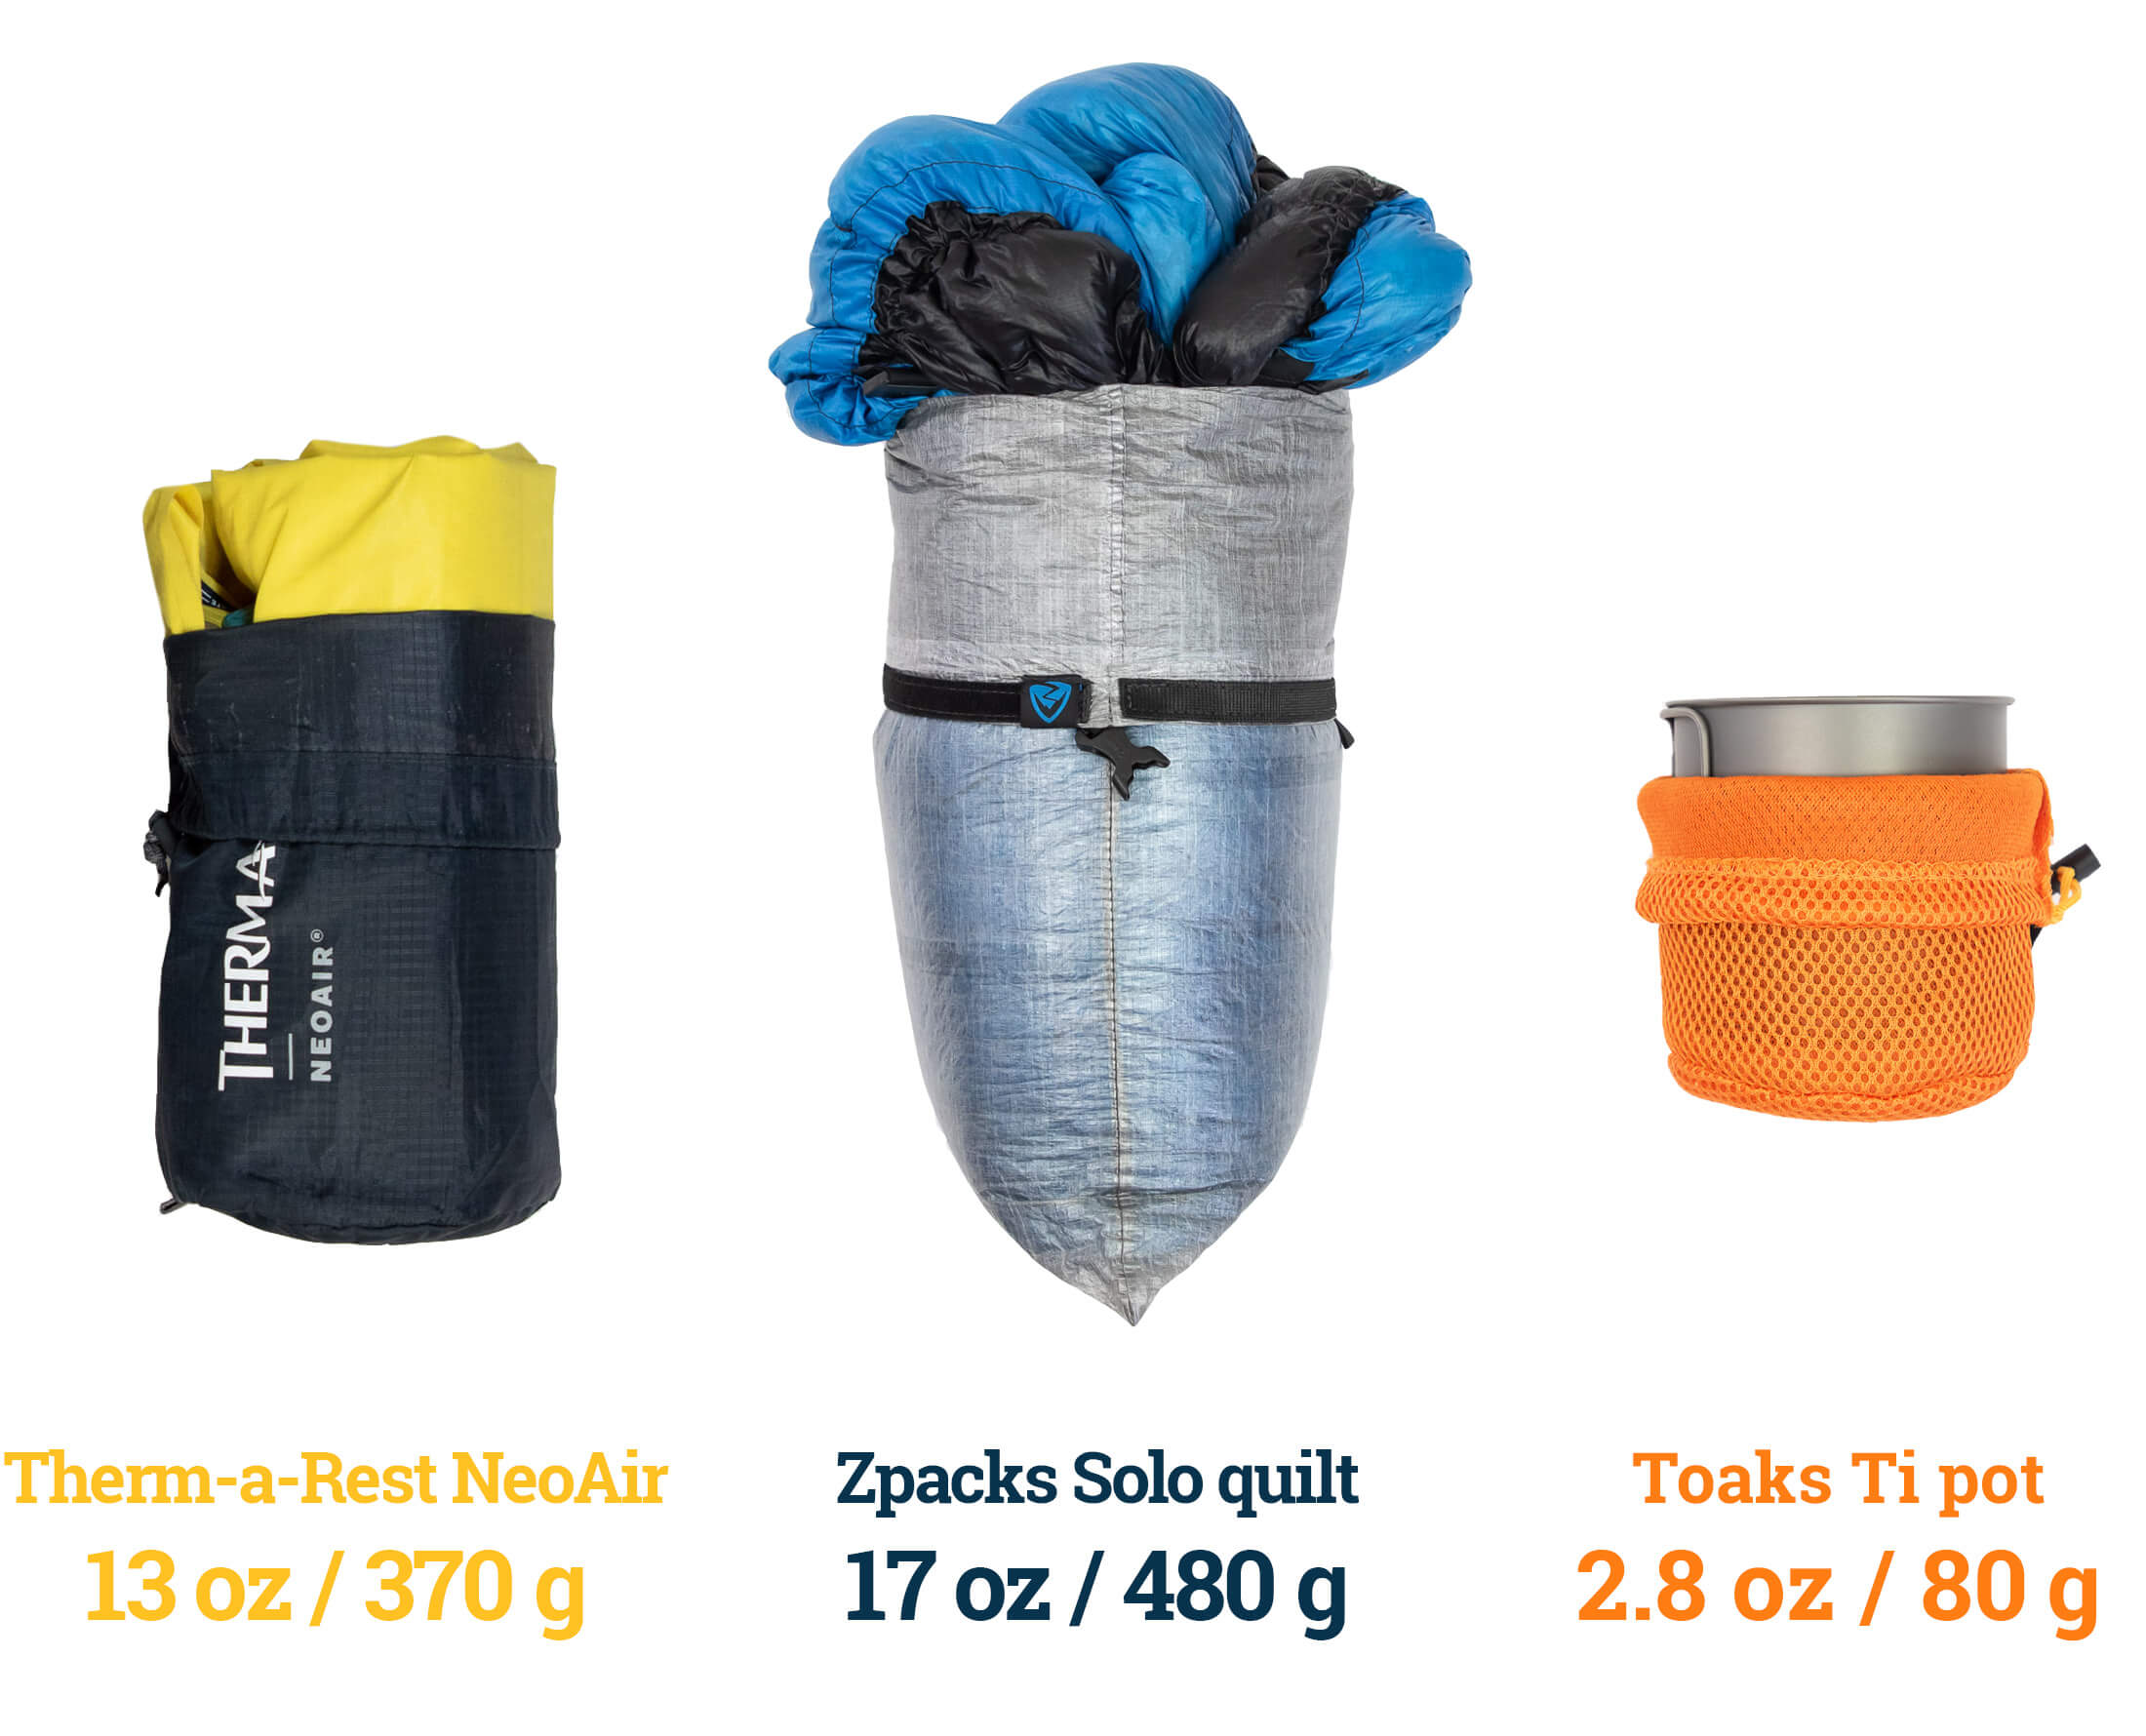
Until just several years ago you’d have to freeze at night to travel light – as the old military adage goes. Fortunately, that’s no longer the case. The development of ultralight gear now makes it possible to stay warm and dry with a kit weighing no more than a few kilos. A tarptent weighs less than a kilo, and a down quilt weighs around half a kilo, as does an ultralight air pad. But ultralight gear is expensive, and you’ll want to do thorough research before you part with your money. Better yet, borrow gear from friends while you build up your kit. This will allow you to test out different models and so get an idea of what kind of gear will work for you.
Cut down on anything extra
Even after upgrading to ultralight gear, you might still need to get drastic with weight saving to keep your kit weight under five kilograms (11lbs). Cut your toothbrush handle down. Remove unneeded straps. Don’t take a full tube of toothpaste when you only need a third. Don’t pack more than a dozen sheets of TP if that’s all you need. But also be careful not to give up necessities just to save a few grams. Going without rain gear when you might need it isn’t a good idea.
Share gear
Even if you upgrade your kit with a few key pieces of ultralight gear, you might still only be able to get the your gear weight down to five or six kilograms, and that’s still a bit on the heavy side if you consider that you also have to carry between two and three kilograms of food on a three-day trip. If this is the case, you will have to share gear to reduce your kit weight. No team needs more than one shelter, cookset, stove, first aid kit, or GPS, and by sharing these items, you can save a lot more weight than you would by shaving the meagre excess from necessities.
Wash and wear
You can run in the same shirt and pair of shorts every day, and besides fresh socks and underwear, you only need a single set of clean, dry clothes to wear in camp at the end of the day. If your running shirt gets too smelly, you might be able to give it a quick wash and dry it out the same day if you reach your camp early enough. Socks too and underwear (if your shorts don’t have integrated boxers) can be washed, and there’s no reason to carry more than two extra pairs of socks.
Prepare for the elements
Since your aim is to carry only ‘just enough’, it’s very important to know what kind of conditions are expected and to pack accordingly. This will be easier for short trips, since the forecast for your last days on the trail will be more accurate than it would be for a forecast for the end of a week-long trip. If the weather could produce conditions worse than expected, err on the side of caution and go in a little better prepared. With the strategies mentioned above, you shouldn’t have to skimp on essentials like foul weather gear or a warmer sleeping bag.
Trail gear
Footwear
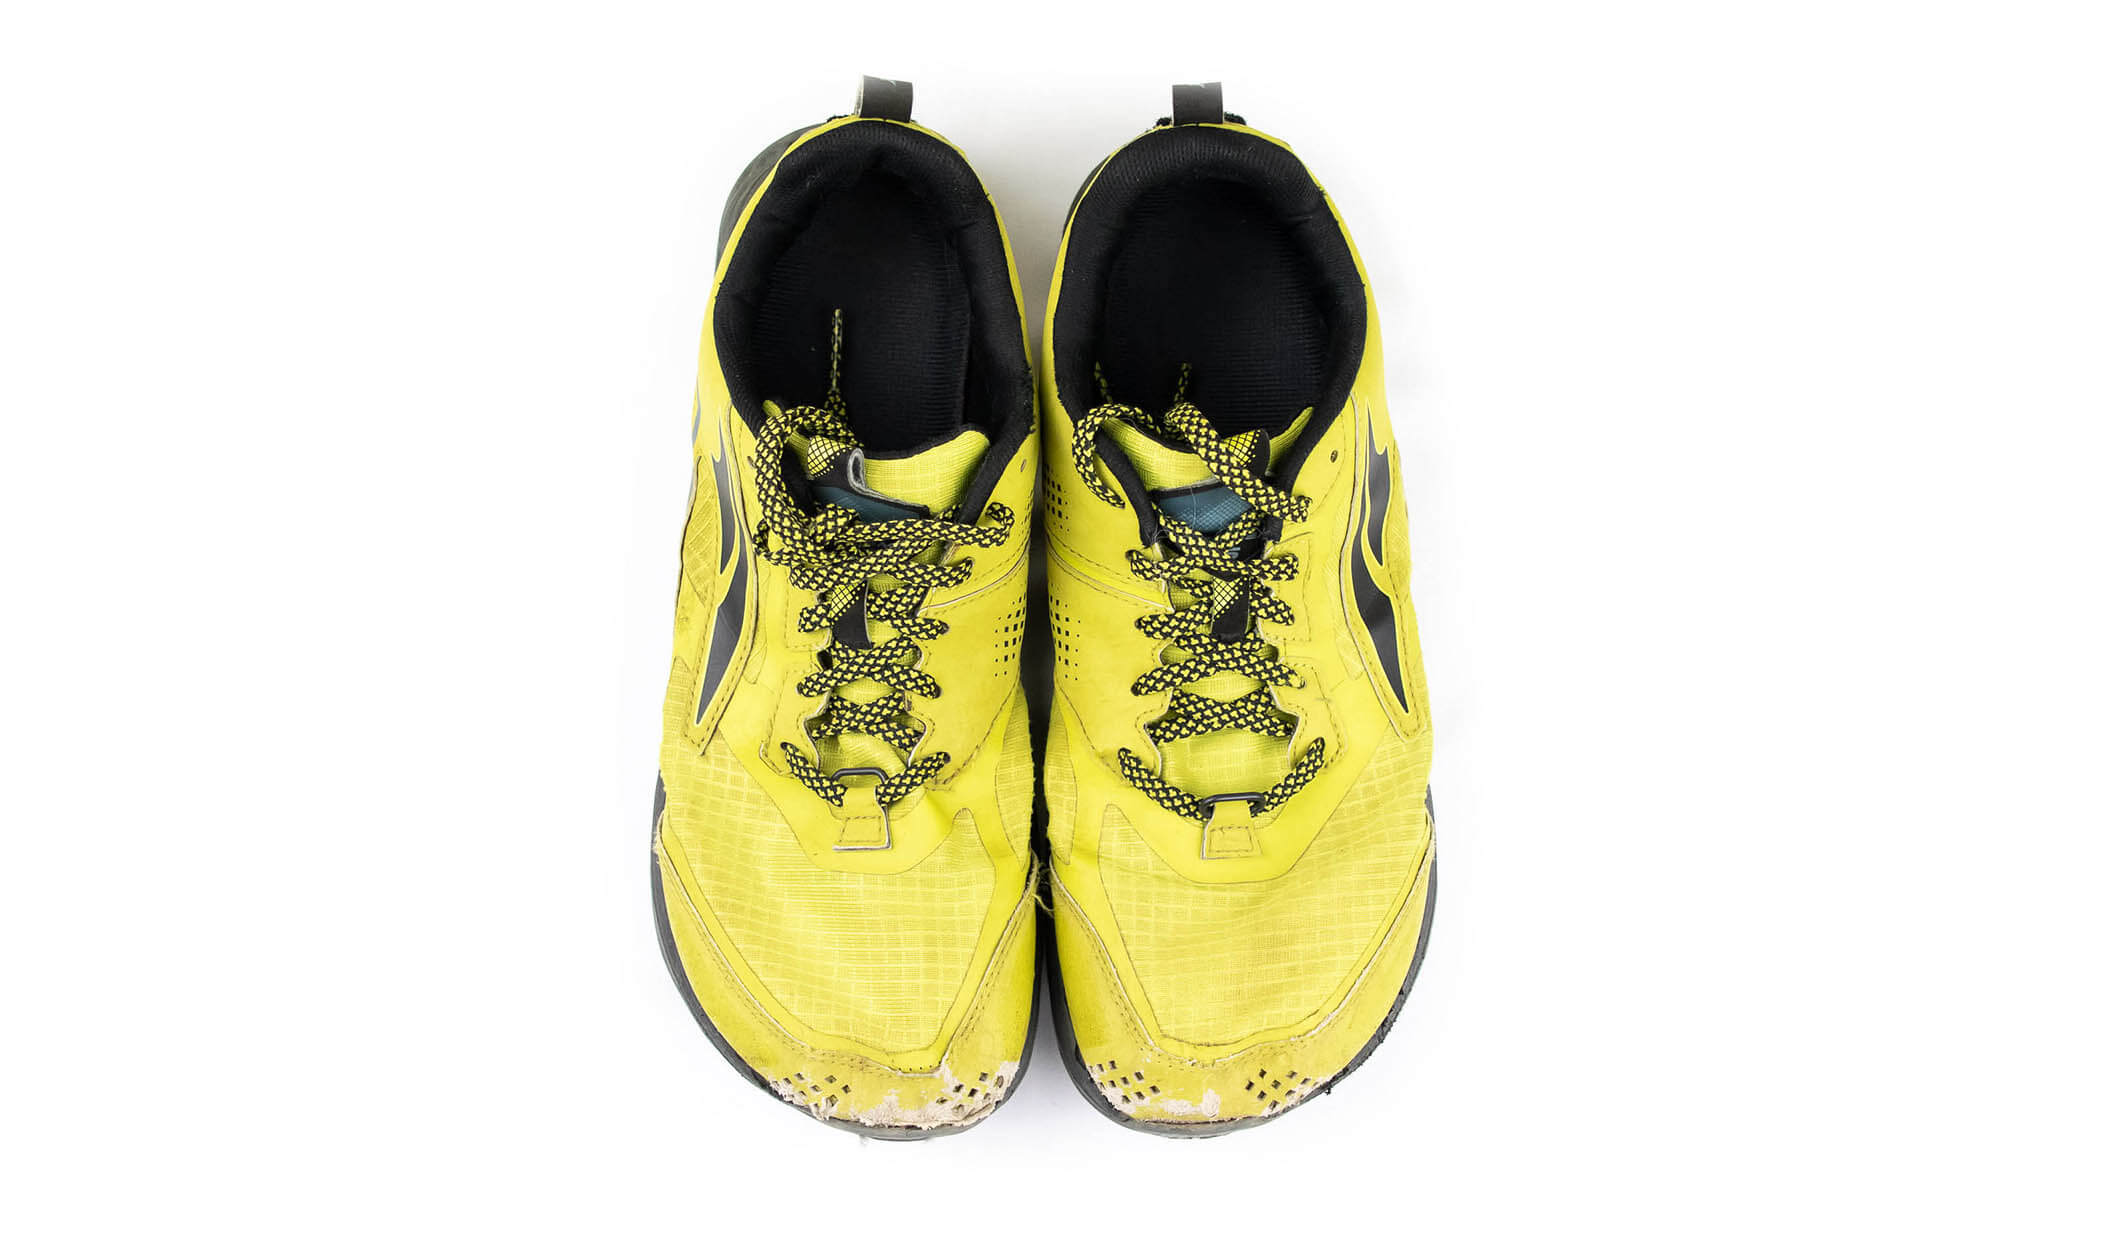
For fastpacking you can wear whatever you’d normally run in. However, shoes with a more relaxed fit will be kinder to your feet, and that can make a difference when you punish them with high mileage on consecutive days. Besides a wider toebox, I also prefer zero drop shoes with at least 20 mm of cushioning from front to back – a combination that ensures ample support and makes it easier to land midfoot. If you aren’t familiar with the benefits of zero-drop shoes and are interested, see my guide on how to transition to minimalist and zero-drop shoes.
Pack
Of all the gear decisions you make, your choice of pack is the most important. If you choose the wrong pack, it will bounce up and down, rub your skin raw, and sap your energy. The right fit is essential, and after that, size is the second most important factor. The ideal pack is somewhere between 25 and 30 litres, but some thrifty fastpackers will be able to get away with a pack as small as 20 litres. My advice is to not go any smaller than 25 litres if you’re new to fastpacking. Once you’ve identified a few candidates in this size range, you need to look for design features that will ensure a secure fit:
- soft back pad that conforms to your back
- waist belt that sits comfortably around the narrowest part of your torso
- shoulder straps with minimal padding
- adjustable sternum strap
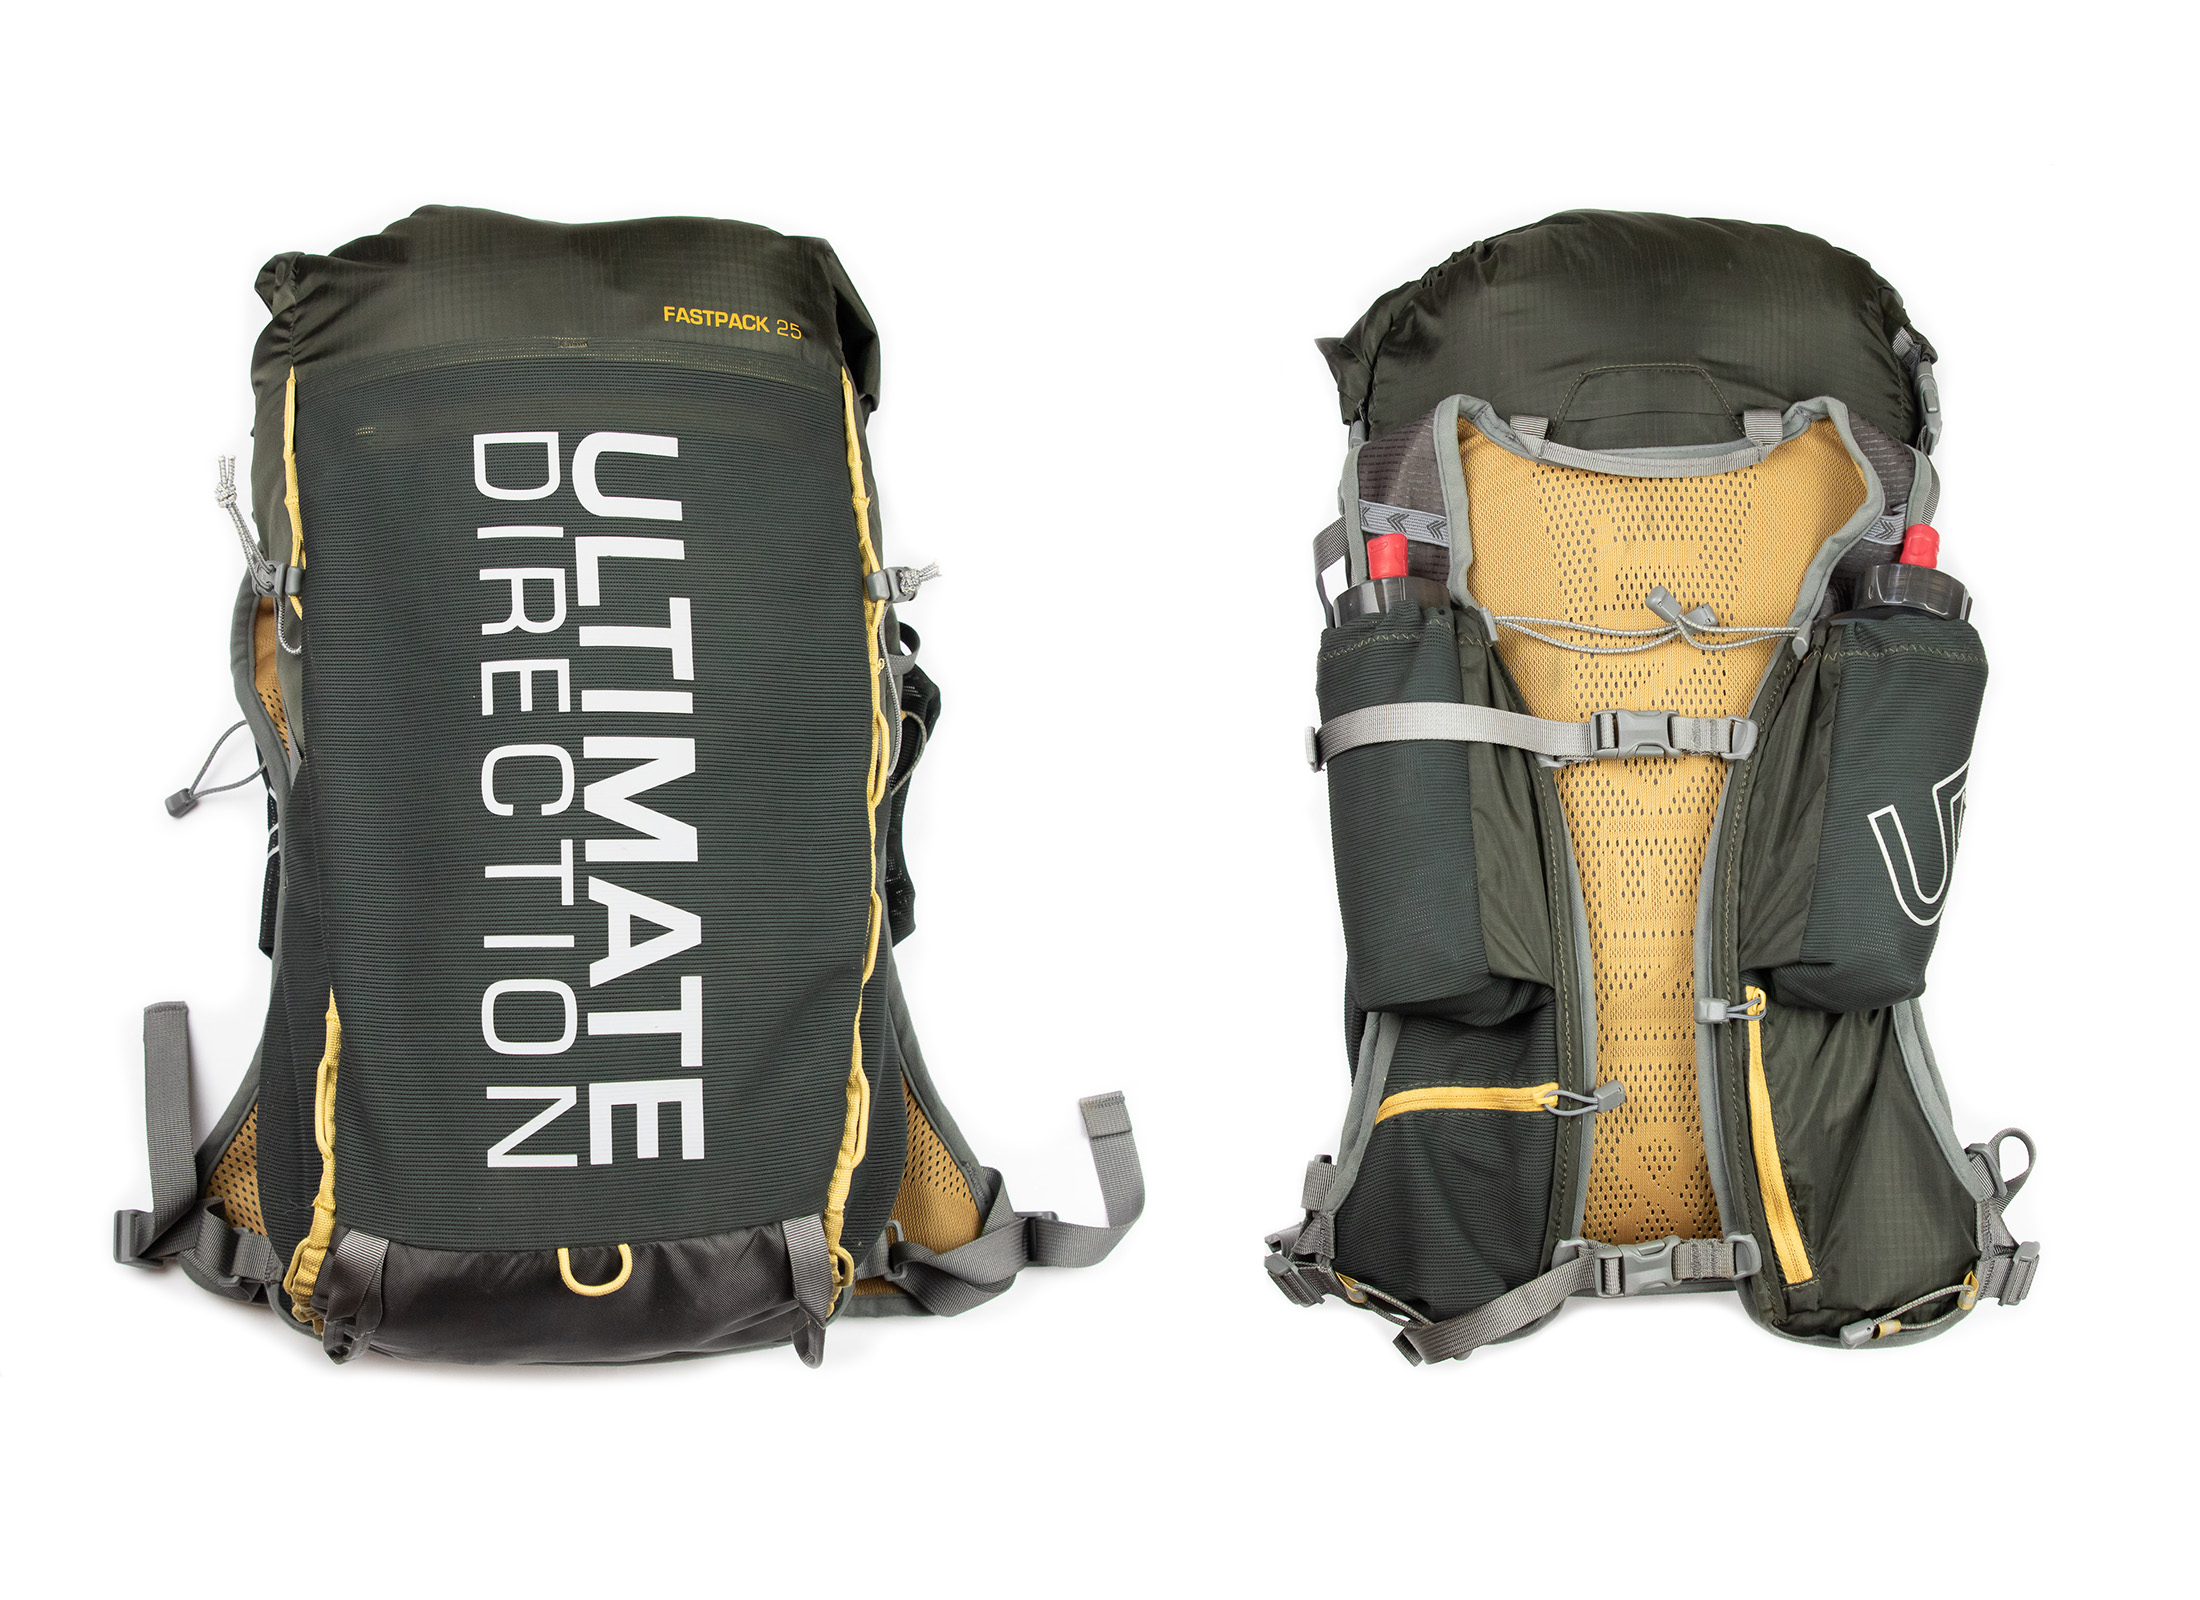
You might find a few of these features on some general purpose daypacks, but you’d have to test several packs before finding one that doesn’t bounce when you run (yes, you might have to take a little test run in the shop – pack full). If you want to shorten your search, look at packs designed specifically for fastpacking. The Ultimate Direction Fastpack 25, Six Moon Designs Flight 30, and Epic XT Backpack are all designed with the discerning fastpacker in mind. In addition to a secure fit, these packs feature the kind of accessory attachments and pockets that fastpackers need.
- trekking pole mounts that allow on the move access
- water bottle pockets within easy reach
- pockets big enough for a GPS or phone
- large quick-stash pocket for a jacket or extra layer
Pack rain cover or liner
If your pack isn’t made of Dyneema Composite Fabric, which is inherently waterproof, you will need something to waterproof it when it rains. Some larger packs have built-in rain covers, but these are less common on ultralight packs. If your pack doesn’t have one (very likely), you can get a separate rain cover or a sack liner – if you don’t mind the outer pockets getting wet. Alternatively, you can pack an ultralight poncho instead of a rain jacket and use that to cover both you and your pack when it really starts to come down.
Trekking poles
A decision to use trekking poles should depend on your personal preference. Poles can improve efficiency and help keep you in balance on downhills, but they also give you something extra to carry when you’re not using them. I don’t usually use poles for trail running, but on fastpacking trips I find them useful on steep uphill slogs where I notice the weight of a pack most. And if I’m carrying a tarp or shelter, I’ll also use the poles as supports.
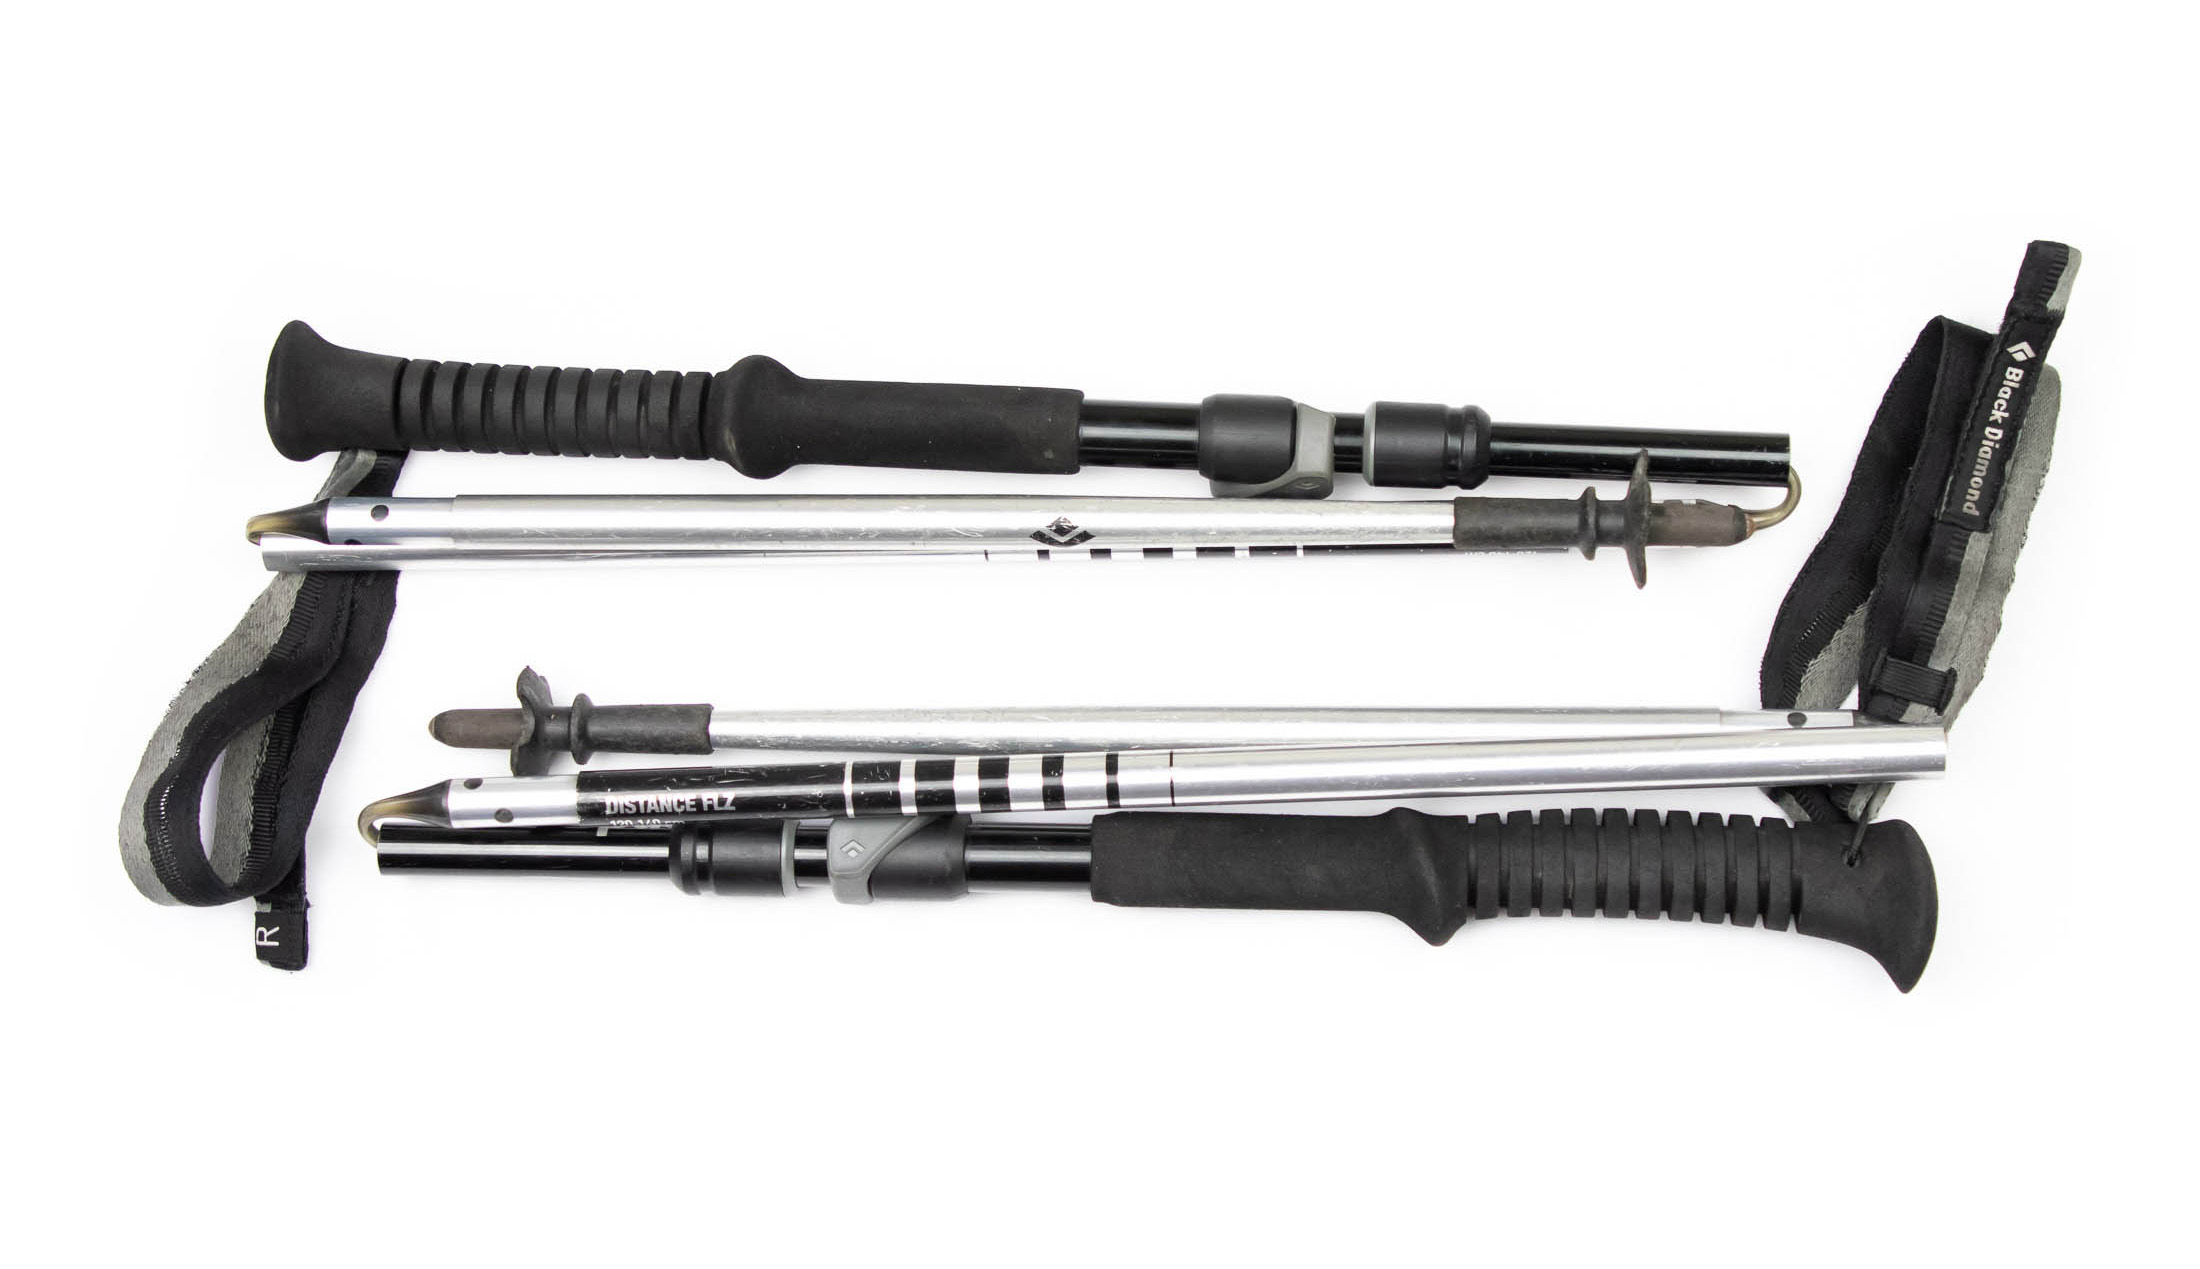
For a more detailed look at the factors in the trekking pole decision, see my guide to trekking poles, where I explain all the pros and cons of using poles. If you then decide you need poles, a pair of light foldable carbon fibre poles should be your first choice. If you intended to use them for rigging a tarp or shelter, you’d just need to ensure they were also adjustable. In that case, a pair of hybrid folding-telescoping poles like the Black Diamond Distance Carbon FLZ would be your best option.
Water bottles or reservoir
If you can refill at streams regularly, you may be able to get away with carrying just a litre of water. If not, you could have to carry two or three times that. When it comes to your hydration system, you have three options: reservoir, water bottles, and soft bottles. While hard bottles have certain advantages for backpackers (they’re easier to refill), I’ve found that they’re not suitable for fastpacking. Their hard, non-confirming edges can dig into your back and chest, and when only partially full, they make sloshing sounds, which are more irritating than you might think.
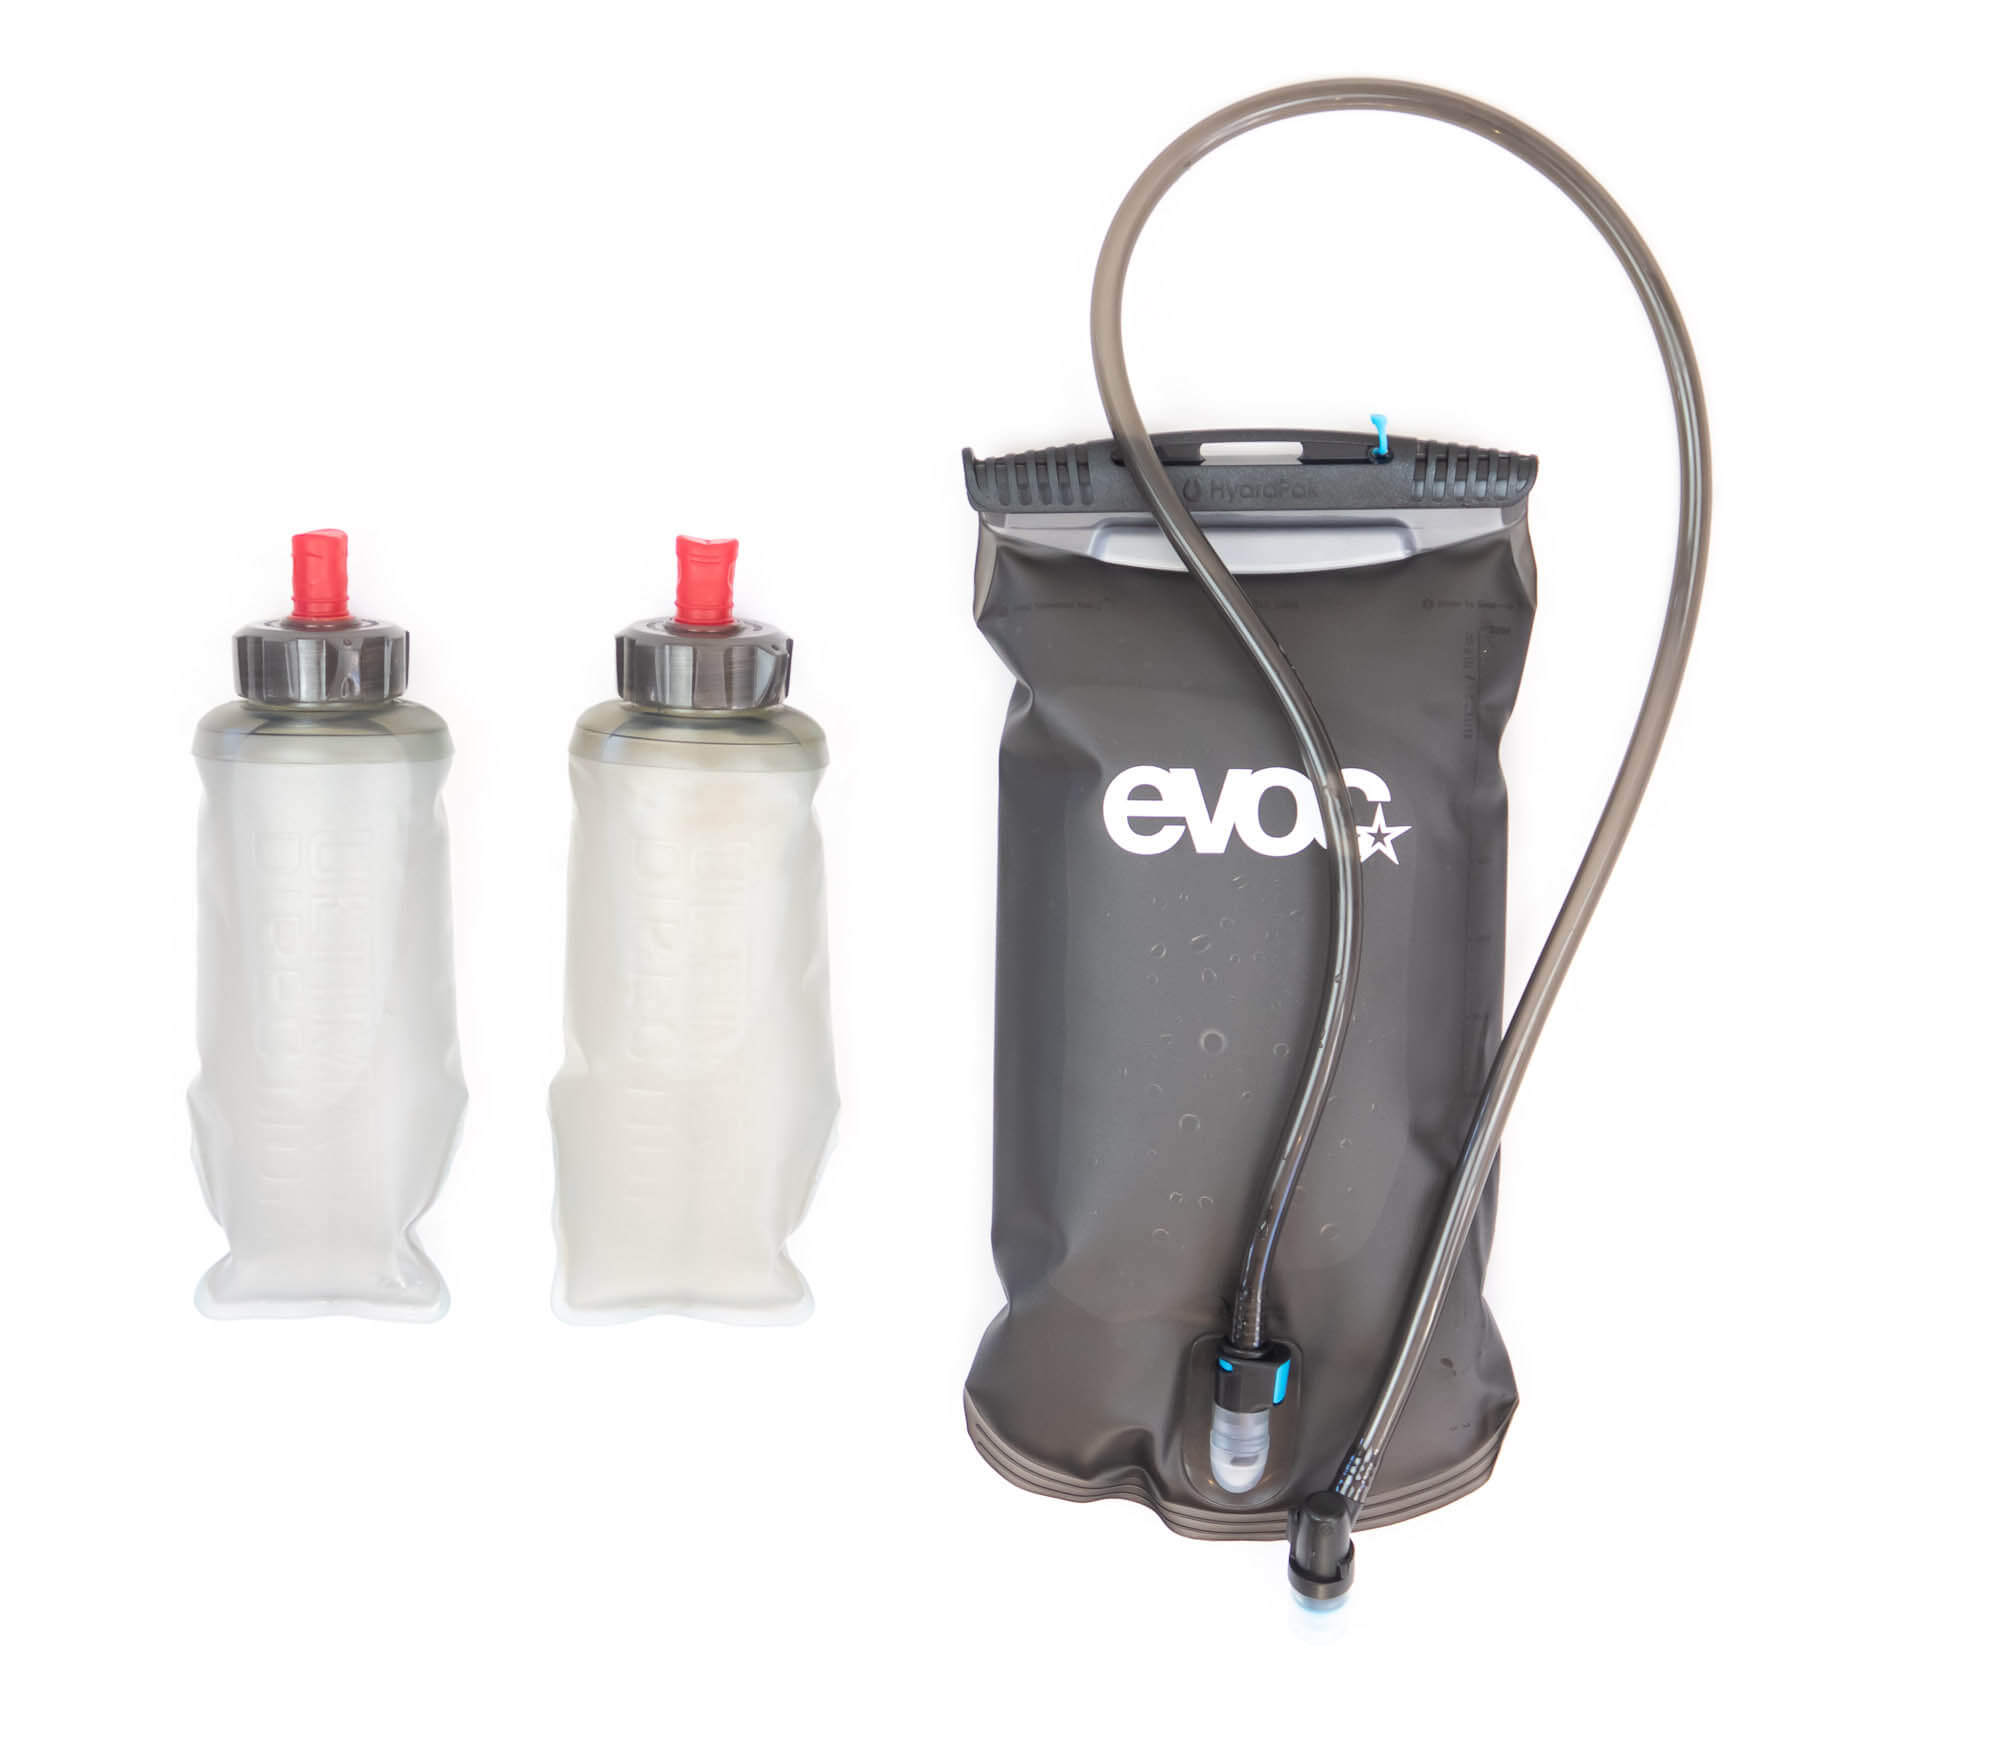
A bladder will conform comfortably to the shape of your back and will afford you easy access to your water, but it too has disadvantages: the first is that it takes up room in your pack, where space is at a premium. The second is that you have to take your pack off and remove the reservoir to refill it – unless you have an accessory like the Sawyer Fast Fill Adapter, which allows you to fill the reservoir through the drinking tube. My water container of choice is a soft bottle, and on most fastpacking trips, I carry two 500 ml soft bottles for clean filtered water in my vest pockets and a third 500 ml ‘dirty water’ soft bottle (for collecting and filtering water) in the main compartment.
GPS, map and compass
There are plenty of cellphone apps with navigation functions, but they’re only useful when you still have signal. At some point you’re going to venture beyond the range of cell towers, and that’s when you can benefit from having a GPS. I say ‘benefit’ and not ‘need’ because a GPS shouldn’t be your only navigational aid when you’re in unfamiliar territory. There’s a danger in relying on technology when batteries can die and screens can break. It’s best to also carry a map and compass – and know how to use them.
Satellite messenger
Your first few trips should be close enough to home for you to always be in range of a cell tower. But as you venture further afield, it would be wise to add a satellite messenger to your kit list. Besides enabling two-way messaging with a search and rescue dispatcher, most devices have some kind of GPS function, and larger models even have colour maps. Although these fully-featured messengers can replace a GPS, I have seperate devices since I don’t always need a navigational aid (or want the extra weight).
Tent or tarp
On some trips it’s possible to overnight in huts or permanent shelters, but there’ll be many more when you’ll have to camp. And that’s where you have to make one of your biggest gear choices. Unless you’re expecting perfect weather, you’ll need something over your head. With shelters ranging from 3-season tents to gossamer-thin tarps, there's a wide range of options with varying levels of weather-protection and weight. My guide to tarp camping explains the pros and cons of tarps verus tents, and the following paragraphs only serve as a summary of a complex topic.
Tent
At the most protective and user friendly end of the spectrum, you have ultralight 3-season tents. These are fully enclosed, so they offer protection from both weather and bugs. And they’re freestanding, which means they can be pitched without perfectly tensioned guy lines. This is a big advantage when you want to pitch your shelter in a hurry or when the ground is too hard to peg. But ultralight tents are relatively heavy and expensive. An ultralight two-person, two-door tent will weigh somewhere between 0.9 kilos (2lbs) and 1.4 kilos (3lbs) and cost around $450 or €400.
Fly-and-footprint setups
Some ultralight tents can be pitched with just the fly and a footprint (purchased separately), essentially turning them into freestanding shelters. These hybrid single-walled shelters are up to 300 grams (11 oz) lighter than a full tent, putting them in the same weight category as tarp tents. And for that you only give up protection from bugs and severe weather. This kind of versatility is particularly useful if you want the protection of a tent most of the time but still want the option of shedding a few hundred grams when you need to travel lighter.
Shelters
Shelters can be double-walled like most freestanding tests or single-walled. They also can be completely enclosed like tents to keep bugs out or open bottomed to improve ventilation and reduce weight. What they have in common is that, unlike tents, they aren’t freestanding. Their poles have to be held in place with properly tensioned guy lines, and that requires more skill and effort than the fuss-free pitching of a tent. The advantage of shelters over tents is that they can be pitched using adjustable trekking poles, negating the need for dedicated poles and making them up to 300 g (11 oz) lighter than equivalent-sized tents.
Tarp tents
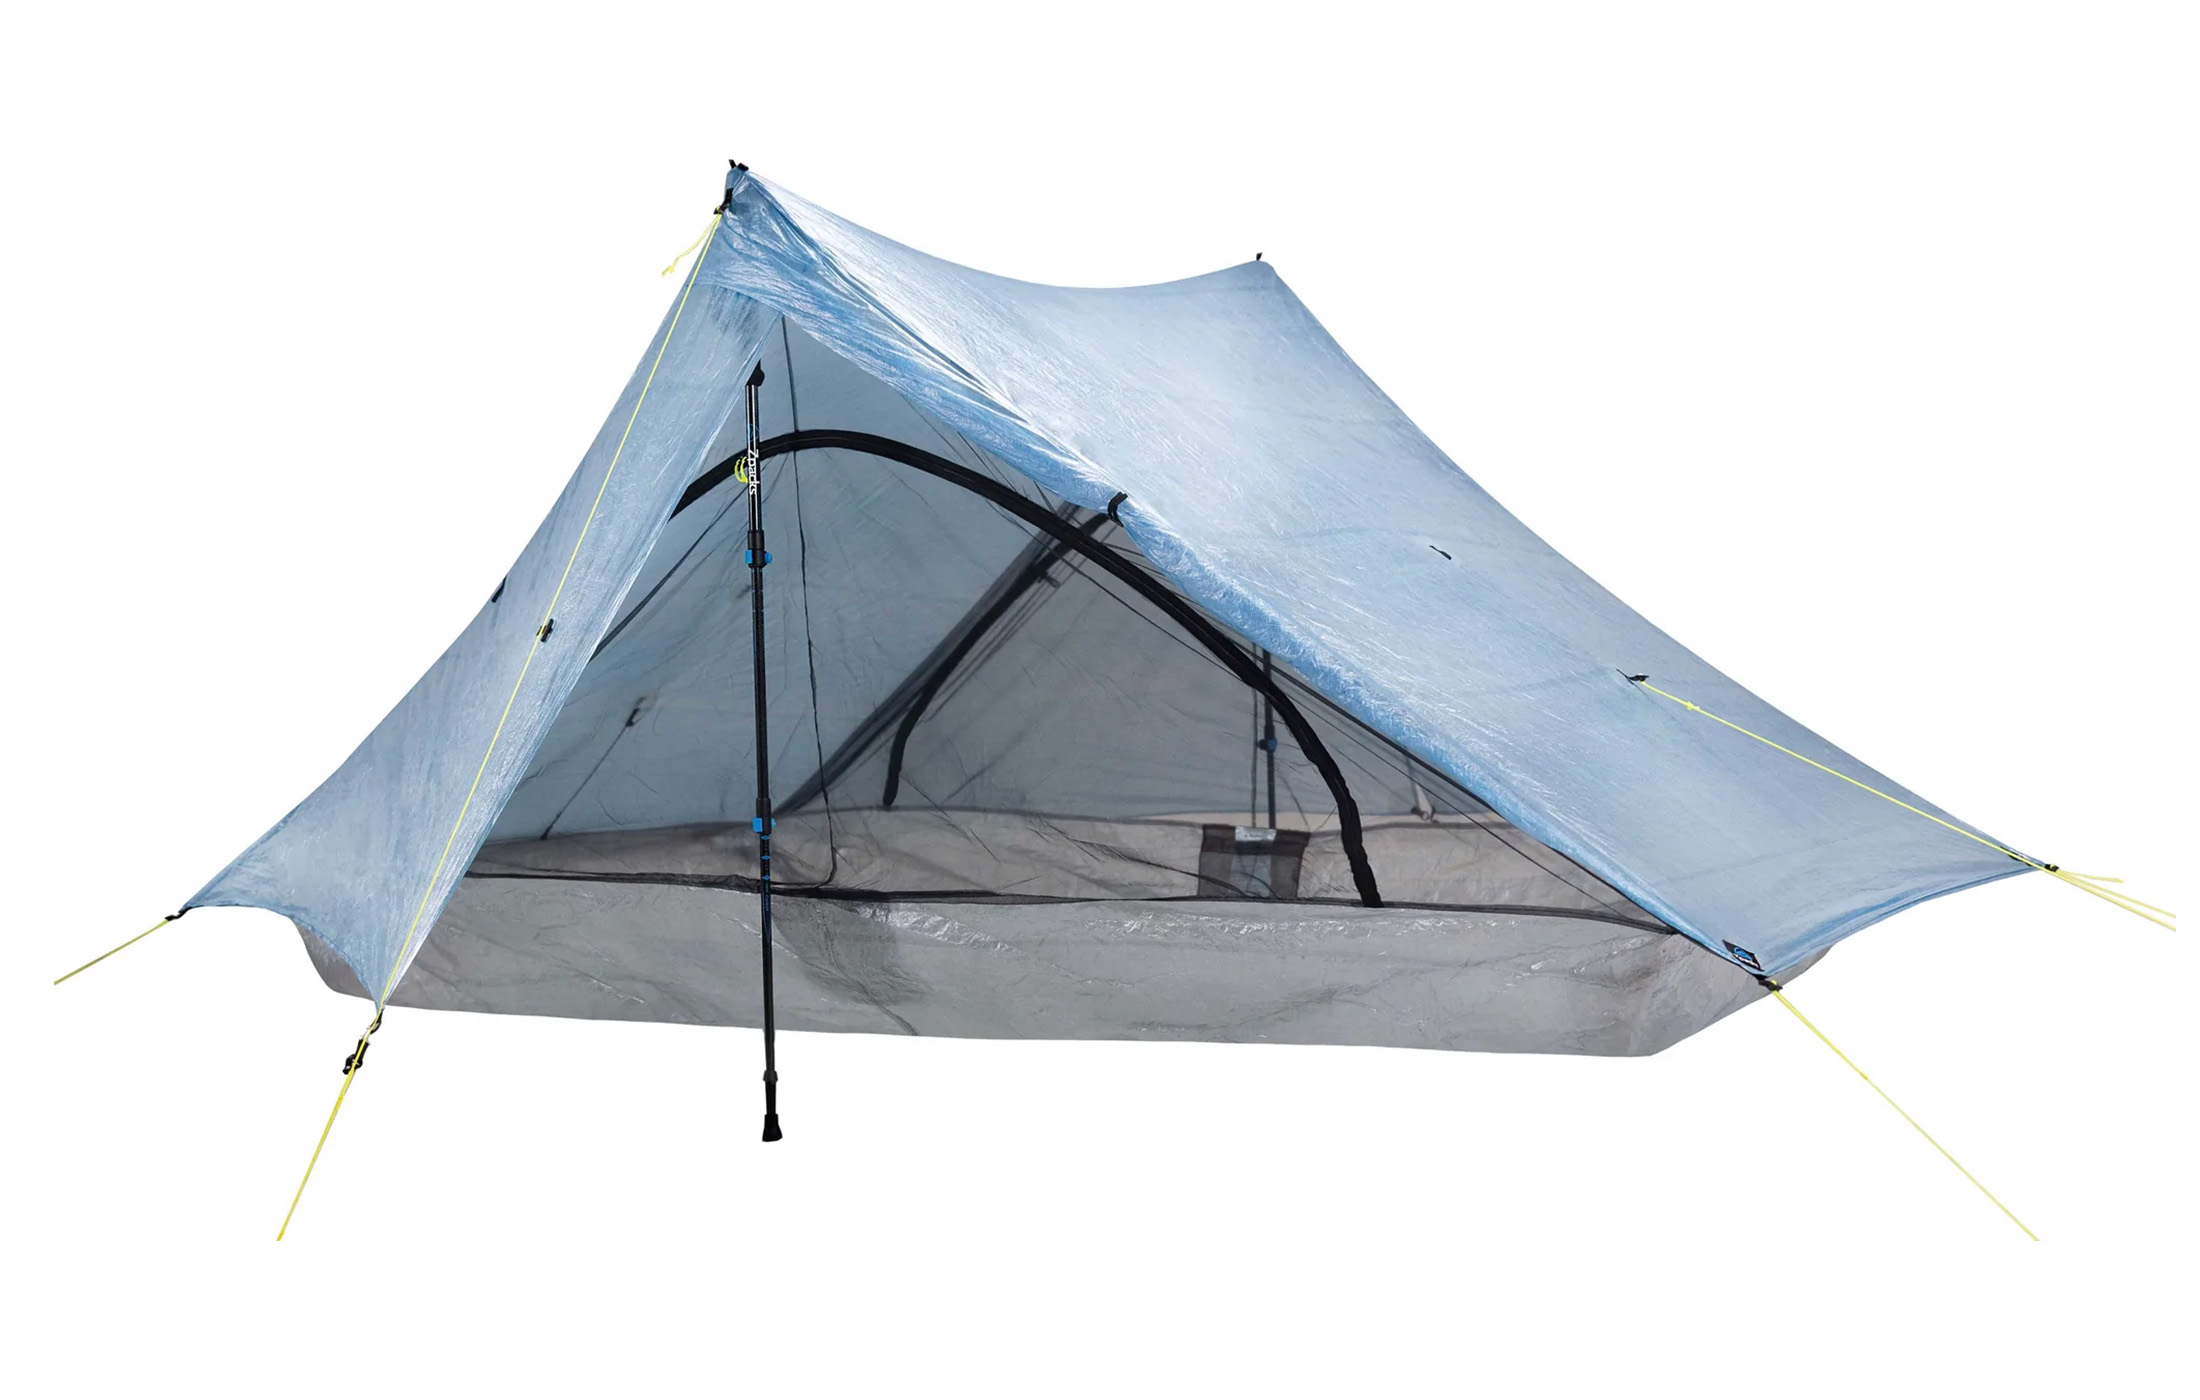
Tarp tents are light A-frame shelters that are supported by a pole at each end. Many have single walls with mesh doors and bathtub floors sewn into them, while others have double walls, much like a free-standing tent. Double-walled models weigh about as much as ultralight freestanding tents while single walled models are up to 40% lighter. This lightness makes these more minimalist shelters a good option if you run with trekking poles and you’re willing to learn how to pitch a shelter in trickier conditions – on hard or very soft ground with little else around for support.
Pyramids
Pyramids differ from tarp tents in three ways. Firstly, their sides slope away from the apex in all directions, which makes them better at shrugging off snow and strong winds. Secondly, with ground-to-peak walls and fewer vents, they don’t ventilate as well. And thirdly, they’re usually made without integrated floors and mesh inner walls. If these features are an option, they’re most likely to be modular add-ons. Like tarp tents, many mids can also be pitched with trekking poles (others require dedicated poles), thus achieving a similar weight, but overall mids are better suited to winter camping.
Tarps
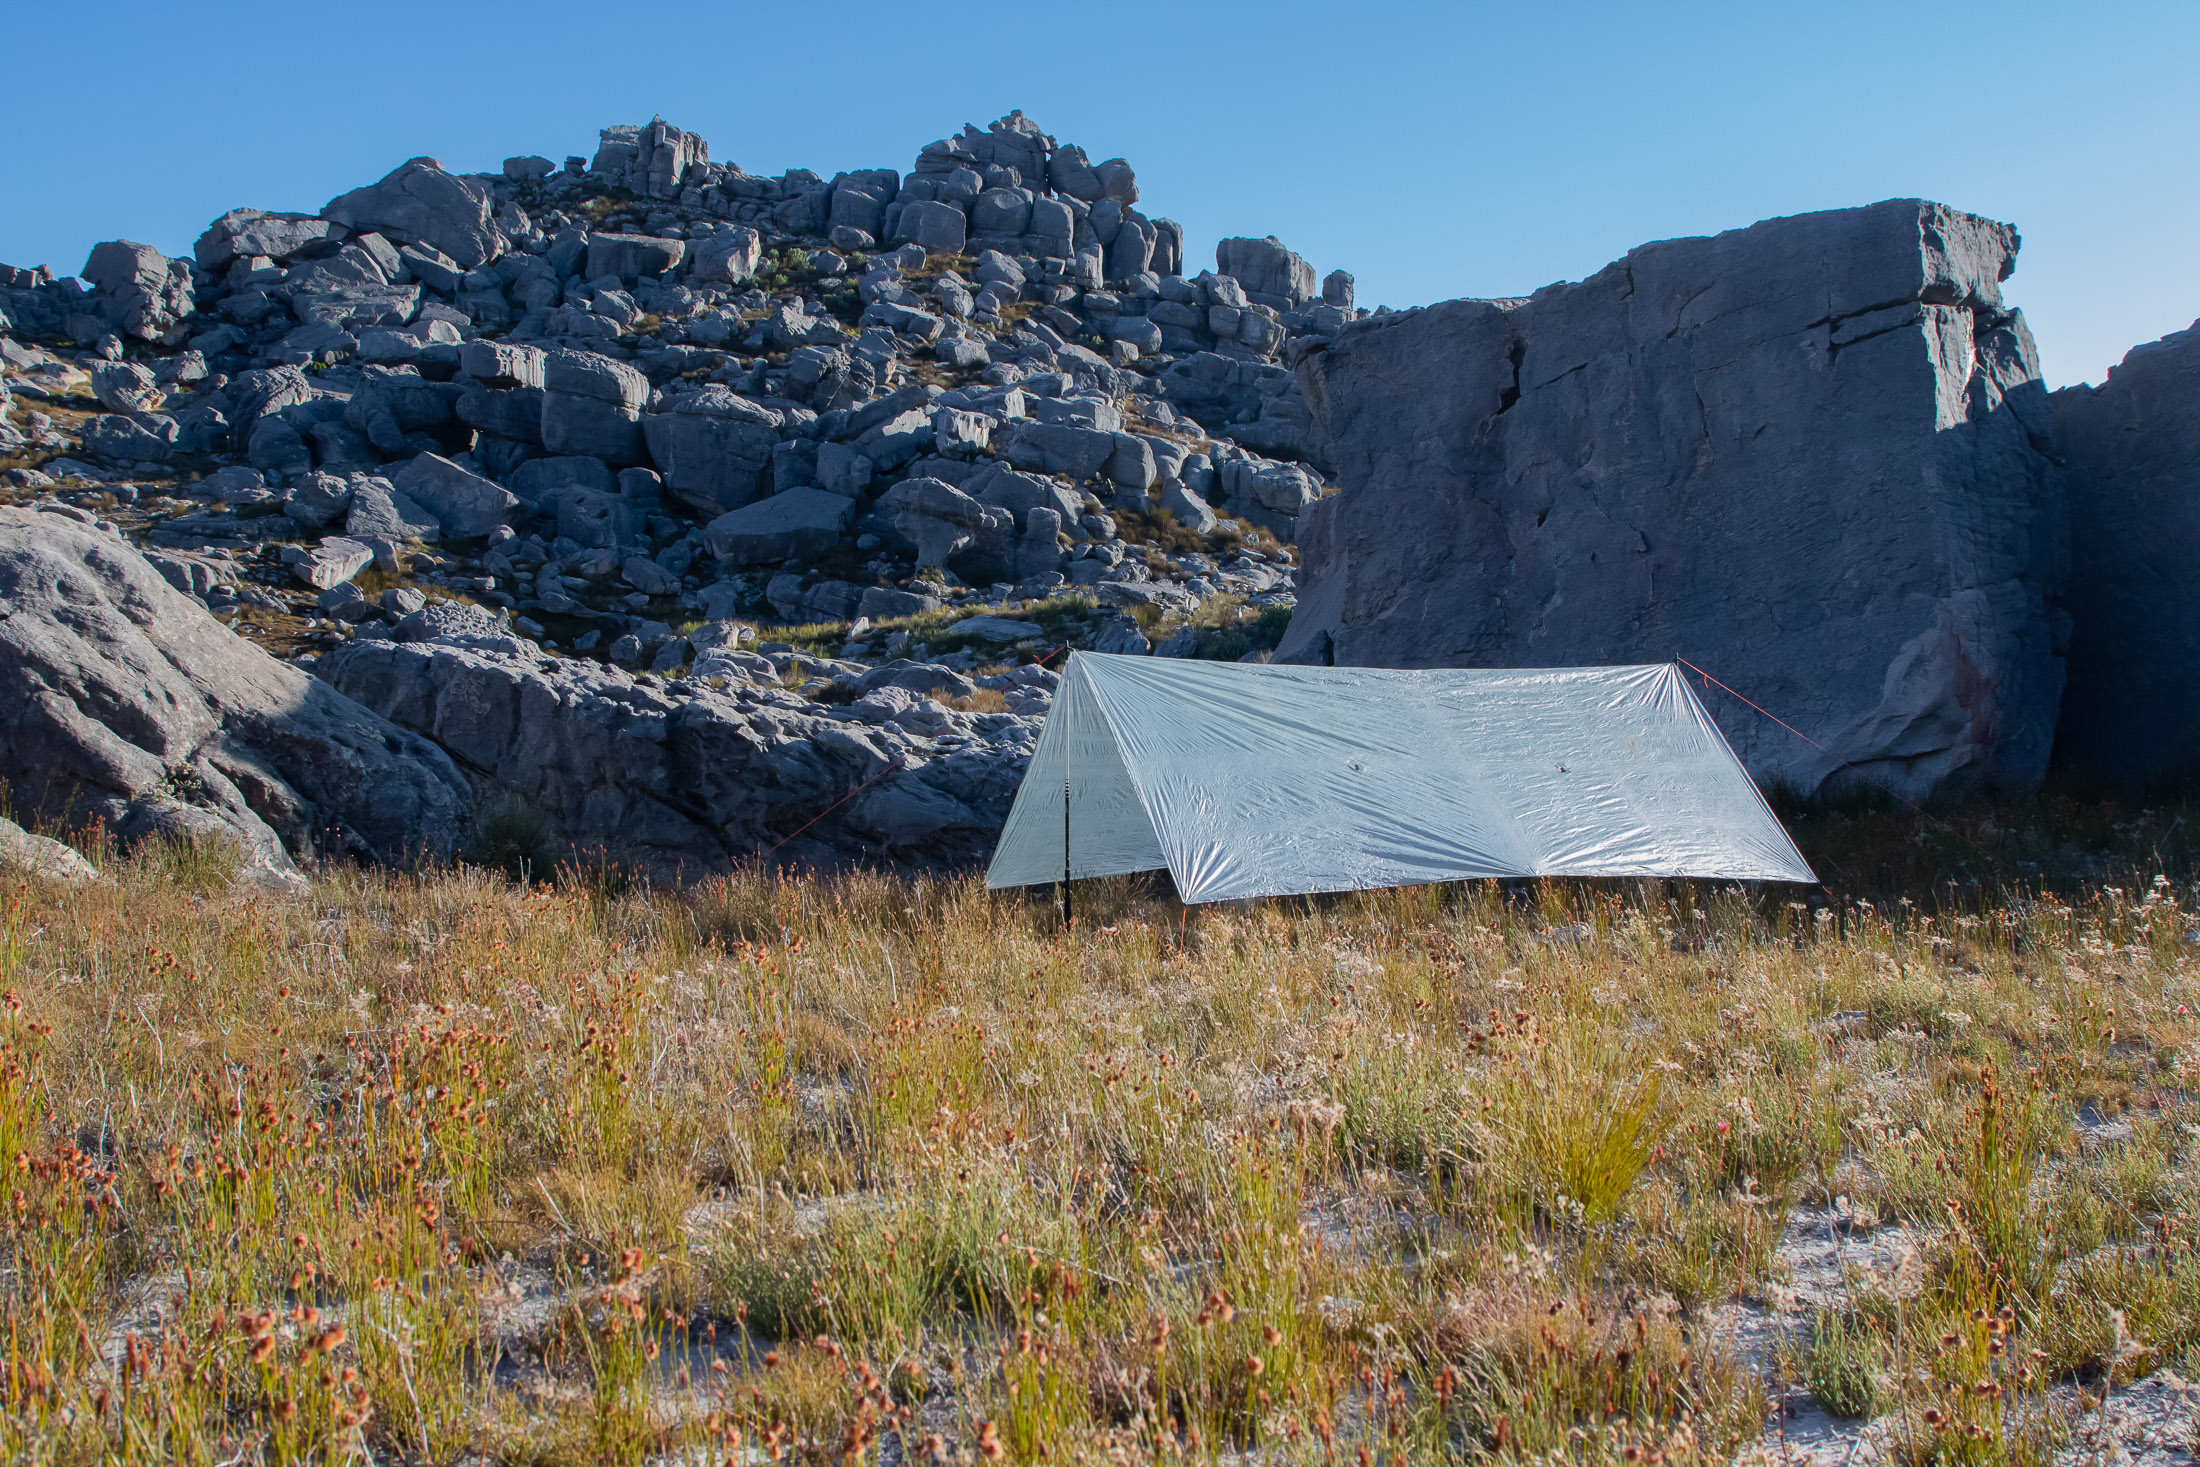
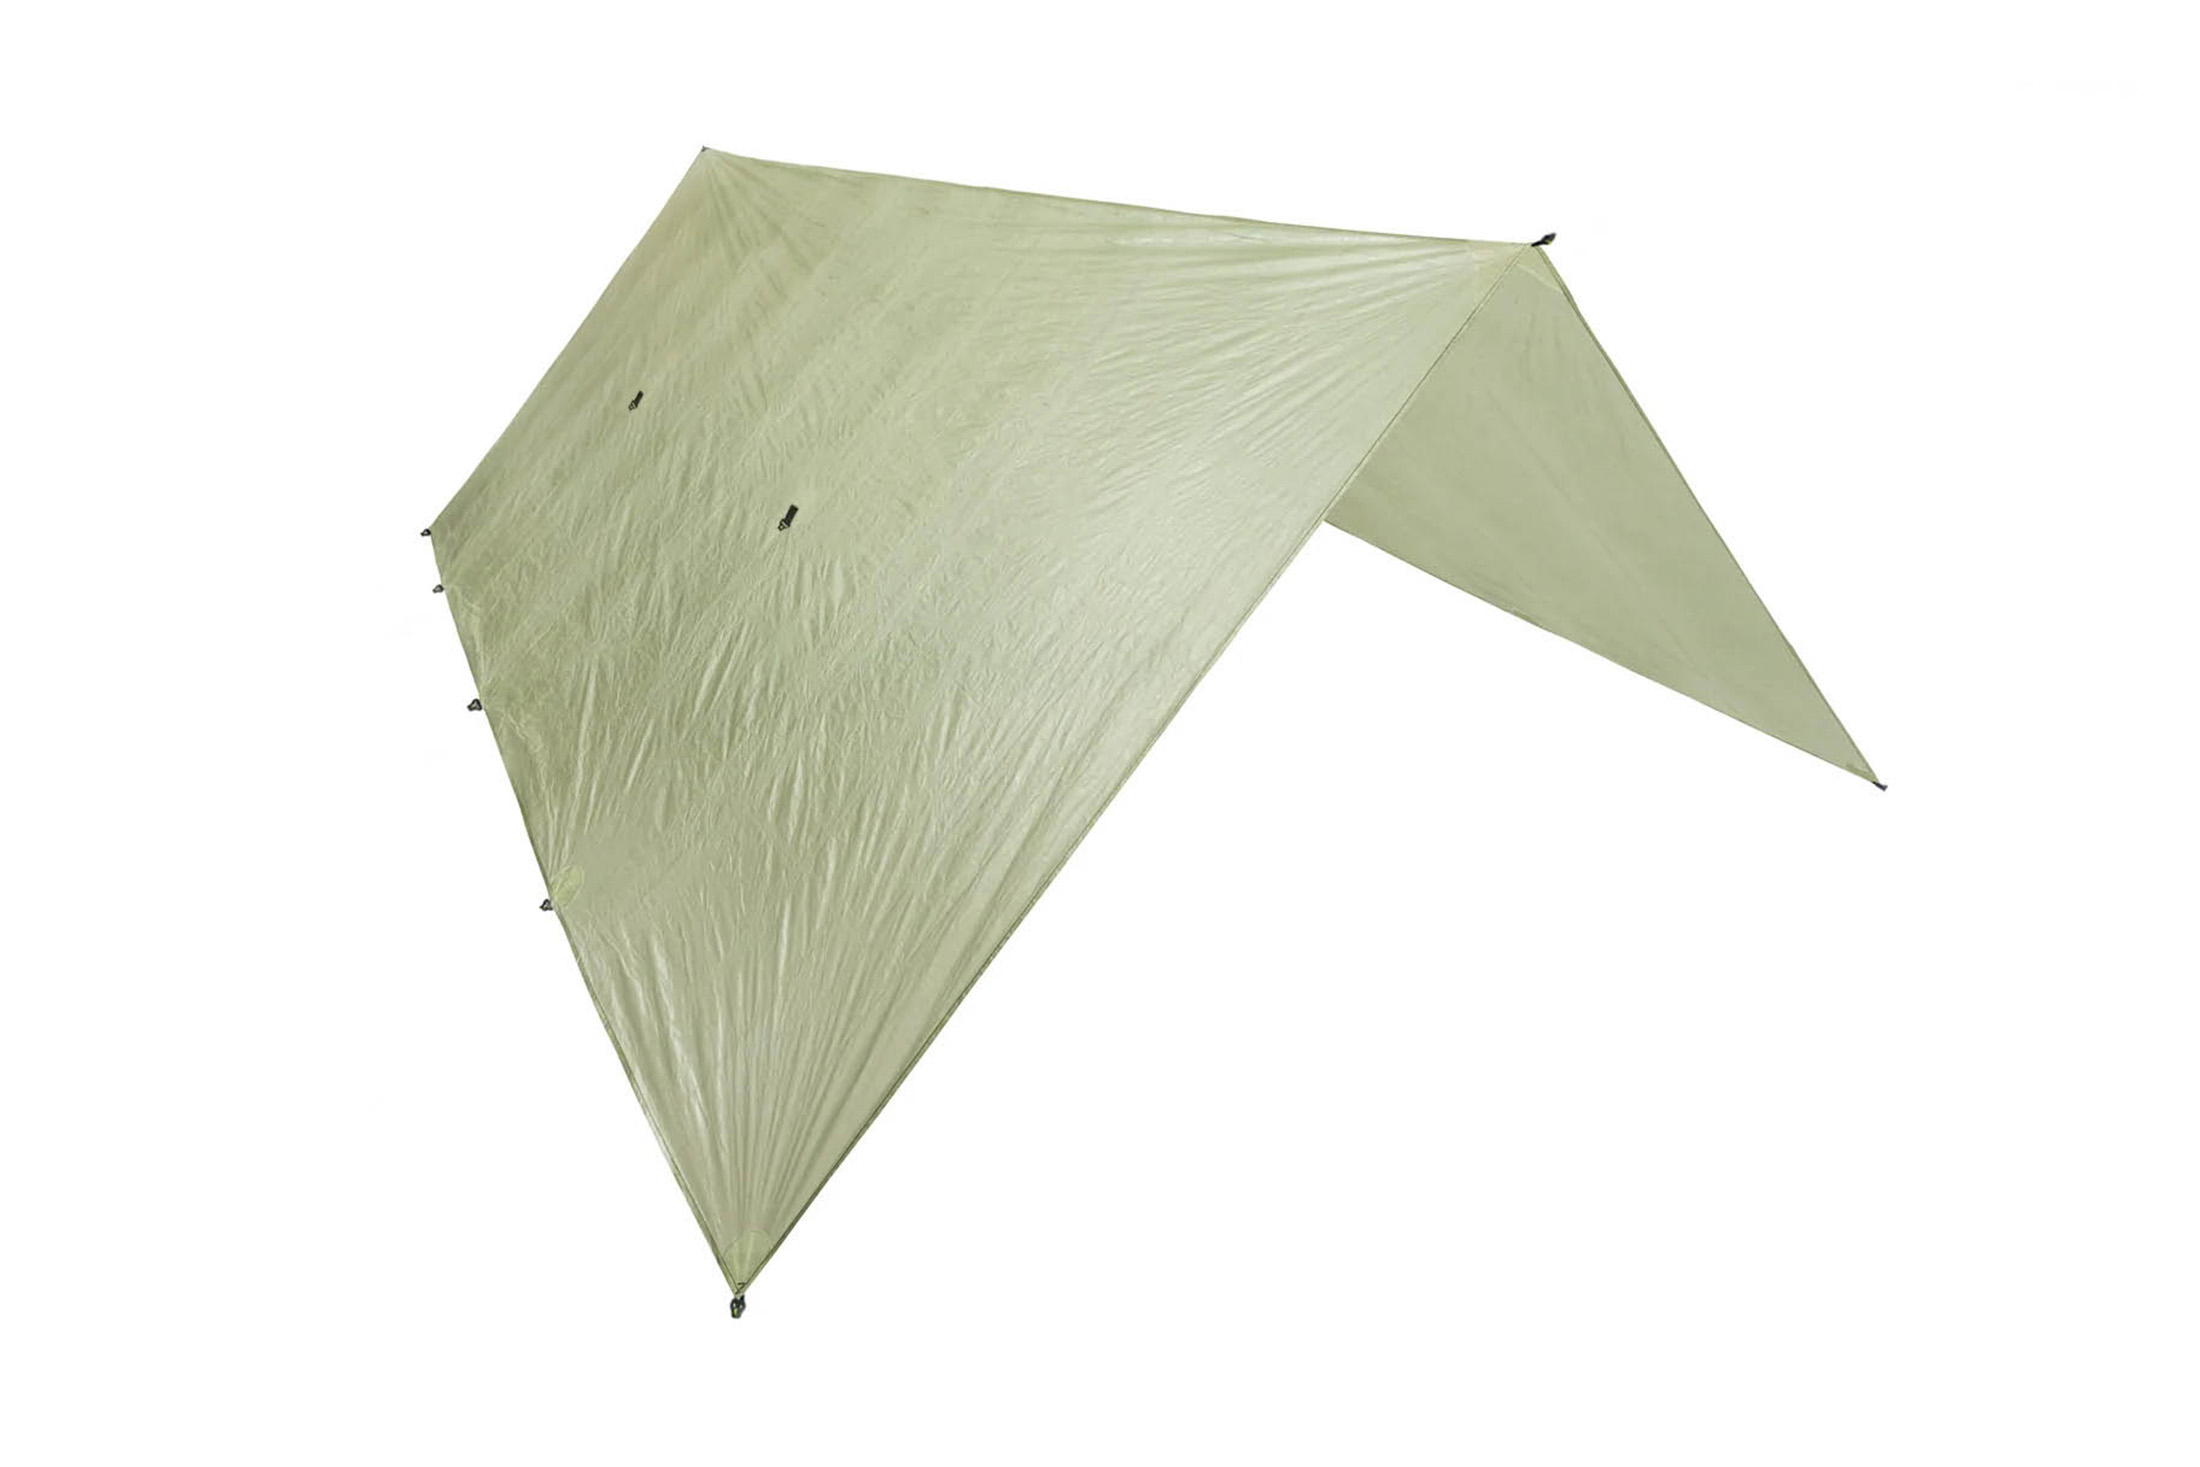
Tarps are the lightest, simplest and least expensive of your options. If K.I.S.S is your motto, you can’t get any simpler or more minimalistic than a rectangular piece of fabric held in an A-frame with a pair of trekking poles. Of course this minimalism comes with a compromise, and that is protection from the elements and insects. You have nothing to stop mosquitos from getting at you, and you can get wet if the wind shifts and sends rain through an opening. But there are ways around both challenges. See my article 8 Ways to Rig a Flat Tarp for advice on how to get around tricky tarp rigging situations.
Groundsheets
To protect the underside of your sleeping pad from abrasion and dampness, it’s a good idea to use a groundsheet. The same goes for floorless pyramids. You want to cut your groundsheet at least 10 centimetres (4 in) smaller than the area covered by your tarp or shelter. That way your groundsheet won’t stick out from underneath the tarp and collect water. Laying down a groundsheet will also ensure that you have a clean surface to layout gear on. In keeping with the multipurpose principle, I will carry a groundsheet poncho (made by Zpacks), which does double duty as rainwear, if there is any chance of rain.
| shelter type | kg | lb/oz |
| ultralight tent | 995-1250 g | 2.2-2.8 lb |
| ultralight tent (fly & footprint setup) | 765-965 g | 1.7-2.1 lb |
| tarptent (double-walled) | 950-1100 g | 2.1-2.4 lb |
| tarptent (single-walled) | 500-790 g | 1.1-1.7 lb |
| pyramid + inner wall/bathtub floor | 815-960 g | 1.8-2.1 lb |
| pyramid + groundsheet | 440-590 g | 15-21 oz |
| tarp + groundsheet | 190-360 g | 7-12 oz |
Shelters and tarps are rigged with trekking poles, the weight of which is not included here.
Figures shown here are average minimum weights for 2-person models.
Sleeping setup
Sleeping pad
There are five factors worth considering when choosing a sleeping pad for a fastpacking trip: weight, bulk, comfort, temperature, and sleep setup. Closed-cell foam pads are light, inexpensive and fail proof, but they’re also thinner, less insulating (R-value 2.2 or lower), and more bulky – you’ll have to attach one of these to the outside of your pack. Air pads, on the other hand, are more compact when deflated, thicker when inflated (some at least), and are often warmer. But they’re also more expensive and can leak air if punctured. If you use a quilt, know that it’s even more important that you have a properly insulating pad underneath you, and that means an R-Value of 4.0 or higher.
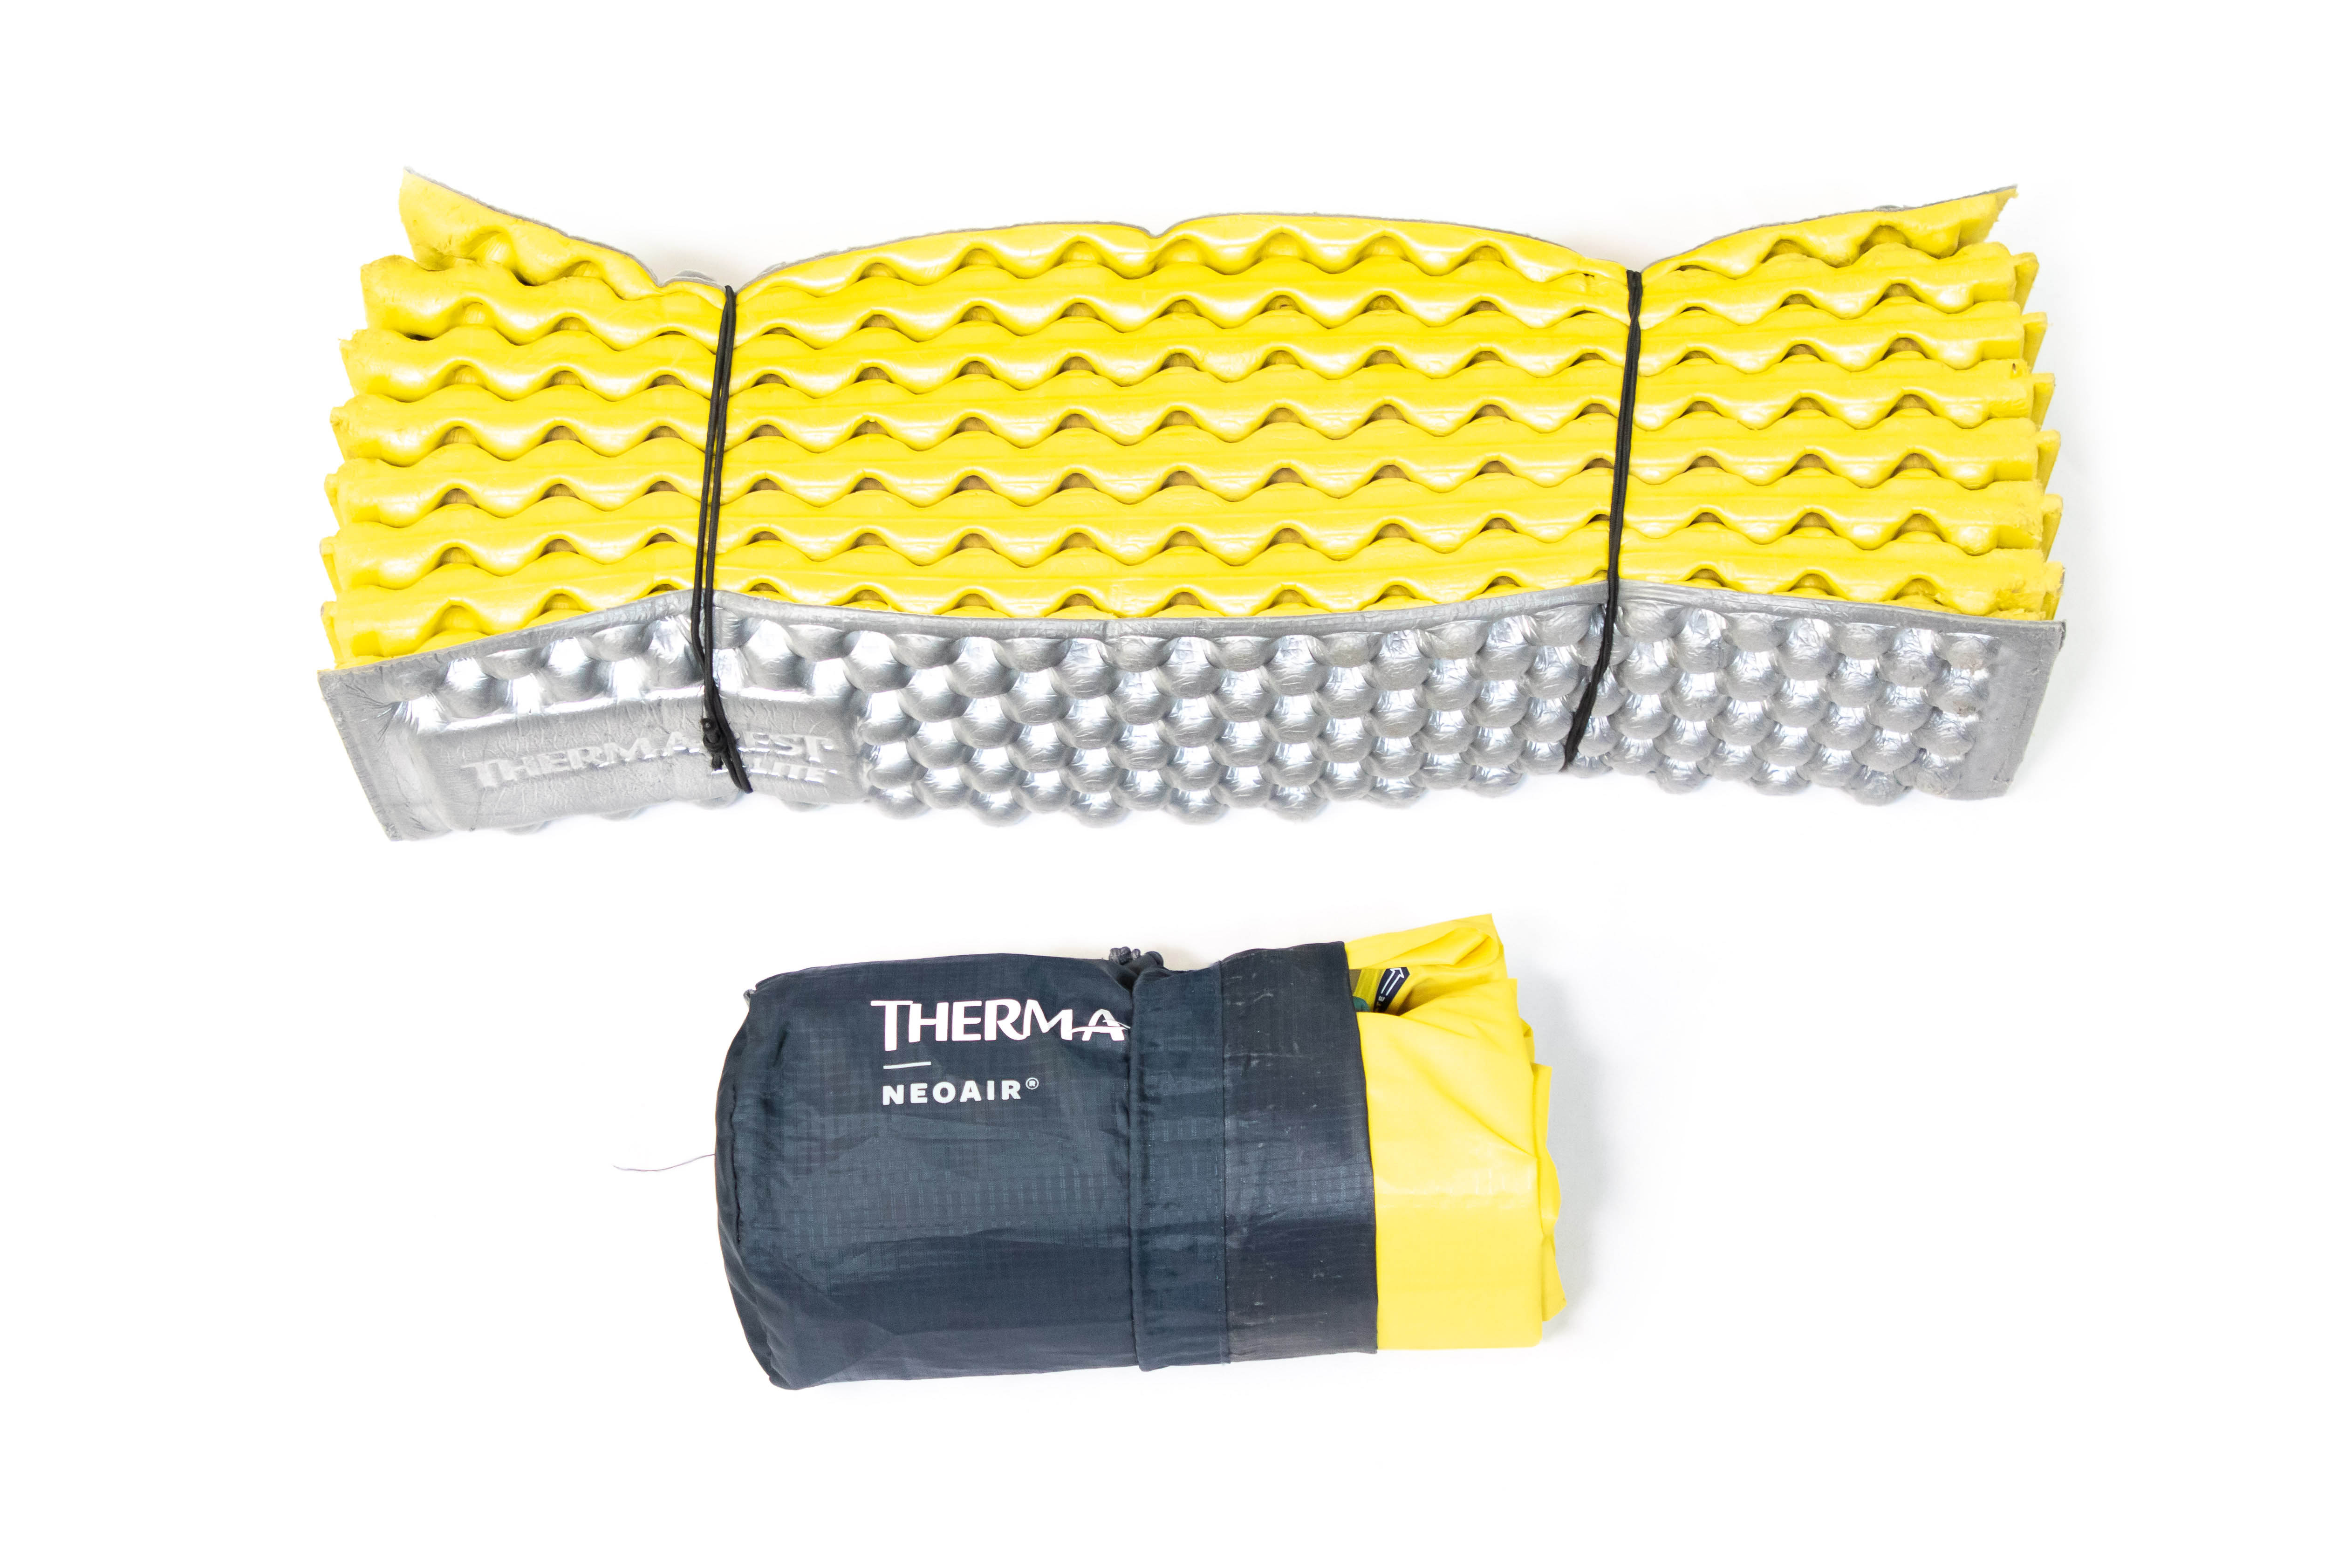
Some pads come in different lengths, and some ounce-counters prefer a short pad (long enough only for hips and shoulders). But this strategy only works for warm weather trips and those where you have enough spare clothes to use as insulation under your legs. If you decide you don’t need a full pad and would prefer to save a few ounces, you can also cut your existing closed-cell foam pad shorter if that’s what you already have. Some people have even shortened their air pads, but I don’t recommend it. My guide to sleeping pads goes into this purchase decision in more depth.
Quilt or sleeping bag
For a long time, outdoorsmen had only one choice if they wanted a warm night’s sleep, and that was a traditional mummy sleeping bag. But that was before 900 fill-power down and the design advancements that have made quilts a firm favourite with the ultralight crowd. With no hoods, bottom insulation, or zippers, quilts are lighter and less restrictive than sleeping bags. Quilts don’t put anything underneath you, but that’s the point. When compressed, fill has no insulating value, and with a quilt there is no ‘wasted’ fill (For a full explanation see my guide on sleeping bags and quilts).
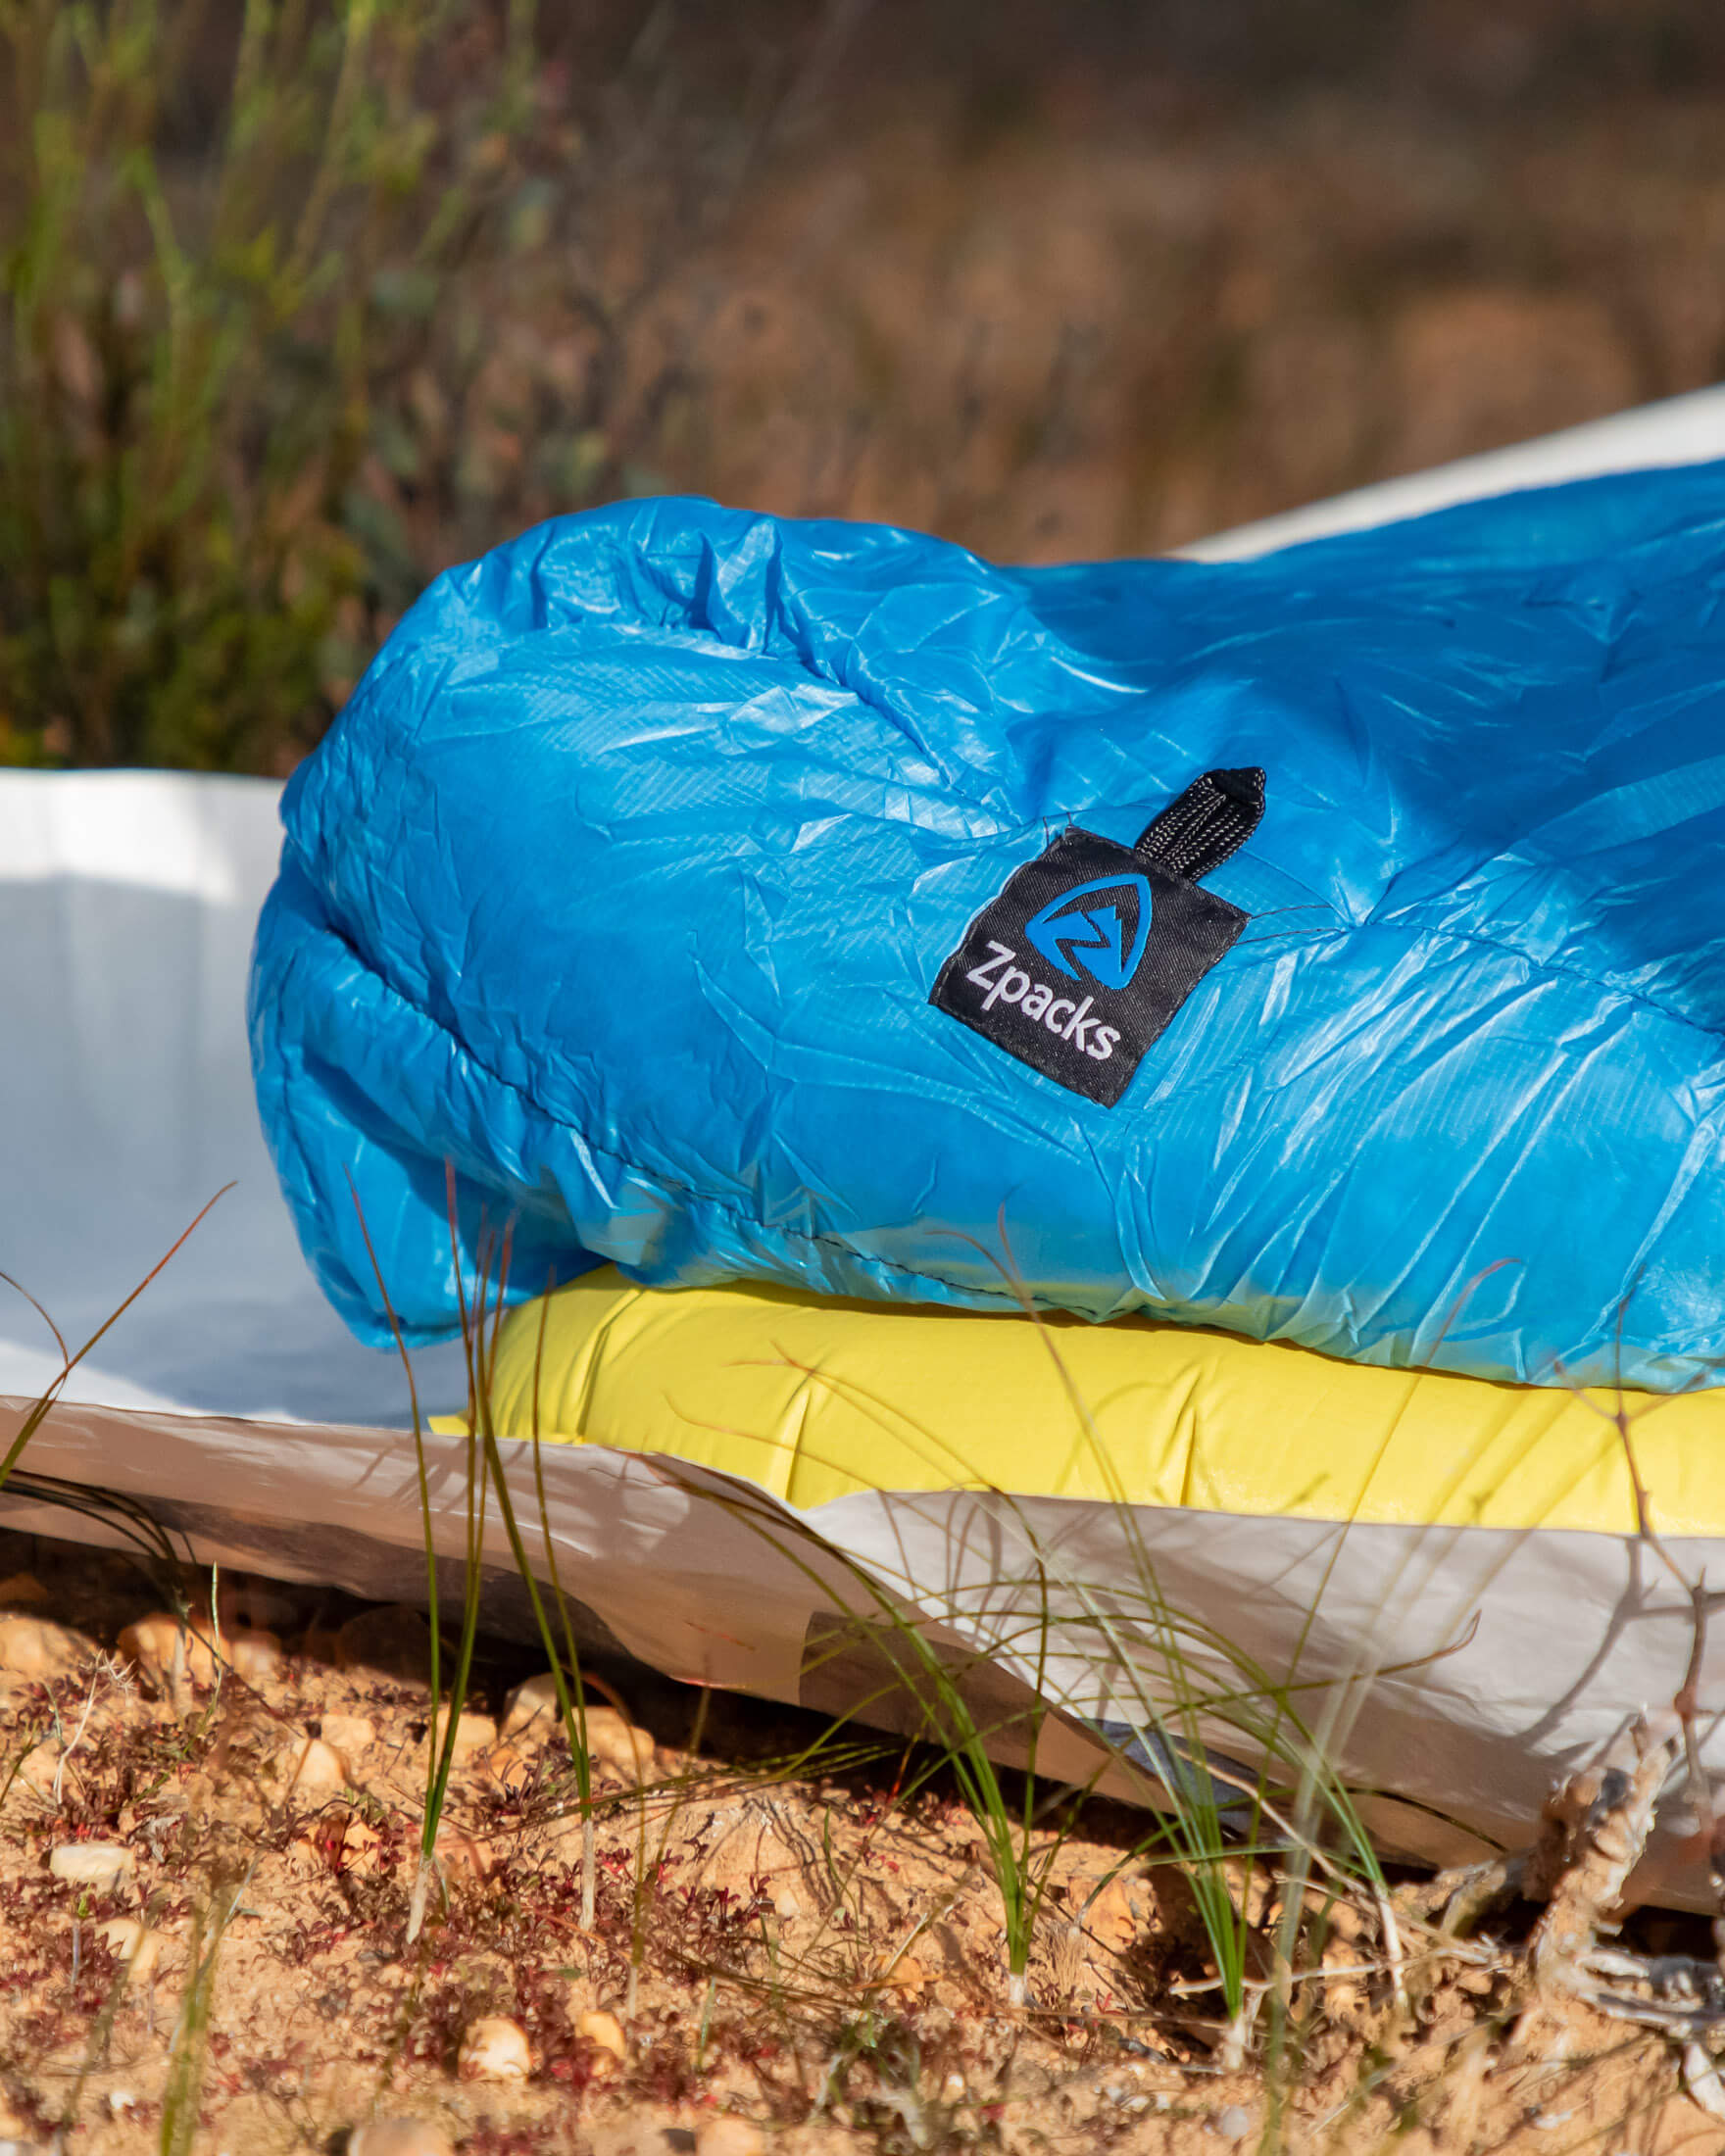
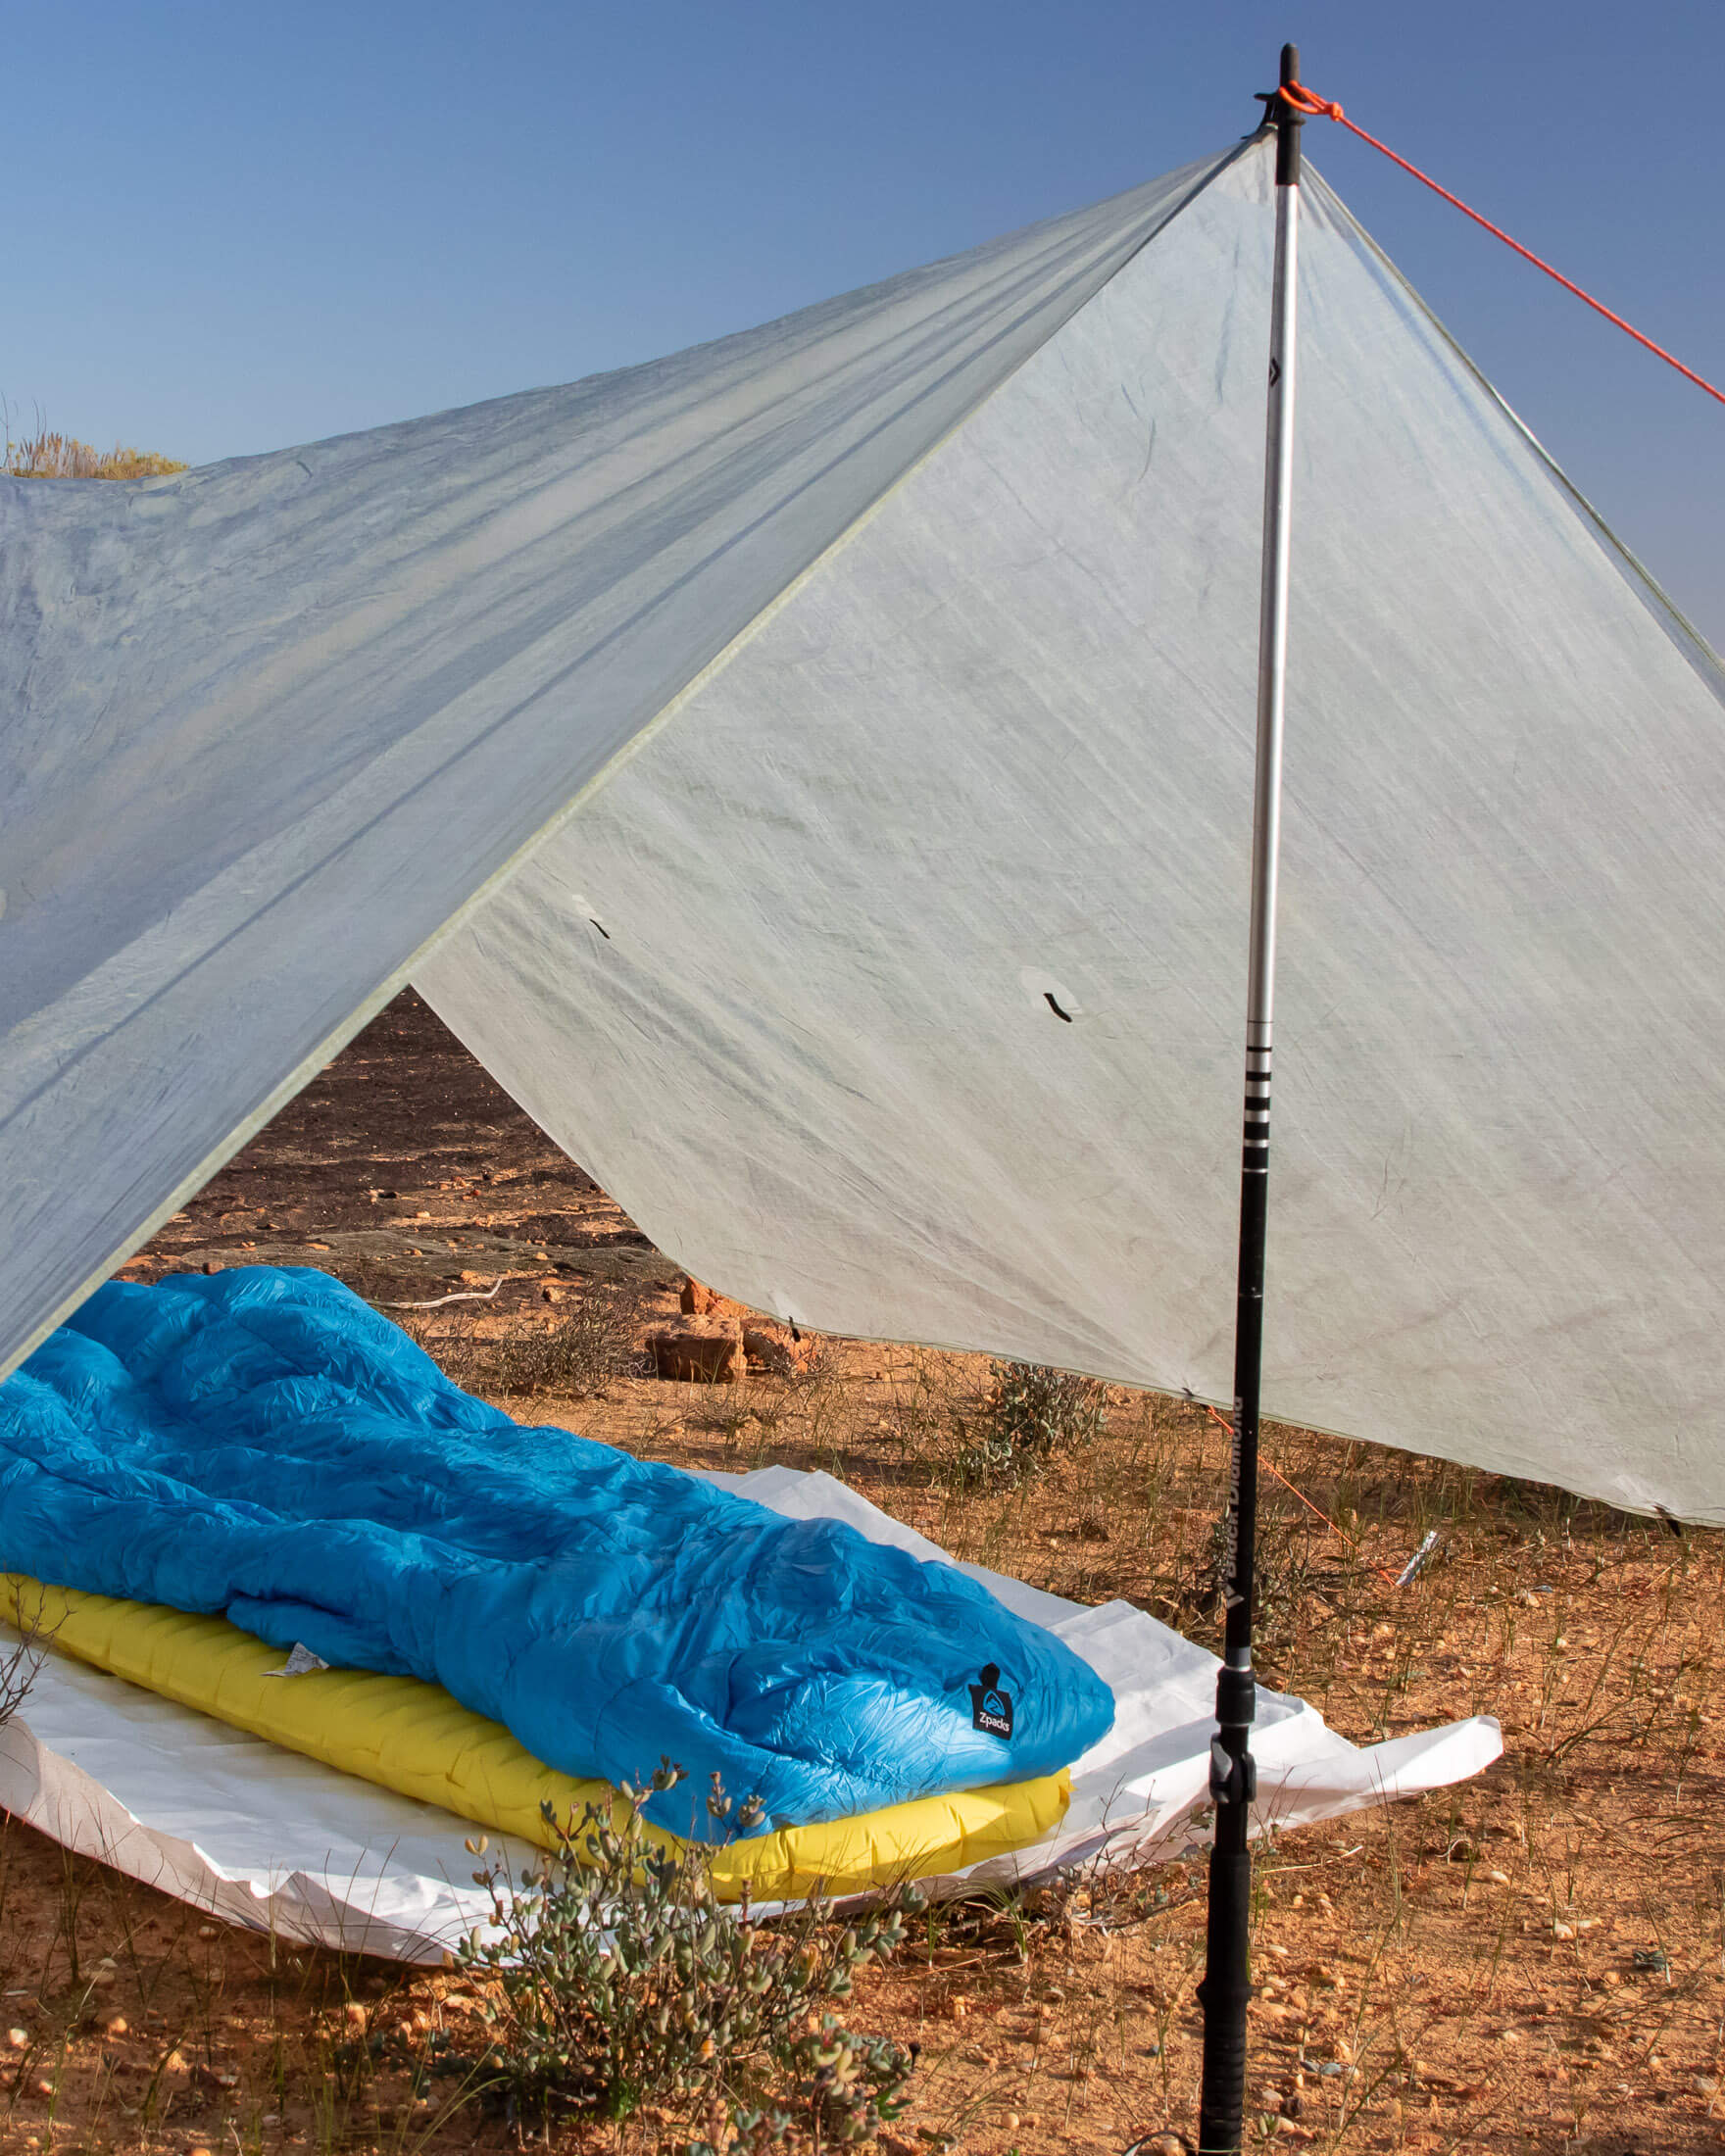
There are only two major downsides to a quilt. It won’t cover your head (you’ll have to wear a warm hat if it gets cold). And you’ll have to attach it to your sleeping pad with a strap and clips if you want to keep it properly positioned – a little more fuss but something that quilt fans get used to. On that note, don’t discount personal preference. Some people just prefer a sleeping bag for its simplicity and security, and they will happily take a weight penalty for the sleep setup of their choice. If you decide to go with a quilt, just be aware that quilt temperature ratings are generally not as accurate as those for sleeping bags. To be safe, choose a quilt rated for temps 10 degrees colder than you think you need.
Pillow
In my hiking guides, I recommend using a dry bag as a pillow. This can work well if you have enough clothes to at least partially fill the bag (or whatever it is you’ve put your clothes in). The problem with relying on this strategy when fastpacking is that you might not have enough spare clothes to fill your pillow (You’re just carrying less that you would on a hiking trip). You can try to seal air inside a dry bag, but dry bags tend to become porous and leak over time. If you don’t want to have to inspect your dry-bag-pillow before every trip and replace it when necessary, it would be best to pack an inflatable pillow. At 45 grams (1.6 oz), it won’t add any noticeable weight.
Camp kitchen
Stove
When it comes to eating and cooking on a fastpacking trip, there are two approaches: with and without a stove. Minimalists like to point out the obvious – that leaving your stove and cookset behind saves weight. But with ultralight stove and pot combos weighing little more than a single freeze-dried meal, you don’t have to incur a weight penalty for the ability to boil water and cook. And then you also have to have to factor in the weight you can save by carrying dehydrated and freeze-dried meals, which are significantly lighter than ready-to-eat meals. The reduced weight of several dry meals can easily offset the extra weight of a stove.
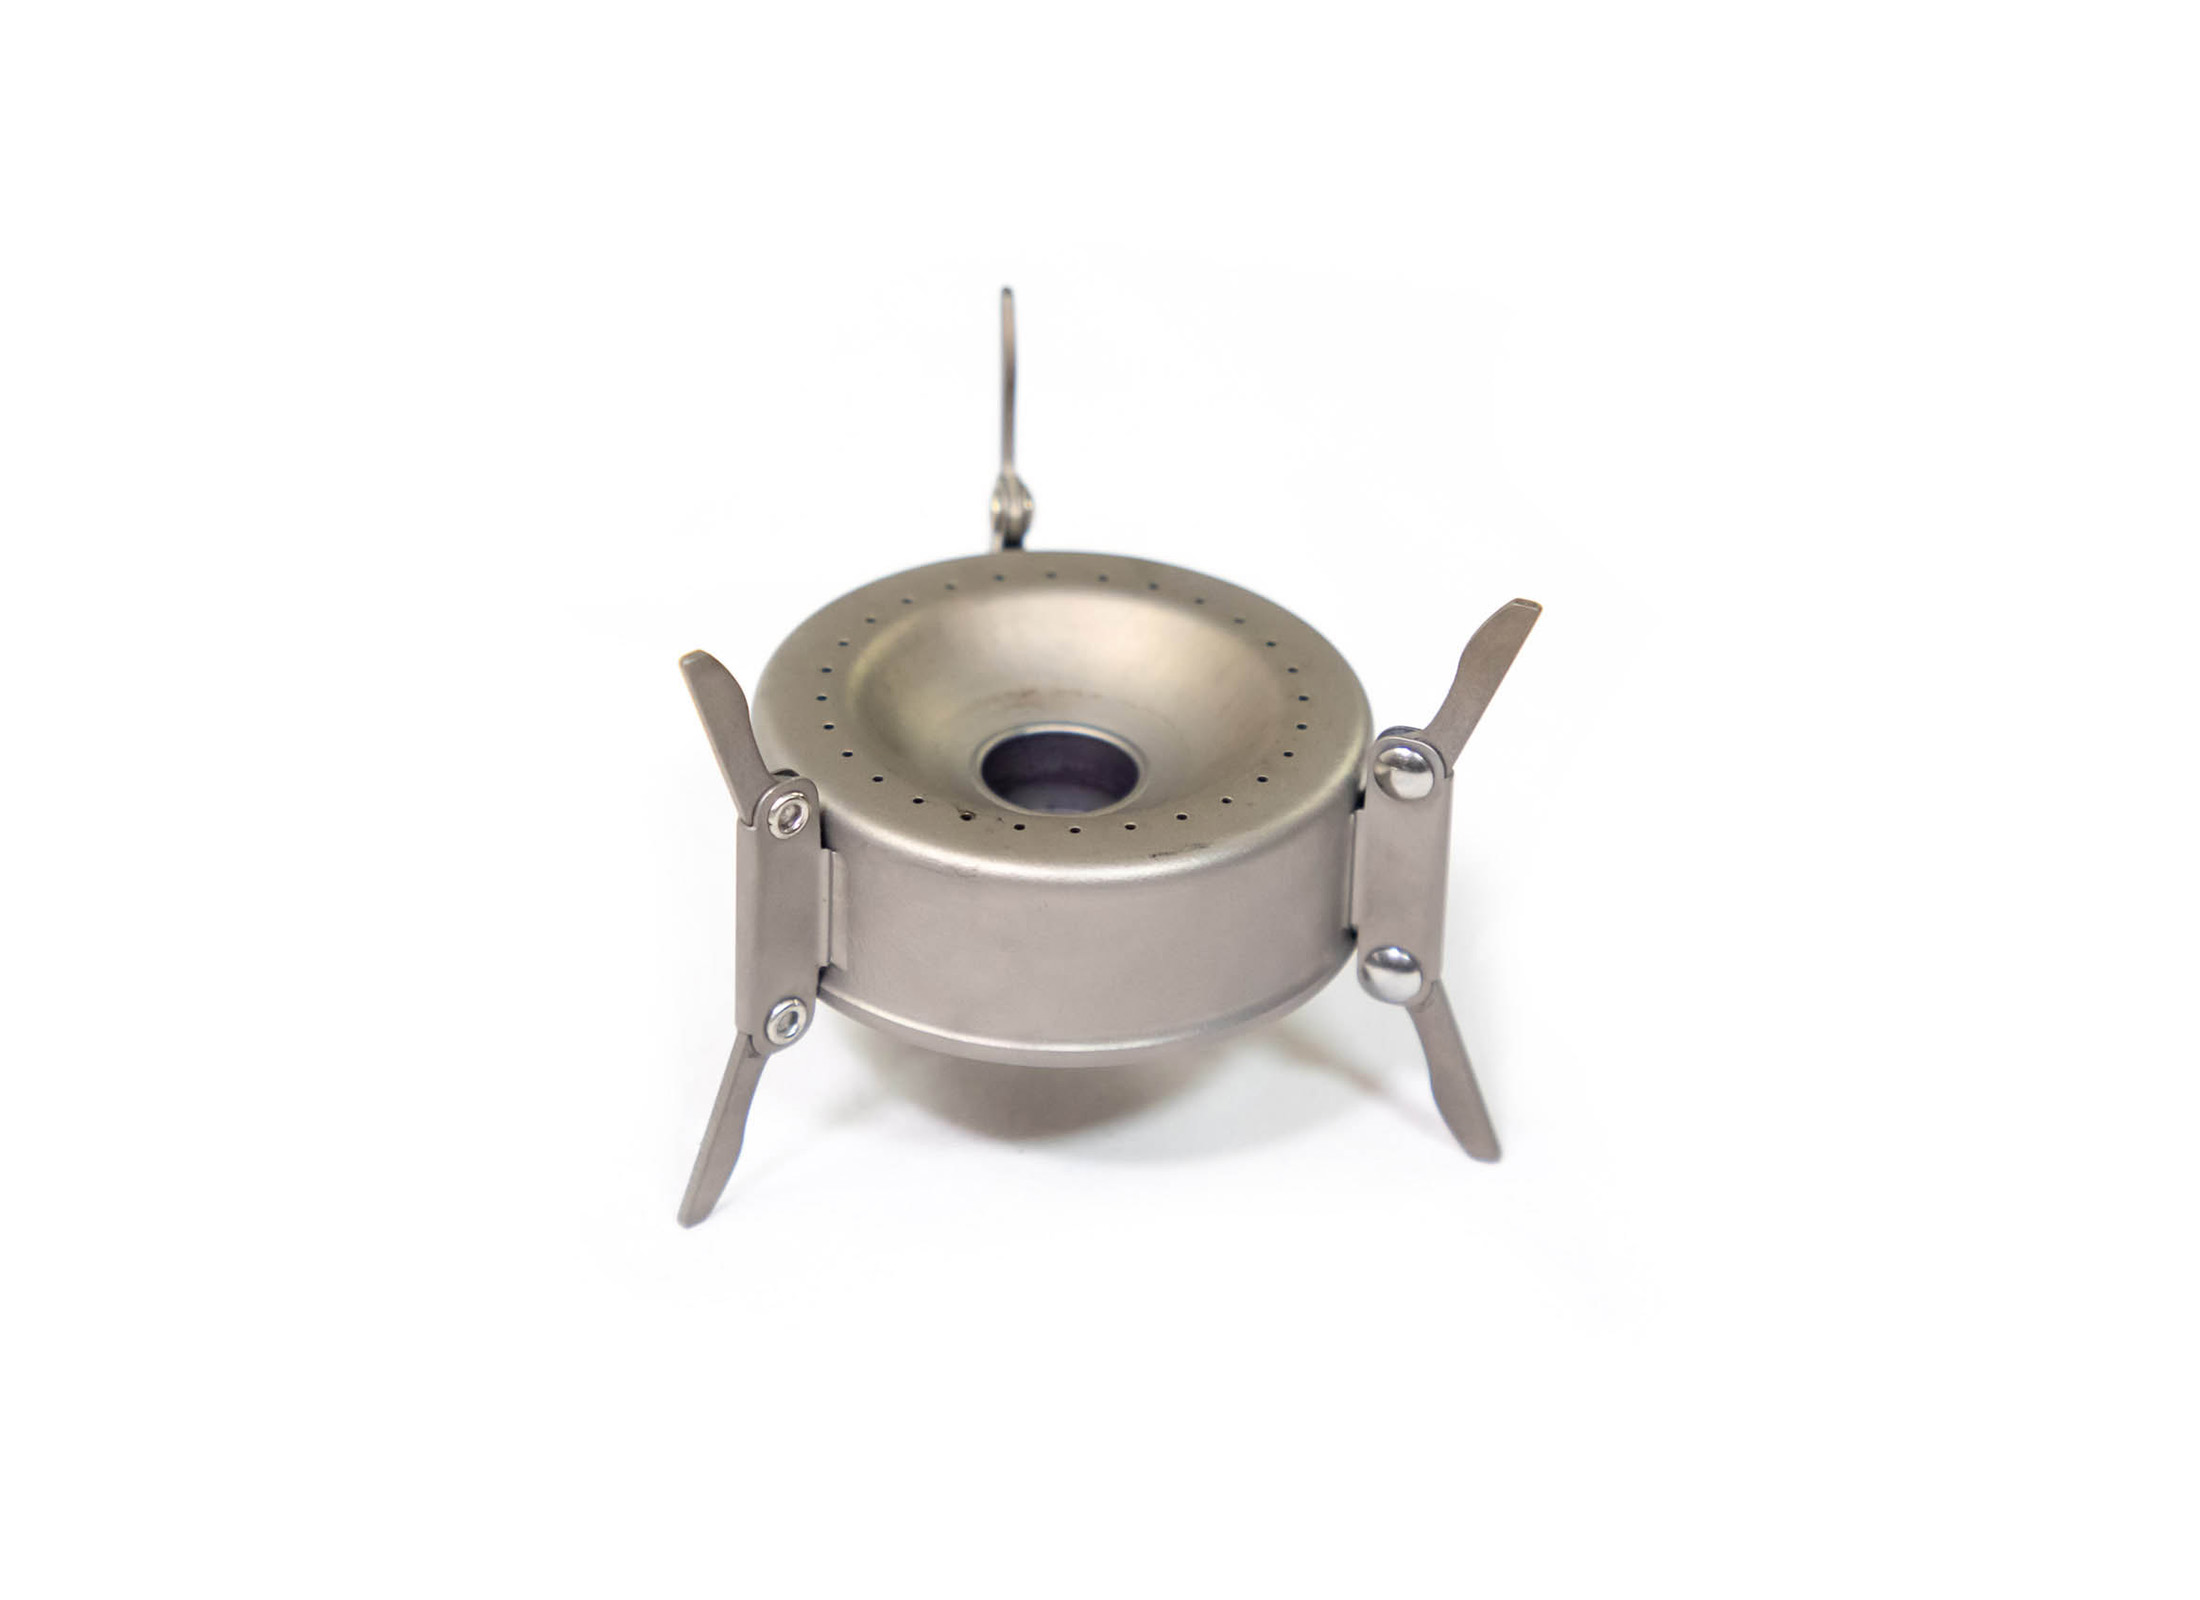
If you decide to pack a stove, the next decision is what kind of stove? Light canister stoves produce powerful flames, but these stoves weigh in at around 650 grams (23 oz) or more with canister and pot, making them more practical for teams who can share the weight. Solo fastpackers might find that half a kilo is too much to dedicate to a stove kit and so might consider an alcohol stove instead. My ultralight stove kit weighs only 400 grams (14 oz) with a windscreen, pot and 8 oz of fuel, and performs as well as a canister stove with the exception of simmer control. For a full explanation of the pros and cons of the different types of stoves, see my guide to backpacking stoves.
Tip: Carry a flint striker or lighter even if your stove has a piezo ignition.
Pot
In fastpacking, your pot needs to serve as both cookware and serving vessel (bowl and cup), so it should be easy to hold when warm and be shallow and wide enough to get to the bottom of with a spoon. Look for a squat pot between 750 millilitres and one litre. This will be easy to cook in and eat out of, and it will be light enough to not weigh you down. A wider pot will also hold a canister if you need it to. If you go with an integrated stove system, you’ll have to use whatever pot your stove is built into, making your choice of cooking system even more important.
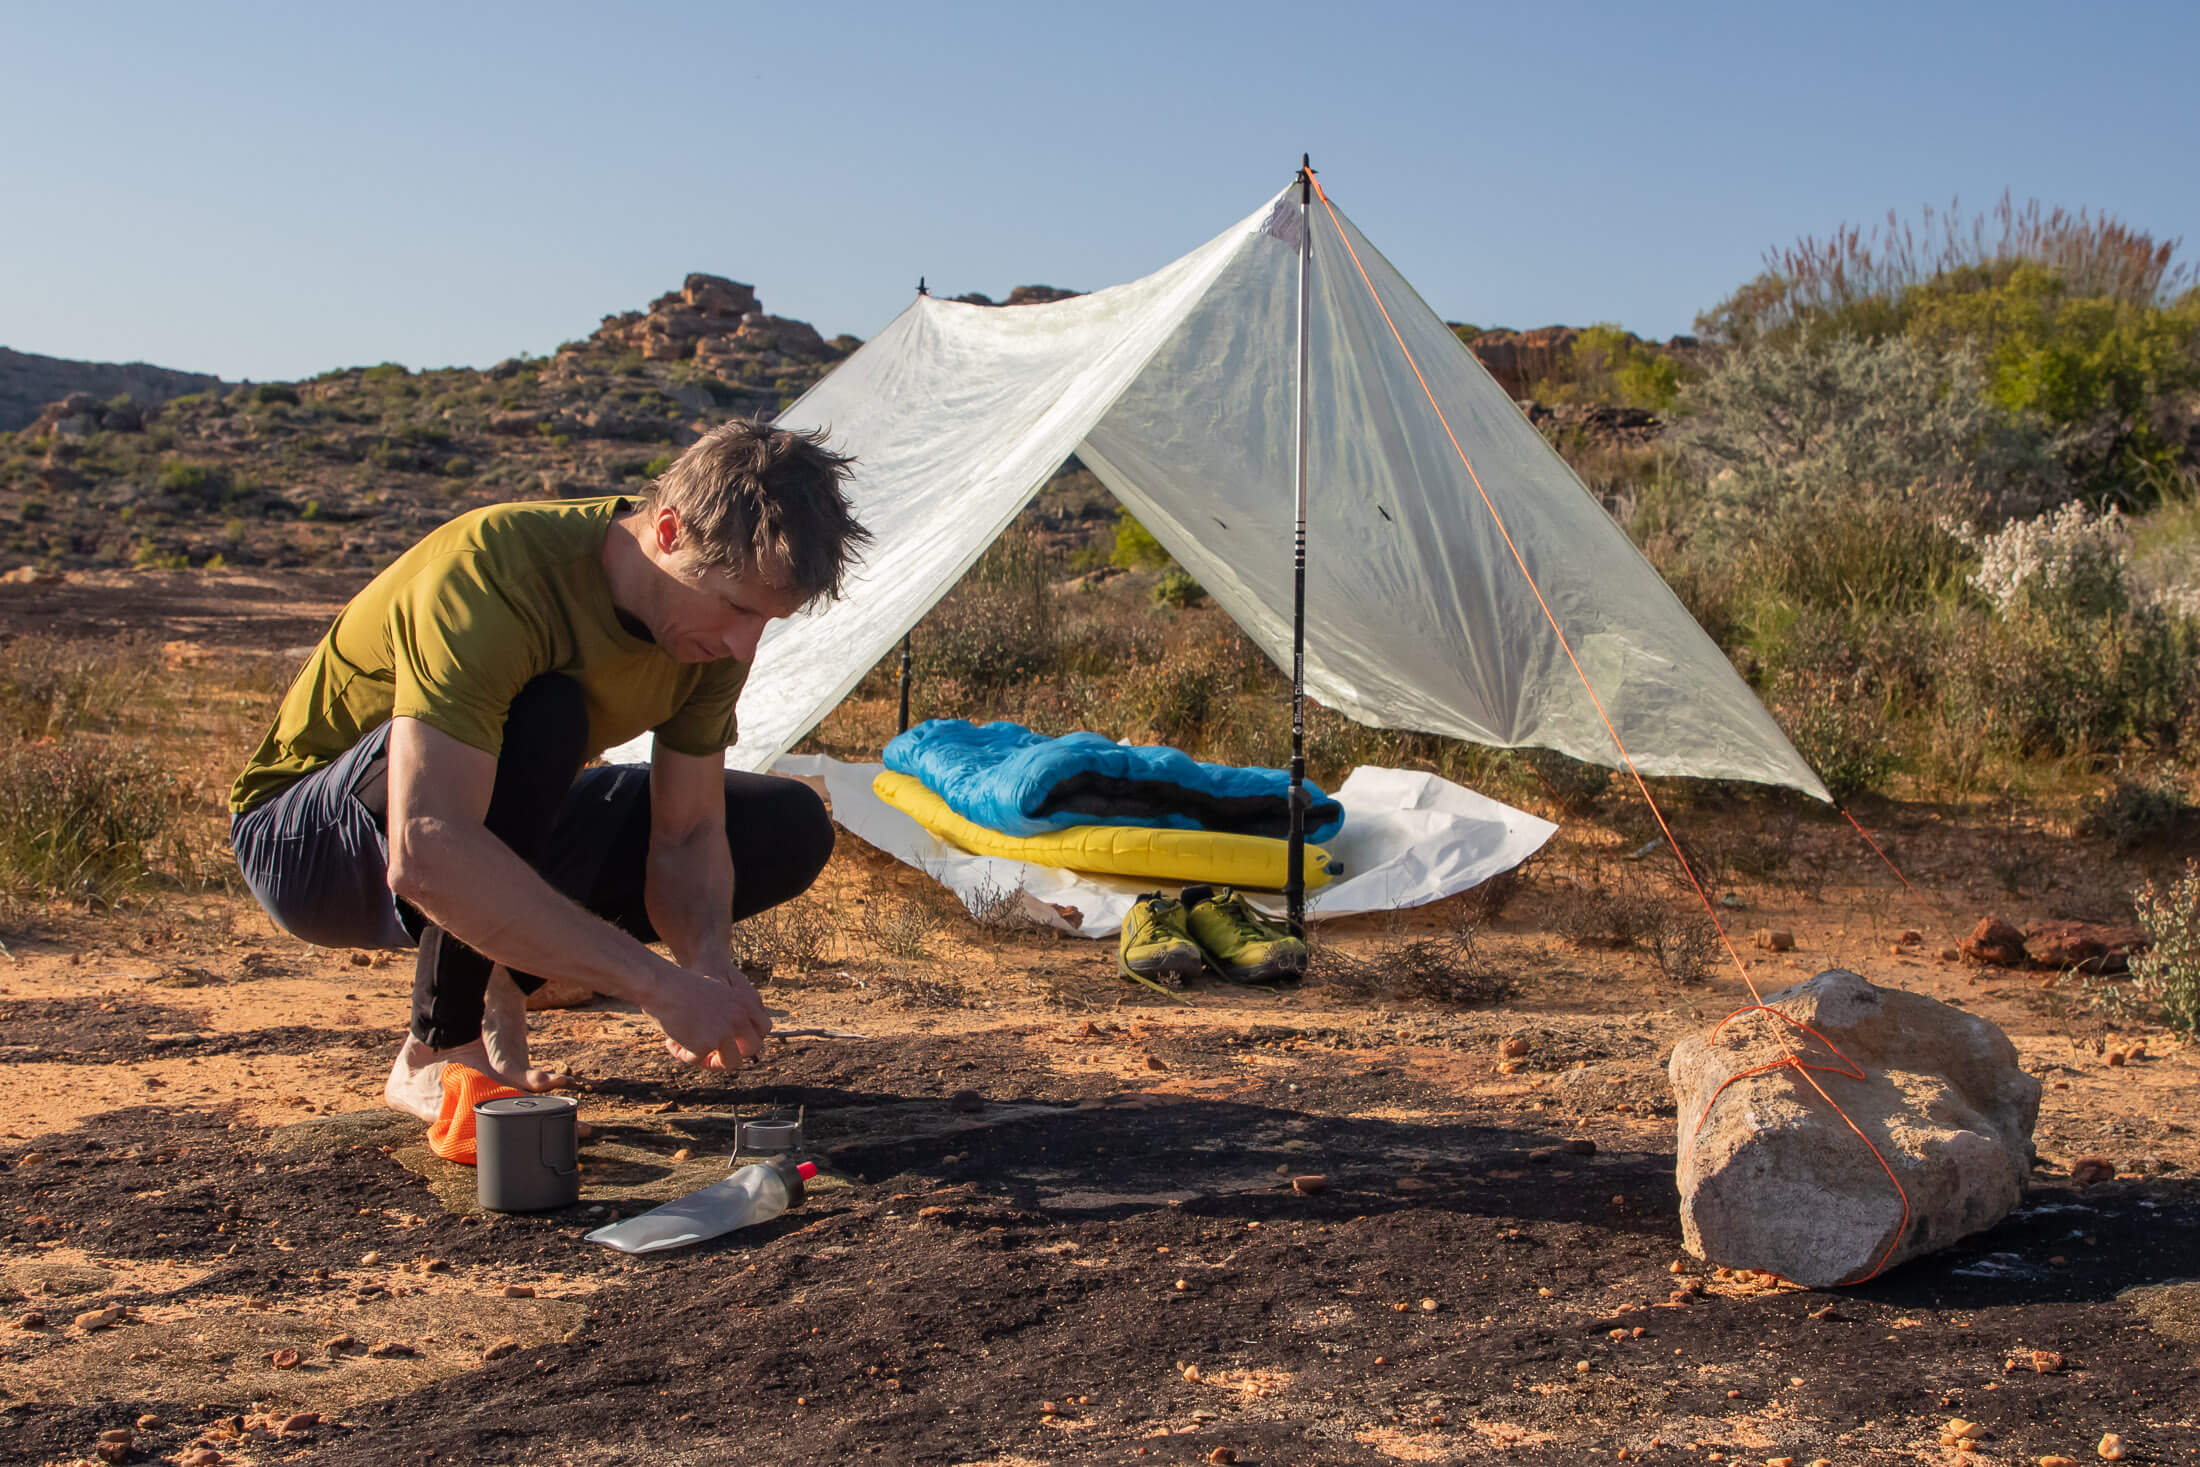
Other important features include a snug-fitting lid and a handle or gripper. My preferred pot is made of titanium. This lightweight metal doesn’t distribute heat as evenly as aluminium (important for actual cooking), but on fastpacking trips that’s not a concern since I’ll only really use it for boiling water for instant oats and dehydrated meals. This pot also has an insulated handle that serves much the same purpose as neoprene sleeves on integrated pots – allowing you to get a better grip on it while it’s still quite hot.
General gear
Headlamp
A sip & squeeze filter will provide sufficient protection in most North American backcountry areas. In pristine environments, where human activity is relatively low, the main threats are protozoa and bacteria. However, if you’re following a popular trail and you suspect that some trail users have been practicing less than perfect water sanitation, it would be wise to treat your water with a chemical disinfectant like chlorine dioxide. For backcountry water treatment best practices, see my article on filtration and purification.
Toiletry kit
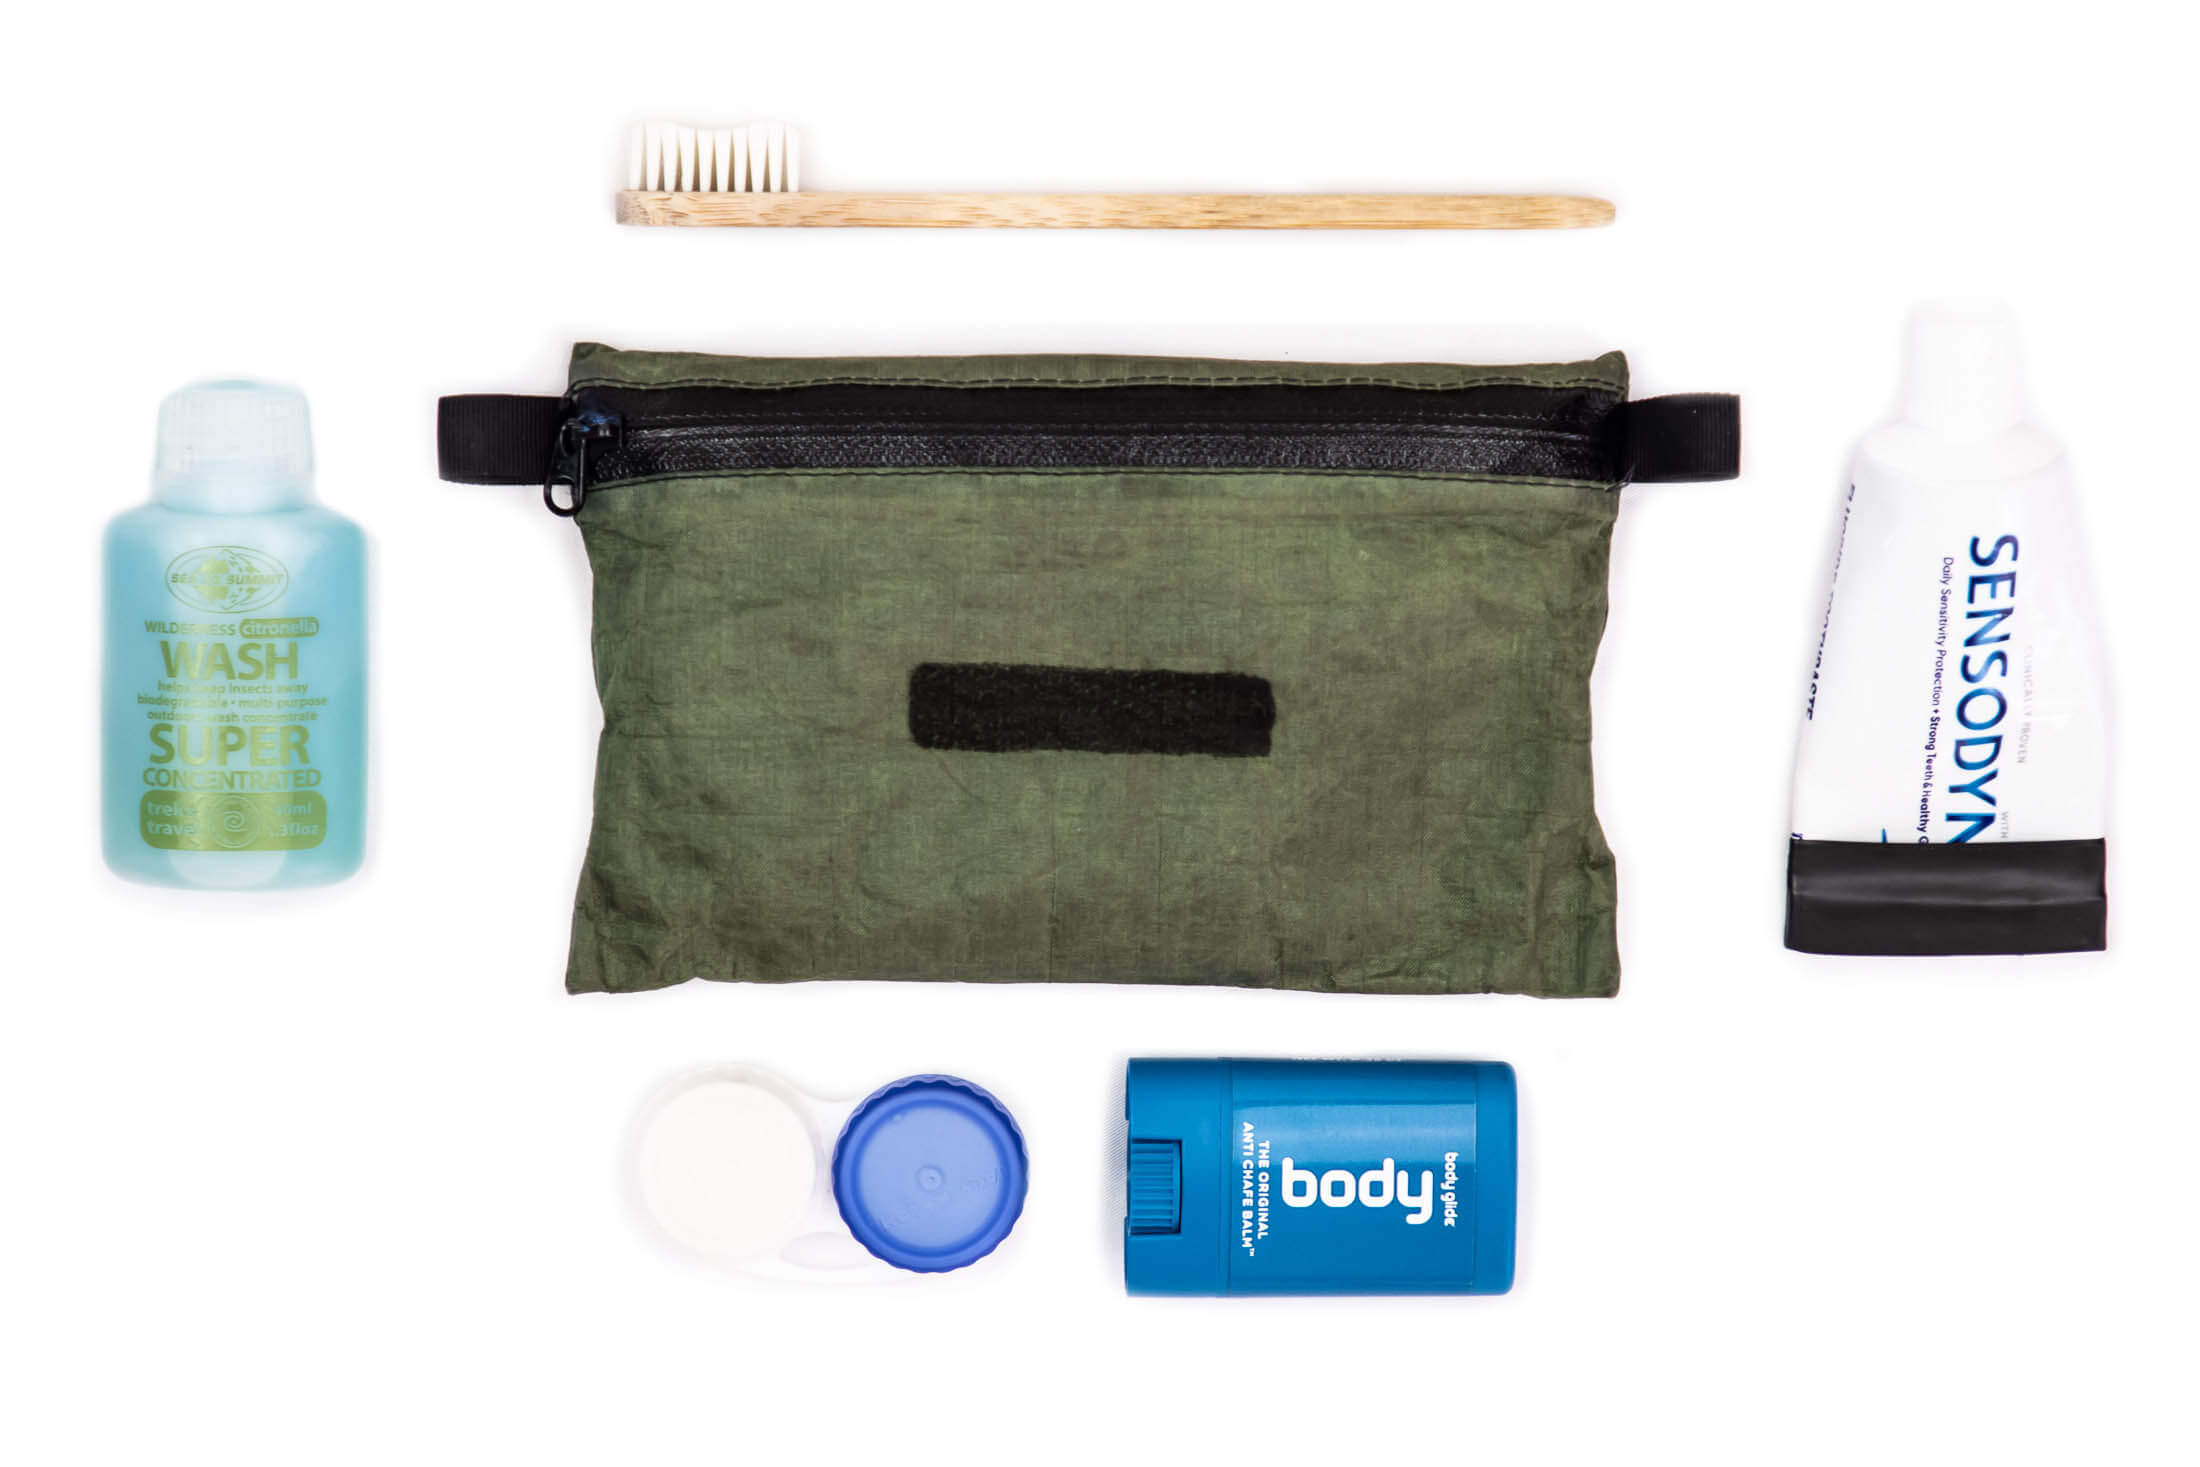
Get everything in the smallest bottles possible. Decant soap into small bottles and take only one-third full tubes of toothpaste (You can cut off the bottom empty half and fold/tape over the end). As for your toothbrush, the only way to make that smaller is to cut it in half – not a bad strategy if every gram matters. Depending on conditions, you might also want to pack bug spray and lip balm. Some people use plastic pouches as toiletry bags, but these tend to trap moisture, which can lead to a manky toothbrush. A small zippered bag made out of breathable nylon fabric is usually a better option since it allows contents to dry out.
Water filter or purifier
A sip & squeeze filter will provide sufficient protection in most North American backcountry areas. In pristine environments, where human activity is relatively low, the main threats are protozoa and bacteria. However, if you’re following a popular trail and you suspect that some trail users have been practicing less than perfect water sanitation, it would be wise to treat your water with a chemical disinfectant like chlorine dioxide. For backcountry water treatment best practices, see my article on filtration and purification.
Go bag
Here I’m referring to a different type of go bag – that which you grab when nature calls. In some wilderness areas you’re required to pack out your used TP or wipes. To do that safely (and make it a little less gross), I suggest a double-bag strategy. Put some of your favourite two-ply or wet wipes into a ziplock bag, and put this with a second ziplock bag for the dirty TP or wipes into a small dry bag (1L). When you’re done, you just fold over the TP or wipe so that the clean side is on the outside and put it into a ziplock bag marked ‘dirty’. This then goes into the dry bag until it can be tossed into a trash bin. See more wilderness ablution tips in my article unambiguously titled How to Poop in the Backcountry.
First aid kit
Don’t rely on an off-the-shelf first aid kit until you have carefully examined its contents. Many lack essentials like rehydration salts, blister patches, and scalpel blade (for lancing blisters). My article on what to put in a wilderness first aid kit provides instructions on how to assemble a first aid kit that will cover you for most common minor ailments without weighing you down. It’s quite possible to put together a useful kit that weighs as little as 120 grams (4 oz).
On trips into remote wilderness, it’s a good idea to carry a light survival or ‘fix-it’ kit. Many people combine their first aid and survival kits, but I keep mine separate for reasons I explain in my article on survival kit essentials. Items include flint striker, tinder, sewing kit, duct tape, spare rubber trekking pole tip, and a sleeping pad repair kit. On some trips I might even pack a few meters of 4mm accessory cord. In a pinch this can be used to create a spare pair of laces, replace a tarp guy line, or suspend a food bag out of reach of rodents.
Bear bag and spray
Although recommended, hanging your food is not much of a deterrent to a hungry bear. The best way to protect your food from a bear is to use a bear canister. However, that’s not really an option for fastpackers, who need to keep both weight and bulk down. Bear bags such as the Ursack Major Bear Bag make for low weight, low profile alternatives, but they don’t offer the same level of protection. Even if a bear can’t get into a bear bag, it might still pulverize its contents. To avoid such vandalism, it’s best to add another level of protection. By packing your food in odor-proof bags before putting it in the bear bag, you might prevent a bear from finding your stash in the first place.
Clothing
Top
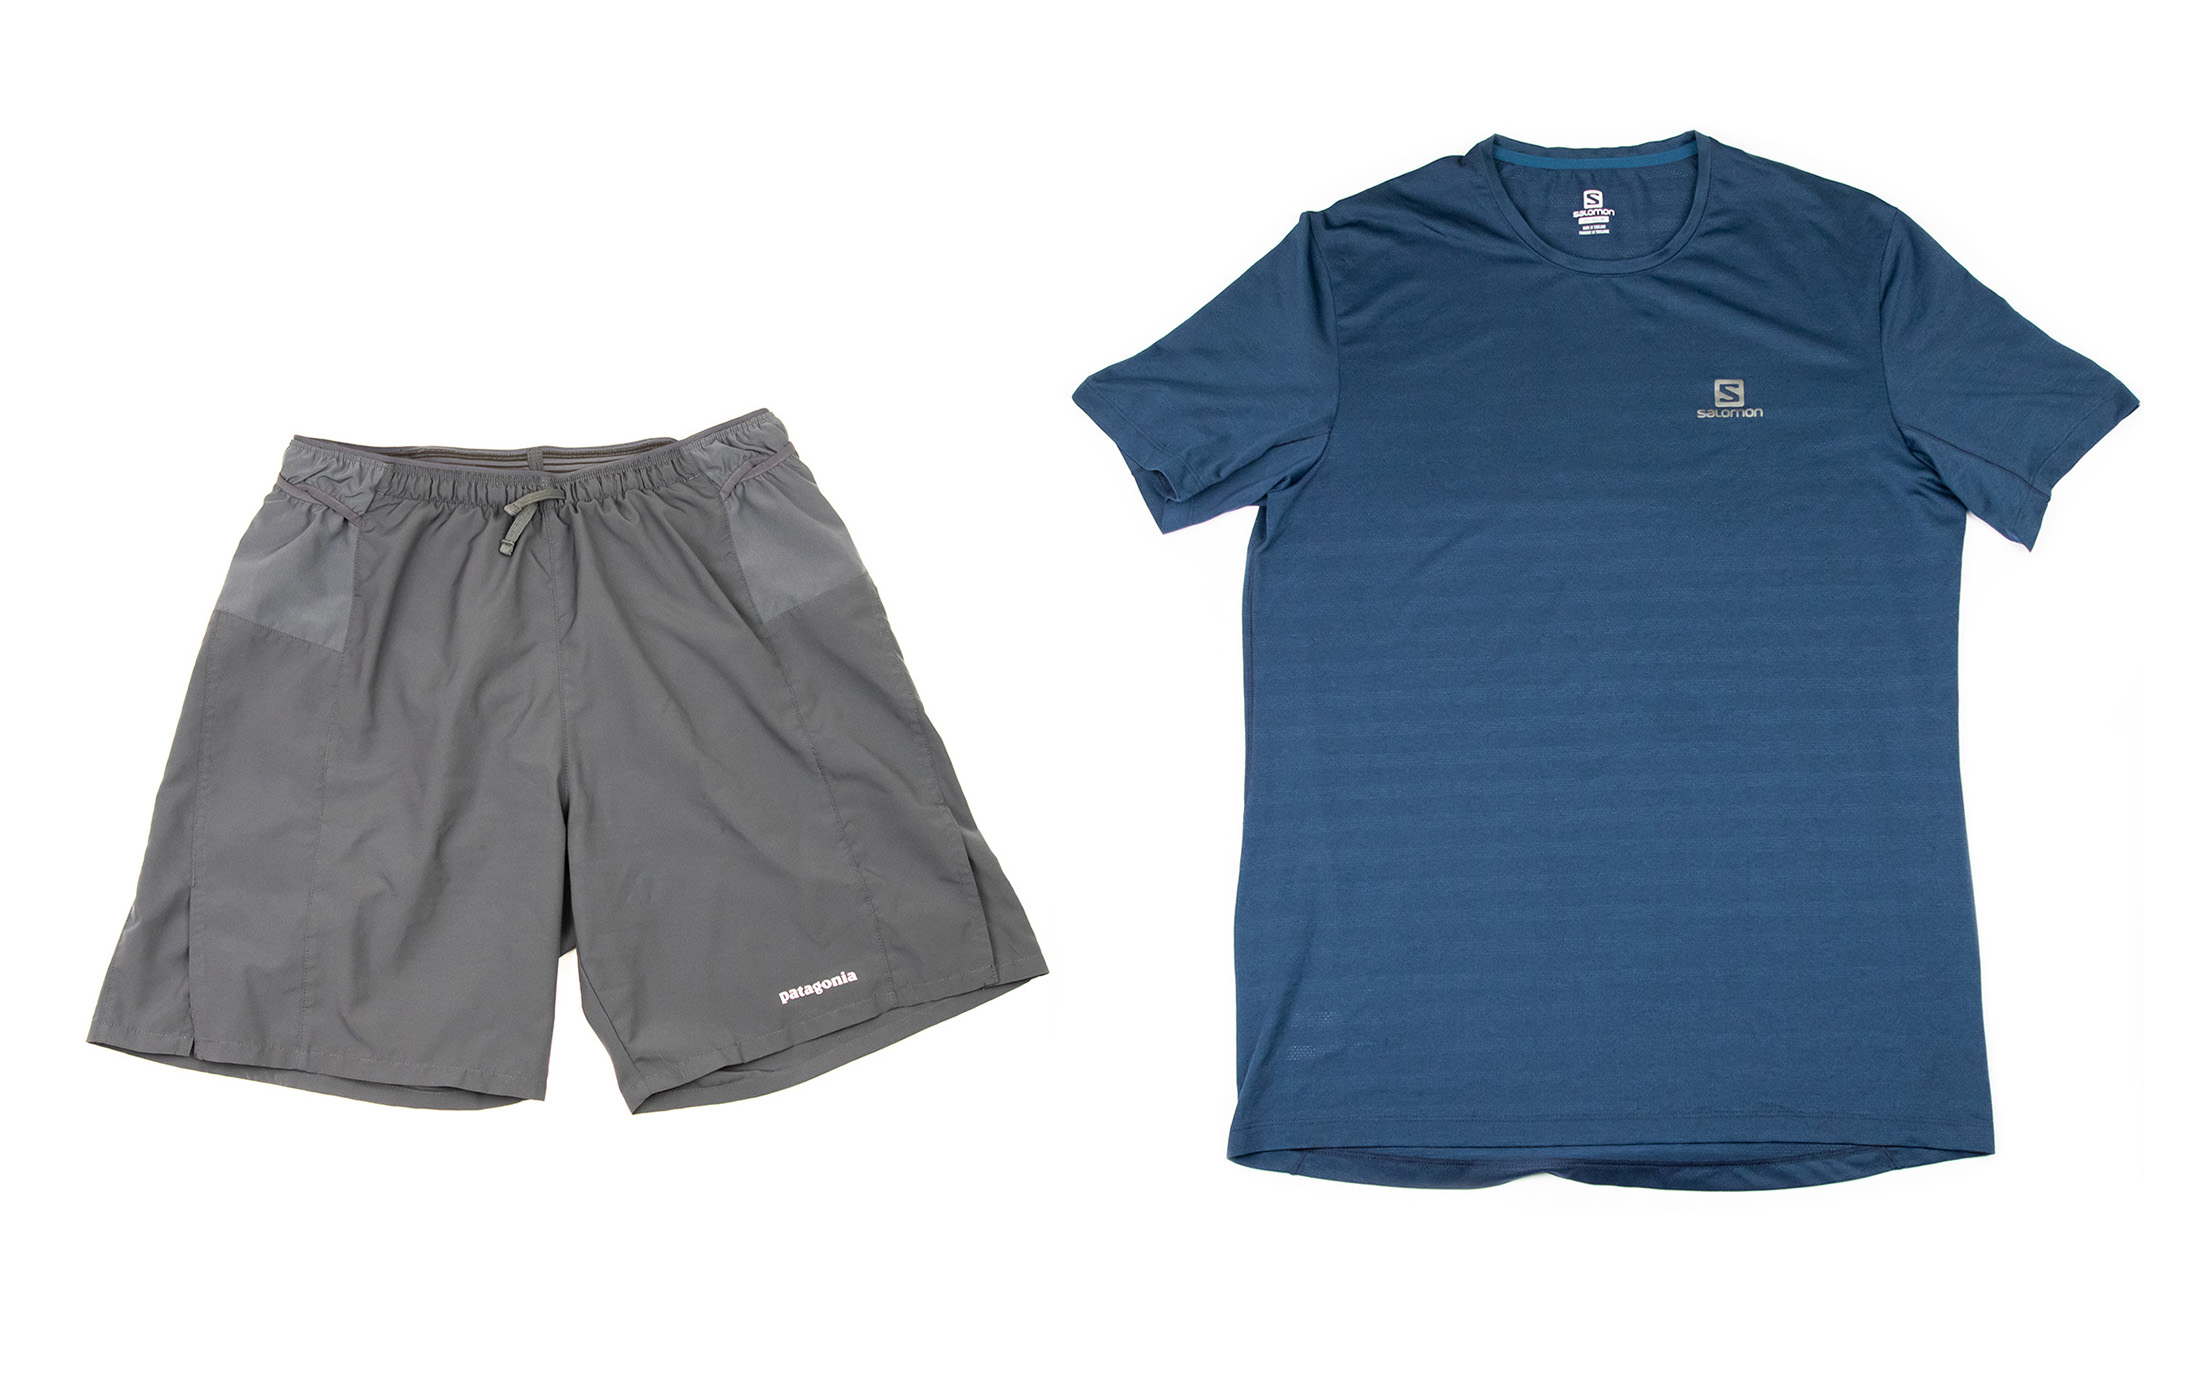
Your running clothes should be made of material that wicks away moisture and dries quickly (merino wools and synthetics are the order of the day). In warmer weather, you might need only a t-shirt or maybe a longsleeve UPF shirt, but colder temps could call for a baselayer top or even a midlayer like a light fleece (kept in your pack until you really need it). On trips lasting more than two days, you can still get by with just one running shirt by wearing and washing it in rotation with the top you wear in camp. You might smell a bit, but that’s the price you pay for going light.
Pants
Your running pants should allow for maximum movement and be made of breathable and moisture-wicking synthetics. Shorts are the warm weather go-to for many runners while tights vary in warmth and can be worn in a wide range of conditions depending on their length and fabric. Both running shorts and tights are designed to be worn without underwear, but this is a personal choice which I go into in greater detail in my article on how to choose running pants. Wearing underwear with tights can actually make more sense when fastpacking since it allows you to wear the same tights day after day while you only change your underwear (significantly lighter and less bulky).
Underwear and socks
As with your other apparel, socks and jocks should also be made of a moisture-wicking synthetic that offers next-to-skin comfort. But, if it’s really cold, you might want to consider merino wool (also a good material to have in tights too). Also, when choosing underwear, look for low profile seams which won’t contribute to chafe. When packing spares, it’s best to have a clean pair to put on every day as these will get sweatier than the crepe liner in a pair of running shorts. The same goes for socks although if you wash and wear, you can get away with just one or two extra pairs.
Camp clothes
In addition to your running clothes, you might want something dry, clean and warm to put on once you’ve reached camp. For me that’s a clean T-shirt and pair of lightweight casual shorts or fleece pants. I also pack a woollen hat to sleep in if I’m carrying my quilt (the norm). Without a hood, a quilt doesn’t offer quite the same level of protection as a mummy sleeping bag, and a warm hat can prevent heat loss through your head on cold nights. To save space, pack your camp clothes and spare underwear in a light drybag. Once it has been compressed and sealed, your clothes will be up to fifty percent more compact.
Puffer jacket
For most fastpacking trips you’ll need two outer layers: some kind of lightweight shell for running in, and an insulated jacket for chilly evenings. For sheer weight-to-warmth ratio, there’s no beating a down or Primaloft jacket. The latter will be a little heavier than an equivalent down jacket, but Primaloft will still keep you warm even if it gets a little damp. Down, not so much. An insulated jacket can be worn inside your sleeping bag or quilt to achieve the toastiness of a bag rated several degrees warmer.
Running jacket or poncho
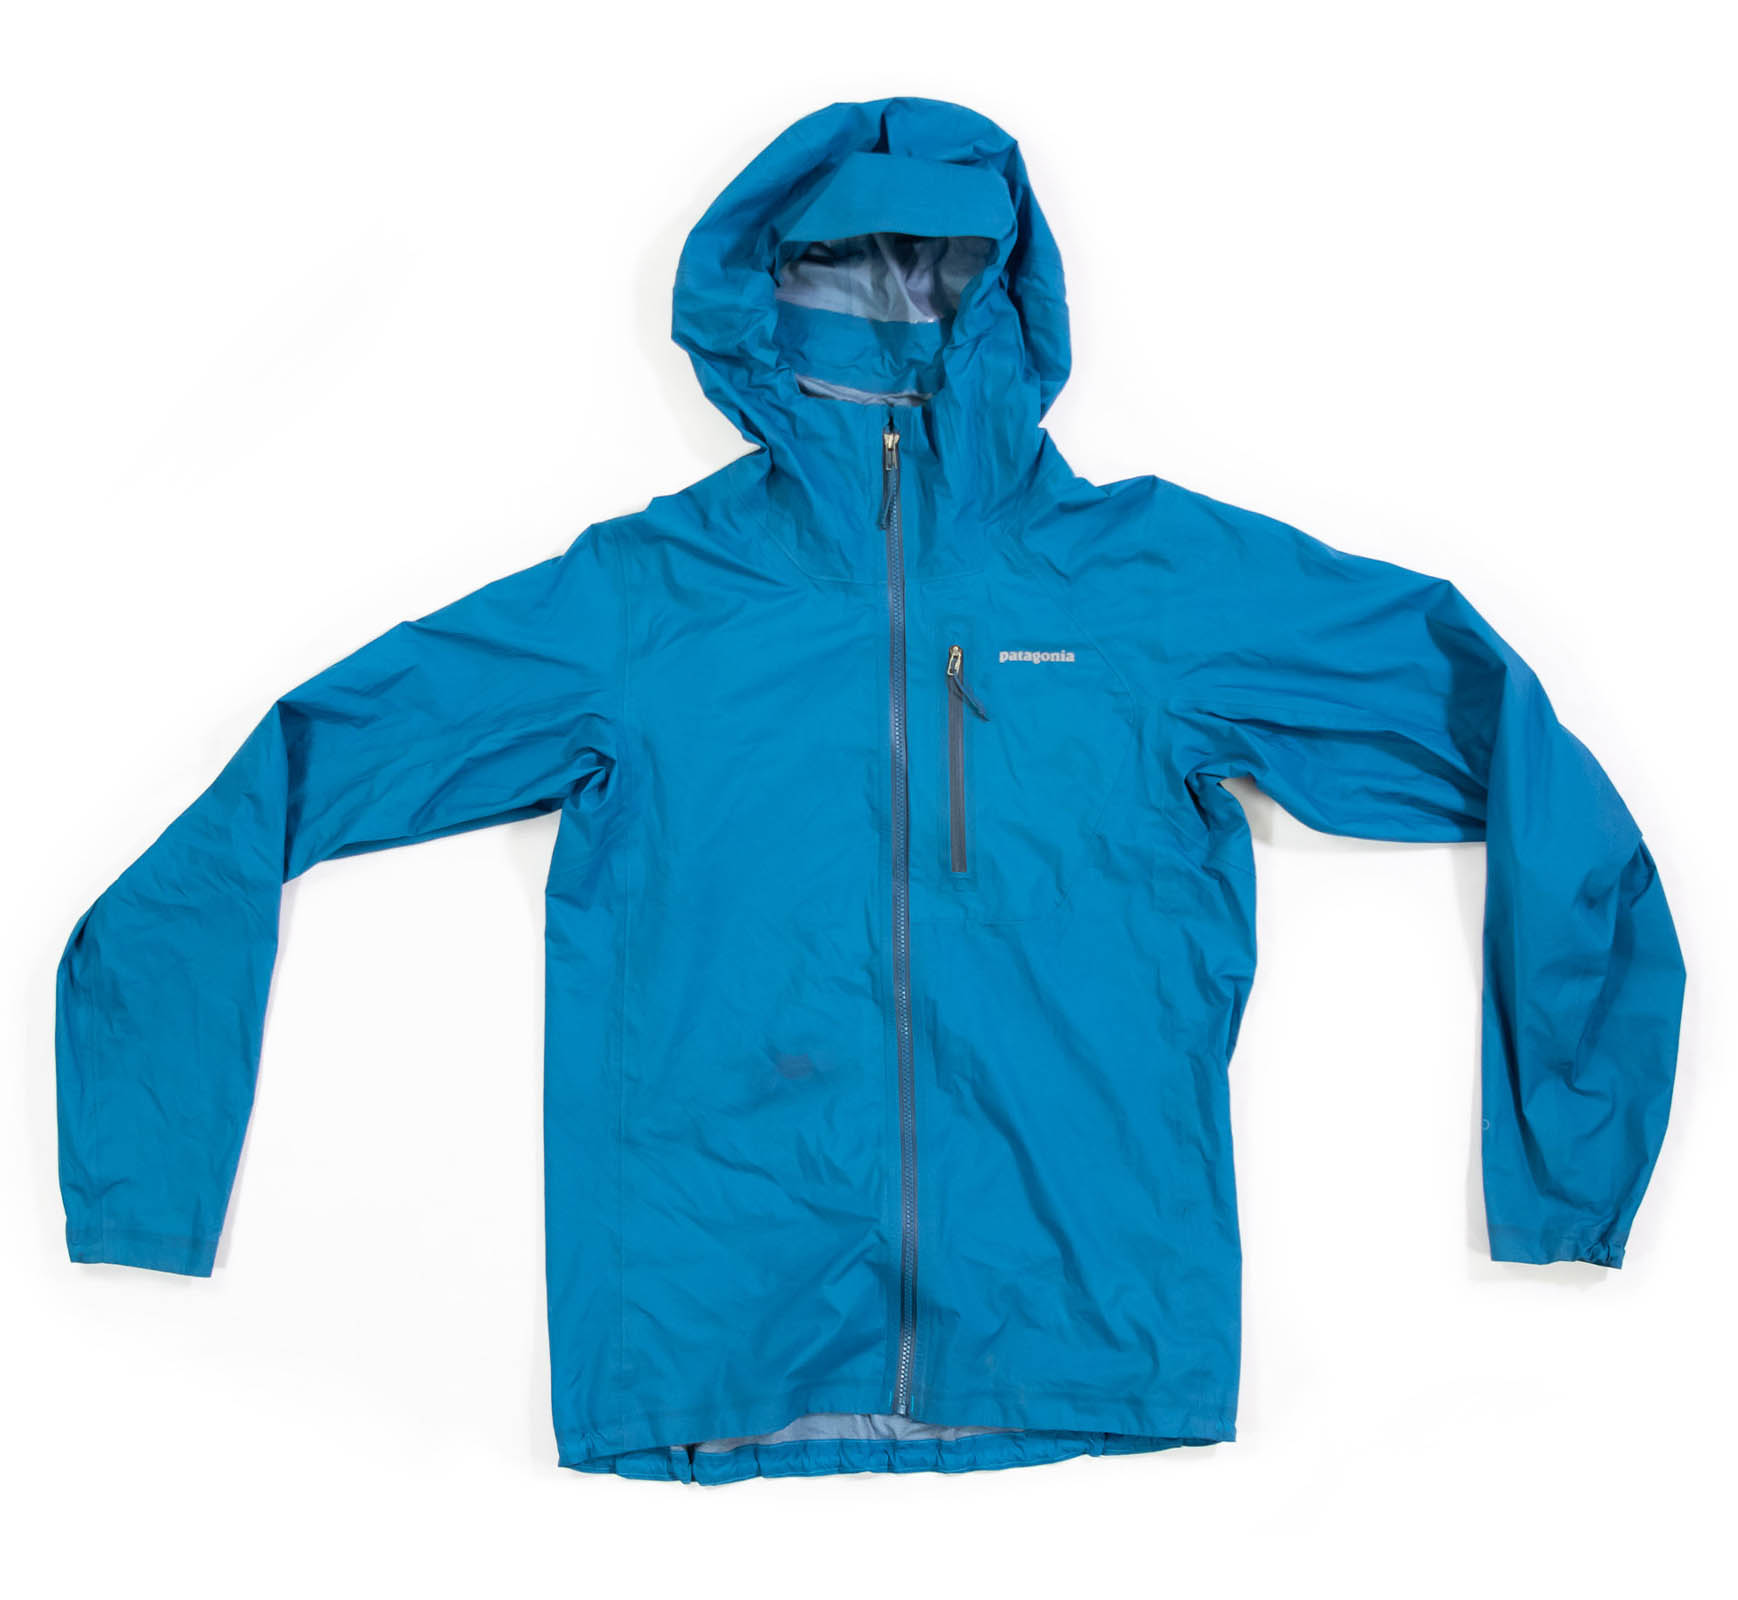
Running jackets come in varying degrees of weatherproof, from lightweight shells to heavy-duty outerwear, so it’s important to know what kind of weather to expect and to pack accordingly. A quality general purpose running jacket will weigh somewhere between 170 g and 230 g (6 - 8 oz), with heavier models being significantly more weatherproof and durable. Alternatively, you can carry an ultralight poncho, which can offer better ventilation in sweatier climates.
How to keep your base weight to nine pounds
The ideal pack weight for fastpacking is under nine kilograms or twenty pounds. If you exceed this by more than a few kilos, you’re going to notice it. But getting your pack weight under nine kilos can be a serious challenge. Three days worth of food can weigh around 2.4 (5.3 lb) kilograms, and you might need to carry as much as two litres of water. That’s 4.4 kilos just for food and water, which leaves you with only a 4.6 kg (10 lb) allowance for kit. Limiting yourself to this much gear is possible. To illustrate this, I’ve listed my solo kit below. If I were going to face swarms of bugs, I might pack a single-walled cuben fibre shelter (additional 300 g / 10.5 oz) instead of a tarp. Otherwise, this kit is good for most warm weather fastpacking adventures.
My kit list
| pack | Ultimate Direction FastPack 25 | 555 g | 1 lb 3 oz |
| shelter & stakes | Zpacks 8.5’ x 10’ flat tarp + 6" Sonic stakes x 8 | 250 g | 8.8 oz |
| groundsheet | Zpacks flat groundsheet | 80 g | 3.1 oz |
| sleeping pad | Therm-a-Rest NeoAir XLite | 340 g | 12 oz |
| quilt | Zpacks 20F Solo | 510 g | 1lb 2 oz |
| ‘clean water’ bottles | Ultimate Direction Body Bottle 500 x 2 | 130 g | 4.6 oz |
| ‘dirty water’ bottle for filter | Hydrapak Stow 0.5L | 43 g | 1.5 oz |
| water filter | Sawyer Mini | 57 g | 2 oz |
| headlamp | Black Diamond Revolt 350 | 90 g | 3.2 oz |
| satellite messenger | Garmin InReach Mini | 100 g | 3.5 oz |
| compass | Suunto A-10 | 30 g | 1 oz |
| first aid & survival kit | self-assembled kit | 180 g | 6.4 oz |
| toiletry kit | toothbrush, toothpaste, contact lens case | 90 g | 3.2 oz |
| utensil | Toaks Titanium Spork | 18 g | 0.6 oz |
| pot | Toaks Titanium 650 ml Pot | 80 g | 2.8 oz |
| alcohol stove | Vargo Triad with titanium windscreen | 68 g | 2.3 oz |
| stove fuel | 240ml / 8oz alcohol in plastic bottle | 215 g | 7.6 oz |
| dry bag | Sea to Summit Ultrasil 8 L | 30 g | 1 oz |
| insulated jacket | Patagonia Men's Nano puffer | 335 g | 11.9 oz |
| Patagonia R1 fleece pullover | Patagonia R1 fleece pullover | 330 g | 11.7 oz |
| camp shorts | Patagonia Men’s Baggies Lights | 110 g | 3.9 oz |
| spare T-shirt | Patagonia Capilene Cool Lightweight T | 65 g | 2.3 oz |
| spare socks & underwear | Smartwool PhD Run Light Elite Low Cut Socks | 100 g | 5.3 oz |
Total weight: 3.9 kg (8 lb 10 oz)
Note: 800 grams (1.7lb) of food a day is enough for me, but might not be enough for others. Calorie requirements can vary depending on weight, metabolism, fitness level, and expected level of exertion. See my article How to Feed Yourself in the Backcountry for guidelines that can help you figure out your energy requirements.
Get out there
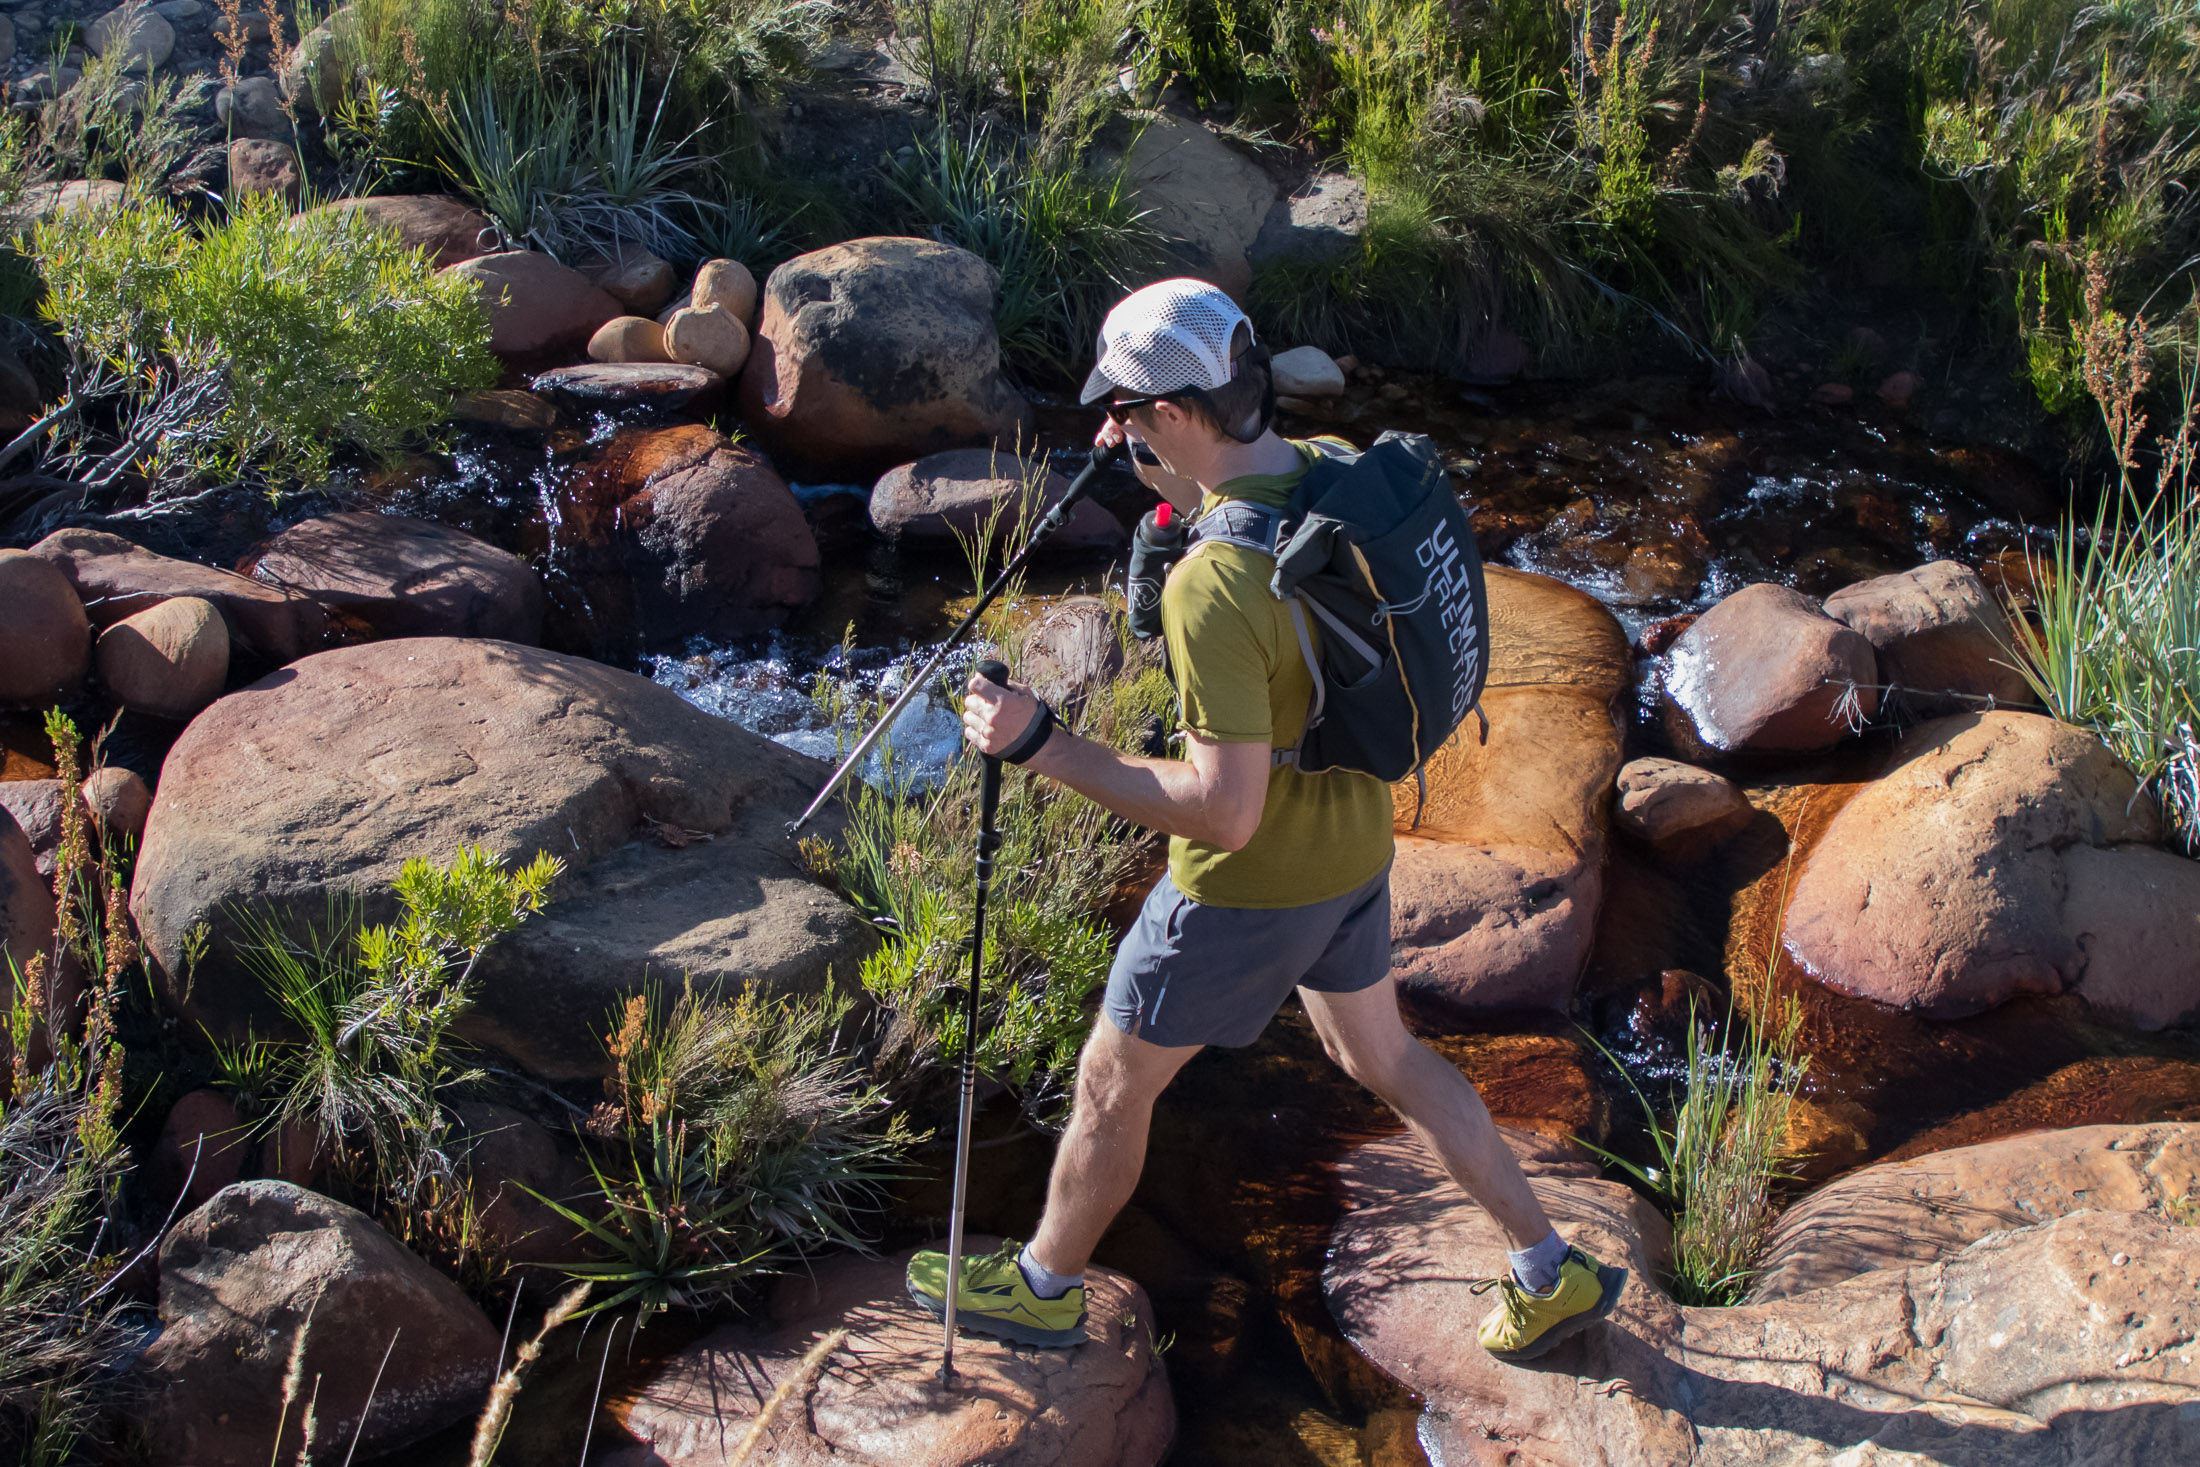
The best way to get into fastpacking is to get out there by joining a group of experienced fastpackers. That said, if it’s further instruction you’re after, this site has many more articles filled with pointers, practical tips, and valuable insights. Successful fastpacking depends as much on sound backcountry skills as it does on having the right gear. And you can make your first fast and light adventure easier by knowing what challenges to expect and having strategies for getting around them. For such a primer, read my article Fastpacking 101.
