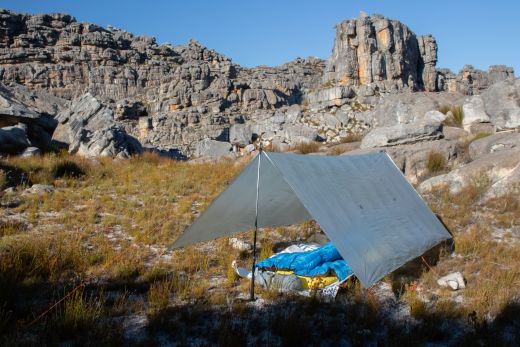
Glance around any trailside campsite, and you’ll notice that there’s a trend among the fast and light crowd to use tarps instead of tents. Makes sense. Tarps are, after all, a lot lighter than the average tent. But then it’s also apparent that it’s not just fastpackers and ultralight backpackers using tarps. It’s also kayakers, bikepackers, fishermen, and scout groups. And some of them are carrying upward of 15 kilograms of gear. So there’s clearly more to the appeal of tarp camping than just the reduced weight. In this – the first article in a four-part series on tarps – I go into the attractions of tarp camping in a little more detail and then explain how you too can make a tarp work for you
- Why use a tarp?
- Tarp rigging gear
- Groundsheet or bivvy bag
- Tarp rigging fundamentals
- Basic configurations
- Choosing a site for a tarp
- Dealing with rain
Why use a tarp?
With ultralight tents now weighing as little as 900 grams, the weight difference between a tarp and ultralight tent isn’t quite as significant as it once was. And that begs the question, why are tarps still so popular among avid outdoorsmen.
Advantages of a tarp
Yes, weight is a factor, but I’ll get to that in a minute. Before considering the obvious, let’s look at the other ways that a tarp can be better than a tent. The first is versatility. Flat tarps can be rigged in many more ways than a tent. If you find yourself in a space too confined for a tent, you can probably still rig a shelter using a tarp. The second is that tarps are more open than a tent and are better from ventilation – a factor in hot and humid conditions. And the third is durability. With zippers or clips, there’s very little on a tarp that can break.
- Lightness
- Versatility (flat tarps)
- Ventilation
- Durability
Beyond these factors that relate to performance, there is one more aspect of tarp camping that make these minimalist shelters attractive to a certain type of outdoorsman. Being open sided, tarps remove a barrier between you and nature, the very thing you venture out into the wilderness to experience. If you want to feel at one with your surroundings, tarp camping is the closest you can get to sleeping under the stars while still having something over your head.
Downsides to using a tarp
Of course, tarps are not without their drawbacks. The obvious of these is that they offer less protection from the elements than a tent. You can ride out a storm under a tarp, but you definitely have to pitch it with the wind direction in mind. Bugs too, can be a problem for tarp campers. There are solutions to keep the little biters at bay, but these involve compromise be they less space or more weight. A tarp is also more difficult to pitch than a tent since it has to be properly tensioned (some consider this skill to be the mark of a true outdoorsman). And lastly there is the flapping. Flat tarps tend to flap in the wind. It’s hard to get around that.
- Less protection from elements and bugs
- More difficult to pitch
- Flapping
How much weight do you save when tarp camping?
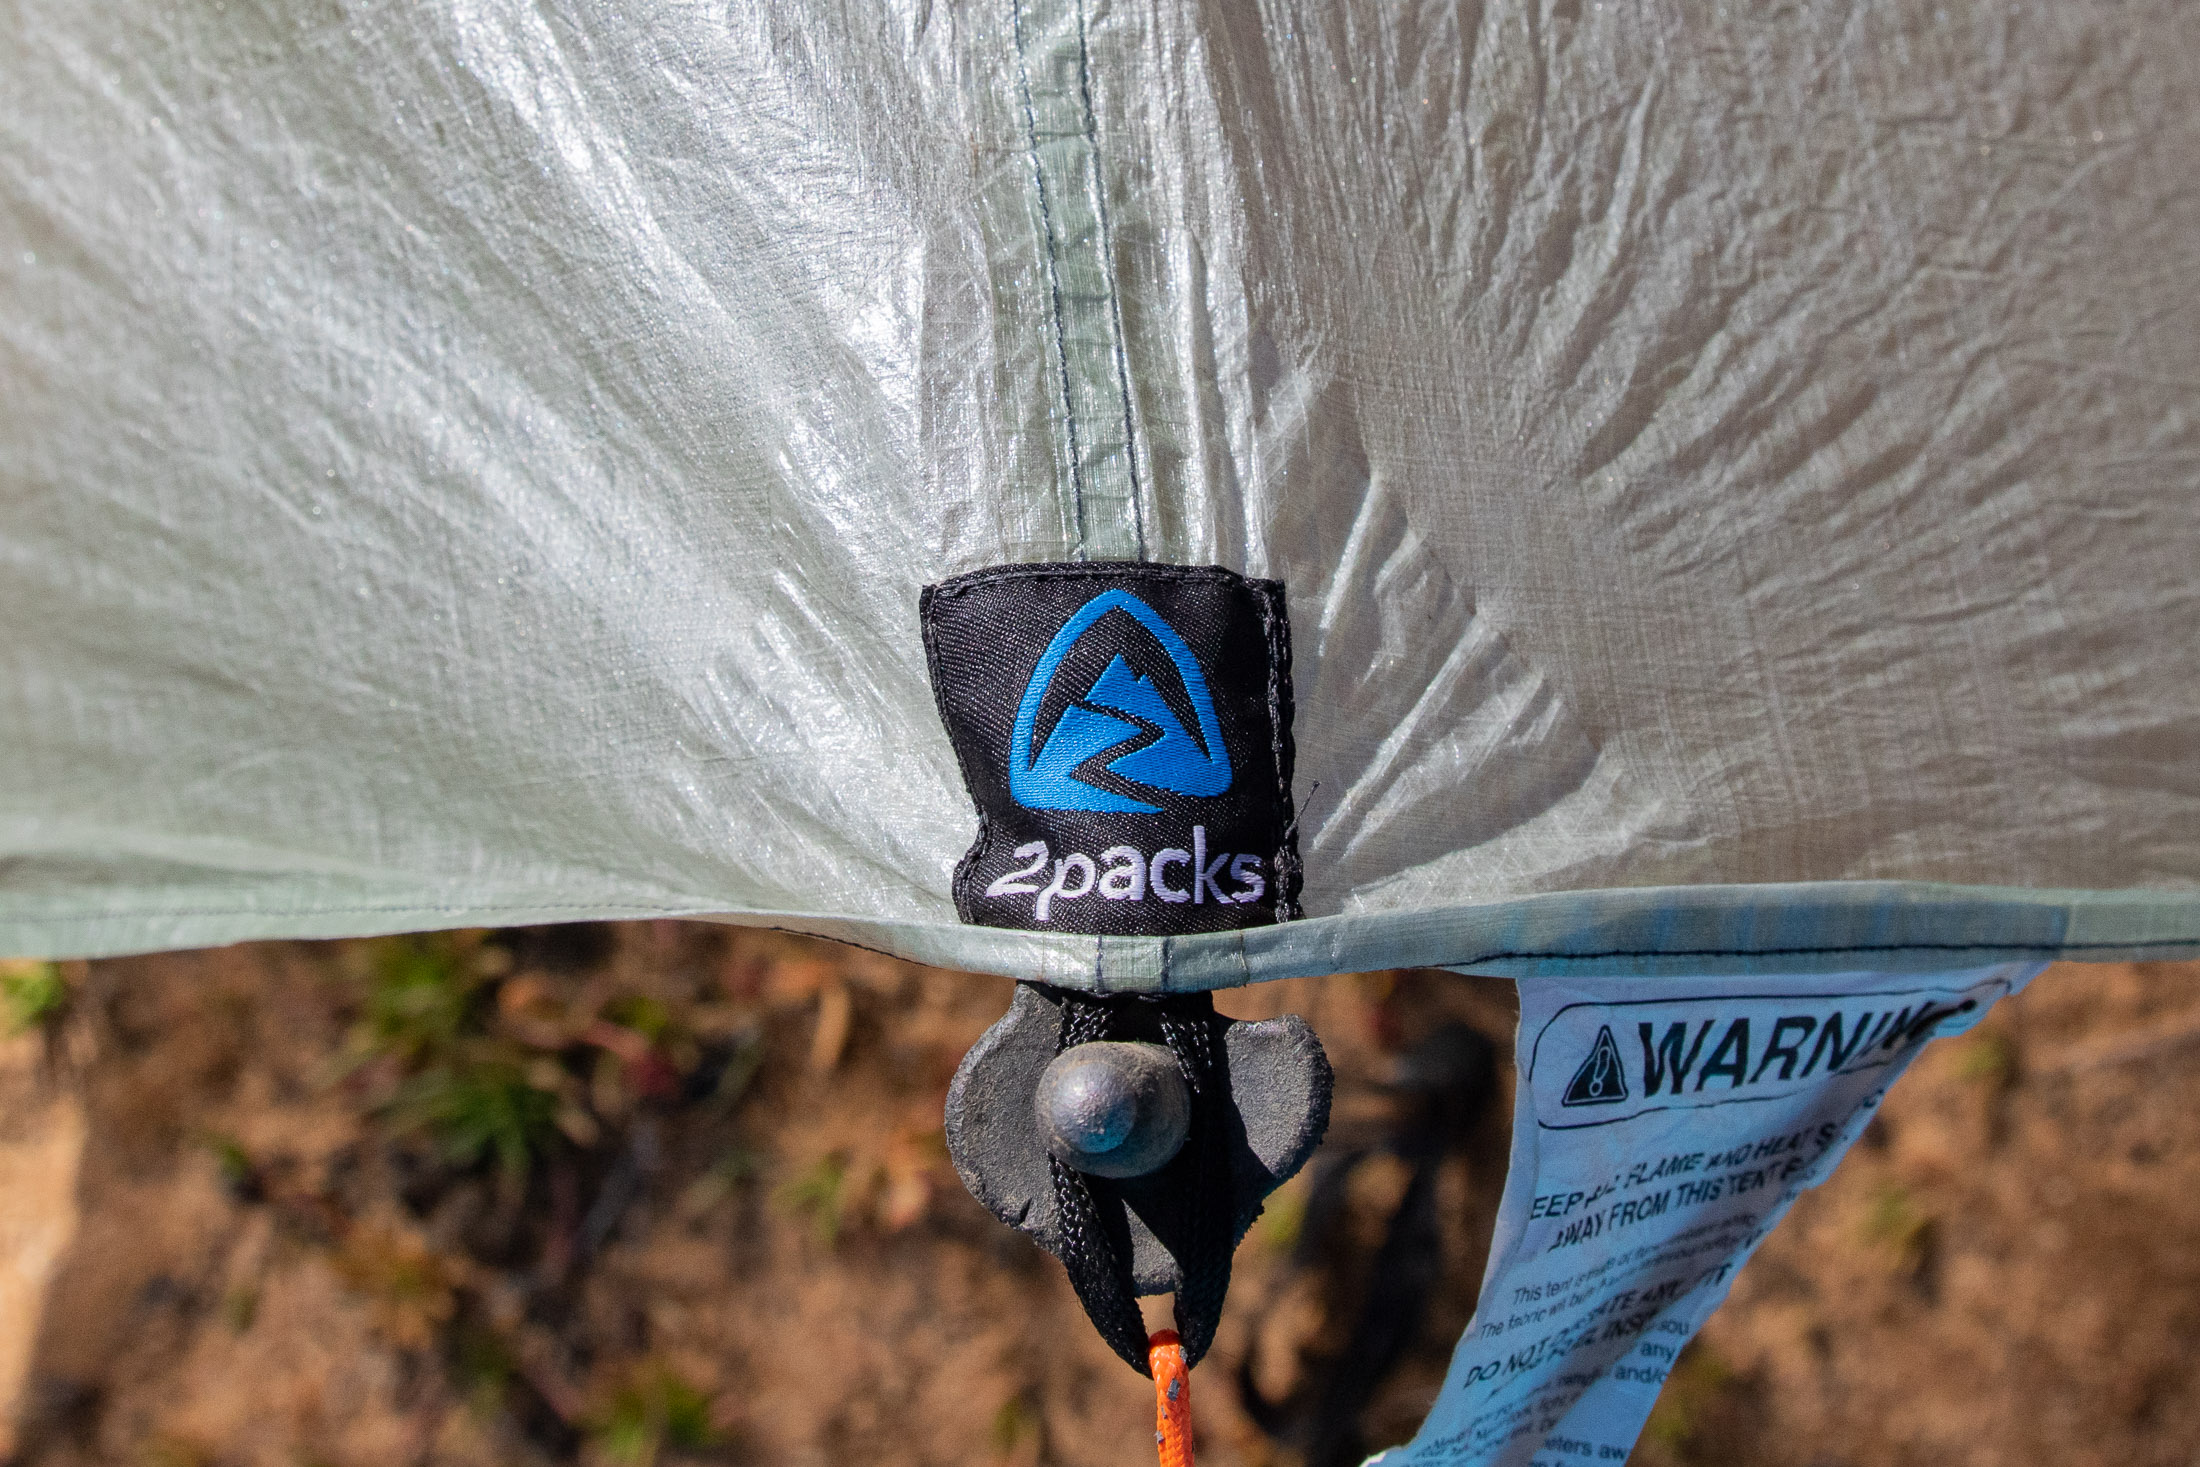
Using a tarp instead of a tent can save you a significant amount of weight, but only if you are going to run or hike with poles or can count on being able to use some other kind of support that doesn’t add to the weight of your pack. If you have to carry accessory poles (or trekking poles) just for pitching your tarp, your setup is not going to be that much lighter than an ultralight tent once you’ve also factored in the weight of a groundsheet or bivvy bag. Below I’ve compared the weight of three different setups. To make this as fair as possible I’ve compared one of the lightest tarps out there with one of the lightest tents (trail weight).
| Big Agnes Tiger Wall UL2 | 990 g / 2 lb 3 oz |
| Zpacks 8.5 x 10’ flat tarp | 200 g / 7.1 oz |
| 12 stakes + guylines | 140 g / 5 oz |
| Zpacks flat groundsheet (DCF) | 88 g / 3.1 oz |
| Total weight | 428 g / 15 oz |
| Zpacks 8.5 x 10’ flat tarp | 200 g / 7.1 oz |
| 12 stakes + guylines | 140 g / 5 oz |
| Outdoor Research Helium Bivvy | 448 g / 15.8 oz |
| Total weight | 788 g / 27.8 oz |
If you added two 48” carbon accessory poles (75 g / 2.6 oz) each, the weight of the kit with the bivvy bag would only be 50 grams off the weight of the tent.
What about wild animals?
Some people might worry that a tarp offers less protection from wild animals than a tent, but the truth is that a tent won’t protect you from a determined bear either. Regardless of whether you use a tent or tarp, you should take precautions to protect yourself and your food from scavengers. Make proper use of bear boxes or canisters, ensuring that these are kept a safe distance from your campsite, and avoid areas that have been frequented by bears. Follow these precautions, and you’ll be a lot less likely to have any unwelcome visitors.
Tarp rigging gear
The gear you need for rigging your tarp will depend a lot on what kind of configurations and supports you intend to use. You could, like me, put together a kit that will be pretty versatile, or you could assemble a kit intended for just a few of your preferred configurations.
Tarp
Modern tarps come in a variety of shapes and styles, each with its own pros and cons. I will only go into these briefly here as I also have an article that covers tarp choice in more depth.
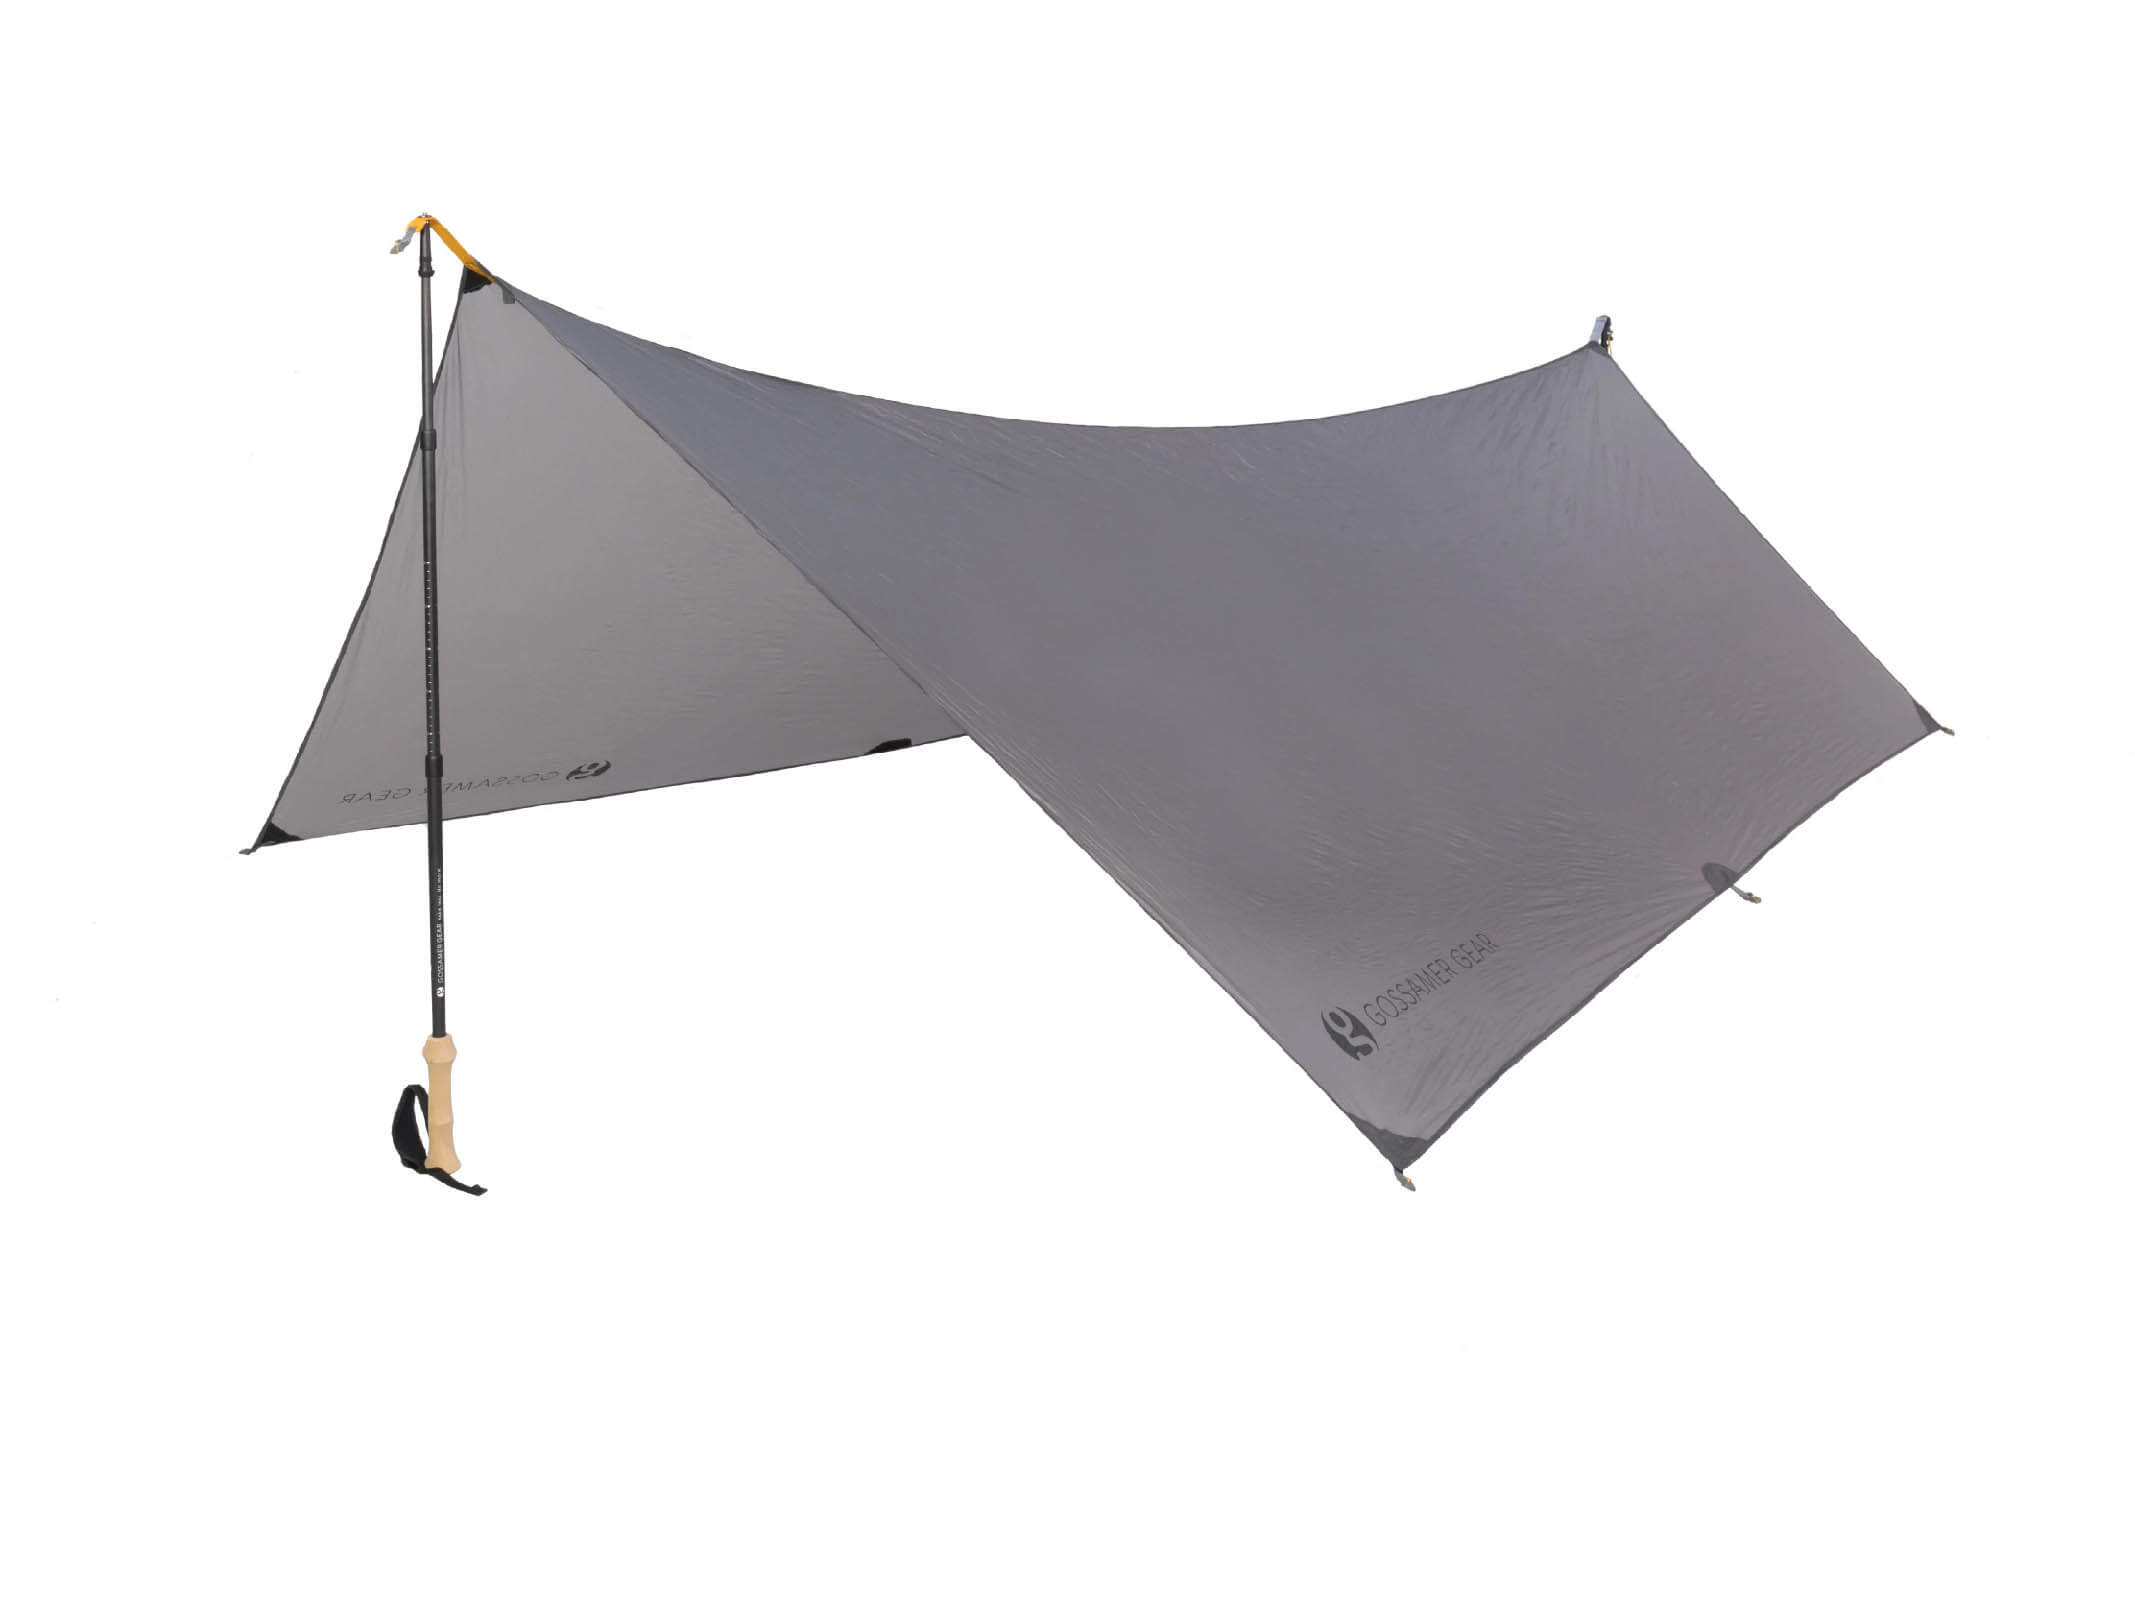
Flat tarps
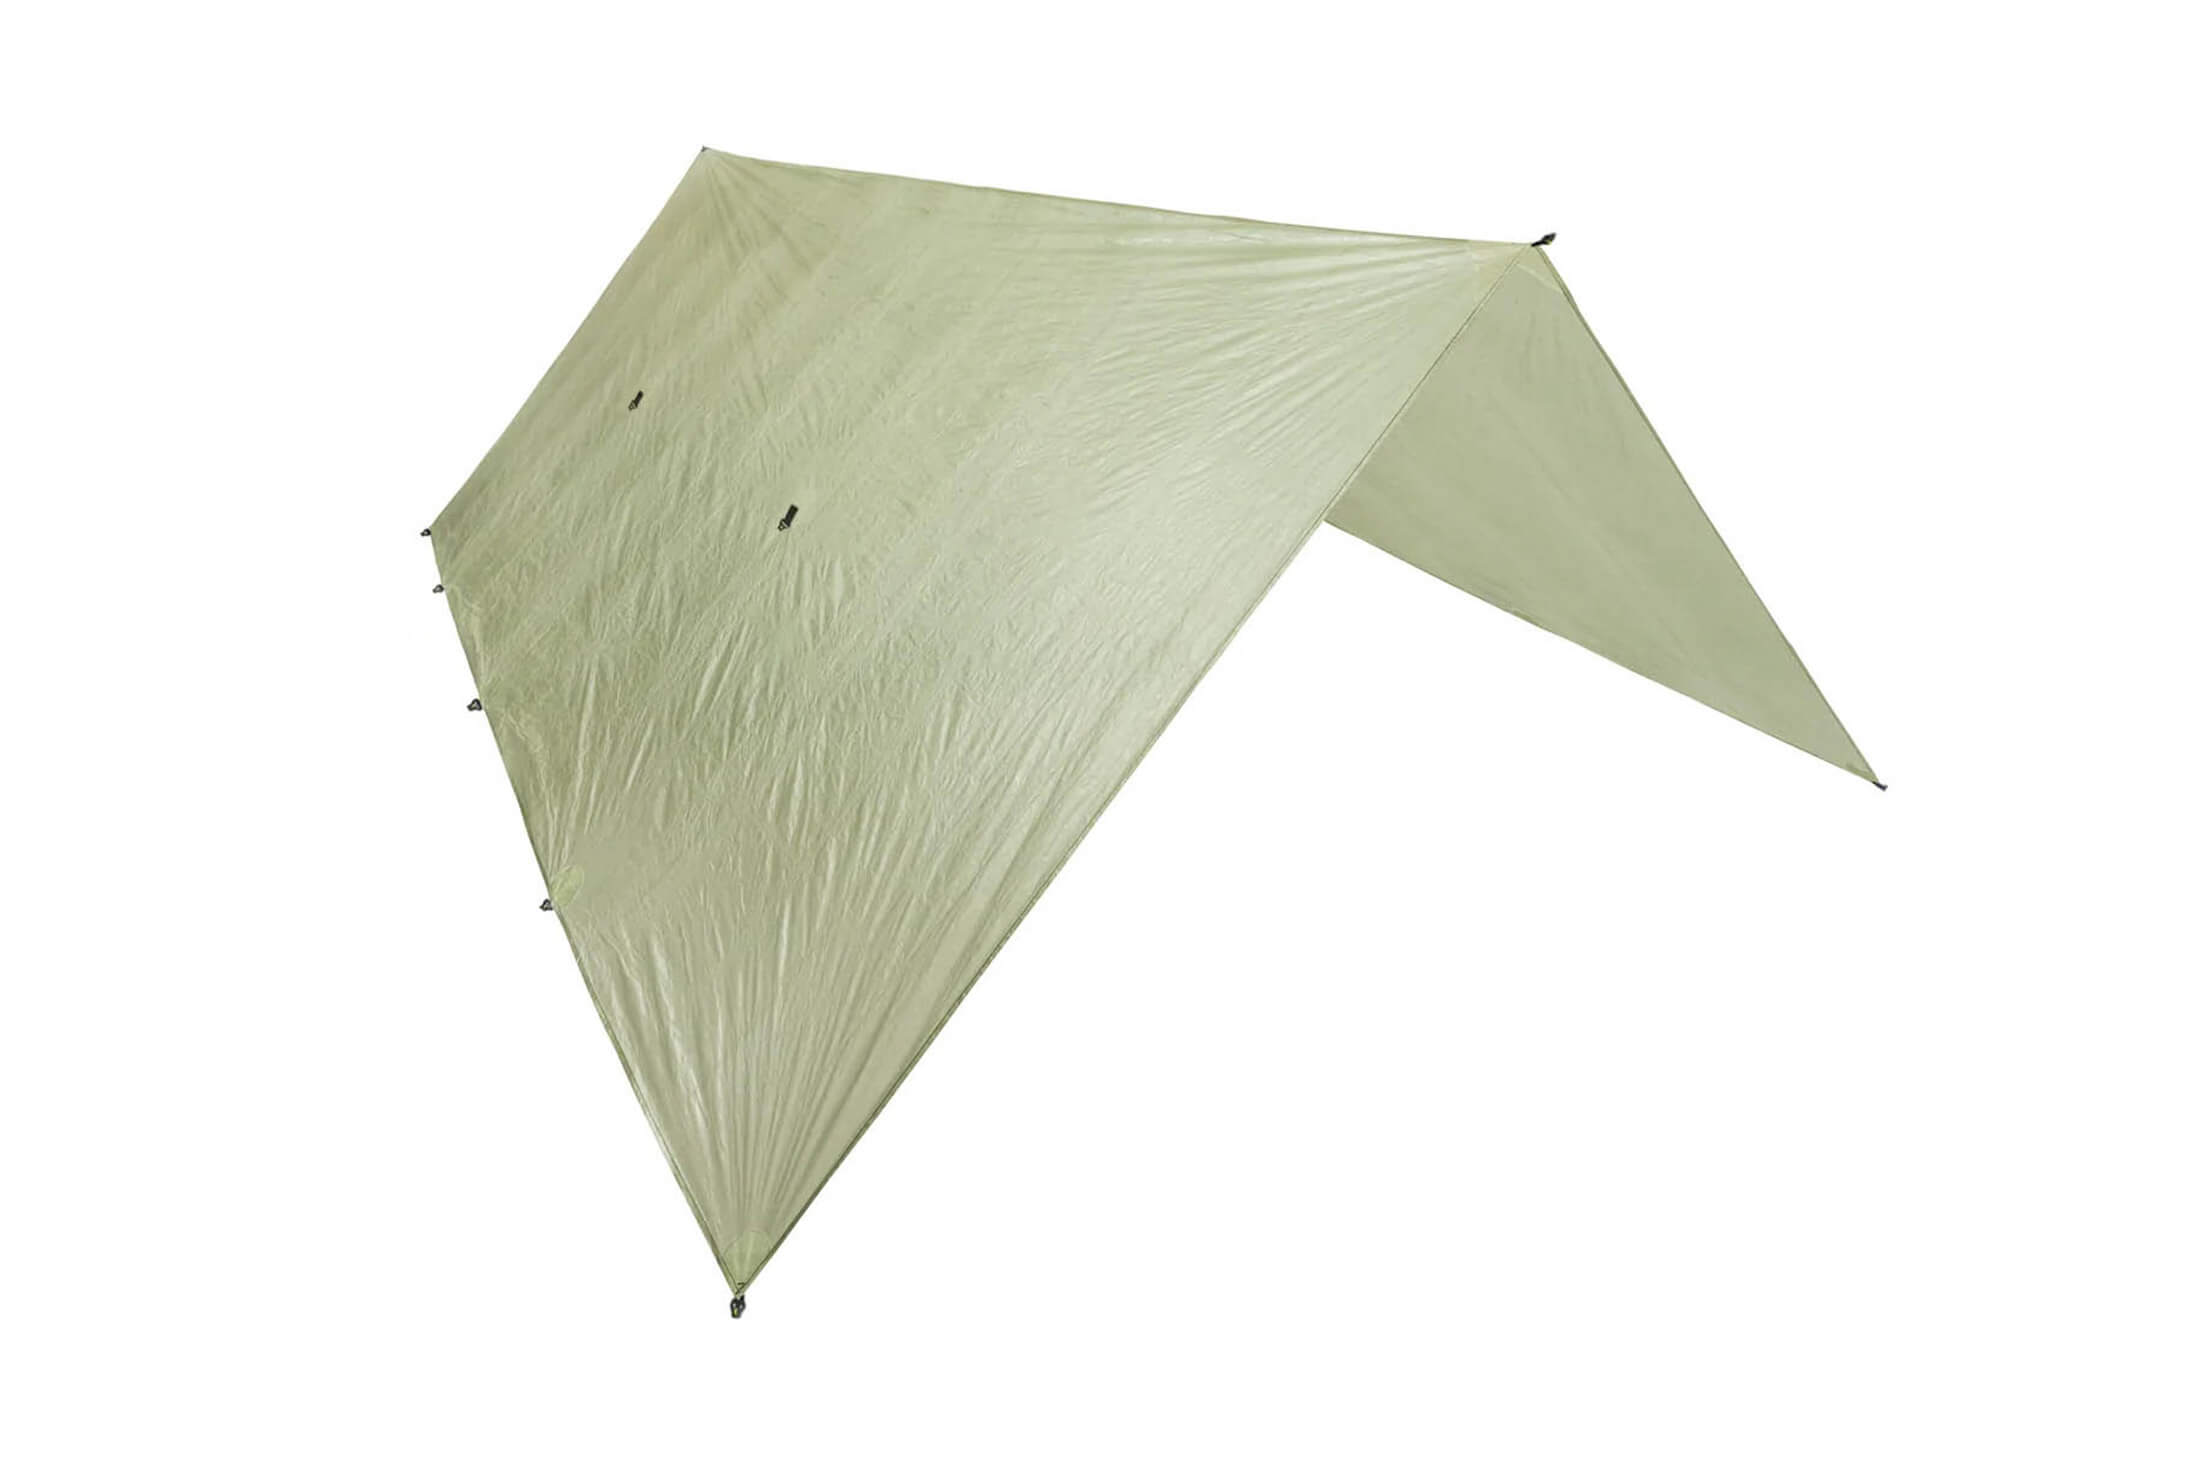
Flat and straight sided, this is the most versatile and popular type of tarp. Although usually slightly longer on one side, flat tarps can also be square, a good shape if you are also going to be using your tarp for hammock camping. If you think you’ll probably need to rig your tarp in a configuration other than the traditional A-frame – to guard against the wind or take in a view – this is the best option.
Catenary cut tarps
Simple cat cut tarps are also rectangular, more or less. Instead of straight sides, the edges of a catenary cut tarp are curved. This makes it easier to ensure a taut pitch. Besides making a shelter more stable, having the fabric evenly tensioned across a tarp also reduces flapping, which can be a nuisance when camping with a flat tarp. The downside to a cat cut tarp is that it can only be pitched in one of two configurations: completely flat or A-frame.
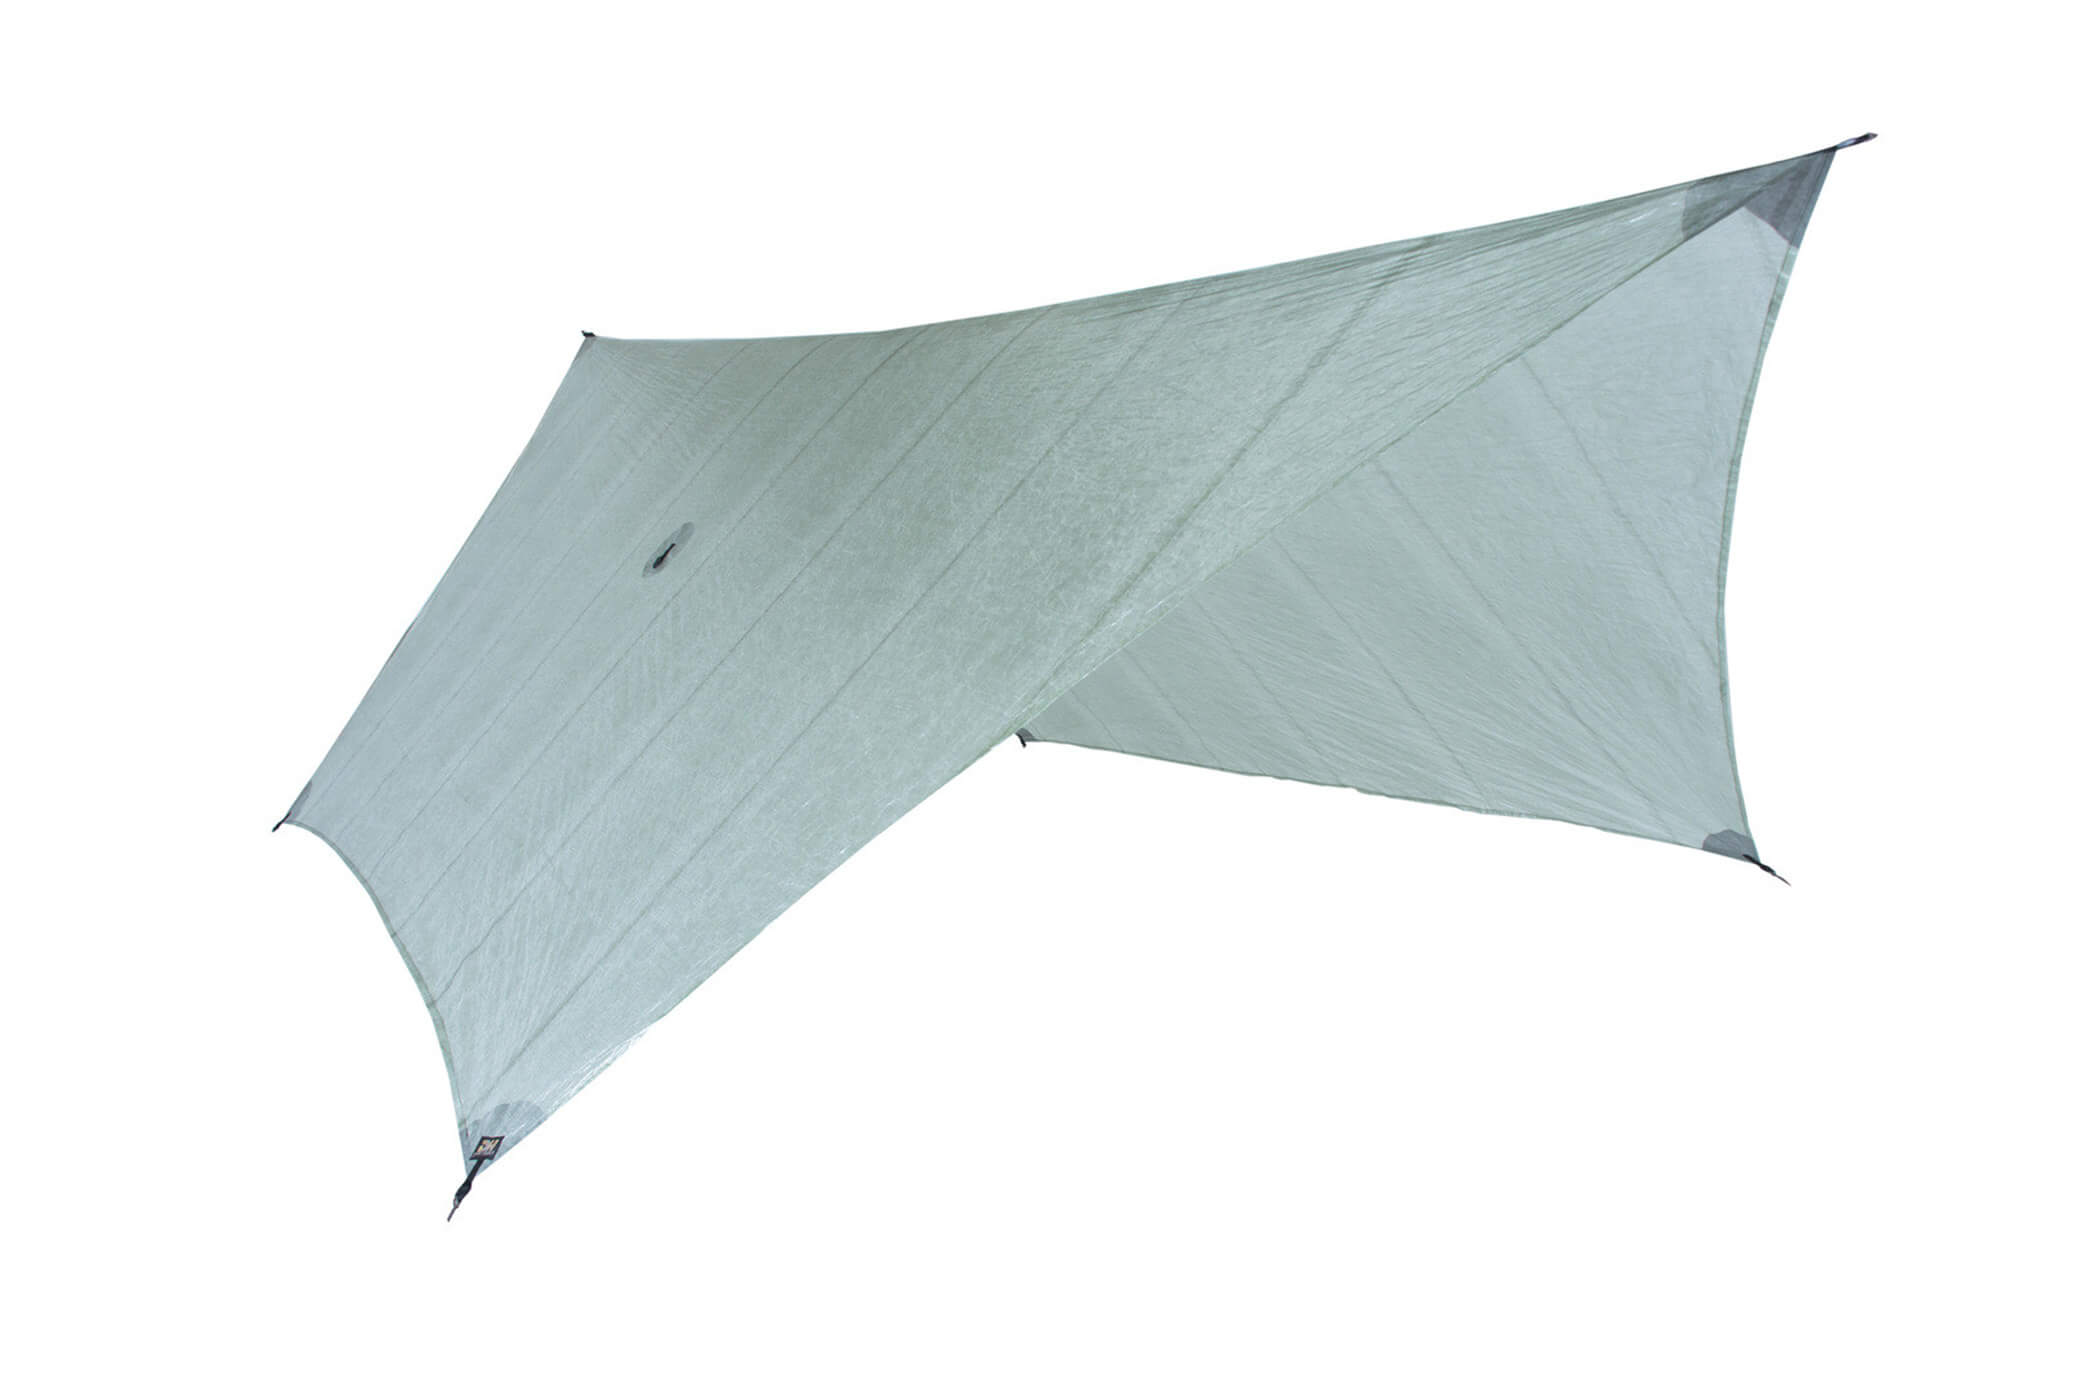
Hexagonal and heptagonal tarps
Some tarps have more than four sides, the idea being that these designs create a larger usable footprint (that which you can shelter) with the same amount of material. The downside to these shapes is that, like cat cut tarps, they can only be rigged in a very limited number of configurations. Accepting this limitation and wanting to make the most of it, some tarp manufacturers have designed their hexagonal and heptagonal tarps with catenary cut edges.
Guylines
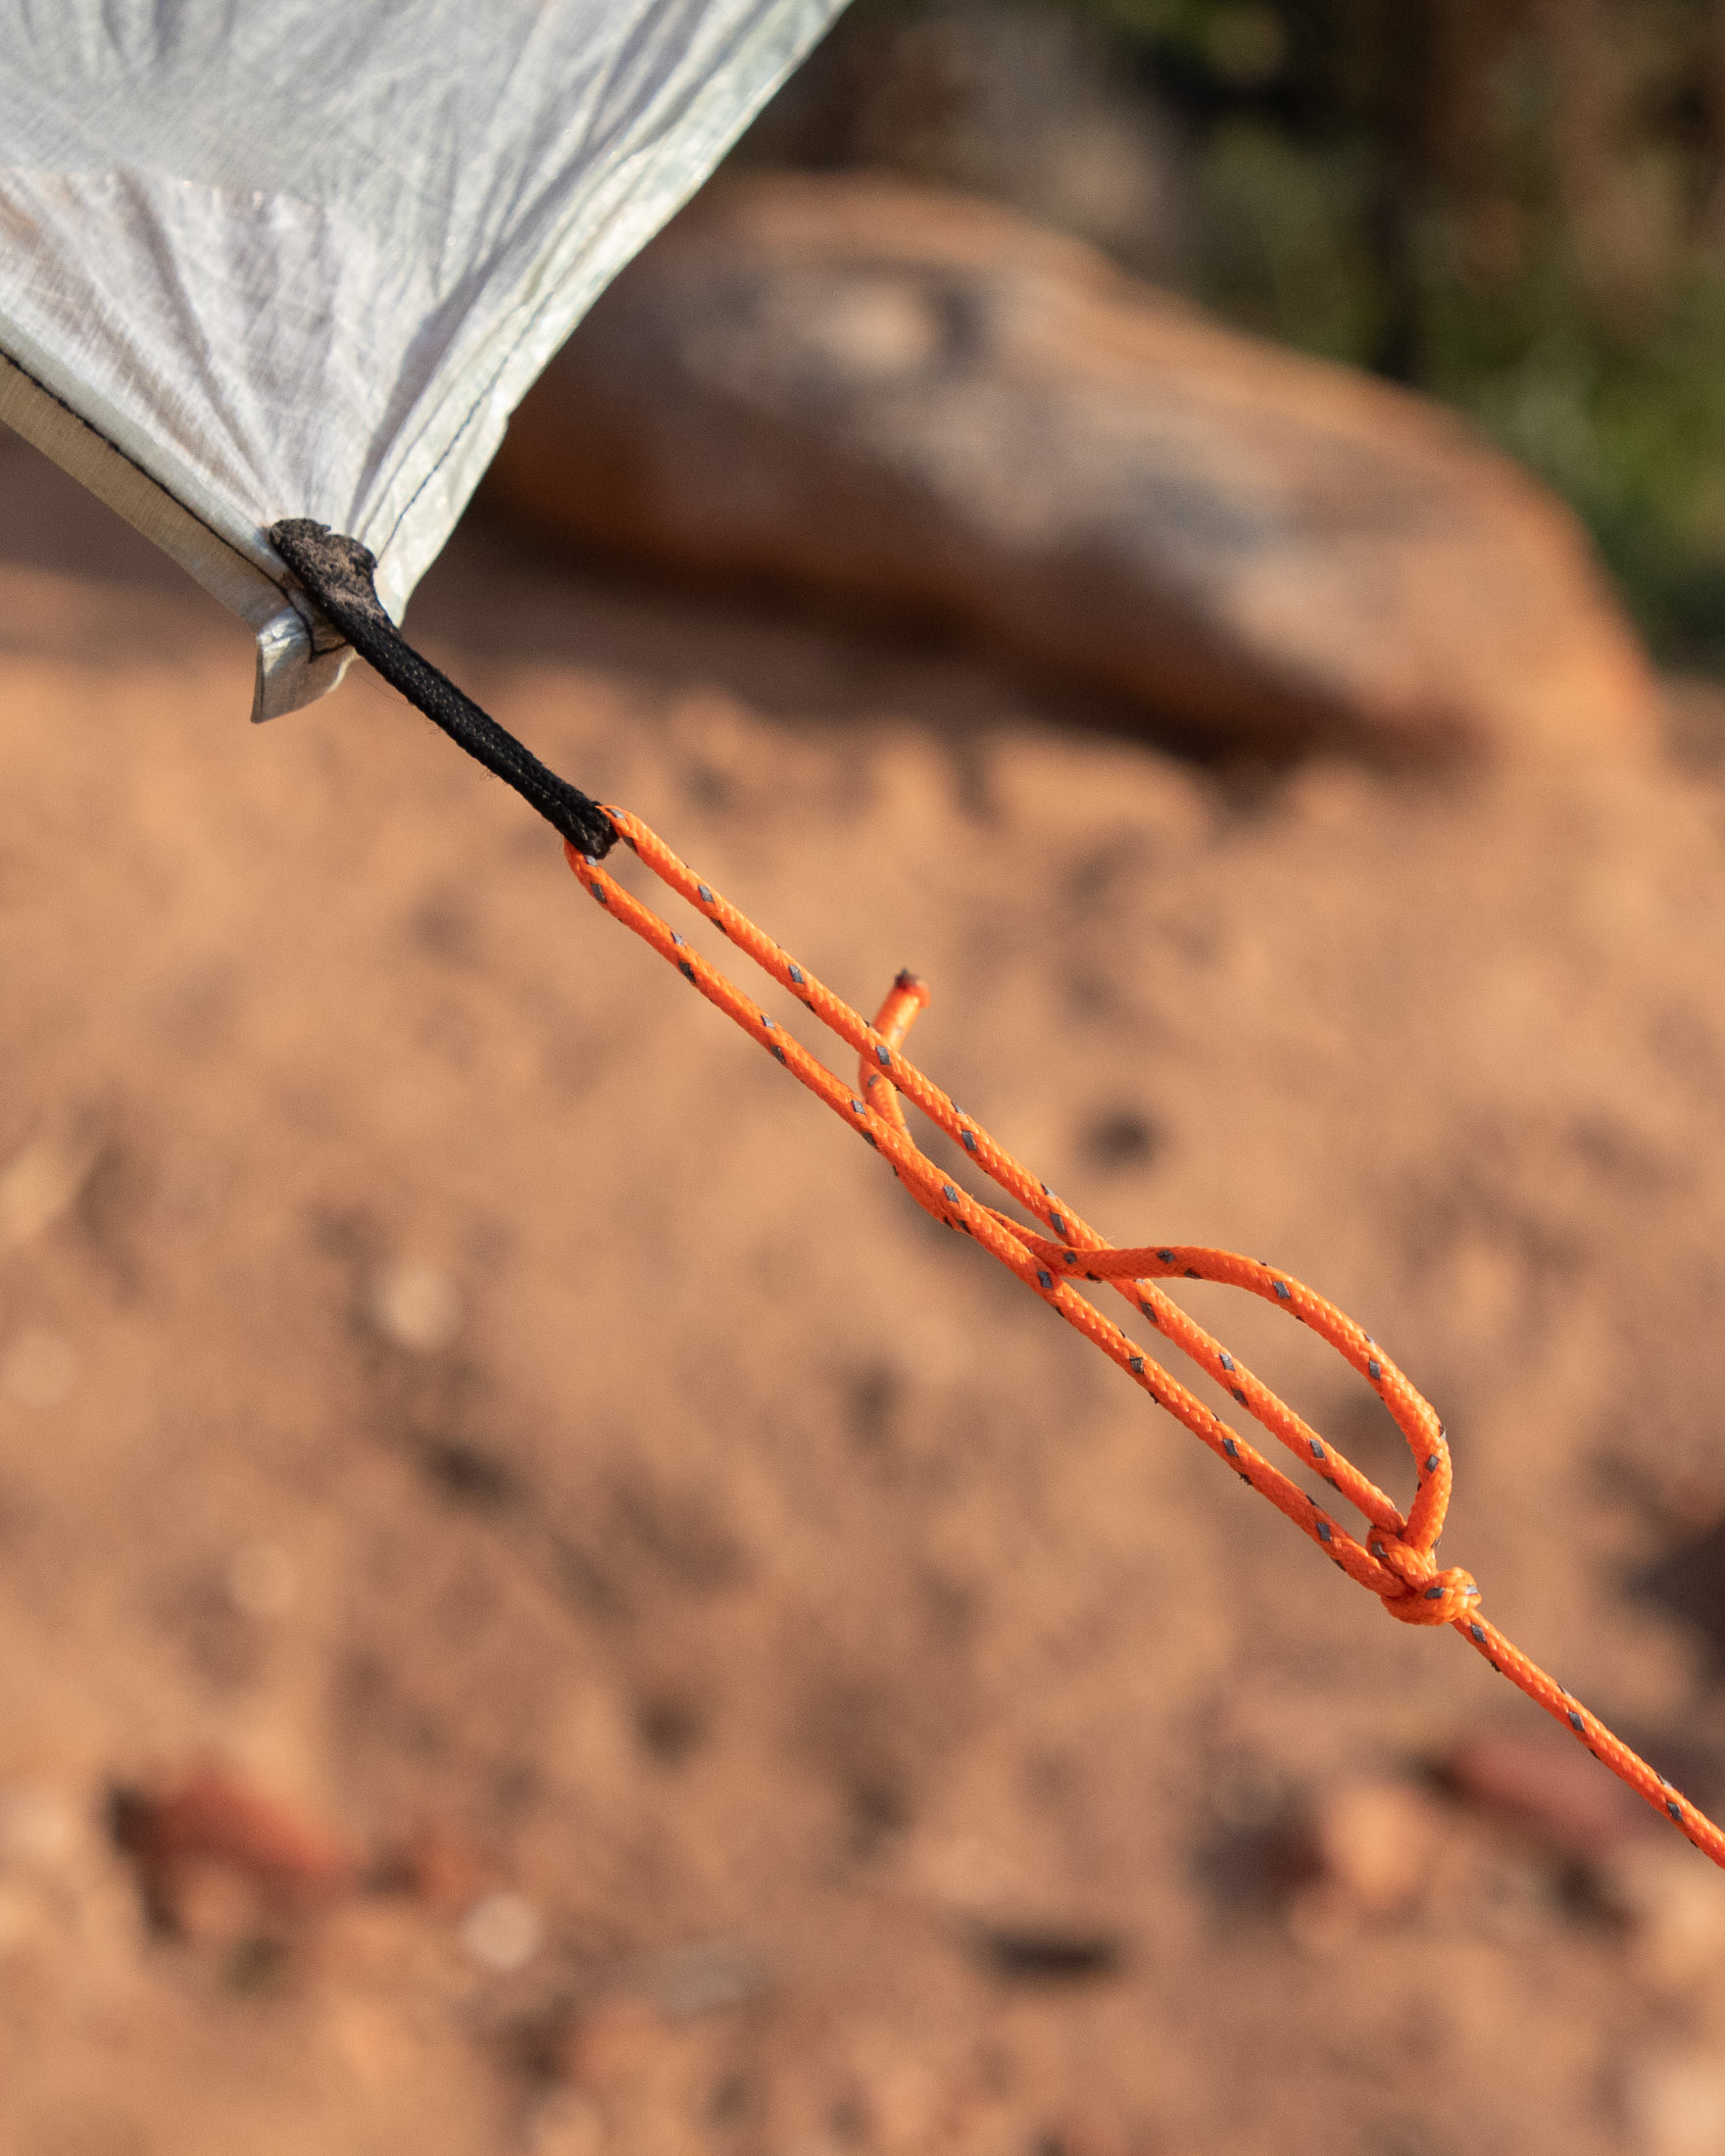
The number and kind of guylines you need will depend largely on the type of configurations you plan to use when pitching your tarp. A very simple configuration like the diamond only requires two short guylines whereas configurations like the A-frame and wind shed require a dozen guylines of different lengths. If you use a flat tarp and intend to rig it in a variety of configurations, I suggest carrying an assortment of long and short (pre-tied) guylines.
Short pre-tied guylines
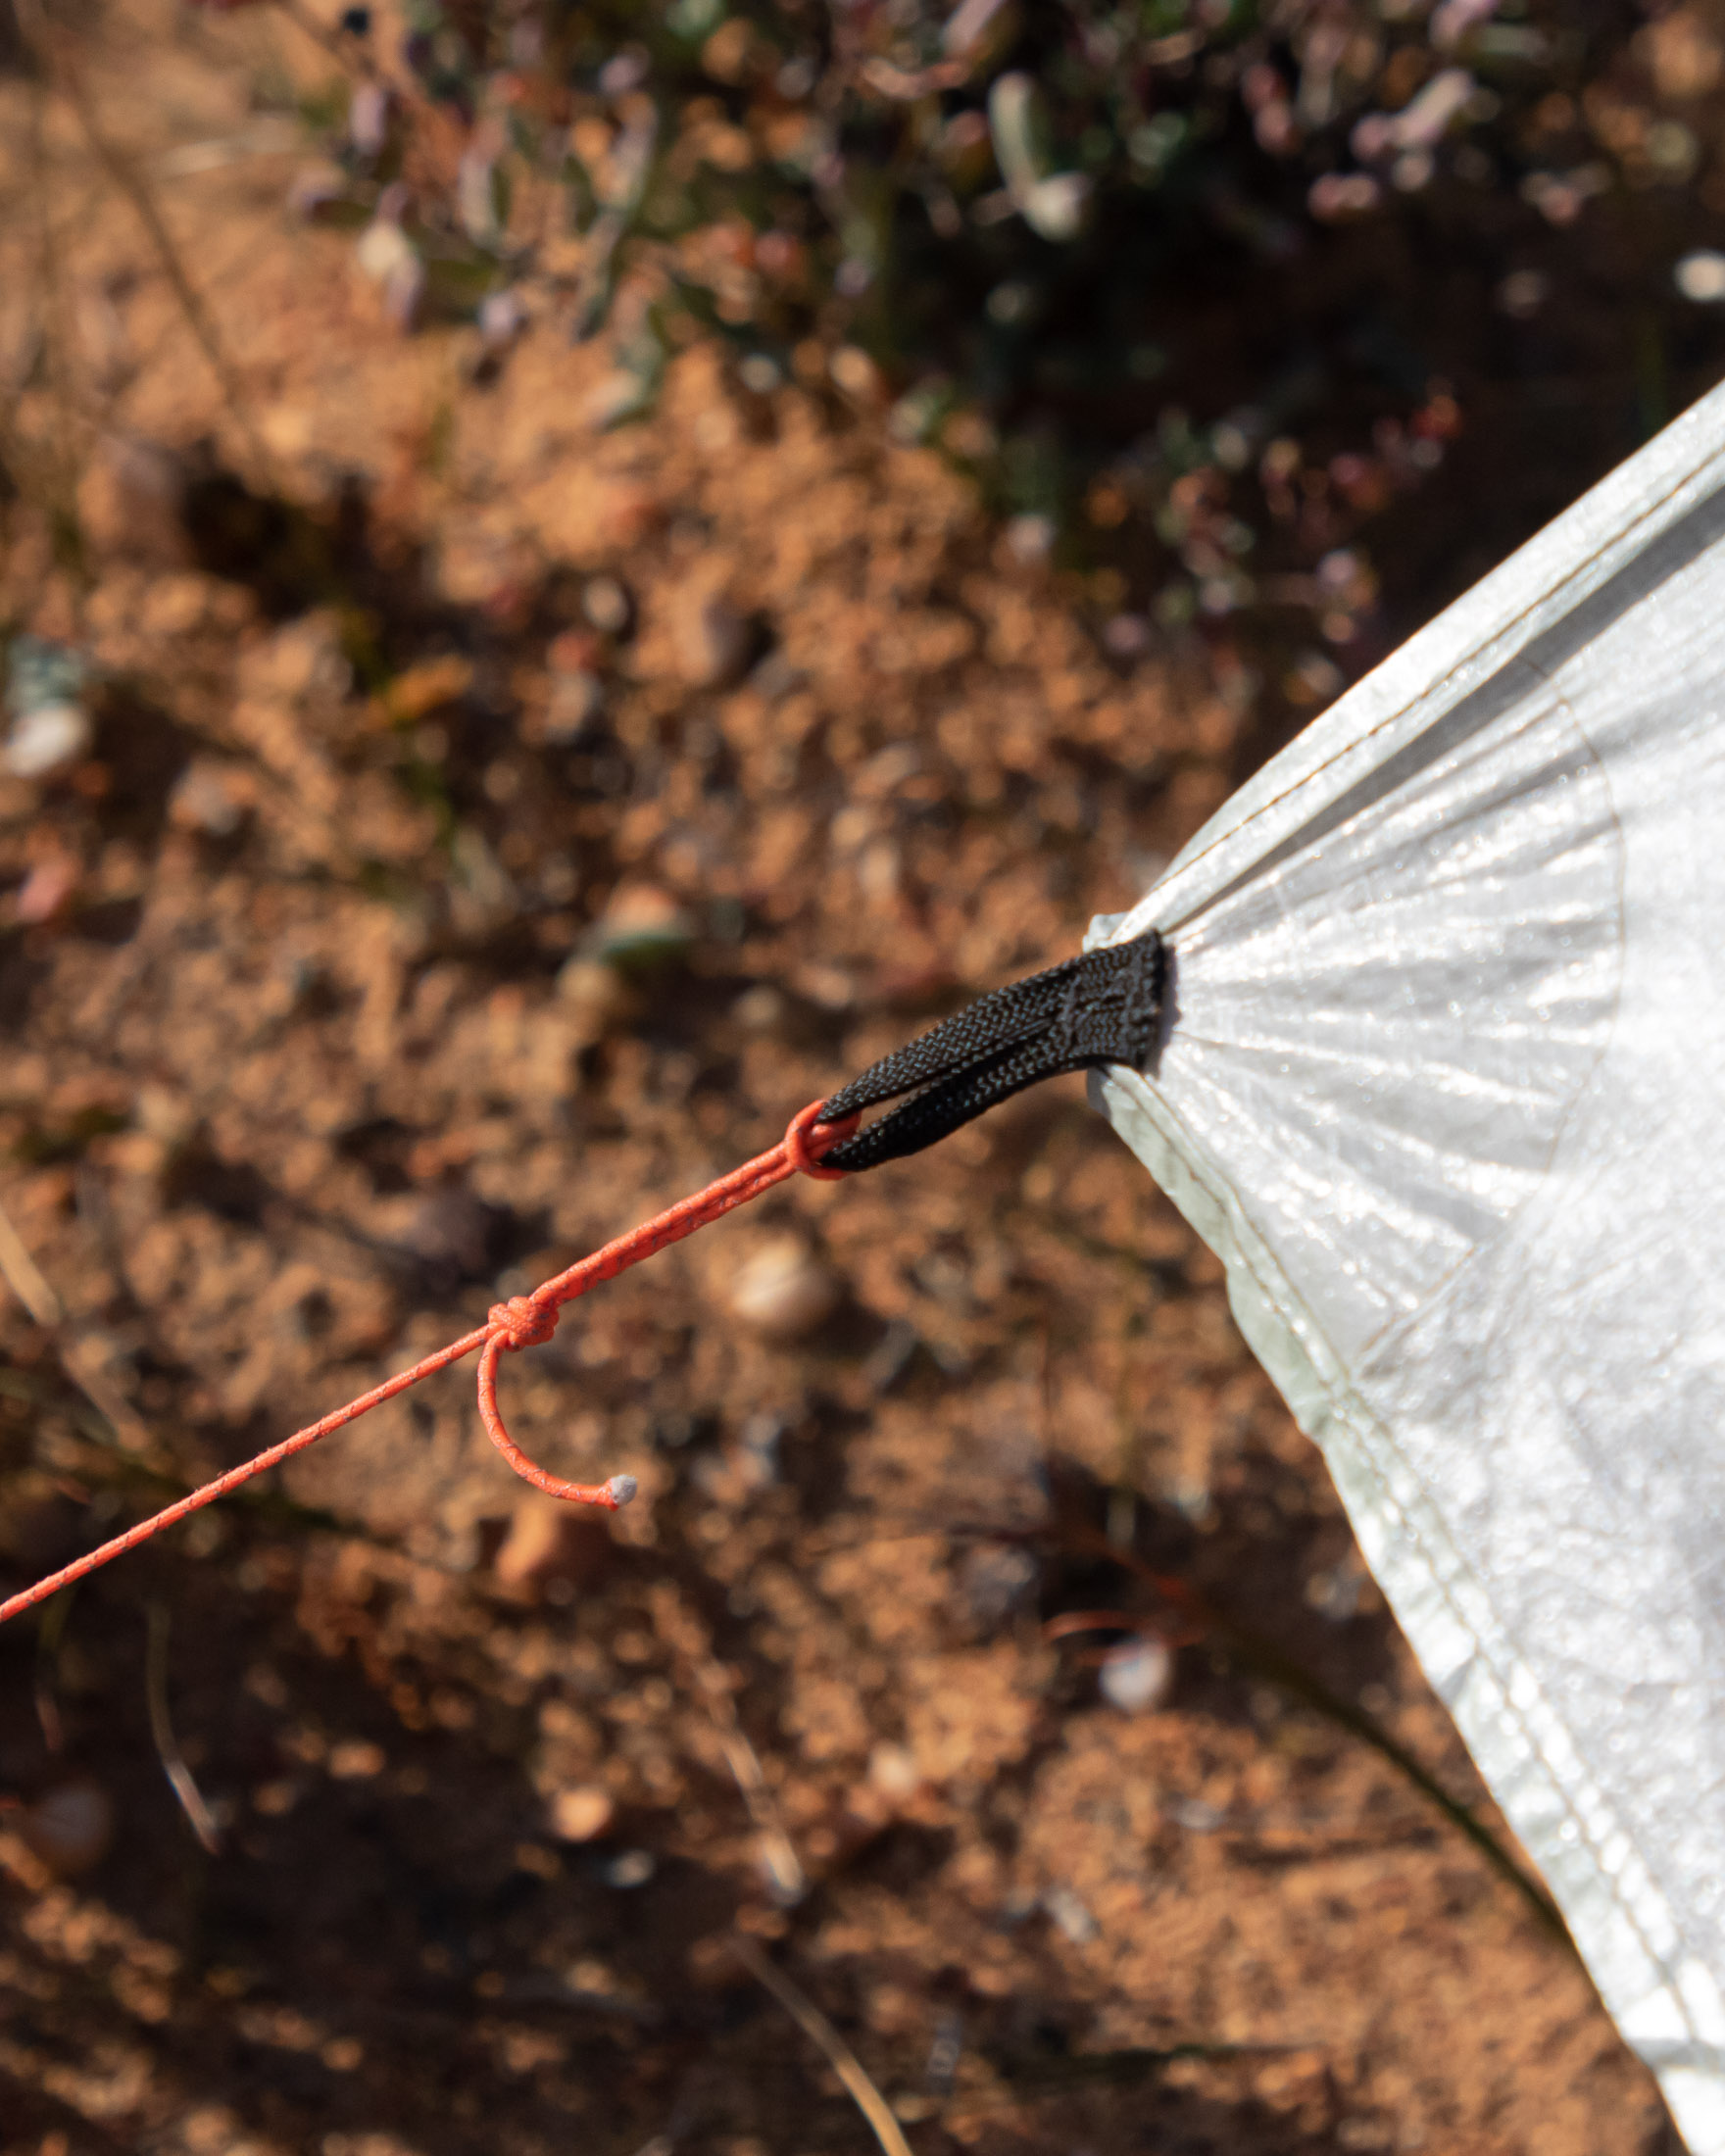
To rig an A-frame tarp just off the ground – as is the norm – you will need six to ten shorter guylines depending on how secure you want your pitch. For these I recommend creating your own pre-tied guylines: pieces of cord cut the same length with short loops in either end. Besides reducing the amount of a faff involved in pitch a tarp, using pre-tied guylines allows you to use thinner and lighter cord. 1.3 mm cord is too thin to untie once it has been properly tensioned, but that just doesn’t matter if you are going to leave those guylines pre-tied. I have six such guylines, all 15 cm, in my kit.
Long tensioning guylines
In addition to the shorter pre-tied guylines, you will also need at least some longer guylines for staking down the high points of your tarp. Again the number you need will depend on which configurations you intend to use. A close-ended A-frame is rigged with one long guyline, a regular A-frame with two, and a lean-to with four. To keep your options open, I recommend carrying no fewer than four guylines around 2 meters (6.5 ft) long. Unlike your pre-tied guylines, these have to be made of cord that is thick enough to be easy to untie. I recommend a brightly coloured or reflective 2.3 mm cord.
Supports
A support is anything that holds a tarp aloft. This could be a self-supporting upright like a tree, or it could be a piece of gear – typically some kind of pole – which can hold up a tarp once it has been tensioned. If you can’t rely on there being conveniently spaced trees at every campsite, you’ll need to carry your tarp supports with you, or better yet, plan to use a piece of gear that you’d already have with you.
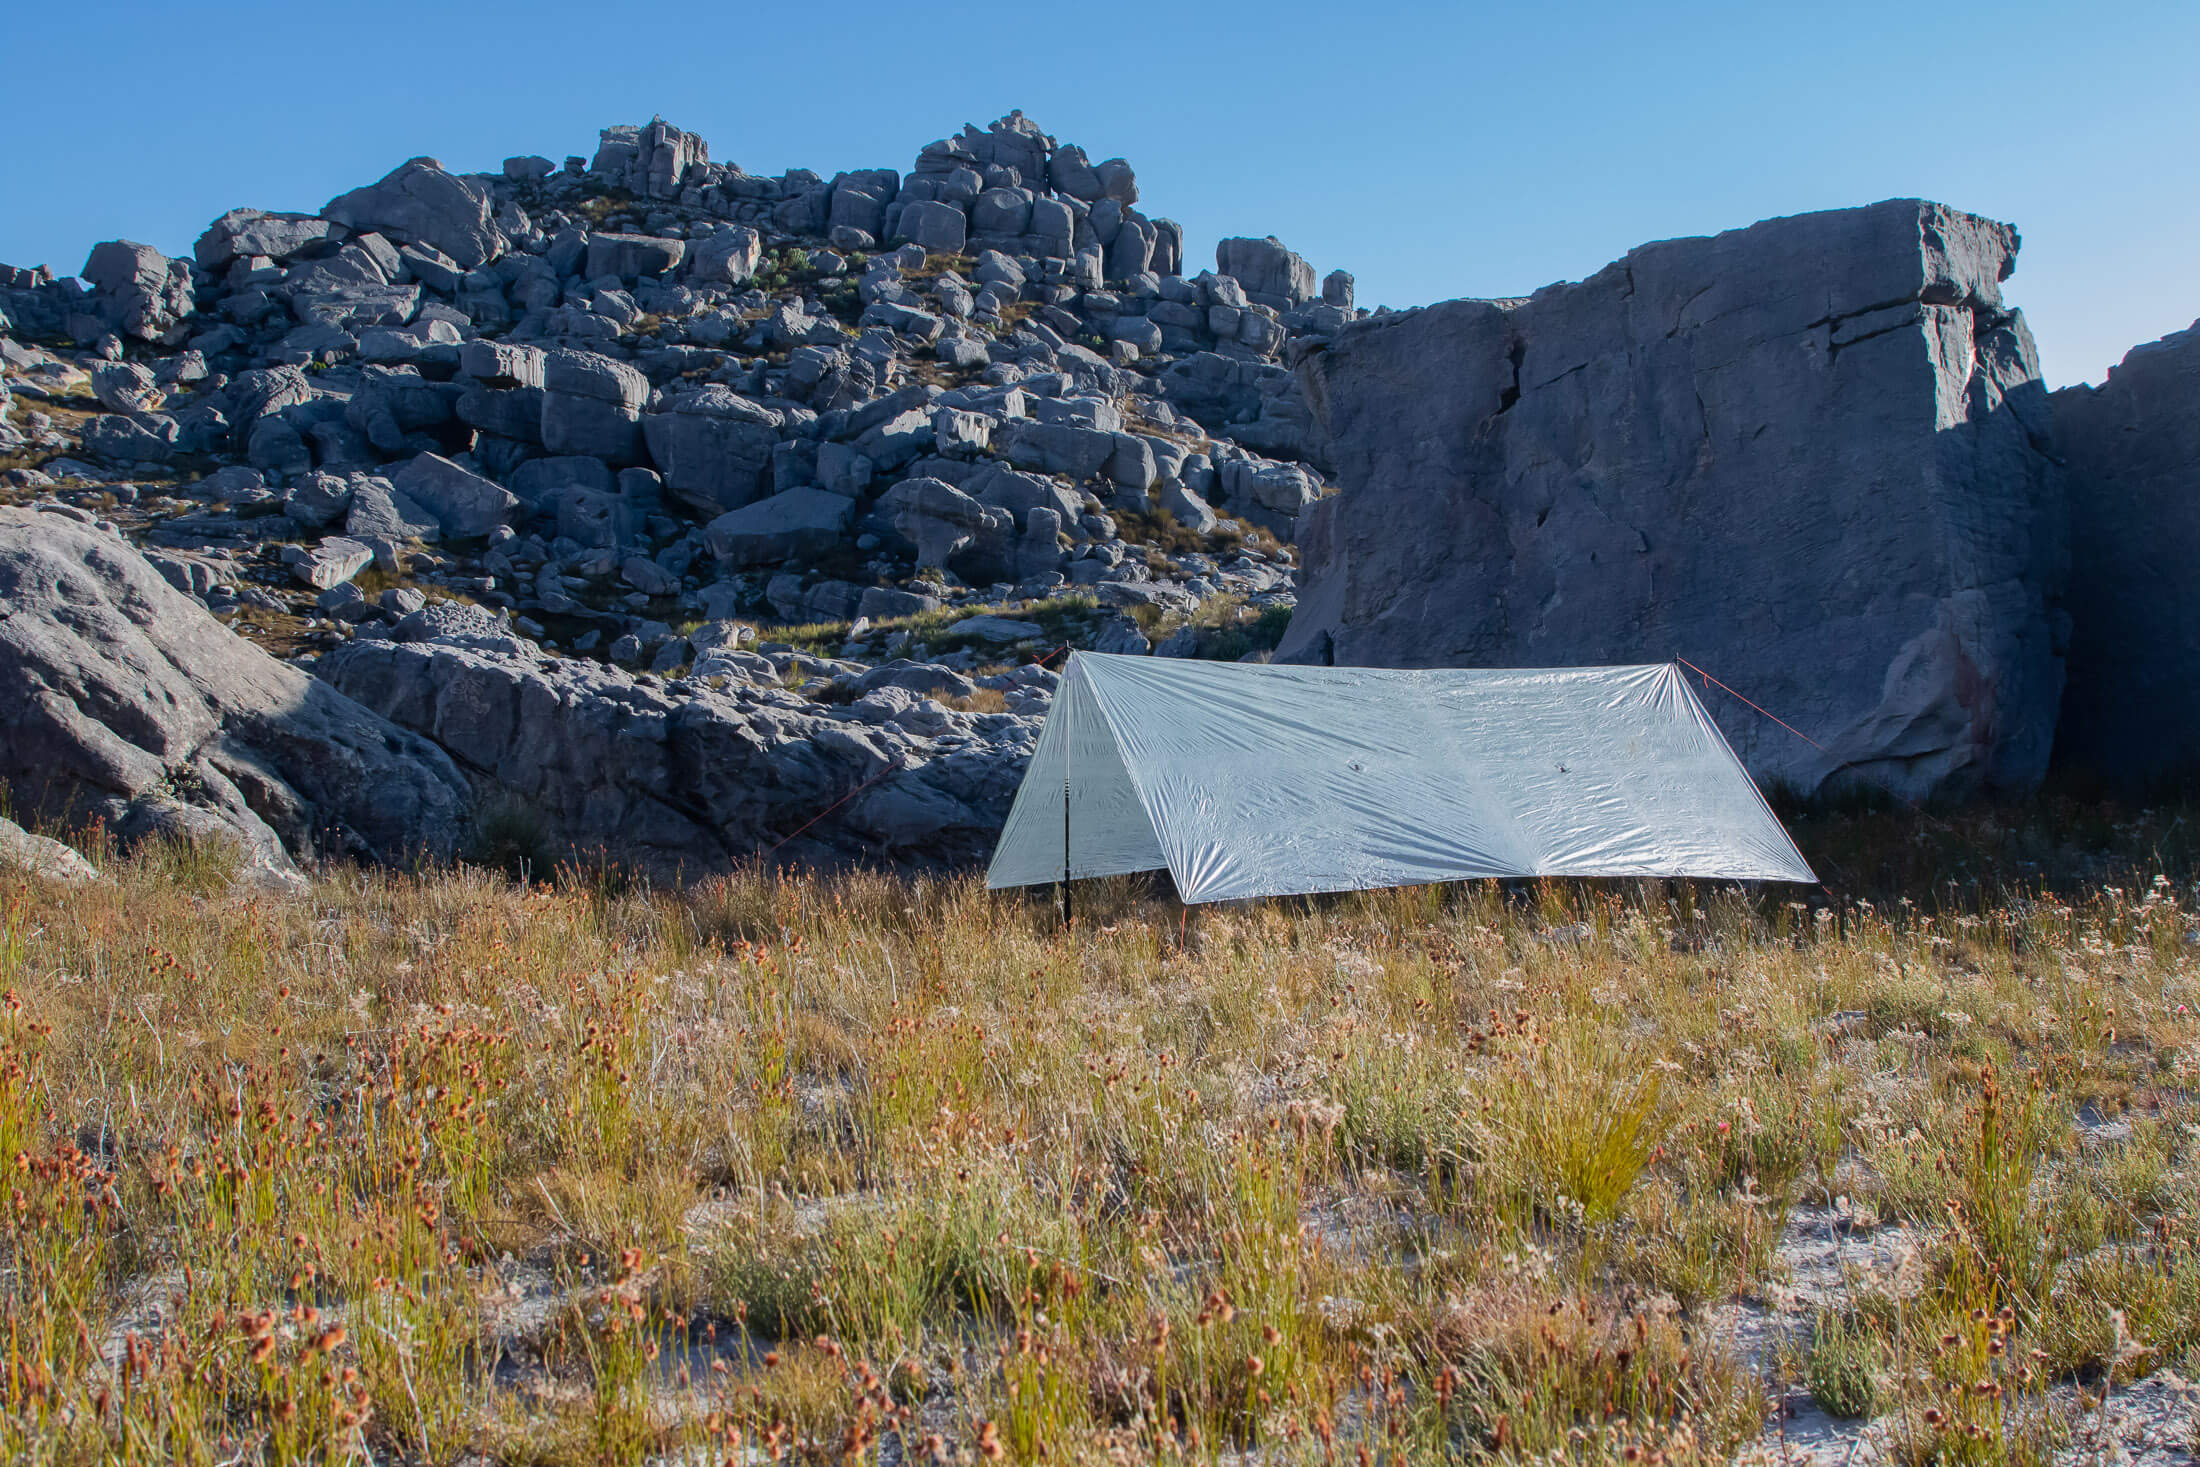
Trekking pole
Trekking poles are the most commonly used type of support. Because their primary function is to assist with hiking and are in a hiker’s hands most of the time, they don’t add any weight to one’s pack. Poles with an adjustable telescoping function are particularly useful in that they allow you to adjust the height of your setup. If you go this route, I suggest getting poles that extend rather than shorten beyond the length you’d normally use them when hiking. The ability to lengthen a trekking pole is generally more useful than being able to shorten it when you’re trying to pitch a tarp.
Bicycle
Their low weight means that tarps are becoming increasingly popular with bikepackers, who sometimes use nothing more than their bikes to support their pitch (with the front wheel and rest of the bike as separate supports). My recommended bike-supported A-frame configuration involves a single tarp pole in addition to the bike itself. This setup raises the pitch higher than you would be able to if you used only the bike, and it makes it easier to get in and out of your tarp without the bike in the way of the entrance.
Paddle
Like a trekking pole, a paddle can be used for rigging a tarp as well as for fulfilling its main purpose. But there is one advantage that a paddle has over a trekking pole, and that is that it can be self-supporting if you bury it deep enough in a river bank – although it would probably be a good idea to still pack some longer guylines. In addition to the paddles themselves, you will also need some kind of strap or cord for securing your tarp to the paddle’s shaft. I describe my solution in my article on tarp rigging, a handy how-to guide you will probably want to read next.
Stakes
There are many things you could use for anchoring your tarp, but the most popular and versatile are a set of stakes. If you have a tent, you might want to use the stakes that came with it. Alternatively, you could buy a set of stakes that better meet your needs. Depending on the material, design and length, a stake can be lighter, stronger or more secure – have more holding power. If you’re likely to pitch your tarp in a certain type of environment, some of these properties will be of a higher priority than others.
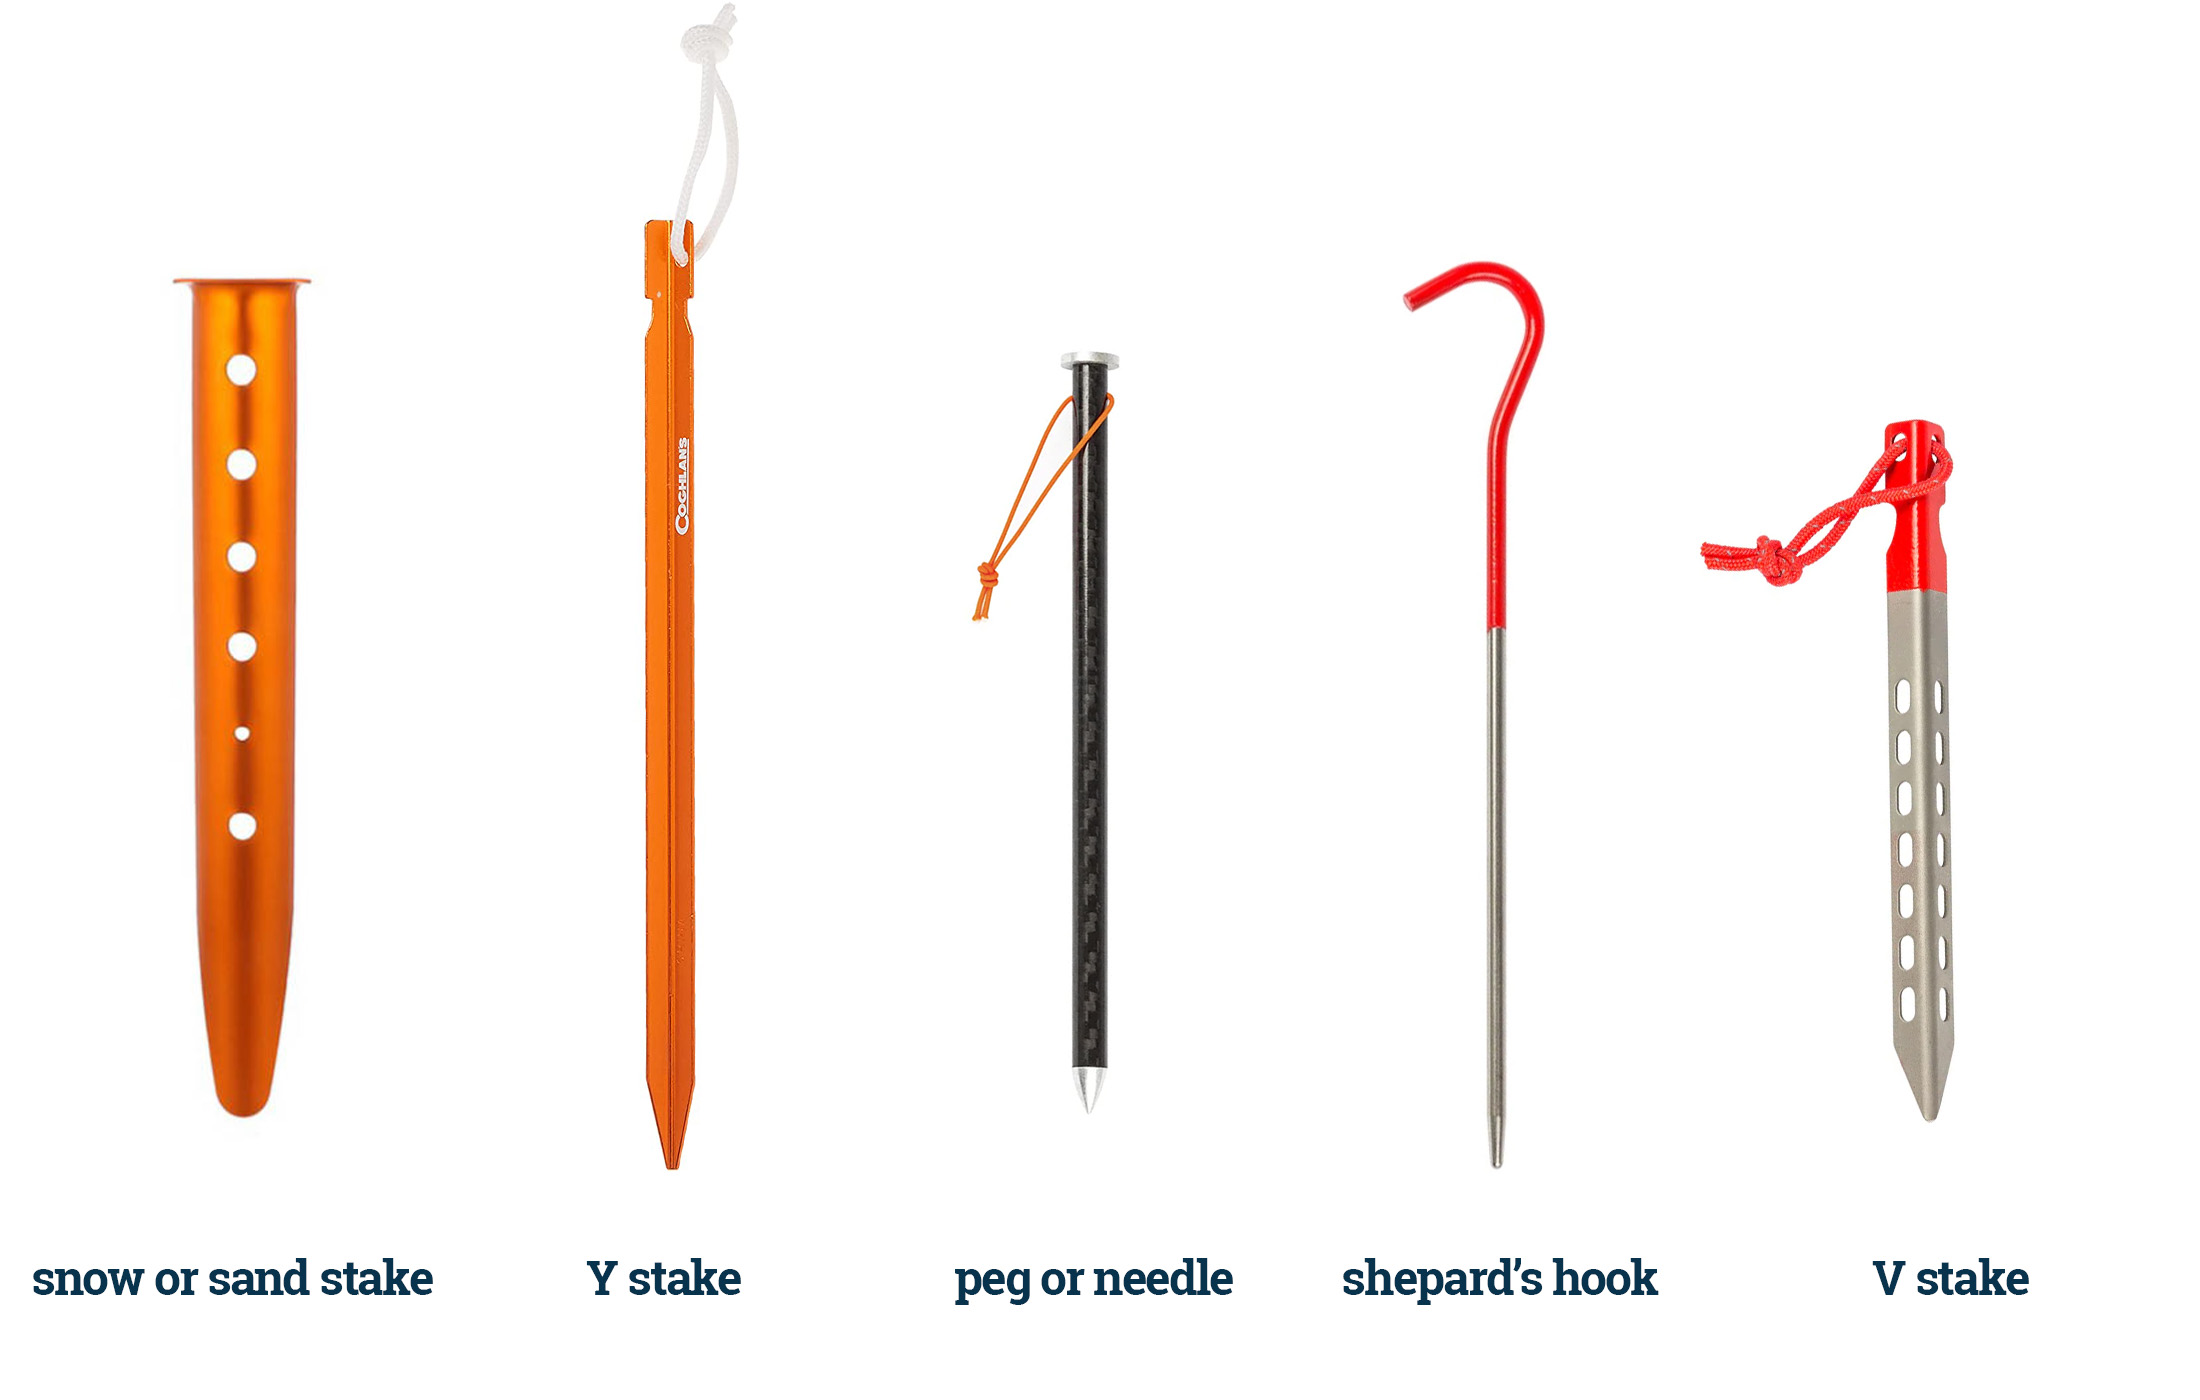
If you’re likely to pitch your tarp on sandy river banks, a sand or snow stake will give you the most amount of purchase, but if you were more likely to pitch a tarp over rocky or hard ground, a steel peg might be a better option. Y stakes and V stakes are the most popular designs as they provide enough holding power for most types of soil and are not too difficult to drive into the ground. Typically these are available in aluminium (light but weaker), steel (strong but heavy) and titanium (light, strong and expensive). The lightest stakes are pegs with carbon shafts and metal tips. A full set will be around a dozen stakes.
Ridgeline gear
If you intend to rig your tarp between two trees or want to fold your tarp along a line where there are no tie-outs, you will have to create a ridgeline between your supports. Here’s what you will need to do that.
Cord
The cord used to rig a ridgeline needs to be thick enough for a prusik knot to be able to grab it. 550 paracord or 4mm accessory cord is a popular choice. In terms of length, seven meters should be sufficient for spanning two trees a suitable distance apart for a hammock setup. As with guylines, I suggest going with a bright colour to make your ridgeline as visible as possible. The norm is to have your ridgeline at just the right height to catch you around the neck if you blindly walk into it.
Prusik loops
You’ll also need two or three prusik loops and clips (some kind of lightweight hardware) for securing your tarp to the ridgeline. I use 10 cm (4 in) lengths of 4mm accessory cord (available from any store that sells climbing gear) tied into loops with a blood knot. And for the clips usually use accessory or keychain carabiners (the kind that manufacturers tell you are not suitable for climbing).
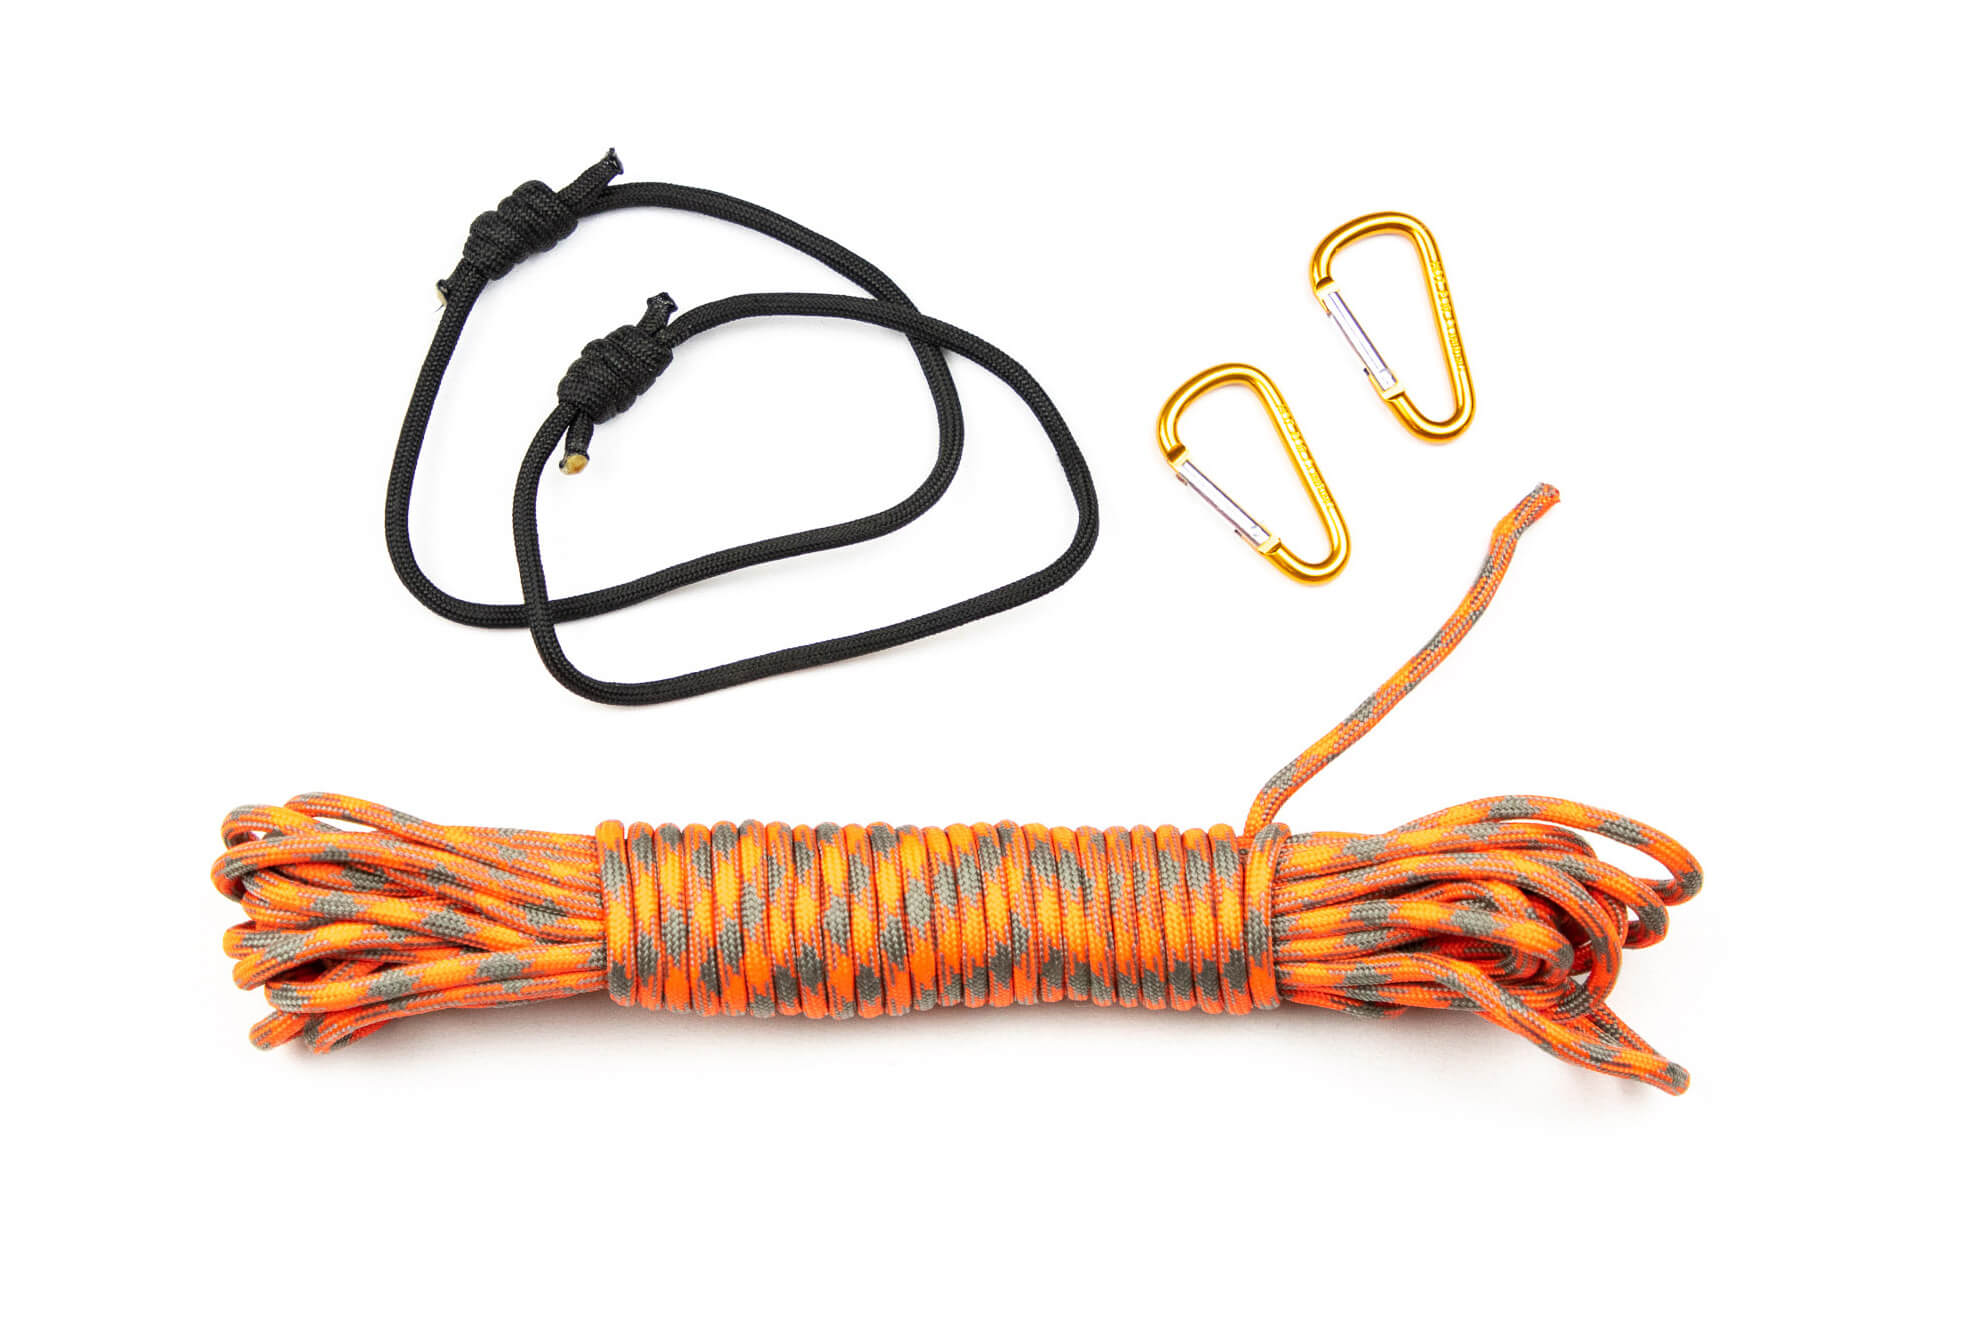
Standard rigging kit
A standard tarp rigging kit looks something like this: everything you need to rig the configurations described in my guide on 8 ways to rig a flat tarp.
| Flat tarp |
| Trekking poles x 2 |
| Y or V stakes x 12 |
| Long (2 m) tensioning guylines x 4 |
| Short (15 cm) pre-tied guylines x 6 |
| 7m ridgeline cord, prusiks and clips |
Bivvy bag, groundsheet, or bug shelter
You need to have something between you and the ground. Depending on the weather conditions and your personal preference, that could be a bivvy bag or groundsheet.
Bivvy bag
The big advantage of a bivvy bag over a groundsheet is that it does a much better job of protecting your sleeping bag or quilt from rain as it hits the ground and splashes back up and under the edges of your tarp. But a bivvy bag also adds five to tens degrees extra warmth to a sleeping bag or quilt. Of course, this can be an upside or downside depending on the temps. The other advantage of a bivvy bag is that some come with a built-in bug net window, negating the need for a full-size net. So that’s better protection from rain and bugs – just the solution for tarp camping in the Pacific NorthWest. The downside to a bivvy bag is it weighs more than a groundsheet (see kit weights compared above).
Ground sheet
The minimalist and lightweight alternative to a bivvy bag is a groundsheet. If you go this route, you will have at least three materials to choose from. DCF is light and very waterproof, but it’s also expensive and cannot be cut to size – not a problem if you can find a groundsheet in the dimensions you want. Tyvek is more durable than polycro but slightly less waterproof than polycro, which is the least durable of the three. If you decide on Tyvek – the most popular of the three materials – know that it’s crinkly and quite loud when new. It does get softer and quieter with use, but there is also a quick fix: you can just put in the washer for a cycle (warm, regular wash). Just don’t put it in the drier.
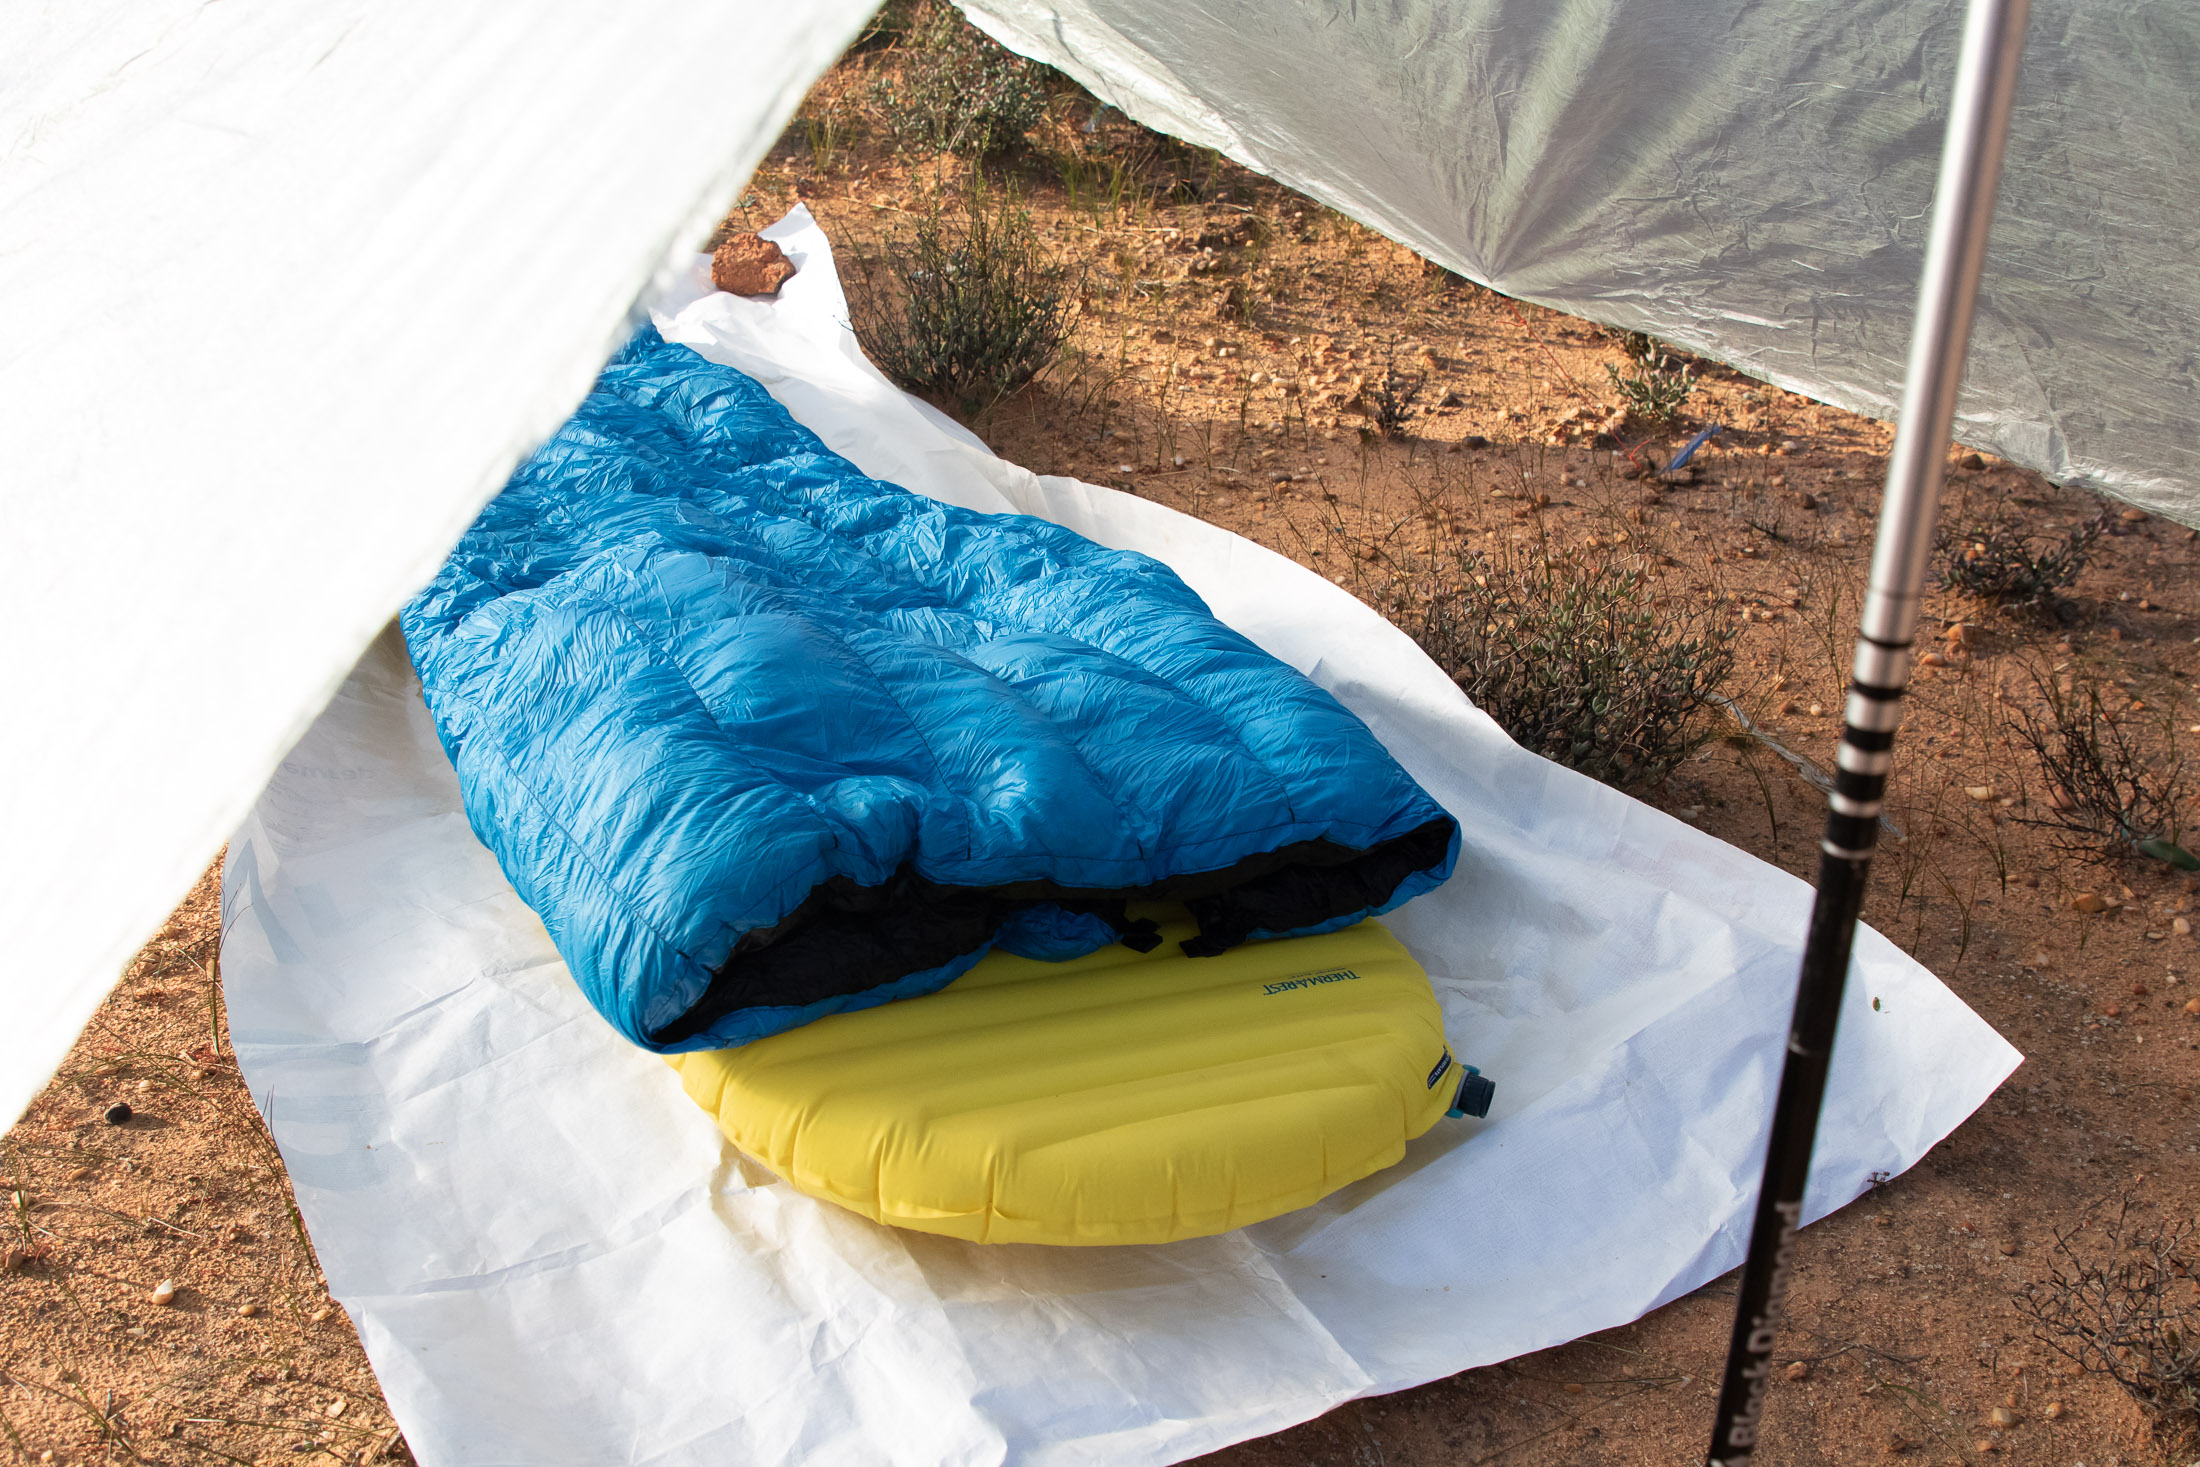
Regarding groundsheet size, you should aim to make yours at least several inches longer and wider than your sleeping pad and at least several inches narrower than your tarp when it’s rigged in an A-frame configuration. If your groundsheet were the same width as your tarp’s footprint, it might stick out under the edge and collect rain, which would then likely find its way to you. Tyvek and polcro can be cut with a regular pair of scissors.
Bug shelter
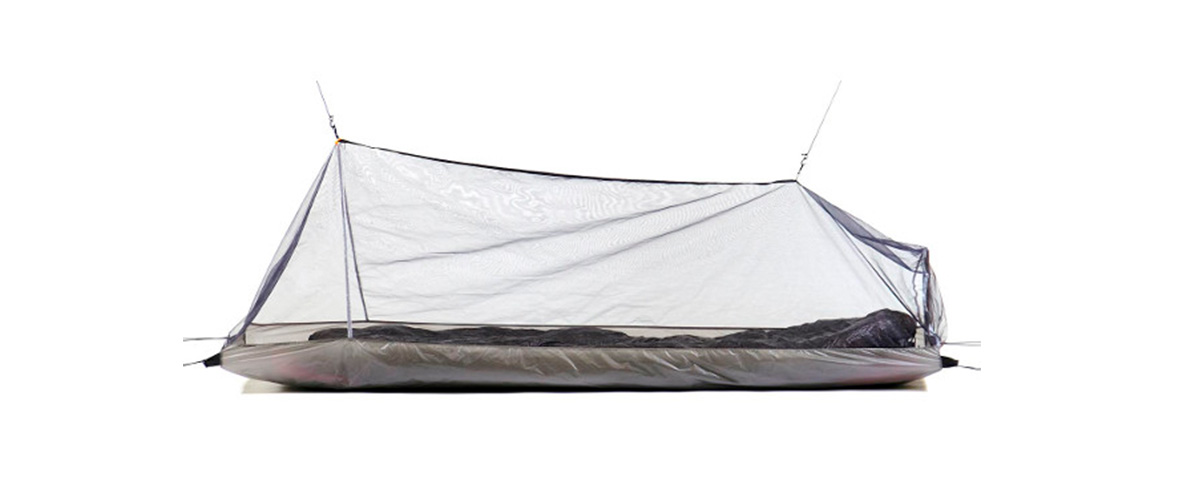
If there are going to be a lot of biting insects around, you’ll need some kind of bug net. Most bivvy bags have a built-in net window, which is great if you’re only going to spend a few waking hours in your bivvy. If, on the other hand, you’re going to spend a significant amount of your camp time ensconced in some kind of protective cocoon, you’ll want something that feels a little less claustrophobic. In such cases, a bug shelter is the best solution. Much like a tarp tent’s inner wall, a bug shelter has a bathtub floor and mesh walls (fully enclosed) that you suspend from either end of your tarp. Such an addition will weigh between 6 and 11 oz, but then you’re not packing a groundsheet, but then you’re not packing a groundsheet.
Tarp rigging fundamentals
Tarp rigging involves some skills that tent campers just never need to acquire. The downside, as with most learned things, is that there’s quite a bit of trial and error. The upside is that such know-how can also earn you some serious trail cred. The paragraphs below just cover the basics. For more detailed instructions regarding knots and related techniques, see my article on tarp rigging.
Knots
You will, at the very least, need to know three knots: one for hitching shorter pre-tied guylines to tie-outs, one for tying longer guylines to tie-outs and anchors, and another for tensioning your tarp.
Larks Head – for attaching a pre-tied guyline to a tie-out
In tarp camping you will use this hitch for connecting the loops on the ends of your pre-tied guylines to your tarp’s tie-outs. To link the two loops together, pass one end of the guyline through the tie-out loop and then bend the guyline back towards itself. Next, open the loop in the end of the guyline (now through the tie-in) and thread the rest of the guyline through this. Finally pull the whole thing tight and neaten it up.
Bowline – for attaching an longer guyline to a tie-out
If you were ever a scout, this is the knot you probably would have learned first. It has many applications in many different activities, but in tarp rigging it’s commonly used to connect a guyline to a tarp tie-out at one end and to a stake at the other. I’m not going to try to explain how to tie a simple bowline. Animated Knots does this much better, and you can see their demo here.
Trucker’s hitch – for tensioning a tarp
Like the bowline, the Trucker’s Hitch can be used for securing a guyline to an anchor or tie-out. The difference is that Trucker’s Hitch creates a 2:1 pulley and can be used for tensioning a tarp. The trick to using a Truckers Hitch is knowing that the other end of the guyline has to already be secured to something. That’s why I recommend that you secure only the secondary primary guyline with this hitch. In an A-frame pitch only one of the two primary guylines has to be tensioned to ensure that that is taut right through its length.
Anchors
Because they have to be tensioned, tarps and shelters require sturdier anchors than freestanding tents. Creating such an anchor can be easy or difficult depending on what you have to work with. The more challenging the conditions (very soft or hard ground can be problematic), the more creative you’re going to have to get.
Stakes
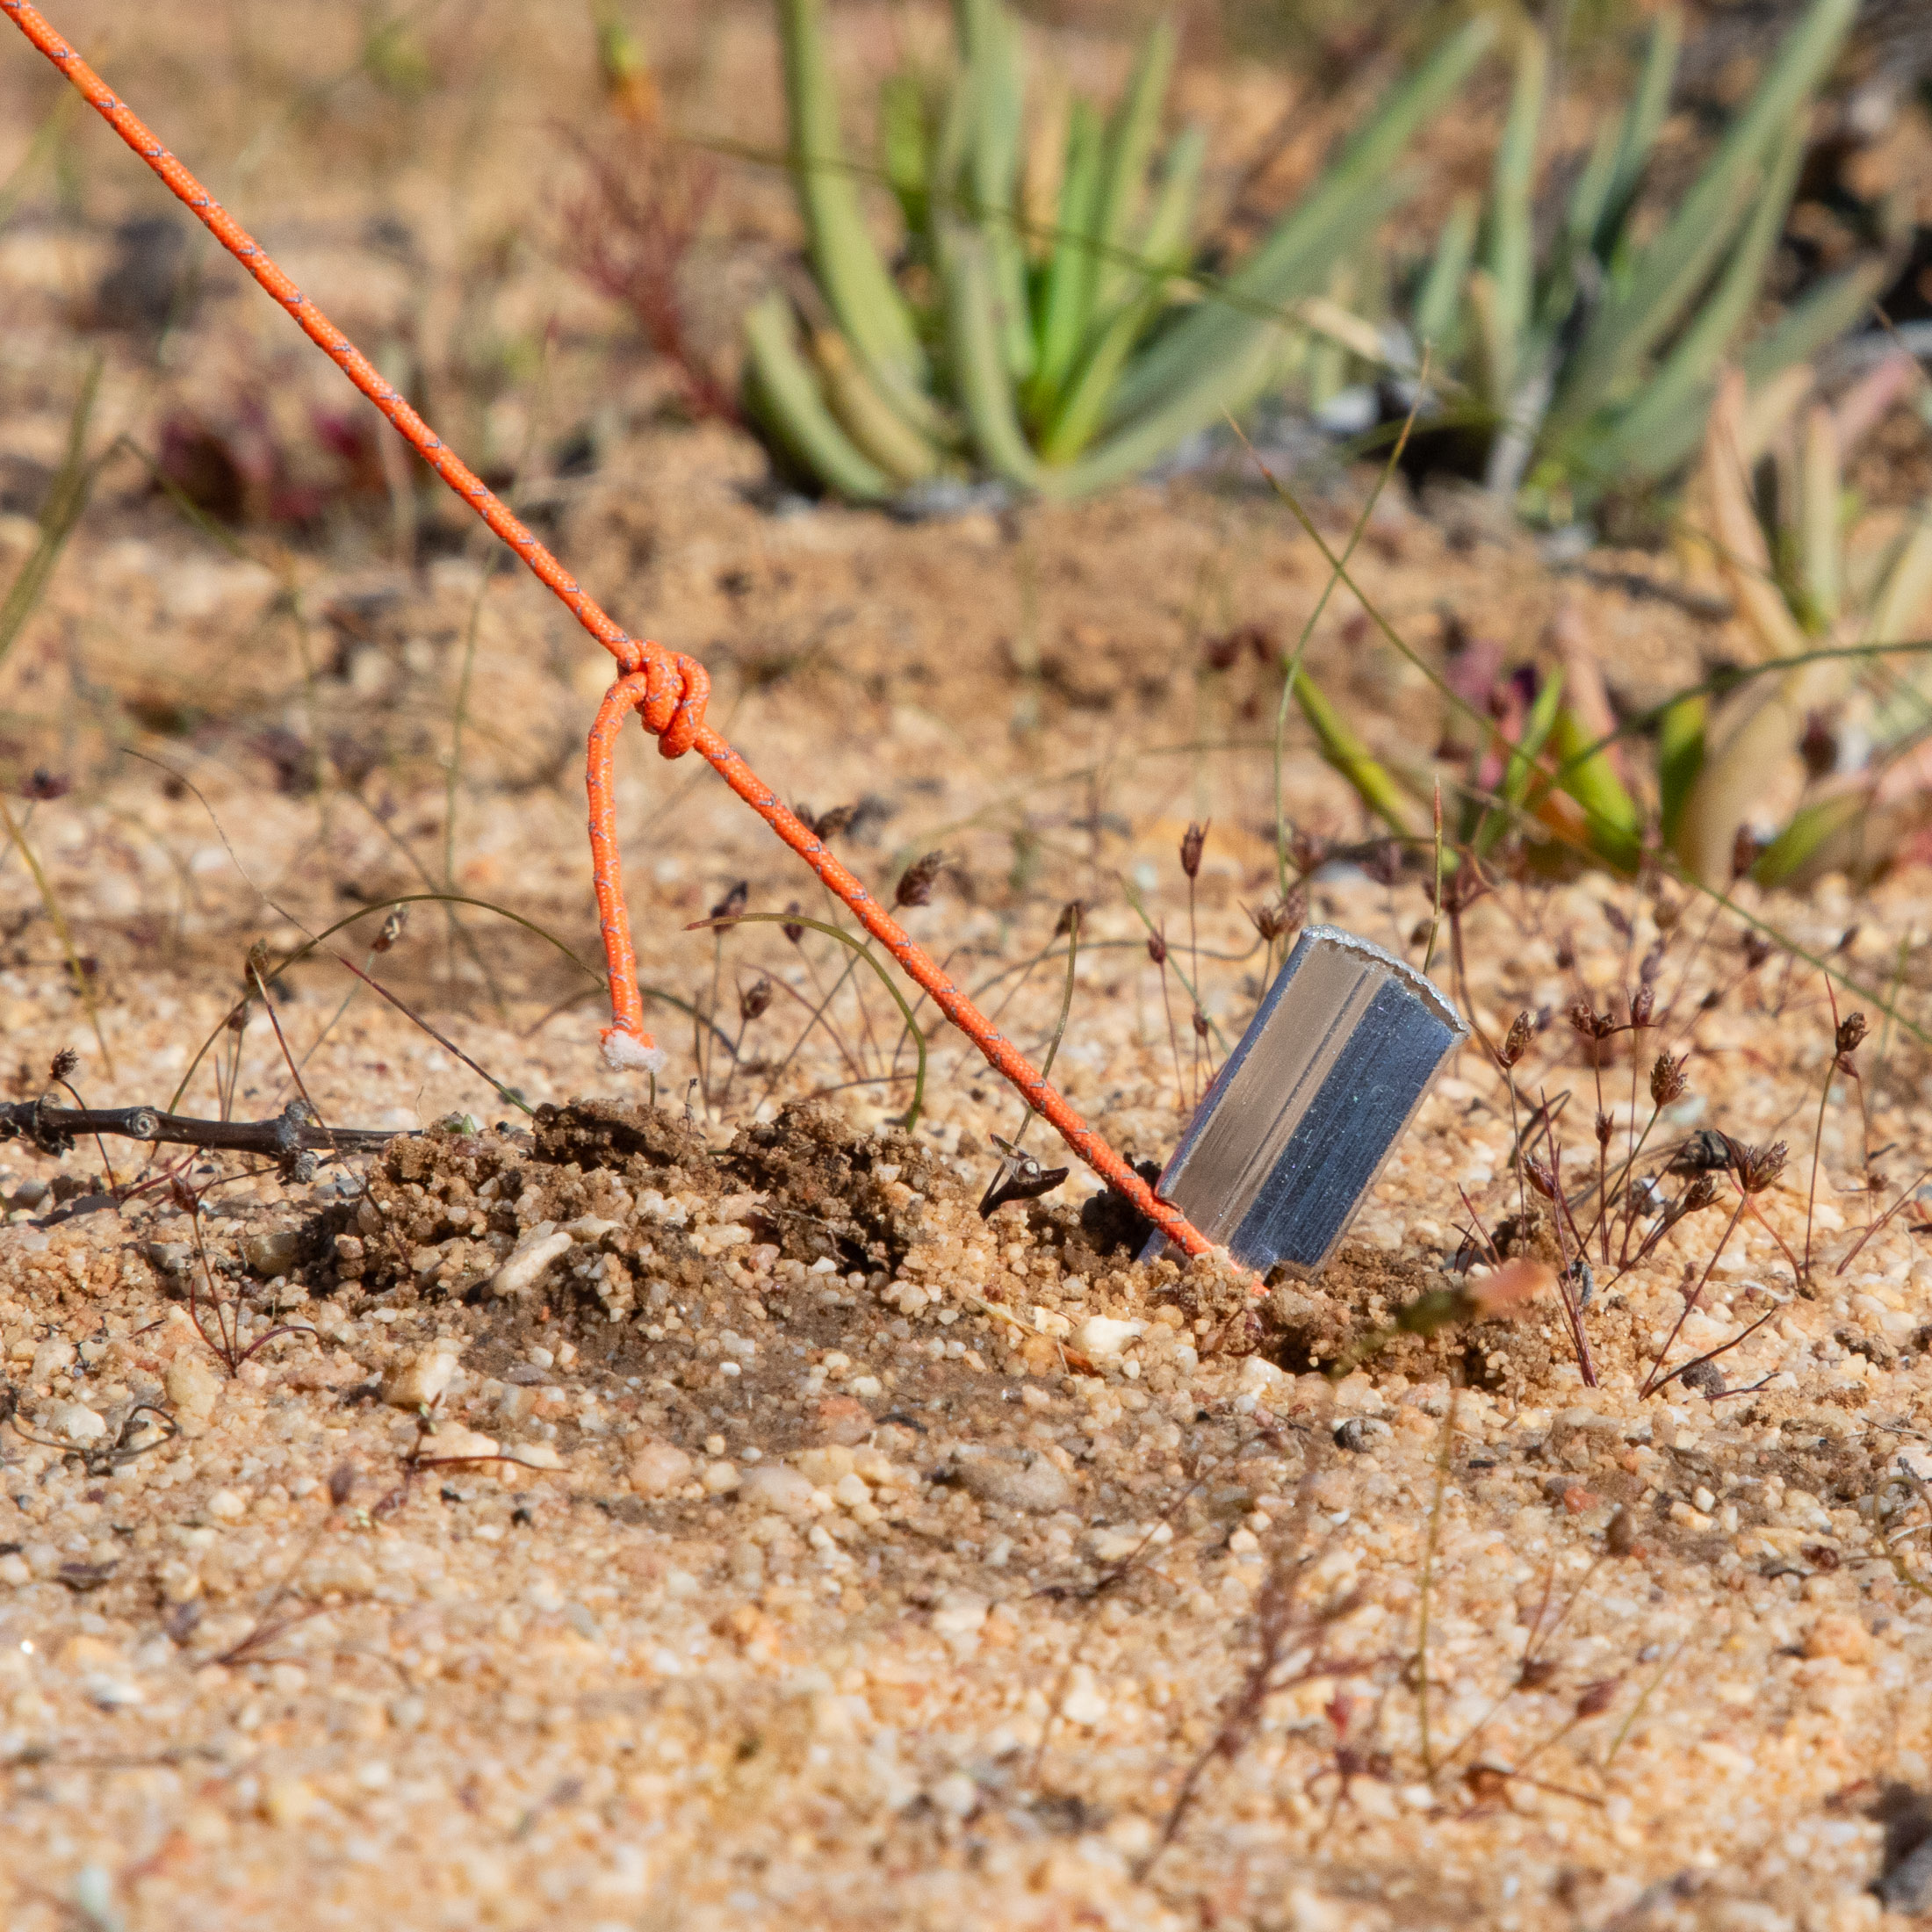
To provide sufficient holding power, stakes have to suit the soil type. For allround versatility a Y stake or V stake usually works best. If you expect to pitch your tarp over hard or rocky ground, a peg or shepherd’s hook is your best option. And if you’re going to have to contend with sand and snow, choose a sand or snow stake. But how you put a stake into the ground also affects it holding power. For maximum strength and stability, always angle a stake slightly away from your shelter – aim for around 65°– when driving it into place.
Rocks and roots
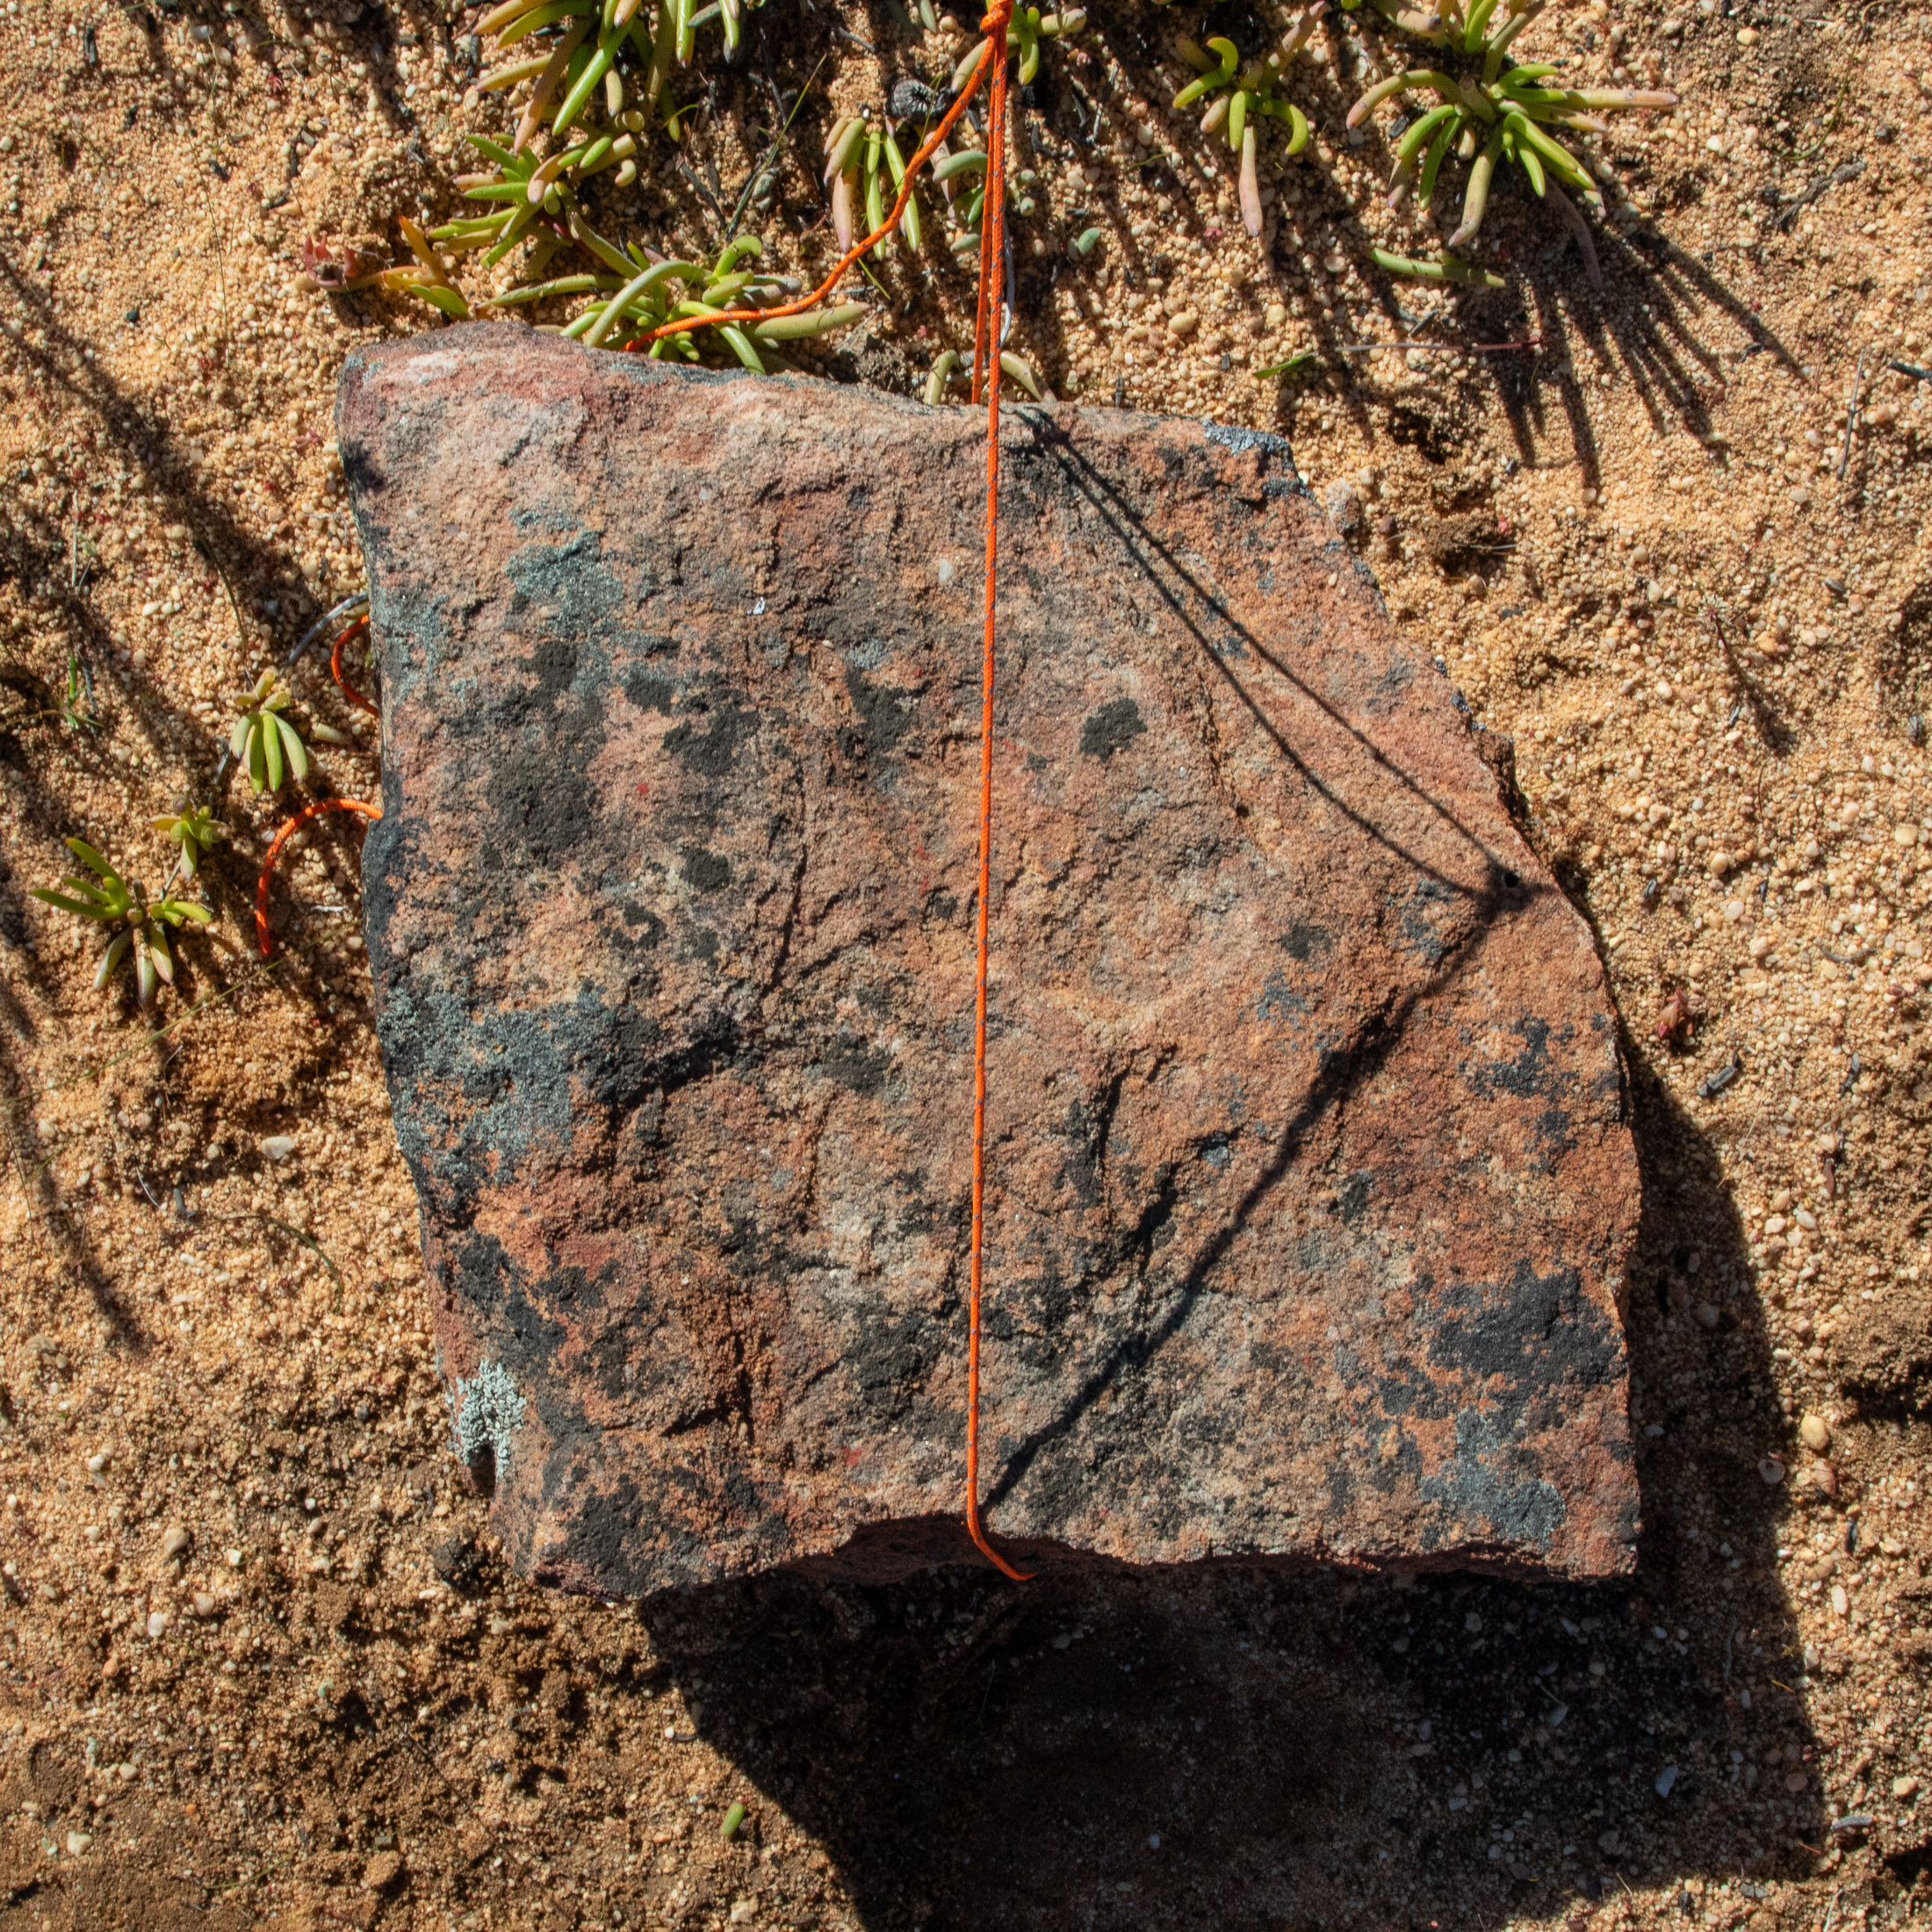
Natural features often make for even better anchors than a stake, and they’re especially useful when the ground is too hard to get a stake into. Roots, boulders and features in the bedrock often make the sturdiest anchors, but you’ll have to position your pitch with these in mind. If you can’t find a suitable spot close enough to such features, you can also use rocks that are small enough to move but large enough to provide decent anchors. To strengthen a less than stellar rock anchor, you can also pack other rocks around and on top of it.
Basic configurations
There are several ways to rig a flat tarp. The A-frame is the most popular of these configurations, and the Lean-to is arguably the second most popular way to rig a tarp. Consider these a good place to start working on your tarp-pitching repertoire.
A-frame
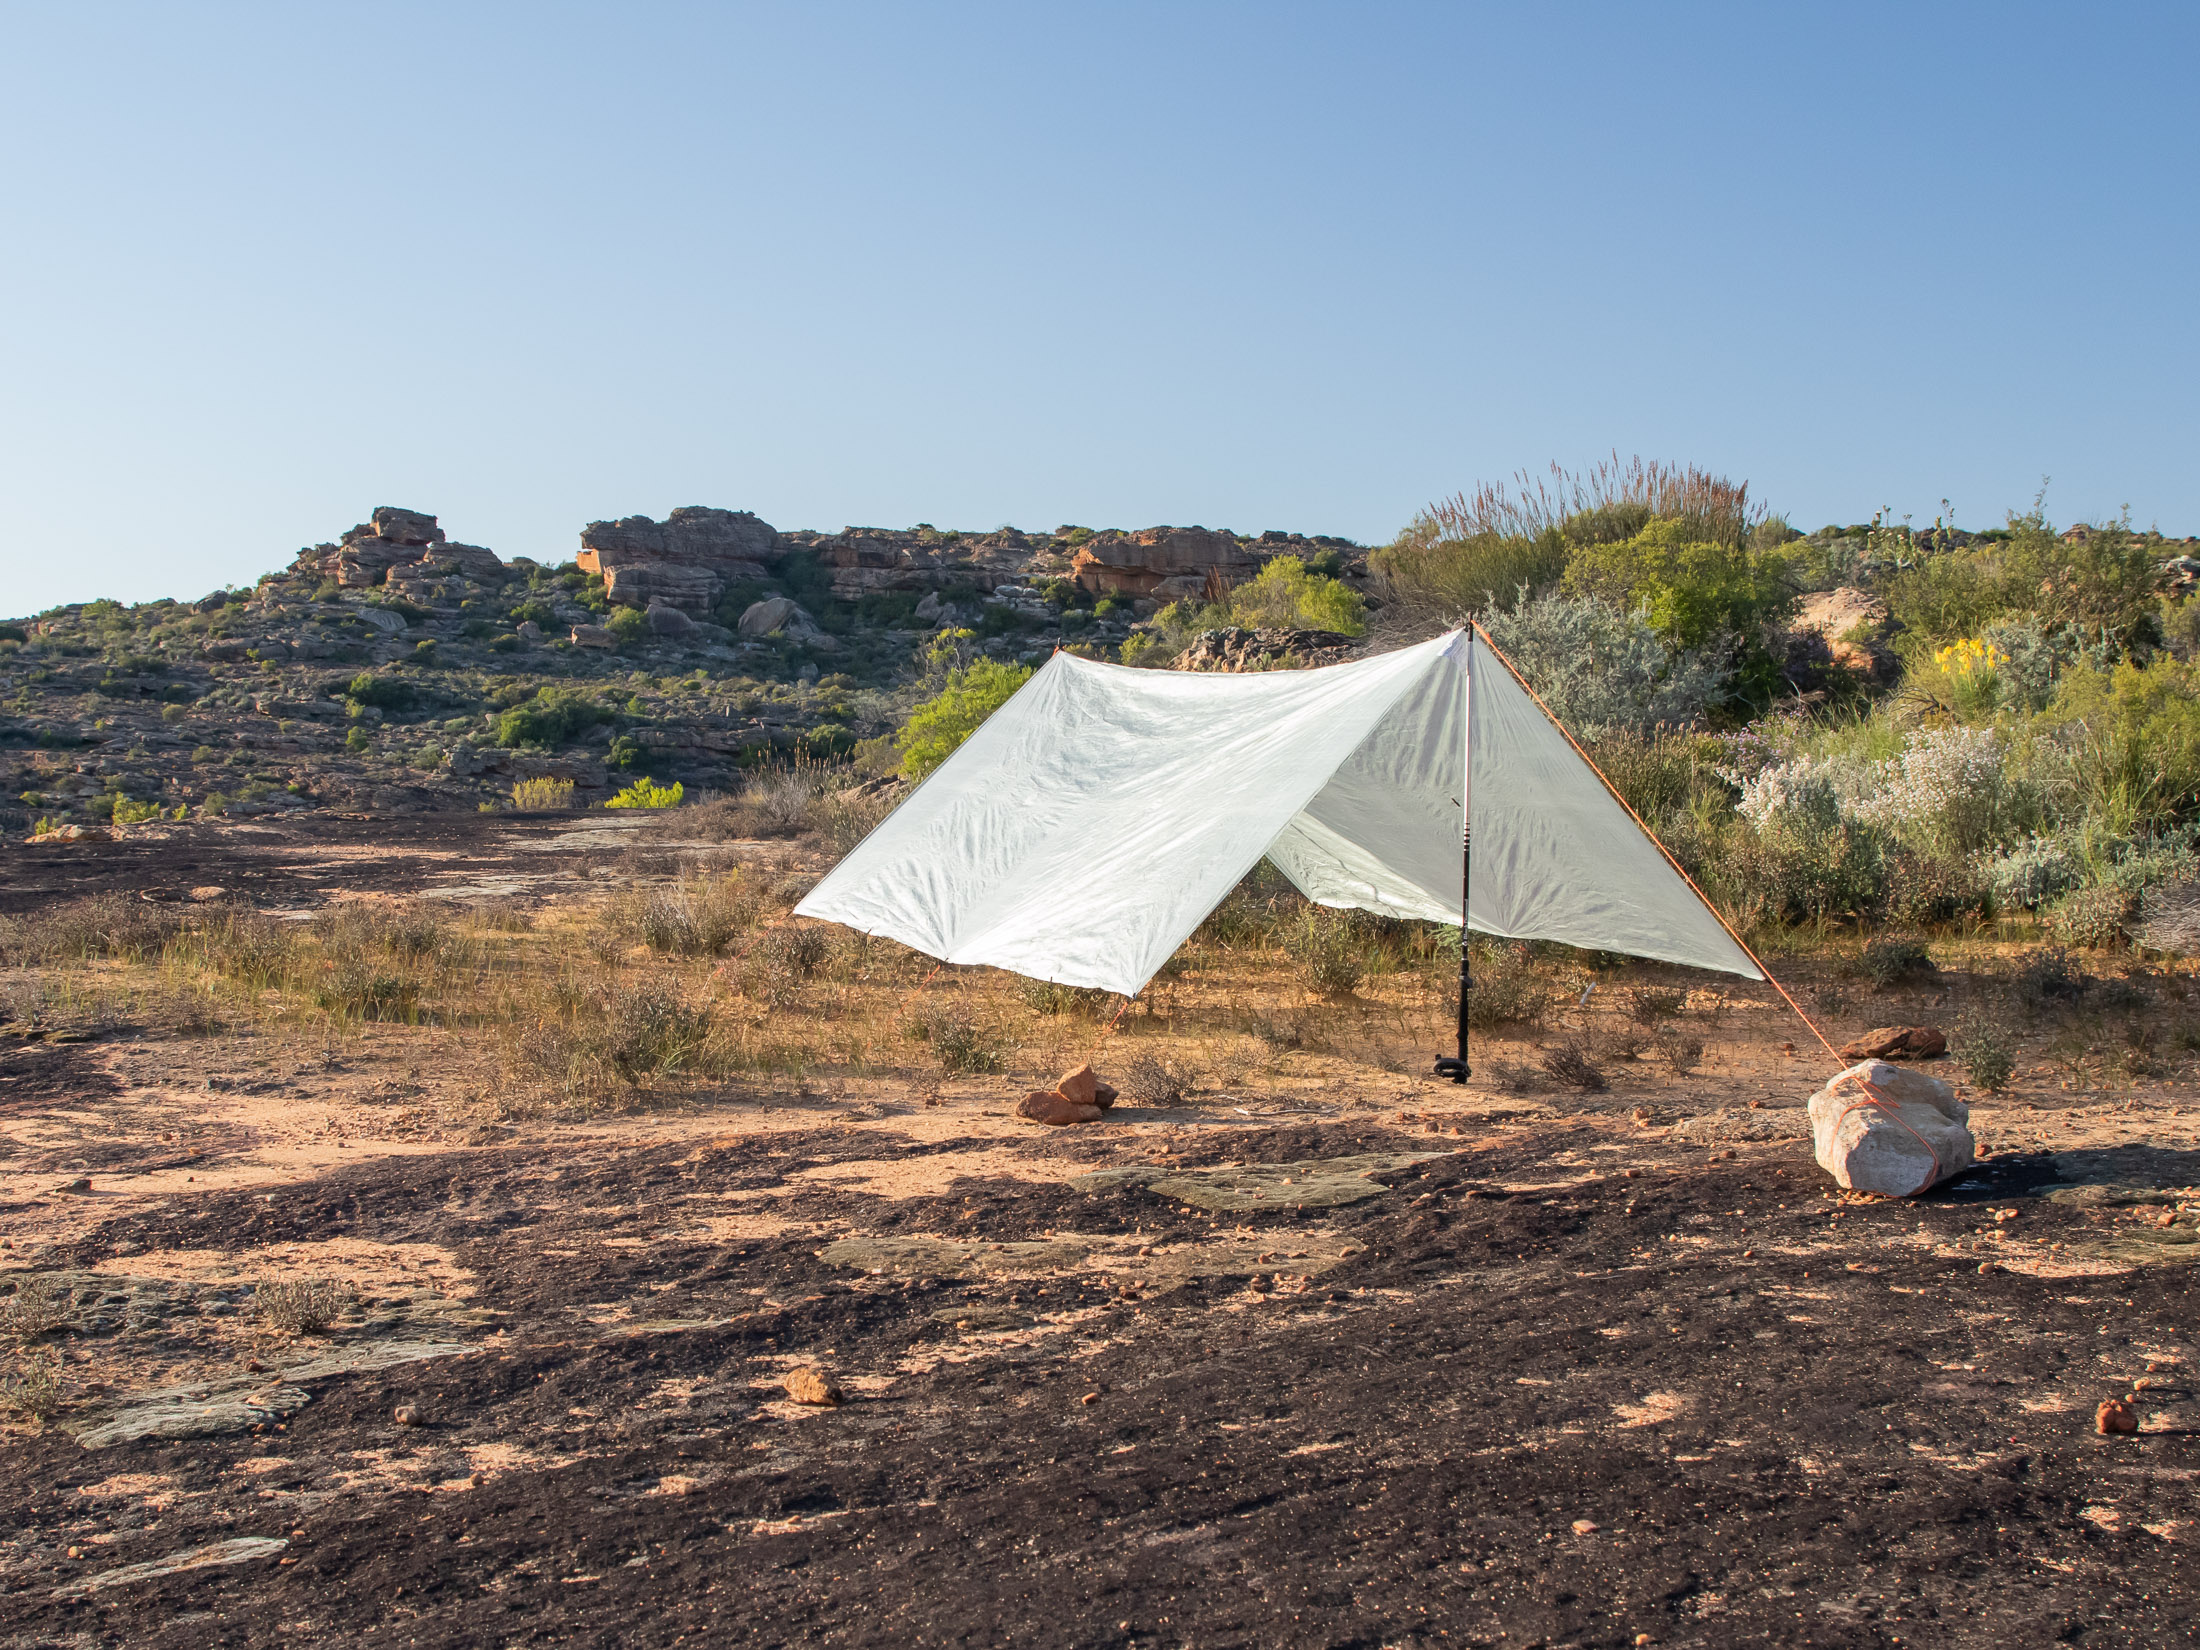
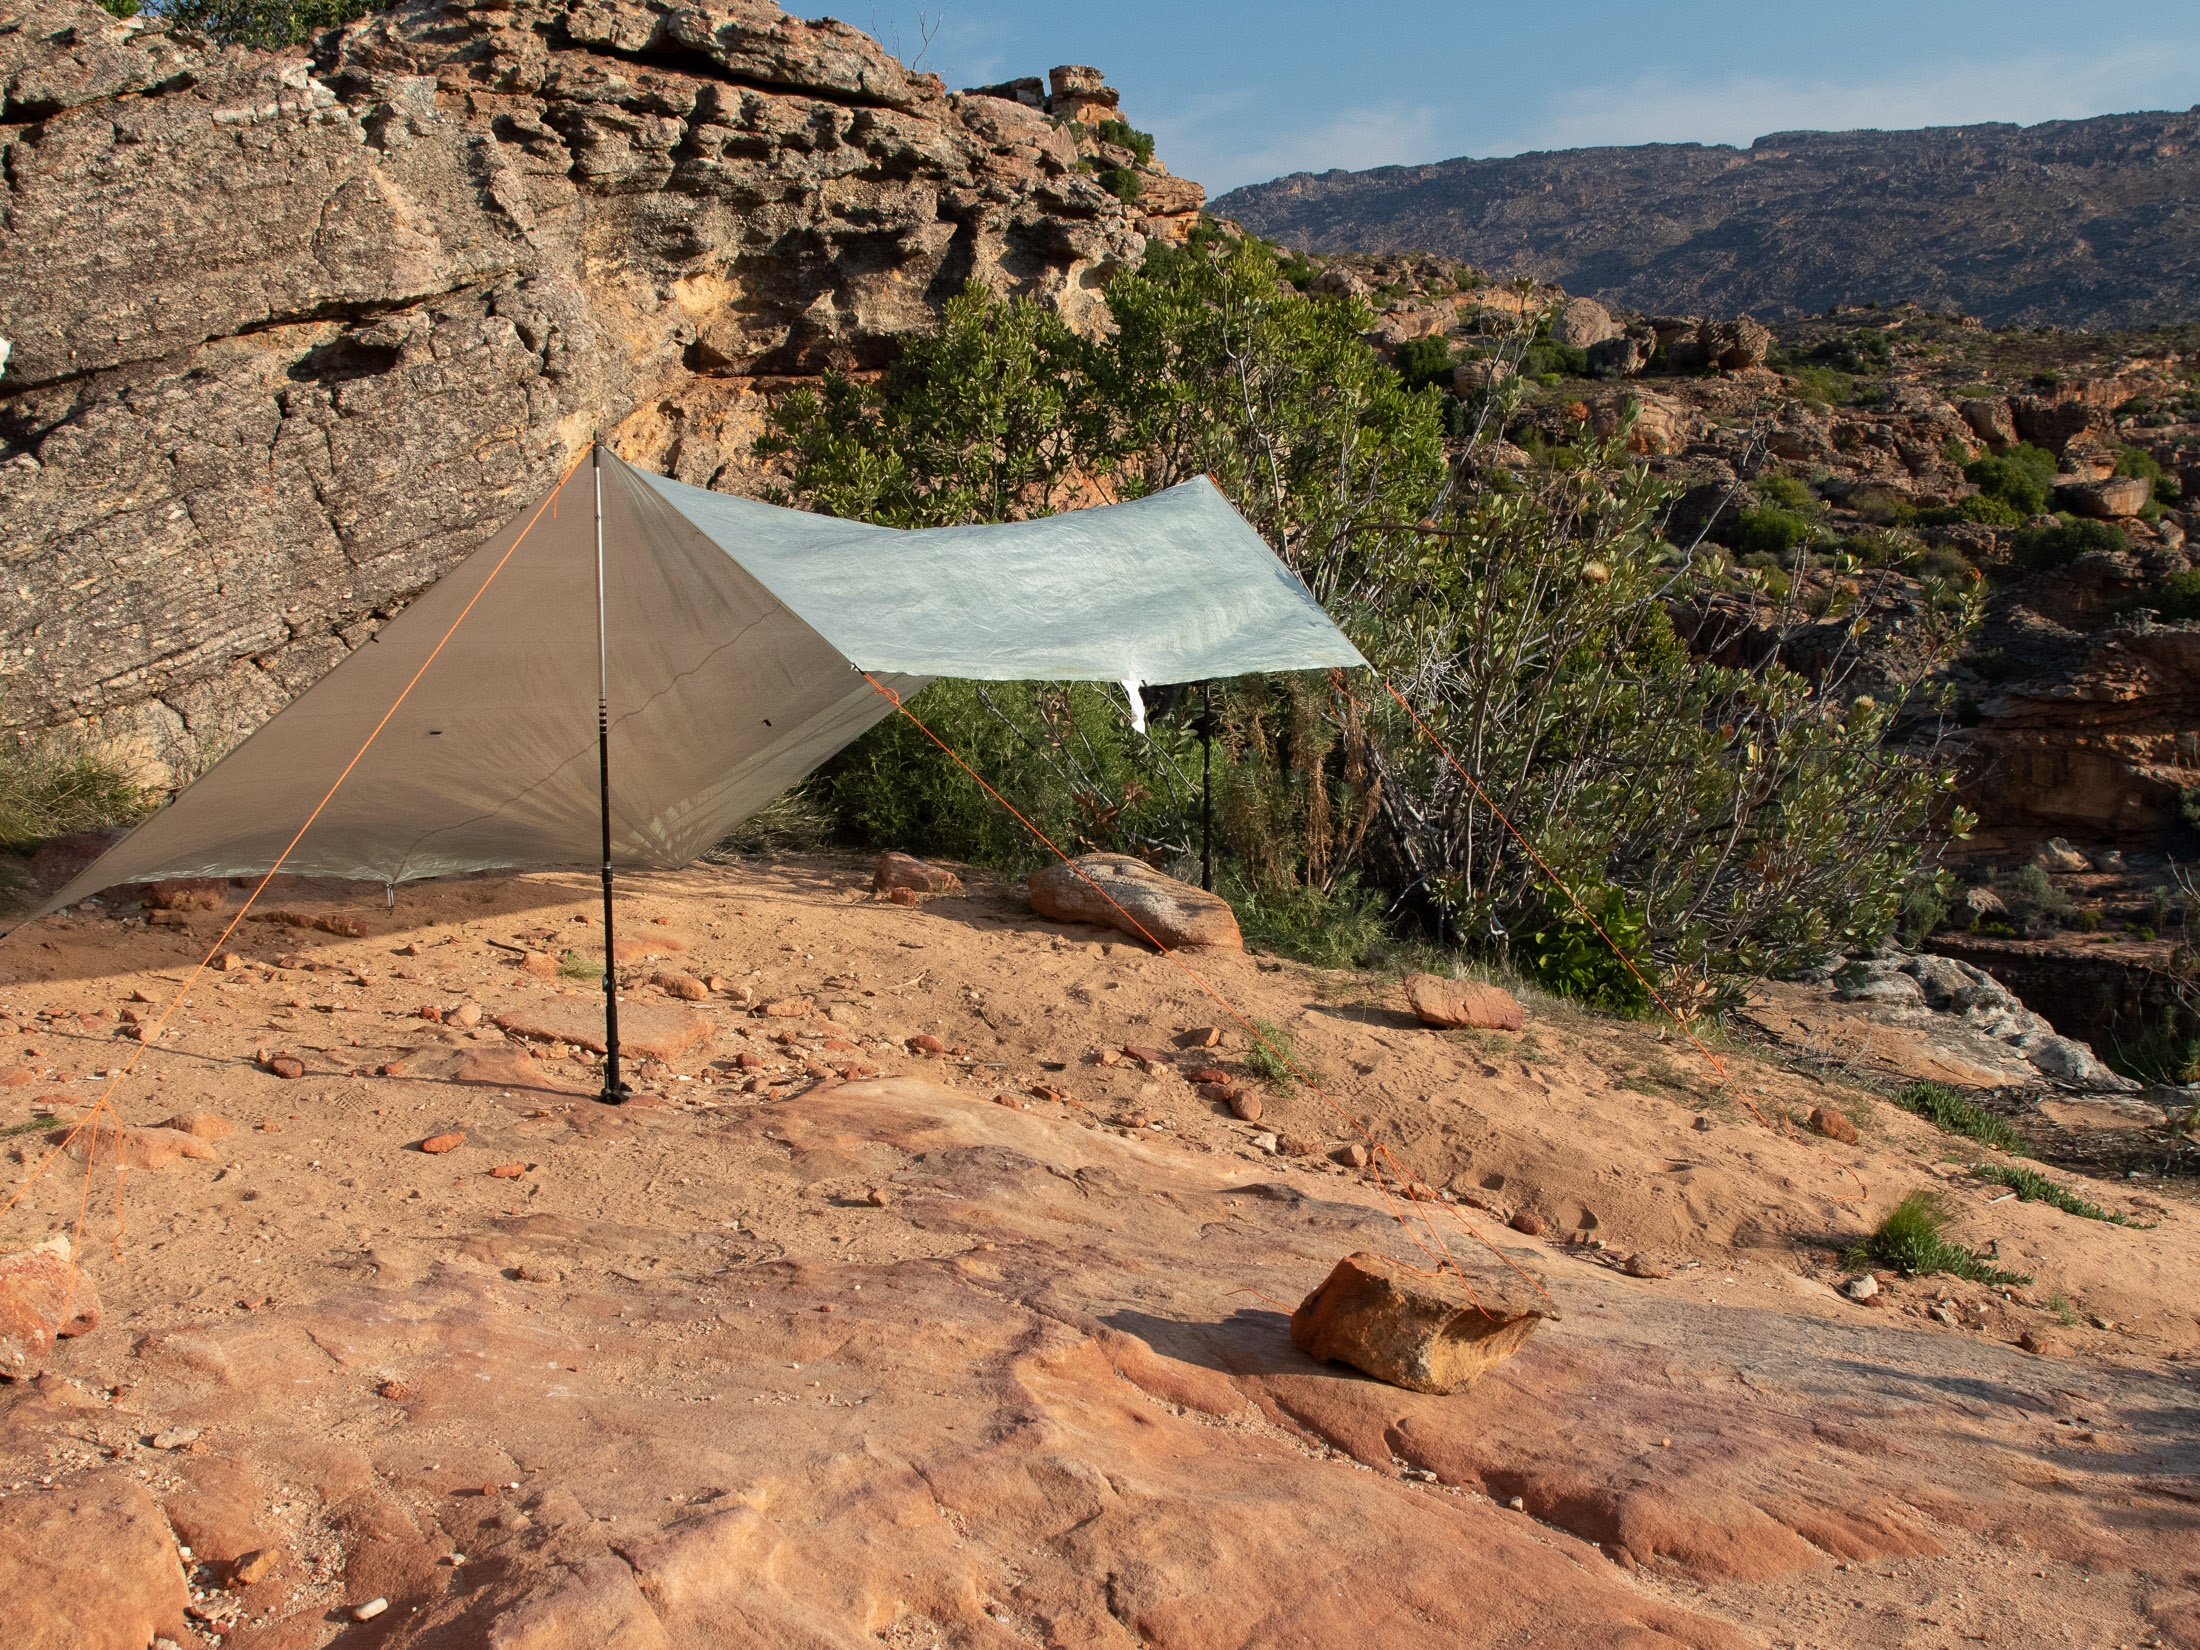
The classic A-frame is one of the quickest and easiest ways to configure a tarp. It can be set up either with a tree-to-tree ridgeline or, more commonly, with two trekking poles attached to the ridgeline tie-outs. You can also use a bike and accessory pole instead of trekking poles when bikepacking. Because of its steeply pitched sides, this setup provides ample protection against the wind and rain.
Supports: two trekking poles or ridgeline
Hardware: 2 trekking poles, 2 guylines, 8 stakes
Complexity: simple
Best for: most conditions
Steps for rigging an A-frame
- Stake down both corners at one end of the tarp. Position the corners further apart or closer together depending on how much headroom you want.
- Put the end of a trekking pole through the ridgeline tie-out at the same end of the tarp.
- Secure the guyline on this tie-out to a stake using a bowline.
- Put the end of the other trekking pole through the ridgeline tie-out at the other end of the tarp.
- Secure the guyline on this tie-out to a stake using a truckers hitch.
- Stake down the remaining corners.
You can adjust the amount of headroom by lengthening or shortening your trekking poles and repositioning the corners. If you want even more space and ventilation, you can raise the whole tarp and guy out the corners and sides a few inches off the ground.
Lean-to
Like the basic A-frame, the lean-to is the same height from end to end, but it is open on one side and provides less protection from the elements. If you have two trees, you can also use these to create a ridgeline and then fold the tarp over this. Otherwise, you will need to use two trekking poles attached to side tie-ins (along a tarp’s length). This second method requires two additional guylines but no ridgeline cord.
Supports: ridgeline or two trekking poles
Hardware: 2 trekking poles, 4 guylines, 7 stakes (swap out 2 guylines for a ridgeline cord if using 2 trees)
Complexity: moderate
Best for: fair weather
Steps for rigging a lean-to with trekking poles
- Stake down the corners on one end of the tarp.
- Put the ends of your trekking poles through the two side tie-outs (opposing) closest to the other end of the tarp.
- Stake out the guylines on these tie-outs at right angles to the tarp.
- Secure the two corner guylines to anchored stakes using the truckers hitch.
Choosing a good site for a tarp
Campsite selection is also more important to a tarp camper than a tent camper. Besides knowing how to use windbreaks like trees and boulders to your best advantage, you also need to know how to position your tarp out of the path of any surface runoff. And in heavy rain, you may have to dig a drainage ditch to divert water away from your sleeping area. More about that in a minute.
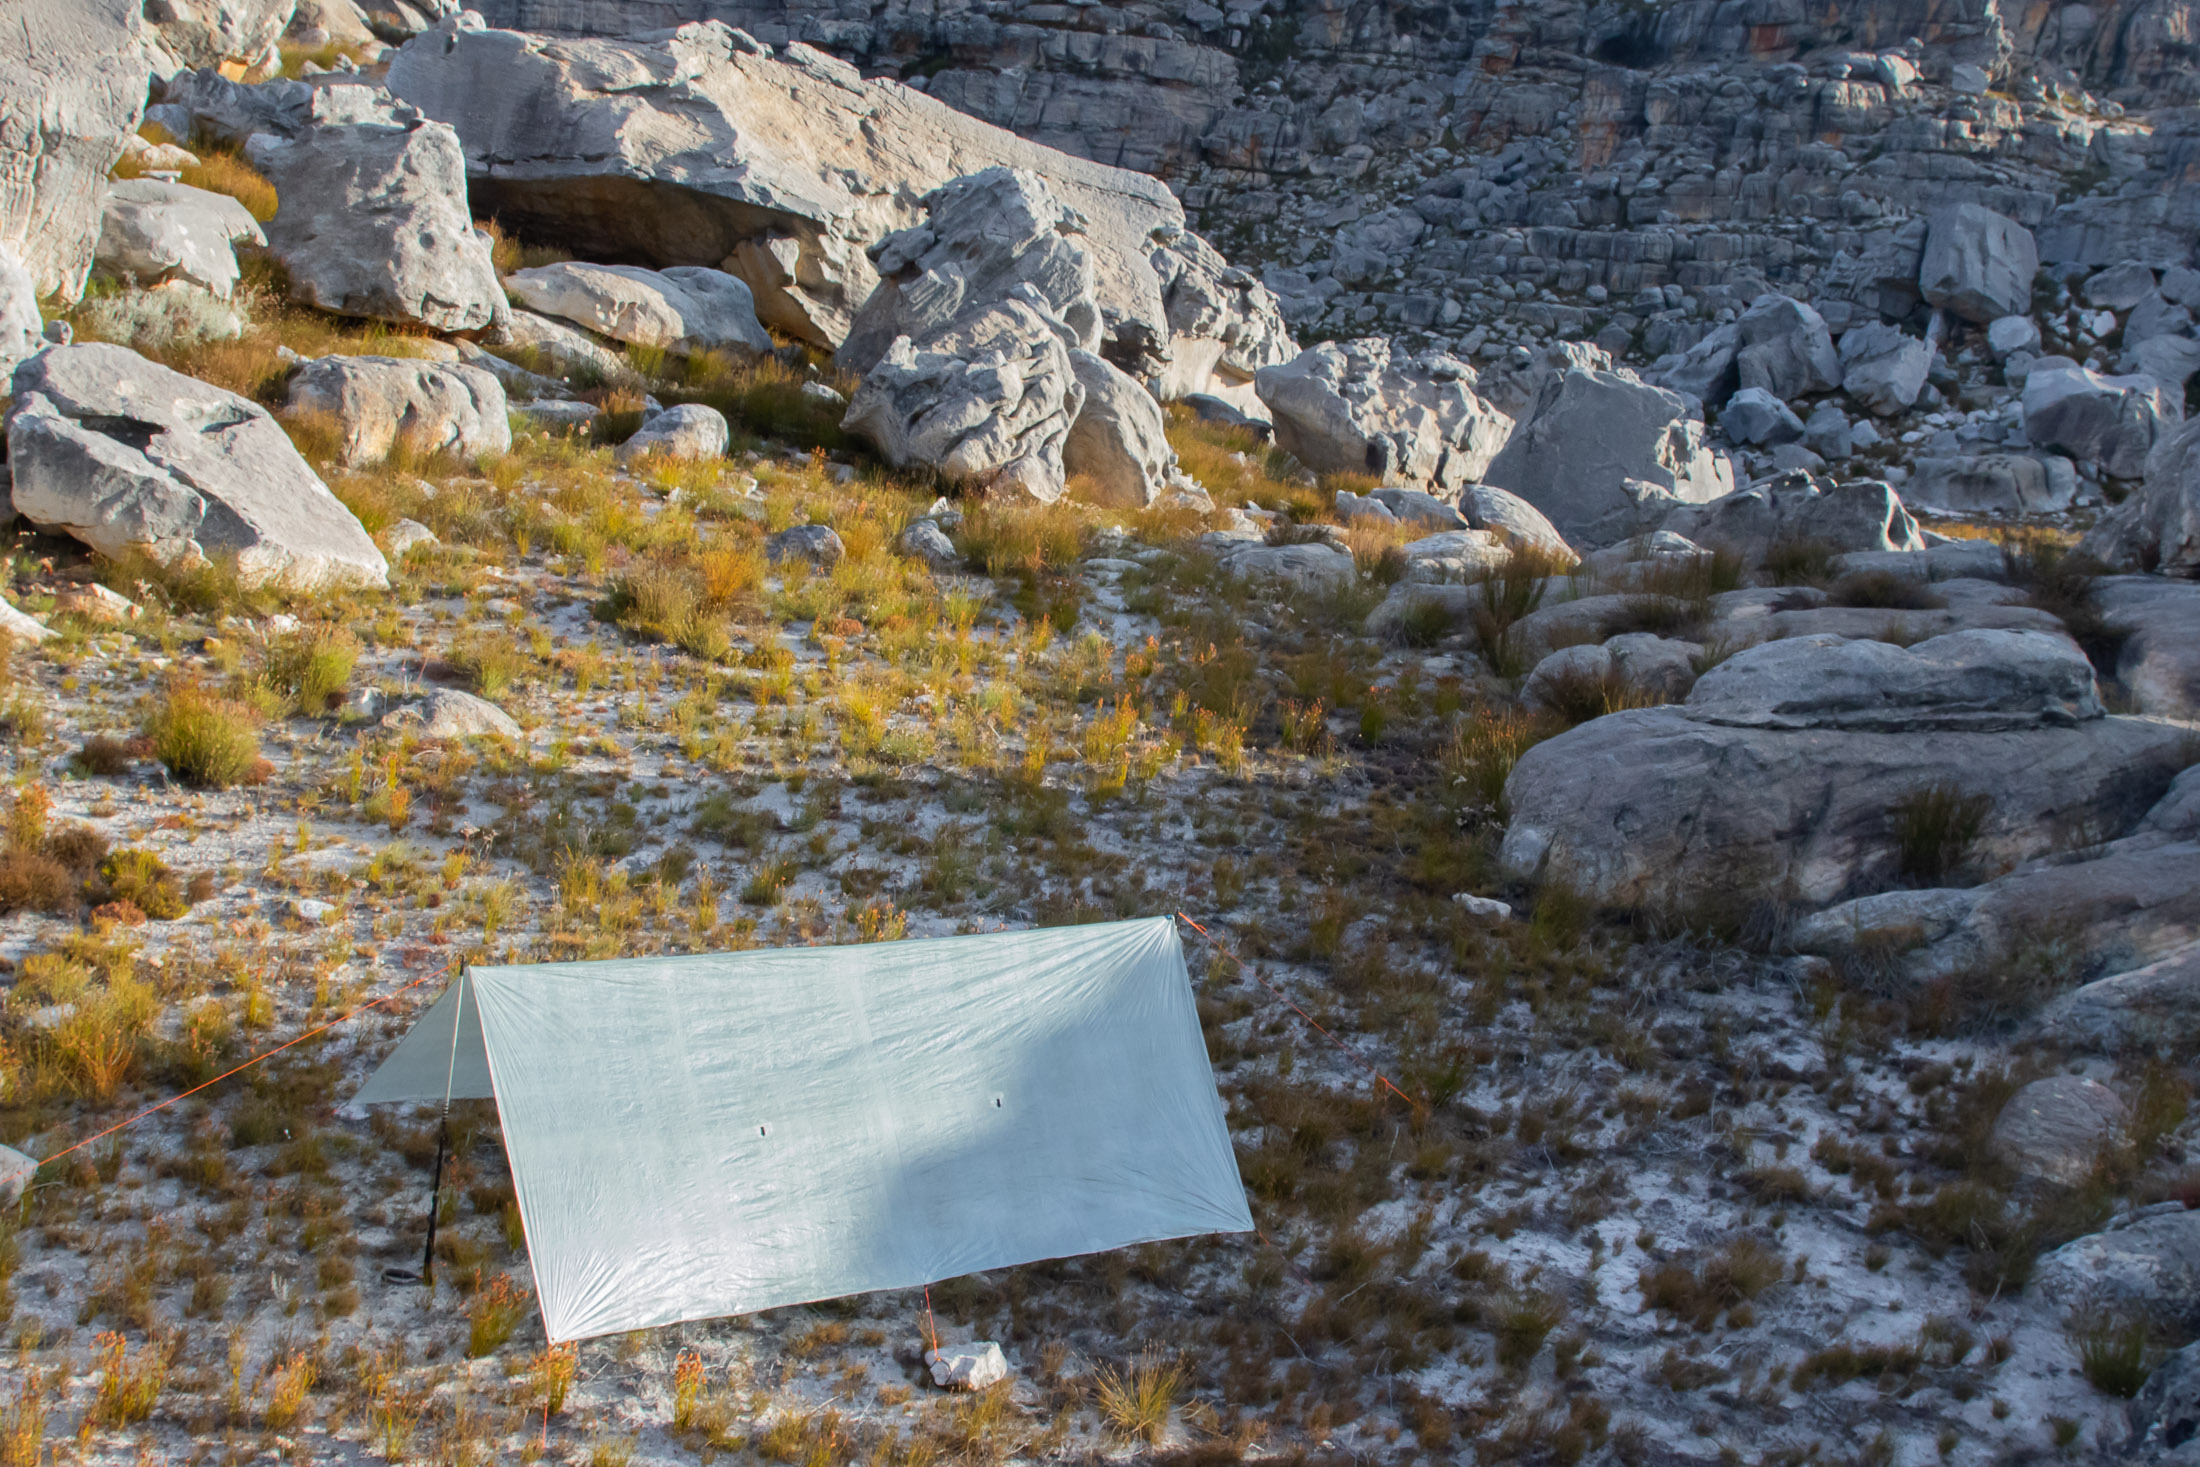
Find a flat and well-drained patch of ground
Unlike tents, tarps don’t have bathtub floors, so it’s even more important to ensure that water isn’t going to collect where you pitch your tarp. If it’s difficult to avoid runoff, you can dig a ditch around your tarp (more about that in a minute), but it’s always better to simply avoid channels and depressions where water can pool. You can sometimes identify shallow depressions by a line marking the rim or by a patch of darker sediment.
Try to sleep with your head uphill if on a slope
If you are forced to sleep on slanted ground you should always try to sleep with your head uphill. Sleeping with your feet higher than your head can result in increased blood pressure in your head, which can result in a headache. Sleeping with your head uphill helps avoid this, and it ensures that if you slide around in your sleep, you will slip down and into your sleeping bag or quilt, not out of it.
Look out for dead branches hung up in trees
Beware dead branches hung up in trees and bushes. With even just a light wind these can fall and injure you. This precaution is even more important if you are hammock camping as your body weight can easily shake loose any loose branches higher up. One way to mitigate this risk is to avoid dead trees altogether, but even then you should always look to ensure that you’re not pitching your tarp under a widowmaker.
Plan your pitch with the wind in mind
Depending on the conditions, you might want to pitch your tarp where it will be more or less exposed to wind. If you’re concerned about mosquitoes and other biting insects, it’s a good idea to pitch your tarp where it will be in a breeze. If, on the other hand, you want to be protected from the wind, pitch your tarp in the lee of a natural windbreak like a large rock or bushe. Just also keep in mind local weather patterns, like katabatic winds, which can cause the wind to shift during the night.
Dealing with rain
Staying dry and warm under a tarp is not as straightforward as it is when tent camping. In the case of light rain and wind, you’ll have no trouble staying dry, but in more challenging conditions, you’ll have to take some measures to ensure that you and your gear don’t get wet.
Use a bivvy bag if you expect rain
The problem with a groundsheet is that you can still get wet if there is splash back – what happens when rain hits the ground and splashes back up under the edges of the tarp and lands on you. You can pitch your tarp in a way that helps avoid splash, but the best way to stay dry in such conditions is to use a bivvy bag instead of a groundsheet. An ultralight bivy bag won’t be fully waterproof, but it will keep you dry under a tarp and provide extra insulation and protection from insects.
Lower your tarp to avoid splash back
The other way to avoid splashback is to pitch your tarp as close to the ground as possible. To get this right, you will need to avoid any small shrubs, roots or rocks that would get in the way if you tried to lower the edges of your tarp. You may also need to shorten your trekking poles to maintain its profile and width. Tip: when choosing trekking poles for tarp camping, choose adjustable poles that, besides being the right height for hiking with, will also allow you to pitch your tarp at heights you are likely to use it.
Dig a furrow around your sleep area
Regardless of whether you use a groundsheet or bivvy bag, it’s always a good idea to dig a small furrow around the edges of your tarp to divert water away from your sleep area. To get your furrow to drain properly, you will need to create it in a U shape with the legs facing downhill. It’s also important that the furrow be dug just under the edges of tarp (or inside by a few inches). Otherwise water might still run off the edges of your tarp and find its way to your groundsheet or bivvy bag.
Get more advice from this gearhead
That was the first article in a four-part series on tarps and tarp camping. Next up is a guide to choosing your first tarp, then an article on tarp configurations, and finally an article on tarp rigging techniques. Read all four, and you’ll know all there is to know about tarp camping and rigging. If, after all that, you want to learn more about the whole fast and light approach to human-powered exploration, check out my articles on fastpacking.
