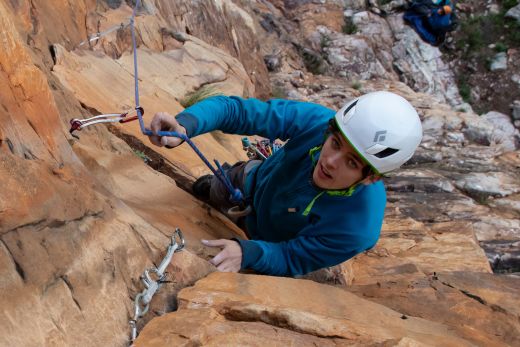
Even if you’ve had only minimal trad experience, you’ve probably already noticed that trad climbers use both slings and quickdraws to connect the rope to protection. Unlike sport routes which tend to have bolts exactly where you need them, trad routes often require you to place gear a few meters left or right of the climbed line. Without longer extensions on some of these pieces, the rope would zig zag all over the route and create rope drag that would make the climb a lot harder than it needed to be. So, mitigating rope drag is pretty important, but it’s actually only one of several reasons that you might need to extend your gear. In this article, I look at all of the situations in which you might need to extend protection and explain what kind of extensions you’re likely to need when.
Why extend gear?
There are three main reasons you might want to extend a piece of protection.
Avoid rope drag
The most severe rope drag is the result of the rope being pulled over an edge or bulge in the rock, but you can also create a significant amount of friction simply by clipping the rope to gear in a way that creates acute angles between placements. At its worst – usually on longer routes – the amount of drag created this way can be enough to make clipping feel like a weighted bicep exercise. Where this is a challenge (meandering and blocky routes), the main objective of extension is to get the rope to run straighter through protection and reduce the amount of contact with rock features that can cause friction. Rope drag caused by meandering routes can also be mitigated with the use of double ropes.
Keep gear in place
When you climb, the swaying rope can tug at gear and in some instances can even pull it out of place or cause it to walk into parts of a crack where it’s less secure or difficult to retrieve. By extending such placements, you can reduce the effect of the rope on your gear and help keep it in place. This is especially important in the case of marginal placements like those in shallow and flared cracks and in nut placements where the piece can be lifted out of the crack. For more on how to make the most of these tricker placements, see my articles on cams and nutcraft.
Prevent the rope or carabiner from being loaded over a sharp edge
The third reason to extend your gear is to keep your rope and connecting hardware away from sharp and square edges. In many cases, the cause is the same as that which creates a huge amount of rope drag when the rope is run over squared-edged rock features. And it can be mitigated the same way – usually by using a longer extension. But then there are also those instances where a carabiner is loaded over an edge, a scenario that puts the hardware at risk of failure if the climber falls. If the carabiner is acting as the connection between the protection and the extension, the solution is usually to connect a sling directly to the pro (methods described below under extension tricks).
Where to extend gear
The most obvious place to use longer extensions is on meandering routes, but even on more direct lines, you’re going to come across certain situations where you need to extend gear.
Deep cracks
Sometimes gear has to be placed deep inside a crack. These placements have to be extended if you want to avoid pulling the rope into the crack to reach the connecting carabiner (a guaranteed way to produce a horrible amount of drag). Once you’ve clipped an extension to the protection, hold it out at full length to make sure that it reaches past the edge or crack entrance.
Ledges
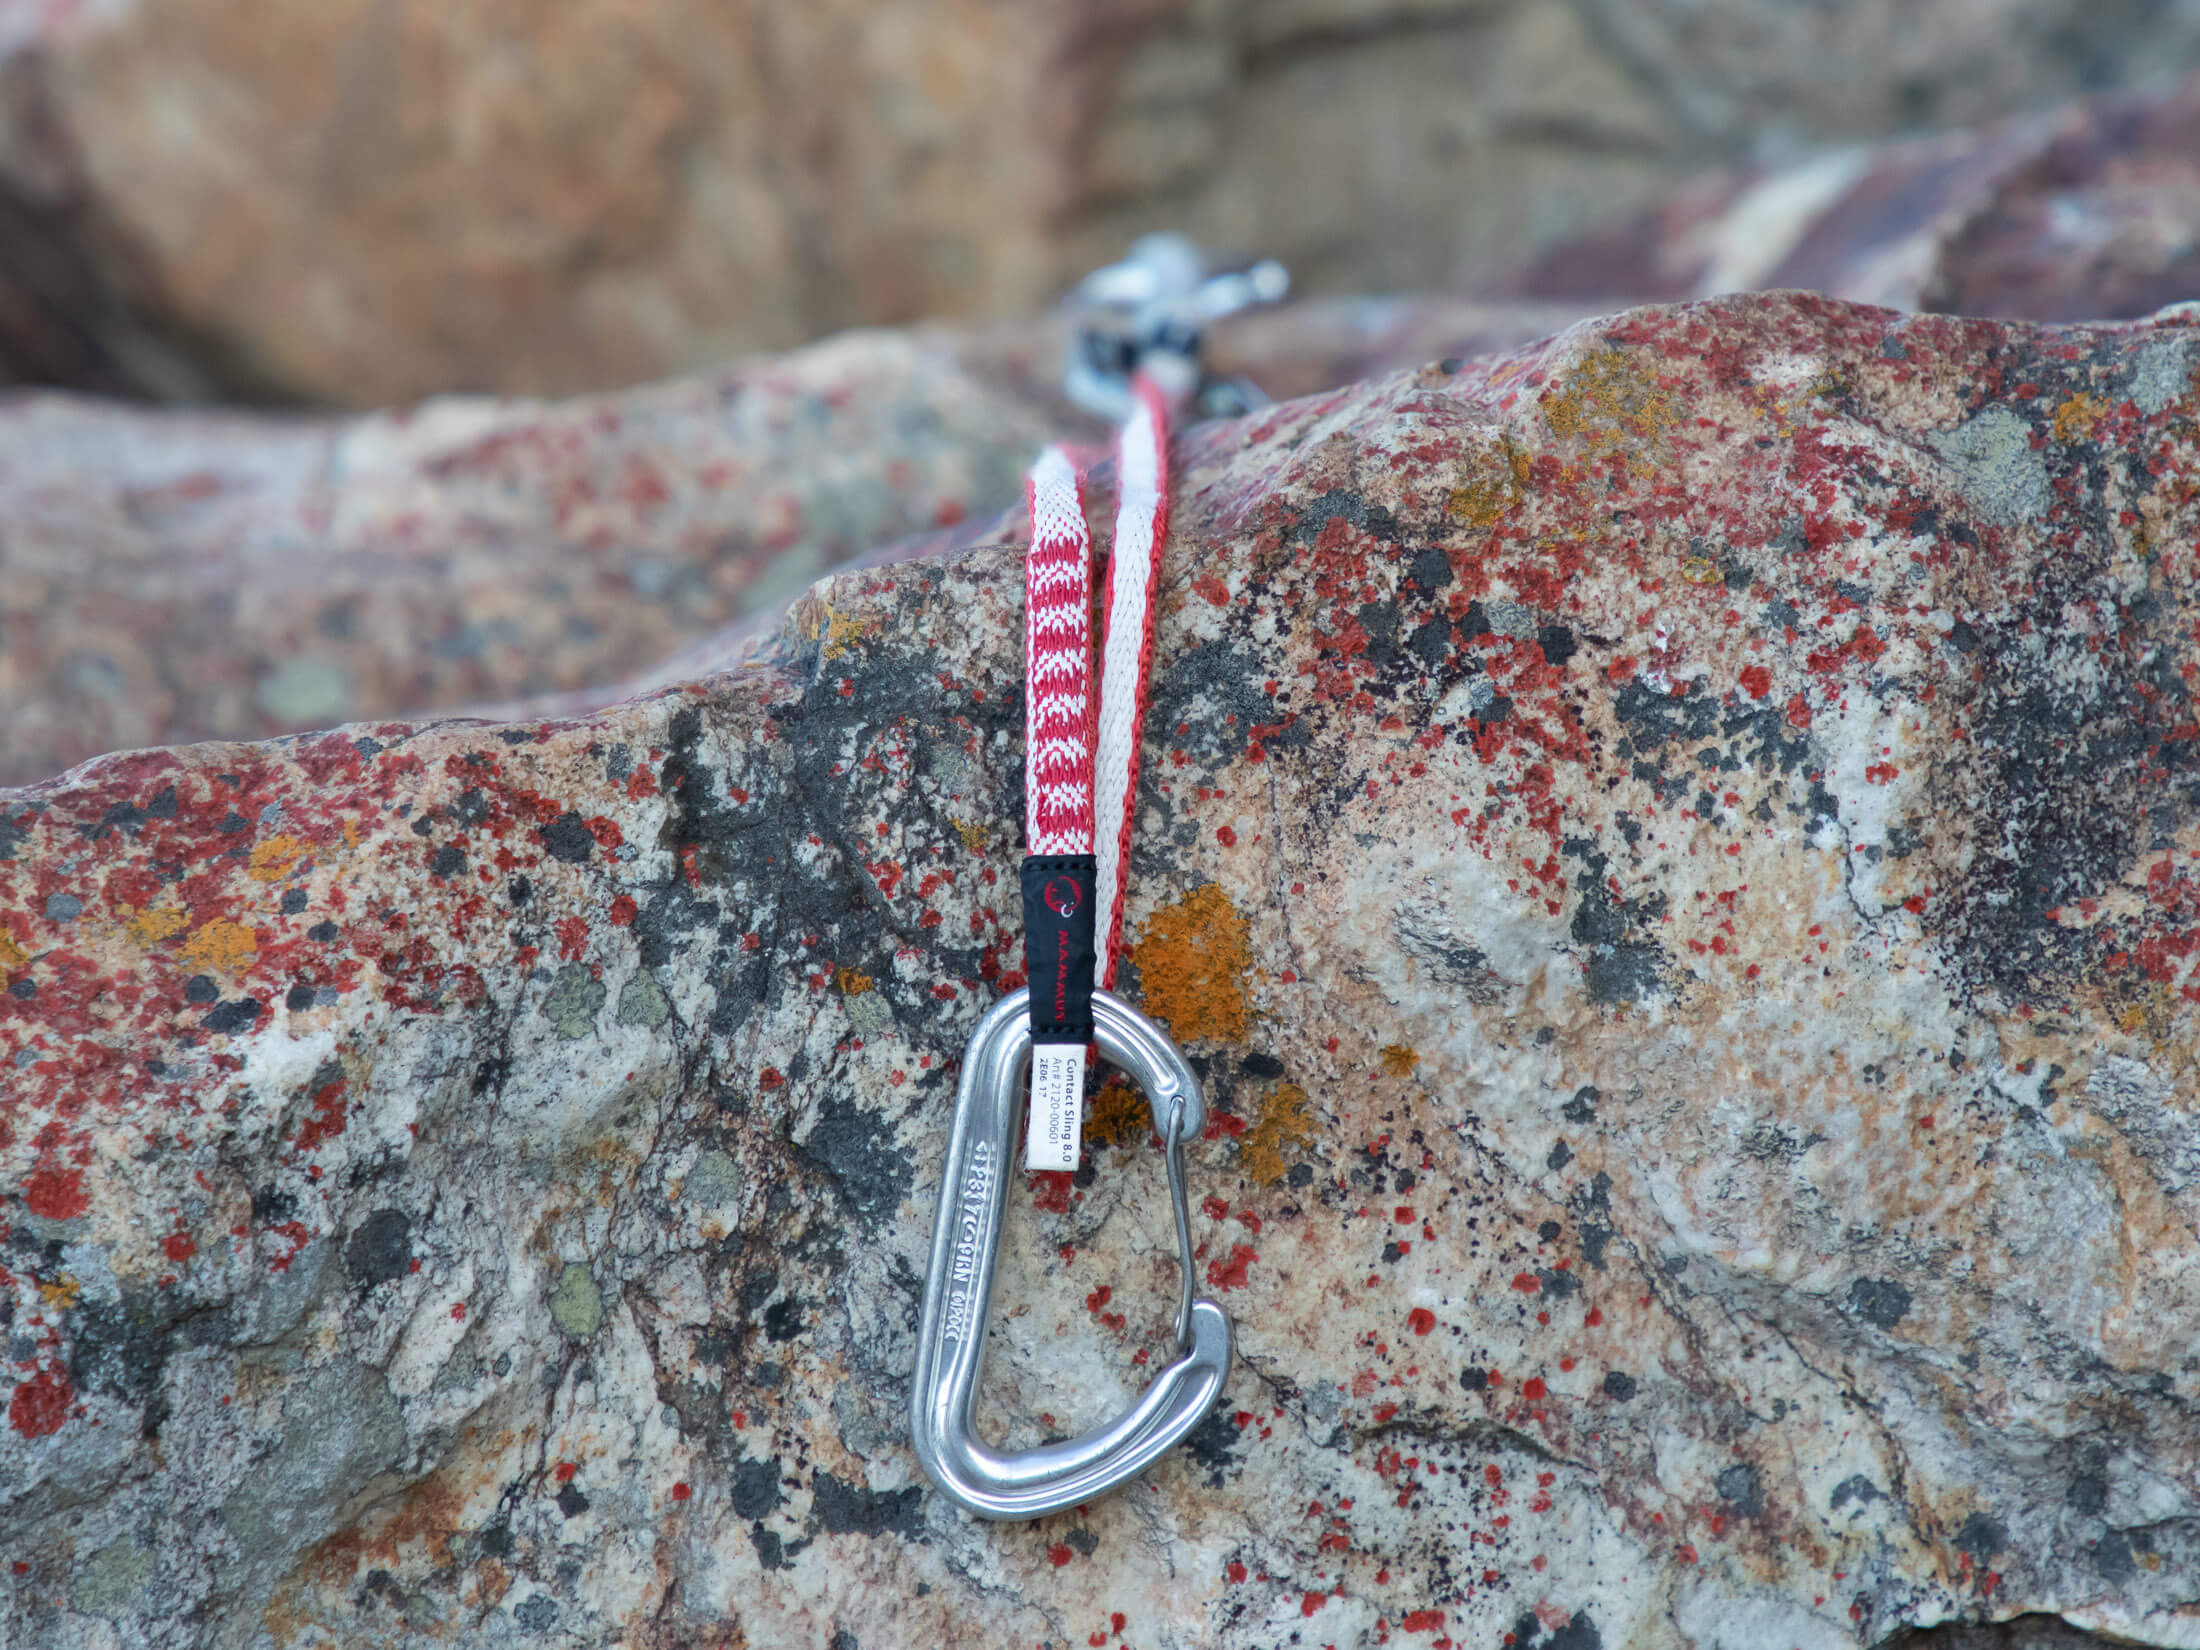
Ledges can pose a danger to your rope and can create a huge amount of rope drag if you have to clip a piece directly above them. In such situations, use a sling to extend your connection beyond the edge of the ledge while also being careful not to load the carabiner over the edge. Ideally you’d be able to ensure that the sling doesn’t run over any sharp edges. If this is unavoidable, it would be best to use two slings of equal length.
Aretes
In other instances, you might have to extend a piece of gear placed around a corner or arete that would create drag if the rope had to run around it. Depending on the height of the feature and the distance of placements from the edge, this could require several long extensions. The best solution in many such instances is to simply use double ropes and run each through gear on different sides of the feature.
Roofs
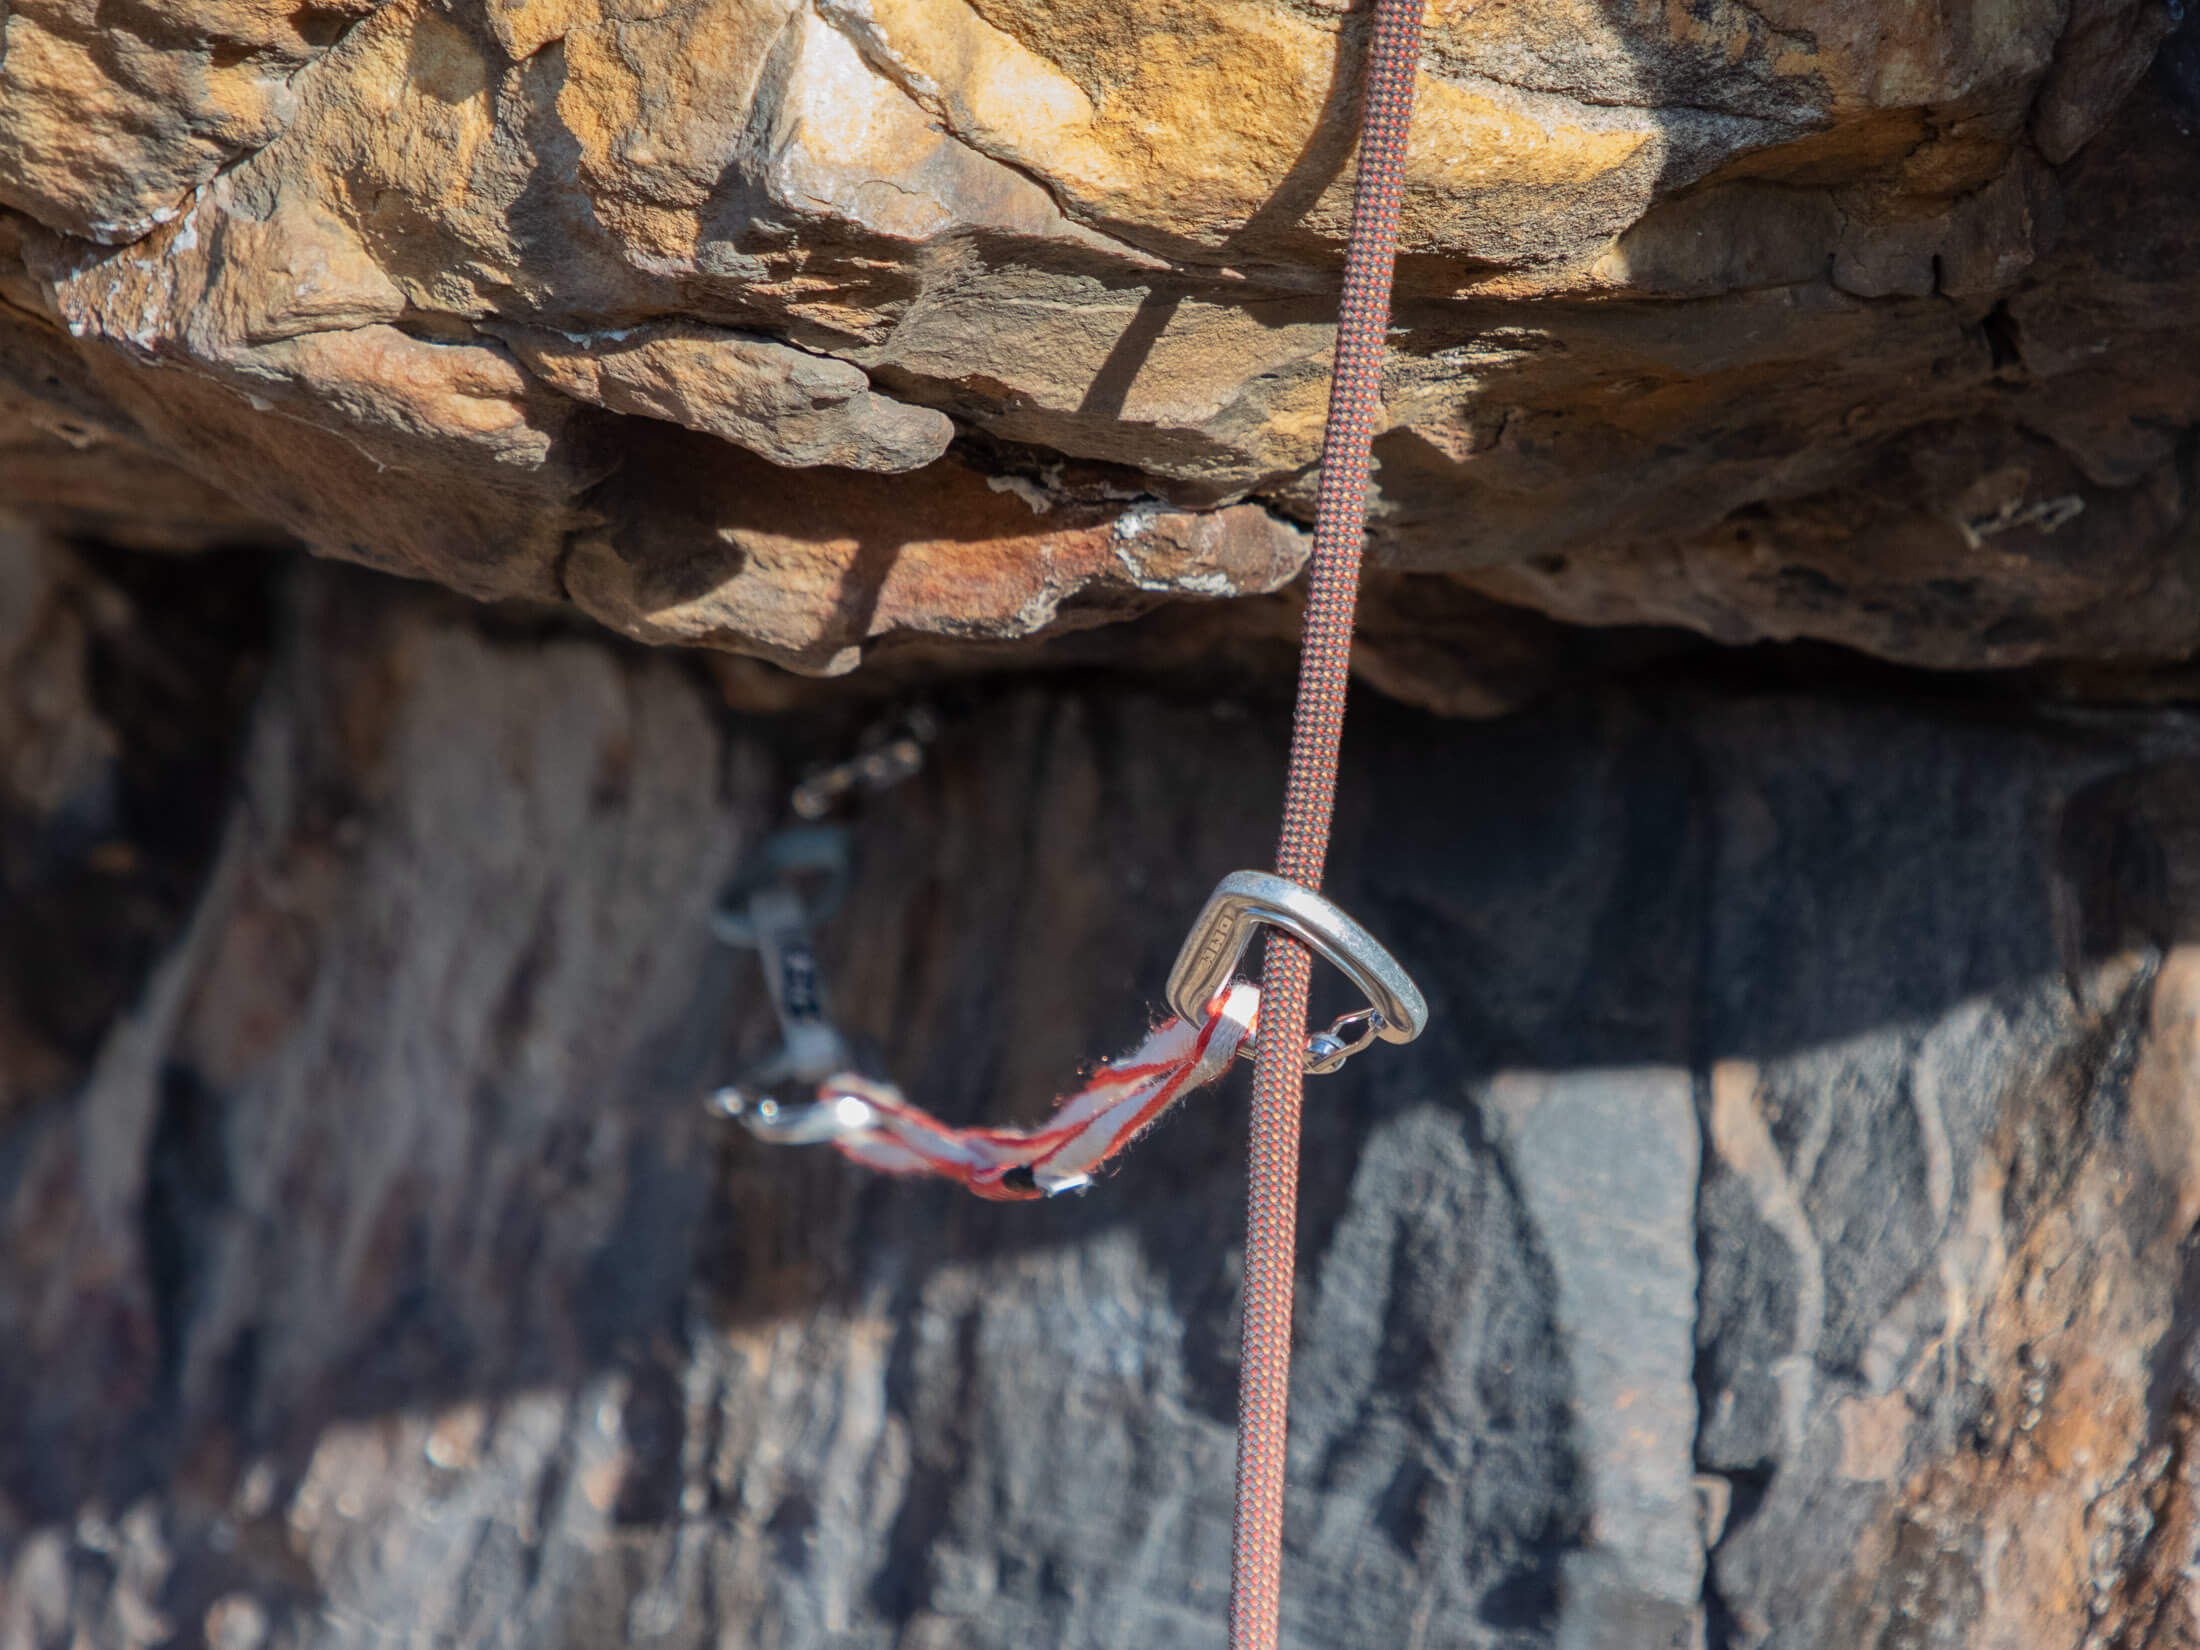
Gear placed under roofs is one of those situations where you’re most likely to create rope drag as it puts a dogleg in the rope at the piece closest to the wall and then runs the rope around the lip of the roof, where it creates even more friction. You can ease the angle and the amount of friction created at both points by extending the piece at the intersection of the wall and roof and by extending any protection in the roof itself.
Traverses
Protection on either end of a traverse should be extended, especially if the changes in direction here are drastic. Extensions are not needed at those ends of a traverse that start or terminate at a belay stance, but the leader would still have to extend gear at the other end of the traverse if the line doglegs there. Similarly, protection that is placed wide on either side of an otherwise straightish line has to be extended to prevent a zig zag pattern in the rope.
Types of extension
You only want to extend gear as far as is necessary, so it helps to carry extensions of different lengths as your needs require. With three commonly used types of extension each of different length, choosing the right gear is simple as knowing how long you need your extensions to be.
Quickdraws (12 - 18 cm)
The shortest of extensions, quickdraws are typically between 12 and 18 cm long. Personally, I prefer longer draws for trad climbing as the extra length helps prevent the rope from tugging at placed protection. Regardless of your preferred length, you will want to keep weight down, and that means thin Dyneema dogbones and slightly smaller (but not tiny) wire-gate carabiners. A carabiner with a gate opening of 23 mm will be good for allround trad climbing. Most manufacturers equip their quickdraws with carabiners of different colours so that a climber can tell the rope-end biner from the pro-side carabiner at a glance. It’s also a good idea to ensure that the top carabiner is a different colour to the carabiners on your alpine draws, as this will make it easier to select the right piece of gear from your harness.

Note: When a quickdraw is used to extend a critical piece of pro, it’s best to secure the rope-quickdraw connection with a small locking carabiner on the rope end of the quickdraw.
Alpine draws and single-length slings (60 cm)
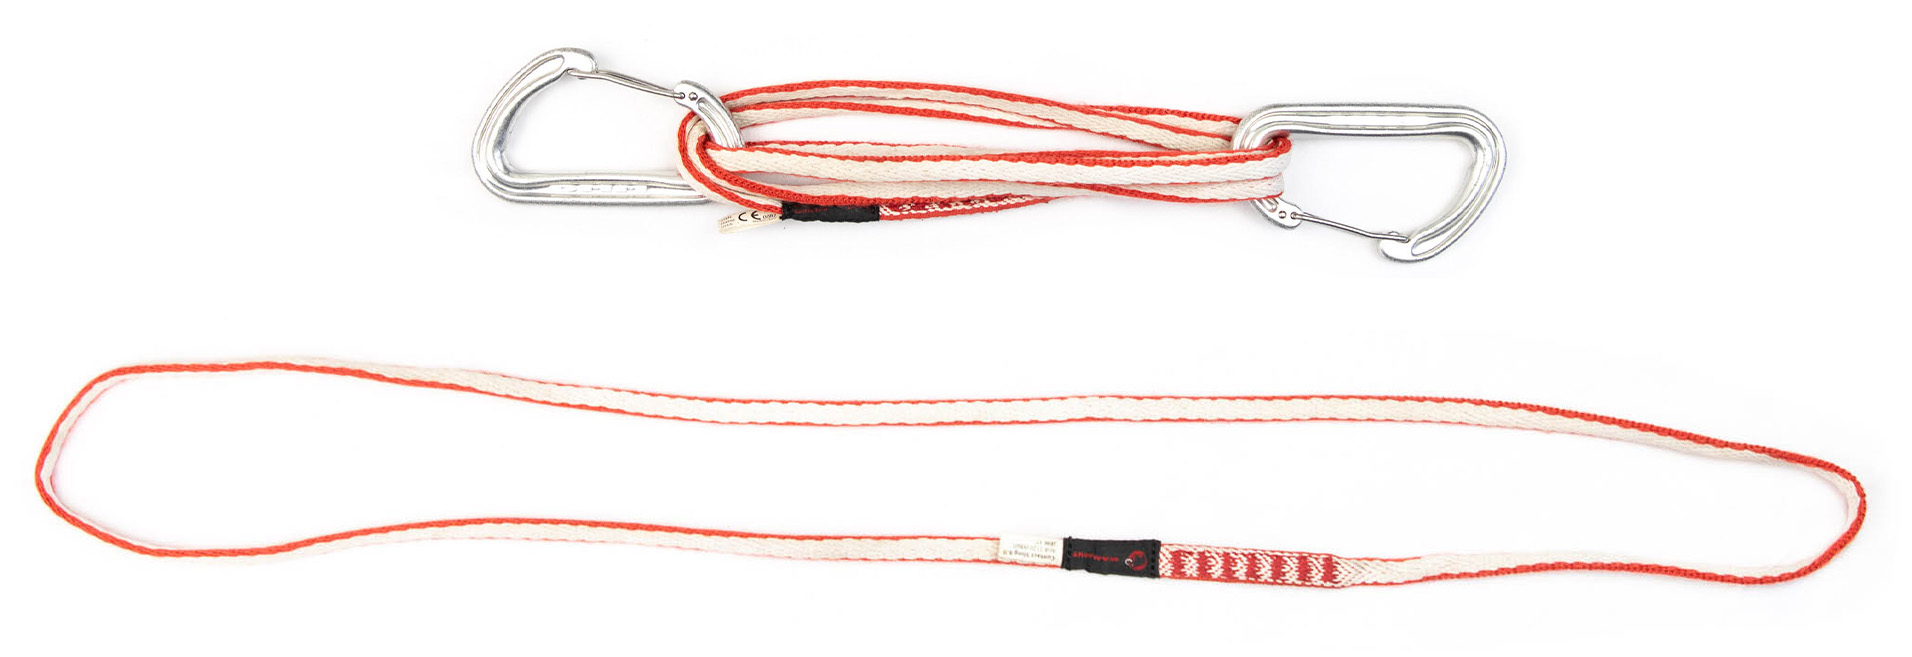
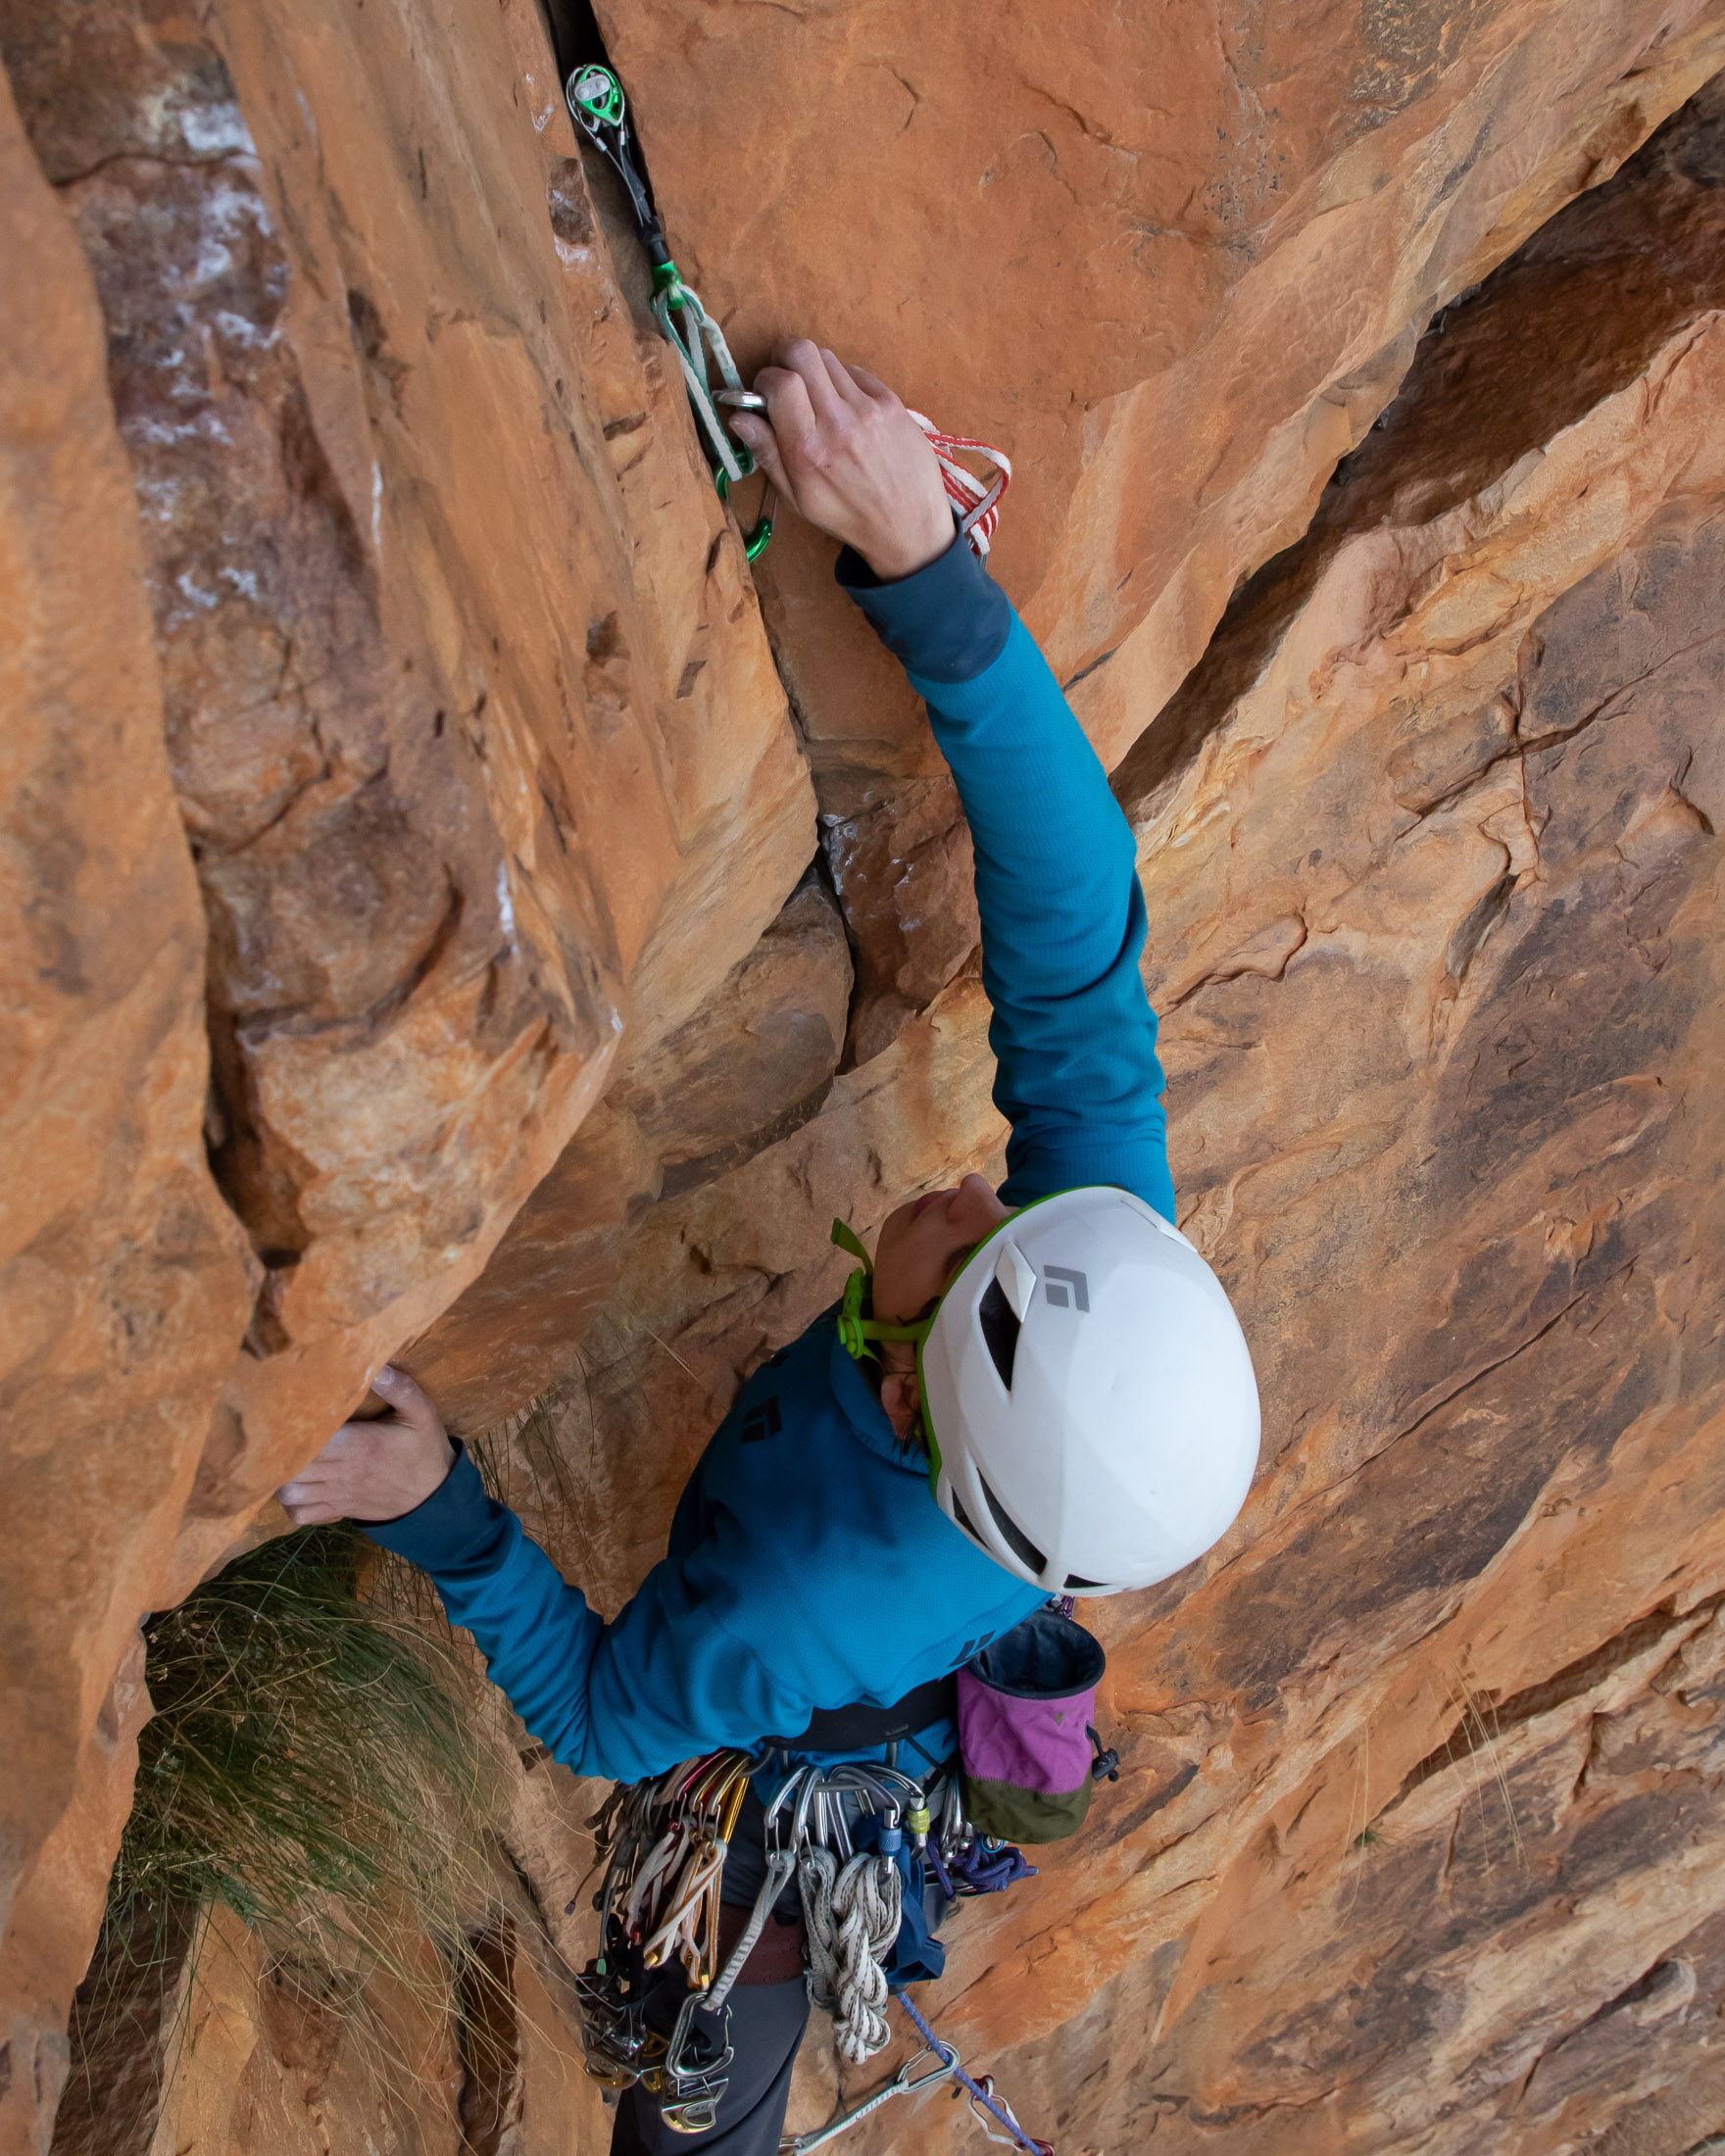
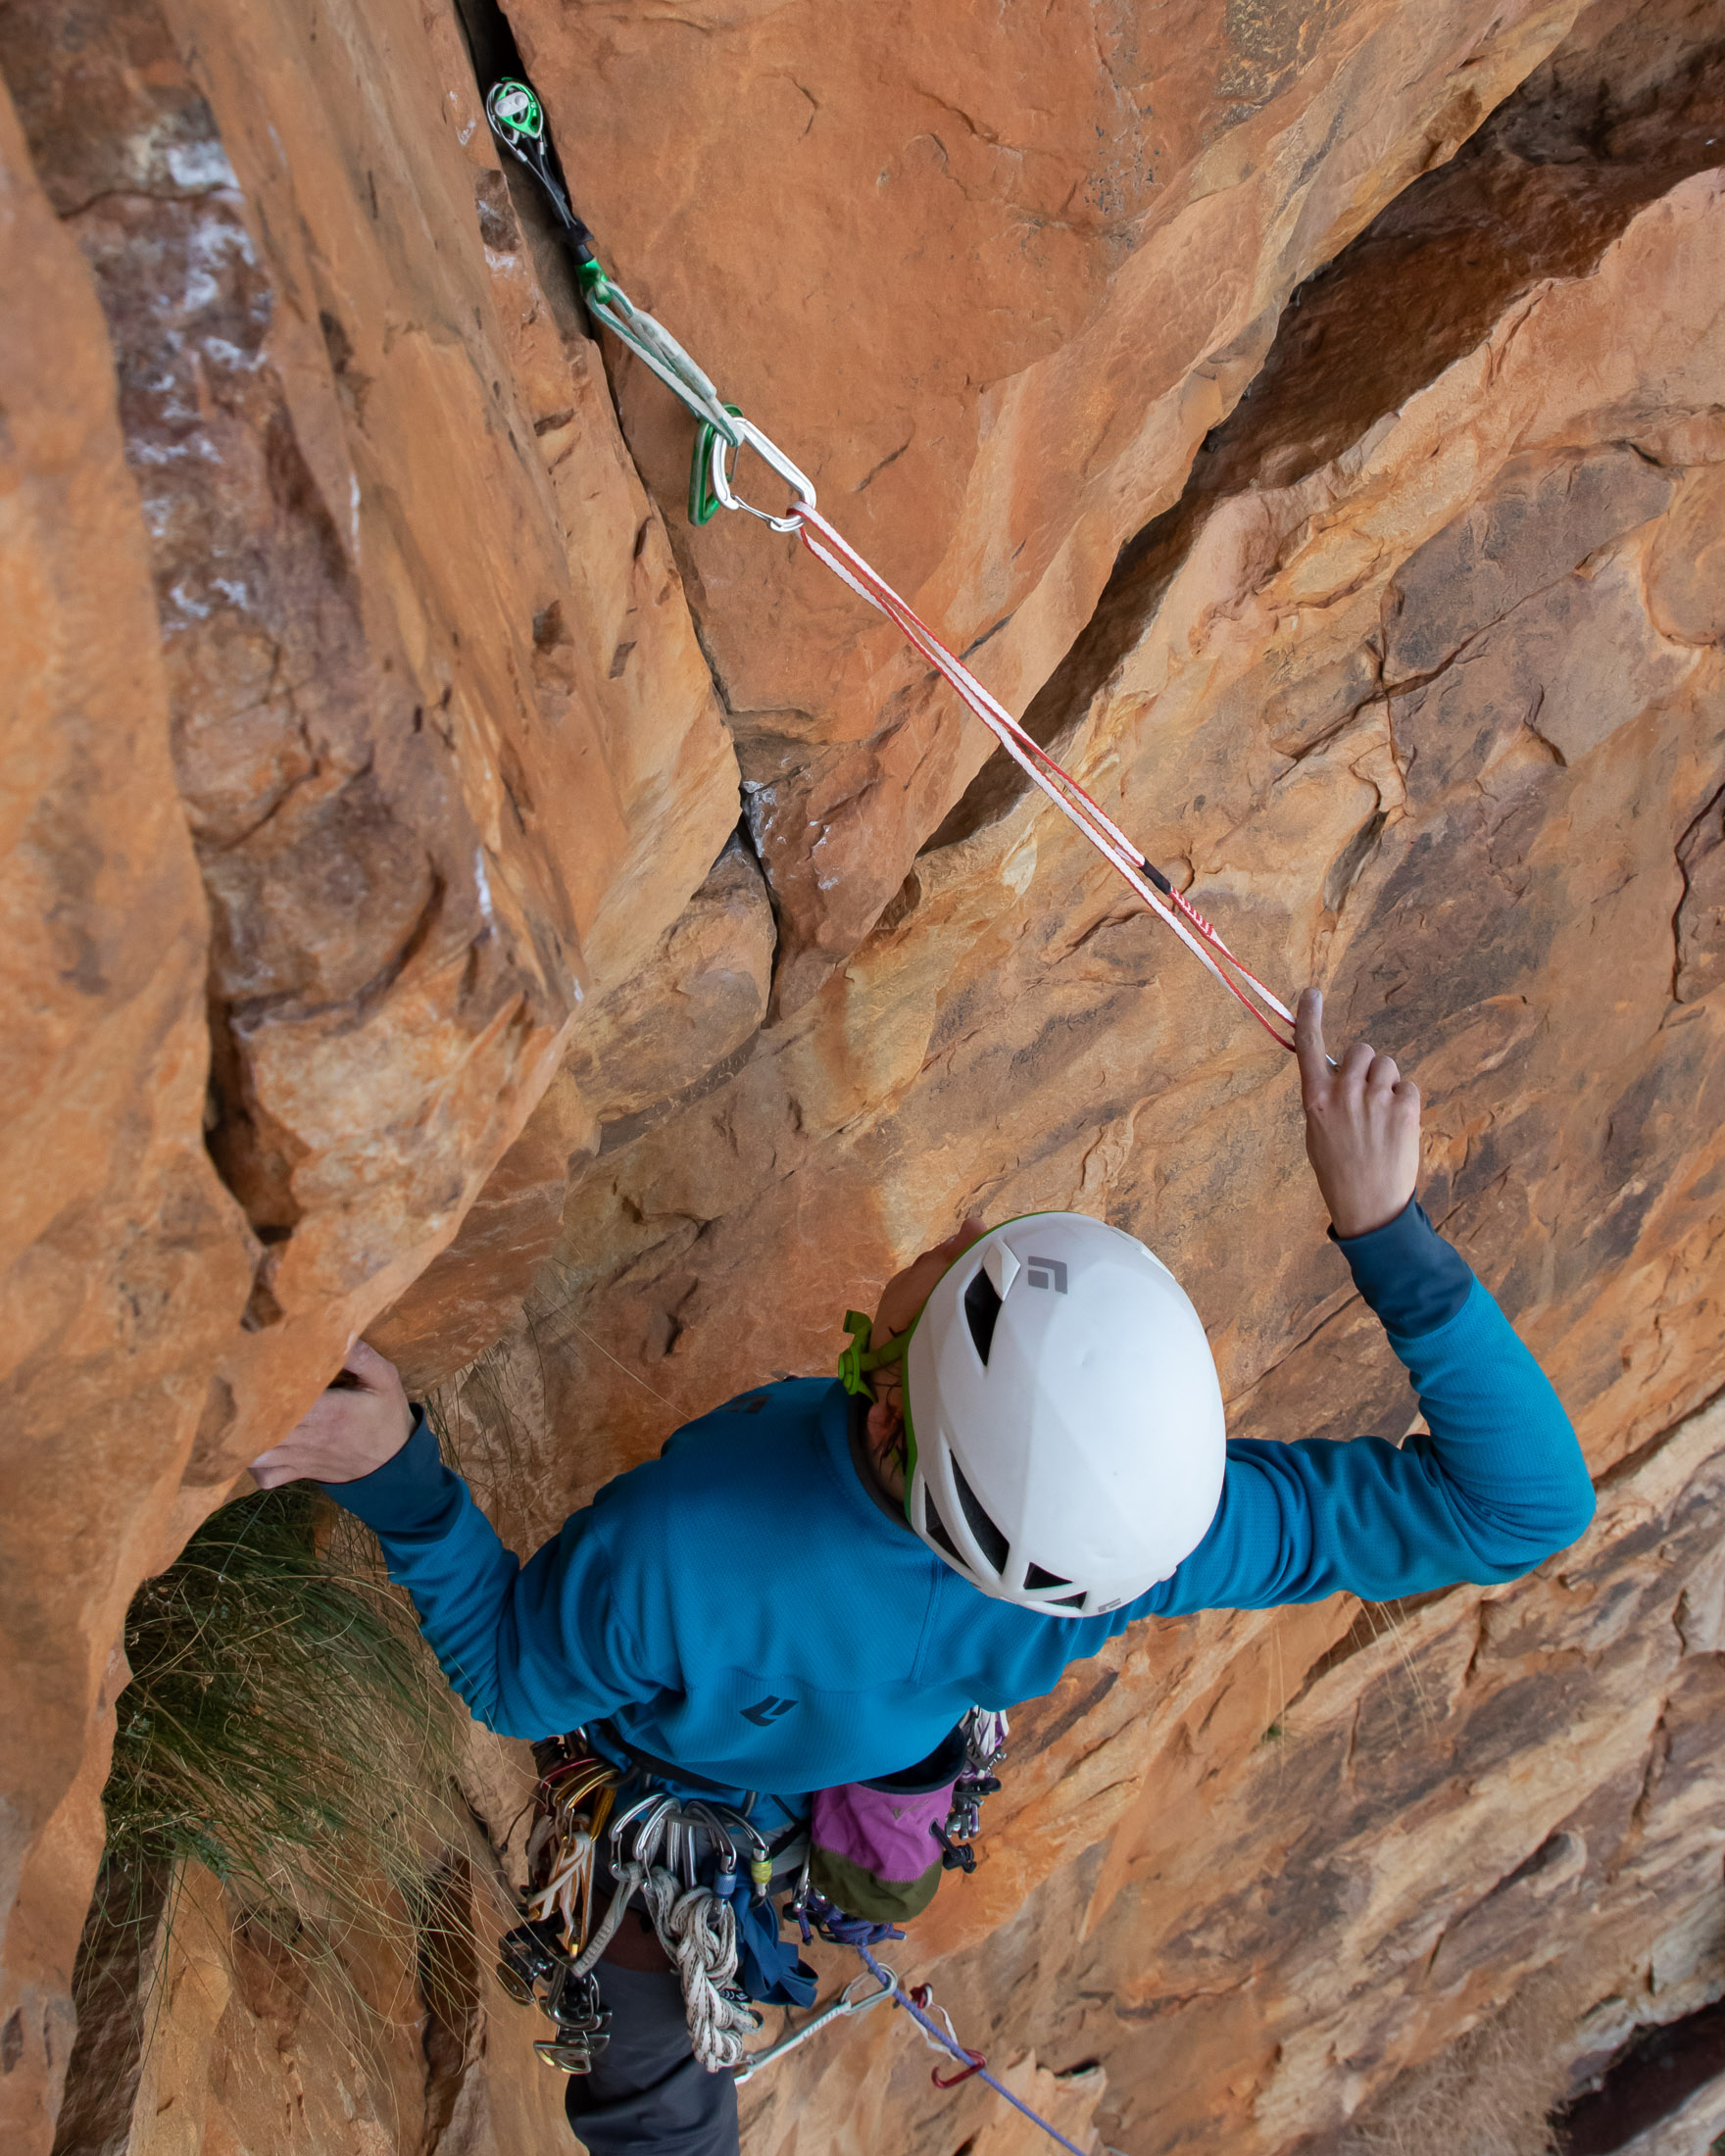
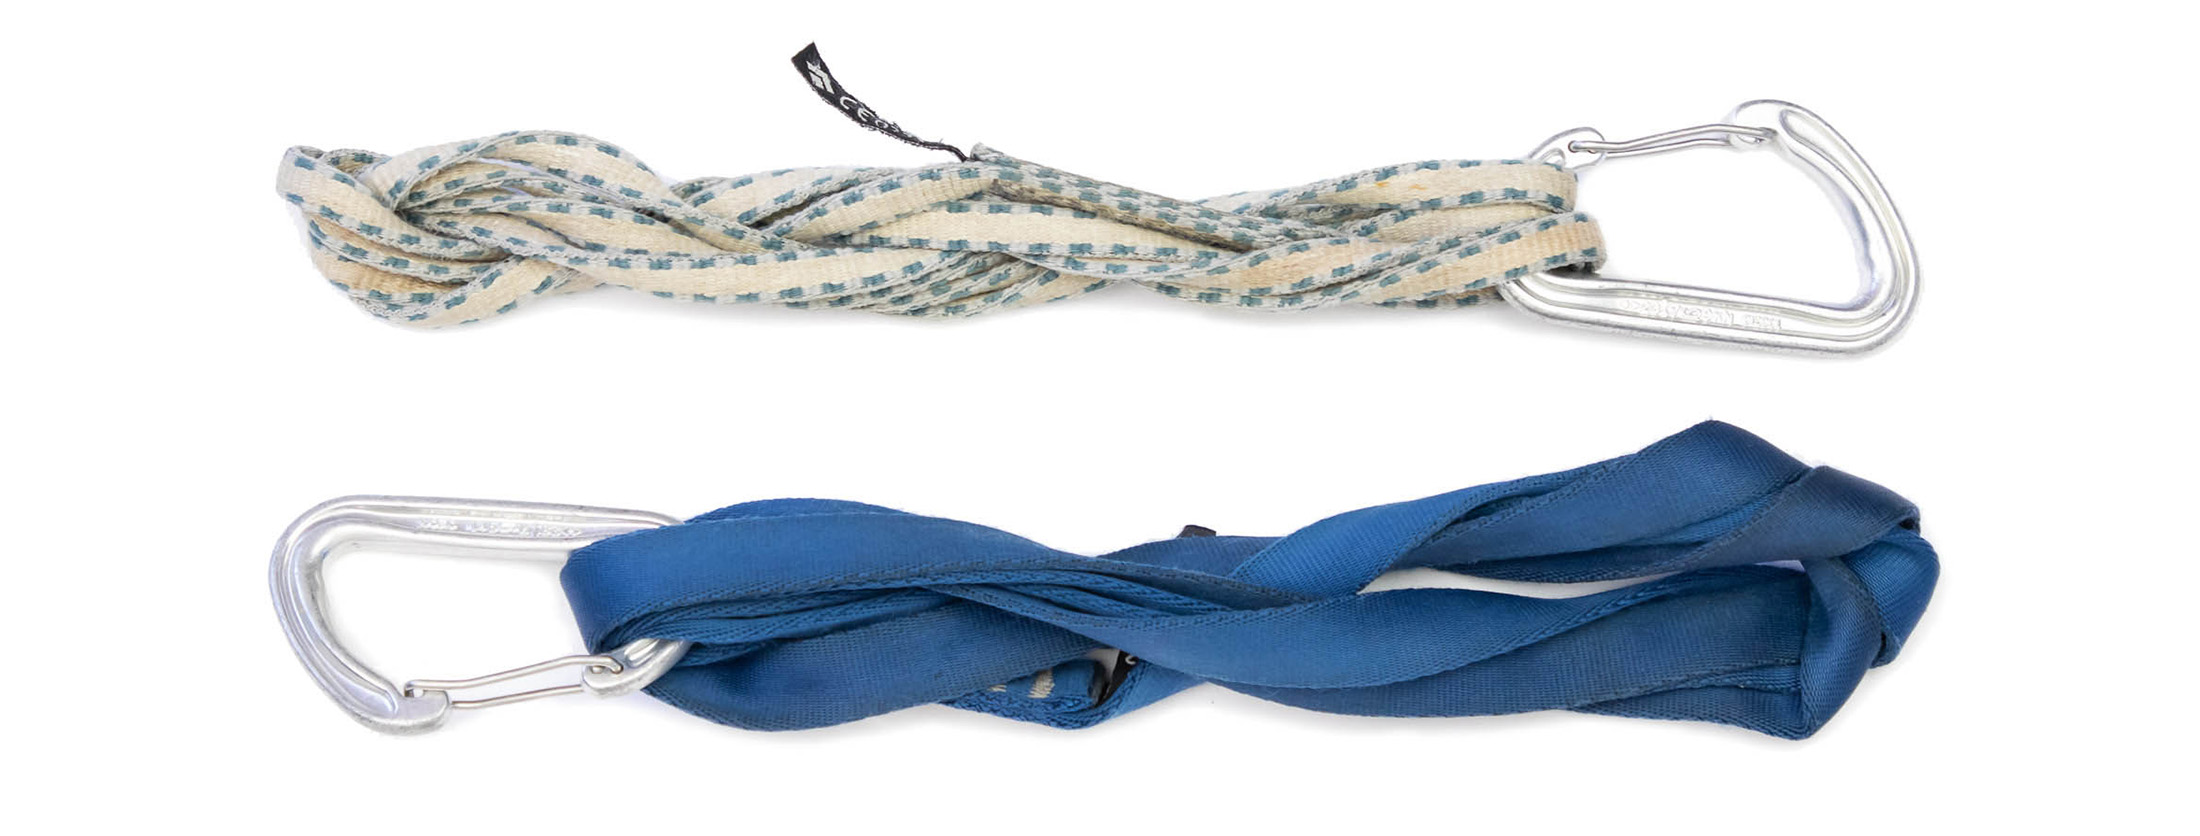
Single-length slings are long enough to prevent rope drag in most situations where a route meanders, making them essential kit for trad climbers. They can be made of skinny Dyneema or nylon, but Dyneema (and equivalents Dynex and Spectra) is a lot more popular as it allows a single-length sling to be made into an alpine draw – that is a tripled single-length sling with a carabiner on either end. When unextended, an alpine draw is only a little longer than a quickdraw and can be used this way. And when it’s extended, it’s a full 60 cm – long enough for most applications. Given their versatility, alpine draws are more useful than quickdraws when a route takes a less direct line.
How to create an alpine draw
Some manufacturers sell pre-packaged alpine draws, but it’s also very easy to make your own using a 60 cm Dyneema sling and two carabiners. Again, you will want to balance low weight with clipping performance when choosing biners. When assembling draws for general trad climbing, it’s best to avoid carabiners with gate openings any smaller than 23 mm as these are likely to be a bit fiddly. In alpine climbing, low weight is more important than clipability, so you’ll probably want to go smaller.
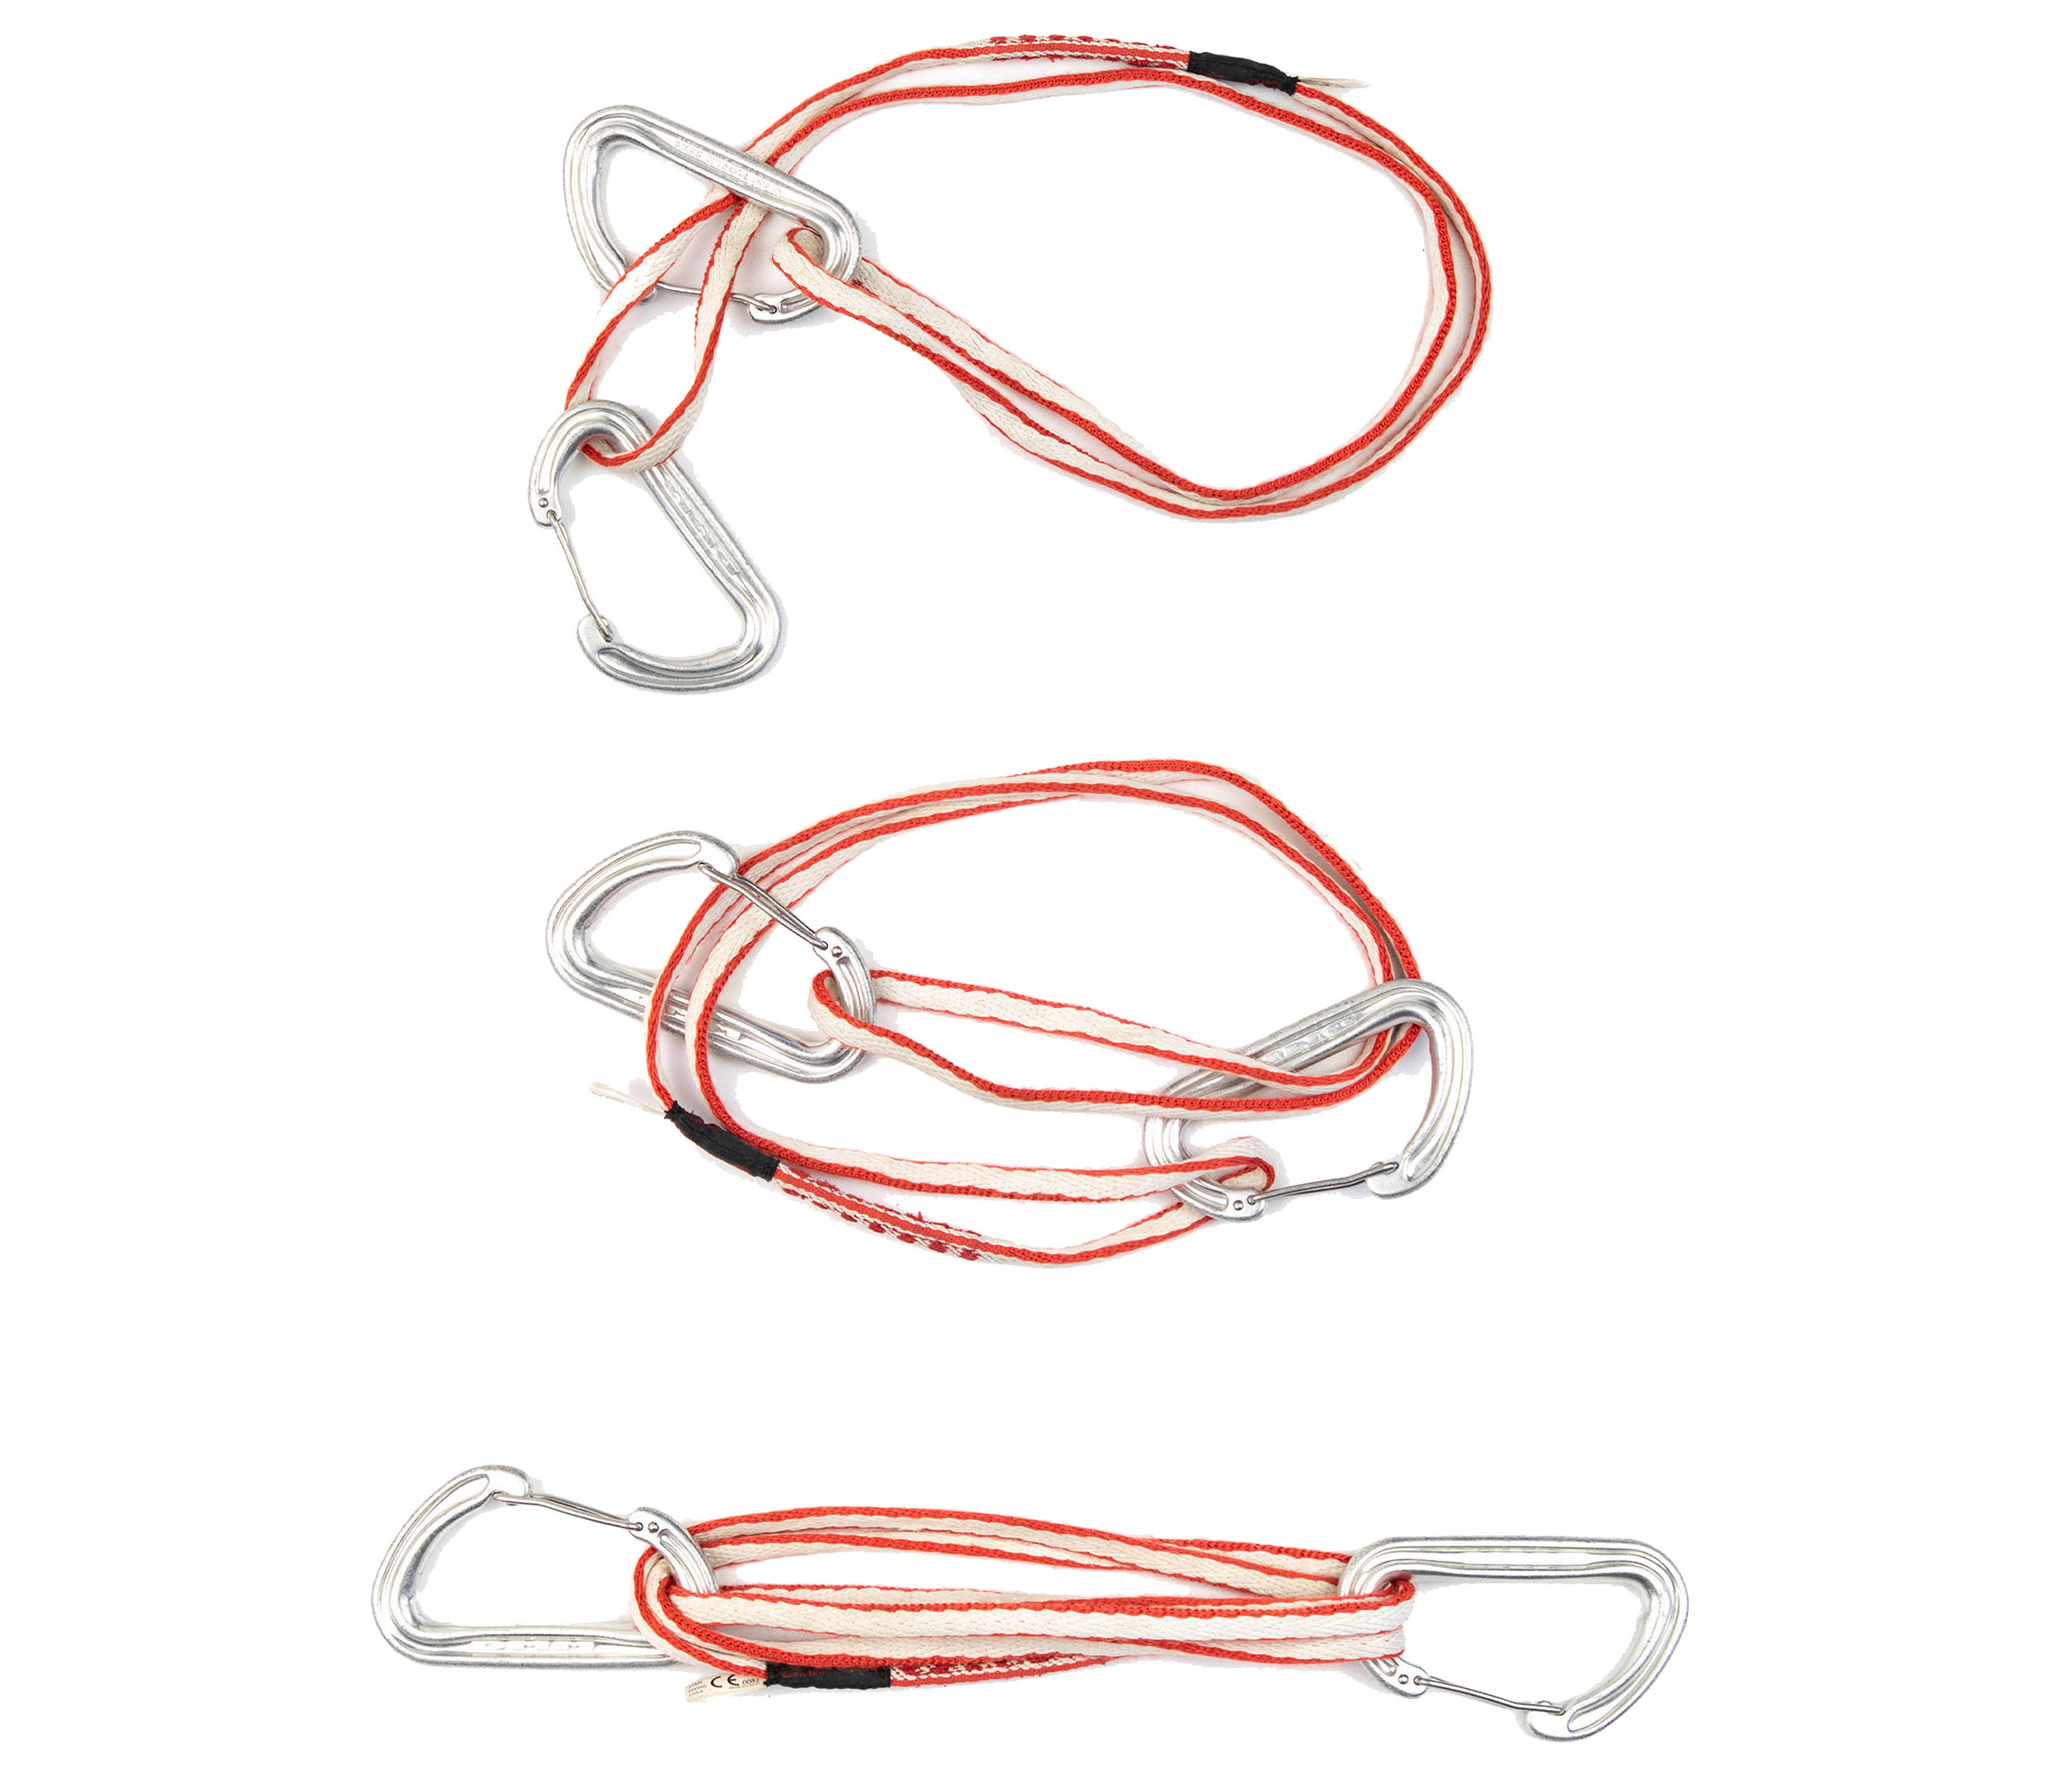
With the sling and carabiners in hand, you can assemble your alpine draw in just three steps:
1. Clip both carabiners to your sling
2. Pass one carabiner through the other
3. Clip the carabiner that went through the other to the loop created by the two strands
When the carabiners is pulled in opposite directions, the result is a tripled sling about the length of a conventional quickdraw. It can be used this way or extended when you need the full 60 cm.
How to extend an alpine draw
Extending an alpine draw is almost as easy as creating it.
1. Clip one carabiner to the protection that needs to be extended
2. Unclip the carabiner from four of the six strands, leaving it on a single loop.
3. Pull on that single loop until the sling is at its full length.
4. Clip the loose carabiner to the rope
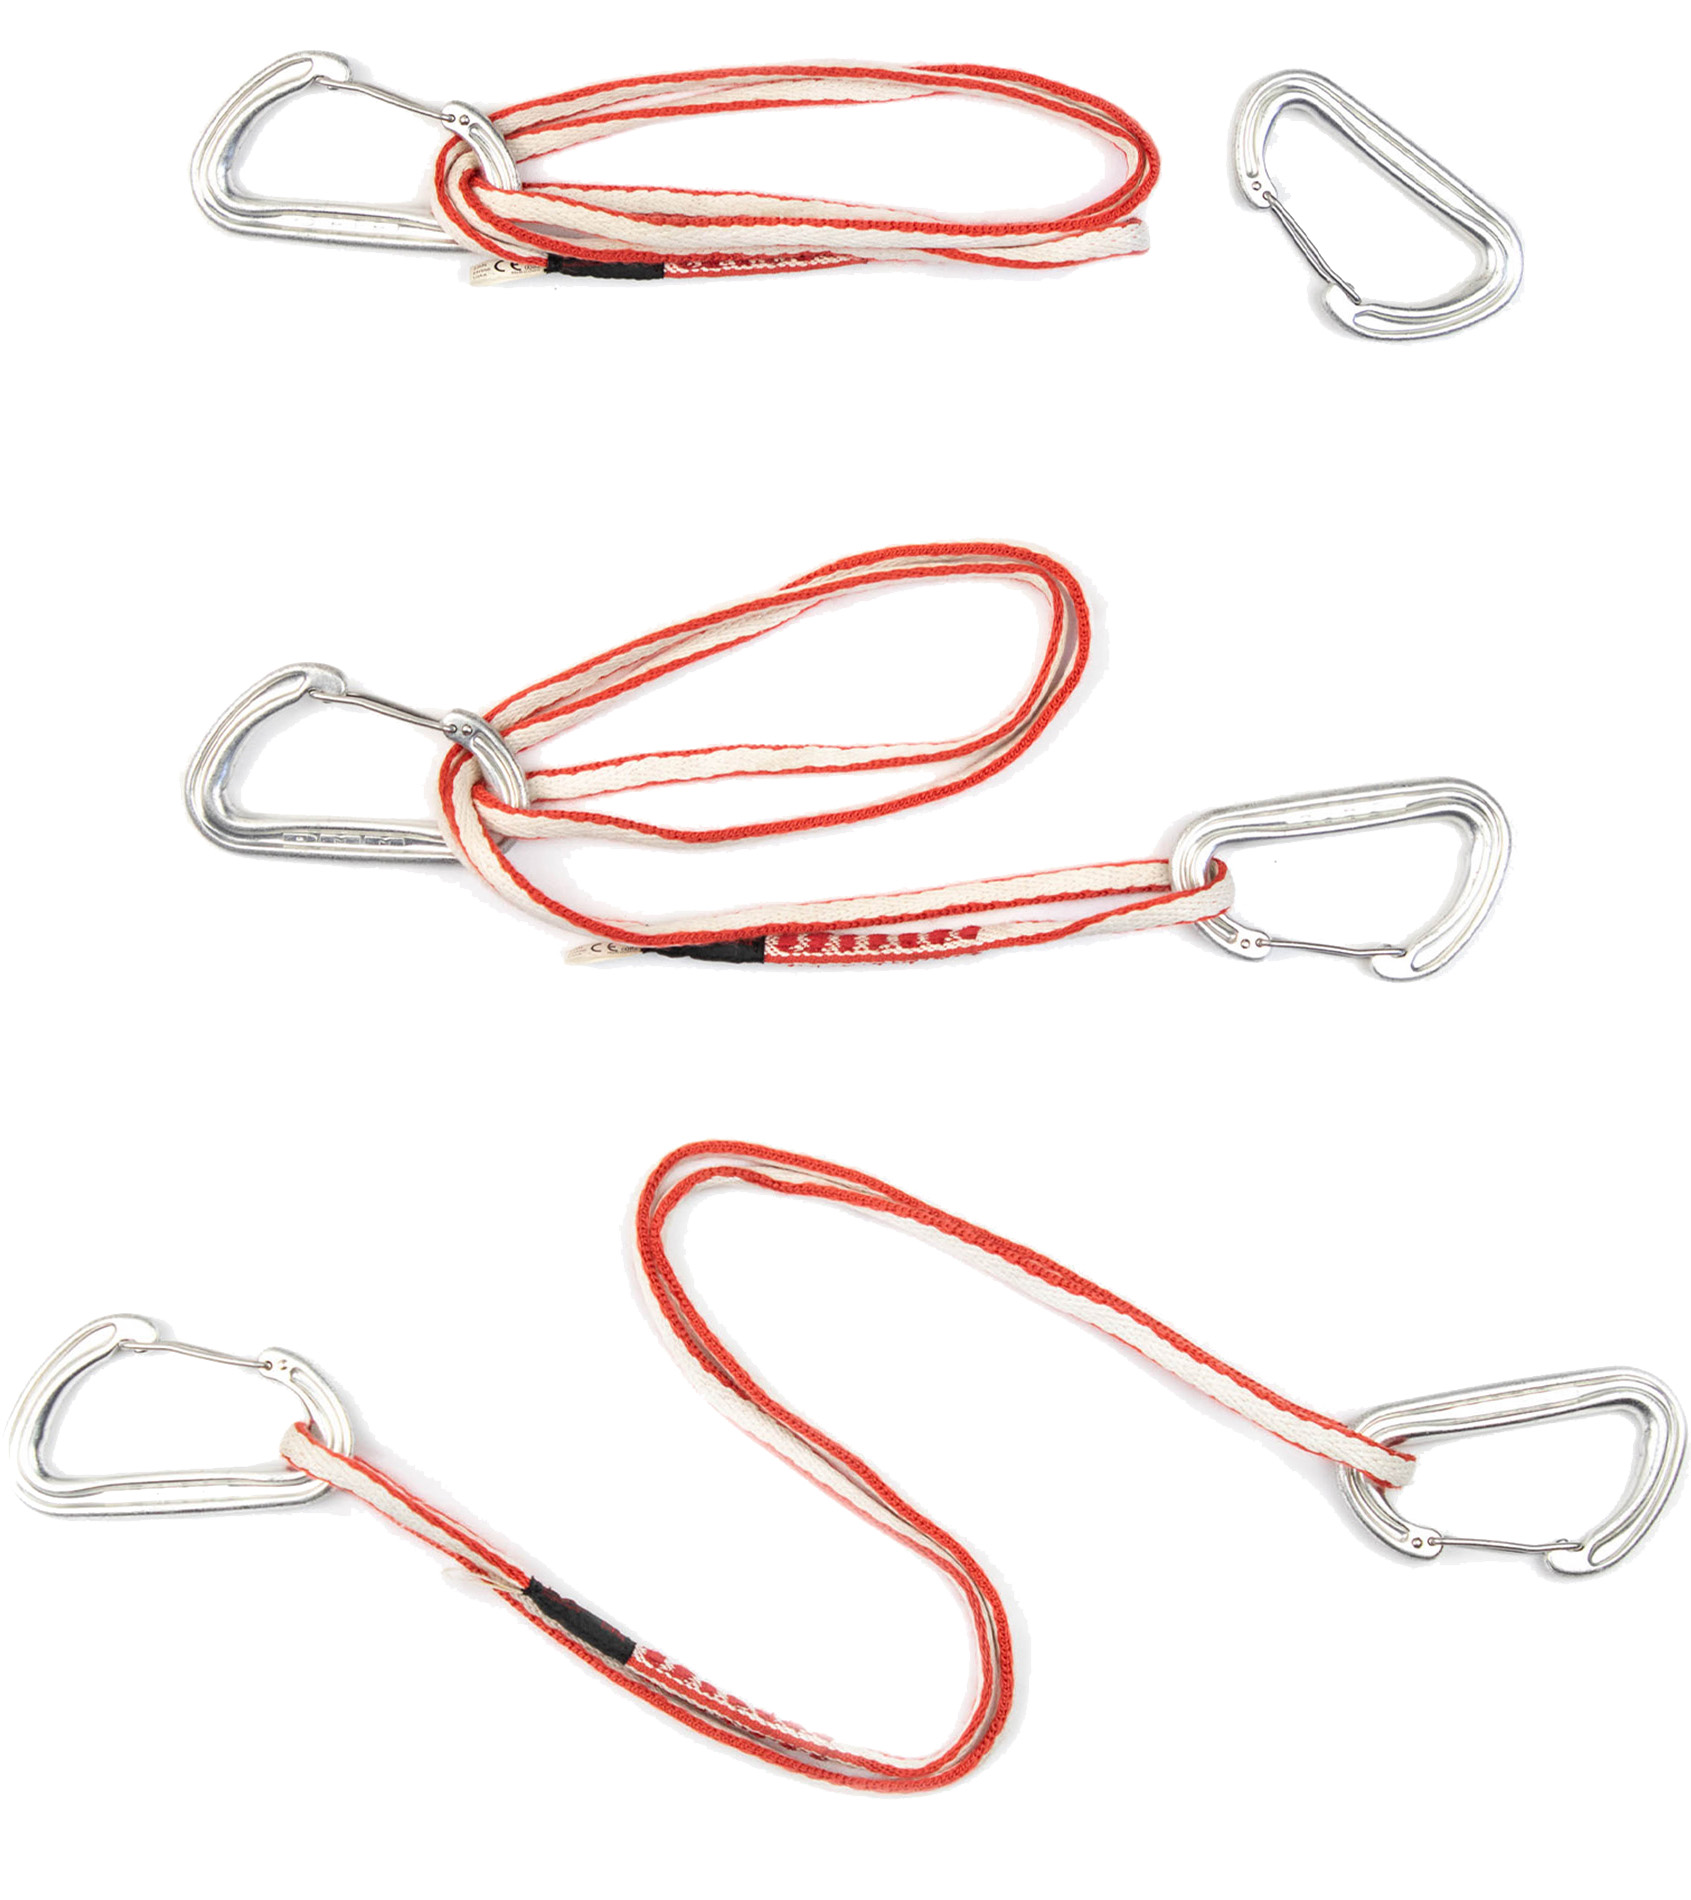
Occasionally the strands will tangle at the pro-end carabiner. This can weaken the sling and make it more likely that it will unclip itself, so it’s best to untangle the sling and make sure that it hangs free.
Note: Do not secure carabiners to the end of a sling or alpine draw using elastic bands or rubber carabiner keepers. Both make it very easy to accidentally clip a carabiner to something while the biner is being held in a pinched bight on the outside of the sling (not through the loop). In such stances, the connection always fails as soon as the elastic is weighted and broken.
Double-length slings (120 cm)
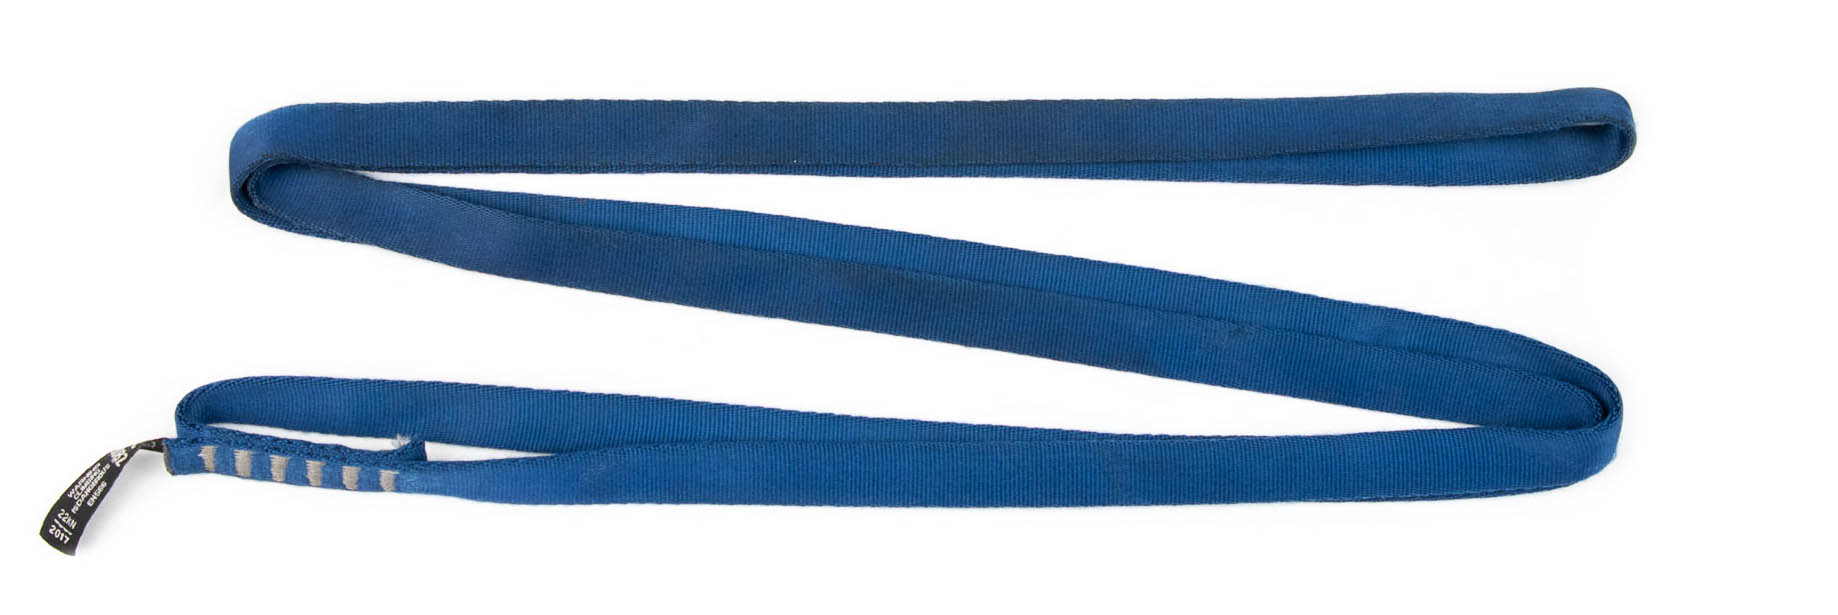
For slinging natural features and extending gear below larger roofs, you will need something even longer – a double-length (120 cm) sling. Like single-length slings, these can be made of nylon and Dyneema, materials that have their pros and cons. Some climbers like how nylon slings grip rock, while others prefer the lightness and handling of Dyneema. On longer routes, I carry one of each. I like how a Dyneema sling fits into skinny cracks (useful when slinging flakes) but prefer to use a nylon sling when slinging more rounded features. Nylon is also more grippy and is generally a better choice when you want to create a more secure placement from less prominent natural features like rounded bollards. It’s also important to note that the two materials have very different knotted properties.
Sling material: nylon vs Dyneema
The advantages of Dyneema (or equivalents Dynex and Spectra) over nylon in most applications are obvious. Dyneema is both lighter and less bulky, which in the case of single-length slings allows for the creation of alpine draws. But the differences between nylon and Dyneema go beyond bulkiness and strength-to-weight ratio. Both materials lose some strength when knotted, but Dyneema, with it’s poor dynamic properties and low melting point, loses even more strength – up to half it’s rated strength.
However, this drawback is less important when slings are used as extensions. With a dynamic component like a free-running rope in the system, you’re unlikely to stress a sling to failure even if it’s knotted. Lead falls put 4 to 7 kN of force on an anchor, well below the 10 kN that knotted Dyneema slings typically fail at. That said, a Dyneema sling can be very difficult to untie once properly weighted, and you’d probably be better off using nylon if a situation allows for it.
Note: Dyneema slings should never be used as personal tethers. Even a factor 1 fall onto an open Dyneema sling can generate an impact force over 15 kN, more than enough to break the sling or cause injury, and a knotted Dyneema used this way will break under an even lower forces.
Combining extensions
Sometimes it is necessary to combine two quickdraws or slings to create an extension of the right length. This is how you do it.
Combined quickdraws
If you need an extension that’s longer than a single quickdraw but shorter than a sling, the simplest solution usually is to clip two quickdraws together. To do this, it’s best to remove the bolt-side carabiner from the second quickdraw and clip the first quickdraw into the dogbone of the second. This reduces the risk of a carabiner unclipping itself, and it avoids any metal on metal contact.

Combined slings
There will probably come a time when you need a double-length sling but only have a pair of single-length slings. In most situations, it’s safe enough to connect these together with a carabiner. Still, there are also likely to be situations where you can’t use a connecting carabiner because it might be loaded over an edge. Or you might find that your just don’t have a spare carabiner. In such instances, you can girth hitch two slings together, just know this does weaken a sling by up to 50% – again, losing even half of a sling’s strength (usually 22 kN) usually isn’t an issue when it’s being used as an extension for gear placed on lead.
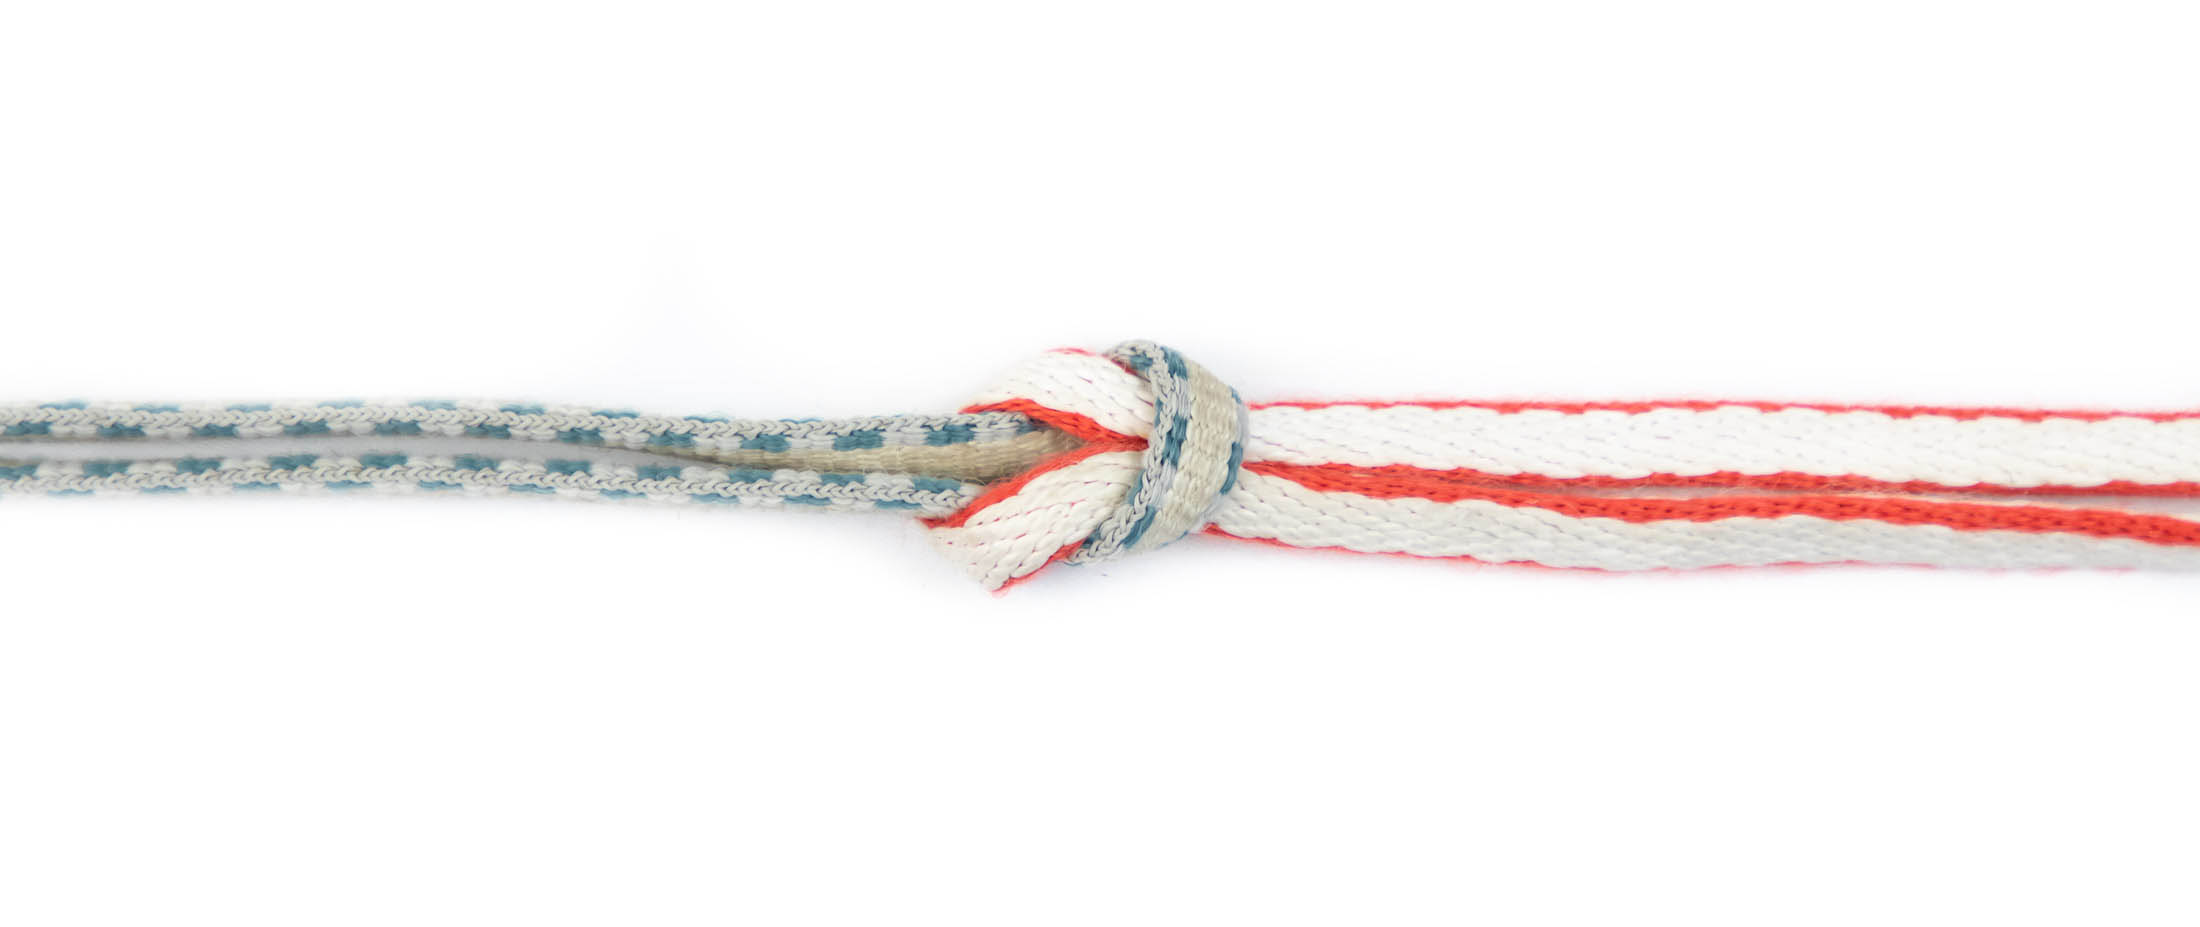
Note: Girth-hitched slings lose more strength when they are of different widths. Try to use slings of the same thickness.
Other extension tricks
Besides knowing how to combine extensions, it also helps to know how to solve the following extension challenges.
Extending nuts without a connecting carabiners
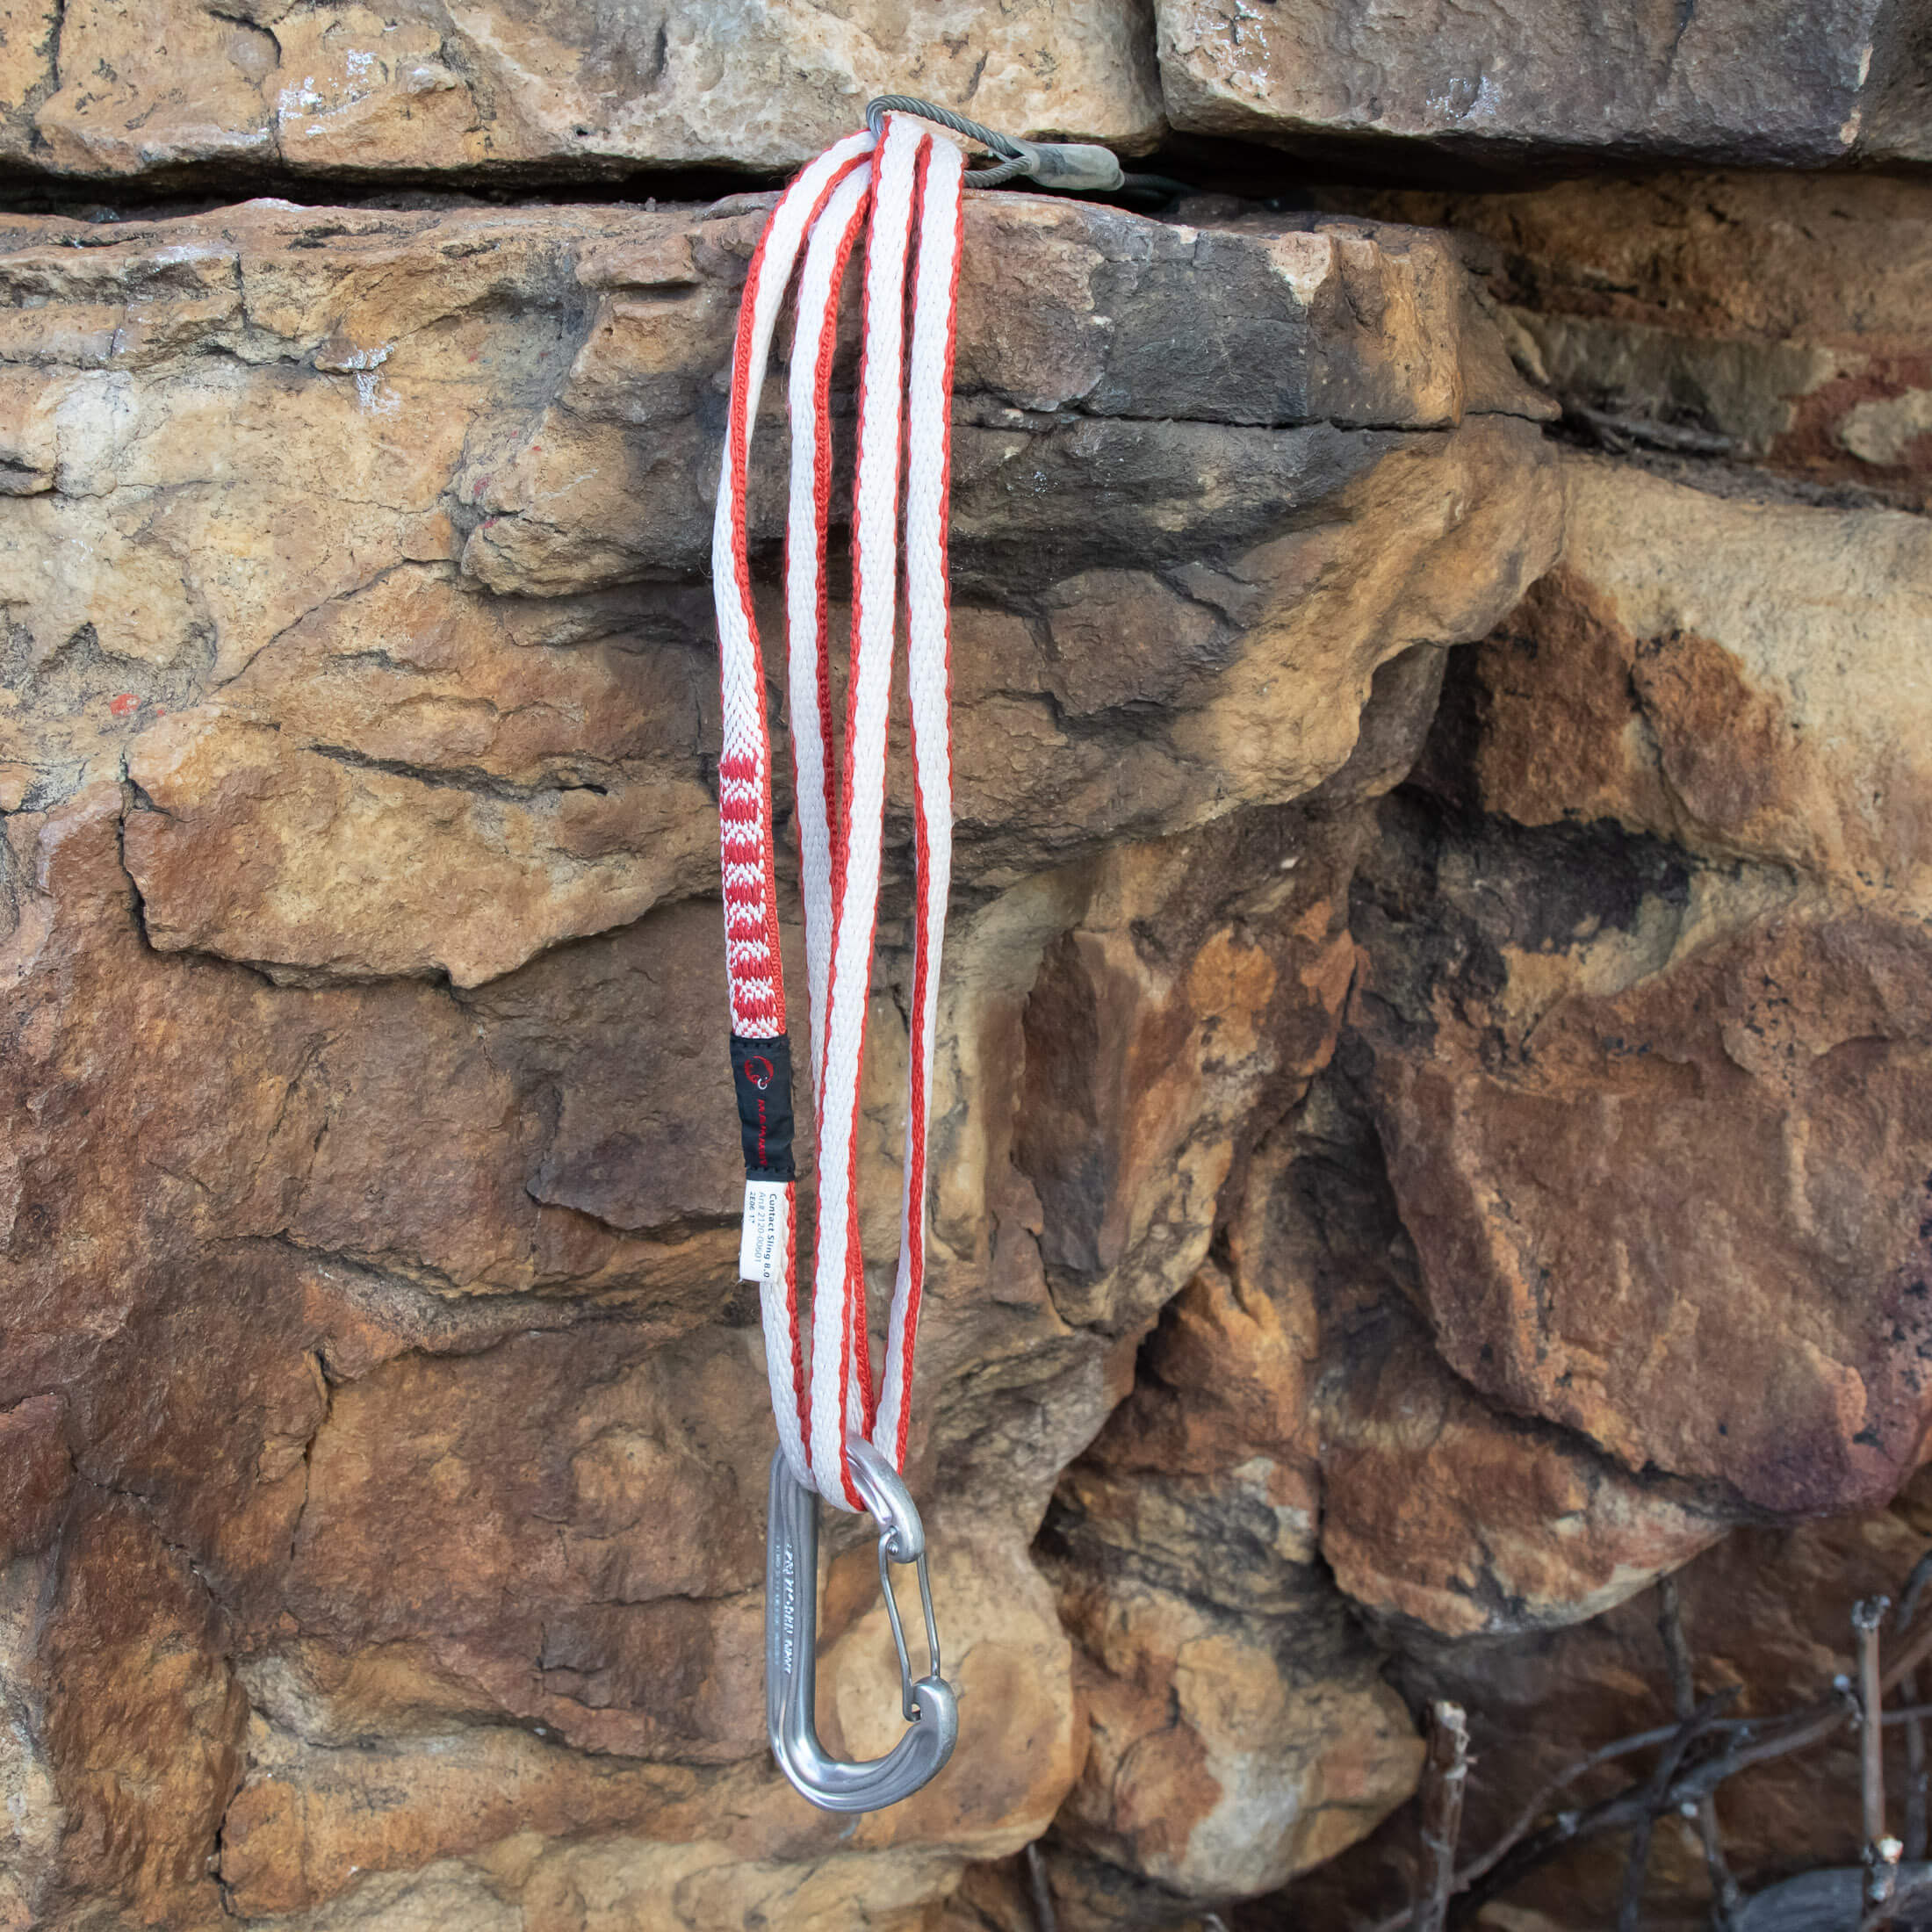
In the case of deep horizontal placements, an extension can sometimes place a carabiner over an edge – a dangerous situation in which a carabiner could break when loaded. With cams, the solution can be as simple at moving the piece forwards or backwards, but with nuts that usually isn’t possible. In such situations, the best solution is to thread a sling through the wire loop on the end of the nut and then clip the two ends of the sling together with a carabiner. It’s not recommended to girth hitch a sling to a nut, as this weakens the sling by well over 50% and to a point where it could fail in a lead fall.
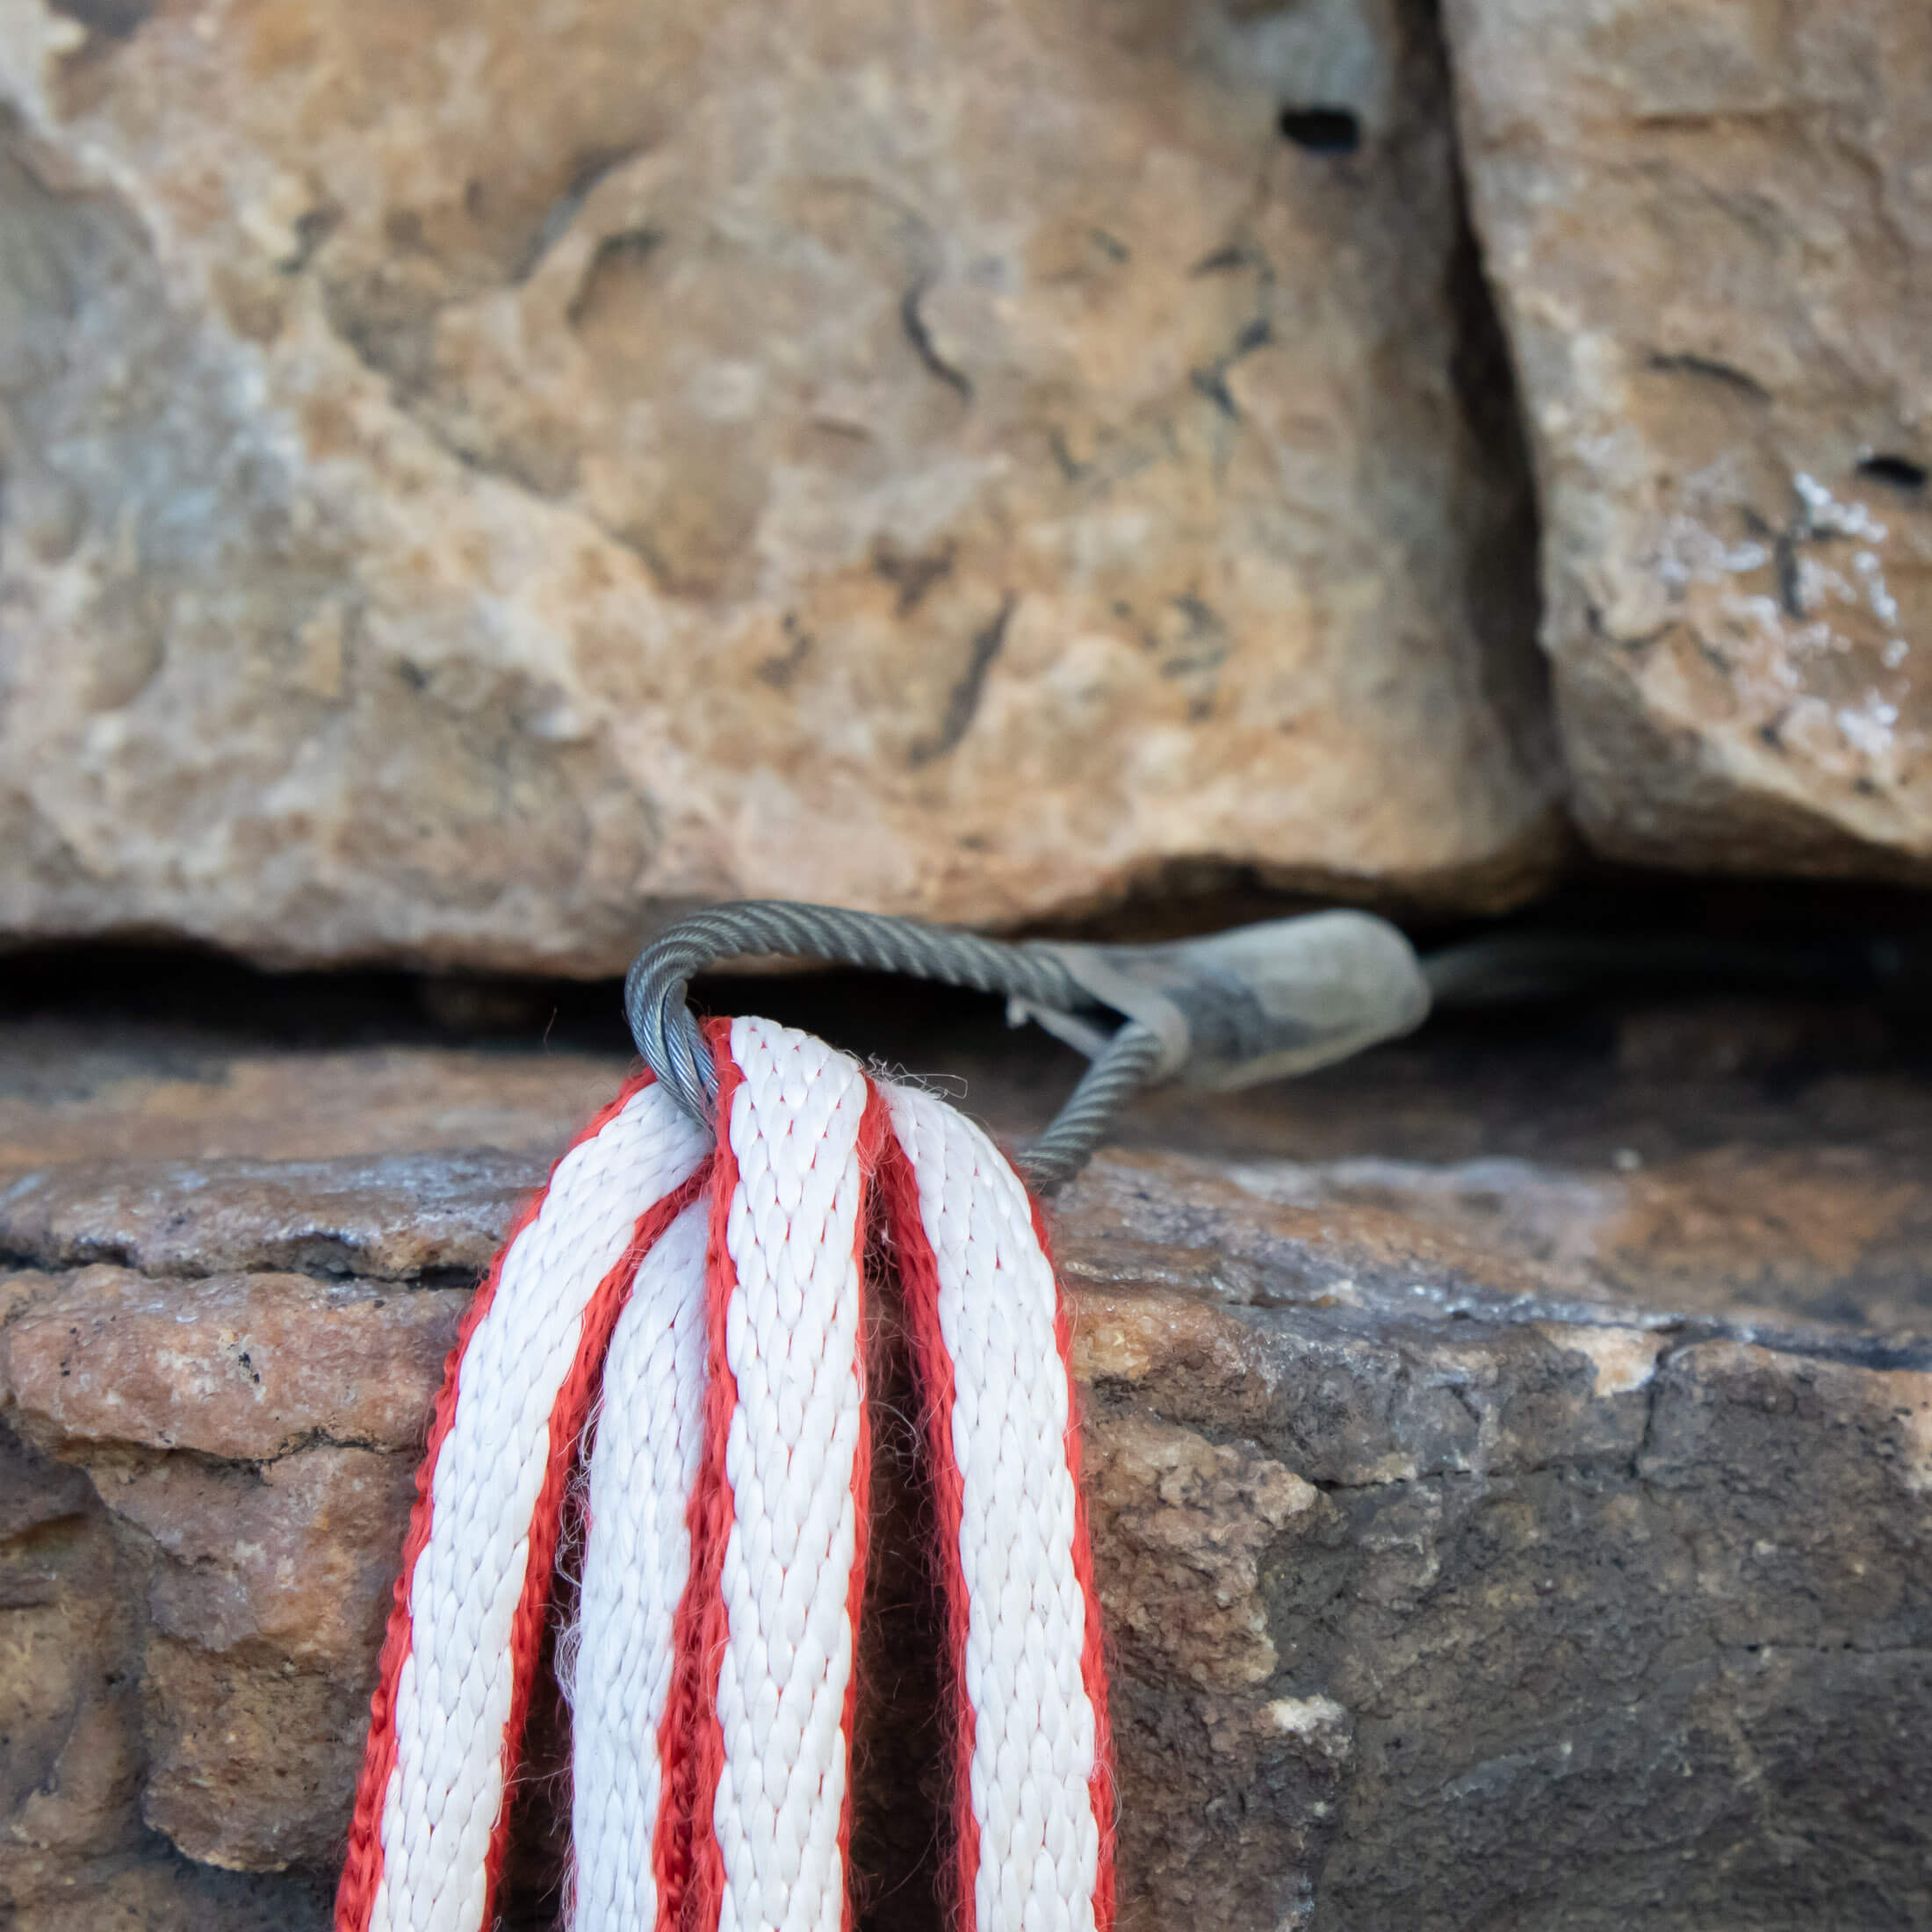
Extending cams without a connecting carabiner
In the unlikely event that you find yourself with a cam placement that puts the carabiner over an edge (and you can’t solve the problem by moving the piece backwards or forwards), you can secure the extending sling to the sling on the cam using a girth hitch. Unlike the wire loop on a nut, the sling on a cam won’t weaken an extending sling to the point that it is unsafe. Even if this sling-to-sling connection weakens these slings by 50%, it will still be good for forces up to 10 kN – more than you are likely to generate in a lead fall.
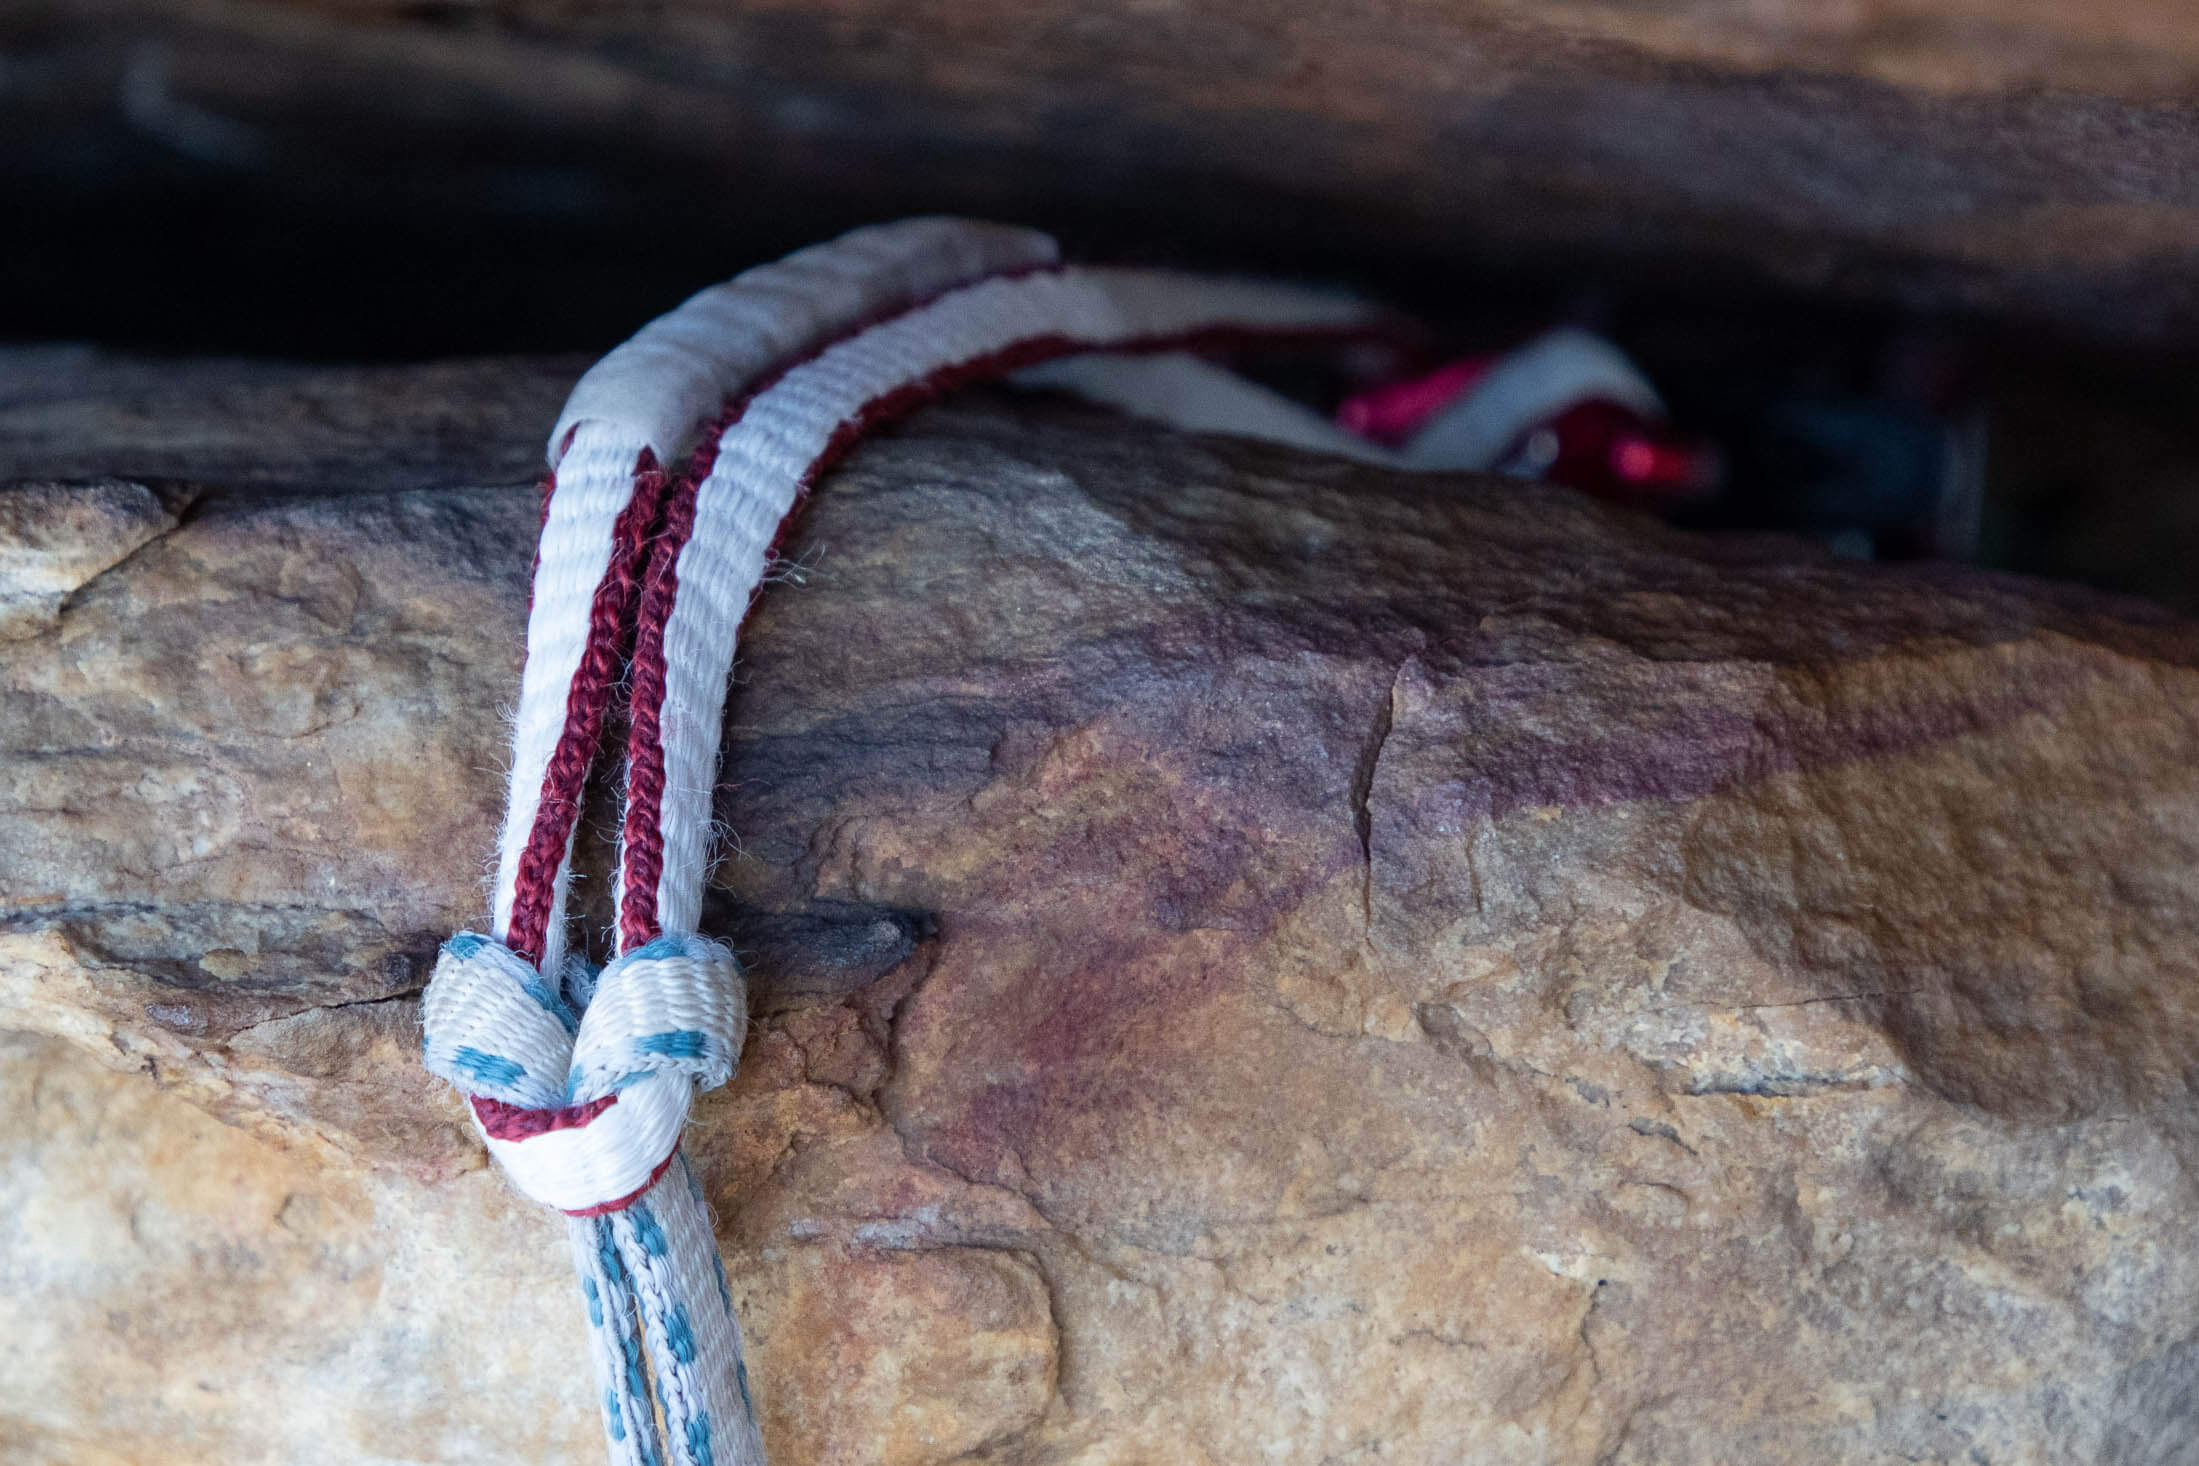
How to rack slings
When given the choice between racking slings on their harnesses (either as alpine draws or on single carabiners) or over their shoulders, most climbers prefer to rack slings on their harnesses. When racked over the shoulder, slings are more likely to tangle, and the carabiners tend to get the way when you look down at your feet. This disadvantage of racking slings on your harness is that it takes up valuable space on your gear loops, which is why you might occasionally have to put a sling or two over a shoulder.
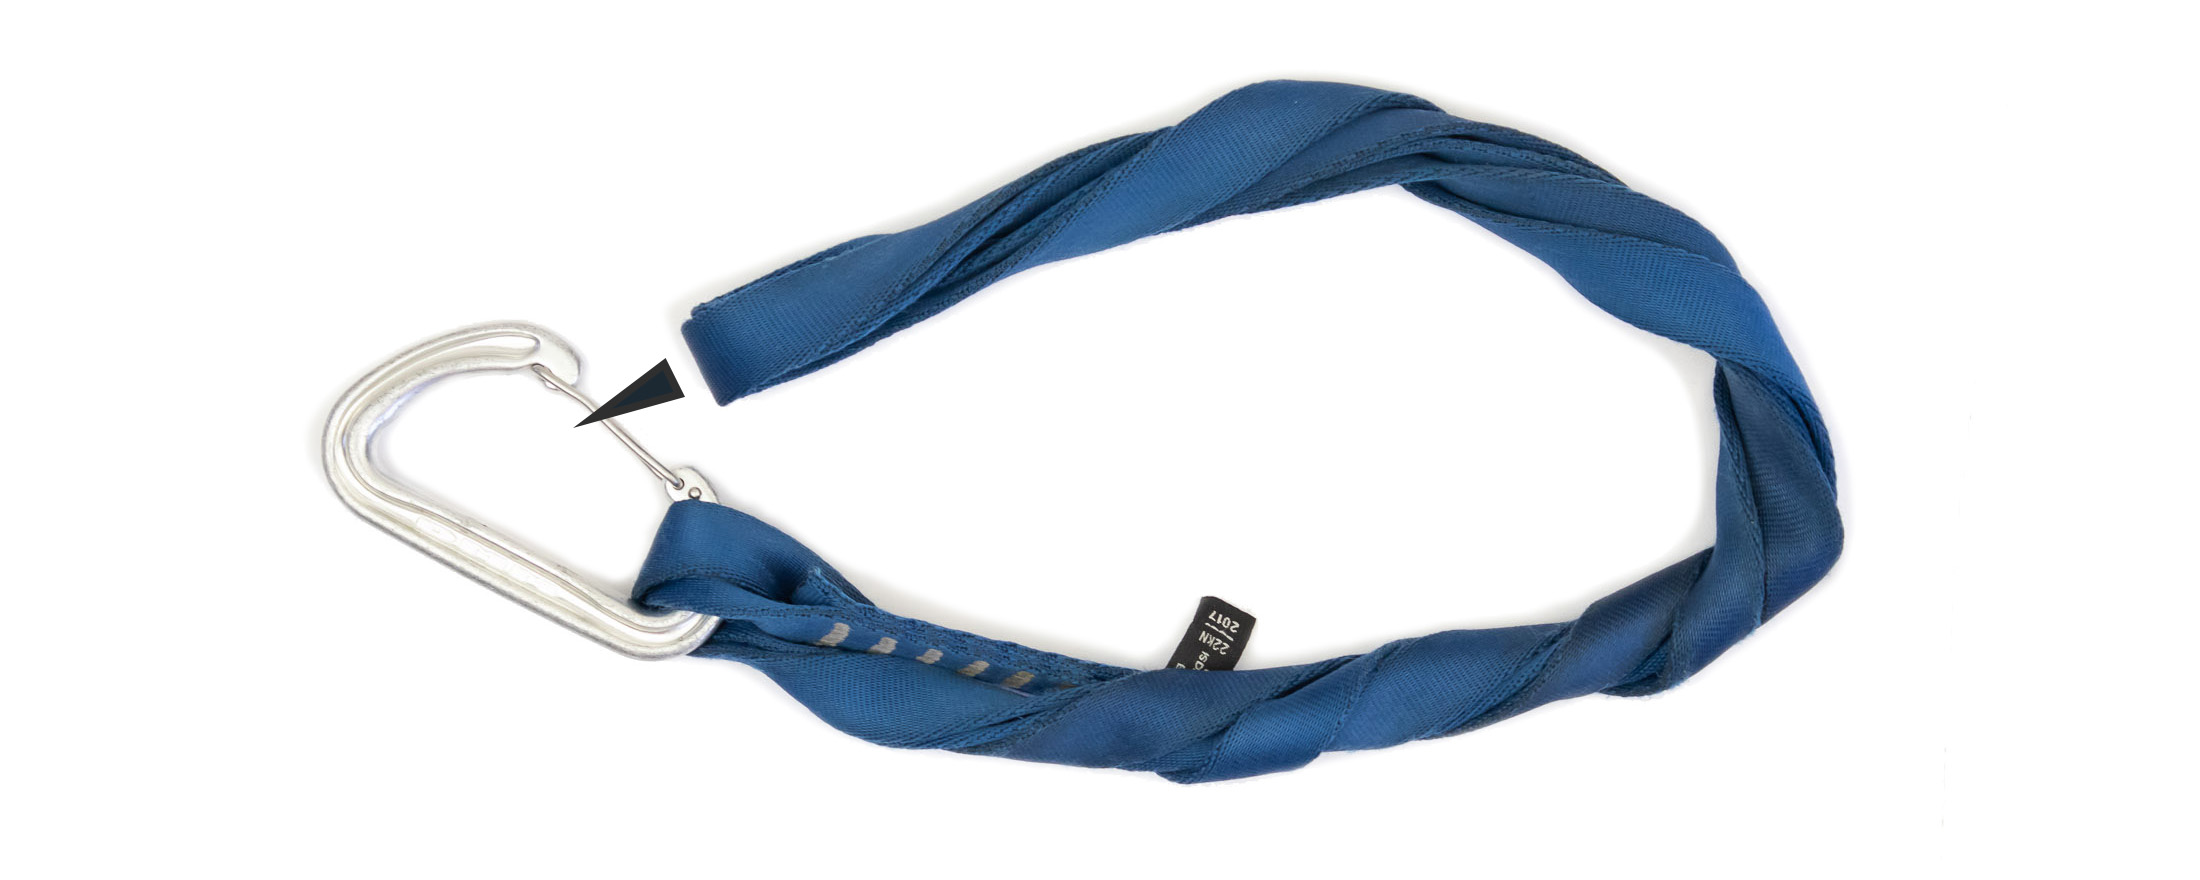
Doing this with single-length slings is easy enough, but double-length slings make things a little trickier. You can double up the sling by putting a half twist in it and then folding one loop over the other, but with this method, you’ll likely find that one loop will grow longer than the other and then get in the way or slowly strangle you. This technique can also make it very hard to remove a sling if you have more than one over the shoulder.
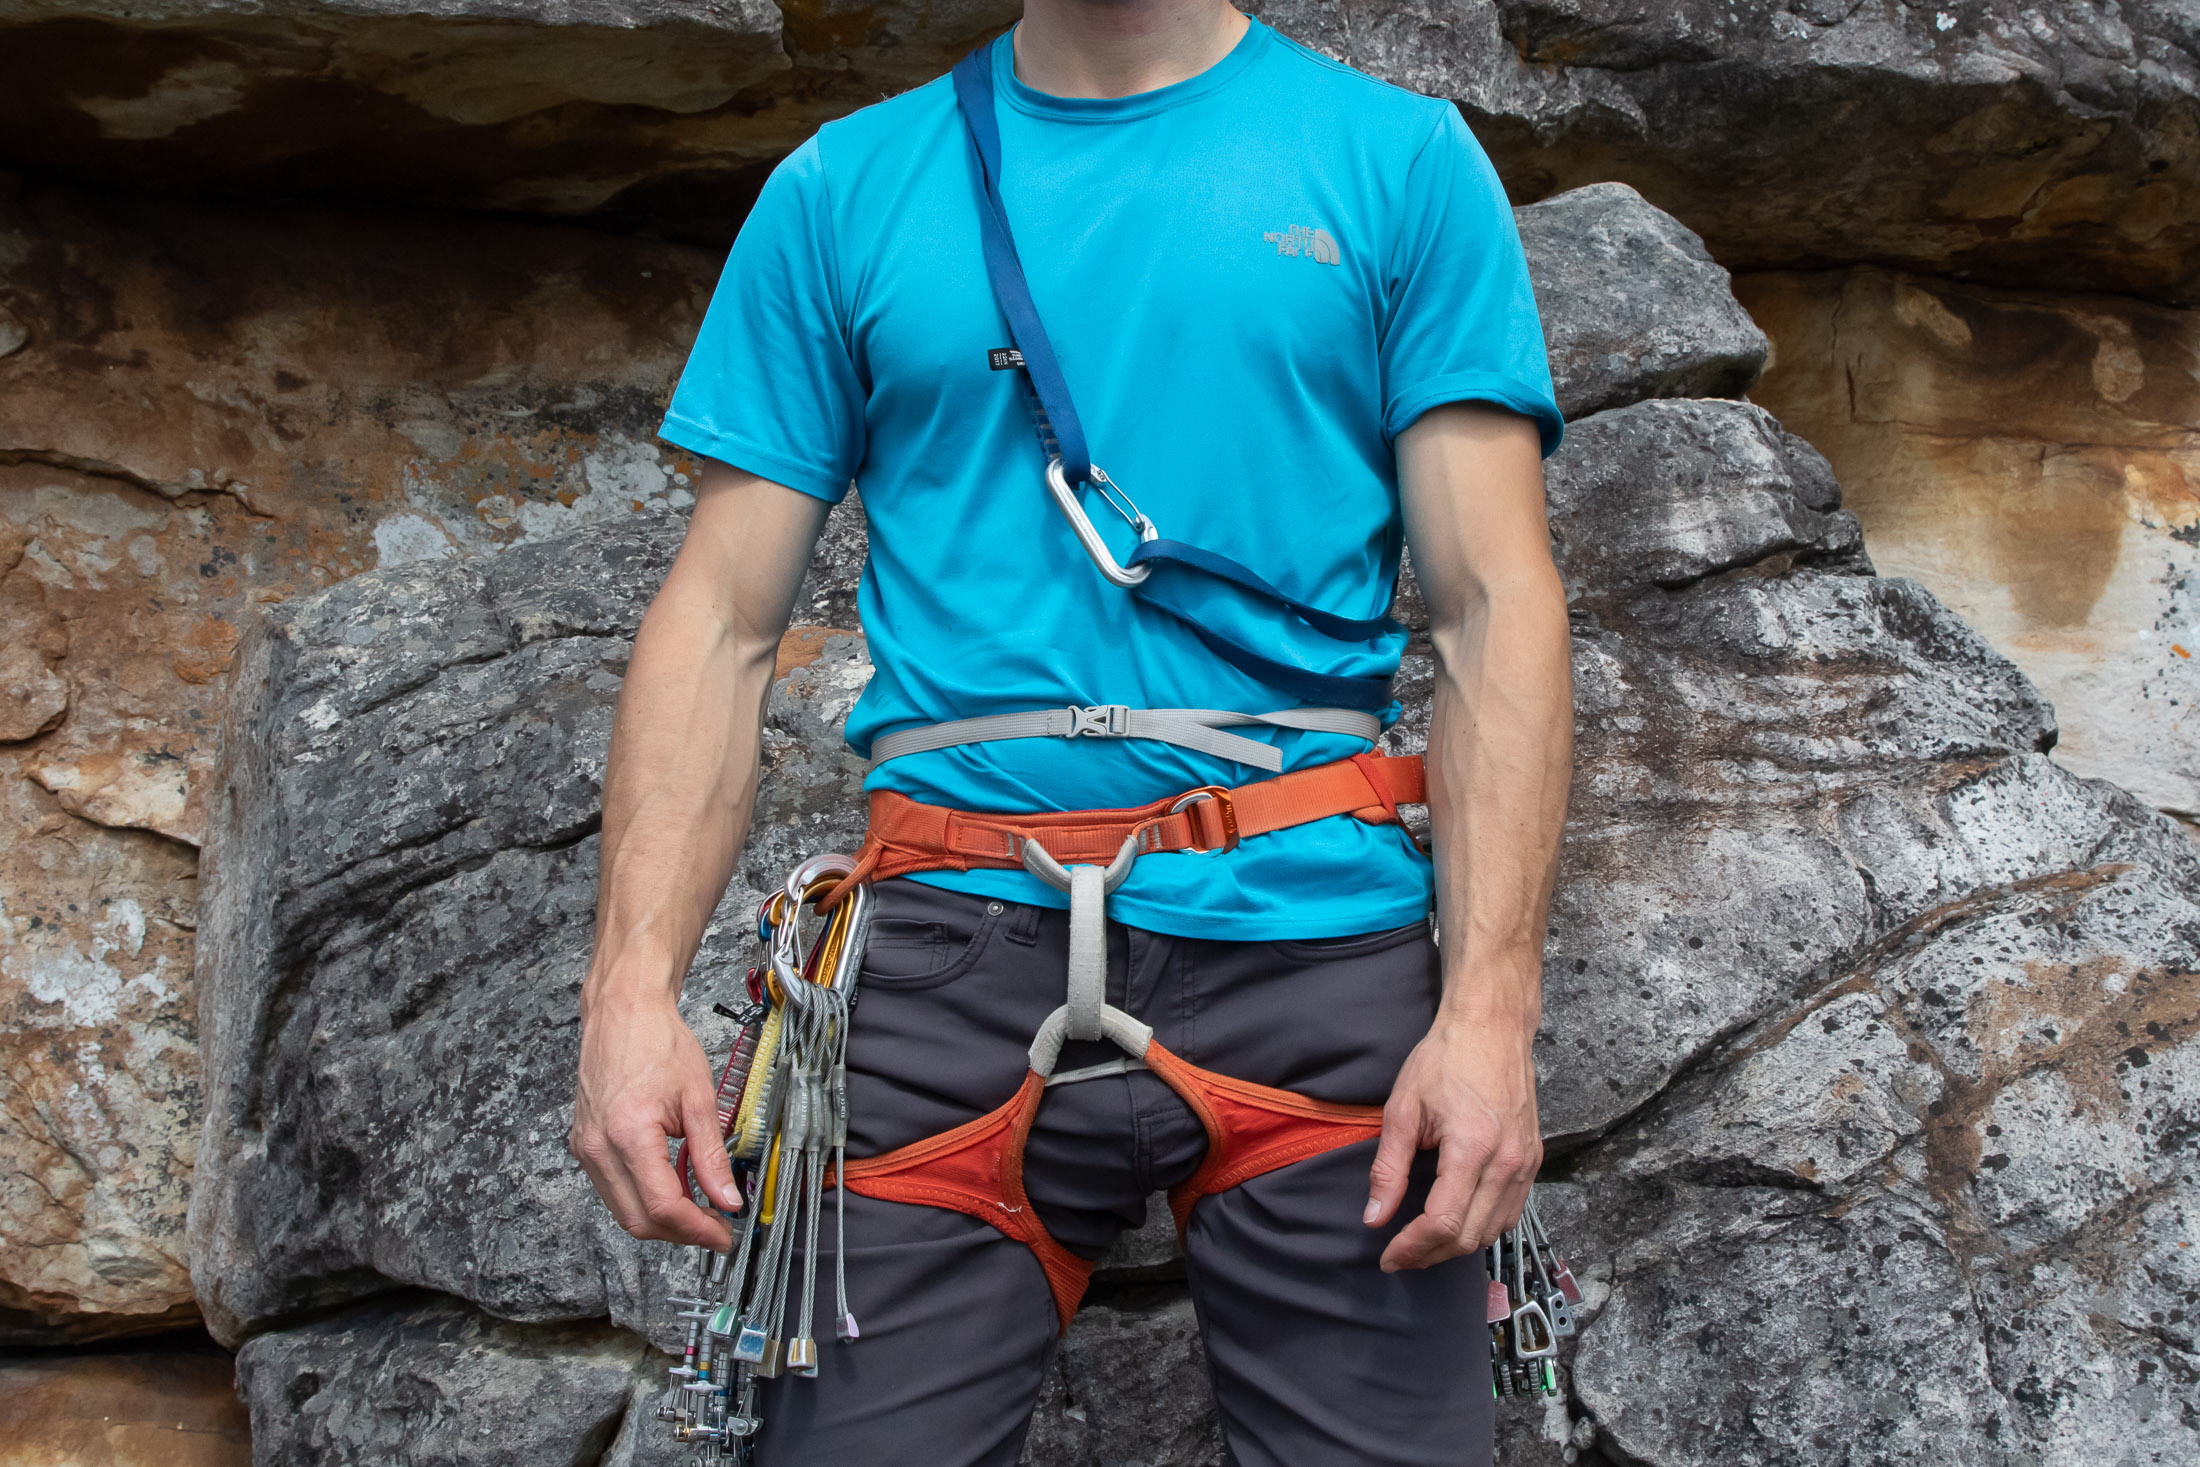
It’s better to make a loop from your sling by clipping the ends together with a carabiner. Besides keeping the stands an equal length, this method makes it easier to rack multiple slings over your shoulder. When you need a certain sling, you can simply unclip the carabiner from one of the two ends and pull it. This method works even if you rack double-length slings under single-length slings.
Get more advice from this gearhead
You now have everything you need to know about extending trad gear. But don’t stop here. On this website you’ll find many more trad-related articles on everything from placing gear to building trad anchors as well as many more gear guides. You can find these under the different sections in the categories menu, or, better yet, sign up for my newsletter to get all the latest from Trail & Crag delivered straight to your inbox.
