Even if you have only recently started trad climbing, you probably already know that some stances aren’t bolted. Some of these naturally-protected belays have a very convenient tree within easy reach, but more often than not, you have to create a trad anchor from three or more pieces of gear. In this article, I will explain exactly how to do that – build an anchor using one of two rigging techniques. Almost every belay stance you encounter will be at least a little different from everything else you’ve seen, and what I aim to do here is give you everything you need to make informed decisions in 90% of all anchor building scenarios – those where you will find at least three strong gear placements.
Of course, by limiting this article to 5000 words, I have not been able to include everything related to anchor building. To cover what I wasn’t able to include here, I have written several other articles on topics like how to use monolithic anchors (trees and boulders) and how to create a distribution-critical anchor. You can find all of these in the rock climbing section of this blog. But, before you dive down that rabbit hole, let’s look at everything you need to know to build a solid anchor at your average gear-protected stance.
- Definitions
- A primer in load distribution
- How to tie a cordelette
- Step 1: Determine the direction of pull
- Step 2: Place your primary anchors
- Step 3 – option 1: Rig an anchor with a quad
- Step 3 – option 2: Rig an anchor with an overhand knot
- The problem with acronym checklists
- A better way to build and assess anchors
- Protecting the anchor
Definitions
First, let’s go over some definitions. That way you’ll know exactly what I mean when I say ‘component’ or ‘off-axis’.
Master point
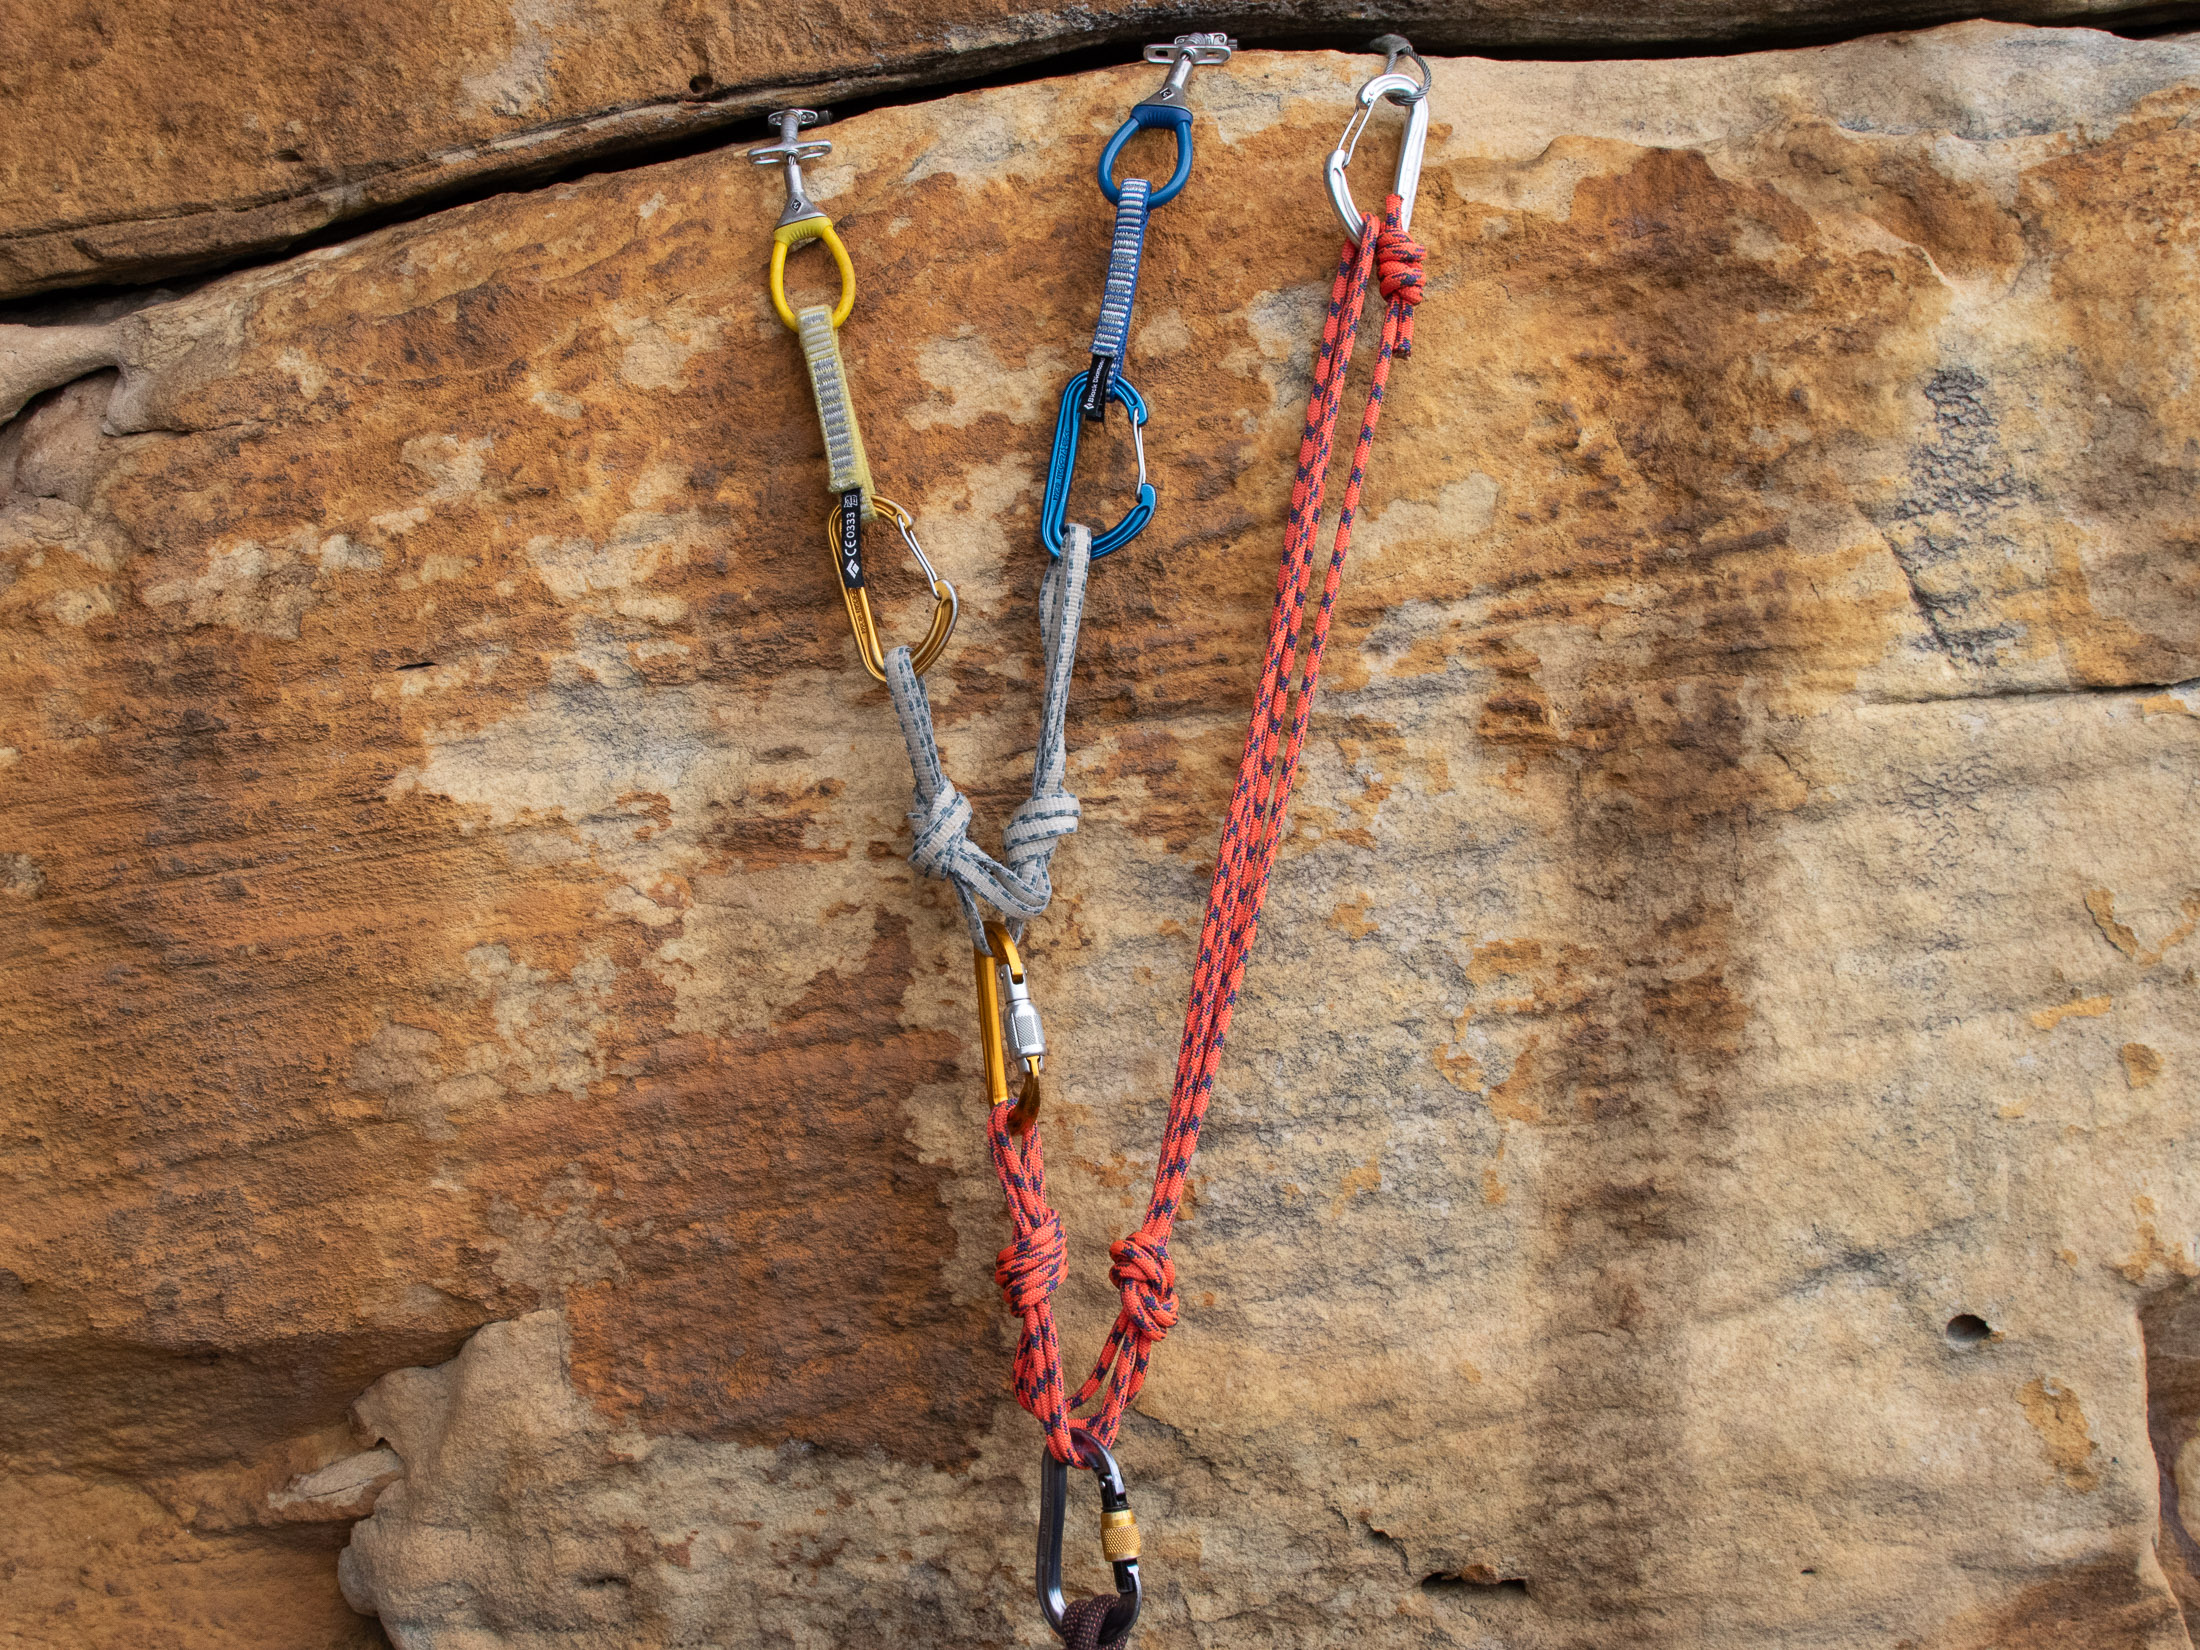
The master point is the part of the anchor you connect yourself and often the belay device to. In the case of an overhand-knot anchor, there’s only one master point – the loops of the bundled strands below the knot. Quads, on the other hand, have two master points, each with two strands.
Shelf
The shelf is a second attachment point created by clipping a carabiner through the loops that make up each arm of an overhand-knot anchor. It gives the belayer an alternative point for attaching the belay – useful if the master point is too low to make for easy belaying.
Component
In this article I will use ‘component’ to refer to the separate primary anchors that make up an multi-point anchor. These could be bolts, cams, nuts, or natural features like boulders or trees that have been secured with a sling. I will use this term interchangeably with ‘primary anchor’.
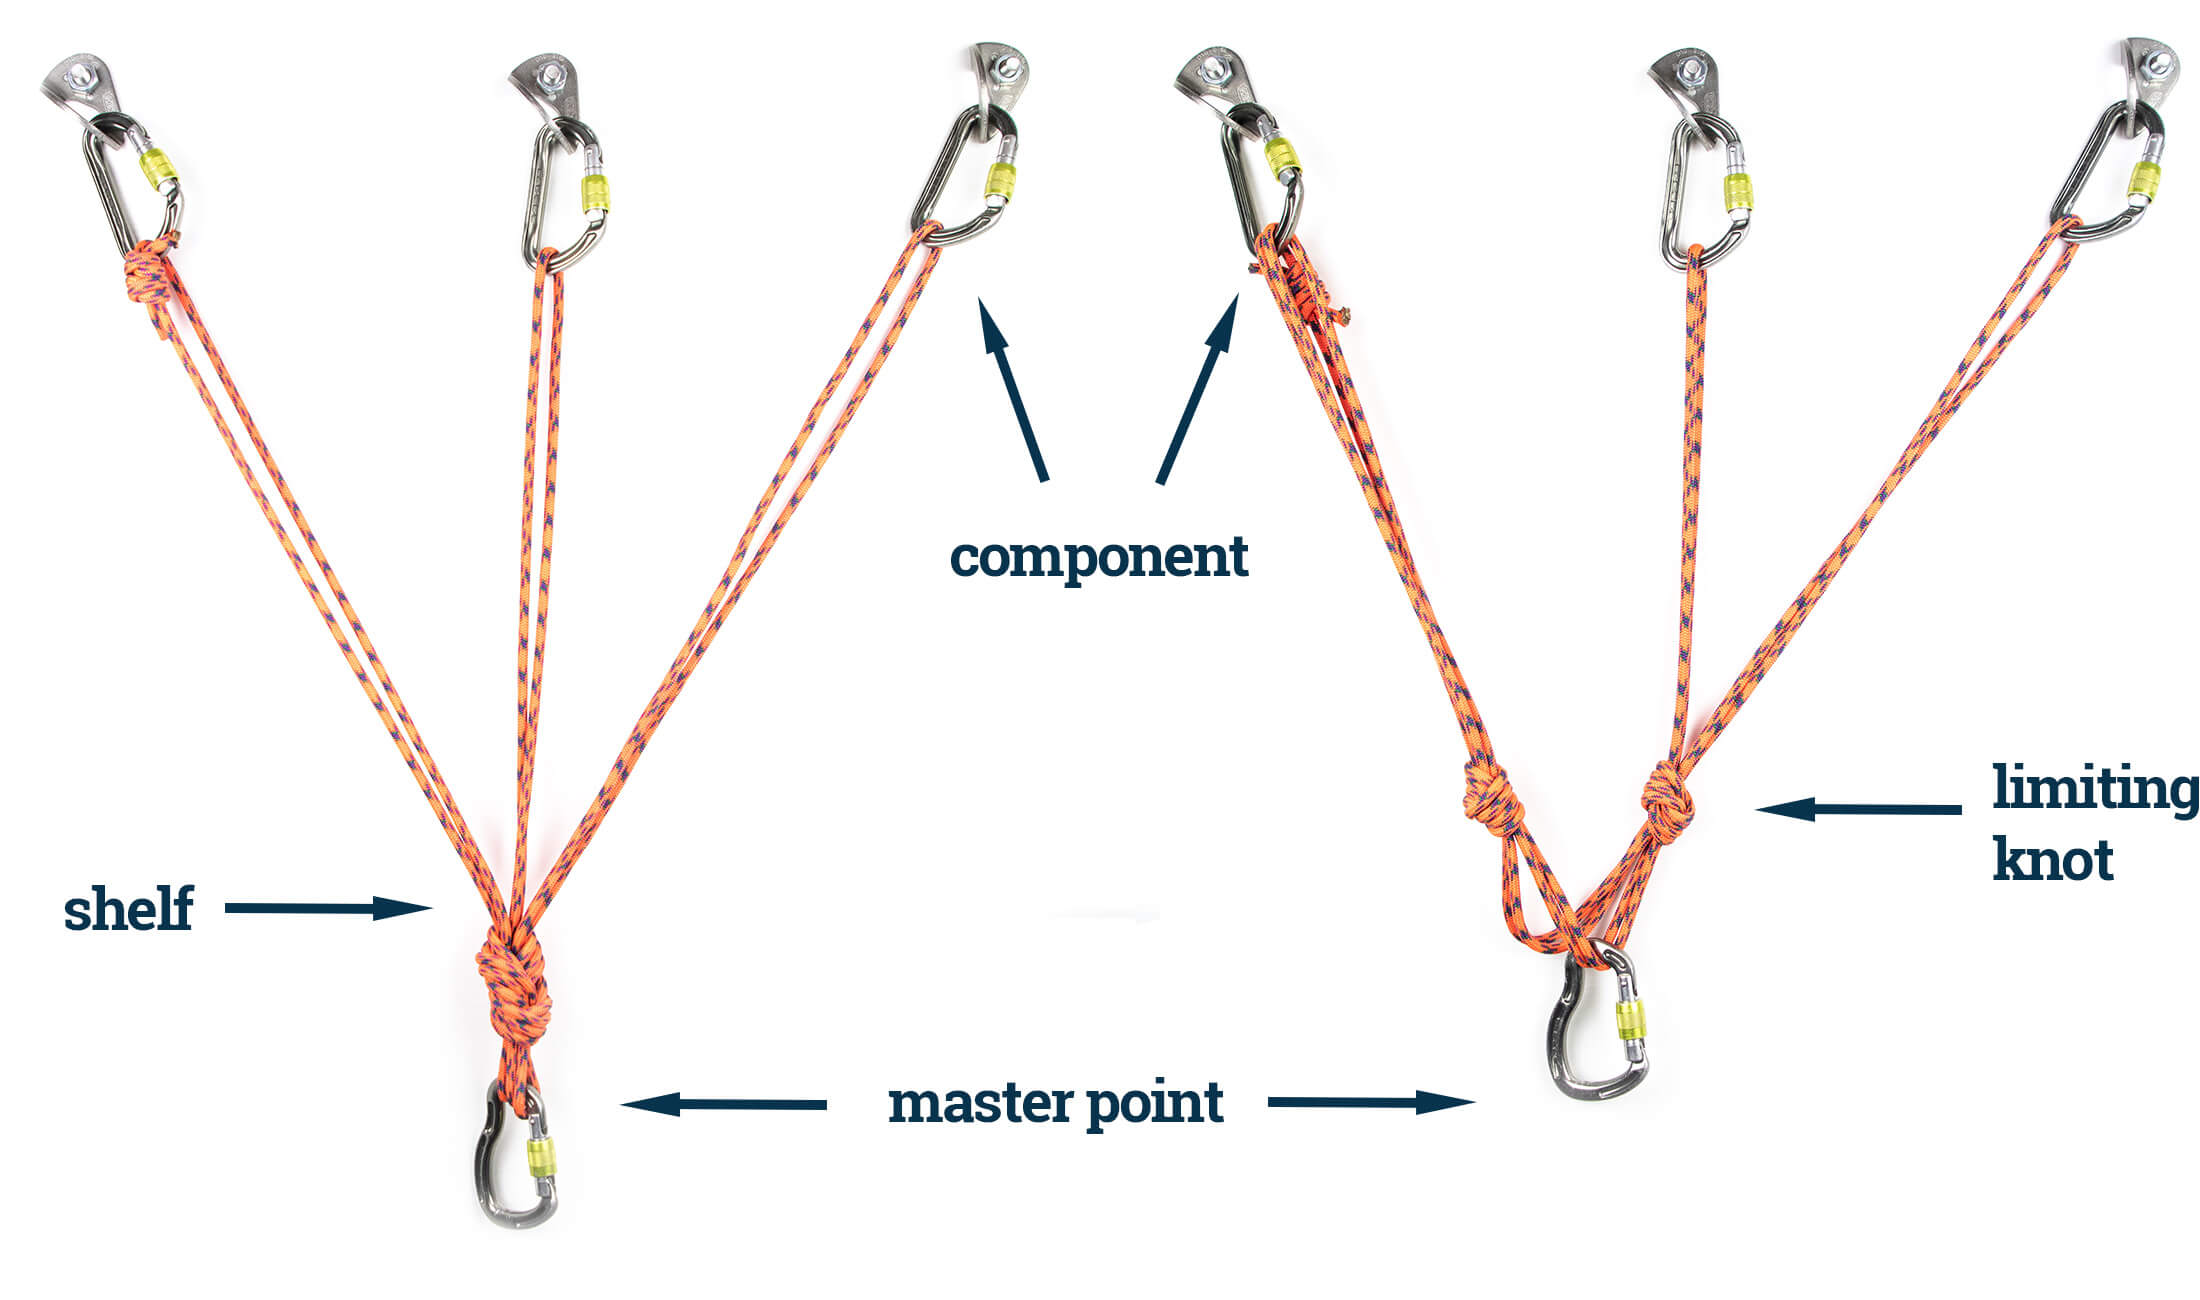
Limiting knot
The knots in either arm of a quad can be tied further or closer to the master point. Their position determines how much the anchor would extend if a component failed, so they are known as limiting knots.
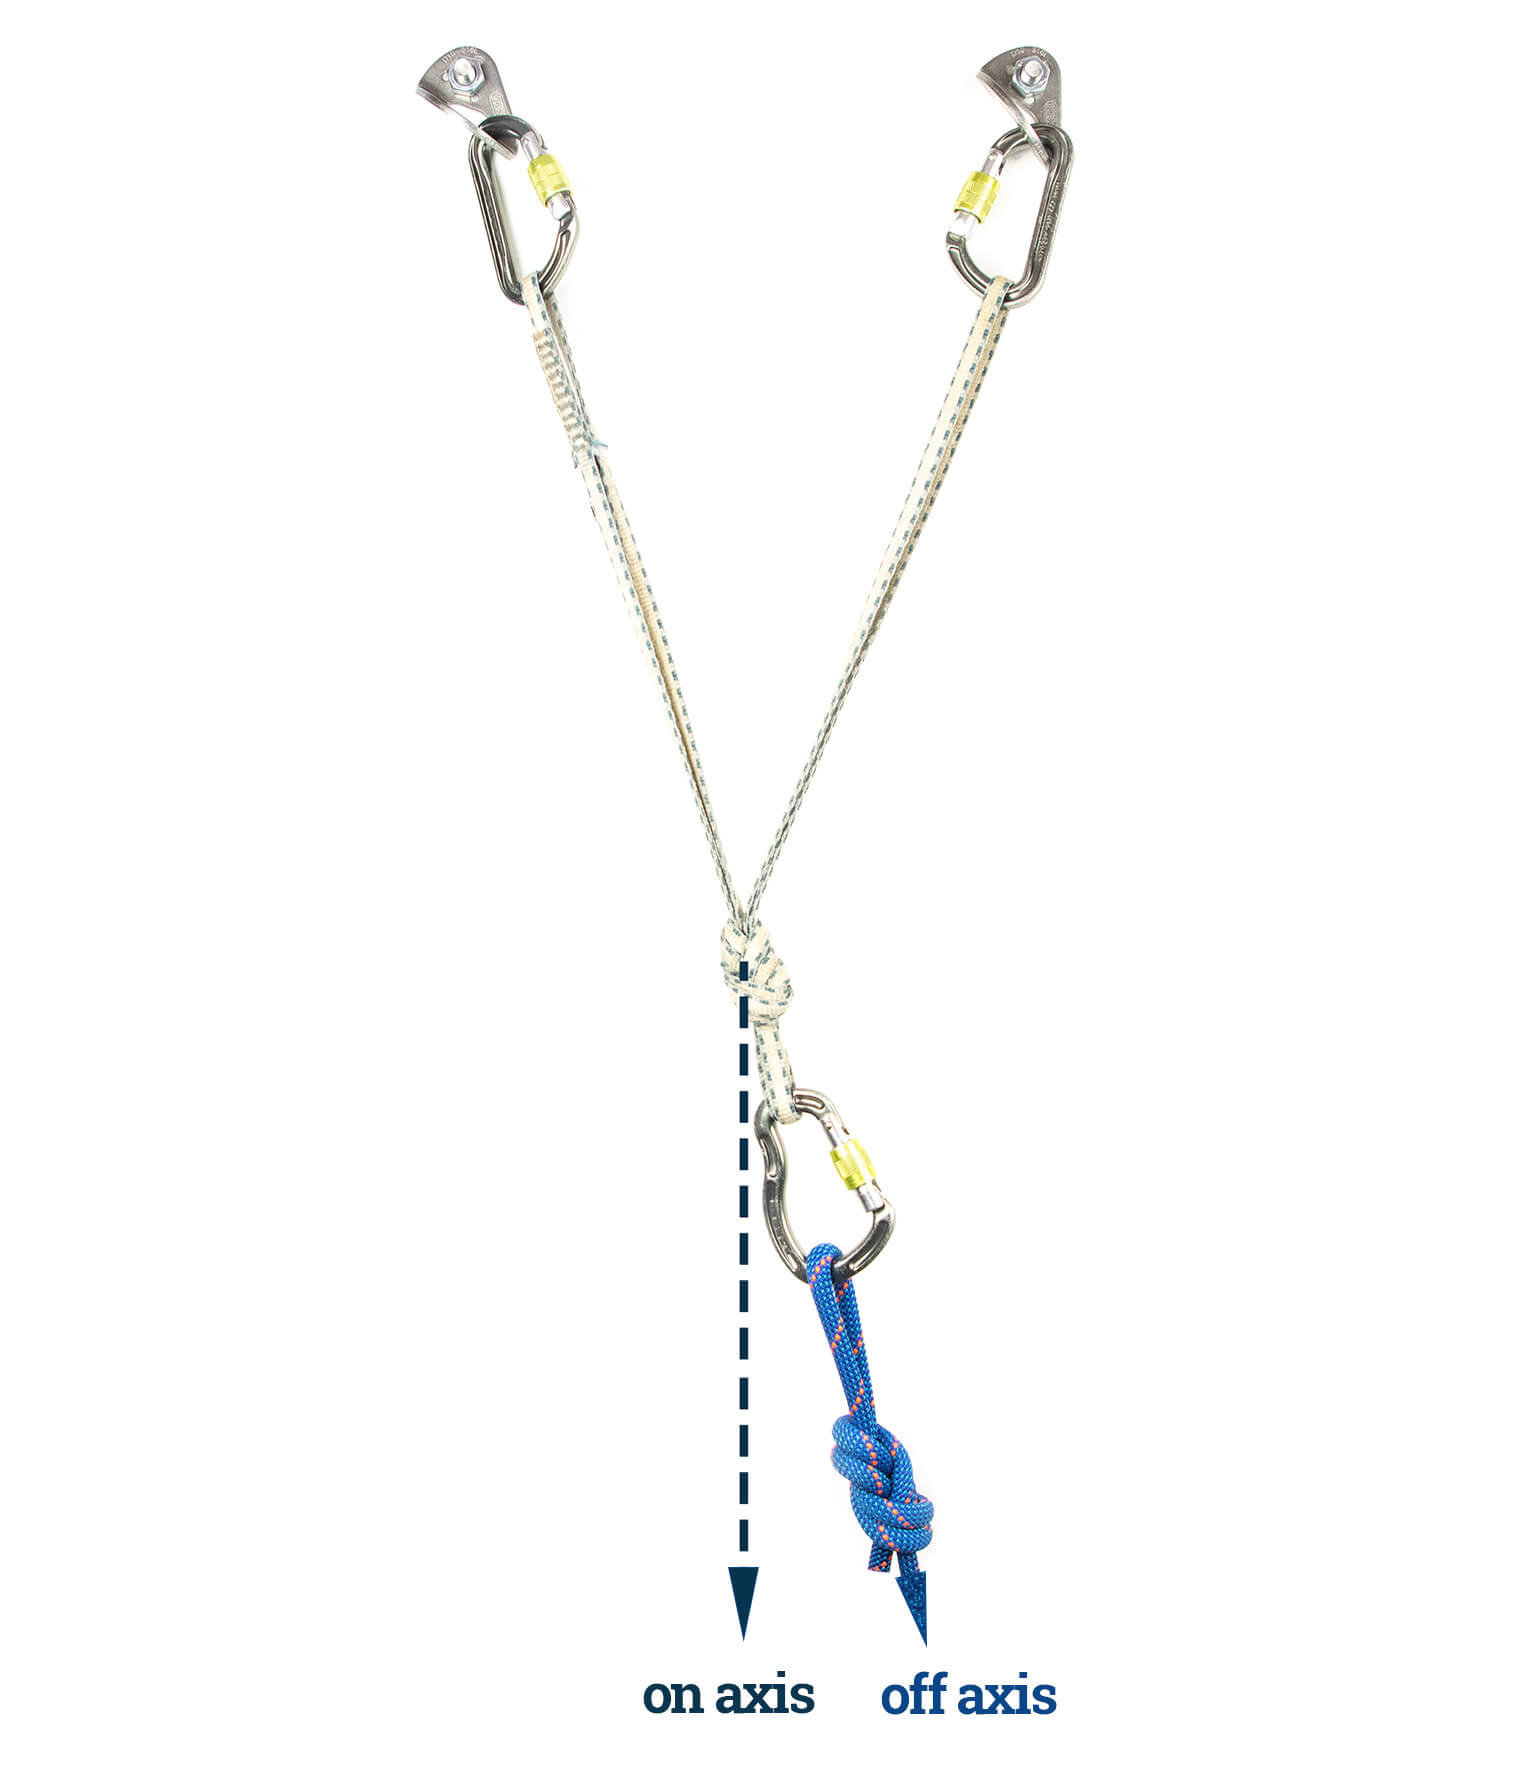
On-axis
The direction of pull on an anchor is on-axis when it is straight on, ensuring a more or less equal distribution of load on all components. An anchor builder should always strive to build an anchor that will be loaded on-axis when the belayer or climber weights the anchor.
Off-axis
The direction of pull on an anchor is off-axis when it is not straight on – that is when it doesn’t distribute a load equally to the primary anchors in a system. The master point in a self-distributing anchor can slide, moving the axis. In this case, an off-axis load is one that the anchor still has to adjust for.
A primer in load distribution
There are two reasons that belay anchors are built with multiple components. The first is that it ensures redundancy – if one component fails, there will be at least one other primary anchor to take the load. The second reason is that you want to distribute the load between components where possible. In fact, in some situations, effective distribution is critical to ensuring that an anchor is strong enough. Knowing when to ensure effective load distribution and how to achieve it is one of the most important skills in anchor building. But for now, all you need to know is that some load distribution is better than none.
Pre-distributed vs self-distributing anchors
Multi-point anchors can be said to be pre-distributed or self-distributing. In a pre-distributed anchor, the distribution point is fixed – usually with a knot – so effective distribution is only achieved when the anchor is loaded in the intended direction of pull. Because you are very unlikely to load an anchor perfectly on-axis in the real world, the reality is that more of the load is put on one component than the others. This is why the strength of your anchor is significantly weaker than the sum of its parts. It’s important to remember this. Three components rated to 9 kN each will not give you an anchor able to withstand 27 kN or even 24 kN (the rating of the average HMS carabiner). Such an anchor might only be as strong as its strongest component.
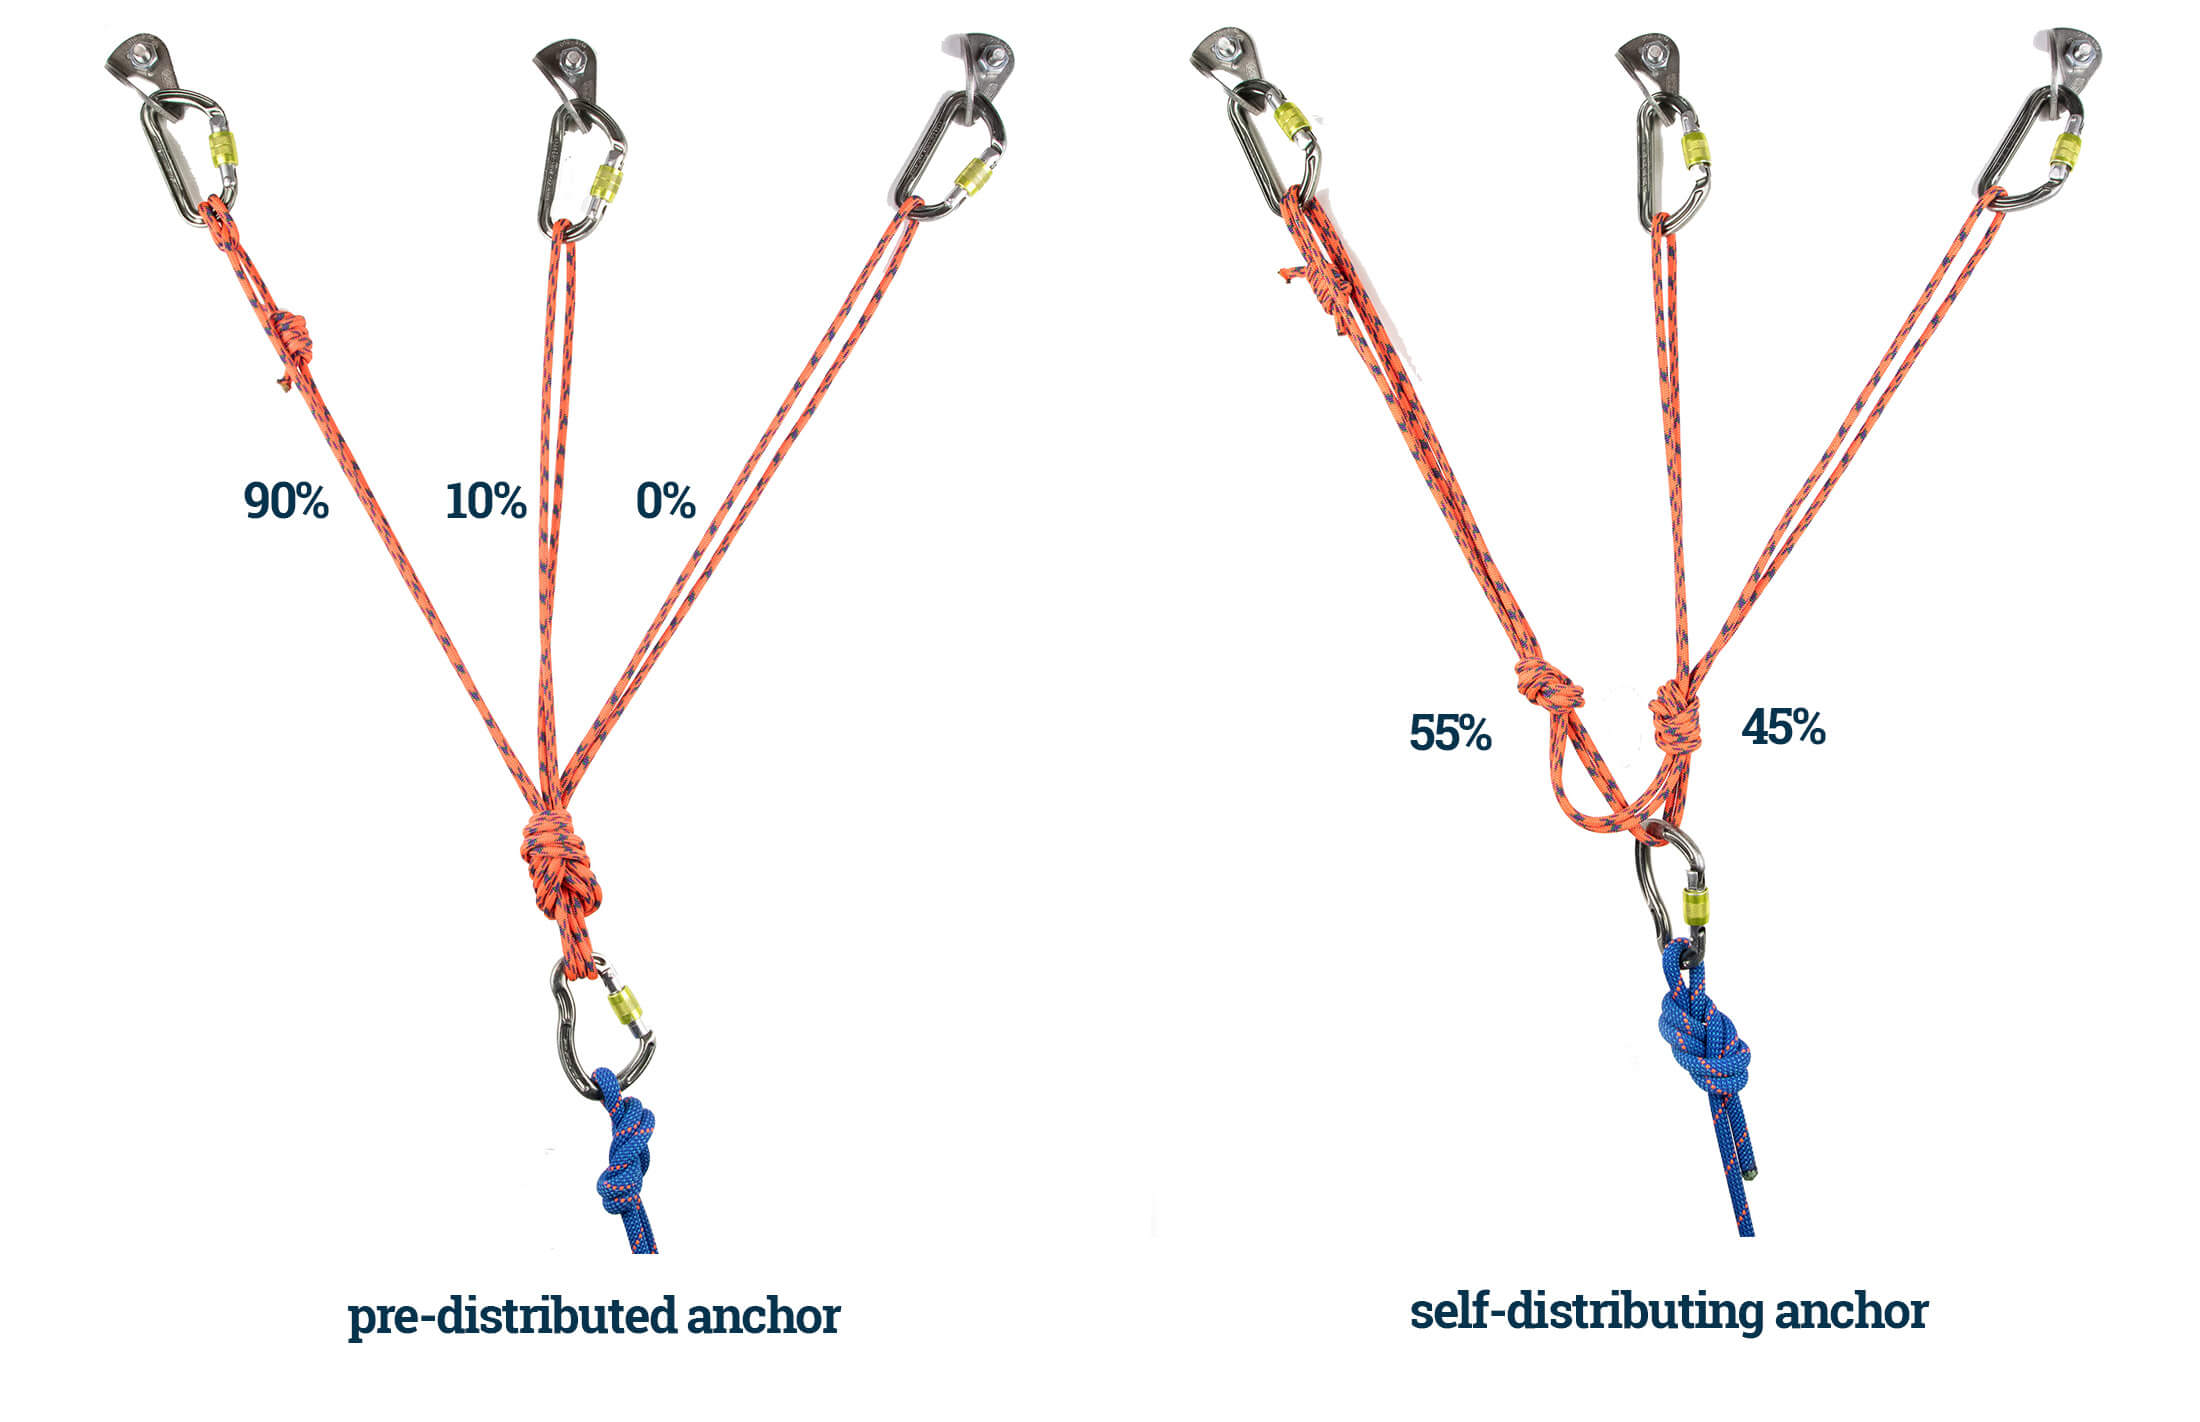
Self-distributing anchors, on the other hand, have distribution points that self-adjust. This means that they continue to share the load between components even when the anchor is pulled of-axis. However, the degree to which these systems self-distribute varies significantly depending on the type of rigging technique used. While a quad can split a load fairly evenly between two arms, a sliding X might only achieve a 70/30 split since the twist in the sling at the master point creates friction which puts most of the load on one of the two arms. Things then get even more complicated when you use a quad to create a 3-point anchor, as the load is split not once but twice.
A load is split by every distribution point
Whereas a traditional overhand-knot anchor can be rigged with three arms to achieve a three-way split when loaded on axis, quads initially have only two arms, each with two loops. You can separate the two loops in one of the arms and secure each to its own primary anchor, but it’s important to note that there are now two distribution points and that the load has been split twice. First it is split at the master point, which puts roughly 50% of the load on arm 1 and roughly 50% on arm 2. And then it is split again by the knot in arm 2, which put roughly 25 % of the load on 2A and 25% on 2B. This second distribution point doesn’t self-adjust so distribution here is less even when pulled off-axis.
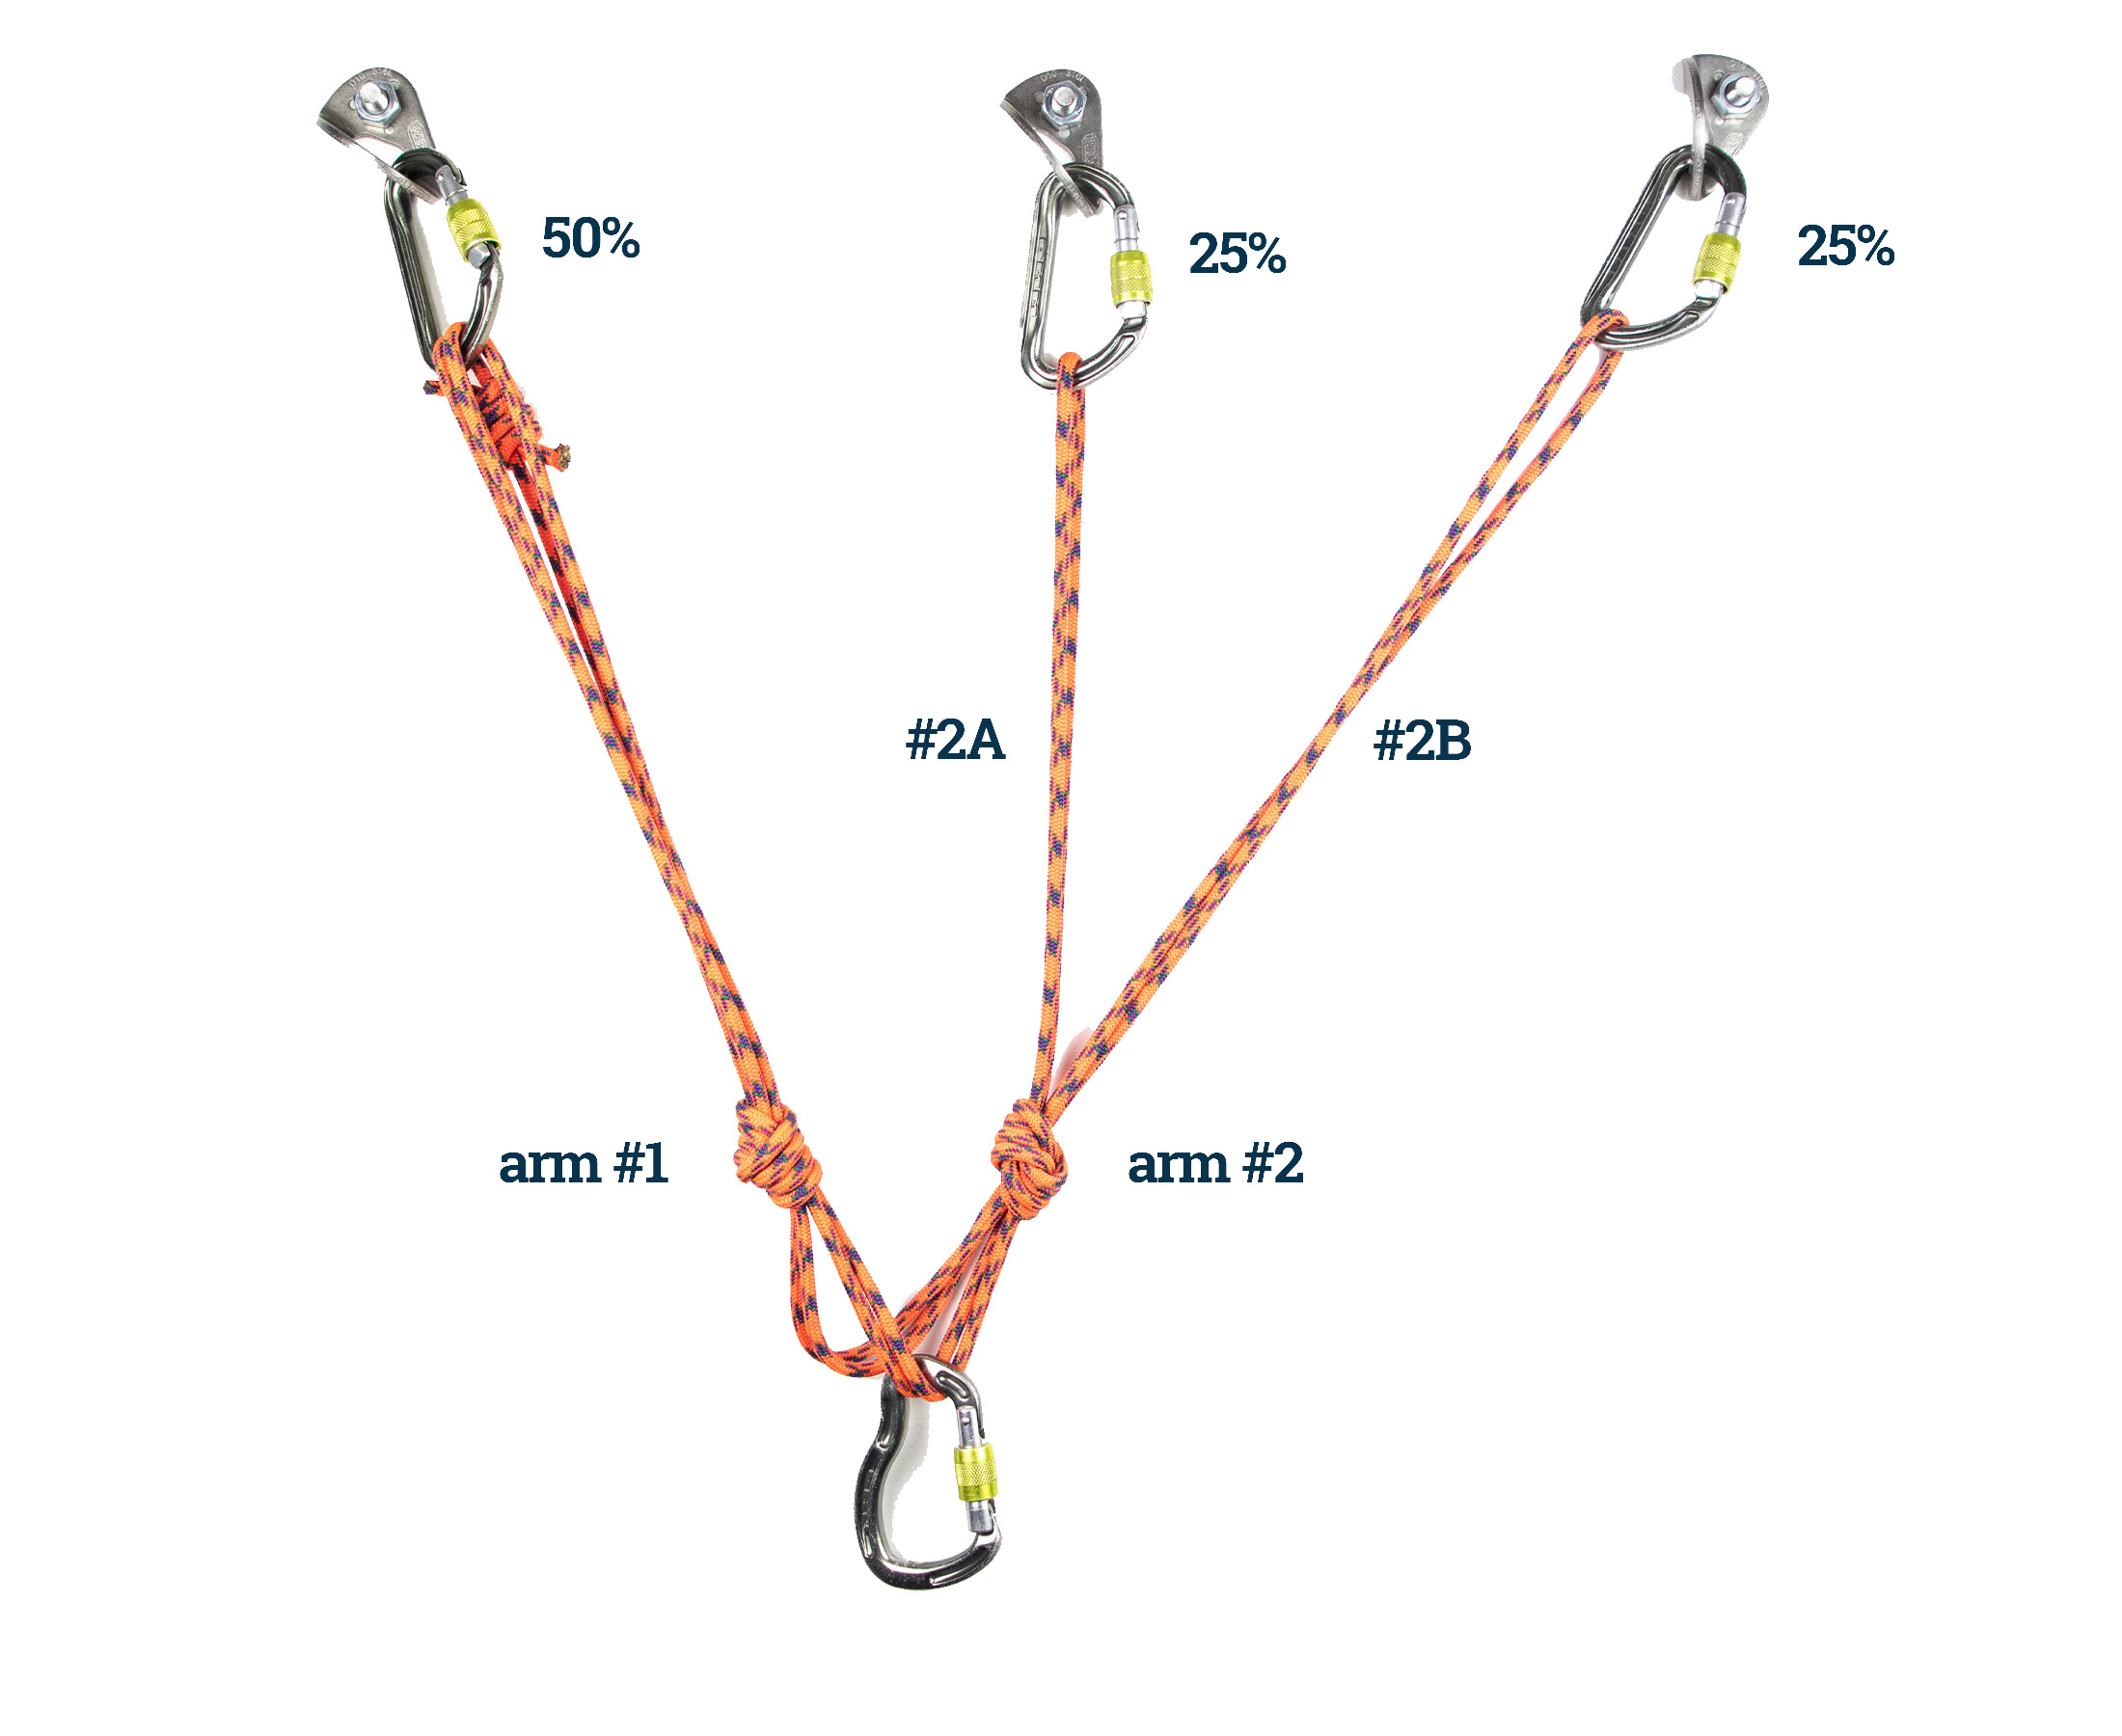
Angles in an anchor act as levers
In the diagrams above, the load percentages for each component add up to 100%, but in reality, the load on a properly distributed two-point anchor will be higher than 50%. The reason for the increase is that angles in an anchor act as levers and increase the load on its components. The larger the angle, the larger the vector force. Obviously we don’t want any additional load on our components, so we need to try to keep angles as narrow as possible or at least within 45°.
An angle of 45° increases the load on each component in a two-point anchor to only 54% (of the total load) whereas an angle of 90° would increase the load on each component to 71%.
How to tie a cordelette
In this article I describe how to create a quad and a traditional overhand-knot anchor. Both of these can be rigged with a 5 to 7.5 m (17 to 25 ft) loop of cord, either 7 mm nylon accessory cord or 6 mm technora cord. For my loop, I use a 6 m (20 ft) piece of Sterling’s Power Cord, which I prefer for its low bulk and durability. Once I’ve tied the ends of the cord together with a double fisherman's knot, the loop is slightly less than 3 m (10 ft) from end to end.
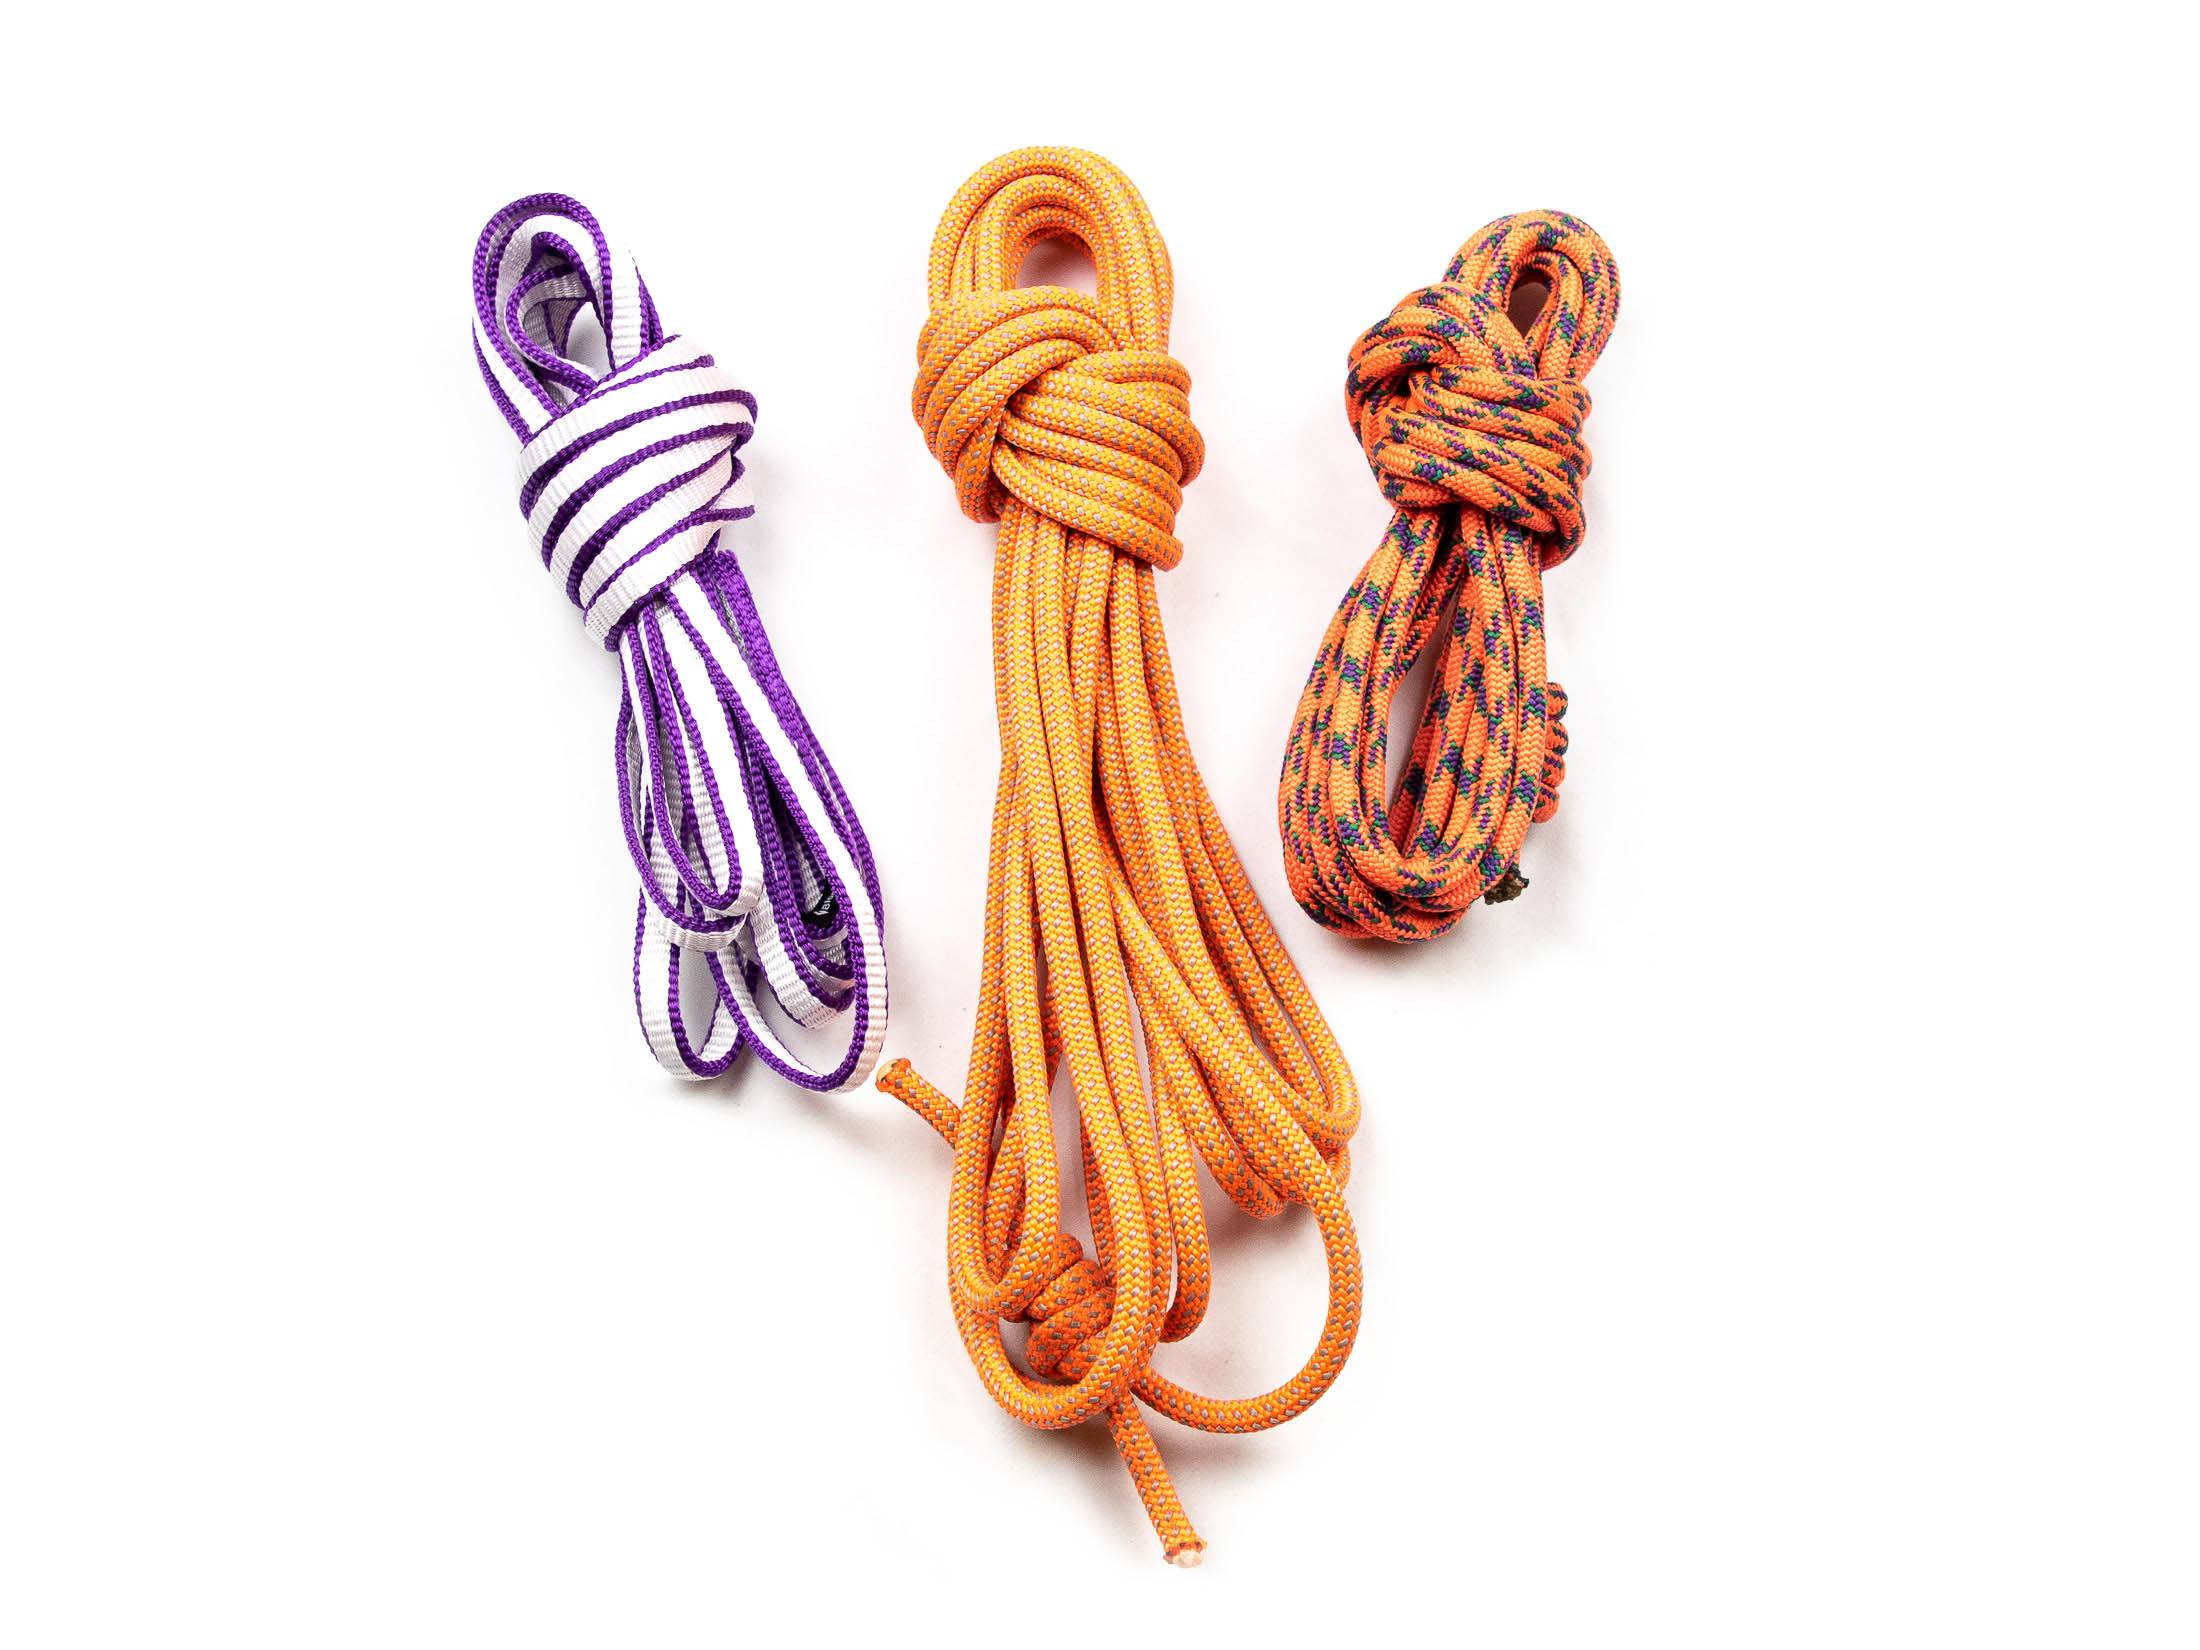
Some climbers use lengths of cord as short as 4.5 m (15 ft). These are fine for two-bolt anchors but can be restrictive when building three-piece trad anchors. I won’t usually use 240 cm dyneema slings for the same reason. Dyneema is also known for its low strength when knotted, but the multi-strand knots of a quad or overhand knot anchor are unlikely to weaken this material to a point that significantly compromises an anchor. For this application, I prefer cord over slings because I can cut it to whatever length I need and because it’s much easier to take knots out of cord after it has been weighted.
Step 1: Determine the direction of pull
Before you even place your primary anchors, you should look at the direction in which the anchor will be loaded – both by you and the follower. It’s important to give this careful consideration for two reasons: The direction of pull will determine which placements will make the best primary anchors, and it will guide your decision on how to incorporate components into an anchor. Slings and passive protection will usually only hold when loaded in a certain direction. If you include this kind of protection in an anchor, it’s essential to consider how the belay will load these components.
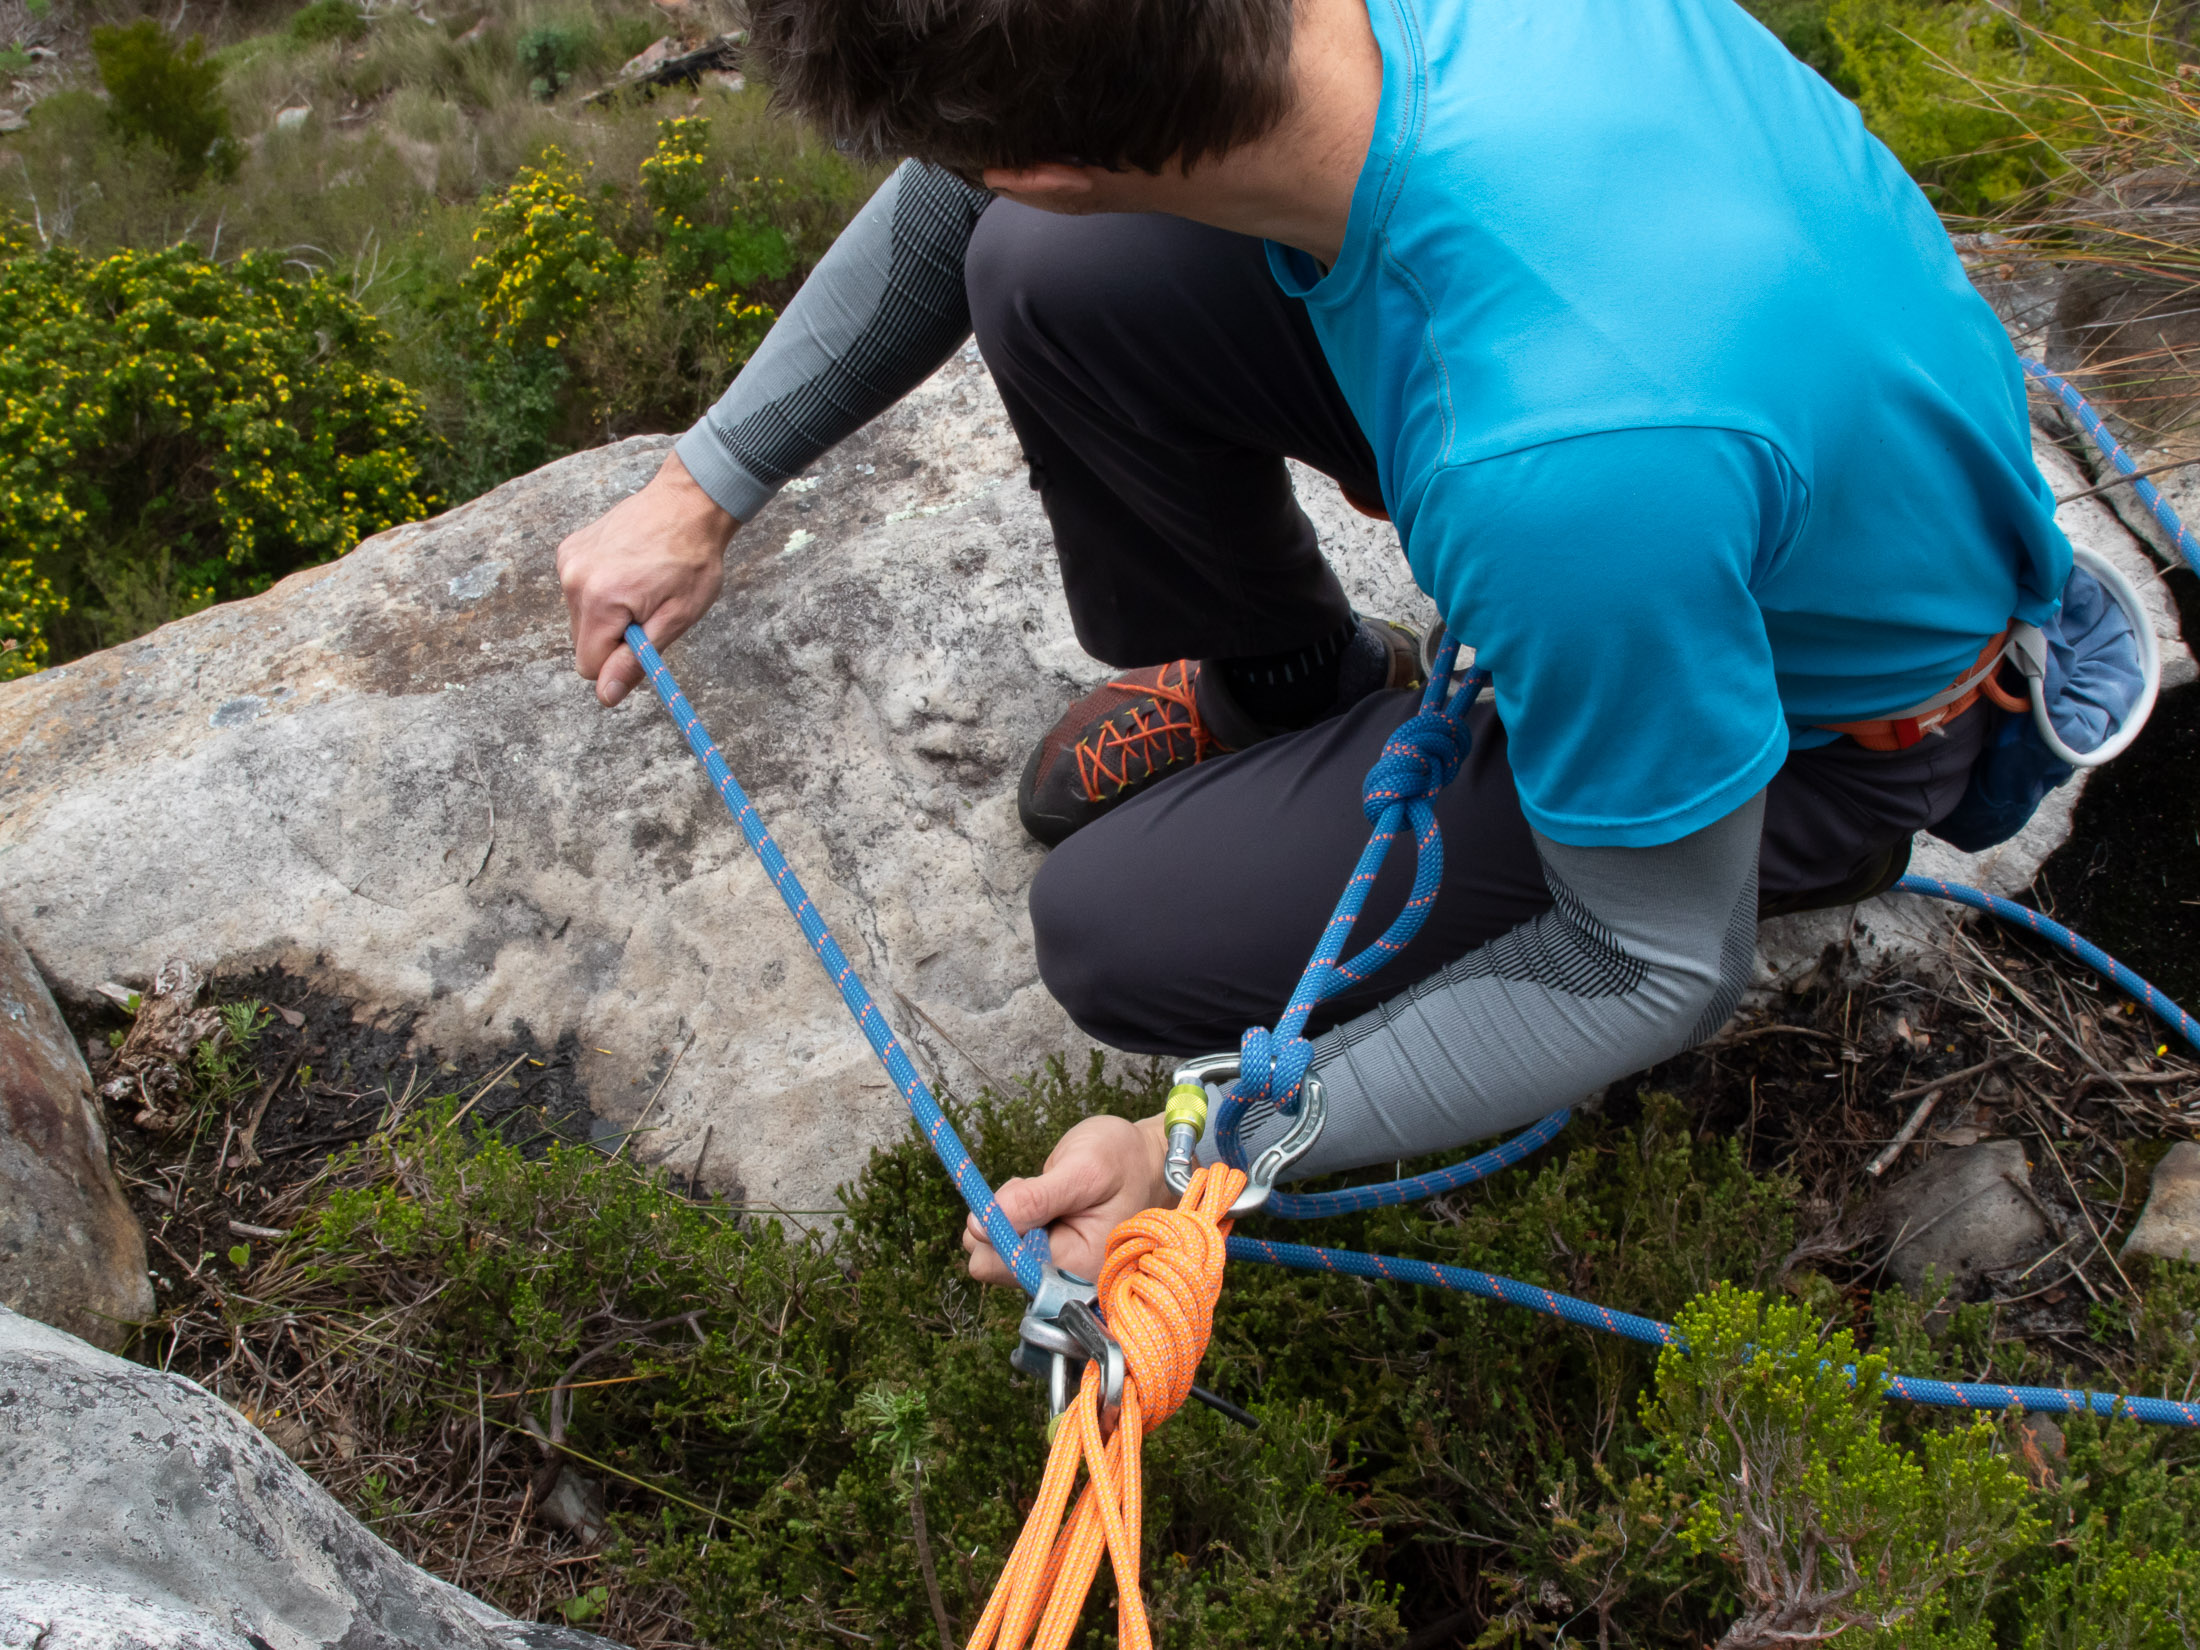
In many cases, the direction of the pull that you and your follower put on the anchor will be similar – roughly straight out and down – but in others, especially pitches that end with traverses, your follower will load the anchor from side-on while you load the anchor from below. The anchor needs to be able to withstand a pull from both directions, and it’s important that you choose placements that will withstand these forces.
Step 2: Place your primary anchors
Once you know where forces on an anchor will come from, you can choose placements that will oppose these best. But there’s more to placing primary anchors than simply ensuring the correct direction of pull. Besides ensuring appropriate load direction, your components also need to be strong enough for the application and be placed far enough apart to ensure redundancy.
Only use strong components
Strong primary anchors are the most important requirement in anchoring building. If your components are unquestionably strong, it doesn’t matter whether you combine them with a quad or overhand-knot anchor. The strength of your components will depend on three factors: gear strength, rock quality, and the level of security offered by a placement. Being able to tell a good placement from a bad one takes some experience. But gear strength is an easy one – you just need to look for the kN ratings on your gear and choose protection that is sufficiently strong. Of course, now we have a definition problem. How strong is ‘strong’?
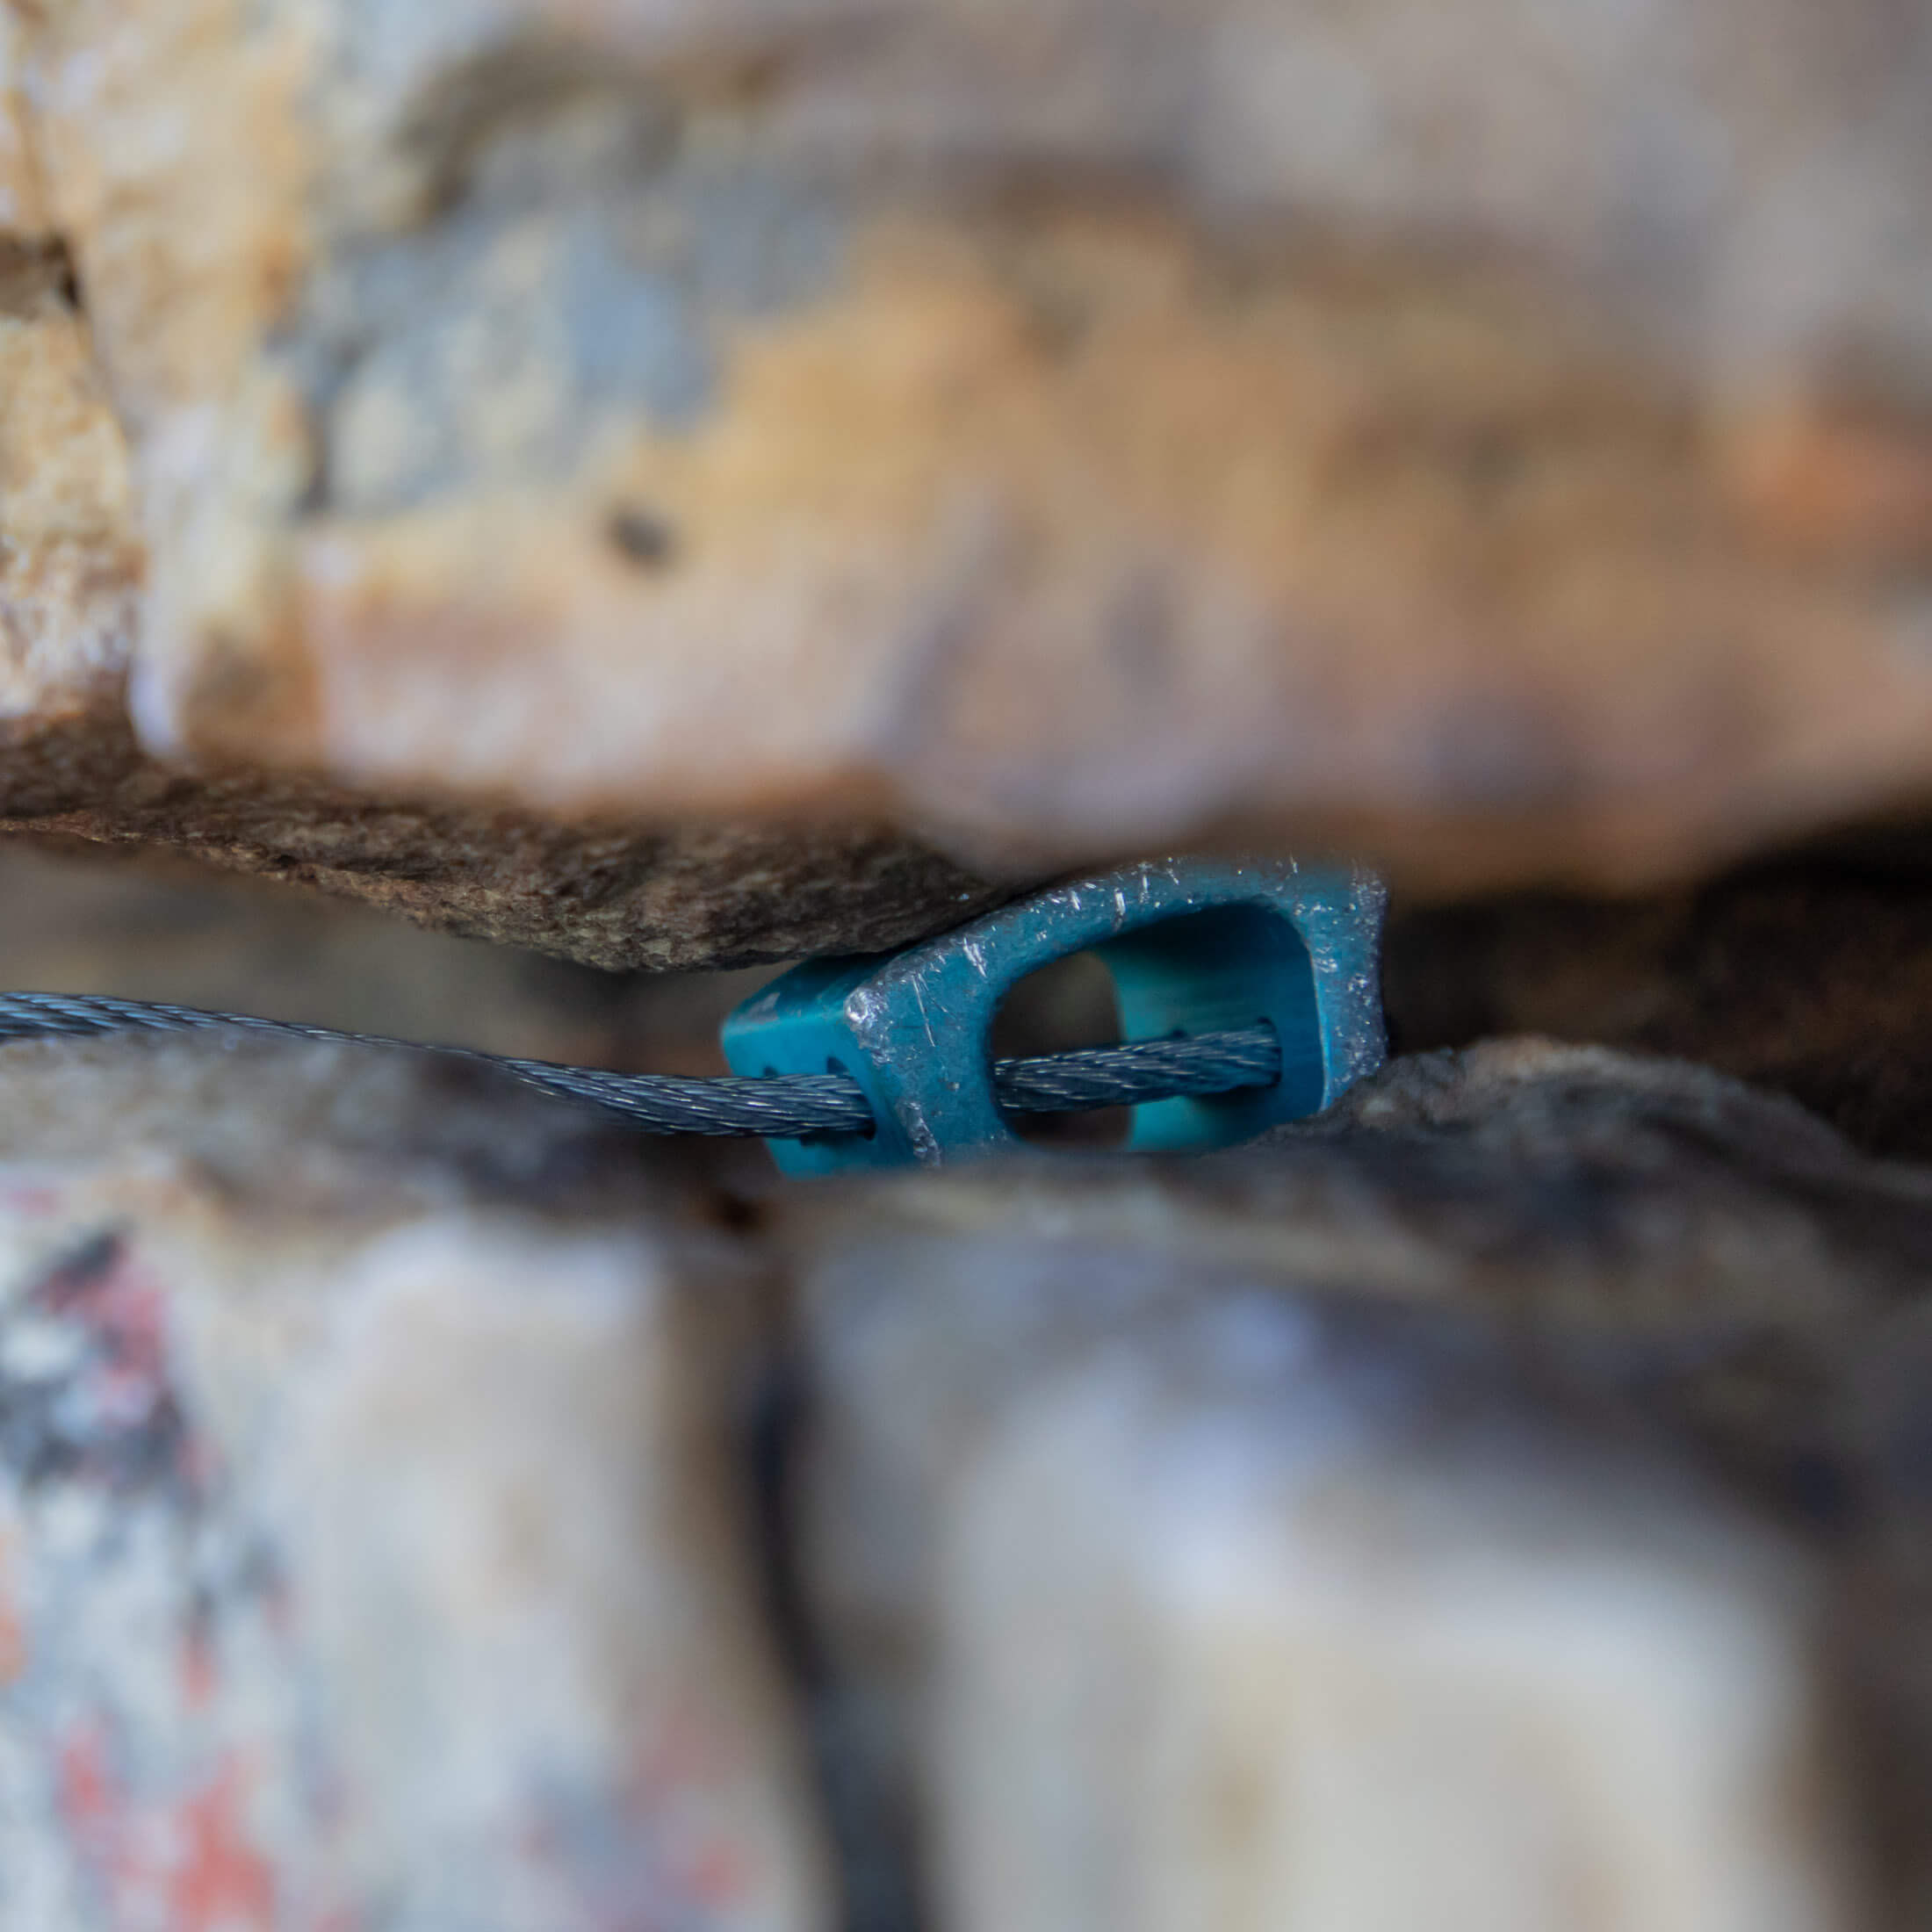
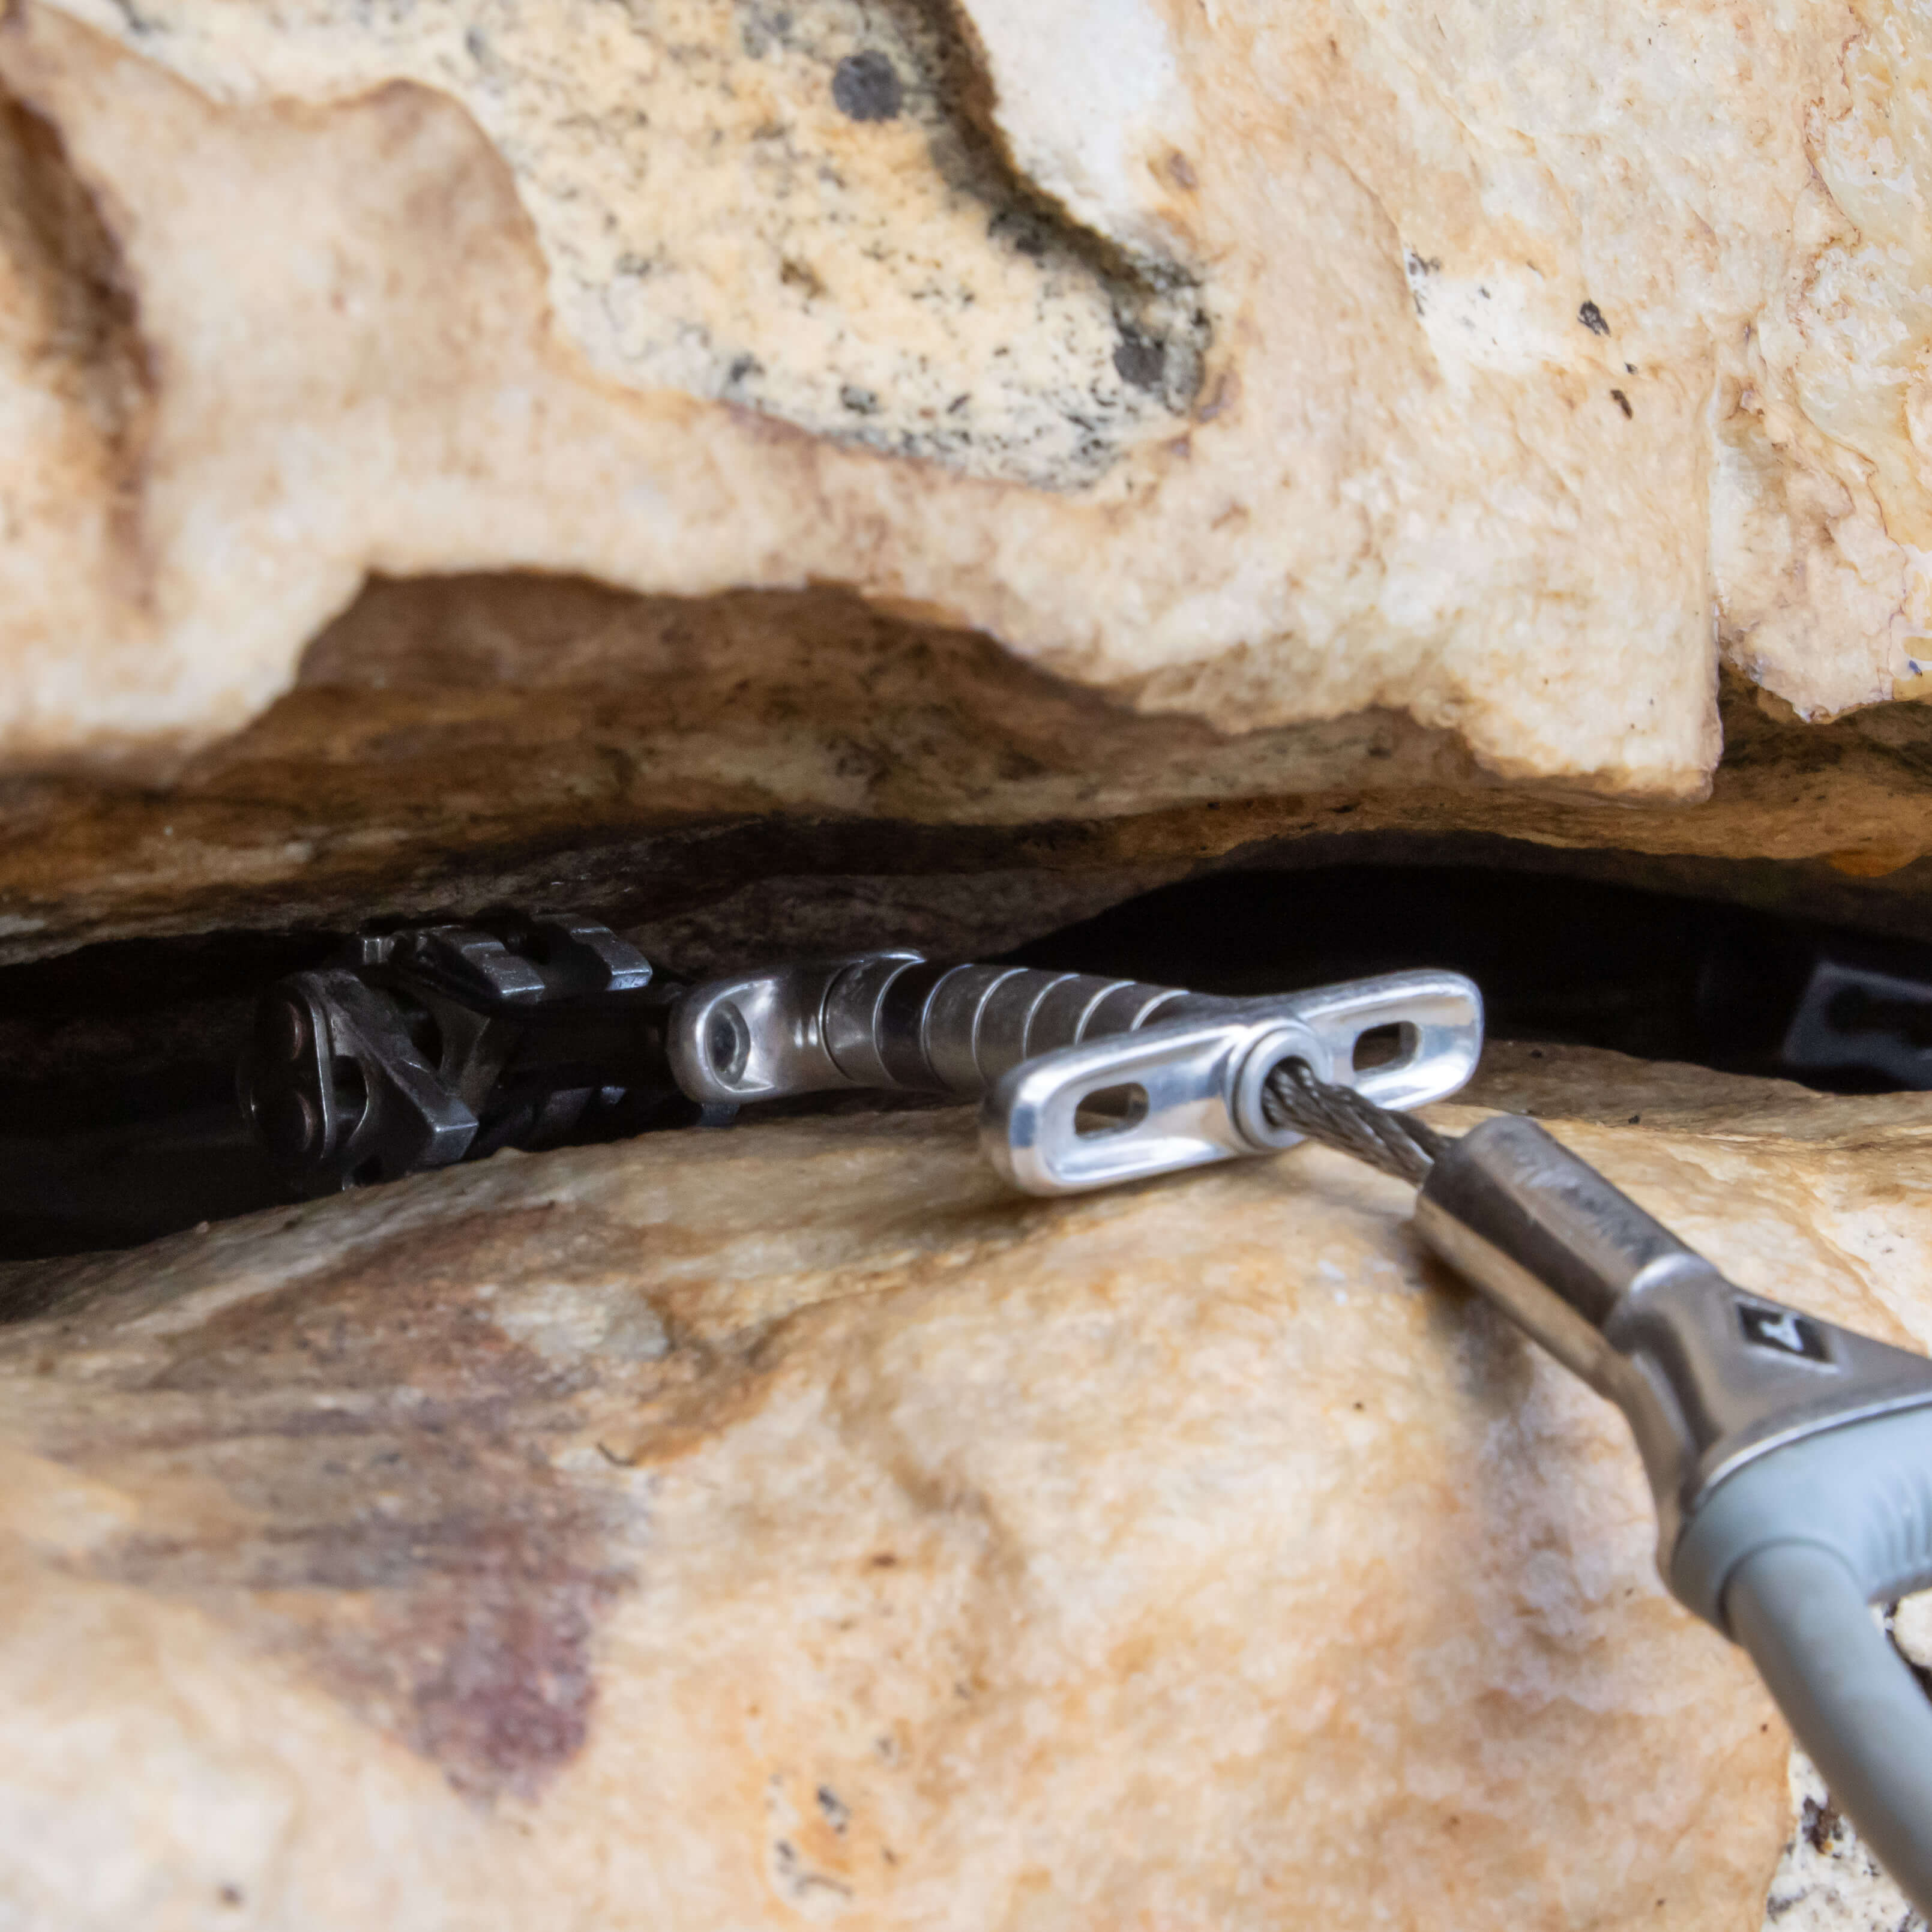
Your anchor needs to be able to withstand a worst-case scenario impact force, and that is a factor 2 fall – one straight onto the anchor. In falls this severe, it’s possible to generate forces as high as 10 kN, so it follows that your anchor should be able to withstand the same kind of force. Some readers might point out that the anchor should be ‘equalised’ and that the maximum load on either anchor should be something like 6 or 7 kN, but that is only true if the load has been effectively distributed. More often than not it isn’t. Bottom line: every component in your anchor should be rated to at least 10 kN.
If there is absolutely no way you can build an anchor entirely from components rated to 10 kN or more (and you’ve considered looking for a stance higher up or lower down), you will have to build a distribution-critical anchor – something beyond the scope of this article but which I cover in another article, A Better Way to Assess Anchors.
Put primary anchors in different features where possible
In North America the norm is to incorporate three pieces into an anchor. You might place fewer pieces if your primary anchors were absolutely bomber or more if you were building a distribution-critical anchor, but the norm is three. To ensure a greater degree of redundancy, you should aim to put your primary anchors in or behind different features. If you placed all your gear in the same feature and the rock around the feature broke, the anchor would fail catastrophically. I personally know two climbers who avoided such an accident because they took the precaution of placing gear in different cracks.
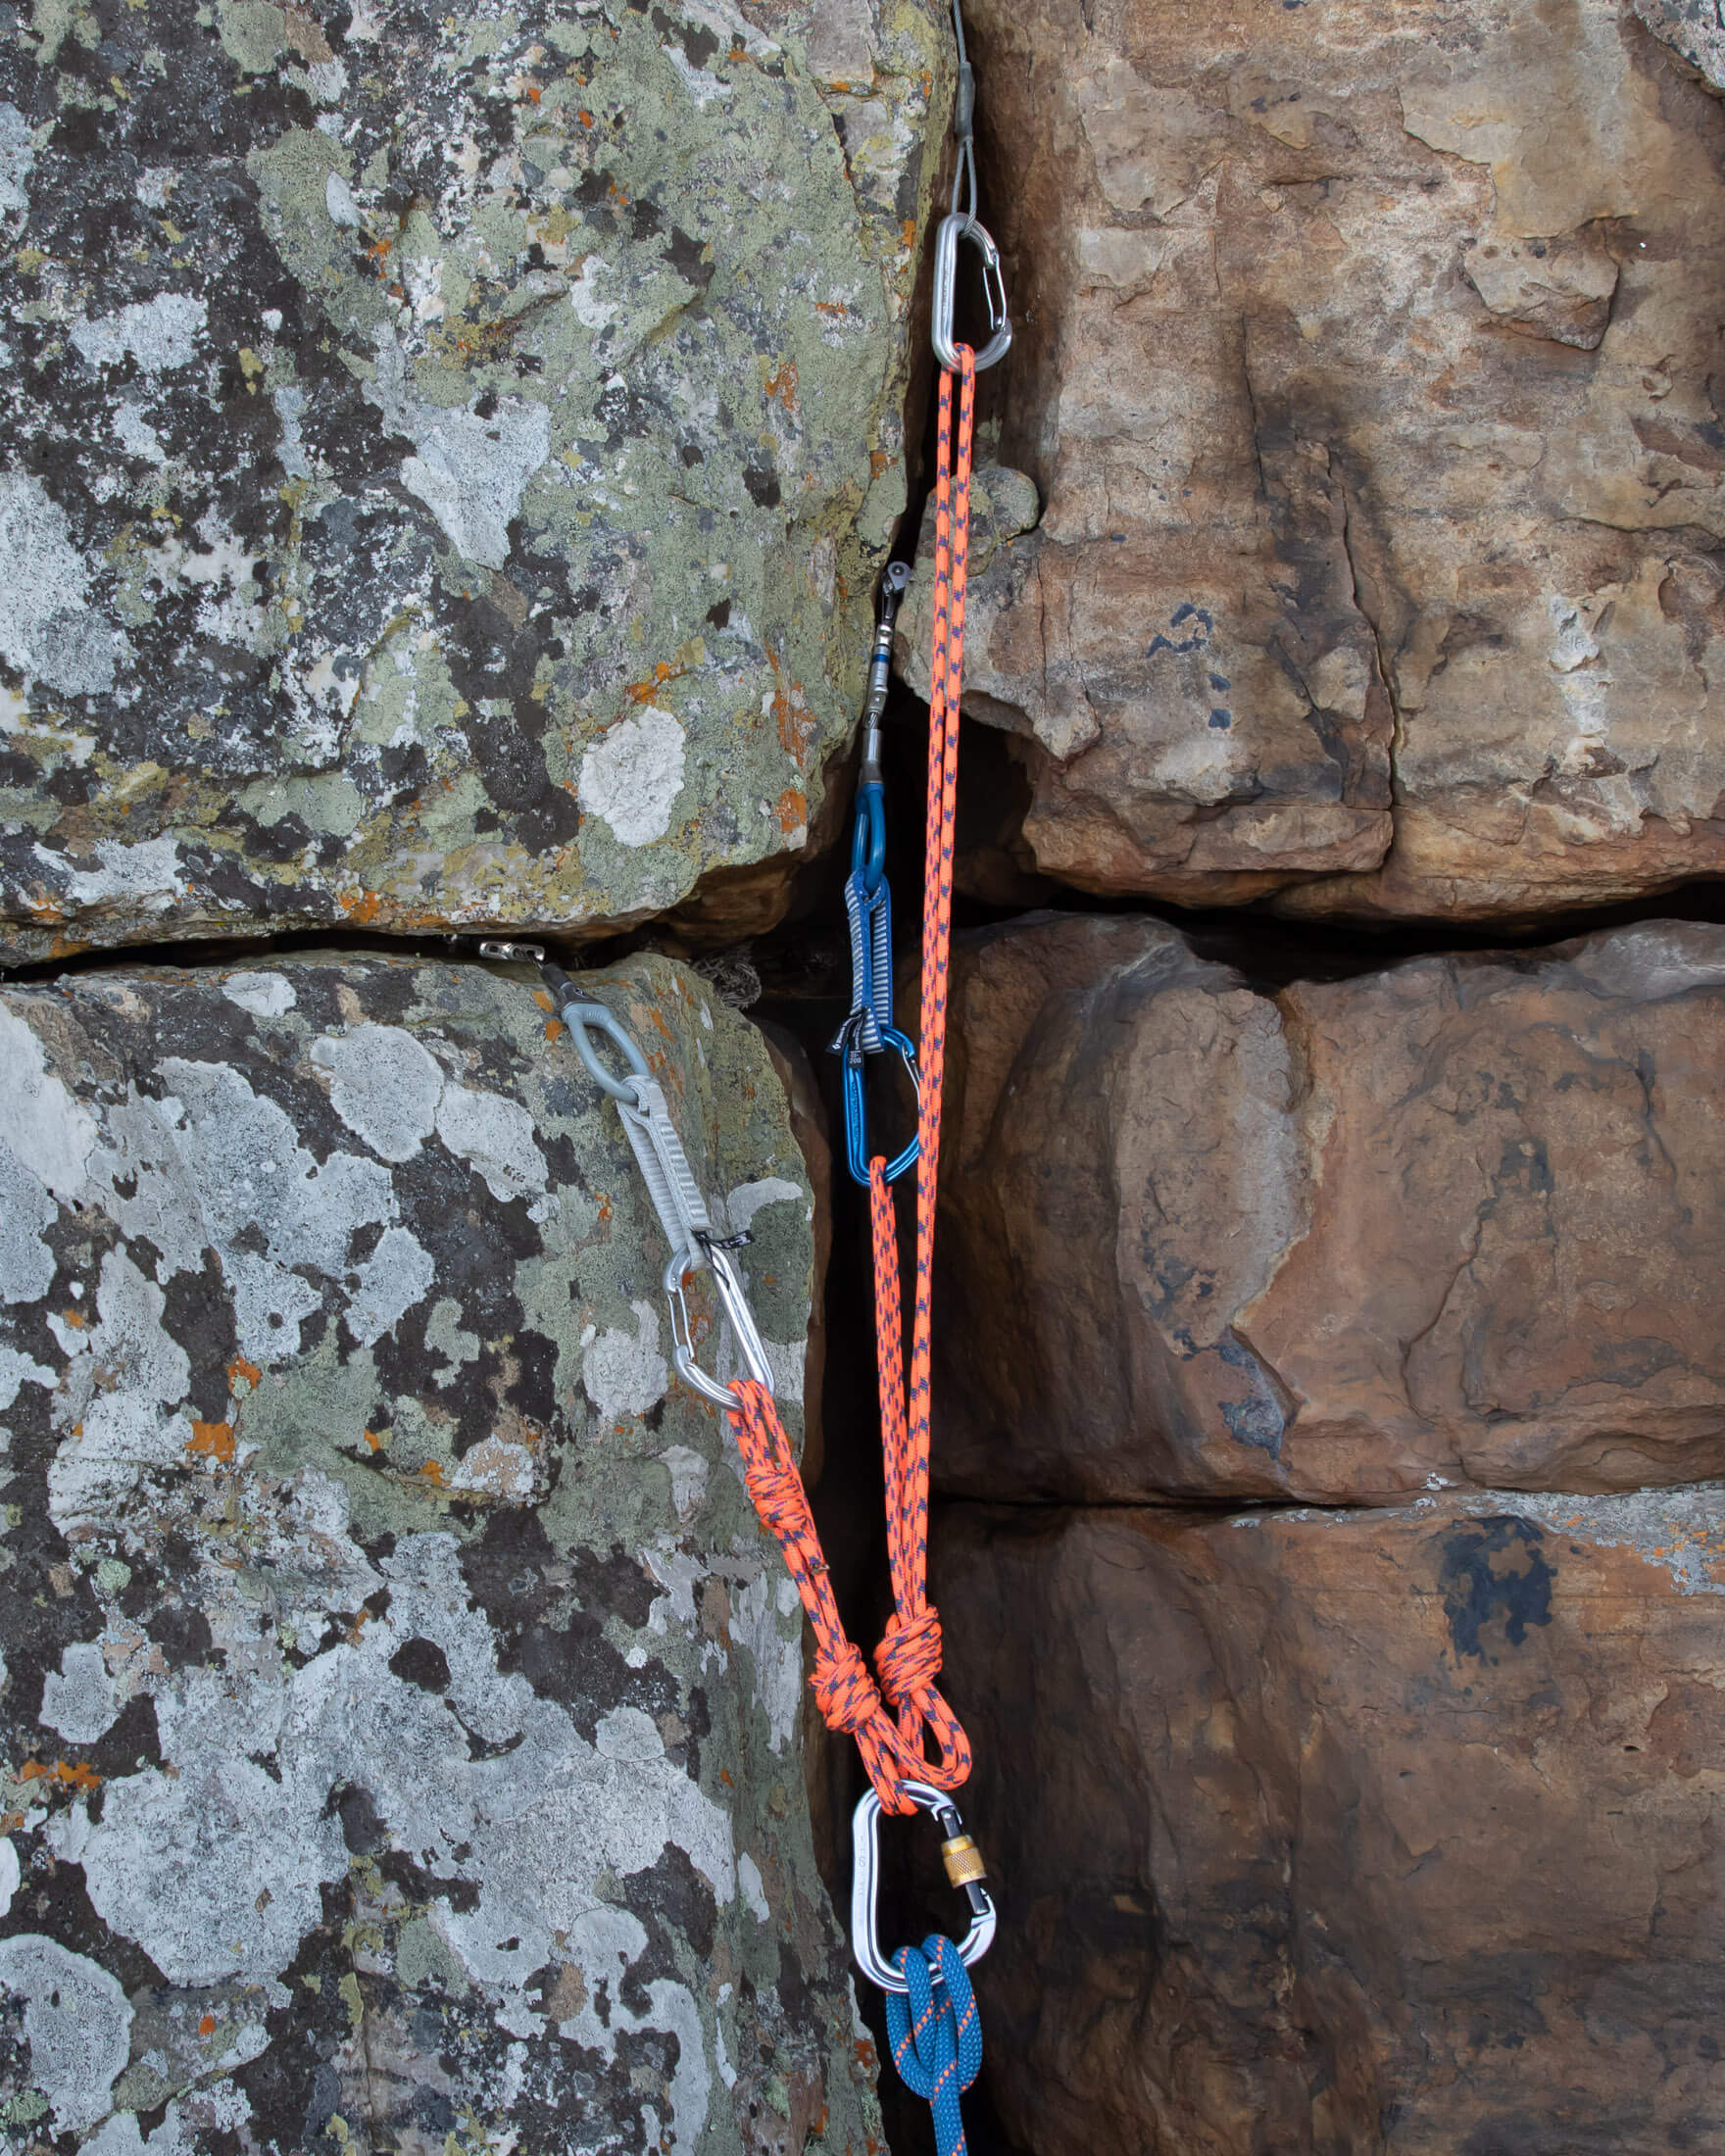
It’s always better to place primary anchors in different features.
So, you don’t want your gear too close together if you can avoid it. But you also don’t want it too far apart. The first reason you should avoid placing your gear over too wide an area is that your cord or sling will only reach so far. The second and more important reason is that having your gear far apart creates large angles between components, and large angles mean large vector forces. As has already been explained, it’s best to try to keep angles narrower than 45°, an angle which limits the increase in load to 4%.
Make sure that at least one piece can withstand an upward pull
With the focus of anchor-building being mostly on downward loads – and sometimes those from side on – it can be easy to forget that the belayer and anchor can be lifted upwards if the leader takes a big fall. The force involved is unlikely to be anywhere near as great as that of a fall straight onto the belay, but it doesn’t take much to lift nuts out of placements that were only intended to withstand a downward pull. To guard against this – having directional pieces lift out of their placements – it’s important to incorporate a component that will stop the master point from being lifted above that height at which other directional protection could be pulled out.
Step 3 – option 1: Rig your anchor with a quad
Once you’ve placed your primary anchors, the next step is to combine them with a sling or cord. The two most popular techniques for doing this are the quad and the traditional overhand-knot anchor. We’ll start with the quad as it offers better load distribution than the traditional configuration.
When to use a quad
The advantage of a quad is that it is a self-distributing system. If it is pulled off-axis, it will re-distribute the load. It won’t be 33/33/33% but more like 50/25/25% or 50/30/20% depending on how well the load has been shared between the two components on the same arm. This is still a big improvement on the load distributing properties of an overhand-knot anchor, which places almost all of the load on one arm if it is pulled just several degrees off-axis.
Now for the shortcomings of the quad – it is, um, short. And by that I mean that the quad has less reach than almost any other anchor configuration rigged with the same amount of cord. This can make it difficult to combine components that are further apart. It is possible to extend a quad using slings or the rope (if swinging leads), but you might want to just use a overhand-knot anchor if load distribution isn’t essential. Given these pros and cons, I use a quad when components are relatively close together or when building a distribution-critical anchor from pieces that are less than bomber (Again, always strive to place unquestionably strong components).
How to rig a quad
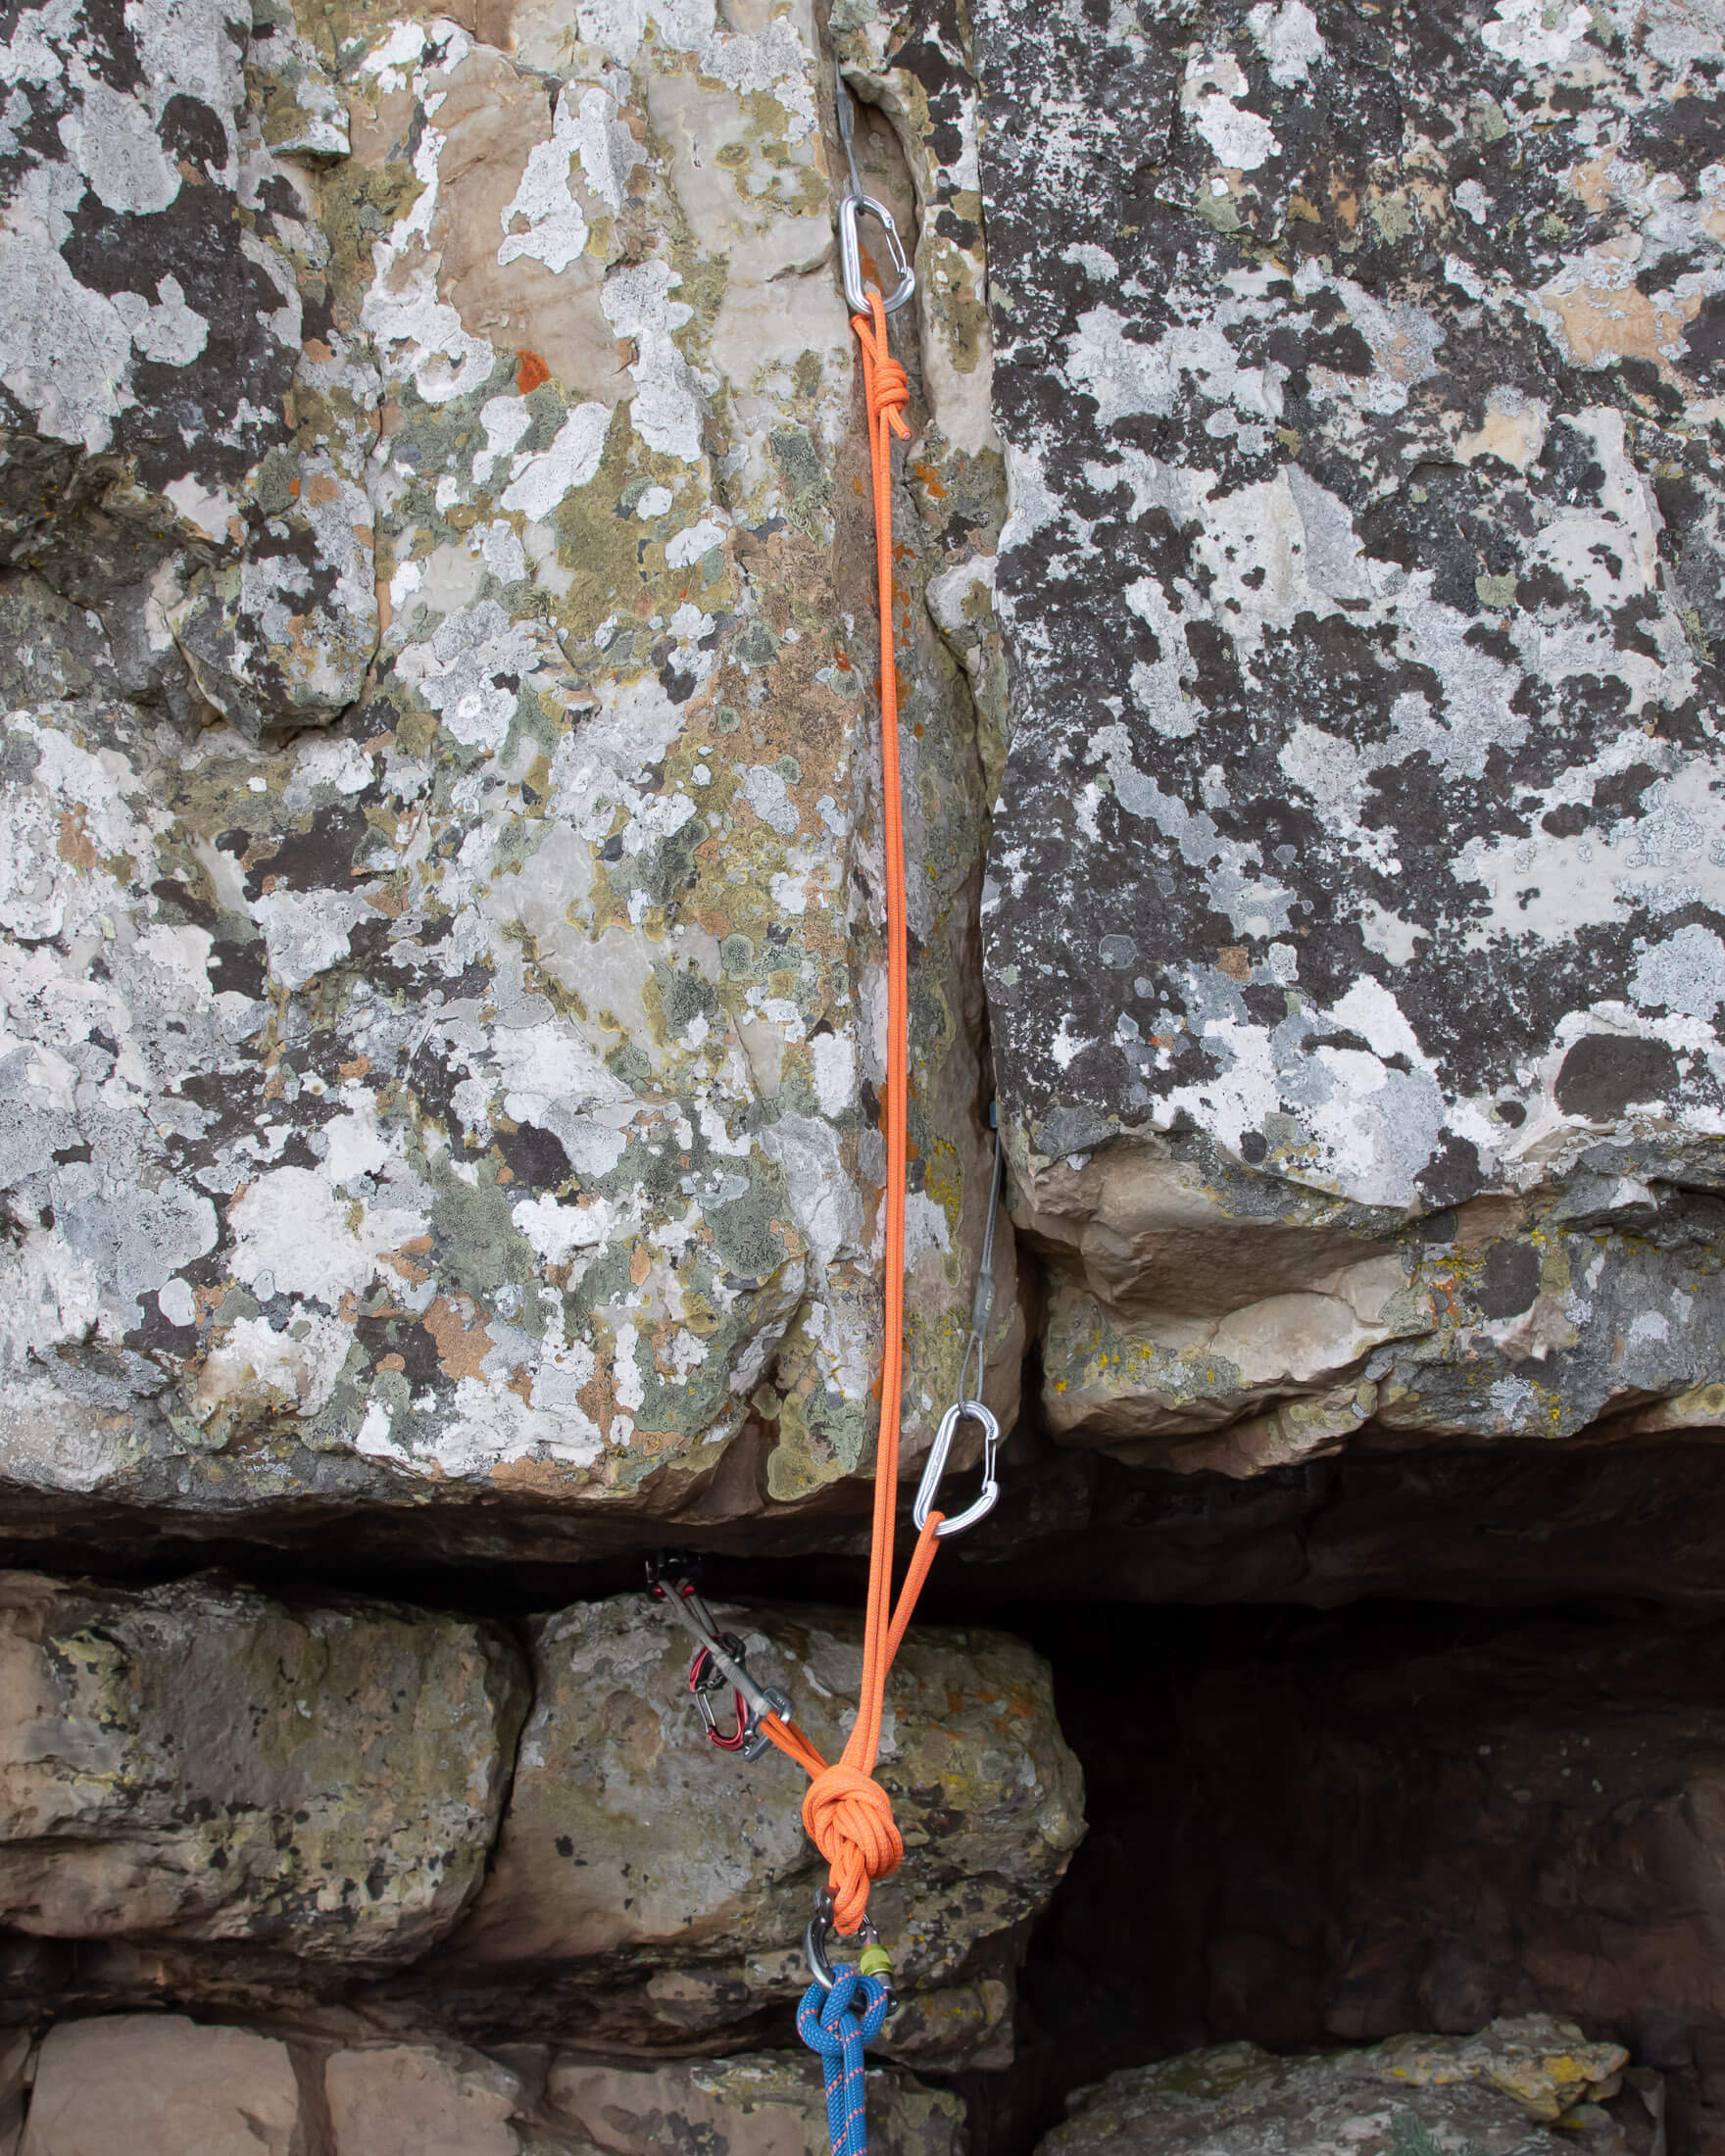
The first step to tying a three-piece quad is to clip your loop to two of your three components. You’ll want to position the double fisherman’s knot just below one of the carabiners as this will ensure that the joining knot doesn’t interfere with the limiting knot. Next, pull the loop into a double stranded ‘V’ with the bottom of the ‘V’ pointing in the direction that the anchor will be loaded. The next step will require some concentration: Pull the four strands together – taking care to prevent any additional lengthening or shortening in any of them – and tie an overhand knot about 30 cm (12 in) below the components.
You can now tie another overhand knot a similar distance from the other end of the two double-strand loops, and then clip both of these to the third component. Ideally this third piece would be the strongest component in your anchor system as it will take most of the load (see A Better Way to Assess Anchors for a full explanation). But you might have to make a compromise if the strongest piece is in the middle.
Limiting the potential for extension
A self-distributing anchor like a quad will extend if all the components on an arm fails. This can shock load an anchor dangerously, which is why it is important to limit the potential for extension as much as possible. In a three-piece quad, only the component on an arm by itself (A) can cause an extension if it fails. Both pieces on the other arm (B) would have to fail to cause a similar extension. To reduce the chances of a failure at this point (the only component that can cause extension in a single-point failure), connect it to the strongest primary anchor or at least one of the two stronger pieces.
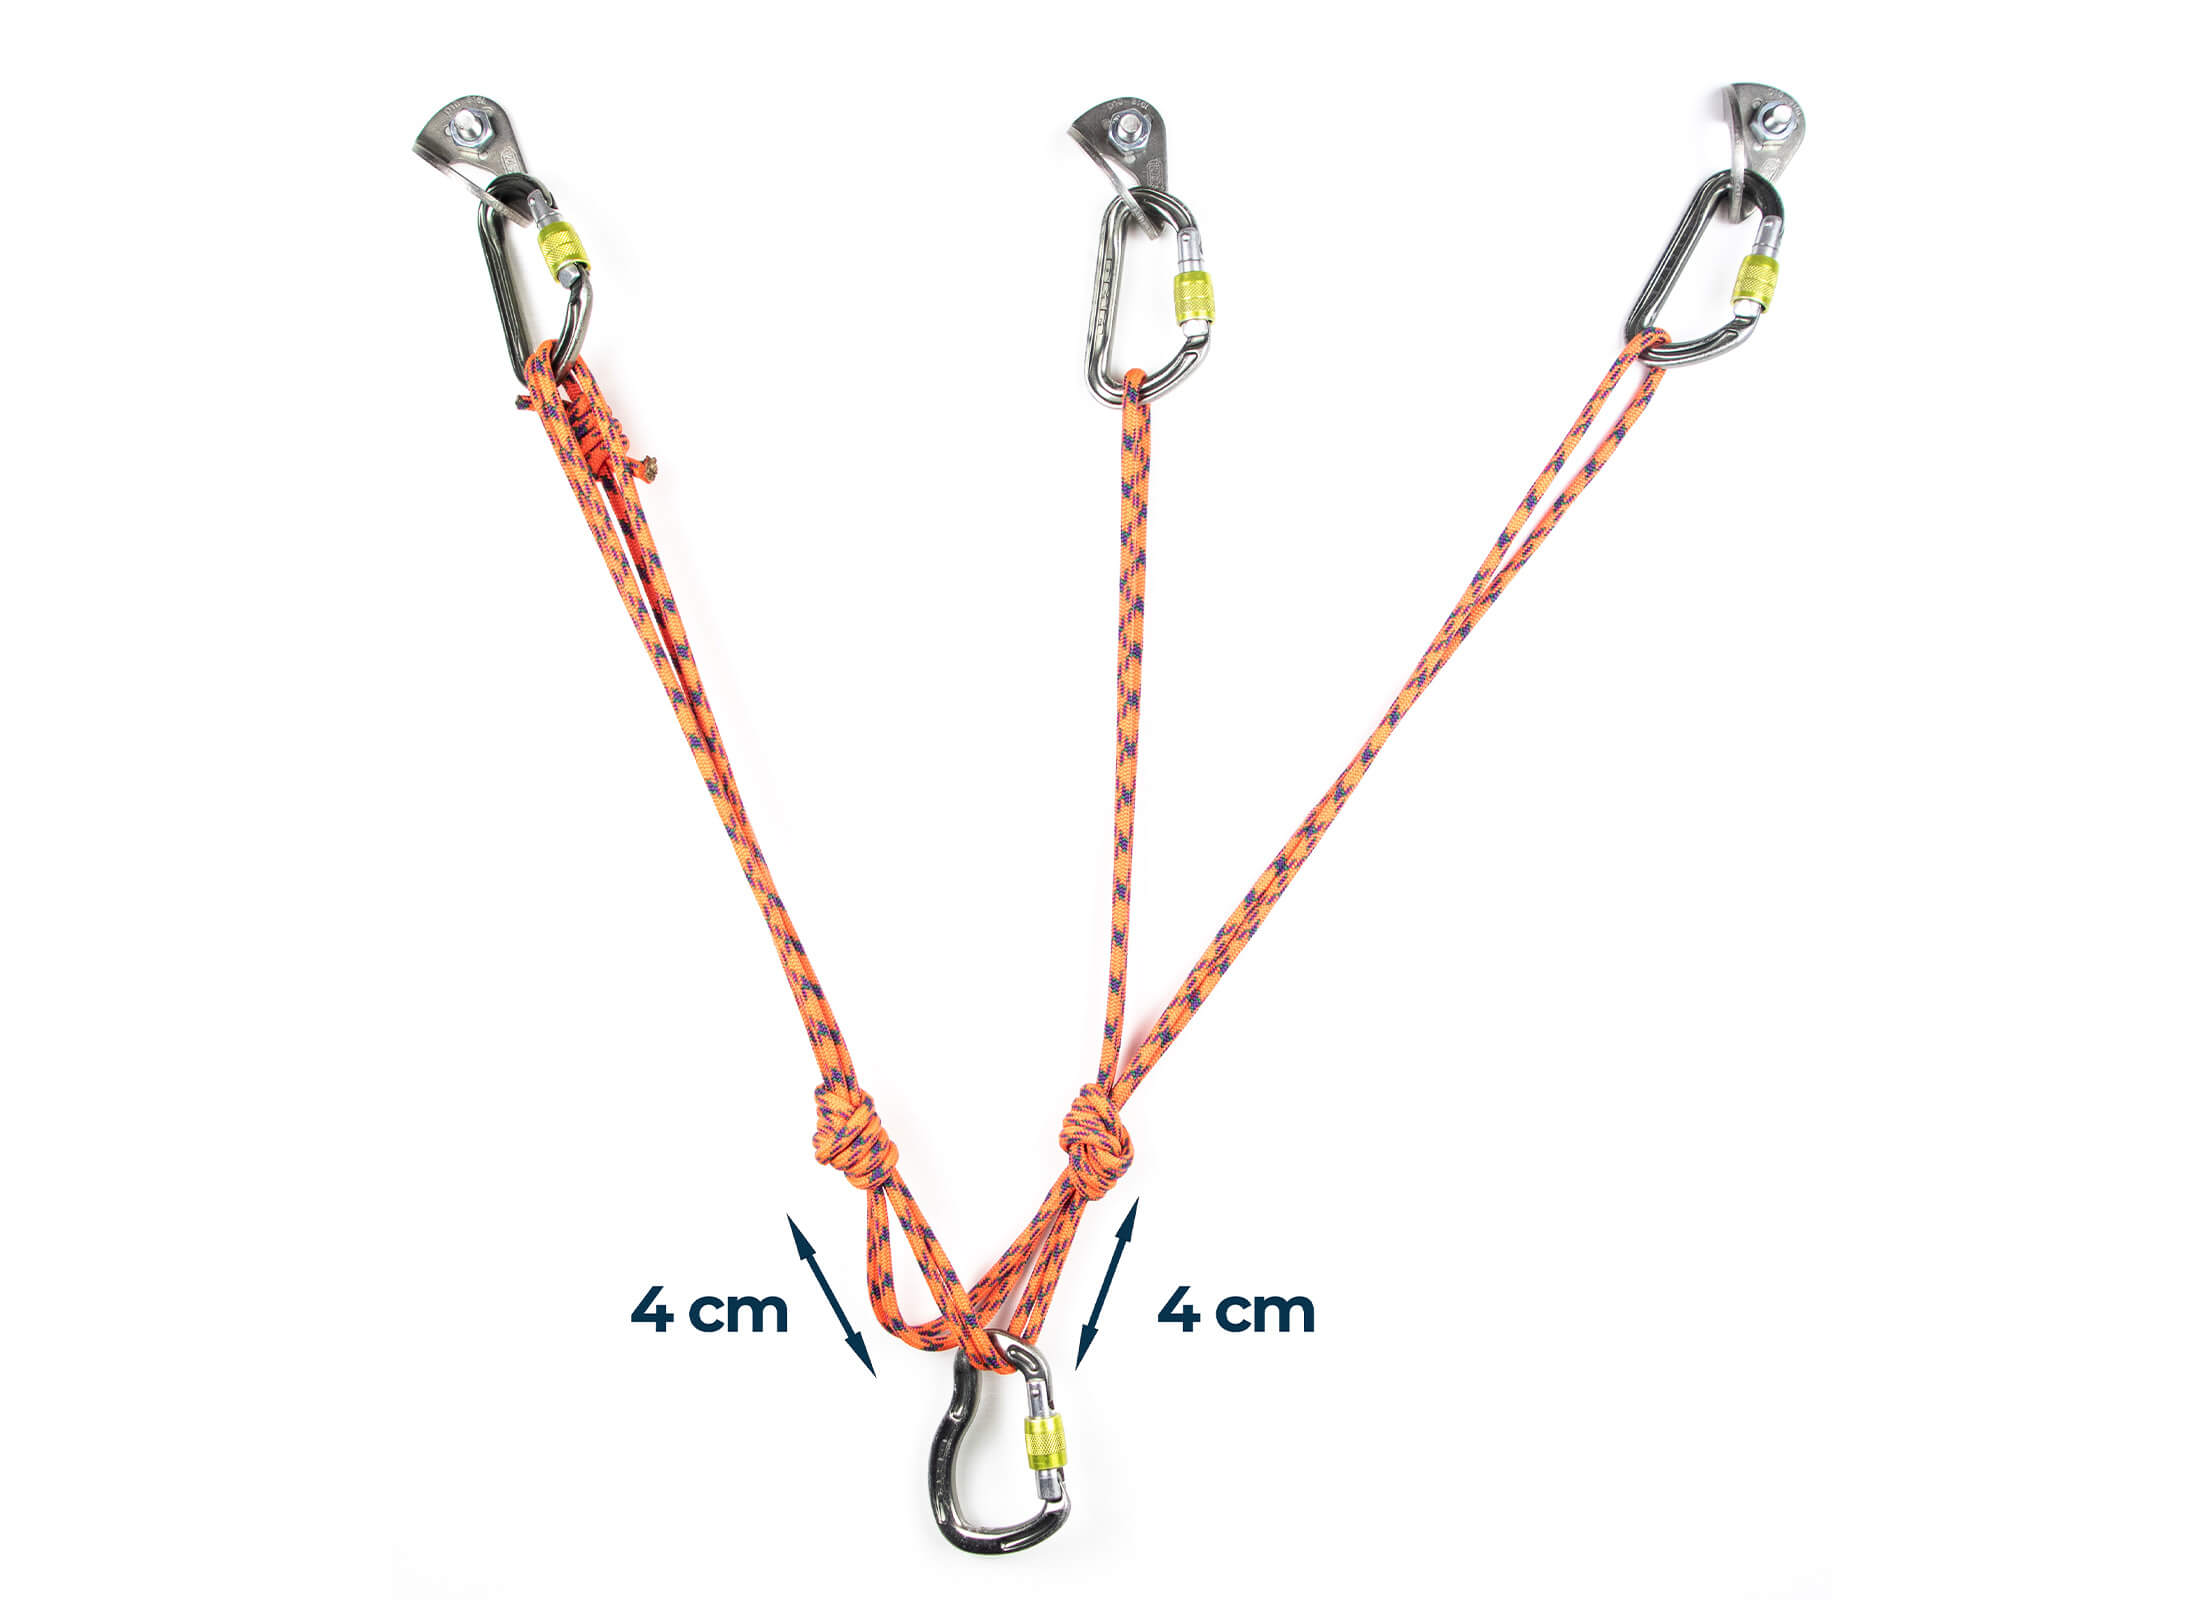
You also want to limit the amount by which an anchor can extend if the components on an arm do fail. This can be achieved by positioning the limiting knots closer to the master point. Just be aware that this will limit the range within which a self-distributing anchor can self-adjust. In my experience, you don’t need more than 1.5 inch (4 cm) between the apex of the master point and your limiting knots. This is enough to ensure that the anchor still self-adjusts when pulled up to roughly 25° off-axis, while also keeping extension to a minimum.
Step 3 – option 2: Rig your anchor with an overhand-knot
The traditional way to make an anchor with a cordelette is to create a W-shaped configuration with a simple overhand knot, figure-8 knot, or figure-9 knot. The difference in these knots is how much material they use and how high or low they position the master point. A simple overhand knot uses the least amount of material, a figure 8 uses more than that, and a figure 9 uses the most material. By shortening or lengthening arms, the choice of knot also affects the angles between pieces - something you have to think about when deciding how high you want your master point.
When to use an overhand-knot anchor
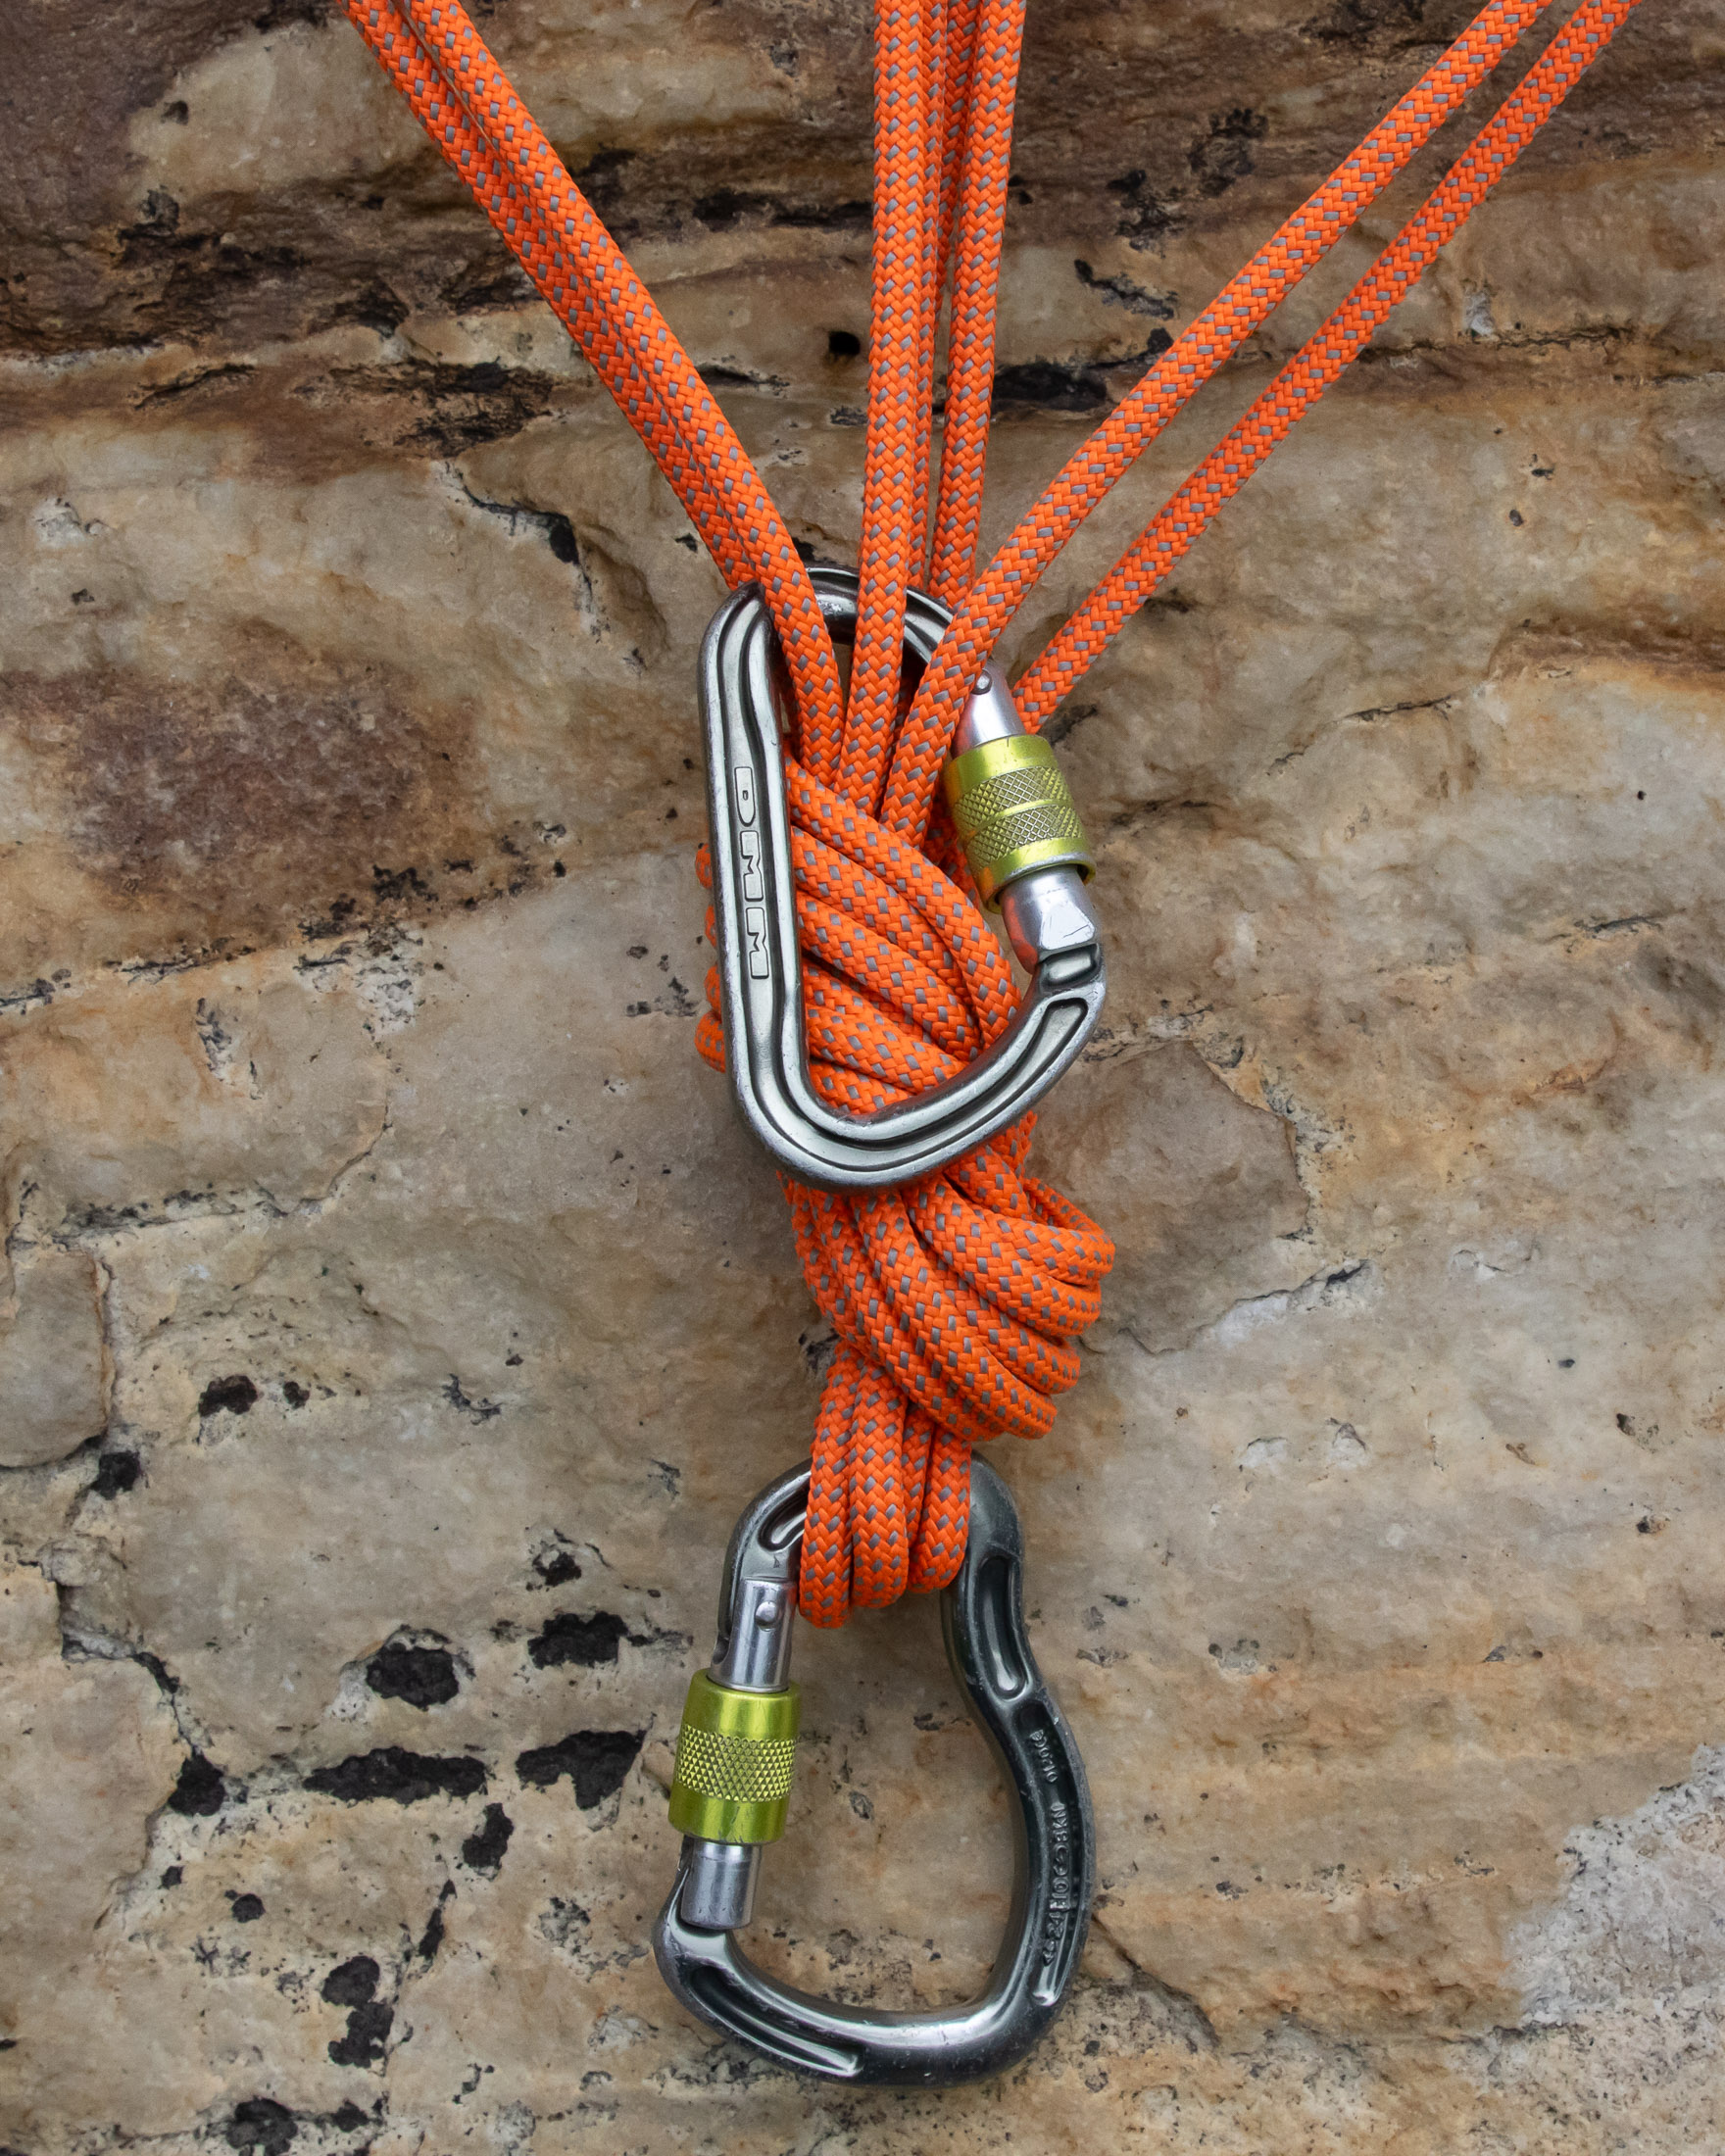
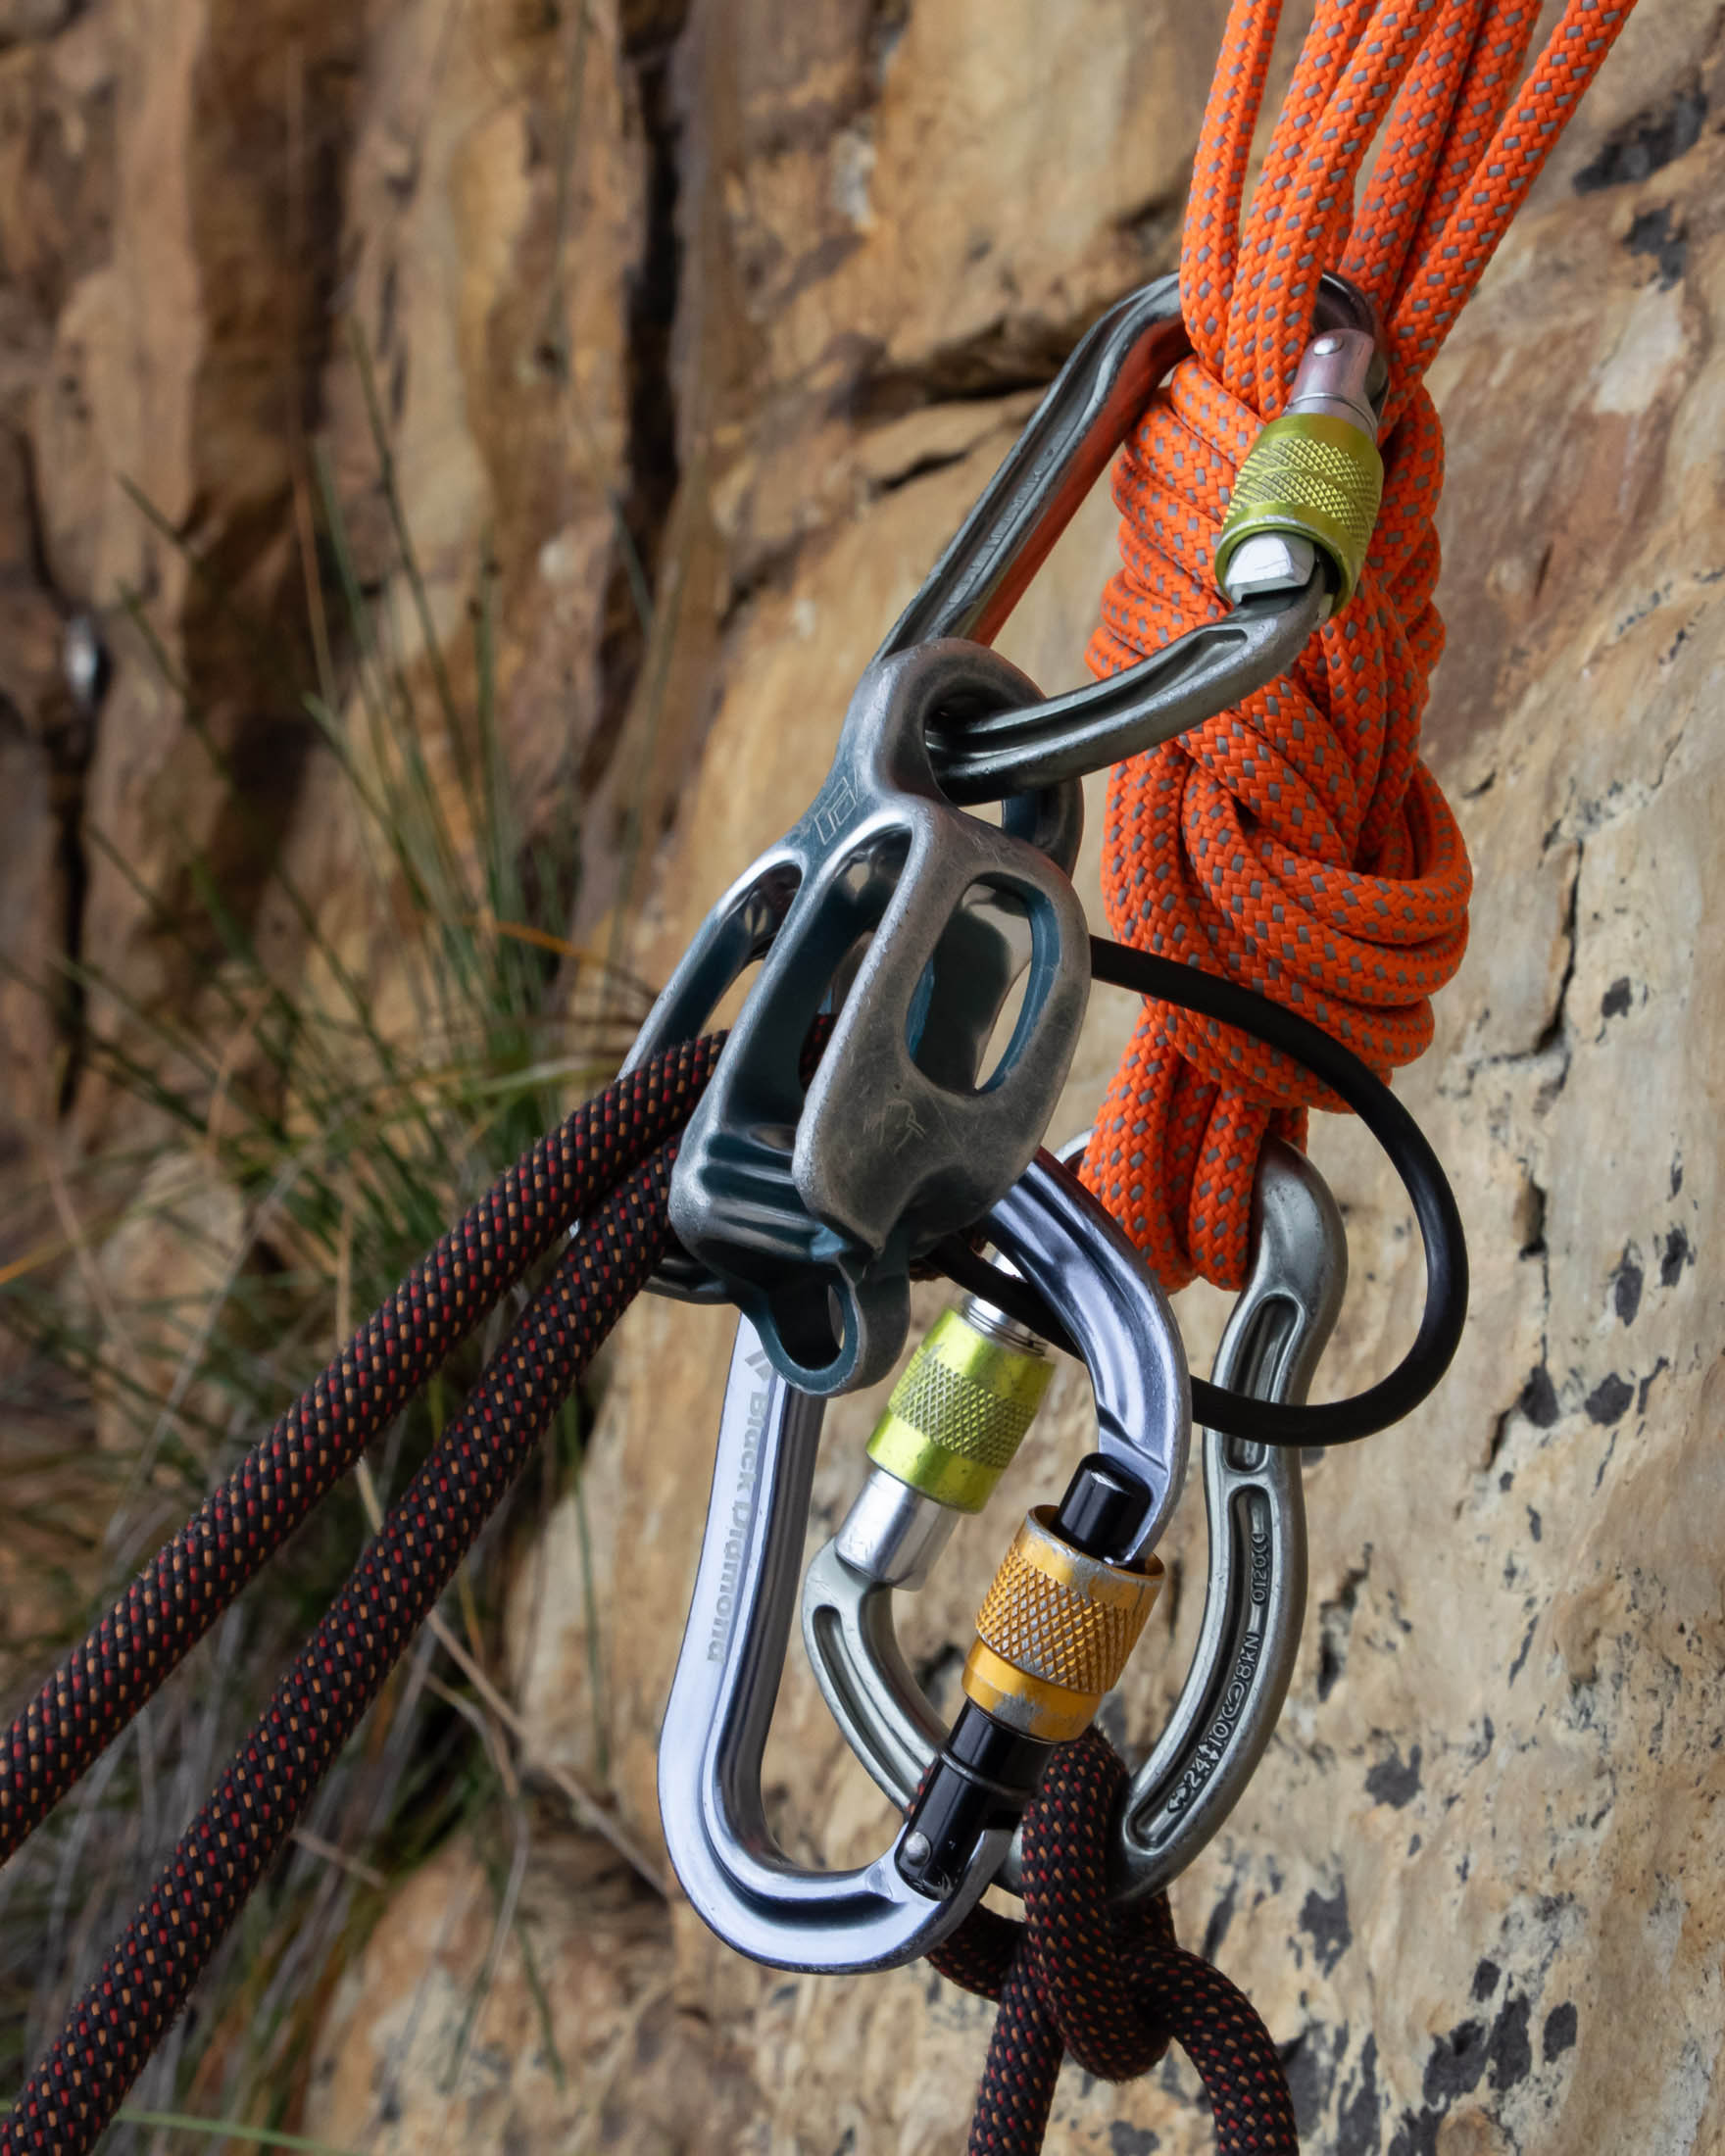
The advantages of the overhand-knot anchor is its simplicity and its reach – it can be used to tie together components that are further apart than would be possible with a quad made from a cordelette of similar length. It’s also easy to shorten with larger knots like the figure-9. If this tactic doesn’t allow you to rig your belay high enough, you can also attach your device to the shelf, a higher attachment point that is created by clipping a carabiner through the loops in all three arms (I explain the proper use of the shelf in my article on how to belay from above).
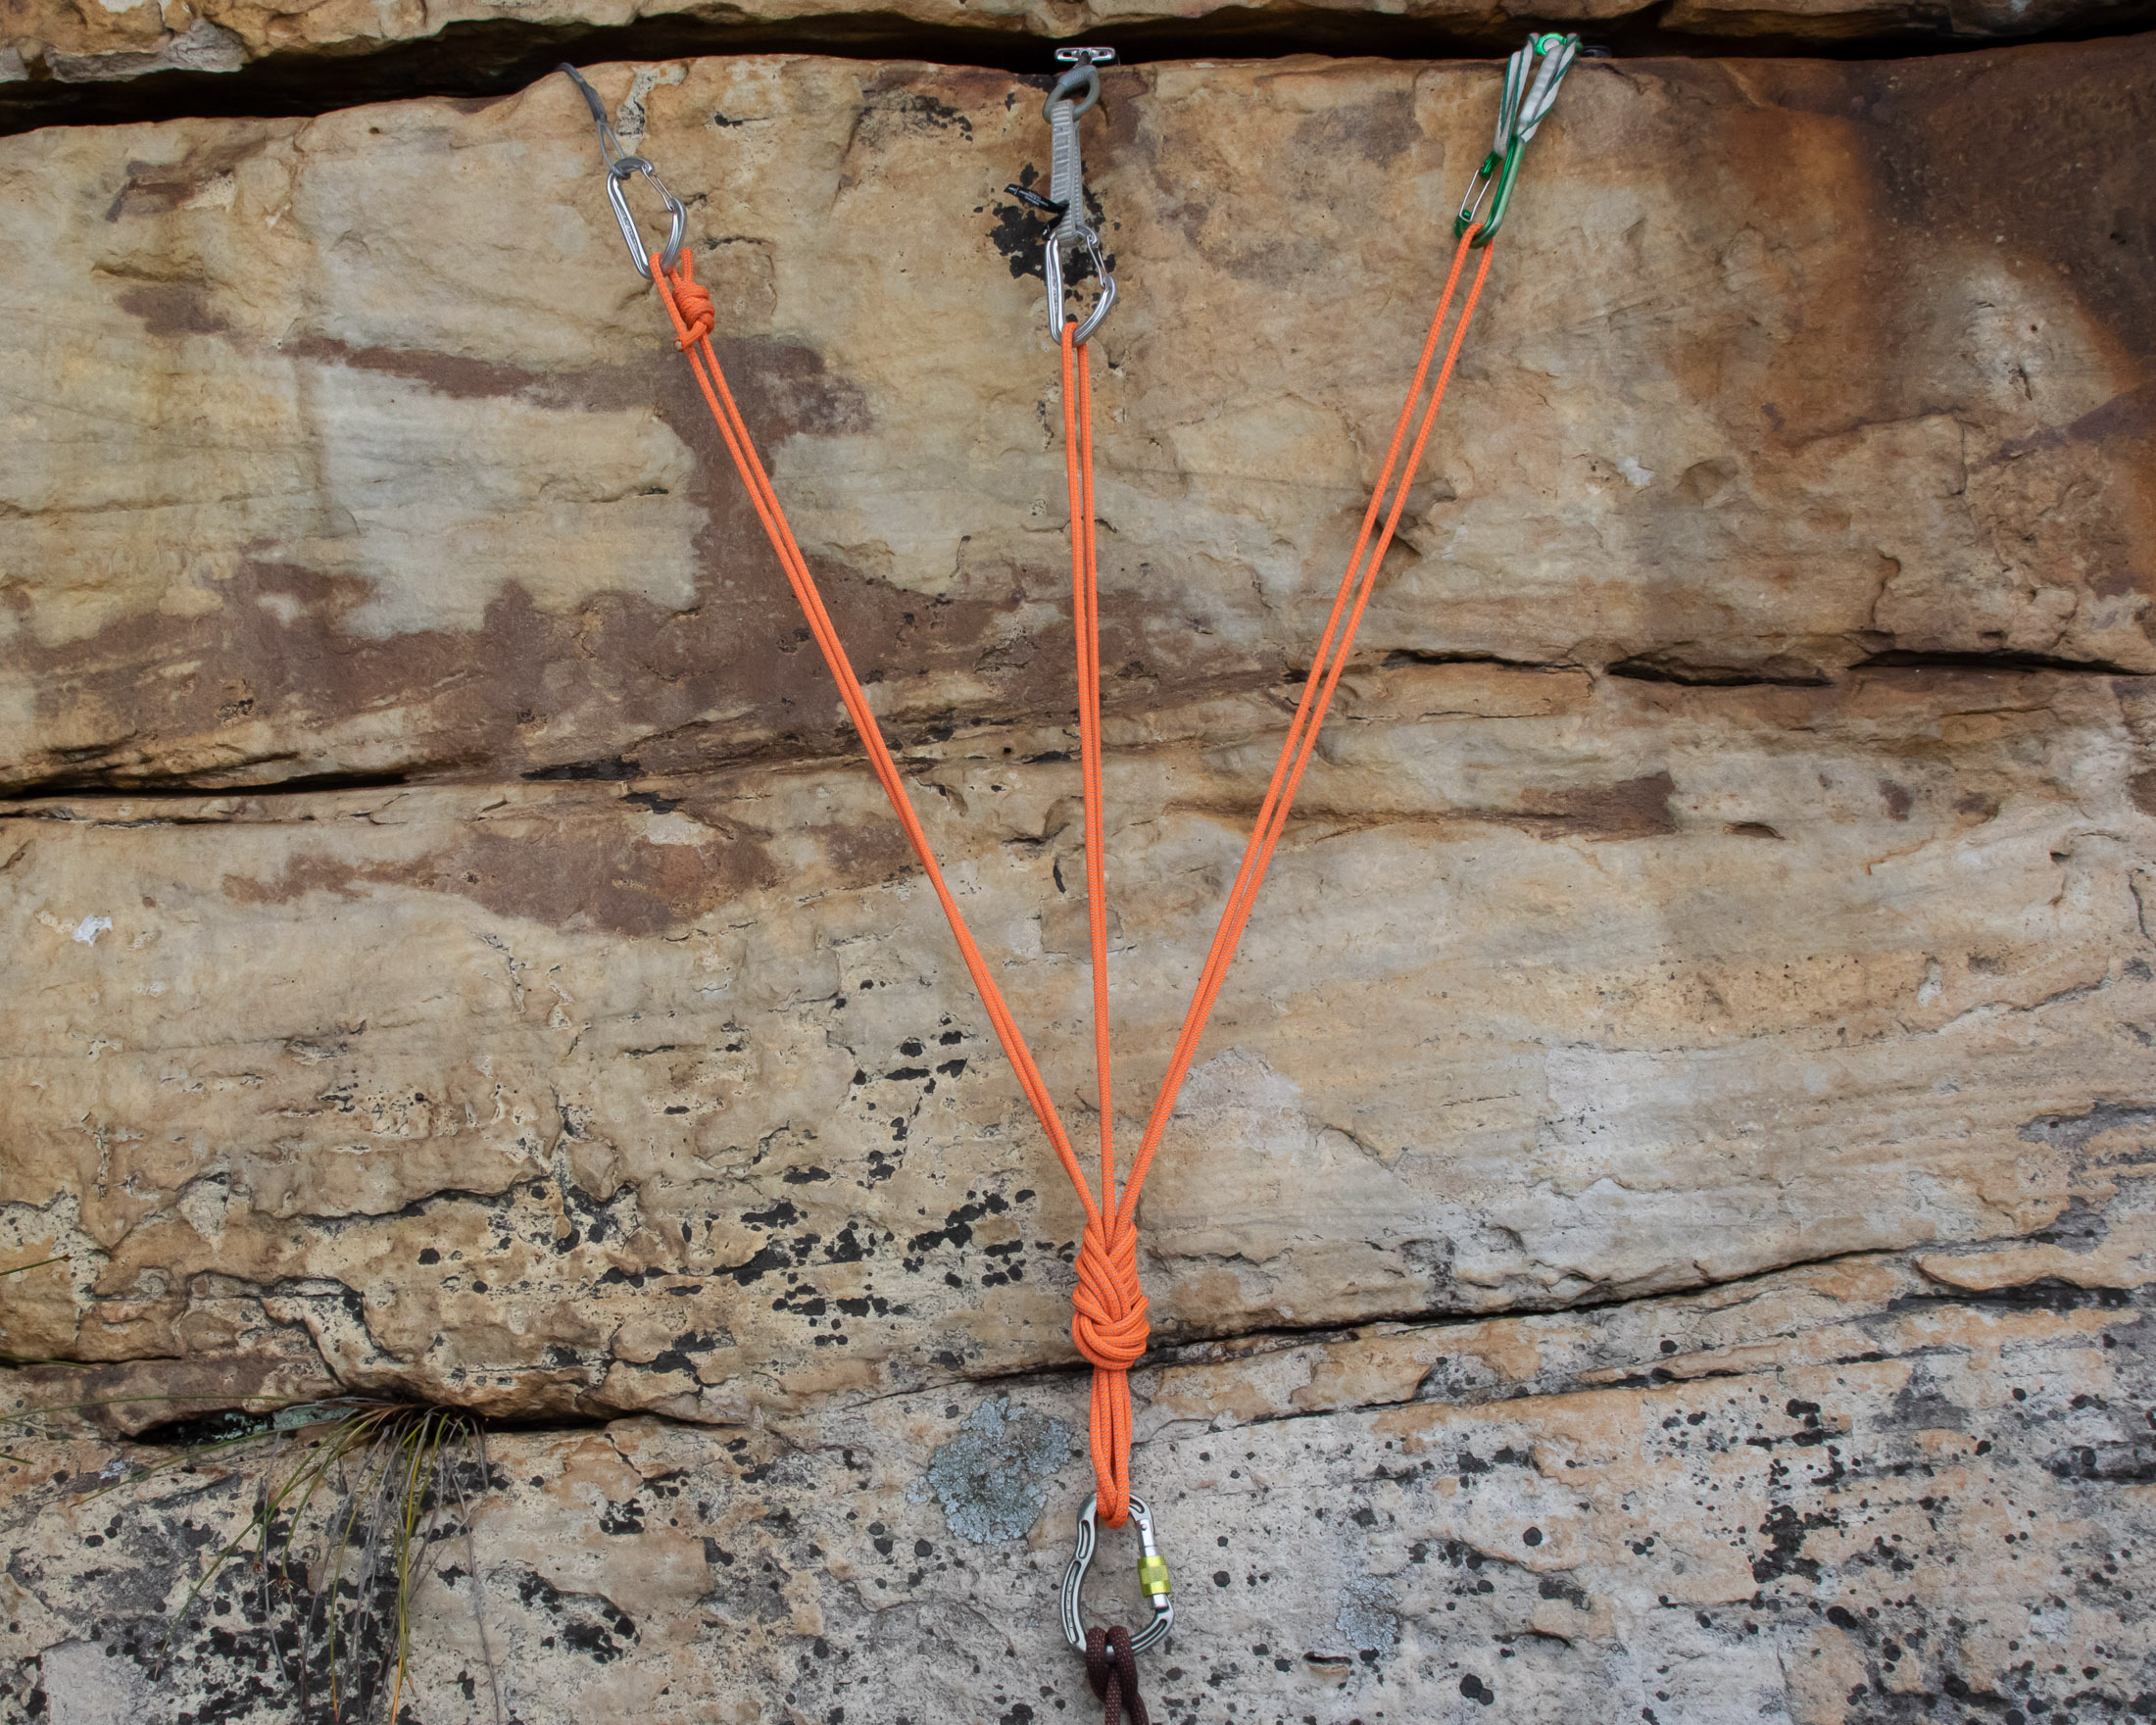
The disadvantages of the overhand knot anchor are that it is not self-distributing and will put almost all of the load on just one or two pieces if it is pulled just several degrees off axis. This makes it an unsuitable choice for building an anchor from pieces that anything less than bomber. All components should be rated to at least 10 kN and be placed in solid rock.
How to rig a cordelette with an overhand knot
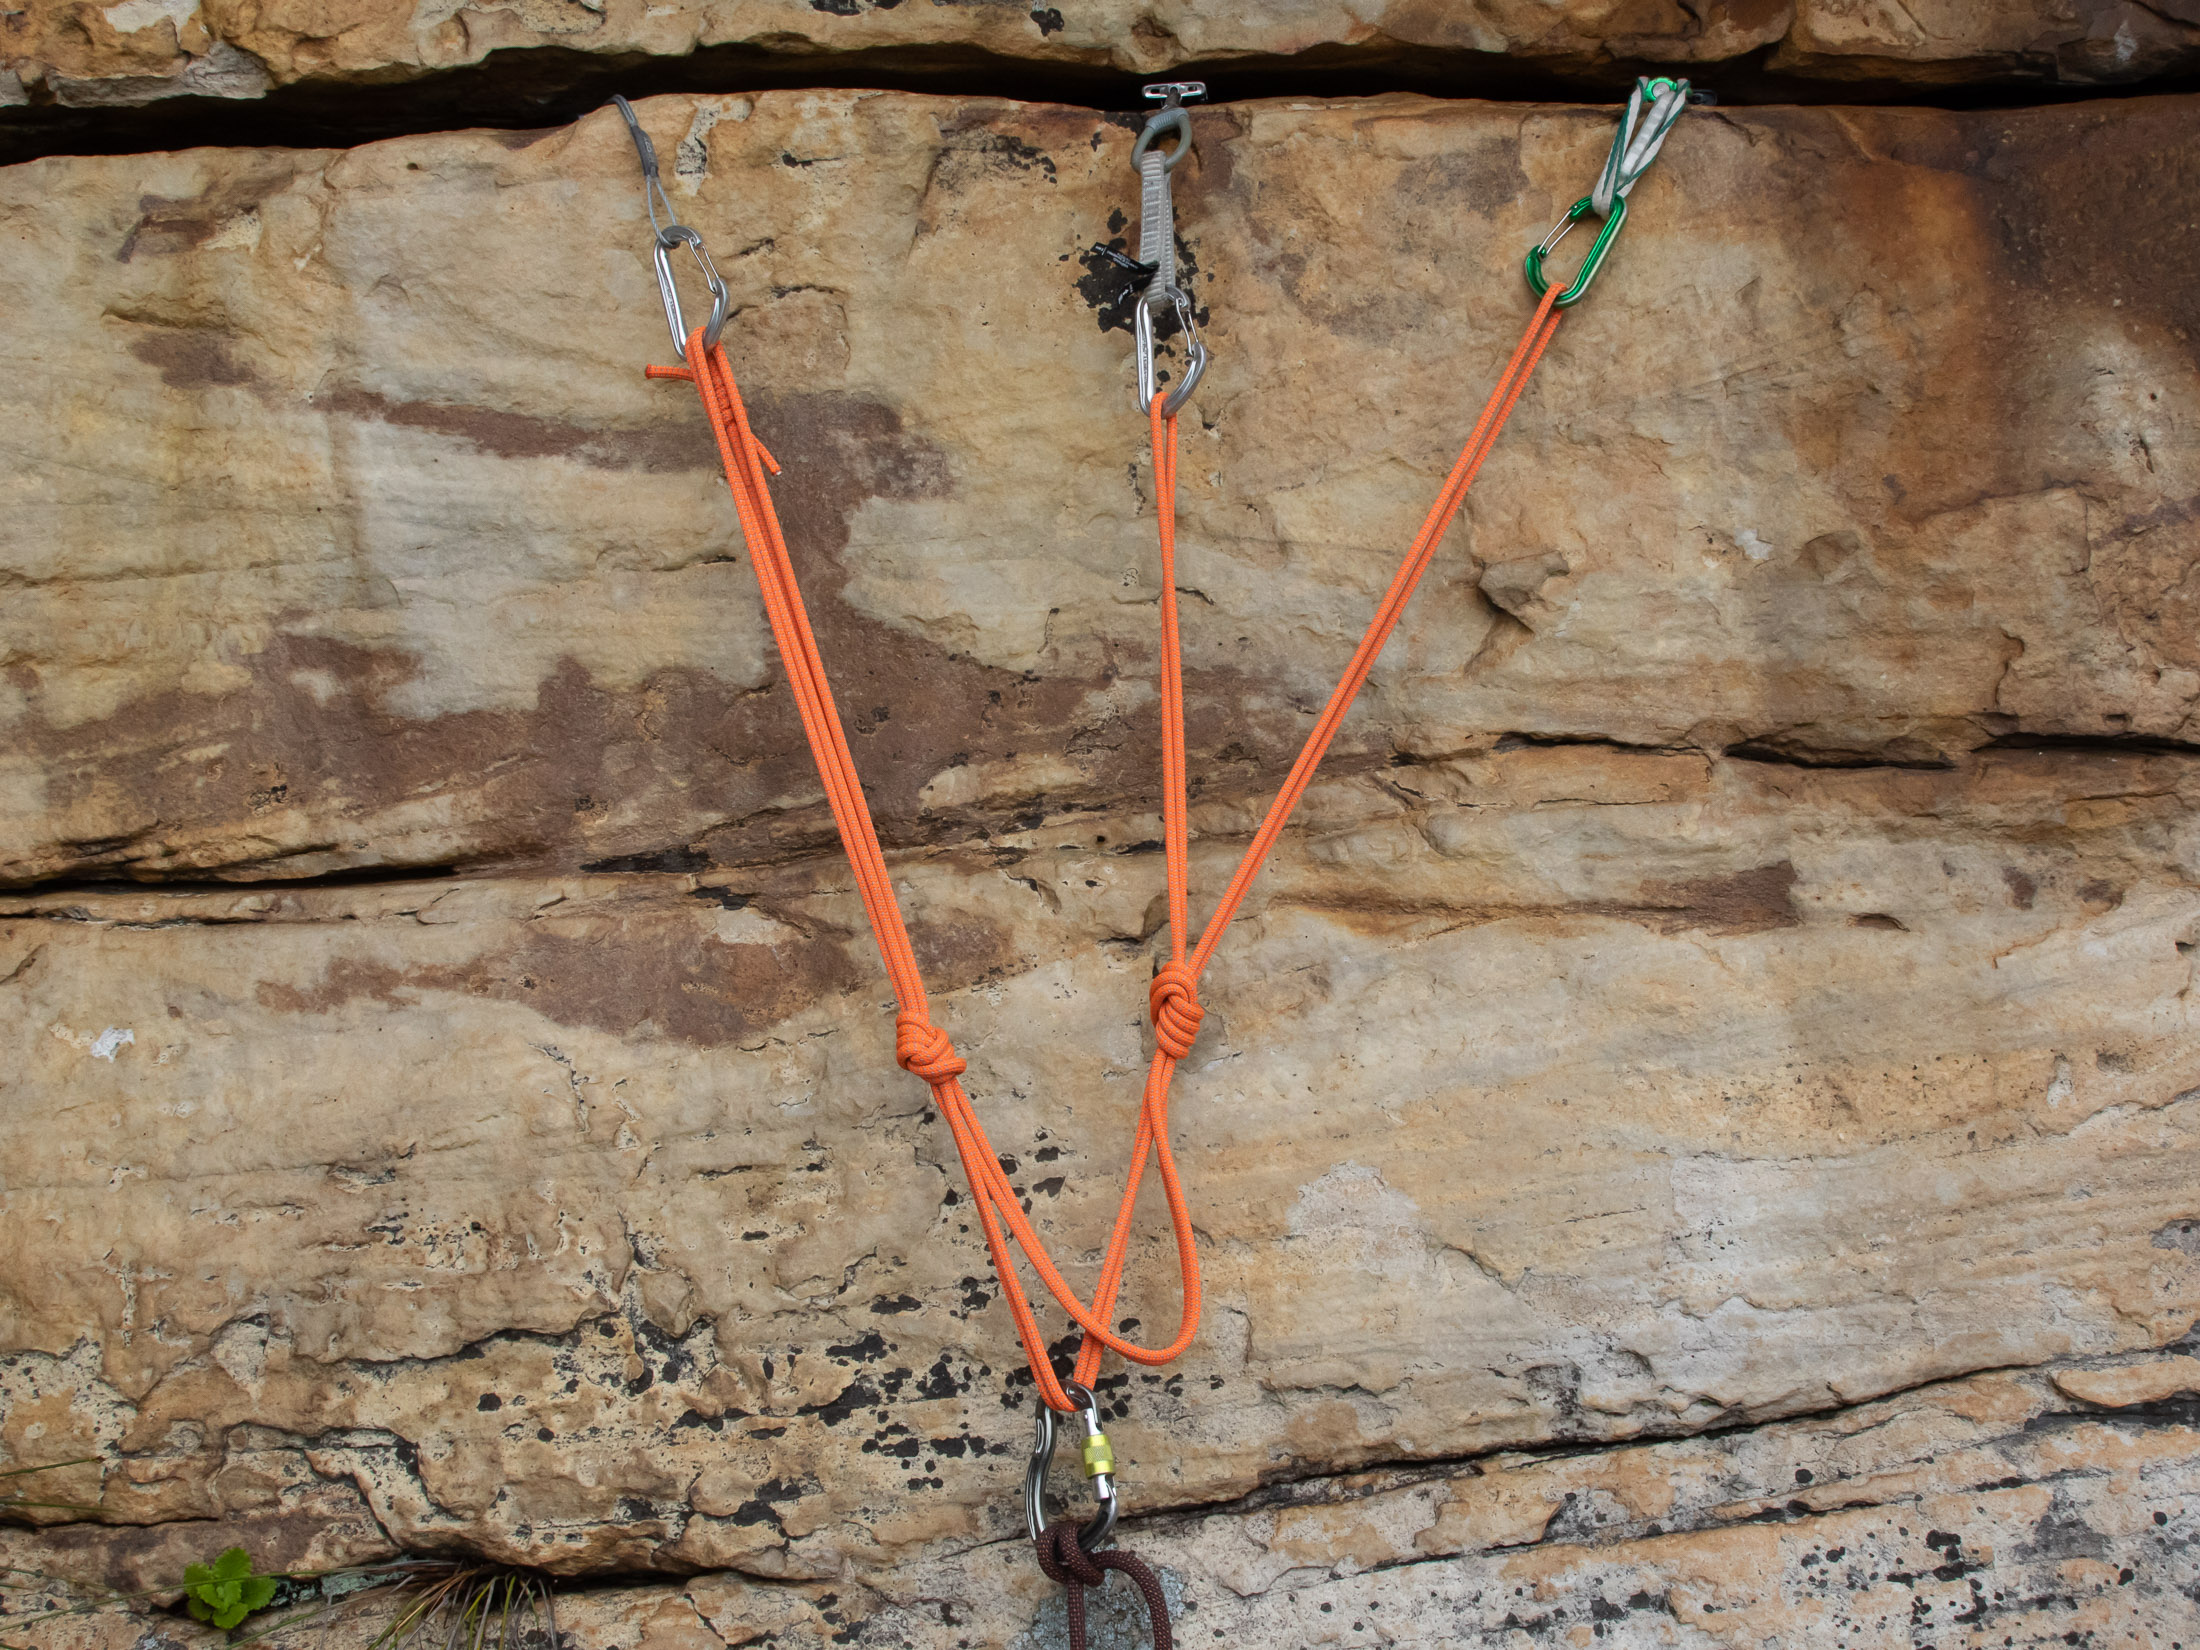
The first step to tying an overhand-knot anchor is to clip your cordelette into all three primary anchors. When you do this, you’ll want to position the double fisherman’s knot so that it is just below one of the components. This way it will be less likely to get in the way of the overhand knot. To keep the double fisherman’s properly positioned, it’s best to clove hitch the cordelette to the component. If you do this, I suggest positioning the double fisherman’s below the middle anchor as this will make the next step easier.
Next, grab the strands between the three components and pull them down to meet the cord below. At this point your cordelette should look like a ‘V’ with a ‘W’ inside it. Make sure that the bottom of the ‘V’ is pointing in the direction that the anchor will be loaded, and then pinch all six strands together. With all six strands held firmly together, you can now tie an overhand knot, figure-8, or figure-9 depending on how much you want to shorten the three arms. Finally, finish off your overhand-knot anchor by adding a locking carabiner to the master point. Unlike the carabiner used for the master point in a quad, this one needs to be large enough to accept six strands of cord and then the rope as well.
Using the shelf
One advantage of the overhand-knot anchor is that it gives you the option of a higher attachment point for the belay device. This ‘shelf’ is useful if attaching the belay to the master point would make things too cramped. To create the shelf, clip a locking carabiner through the loops that make up each arm of an overhand-knot anchor. It’s essential that you clip all three loops and that the carabiner goes through the loops, not around them.
The problem with acronym checklists
If you have heard or SRENE, SERENE, EARNEST or NERDSS, you might be wondering why I haven’t recommended one of these or some other acronym checklist. I don’t like these mnemonics for two reasons. The first is that they they promote ideals that are unattainable in the real world – you can’t have no extension and ‘equalisation’ in the same anchor. There is always potential for extension in a self-distributing anchor even if it is only a few centimeters.
| SRENE | Solid, Redundant, Equalised, No Extension |
| SERENE | Solid, Efficient, Redundant, Equalised, No Extension |
| EARNEST | Equalised, Angles, Redundant, No Extension, Solid, Timely |
| NERDSS | No Extension, Redundant, Distributes load, Solid, Simple |
| LEADSTER | Limit Extension, Angles, Direction, Solid, Timely, Equalised, Redundant |
The second is that they don’t take into account the many decisions a climber has to make when building an anchor. Before you even start rigging an anchor, you should weigh up the pros and cons of different options and make decisions based on the situation in hand. To be able to do this, you need to have a firm grasp of the fundamentals of anchor building and understand that the best way to build an anchor will vary from situation to situation. For example, while an overhand-knot anchor is suitable in most situations, a quad will be a better option when you need to ensure effective load distribution.
A better way to build and assess anchors
What is needed is not a checklist but a protocol that offers a structured way for climbers to approach the many decisions involved in anchor building. In my article on how to assess belay anchors, I describe such a protocol and suggest a system for classifying anchors – one that can guide one of the more important decisions in anchor building. Not wanting to repeat the whole article here, I’ve provided a shorter version below. Here, we will assume that you have already determined the direction of pull and have placed three strong primary anchors. The next step is to incorporate these components into a single anchor system, and that will require you to do three things.
Determine the importance of self-distribution
Having strong primary anchors is more important than any other goal in anchor building. If your components are unquestionably strong (rated to at least 10 kN, well placed, and in solid rock), redundancy is enough, and you don’t need effective load-distribution. That doesn’t mean you shouldn’t try to achieve some degree of load distribution. It just means you can get away with a traditional overhand-knot anchor.
If at least one of your components is rated to less than 10 kN, you should consider using a quad, and if you have two components weaker than 10 kN, you should definitely use a quad or some other kind of self-distributing anchor technique. Just also know that building a strong anchor from weaker components takes some know-how. You should first read my article on distribution-critical anchors and seek some in-person instruction from a guide or an experienced climber before trusting your life to such an anchor.
Consider reach, angles, and working height
Reach, angles, and working height are inextricably linked. If you change one, you will almost certainly change another. Raise the master point, and angles will widen. Extend the arms on your anchor, and angles will narrow – but the master point will drop. In many cases, you will need to make compromises. In these situations, aim to strike a balance that matches your priorities. I have already covered the importance of keeping the angles in an anchor as small as possible, so for now let’s just look at how reach and working height might affect anchor building decisions.
Reach
Reach refers to your anchor’s ability to combine components that are farther apart. It’s actually something you should think about before you decide on a rigging method, but I mention it here because, like the factors listed below, it’s secondary to the issue of load distribution. Because an overhand-knot configuration creates longer arms than a quad, the overhand-knot method is the obvious choice when you need to connect primary anchors that are farther apart and load distribution isn’t critical. But also know that if you want to ensure effective load distribution across primary anchors, you can use slings or even the rope to extend the arms of a quad.
Working height
You want your master point or shelf to be at a height that will make it easy to belay off. In most situations this will be around chest level. A high master point will also make it easier for you to secure yourself and your partner to the anchor. Your goal should always be to prevent slack from forming in your connection to the anchor (leash, personal anchor system, or rope), as a fall could shock load the system dangerously. A high master point and properly adjusted PAS or rope connection make it more difficult to accidentally generate that slack.
Limit extension
If you use a quad, limit the potential for extension by tying limiting knots as close to the master point as possible without restricting the lateral range of the anchor to less than 10° in either direction. In a standard three-piece quad, positioning the limiting knots close to the anchor will also reduce the angle between components on the same arm. If you create a composite anchor in which one of the two primary arms is extended with a two-piece quad or sliding X, you should limit extension in this connection as well. See my article How to Tie and Use a Quad for instructions on how to build a composite quad.
Protecting the anchor
Ultimately, your safety at a stance depends on both a strong anchor and your ability to protect it from a shock load. There are three things you can do to lower this risk.
First piece after the anchor
To avoid a factor 2 fall (the absolute worst thing that you could do to an anchor), place the first piece of protection on the next pitch as soon as possible. You’ll also want to ensure that it’s bomber because it too could be subjected to a high-factor fall so low down. If you are doubtful that your first piece up to task of taking a lead fall, it’s even more important the anchor is absolutely bomber – there will be nothing between it and a factor 2 fall until the first piece has been clipped.
Direction of pull
In both pre-distributed and self-distributed anchors, it’s important to first identify the likely direction of pull and then construct your anchor to take a load from this direction. This is especially important in the case of pre-distributed anchors. Ensuring a on-axis pull can mean the difference between placing 60% of the load on the most heavily loaded component and putting the entire load on it. Before building an anchor, always stop to consider where the last piece (on the route itself) is and how the anchor might be loaded. And then assess again for the next lead.
The climber’s connection to the anchor
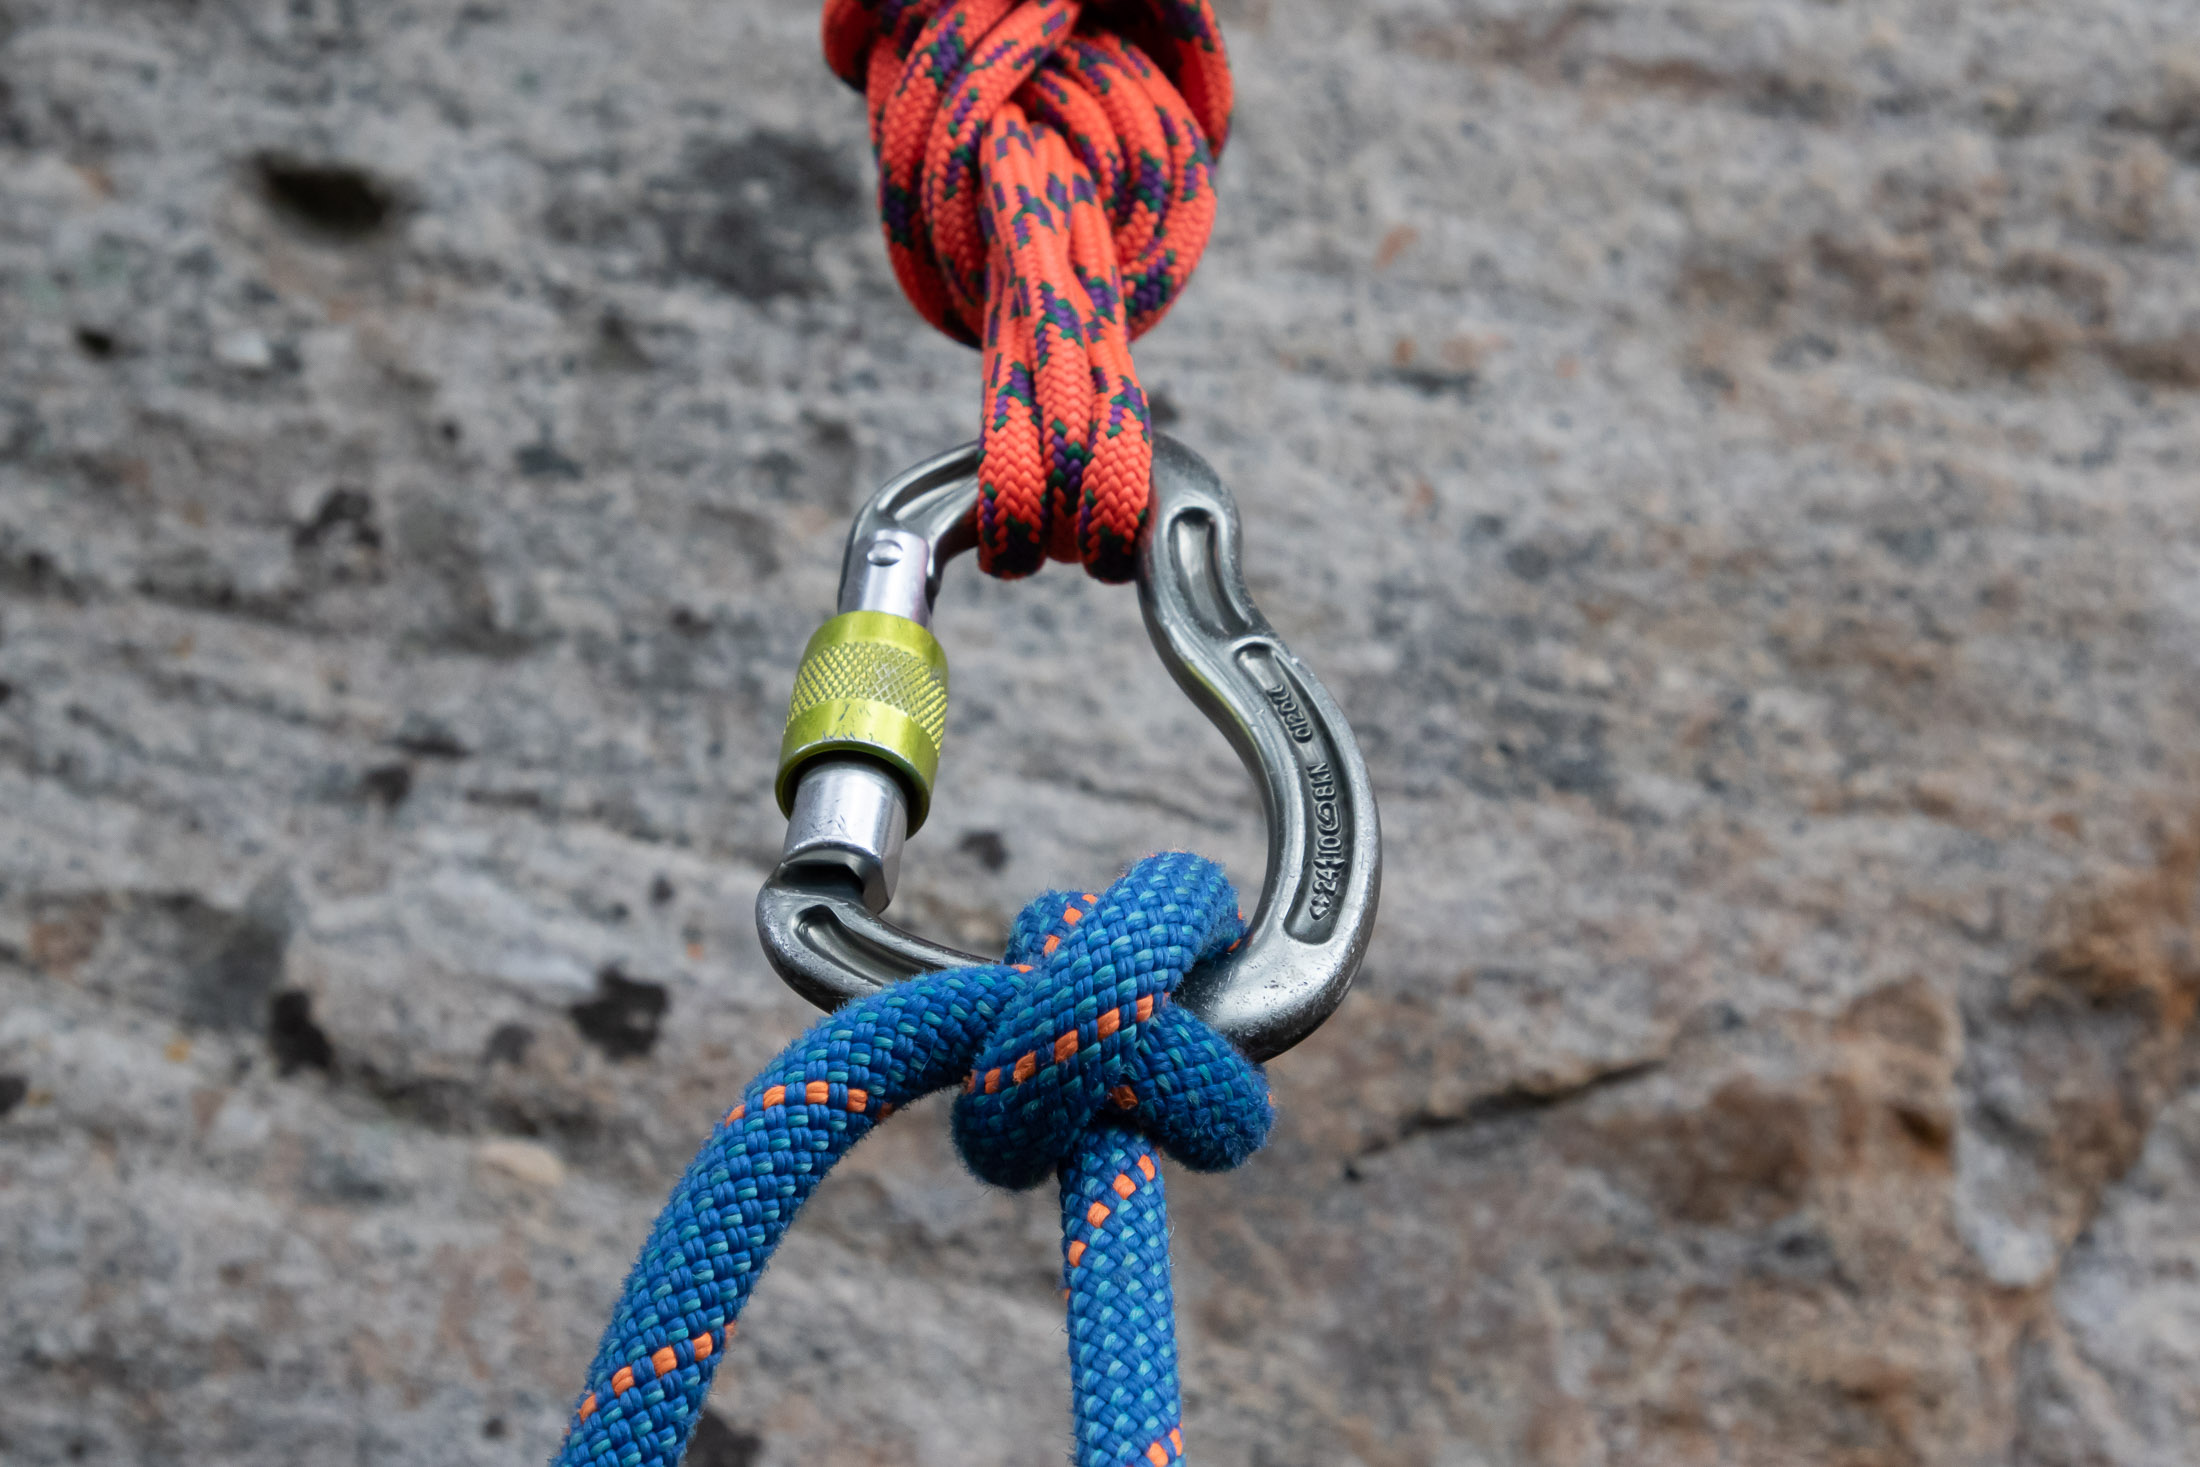
I’ve already mentioned Dyneema’s poor knotted strength, but it has another weakness. It has no stretch and so will absorb absolutely no energy if you slip and fall onto a Dyneema sling connecting you to the anchor. Ideally, you’d never create slack in whatever it is that connects you to the masterpoint, but such a scenario will at some point be unavoidable. To reduce the risk of a severe shock load, you should connect yourself to the anchor either with the rope or with a PAS or leash that has some dynamic properties.
Learn more about anchor building
Having given this a good read, you should now have a firm grasp of the theory you’ll need to build a basic three-piece trad anchor. That said, there is no substitute for in-person instruction, and I strongly recommend that you build your first dozen anchors at ground level and under the supervision of an experienced trad climber. This kind of instruction is especially important if you have limited experience placing gear. Also, know that there’s one more important skill that you need to round off your basic anchor building skills, and that is knowing how to connect yourself and the belay device to the anchor. I suggest reading this article next and then my other articles on anchor building.
