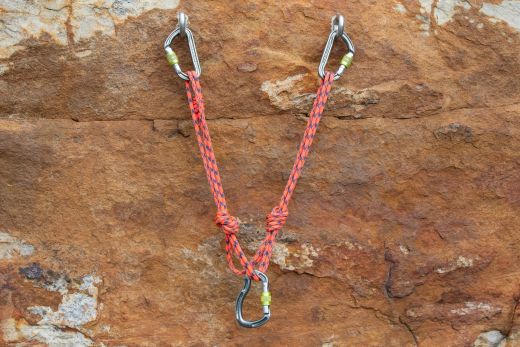
If you’re going to block pitches on a multi-pitch route or you want to ensure proper load distribution across components in an anchor, the solution is to build some kind of self-distributing anchor. There are several ways to build such an anchor, but the quad is currently the most evolved technique for building a self-distributing anchor and is the preferred method for many climbers and guides. In this article – the second in my series on anchor building – I look at the advantages and disadvantages of the quad, show you how to rig it in a variety of situations, and explain how you can overcome some of its limitations.
- Definitions
- A primer in load distribution
- Why use a quad?
- How to tie a cordelette for a quad
- two-piece quad
- Standard three-piece quad
- Composite three-piece quad
Definitions
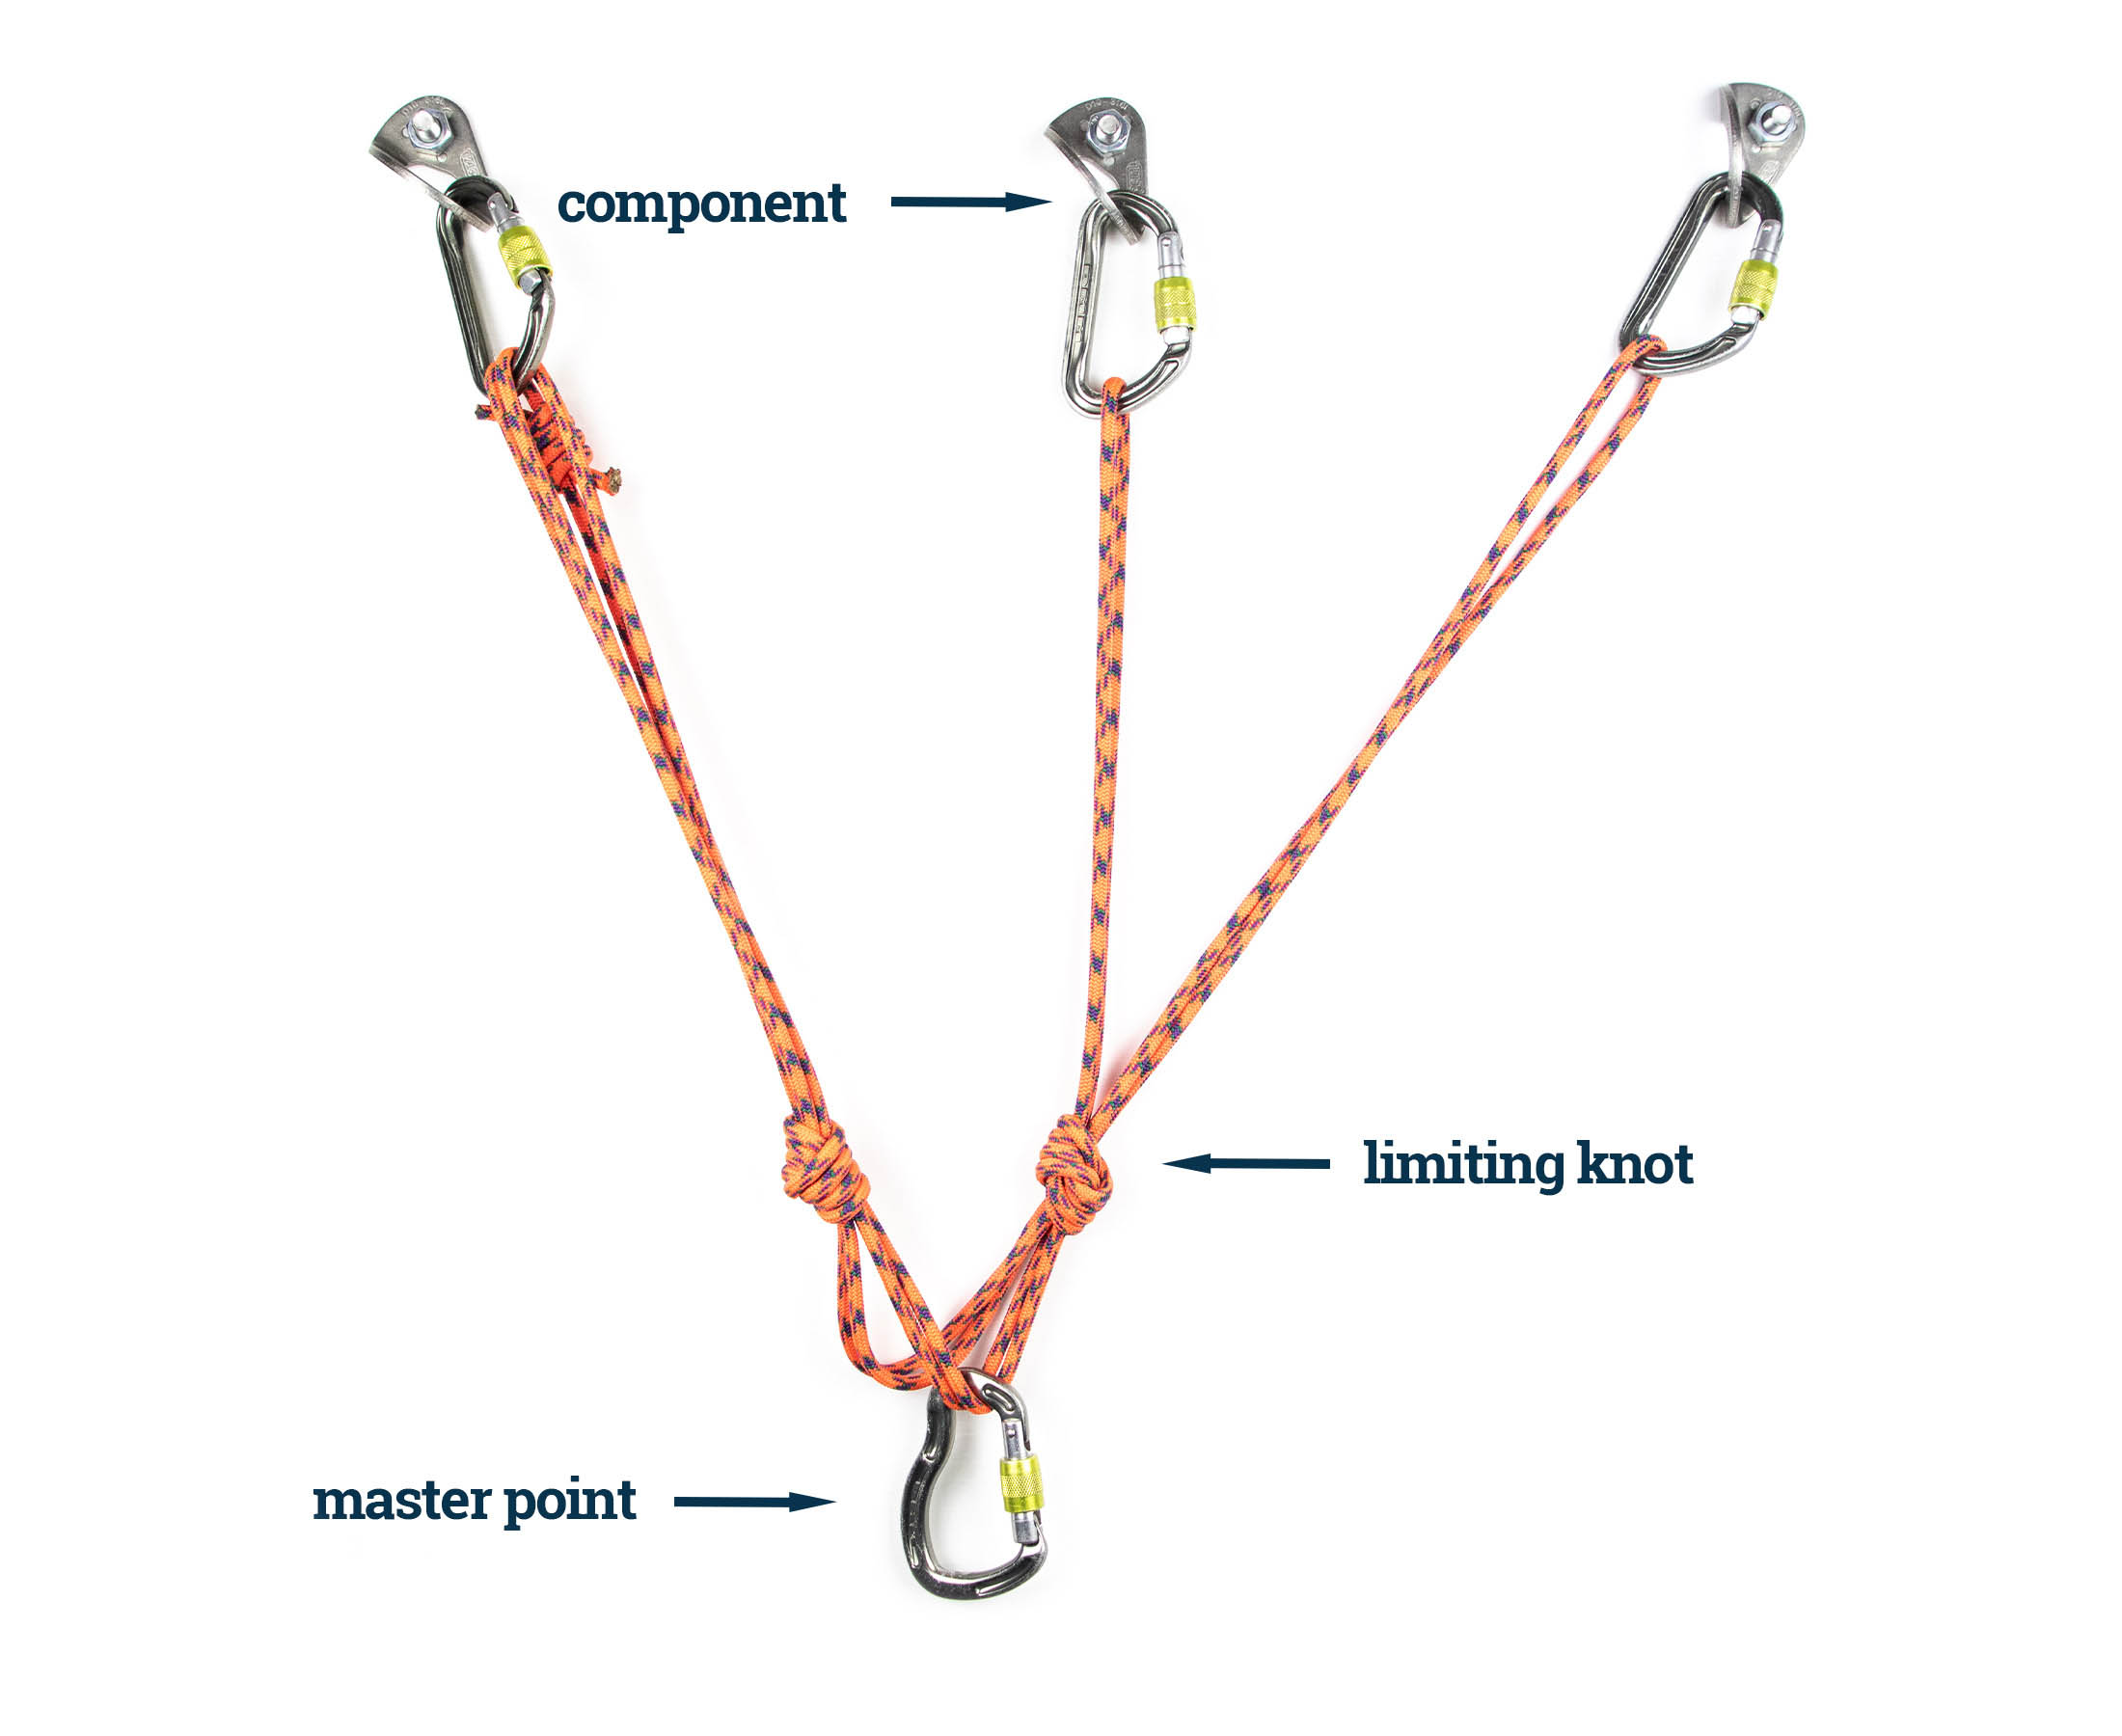
Before this gets too technical, let’s go over some definitions. That way you’ll know exactly what I mean when I say ‘component’ or ‘effective load’.
Master point
The master point is the part of the anchor you connect yourself and the belay device to. In the case of an overhand-knot anchor, there is only one master point – the short loops of the bundled strands below the knot. Quads, on the hand, have two master points, each with two strands.
Limiting knot
The knots in either arm of a quad can be tied further or closer to the master point. Their position determines how much the anchor would extend if a component failed, so they are also known as limiting knots.
Component
In this article I will use ‘component’ to refer to the separate primary anchors that make up an anchor. These could be bolts, cams, nuts, or natural features like boulders or trees that have been secured with a sling. I will use this term interchangeably with ‘primary anchor’.
On-axis
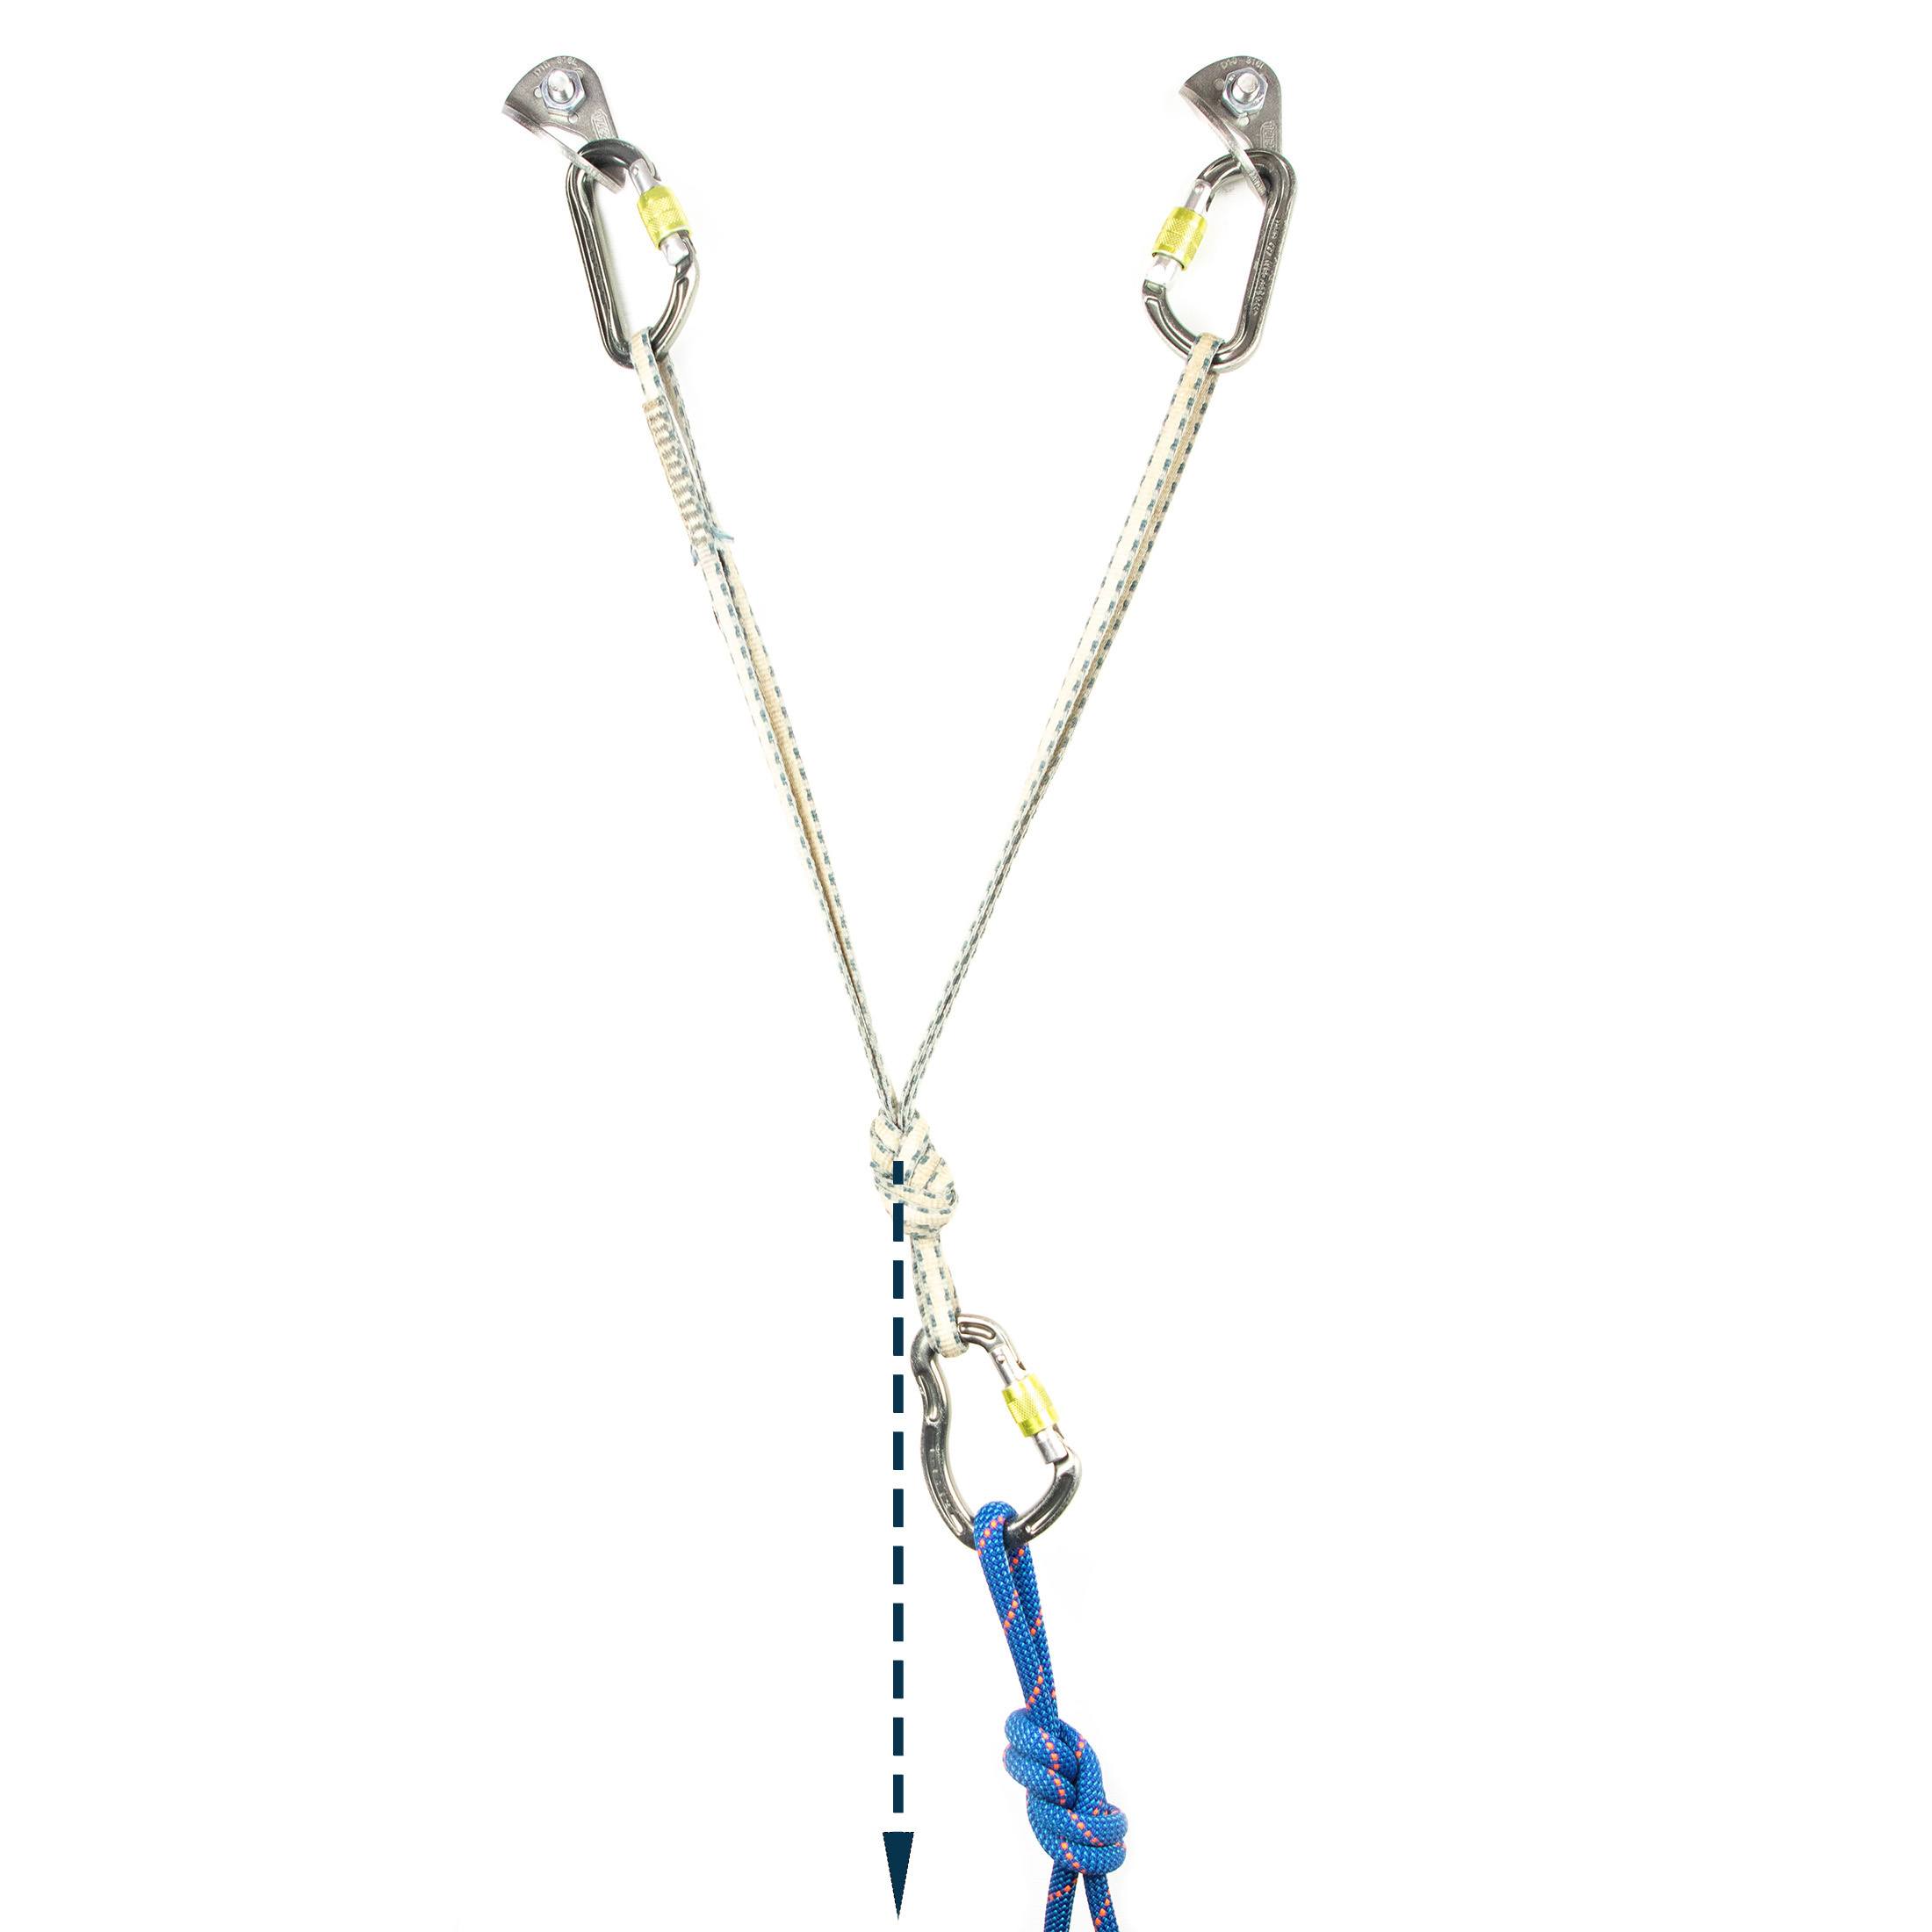
The direction of pull on an anchor is on-axis when it is straight on, ensuring a more or less equal distribution of load on both components. An anchor builder should always strive to build an anchor that will be loaded on-axis when the belayer or climber weights the anchor.
Off-axis
The direction of pull on an anchor is off-axis when it is not straight on – that is when it doesn’t distribute a load equally to the primary anchors in a system. The master point in a self-distributing anchor can slide, moving the axis. In this case, an off-axis load is one that the anchor still has to adjust for.
Load distribution vs equalisation
The term ‘equalisation’ is commonly used to describe how the load on anchor should be shared equally across all primary anchors. In reality, it’s almost impossible to distribute the load equally to all components. In a 3-piece quad, load distribution is closer to 25/25/50%, and in the case of pre-distributed anchors like an overhand-knot anchor, the majority of the load is usually put on just one component. To avoid spreading a dangerous misconception, I will talk about ‘load distribution’ and not ‘equalisation’.
A primer in load distribution
Before we can talk about the advantages of the quad, it’s important to understand load distribution. Almost all anchors can be put into one of three categories: pre-distributed, self-distributing, and hybrid. The traditional overhand-knot anchor is a pre-distributed anchor configuration. It only achieves anything close to equitable load distribution when loaded perfectly on-axis (highly unlikely in the real world). When pulled just several degrees off axis, the vast majority of the load (or even all of it) is placed on a single arm - not desirable if your primary anchors are anything less than bomber (10 kN + in good rock).
To overcome the issue of effective distribution, some creative anchor builder came up with the sliding X, which improved on the overhand-knot anchor by incorporating a sliding master point that redistributes some of the load placed on an anchor when it is pulled off-axis. The problem with the sliding X is that it involves a twist in one of the two strands at the master point. This creates friction when the master point adjusts to an off-axis load, which in turn puts the vast majority of the load on one of the two arms. Instead of a 50/50% split in load distribution, it’s more like 65/35% with a sliding X.
The equalette sought to solve this issue by putting master point carabiners on two separate stands. This configuration avoided the twist while still retaining a level of redundancy with two strands supporting the master point, but the double-carabiner setup complicated things a bit.
Why use a quad?
By the time the quad was developed, anchor builders knew that they wanted an anchor rigging method that would ensure effective load distribution without the complications of a double-carabiner masterpoint. The quad ticked both boxes.
Advantages
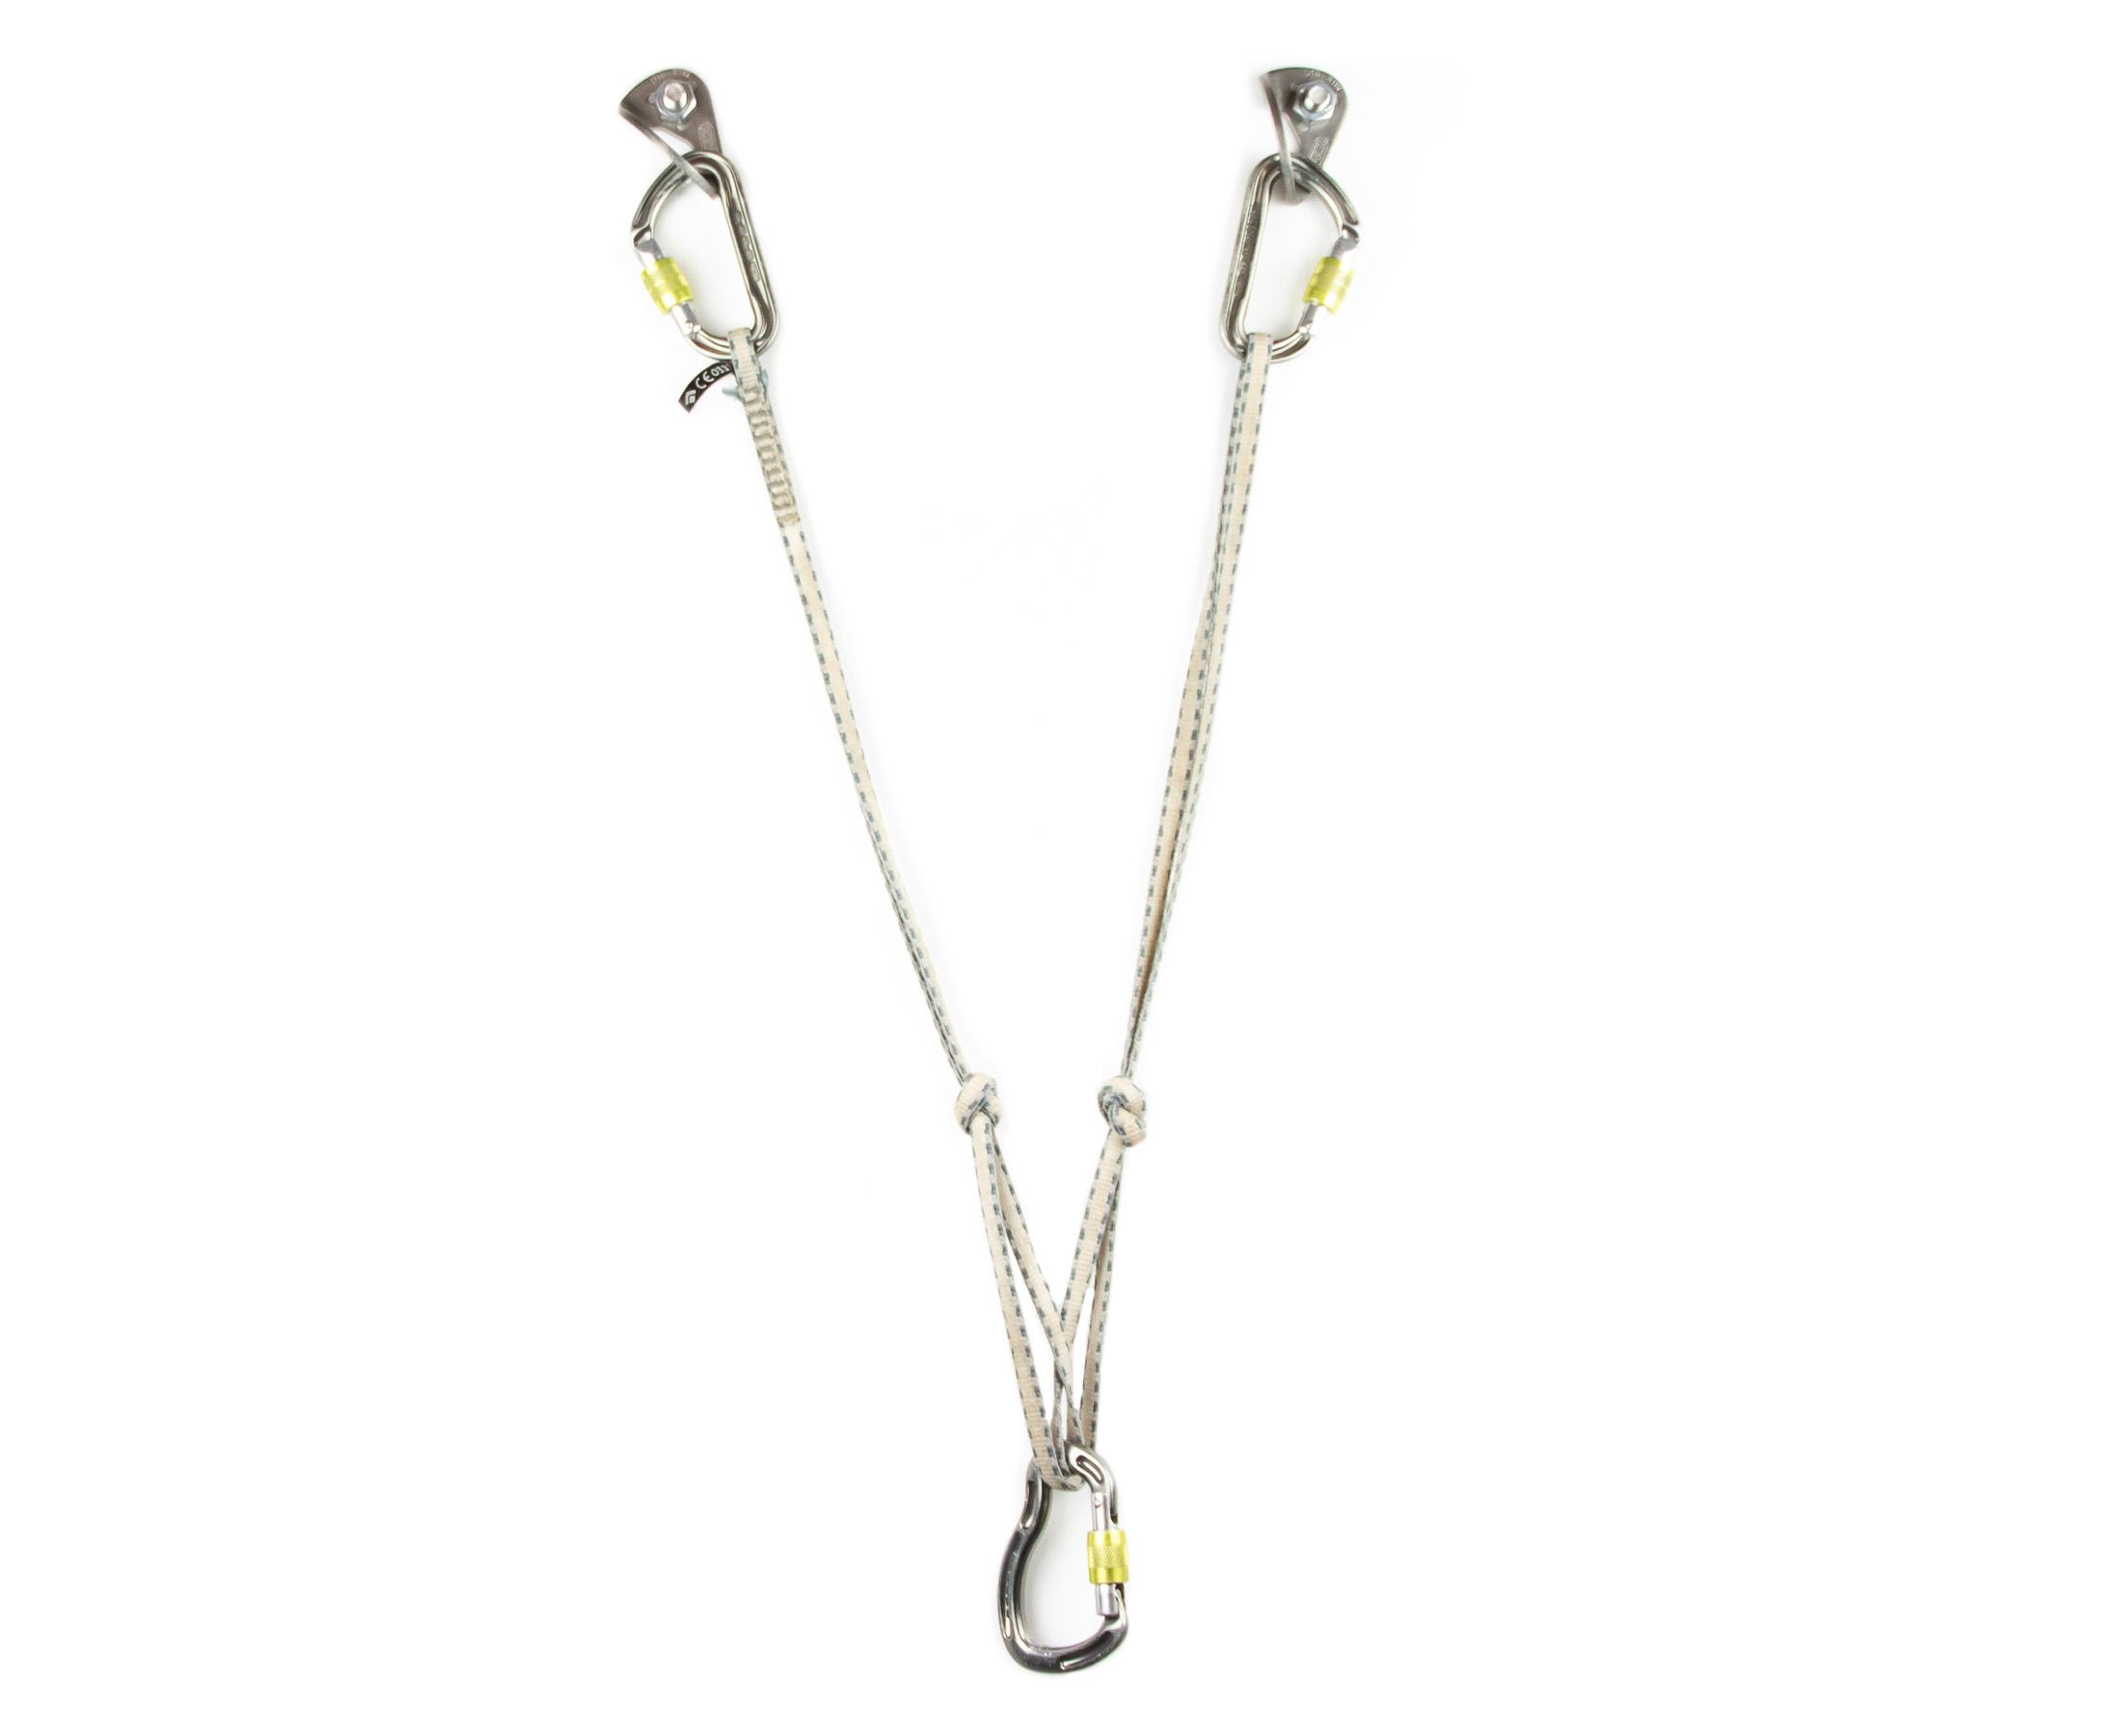
Unlike the sliding X, which relies on a twist to ensure that the master point is connected to two strands, the quad involves no such twist. With four strands between the limiting knots, the quad allows a belayer to clip a master point carabiner to two parallel strands while negating any risk of the carabiner sliding off the end of the cord if an arm fails (the carabiner is constrained to the loop created by the two double-strands and the limiting knots). The advantage of this twistless setup is that it allows for frictionless and more effective load distribution. To understand when to why this is important, see my article A Better Way to Assess Anchors.
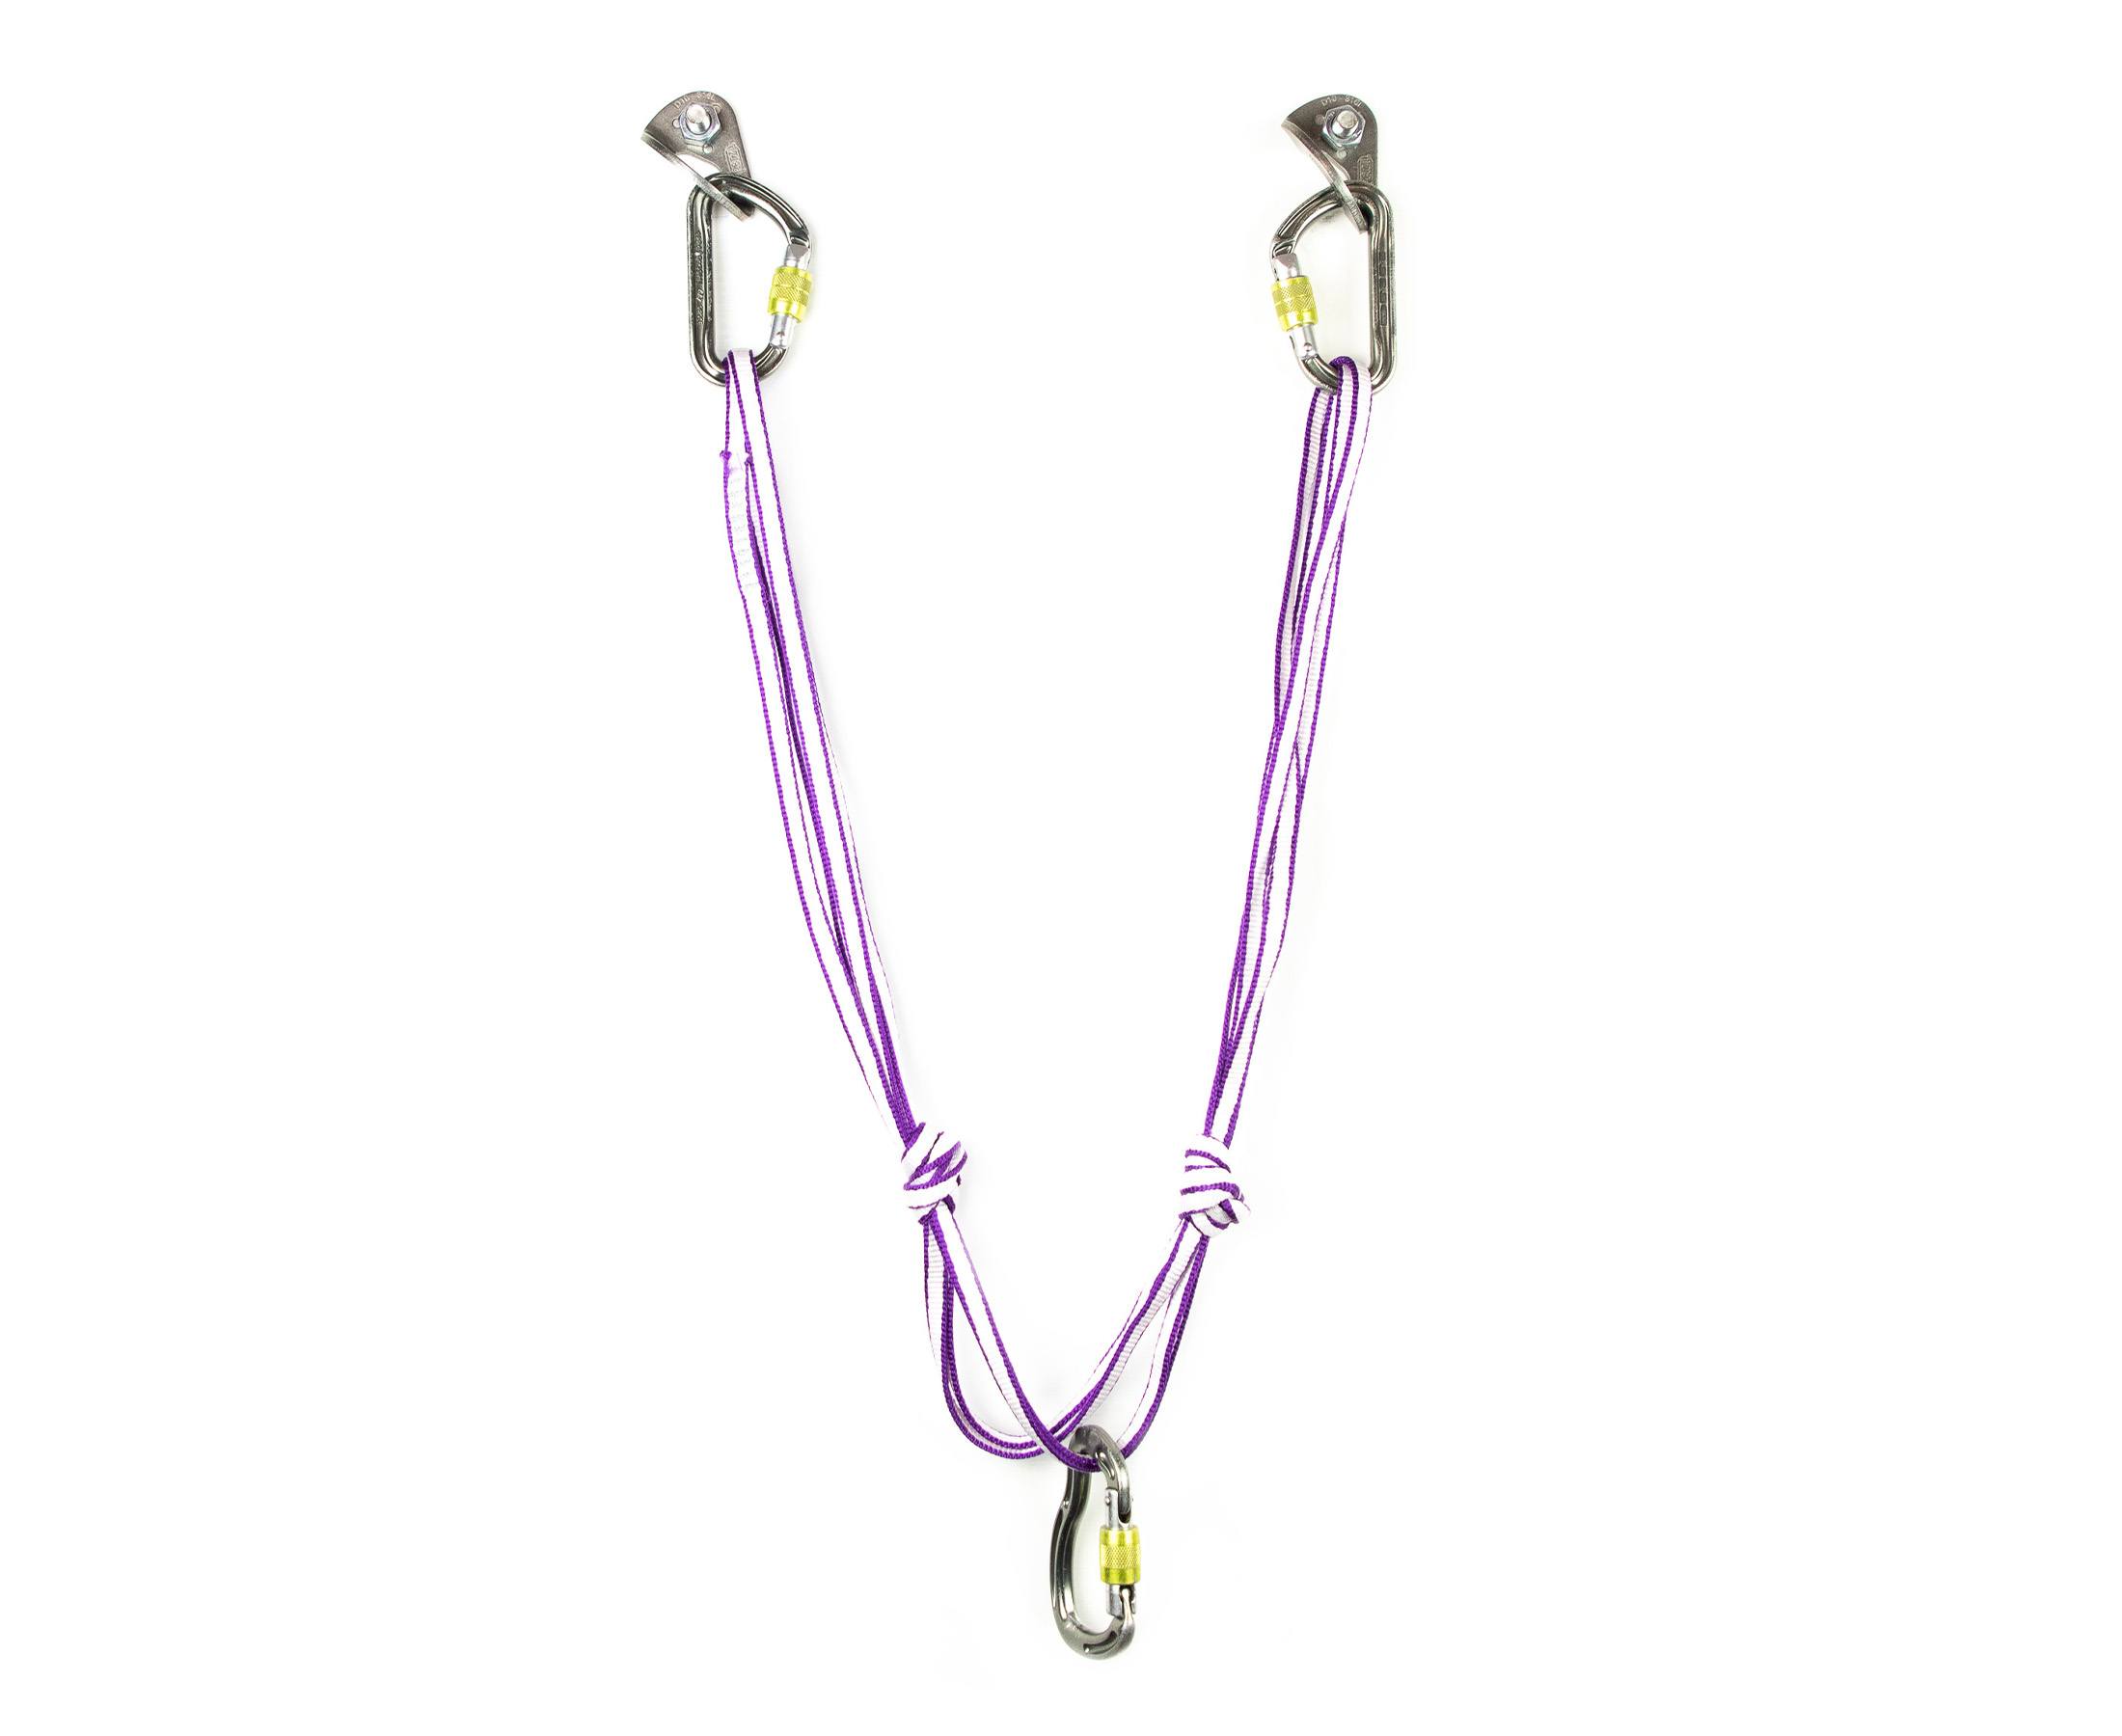
The other advantage of the quad is that it gives the belayer two master points: one for the belayer to secure herself to and another for the belay device. Besides making for less cluttered master points, this arrangement also isolates the forces enacted on the anchor by belayer and belay (to an extent). If one of the two master point carabiners were loaded laterally (by either partner), it would have less effect on the other than if they were sharing a master point. This is particularly useful when the follower arrives at the stance, as it prevents the two partners from pulling each other around.
Disadvantages
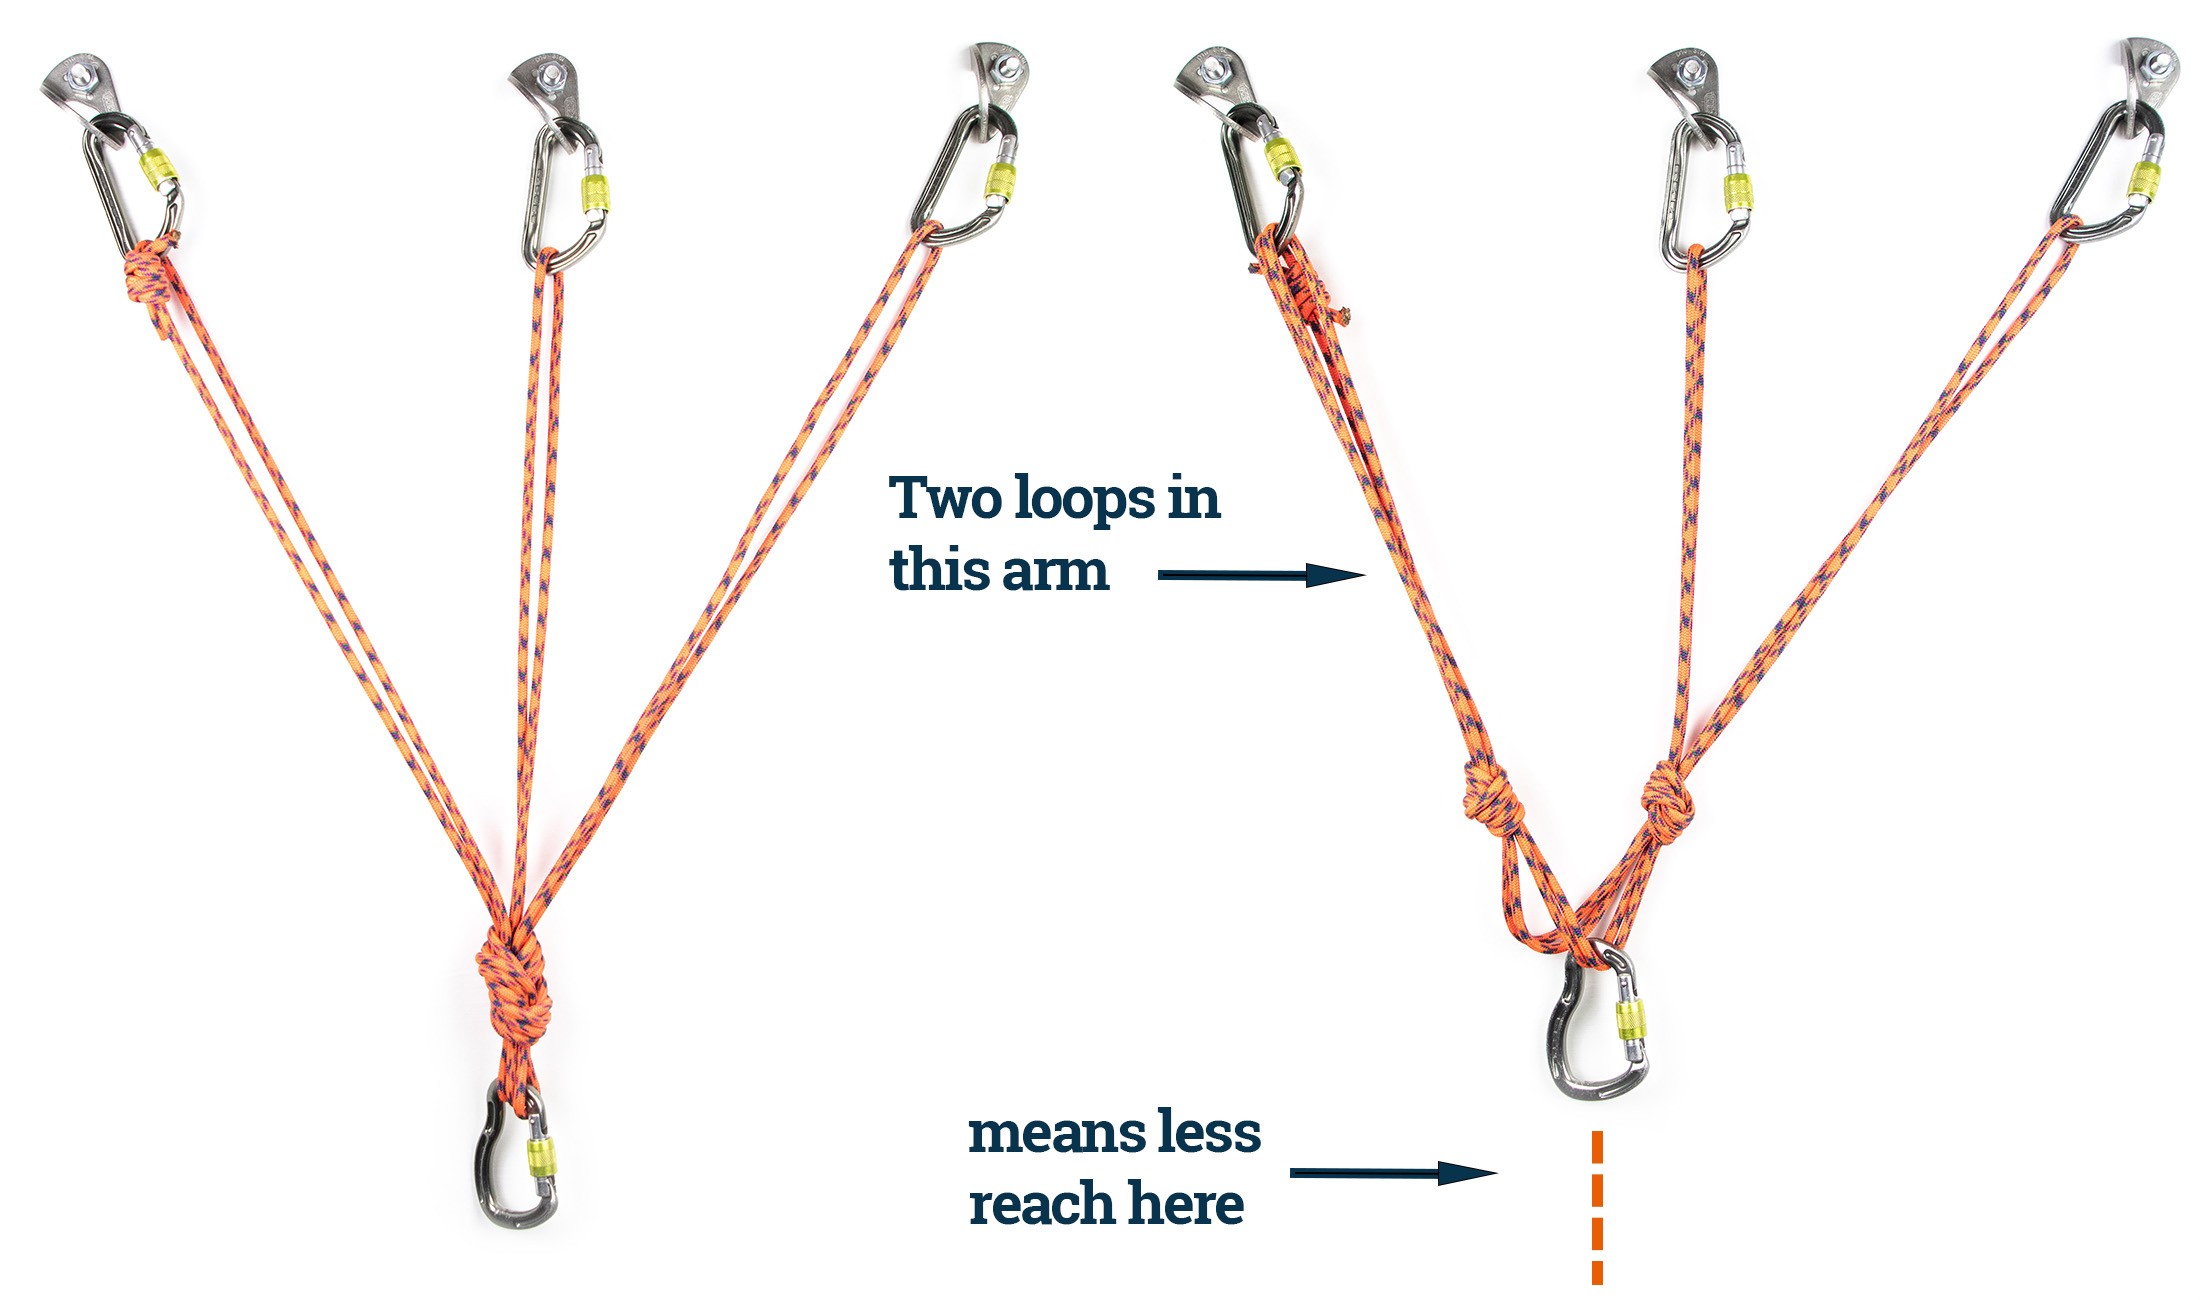
The main disadvantage of the quad is that it gives you less reach than an overhand-knot anchor or equalette made from the same amount of material. Whereas a three-piece overhand-knot anchor has three loops and an equalette has two loops, the quad has four loops (hence the name ‘quad’). As a result the quad has shorter arms, which make it harder to connect components that are further apart. There are ways to extend a quad with the rope (if you are swinging pitches) and with slings, but I will get to these in the section on composite quads.
Tying a cordelette for a quad
Although you can create both a 2-piece quad and a 3-piece quad from the same cordelette, I recommend using a shorter cordelette for bolted stances (those which usually have two bolts) and a longer cordelette for trad anchors. For my shorter cordelettes, I use a 4.5 m (15 ft) piece of 6 mm Sterling PowerCord. You can also use 7 mm accessory cord, but I prefer the tech cord for its low bulk and durability.
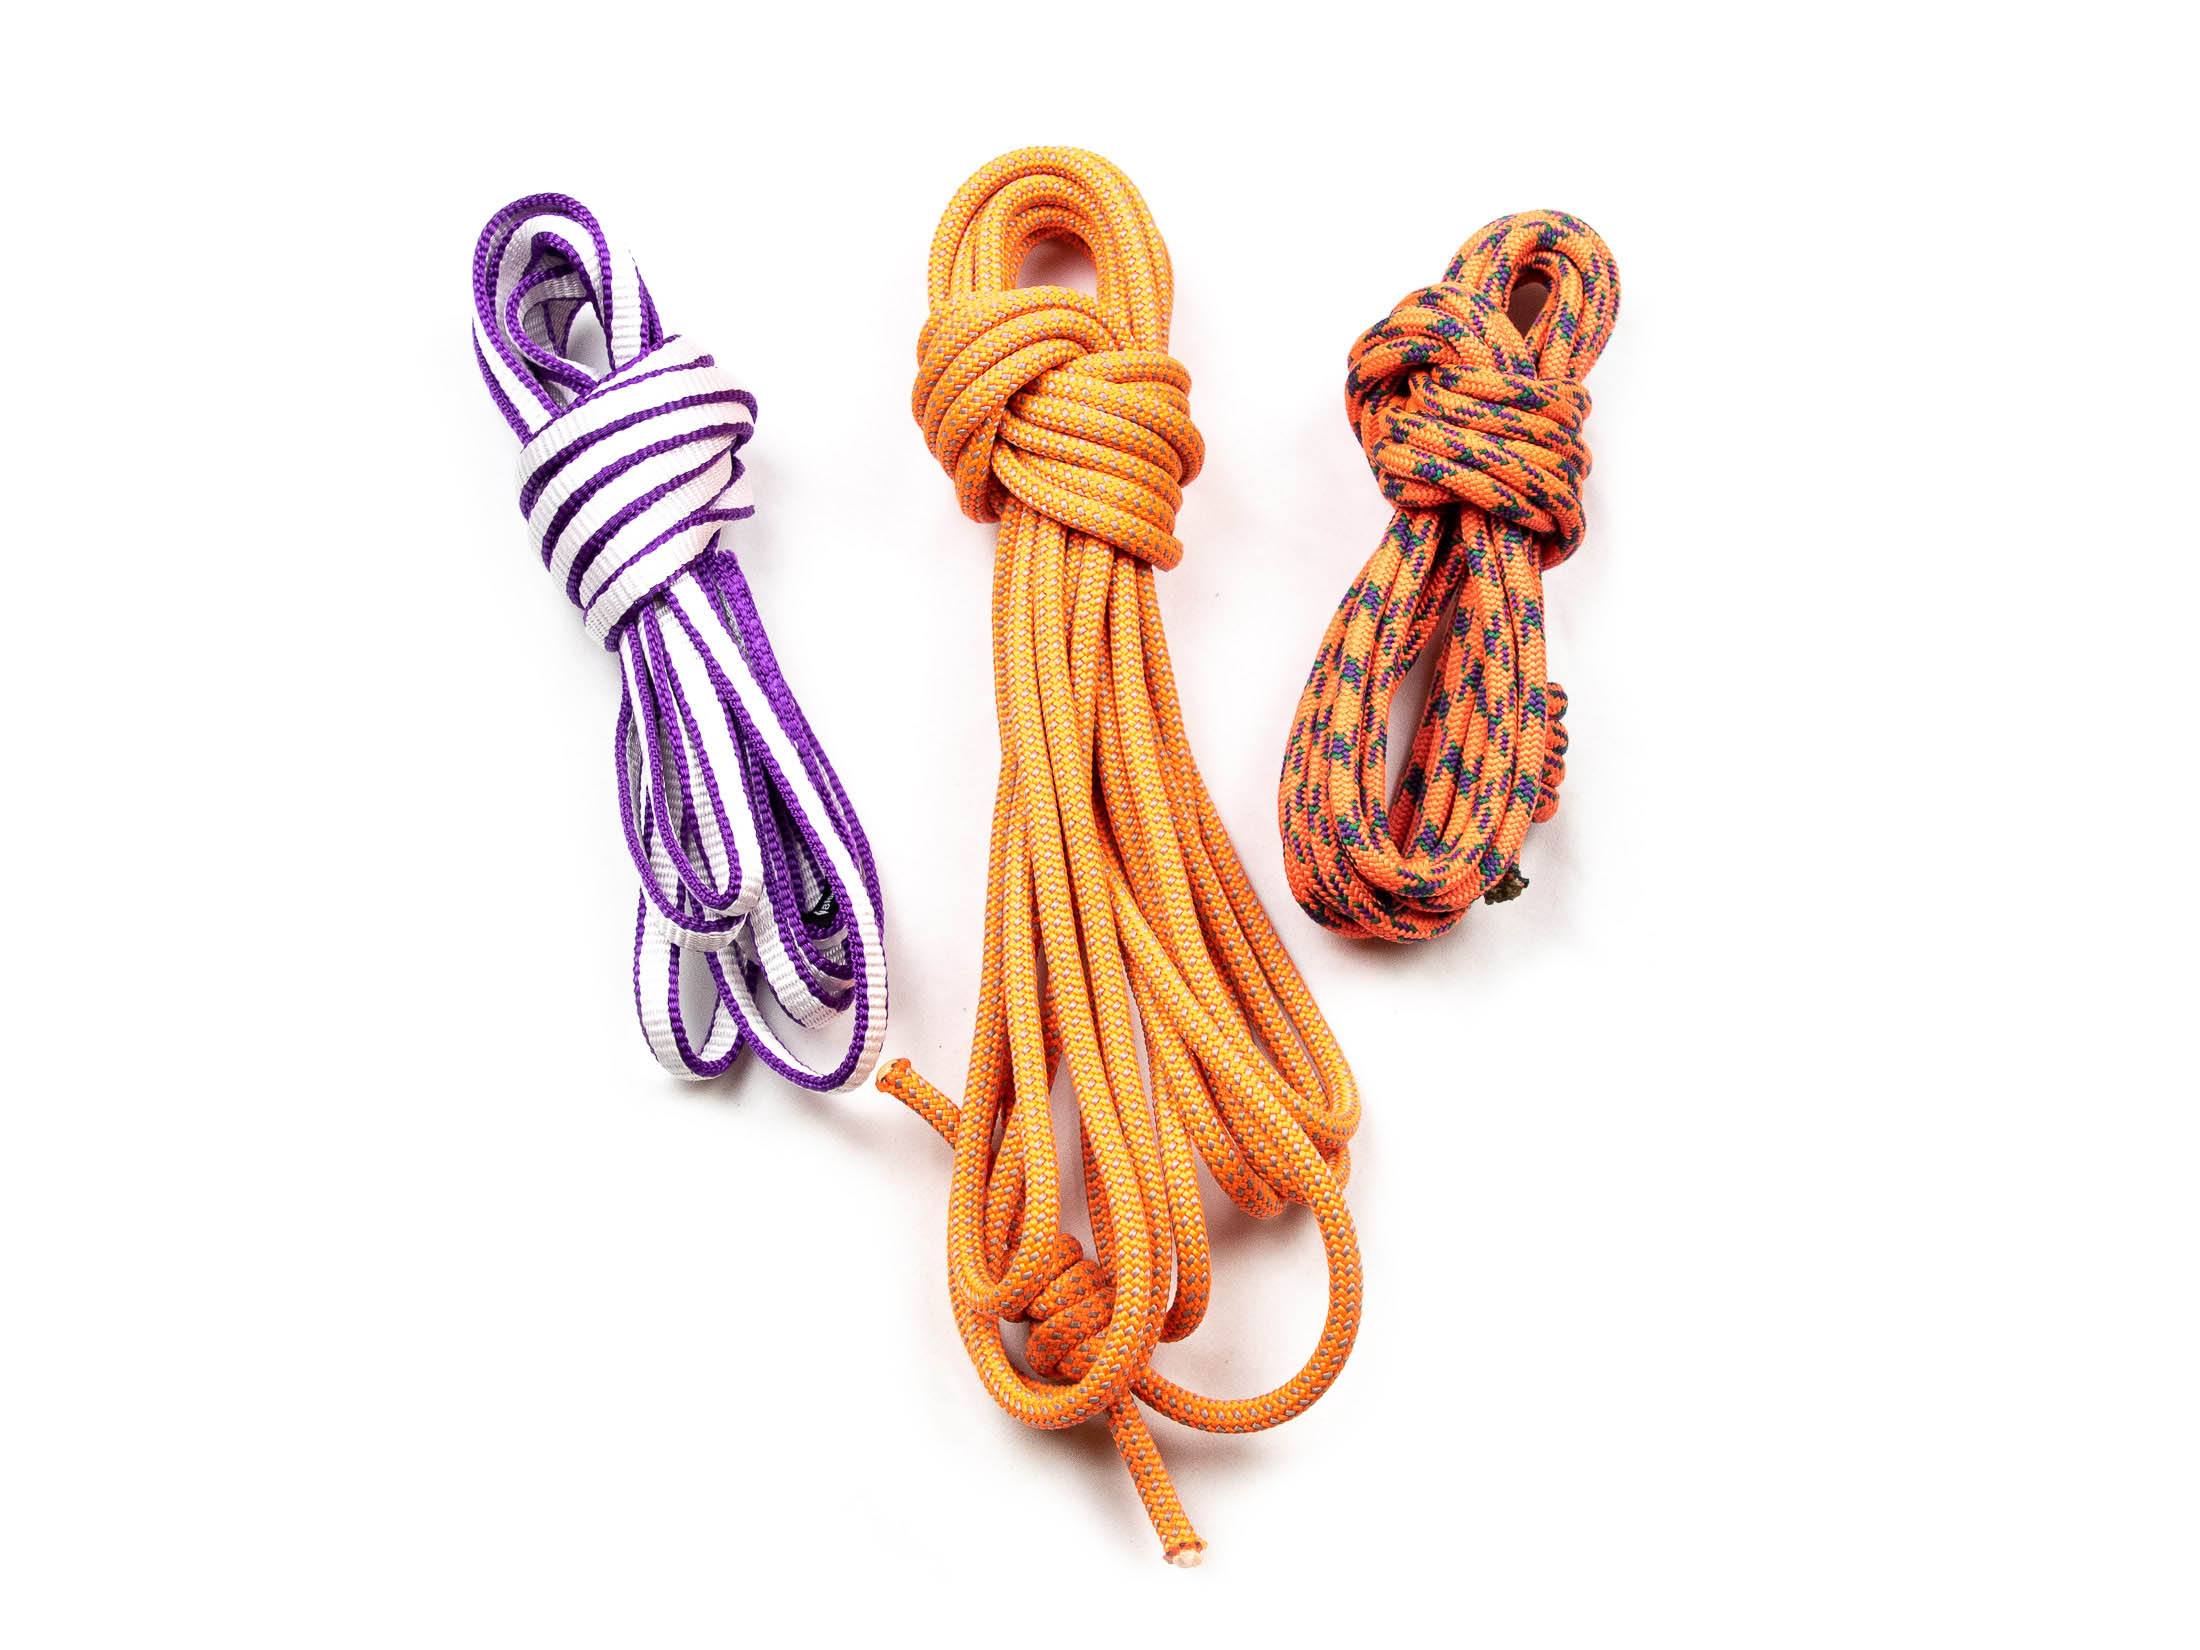
Once you’ve cut the cord to length, tie the ends together with a double fisherman’s knot, leaving 4 cm (1.5 in) of tail sticking out each end of the knot. I make my longer cordelettes exactly the same way except that I use 6 m (20 ft) of PowerCord.
two-piece quad
If you climb routes that typically have bolted stances, it makes sense to pre-tie your quad from a shorter cordelette and then leave the limiting knots in. To allow for staggered bolts, it’s best to position the limiting knots at least 15 cm (6 in) apart. This will ensure that the anchor can still self-distribute even if one bolt is a few inches lower than the other.
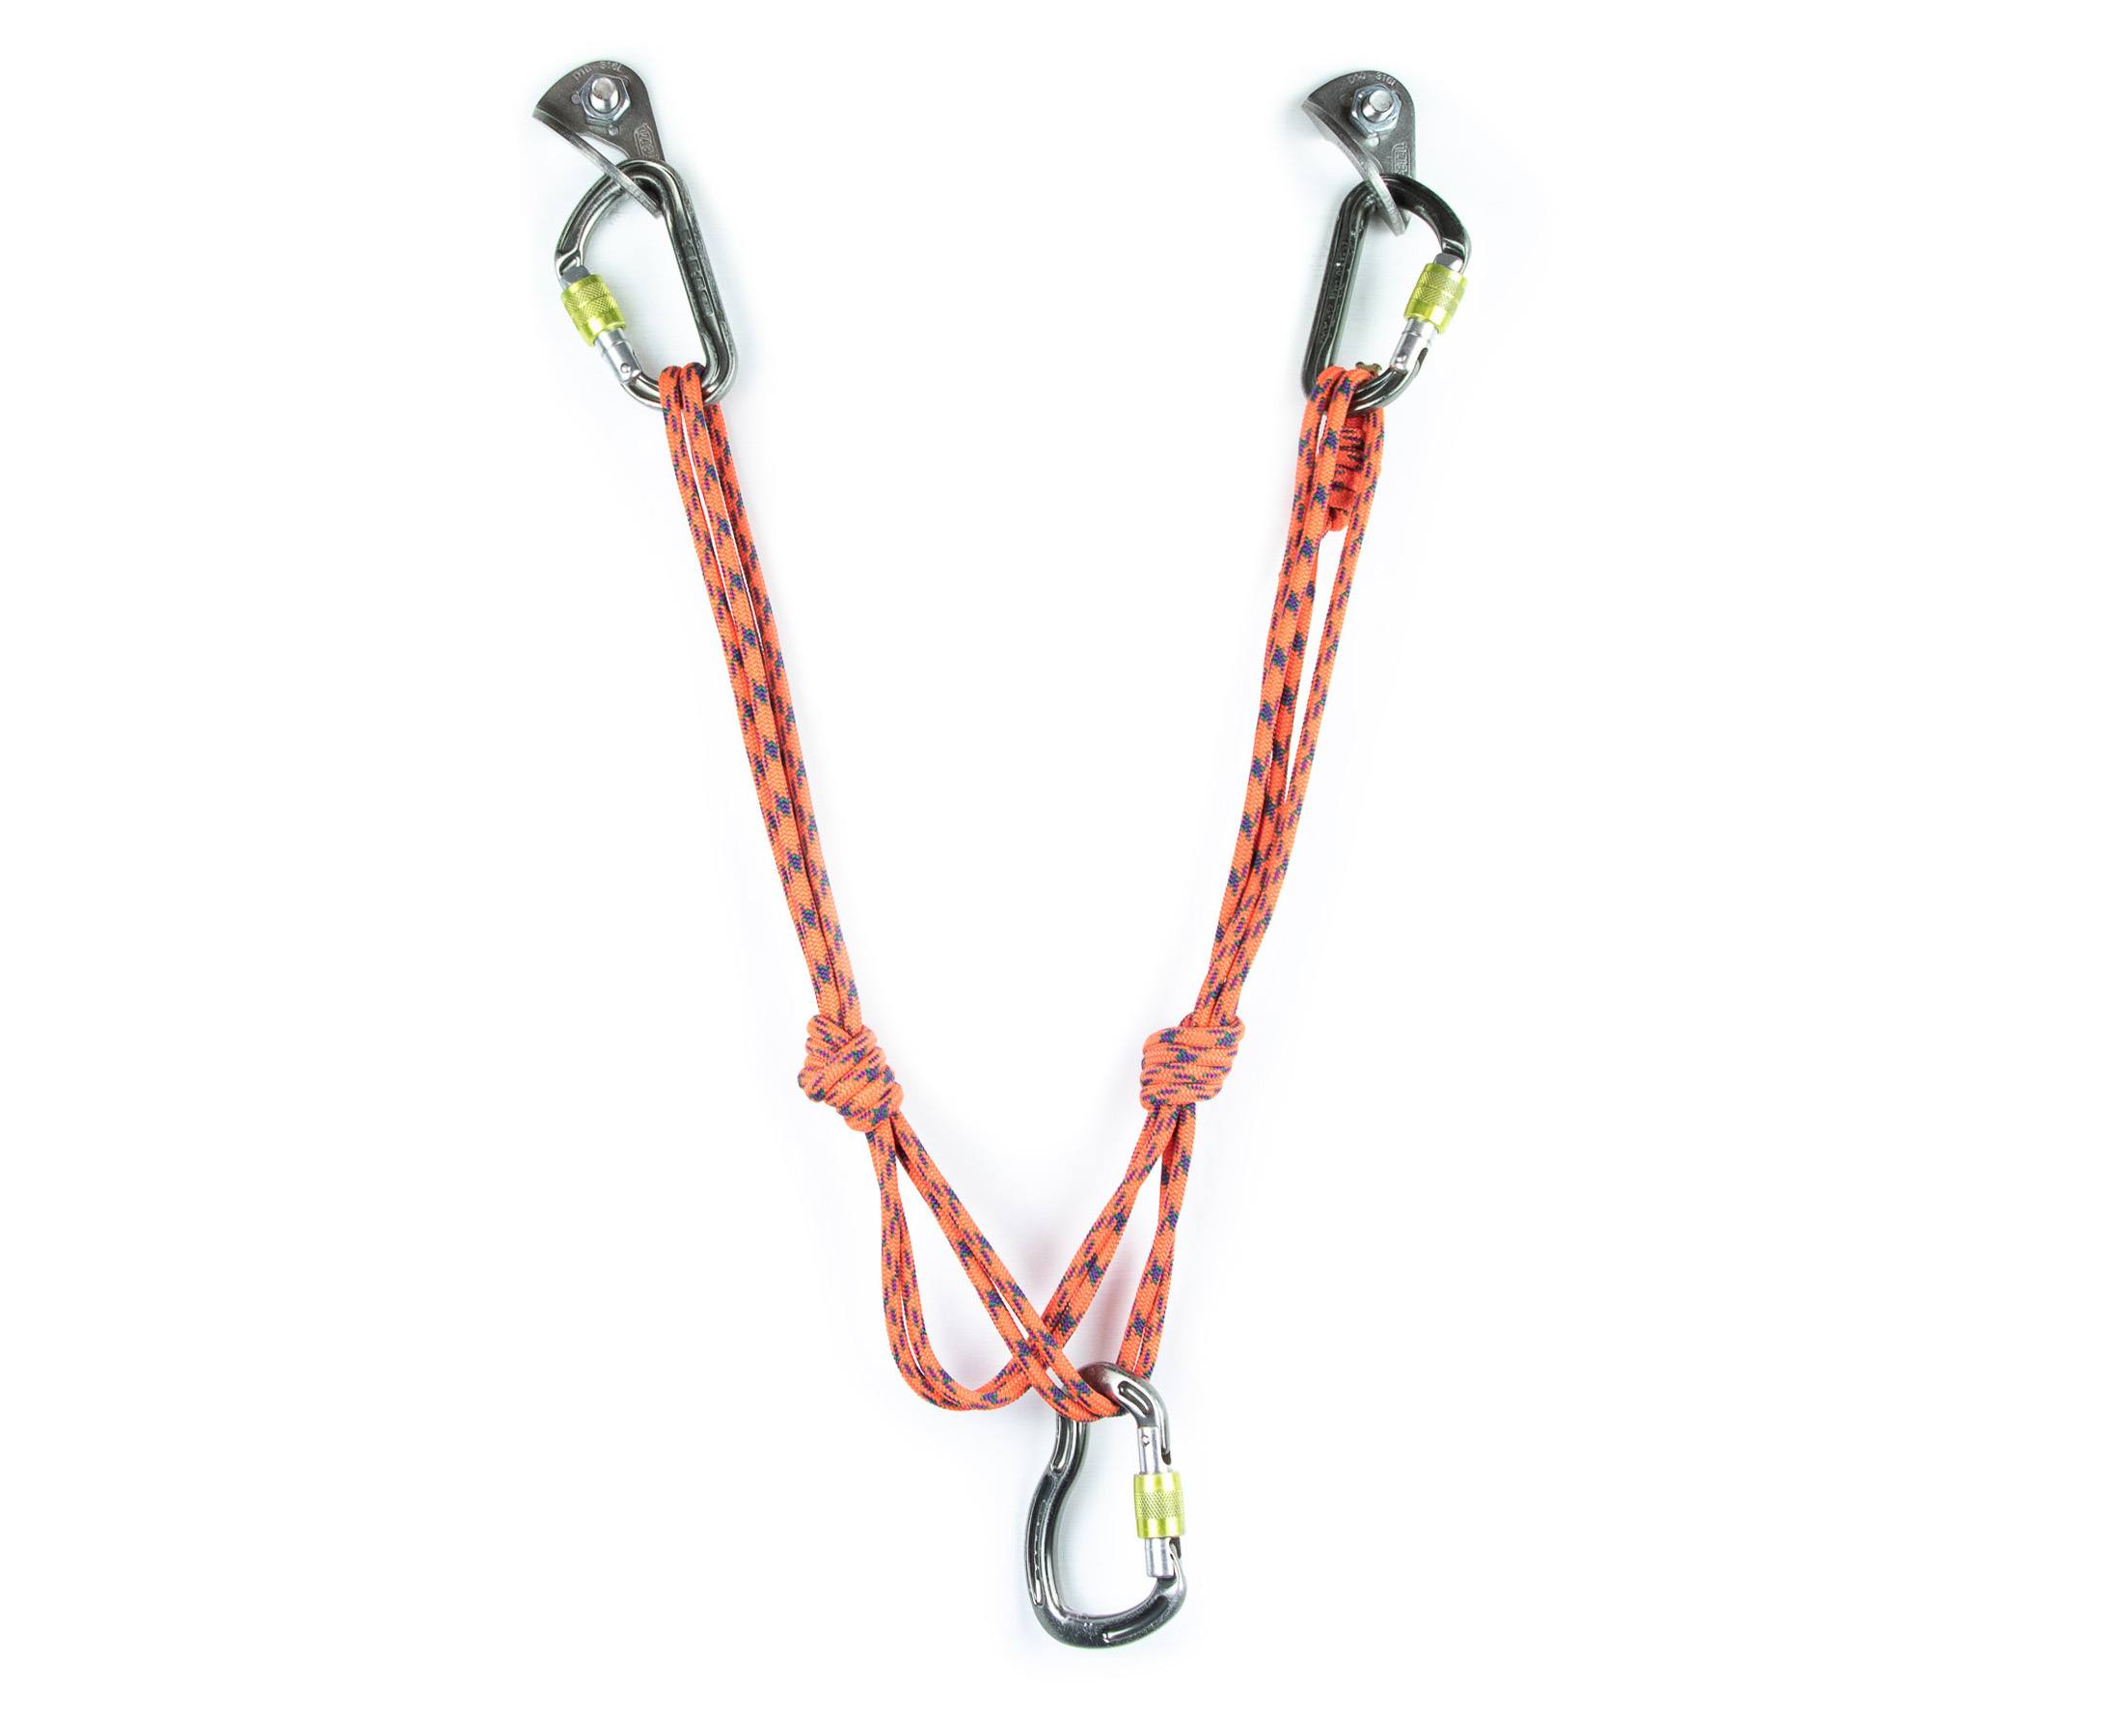
With the quad already tried, all you have to do when you reach the anchor is clip each leg (both loops) to a bolt, and then attach yourself and the belay device. You can use locking carabiners to secure the quad to the bolts, but this isn’t necessary as long as the rock or bolt doesn’t interfere with a carabiner’s gate.
Standard three-piece quad
Unlike two-piece quads, it’s not really practical to pre-tie a quad for a three-piece trad anchor as the position of components and limiting knots can vary widely. For this reason, I recommend storing the cordelette as a loop (racked) until you need it. Once you’ve placed your three primary anchors, you can rig your quad using the following four steps.
- Clip your cordelette to two of your three components, positioning the double fisherman’s knot just below one of the carabiners.
- Pull the loop into a double stranded ‘V’ with the bottom of the ‘V’ pointing in the direction that the anchor will be loaded.
- Pull the four strands together, taking care to prevent any lengthening or shortening in any of them, and tie an overhand knot about 30 cm (12 in) below the components.
- Tie another overhand knot a similar distance from the other end of the two double-strand loops, and then clip both of these to the third component.
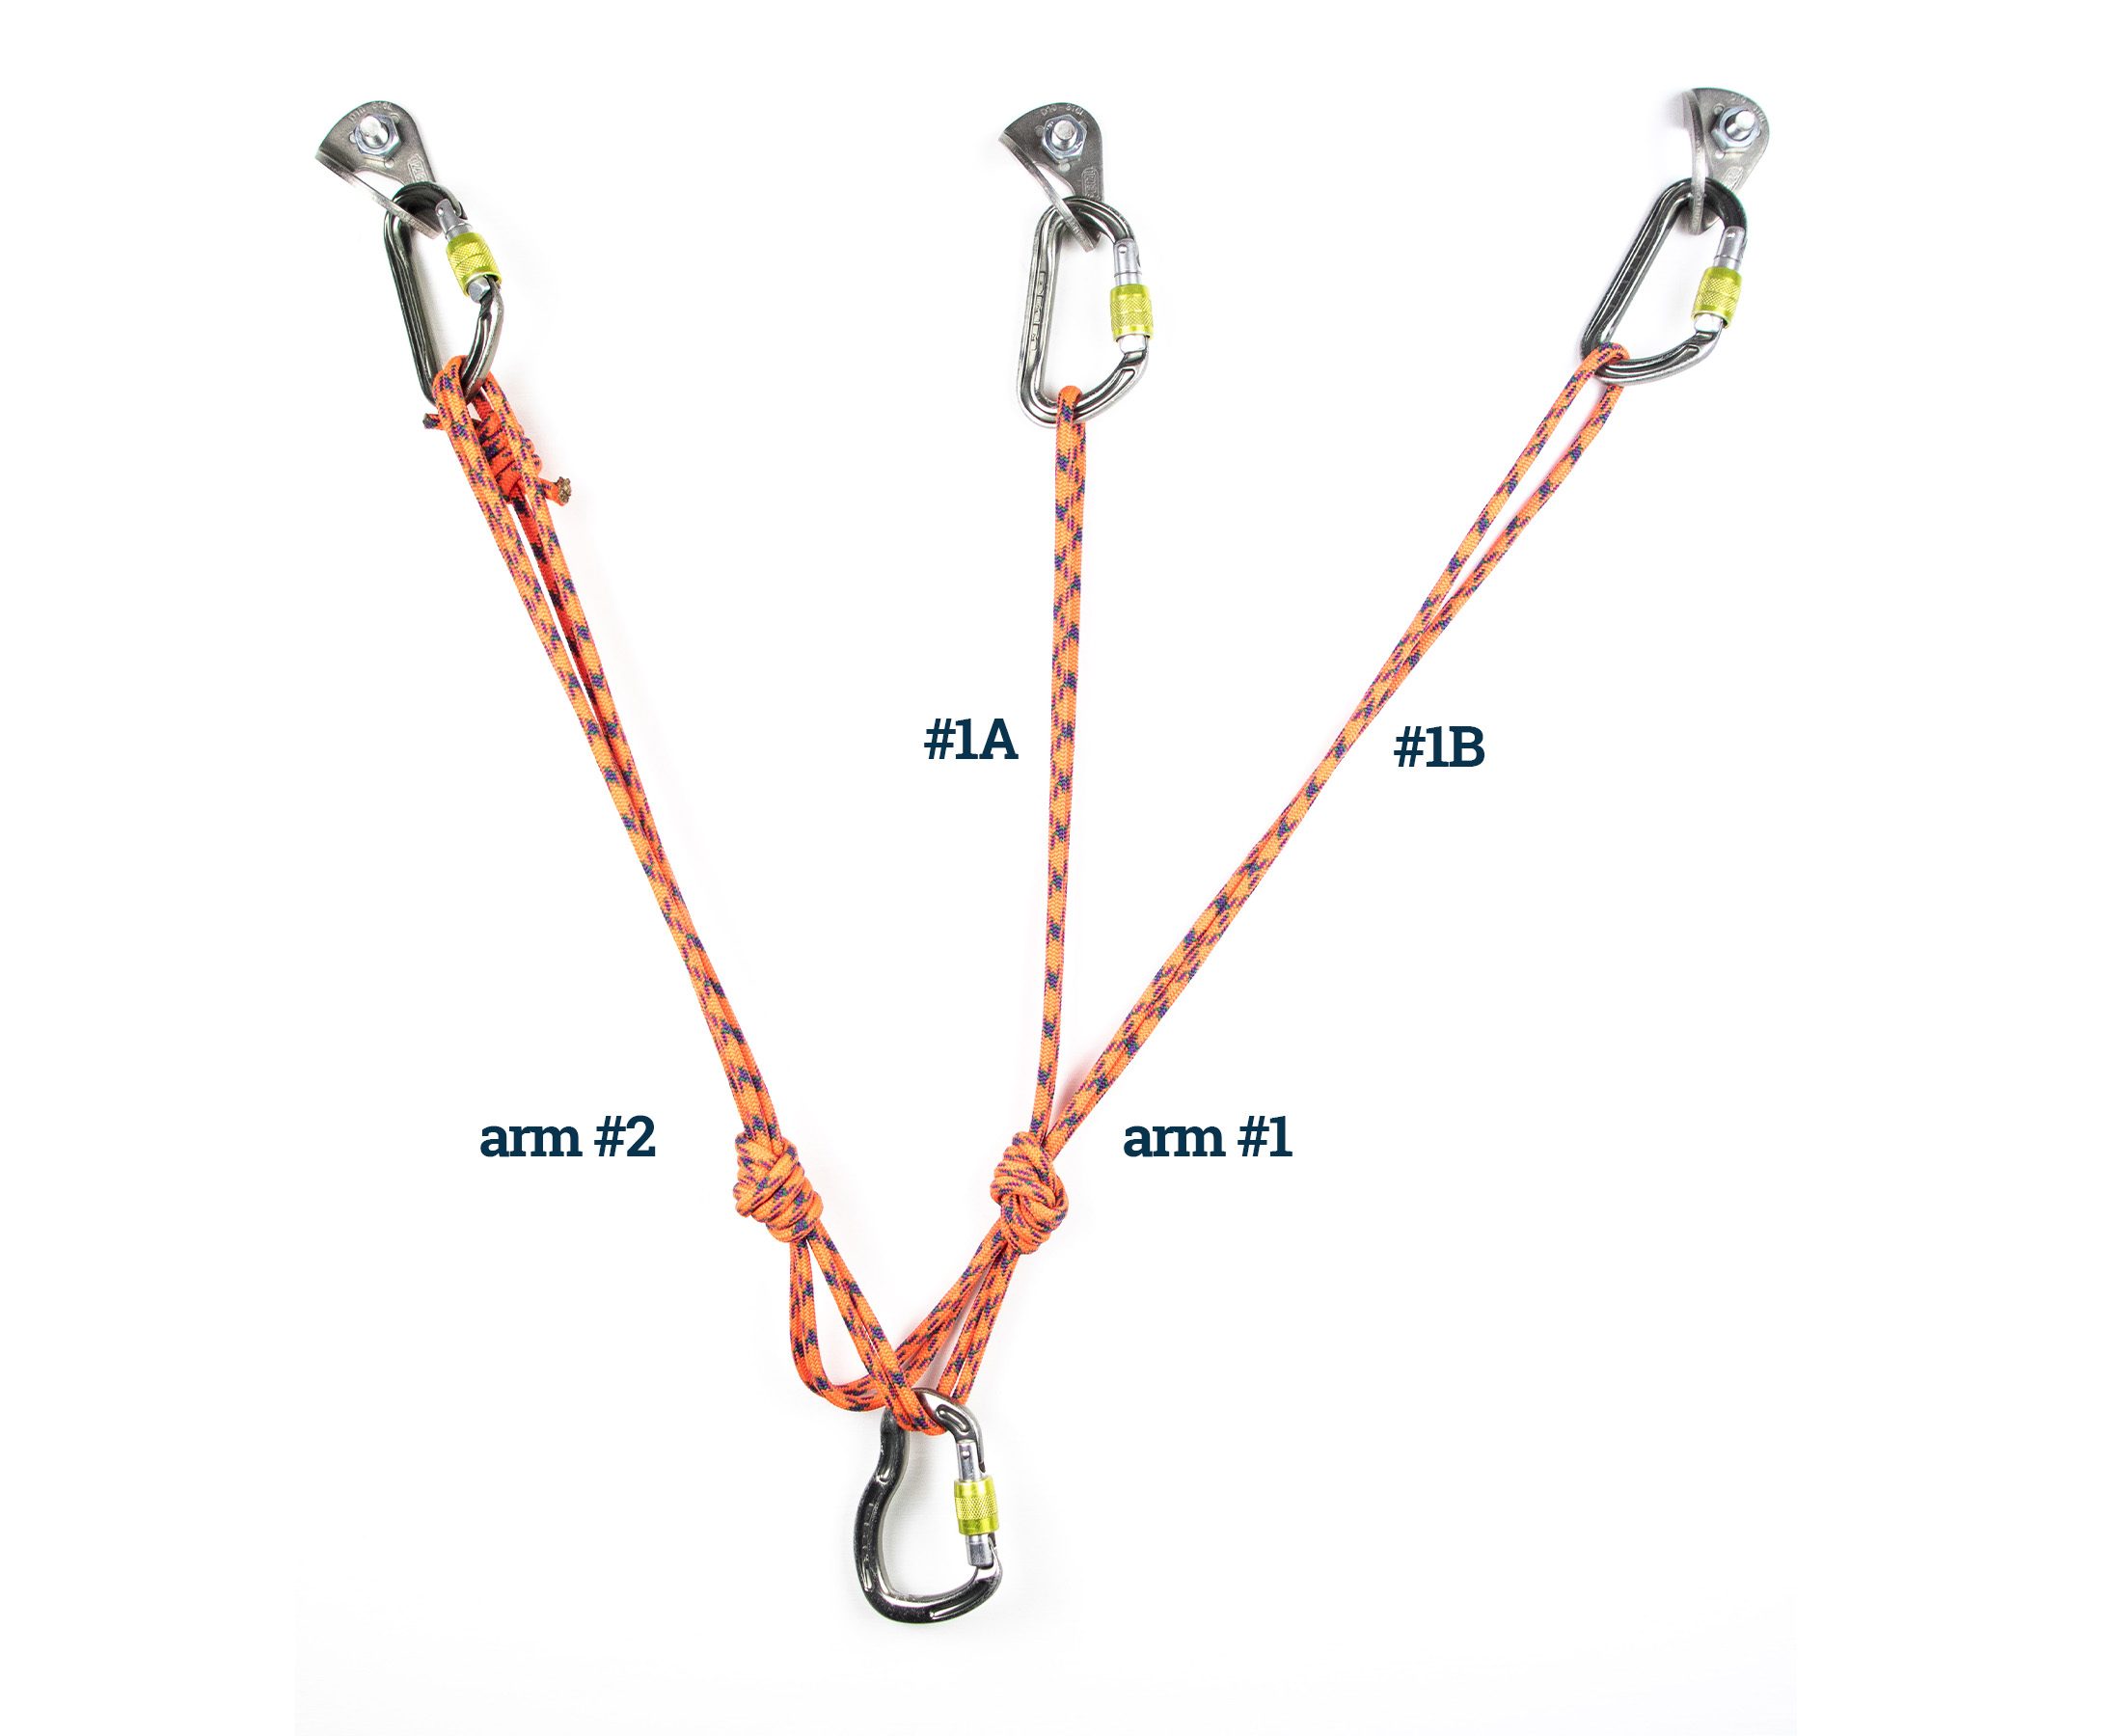
Ideally the piece on the second arm would be the strongest component in your anchor as it will take a larger share of the load than the other two components. The master point splits the load roughly 50/50 between arm #1 and arm #2, and the load on arm #1 is then split again to 1A and 1B. Load distribution at this point depends on the direction in which the anchor is pulled off axis. A load from the right will put more of the load on 1A while a load from the left will put more of the load on 1B. Only a perfectly on-axis load will ensure a 50/25/25 split.
Lastly, check that the angles between components are as small as possible (and not more than 90 degrees). The angles in an anchor act as levers, and an angle of 90° can put an additional 20% on primary anchors. To avoid creating dangerously high vector forces, it’s important to keep angles in an anchor as small as possible. One way to do this is to extend your quad as you would do with a composite quad - coming up next in the next section.
Composite three-piece quad
If the goal is to build a distribution-critical anchor your best option is to create a composite quad. The limitation of the standard 3-piece quad is that it is a hybrid system and not fully self-distributing. The split between component 1A and 1B is fixed (non-sliding), so a greater share of the load will be placed on one of the two components if the anchor is pulled off axis. If you want to ensure a more even distribution of load, the solution is to incorporate a self-distributing extension on arm #1.
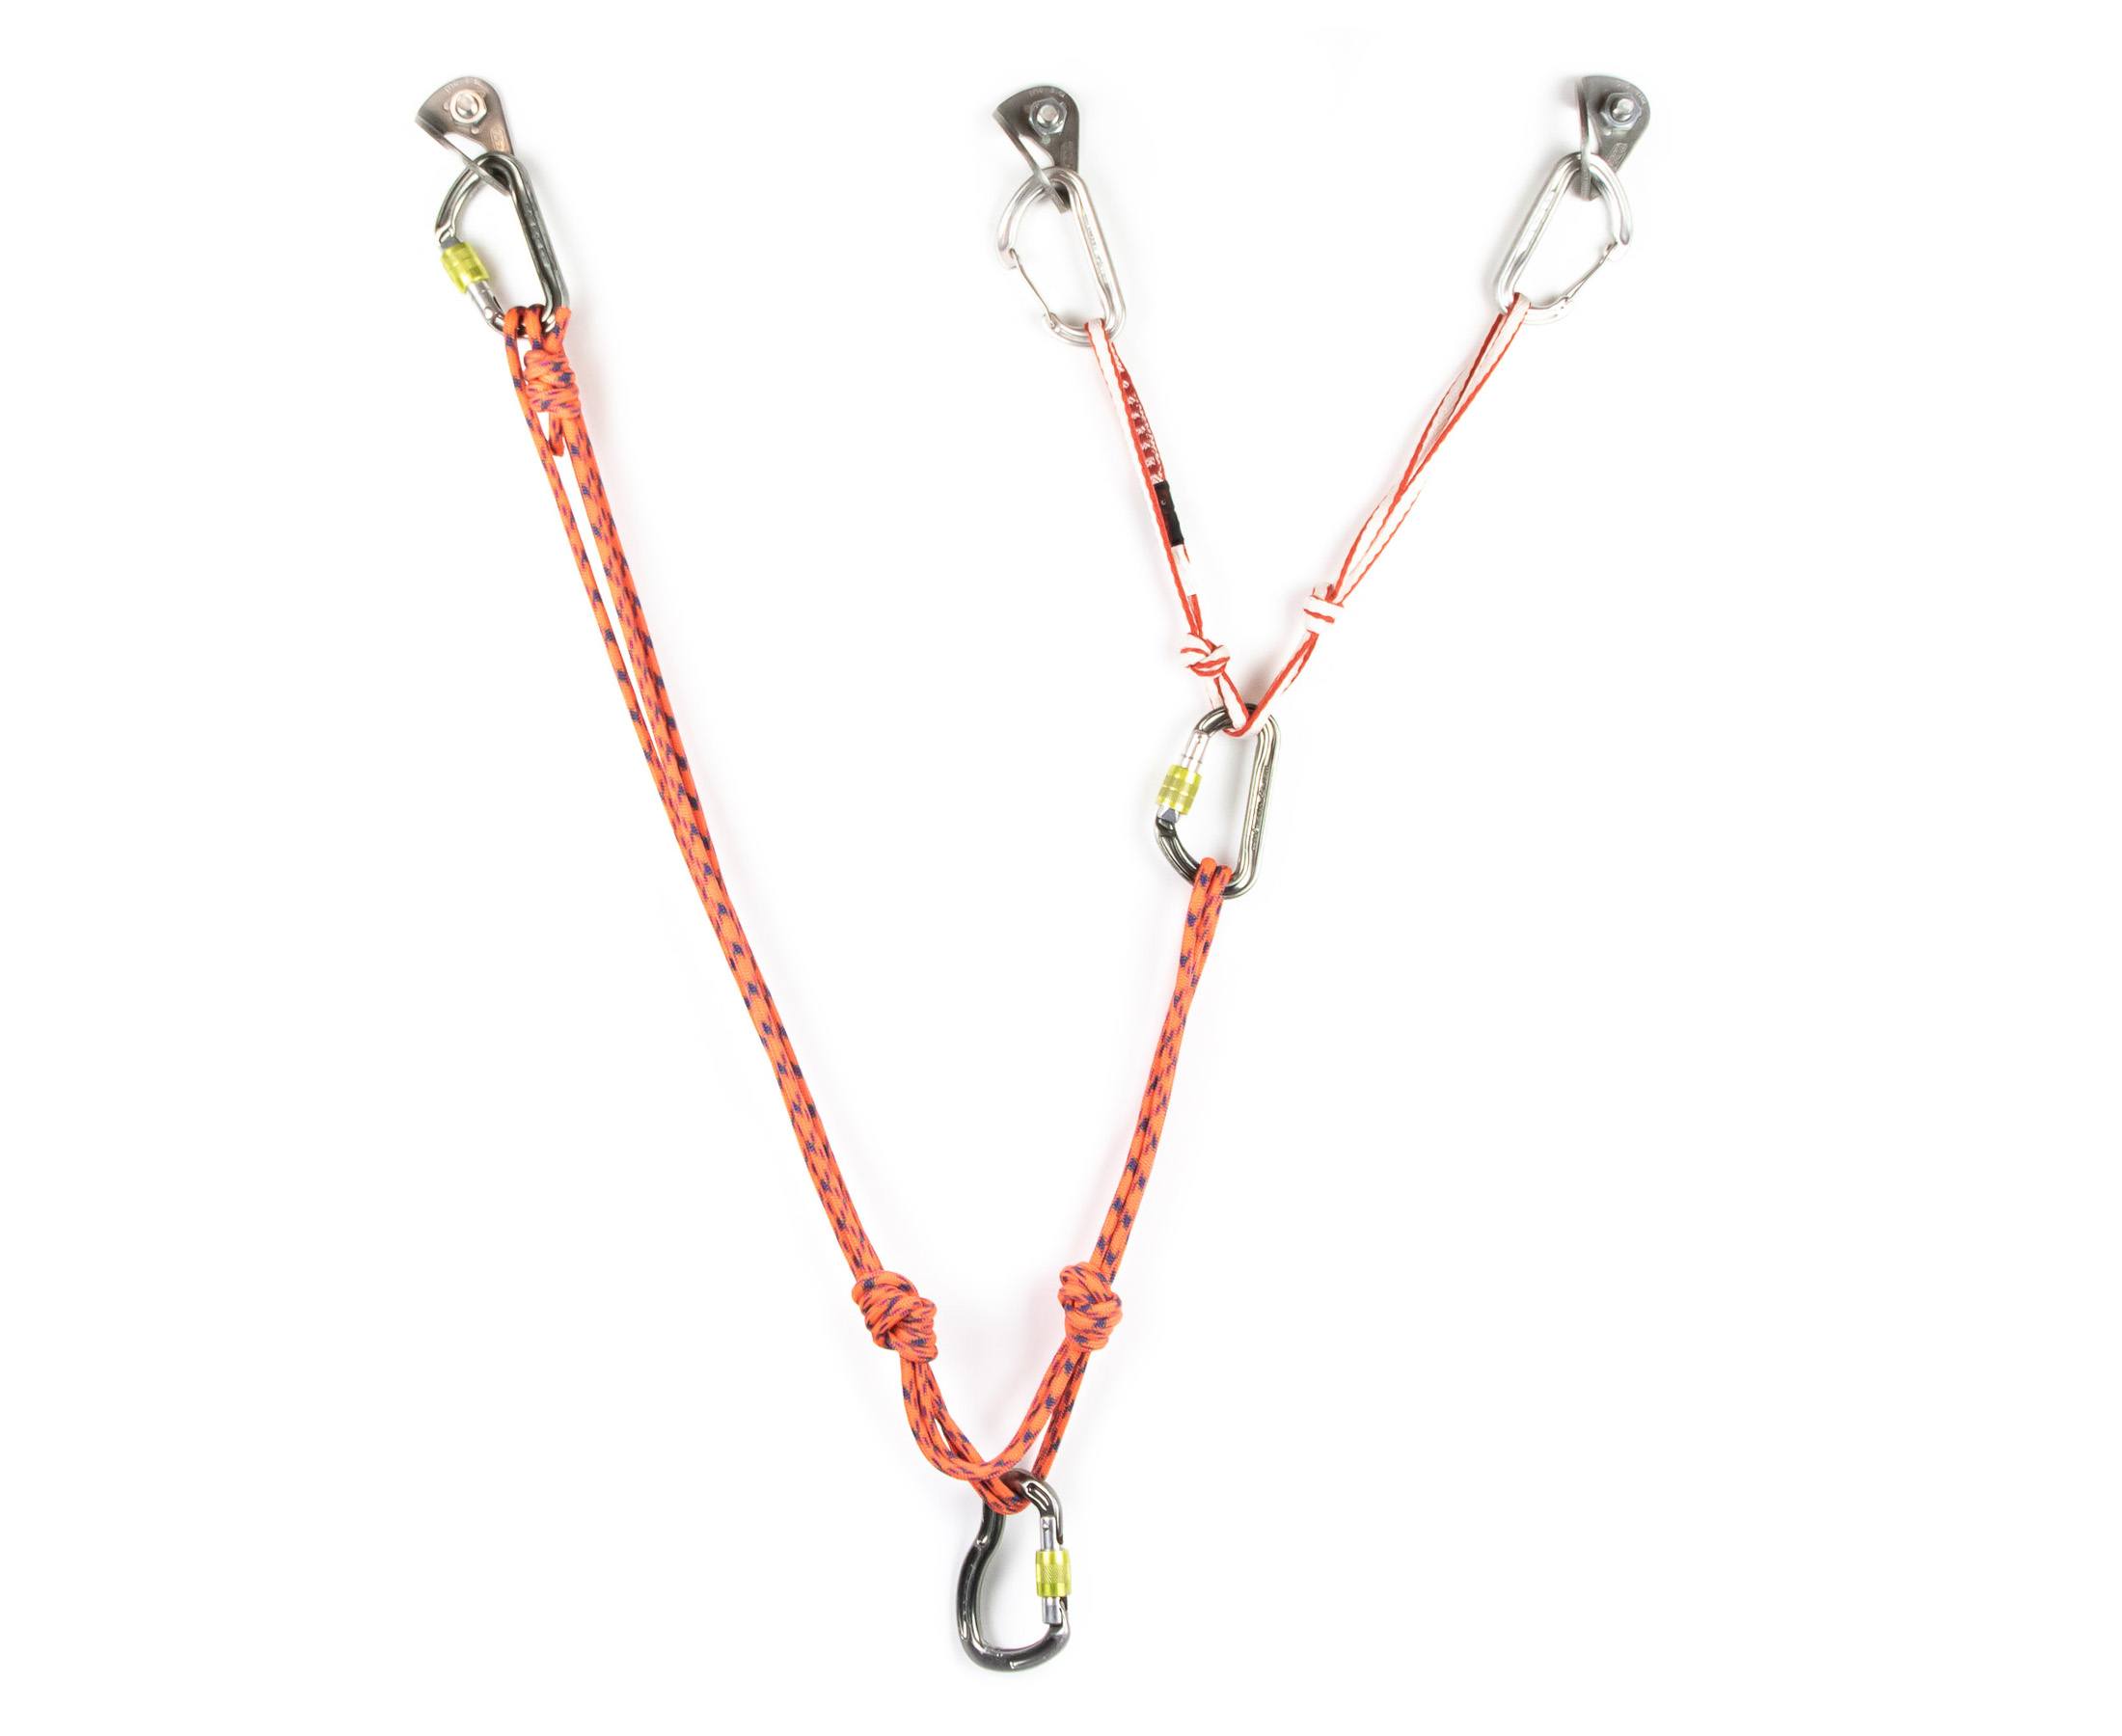
Since a quad distributes a load more evenly than a sliding X, incorporating a second quad made from a 120 cm sling or two 60 cm slings is usually your best option. But you might not have enough slings on hand. It’s also possible that a quad created from a sling might not be long enough. In such cases, your only remaining option might be to use a sliding X. A sliding X rigged from a single 60 cm will have just as much reach as a quad build from a 120 cm sling, and a sliding X 120cm will give you more reach than any of the previously mentioned options.
The downside to the sliding X is that it is not as strong as a quad (a single dyneema is significantly weakened when knotted), and it doesn’t self-distribute nearly as well either. That said, a knotted dyneema sling is unlikely to be the weakest connection in a distribution-critical anchor (the most likely use case) where primary anchors are weaker than 10 kN. On that note, I am going to stress that you should always use strong components (10 kN +) where possible. Only use weaker components where you have no other option, and then make sure to ensure effective distribution and limit the potential for extension as much as possible.
To build a composite quad, follow the following steps:
- Create the quad or sliding X between components 1A and 1B first. If rigging a quad here, you will need a 120 cm sling or two 60 cm slings in parallel.
- Fold your cordelette in half and secure the two loops on one end to the master point (small locking carabiner) of your first quad or sliding X.
- Holding the four strands together, tie an overhand knot roughly 4 cm (1.5 in) above where you expect the master point to be once the other end of the quad has been secured to the third component.
- Tie another overhand knot 8 cm (3 in) below this, and then clip the end of the quad (both loops) to the third component.
You might need to reposition the limiting knots to ensure that your primary quad can still self-distribute. I find that it’s best to have plus minus 4 cm (1.5 in) between the master point and the limiting knots on either side as this allows a quad to self-distribute up to 10° degrees off-axis while also keeping the potential for extension to a minimum.
Learn more about belay anchors
Anchor building is a complex subject, and it’s impossible to cover everything related to belay anchors (or even the quad) in a single article. That’s why I’ve created a whole series on anchor building. To build on what you’re learned here, I recommend reading my articles on how to build a trad anchor and how to assess belay anchors next. But I also have an article on how to secure yourself and a belay device to an anchor and an article on how to use natural anchors. Just know that none of these are substitutes for in-person instruction, and I strongly recommend that you build your first dozen anchors at ground level and under the supervision of an experienced trad climber if you’re new to all of this.
